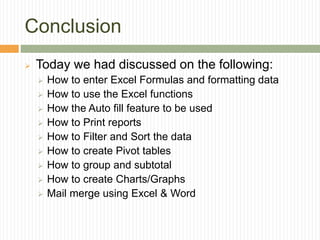
GYAN SESSION – OCT 2014
Rajesh P Menon
Excel Training
Remember …..
Are you also like this??
Objectives and Take away
 Objectives
 The main objective of this Session is to give the
participants insight into Excel which can be used as a
tool for managing organization data and also to
analyze the data in efficient way
 Take away
 At the end of this session each participants should be
able to generate MIS and reports on their own using
Excel features and functionalities acquired
Session Topics
 Excel Overview
 Excel Formulas and data Formatting
 Working with Excel functions and Data
fill utility
 Data validation, analysis (Pivot tables
and Charts), Data Filter and Sorting
 Report Printing in Excel
 Working with Charts and Graphs
 Introduction on Macros
 Conclusion
CHAPTER 1
EXCEL OVERVIEW
GYAN Excel Training
Excel Overview
 What is Excel
 Microsoft Excel is an electronic spreadsheet that runs
on a personal computer i.e. desktop, laptop etc.
 A spreadsheet is the computer equivalent of a paper
ledger sheet. It consists of a grid made from columns
and rows.
 Benefits of using Excel
 You can use it to organize your data into rows and
columns i.e. in a tabular format.
 You can use it to perform mathematical and financial
calculations accurately.
 You can use it to generate MIS and various trend
Excel Overview
MS Office Button
Quick Access Bar
Title Bar
Formula Bar
Excel Overview
Example of a Ribbon shown below along with the explanation
Excel Overview
Excel Overview
Useful information about Excel 2007 which you can use and
remember
FEATURE MAXIMUM LIMIT
Worksheet Size 1,048,576 rows by 16,384 columns
Column Width 255 characters
Row Height 409 points
Total number of characters that a cell
can contain
32,767 characters
Characters in a Header & Footer 255 characters
Sheets in a workbook Limited by System memory
Date range allowed January 1, 1900 to Dec 31, 9999
CHAPTER 2
EXCEL FORMULAS & FORMATTING
DATA
GYAN Excel Training
Excel Formulas and Formatting
 Formatting in Excel
 Change the column width manually and
automatically.
 Change the row height manually and automatically.
 Auto adjust the entire sheet
 Editing/Clearing data in a cell
 Inserting/Deleting columns/rows in a sheet
 Aligning cells (top, bottom & center) and text (Left,
Right and Center)
 Wrapping text
Excel Formulas and Formatting
 Formatting in Excel Contd…
 Changing the fonts and paragraph
 Formatting the numbers and dates
 Using Format Painter
 Merge and Center
 Undo and Redo
 Borders & Shading
 Conditional Formatting
 Format as table
Excel Formulas and Formatting
 Exercise for Formatting
 Open the sheet “Exercise Sheet for
participants” provided to you
Excel Formulas and Formatting
 Arithmetic Operations in Excel
 Basic Arithmetic
 Addition
 Subtraction
 Division
 Multiplication
 Exponent (Power and roots) and brackets – Excel
follows the BODMAS concept
CHAPTER 3
WORKING WITH EXCEL
FUNCTIONS & AUTO FILL UTILITY
GYAN Excel Training
Key Excel Functions
 Functions in Excel
 Function Categories – Arithmetic, Financial, Text,
Date, Logical, Reference
 Commonly Used Arithmetic functions – Sum, Average,
Count, Round, Max and Min
 Commonly used financial functions – PV, FV, PMT
 Commonly used String functions – Upper, Lower,
Proper, Concatenate
 Commonly used Logical function and operator – If,
And, Or
 Commonly used Lookup functions – Vlookup, Hlookup
Excel Auto Fill
 Auto Filling of Data in Excel
 Excel has provided a intelligent feature known as Auto
Filling of the data
 Example – Type January in cell A1 and then use the
handler and drag the same either vertically or
horizontally. By doing the same the data gets filled
automatically i.e. February, March, and so on
 See the next slide which shows the Auto fill list that
are available in the Excel by default.
Excel Auto Fill
 Some more examples of standard list below
Excel Auto Fill
 Auto Filling of Custom Data in Excel
 You can also create Custom Auto fill list. This can be
achieved by selecting Office Button and then select
Excel Options and from the Popular tab select “Edit
Custom Lists”.
 Create the Custom list that you use frequently and is
not available by default. In this example below I have
created a Auto list of alphabets from A to Z.
Excel Auto Fill
 Auto Filling of Data in Excel – Custom Lists
Excel Auto Fill
 Auto Filling of Data in Excel – Custom Lists
CHAPTER 4
DATA VALIDATION, ANALYSIS,
FILTERING AND SORTING
GYAN Excel Training
Data Management Using Excel
 Data Management
 Excel is extensively used by Corporates / Banks /FI
etc for managing large volume of data including
Balance sheets
 The major functionality available in the Excel for
managing data and extracting reports are as follows:
 Data Sorting
 Data filtering
 Data Validation
 Data Grouping
 Data Subtotal
 Pivot Tables
Data Management Using Excel
 Data Sorting
 Sorting allows one to manipulate and manage data in a
worksheet on a give set or criteria.
 There are two types of sorting features available in Excel
 Basic Sorting
 Custom Sorting
 Basic Sorts : To arrange the data based on the first column
select the option as displayed below. Remember that all the
data is selected before you sort or else the data will be
distorted.
Data Management Using Excel
 Data Sorting
 Custom Sort : if you want to sort on more than 1
criteria then you need to use the Custom sort.
 On clicking the above the following dialogue box will
open and here you can select multiple sorting criteria.
Data Management Using Excel
 Data Sorting contd ..
The following
dialogue box
will open and
here you can
select multiple
sorting
criteria.
Data Management Using Excel
 Data Filtering
 Filtering allows to display data in a worksheet that
meets a given set of criteria.
 To filter the data select the option as displayed below.
Excel automatically places the filter on the topmost
header row of the selected data in the worksheet.
 The filtered data can then be copied to another
worksheet as reports or it can be directly printed
Data Management Using Excel
 Data Validation
 Validation helps to build business rules while capturing
data in Excel.
 This feature also helps reduce data entry errors which
in turn helps in easy reconciliation.
 For example we are capturing students exam data and
the marks column should contain marks between 0 to
100. We can build validation which will enforce the
same and thus help us to eliminate data entry errors.
 Time to show the same in Excel.
Data Management Using Excel
 Data Subtotal
 The subtotal command can be used to outline data in
many different ways
 It uses common functions like SUM, COUNT,
AVERAGE, MAX, MIN and PRODUCT to summarize
the data
 The data must be sorted before the subtotal command
can be used and this is very important
 Open the Sales data sheet for this exercise. We will
find the subtotals of all the sales figures based on the
product
Data Management Using Excel
Once you click on
the Subtotal option
the following box
opens where you
can provide the
parameters for
change, function
and subtotal
Select the data
sheet and then
click on the Data
ribbon and you
can select
subtotal from the
Outline group.
Data Management Using Excel
Once the above actions are done the sheet will look like the
following. You can click on the levels highlighted below to see
different views
Data Management Using Excel
 Data Grouping
 The Group utility helps you to group any range of cells
– either columns or rows
 It does not calculate a subtotal of the group
 This feature gives you a ability to show or hide any part
of your worksheet ad display only the information you
need
 In our Sales data sheet we can group Qtr2 to Qtr4 and
then hide that to see only the Qtr1 data
Pivot Tables
 What are pivot tables
 Pivot tables are a versatile reporting tool that makes it
easy to extract information from large tables of data
without using any formula
 Pivot tables are extremely user friendly because by
moving, or pivoting, fields of data from one location to
another using drag and drop we can look at the same
data in a number of different ways
Pivot Tables Contd…
 Important points to remember
 There has to be at least 3 columns of data for crating
pivot table
 It is important that the data is entered correctly.
Remember GIGO
 Leave no blank rows or columns when entering the
data. This means that even between the column
header and first row of data there should not be any
blank row
Pivot Tables Contd…
The Pivot table
field name list
The data areas
are linked to the
Pivot table
Pivot Tables Contd…
 Filtering the Pivot table data
 The Pivot table has built in filtering tools that can be
used to fine tune the results shown by the table
 Filtering data involves using specific criteria to limit the
data that is displayed by the Pivot table
 To do this the user has to select the drop down from
the header of the Pivot table report and filter
CHAPTER 5
REPORT PRINTING IN EXCEL
GYAN Excel Training
Excel Printing
 Header & Footer in Excel
 Header and Footers helps while printing the Excel
data in hard copy (printer). For example - the
company logo can be inserted as a Header and page
number can be inserted in the Footer
 The advantage of the Header and Footer is that it will
repeat in each and every page that you print and the
report will look authentic
 To insert Header and Footer go to the ‘Insert’ Ribbon
and select ‘Header and Footer’ from the Text option.
The Page layout view will automatically become
active (default is Normal view) and you can insert the
logo and page numbers.
Excel Printing
 Printing in Excel
 To print any document from Excel just press Ctrl+P or
click on Office button and select Print.
 You can select the Print Preview to see how the
output will look before printing the document
 Other features are – Page Orientation, Paper size,
Margins
 You can also use Page Break view to check how the
output looks and it also helps to compress the
contents for printing in single sheets
CHAPTER 6
WORKING WITH GRAPHS &
CHARTS
GYAN Excel Training
Graphs/Charts
 A chart or graph often makes it easier to
understand the data in a worksheet because
users can easily pick out patterns and trends
illustrated in the chart that are otherwise difficult
to see
 In Excel we can create the following types of
graphs
 Bar Graphs
 Line Graphs
 Scatter Plot Graphs
 Pie Charts
Bar Graphs
 Bar Graphs are the most common type of graph used to
display data. Also known as “Column charts”, bar graphs
are most often used to show the amounts or the number
of times a value occurs
 Bar Graphs make it easy to see the difference in the data
being compared. See the example below.
0
50
100
150
200
250
Acapulco Amsterdam Achorage Dallas Glasgow Madrid New York Tokyo Toronto
Temperature
City Name
Average Temperature
Line Graphs
 Line Graphs are often used to plot changes in data over
time, such as monthly temperature change or daily stock
price change
 They can also be used to plot data recorded from
scientific experiments, such as how a chemical reacts to
changing temperature or atmospheric pressure. See the
chart below.
0
50
100
150
200
250
January April July October
Temperature comparison
Acapulco
Amsterdam
Pie Charts
 Pie charts, or circle graphs (as they are sometimes
known), are used to show percentages
 The circle of the pie charts represents 100%
 The circle is subdivided into slices representing data
values
Peanut Butter
19%
chocolate chip
33%
Oatmeal Raisin
30%
Cake
18%
Peanut Butter
chocolate chip
Oatmeal Raisin
Cake
SESSION
INTRODUCTION TO MACRO
GYAN Excel Training
Macros
 A Macro is a tool which helps the users to
automate many actions
 This helps in saving time to do the repetiive
tasks
 You can create data entry forms using Macros
and that only a programmer or persons with
reasoning ability can do
How to create Macros
 To record a macro follow the steps
 First activate the Developer tab (ribbon)
 In the Developer ribbon click on the Start
Recording
 Record you actions
 Once done press the Stop Recording
 To run the macro click the shortcut or select the
macro and it will display the list of the macros.
Select the one you want to run and leave the
rest to Excel 
SESSION
WHAT’S MAIL MERGE
GYAN Excel Training
Mail Merge
 Mail merge utility helps users to create multiple
documents from a single template and
structured data source
 The document created using Mail merge can be
sent to many recipients wit small changes, such
as change in address or a change in greeting
line
 Placeholders are created in the document
which will point to the external data source like
Excel or any database and while generating the
document these placeholders are replaced with
the values in the data source
Mail Merge Contd…
We will see the illustration whereby we are using the data
from the “mail merge data” sheet and creating document in
Word
Excel Data Source
which contains the
invitee list
In MS Word open a
new document and
select the Mailings
Ribbon and click on
“Start Mail Merge”
Mail Merge Contd…
Forr selecting the
data source see the
screen shot
Once the data source is selected then the
following Mail merge options becomes
active
Mail Merge Contd…
Once the data source is selected now it is time to create
the template and also inserting the placeholders in the
document
The dropdown
above shows the list
of column in the
Excel data source
The placeholders
are created as
shown
Mail Merge Contd…
Now the final stages of the mail merge. We have to generate
the letters using the data source provided and lets see how that
is done
Once you have
created the
document then click
on the Finish Merge
and create the
merged document
Click this option to
preview the document
and it will show the
record which is
currently selected
Conclusion
 Today we had discussed on the following:
 How to enter Excel Formulas and formatting data
 How to use the Excel functions
 How the Auto fill feature to be used
 How to Print reports
 How to Filter and Sort the data
 How to create Pivot tables
 How to group and subtotal
 How to create Charts/Graphs
 Mail merge using Excel & Word
Questions/Discussions
 Questions and Discussion
 What Next ?
 You can reach me on 8095254254 from
morning 10 AM to 9 PM on weekends
 On weekdays you can call me between 7
PM to 10 PM.
 My email id is
rajeshp.menon@gmail.com
Thanks

Excel training by rajesh p

  • 1.
    GYAN SESSION –OCT 2014 Rajesh P Menon Excel Training
  • 2.
  • 3.
    Are you alsolike this??
  • 4.
    Objectives and Takeaway  Objectives  The main objective of this Session is to give the participants insight into Excel which can be used as a tool for managing organization data and also to analyze the data in efficient way  Take away  At the end of this session each participants should be able to generate MIS and reports on their own using Excel features and functionalities acquired
  • 5.
    Session Topics  ExcelOverview  Excel Formulas and data Formatting  Working with Excel functions and Data fill utility  Data validation, analysis (Pivot tables and Charts), Data Filter and Sorting  Report Printing in Excel  Working with Charts and Graphs  Introduction on Macros  Conclusion
  • 6.
  • 7.
    Excel Overview  Whatis Excel  Microsoft Excel is an electronic spreadsheet that runs on a personal computer i.e. desktop, laptop etc.  A spreadsheet is the computer equivalent of a paper ledger sheet. It consists of a grid made from columns and rows.  Benefits of using Excel  You can use it to organize your data into rows and columns i.e. in a tabular format.  You can use it to perform mathematical and financial calculations accurately.  You can use it to generate MIS and various trend
  • 8.
    Excel Overview MS OfficeButton Quick Access Bar Title Bar Formula Bar
  • 9.
    Excel Overview Example ofa Ribbon shown below along with the explanation
  • 10.
  • 11.
    Excel Overview Useful informationabout Excel 2007 which you can use and remember FEATURE MAXIMUM LIMIT Worksheet Size 1,048,576 rows by 16,384 columns Column Width 255 characters Row Height 409 points Total number of characters that a cell can contain 32,767 characters Characters in a Header & Footer 255 characters Sheets in a workbook Limited by System memory Date range allowed January 1, 1900 to Dec 31, 9999
  • 12.
    CHAPTER 2 EXCEL FORMULAS& FORMATTING DATA GYAN Excel Training
  • 13.
    Excel Formulas andFormatting  Formatting in Excel  Change the column width manually and automatically.  Change the row height manually and automatically.  Auto adjust the entire sheet  Editing/Clearing data in a cell  Inserting/Deleting columns/rows in a sheet  Aligning cells (top, bottom & center) and text (Left, Right and Center)  Wrapping text
  • 14.
    Excel Formulas andFormatting  Formatting in Excel Contd…  Changing the fonts and paragraph  Formatting the numbers and dates  Using Format Painter  Merge and Center  Undo and Redo  Borders & Shading  Conditional Formatting  Format as table
  • 15.
    Excel Formulas andFormatting  Exercise for Formatting  Open the sheet “Exercise Sheet for participants” provided to you
  • 16.
    Excel Formulas andFormatting  Arithmetic Operations in Excel  Basic Arithmetic  Addition  Subtraction  Division  Multiplication  Exponent (Power and roots) and brackets – Excel follows the BODMAS concept
  • 17.
    CHAPTER 3 WORKING WITHEXCEL FUNCTIONS & AUTO FILL UTILITY GYAN Excel Training
  • 18.
    Key Excel Functions Functions in Excel  Function Categories – Arithmetic, Financial, Text, Date, Logical, Reference  Commonly Used Arithmetic functions – Sum, Average, Count, Round, Max and Min  Commonly used financial functions – PV, FV, PMT  Commonly used String functions – Upper, Lower, Proper, Concatenate  Commonly used Logical function and operator – If, And, Or  Commonly used Lookup functions – Vlookup, Hlookup
  • 19.
    Excel Auto Fill Auto Filling of Data in Excel  Excel has provided a intelligent feature known as Auto Filling of the data  Example – Type January in cell A1 and then use the handler and drag the same either vertically or horizontally. By doing the same the data gets filled automatically i.e. February, March, and so on  See the next slide which shows the Auto fill list that are available in the Excel by default.
  • 20.
    Excel Auto Fill Some more examples of standard list below
  • 21.
    Excel Auto Fill Auto Filling of Custom Data in Excel  You can also create Custom Auto fill list. This can be achieved by selecting Office Button and then select Excel Options and from the Popular tab select “Edit Custom Lists”.  Create the Custom list that you use frequently and is not available by default. In this example below I have created a Auto list of alphabets from A to Z.
  • 22.
    Excel Auto Fill Auto Filling of Data in Excel – Custom Lists
  • 23.
    Excel Auto Fill Auto Filling of Data in Excel – Custom Lists
  • 24.
    CHAPTER 4 DATA VALIDATION,ANALYSIS, FILTERING AND SORTING GYAN Excel Training
  • 25.
    Data Management UsingExcel  Data Management  Excel is extensively used by Corporates / Banks /FI etc for managing large volume of data including Balance sheets  The major functionality available in the Excel for managing data and extracting reports are as follows:  Data Sorting  Data filtering  Data Validation  Data Grouping  Data Subtotal  Pivot Tables
  • 26.
    Data Management UsingExcel  Data Sorting  Sorting allows one to manipulate and manage data in a worksheet on a give set or criteria.  There are two types of sorting features available in Excel  Basic Sorting  Custom Sorting  Basic Sorts : To arrange the data based on the first column select the option as displayed below. Remember that all the data is selected before you sort or else the data will be distorted.
  • 27.
    Data Management UsingExcel  Data Sorting  Custom Sort : if you want to sort on more than 1 criteria then you need to use the Custom sort.  On clicking the above the following dialogue box will open and here you can select multiple sorting criteria.
  • 28.
    Data Management UsingExcel  Data Sorting contd .. The following dialogue box will open and here you can select multiple sorting criteria.
  • 29.
    Data Management UsingExcel  Data Filtering  Filtering allows to display data in a worksheet that meets a given set of criteria.  To filter the data select the option as displayed below. Excel automatically places the filter on the topmost header row of the selected data in the worksheet.  The filtered data can then be copied to another worksheet as reports or it can be directly printed
  • 30.
    Data Management UsingExcel  Data Validation  Validation helps to build business rules while capturing data in Excel.  This feature also helps reduce data entry errors which in turn helps in easy reconciliation.  For example we are capturing students exam data and the marks column should contain marks between 0 to 100. We can build validation which will enforce the same and thus help us to eliminate data entry errors.  Time to show the same in Excel.
  • 31.
    Data Management UsingExcel  Data Subtotal  The subtotal command can be used to outline data in many different ways  It uses common functions like SUM, COUNT, AVERAGE, MAX, MIN and PRODUCT to summarize the data  The data must be sorted before the subtotal command can be used and this is very important  Open the Sales data sheet for this exercise. We will find the subtotals of all the sales figures based on the product
  • 32.
    Data Management UsingExcel Once you click on the Subtotal option the following box opens where you can provide the parameters for change, function and subtotal Select the data sheet and then click on the Data ribbon and you can select subtotal from the Outline group.
  • 33.
    Data Management UsingExcel Once the above actions are done the sheet will look like the following. You can click on the levels highlighted below to see different views
  • 34.
    Data Management UsingExcel  Data Grouping  The Group utility helps you to group any range of cells – either columns or rows  It does not calculate a subtotal of the group  This feature gives you a ability to show or hide any part of your worksheet ad display only the information you need  In our Sales data sheet we can group Qtr2 to Qtr4 and then hide that to see only the Qtr1 data
  • 35.
    Pivot Tables  Whatare pivot tables  Pivot tables are a versatile reporting tool that makes it easy to extract information from large tables of data without using any formula  Pivot tables are extremely user friendly because by moving, or pivoting, fields of data from one location to another using drag and drop we can look at the same data in a number of different ways
  • 36.
    Pivot Tables Contd… Important points to remember  There has to be at least 3 columns of data for crating pivot table  It is important that the data is entered correctly. Remember GIGO  Leave no blank rows or columns when entering the data. This means that even between the column header and first row of data there should not be any blank row
  • 37.
    Pivot Tables Contd… ThePivot table field name list The data areas are linked to the Pivot table
  • 38.
    Pivot Tables Contd… Filtering the Pivot table data  The Pivot table has built in filtering tools that can be used to fine tune the results shown by the table  Filtering data involves using specific criteria to limit the data that is displayed by the Pivot table  To do this the user has to select the drop down from the header of the Pivot table report and filter
  • 39.
    CHAPTER 5 REPORT PRINTINGIN EXCEL GYAN Excel Training
  • 40.
    Excel Printing  Header& Footer in Excel  Header and Footers helps while printing the Excel data in hard copy (printer). For example - the company logo can be inserted as a Header and page number can be inserted in the Footer  The advantage of the Header and Footer is that it will repeat in each and every page that you print and the report will look authentic  To insert Header and Footer go to the ‘Insert’ Ribbon and select ‘Header and Footer’ from the Text option. The Page layout view will automatically become active (default is Normal view) and you can insert the logo and page numbers.
  • 41.
    Excel Printing  Printingin Excel  To print any document from Excel just press Ctrl+P or click on Office button and select Print.  You can select the Print Preview to see how the output will look before printing the document  Other features are – Page Orientation, Paper size, Margins  You can also use Page Break view to check how the output looks and it also helps to compress the contents for printing in single sheets
  • 42.
    CHAPTER 6 WORKING WITHGRAPHS & CHARTS GYAN Excel Training
  • 43.
    Graphs/Charts  A chartor graph often makes it easier to understand the data in a worksheet because users can easily pick out patterns and trends illustrated in the chart that are otherwise difficult to see  In Excel we can create the following types of graphs  Bar Graphs  Line Graphs  Scatter Plot Graphs  Pie Charts
  • 44.
    Bar Graphs  BarGraphs are the most common type of graph used to display data. Also known as “Column charts”, bar graphs are most often used to show the amounts or the number of times a value occurs  Bar Graphs make it easy to see the difference in the data being compared. See the example below. 0 50 100 150 200 250 Acapulco Amsterdam Achorage Dallas Glasgow Madrid New York Tokyo Toronto Temperature City Name Average Temperature
  • 45.
    Line Graphs  LineGraphs are often used to plot changes in data over time, such as monthly temperature change or daily stock price change  They can also be used to plot data recorded from scientific experiments, such as how a chemical reacts to changing temperature or atmospheric pressure. See the chart below. 0 50 100 150 200 250 January April July October Temperature comparison Acapulco Amsterdam
  • 46.
    Pie Charts  Piecharts, or circle graphs (as they are sometimes known), are used to show percentages  The circle of the pie charts represents 100%  The circle is subdivided into slices representing data values Peanut Butter 19% chocolate chip 33% Oatmeal Raisin 30% Cake 18% Peanut Butter chocolate chip Oatmeal Raisin Cake
  • 47.
  • 48.
    Macros  A Macrois a tool which helps the users to automate many actions  This helps in saving time to do the repetiive tasks  You can create data entry forms using Macros and that only a programmer or persons with reasoning ability can do
  • 49.
    How to createMacros  To record a macro follow the steps  First activate the Developer tab (ribbon)  In the Developer ribbon click on the Start Recording  Record you actions  Once done press the Stop Recording  To run the macro click the shortcut or select the macro and it will display the list of the macros. Select the one you want to run and leave the rest to Excel 
  • 50.
  • 51.
    Mail Merge  Mailmerge utility helps users to create multiple documents from a single template and structured data source  The document created using Mail merge can be sent to many recipients wit small changes, such as change in address or a change in greeting line  Placeholders are created in the document which will point to the external data source like Excel or any database and while generating the document these placeholders are replaced with the values in the data source
  • 52.
    Mail Merge Contd… Wewill see the illustration whereby we are using the data from the “mail merge data” sheet and creating document in Word Excel Data Source which contains the invitee list In MS Word open a new document and select the Mailings Ribbon and click on “Start Mail Merge”
  • 53.
    Mail Merge Contd… Forrselecting the data source see the screen shot Once the data source is selected then the following Mail merge options becomes active
  • 54.
    Mail Merge Contd… Oncethe data source is selected now it is time to create the template and also inserting the placeholders in the document The dropdown above shows the list of column in the Excel data source The placeholders are created as shown
  • 55.
    Mail Merge Contd… Nowthe final stages of the mail merge. We have to generate the letters using the data source provided and lets see how that is done Once you have created the document then click on the Finish Merge and create the merged document Click this option to preview the document and it will show the record which is currently selected
  • 56.
    Conclusion  Today wehad discussed on the following:  How to enter Excel Formulas and formatting data  How to use the Excel functions  How the Auto fill feature to be used  How to Print reports  How to Filter and Sort the data  How to create Pivot tables  How to group and subtotal  How to create Charts/Graphs  Mail merge using Excel & Word
  • 57.
    Questions/Discussions  Questions andDiscussion  What Next ?  You can reach me on 8095254254 from morning 10 AM to 9 PM on weekends  On weekdays you can call me between 7 PM to 10 PM.  My email id is rajeshp.menon@gmail.com
  • 58.

Editor's Notes

  • #5 Objectives for instruction and expected results and/or skills developed from learning.
  • #6 Introductory notes.
  • #8 Relative vocabulary list.
  • #9 Relative vocabulary list.
  • #10 Relative vocabulary list.
  • #11 Relative vocabulary list.
  • #12 Relative vocabulary list.
  • #14 Relative vocabulary list.
  • #15 Relative vocabulary list.
  • #16 Relative vocabulary list.
  • #17 Relative vocabulary list.
  • #19 Important Point: To use functions, you need to understand reference operators. Reference operators refer to a cell or a group of cells. There are two types of reference operators: range  and union. A range reference refers to all the cells between and including the reference. A range reference consists of two cell addresses separated by a colon. The reference A1:A3 includes cells A1, A2, and A3. The reference A1:C3 includes cells A1, A2, A3, B1, B2, B3, C1, C2, and C3
  • #20 Relative vocabulary list.
  • #21 Relative vocabulary list.
  • #22 Relative vocabulary list. Show the example to the participants.
  • #23 Relative vocabulary list.
  • #24 Relative vocabulary list.
  • #26 Relative vocabulary list.
  • #27 Relative vocabulary list.
  • #28 Relative vocabulary list.
  • #30 Relative vocabulary list.
  • #31 Relative vocabulary list.
  • #32 Relative vocabulary list.
  • #33 Relative vocabulary list.
  • #34 Relative vocabulary list.
  • #35 Relative vocabulary list.
  • #36 Relative vocabulary list.
  • #37 Relative vocabulary list.
  • #38 Relative vocabulary list.
  • #39 Relative vocabulary list.
  • #41 Relative vocabulary list.
  • #42 Relative vocabulary list.
  • #44 Relative vocabulary list.
  • #45 Example graph/chart.
  • #46 Example graph/chart.
  • #47 Example graph/chart.
  • #49 Relative vocabulary list.
  • #50 Relative vocabulary list.
  • #52 Relative vocabulary list.
  • #53 Relative vocabulary list.
  • #54 Relative vocabulary list.
  • #55 Relative vocabulary list.
  • #56 Relative vocabulary list.
  • #57 Conclusion to course, lecture, et al.
  • #58 An opportunity for questions and discussions.
  • #59 Example graph/chart.