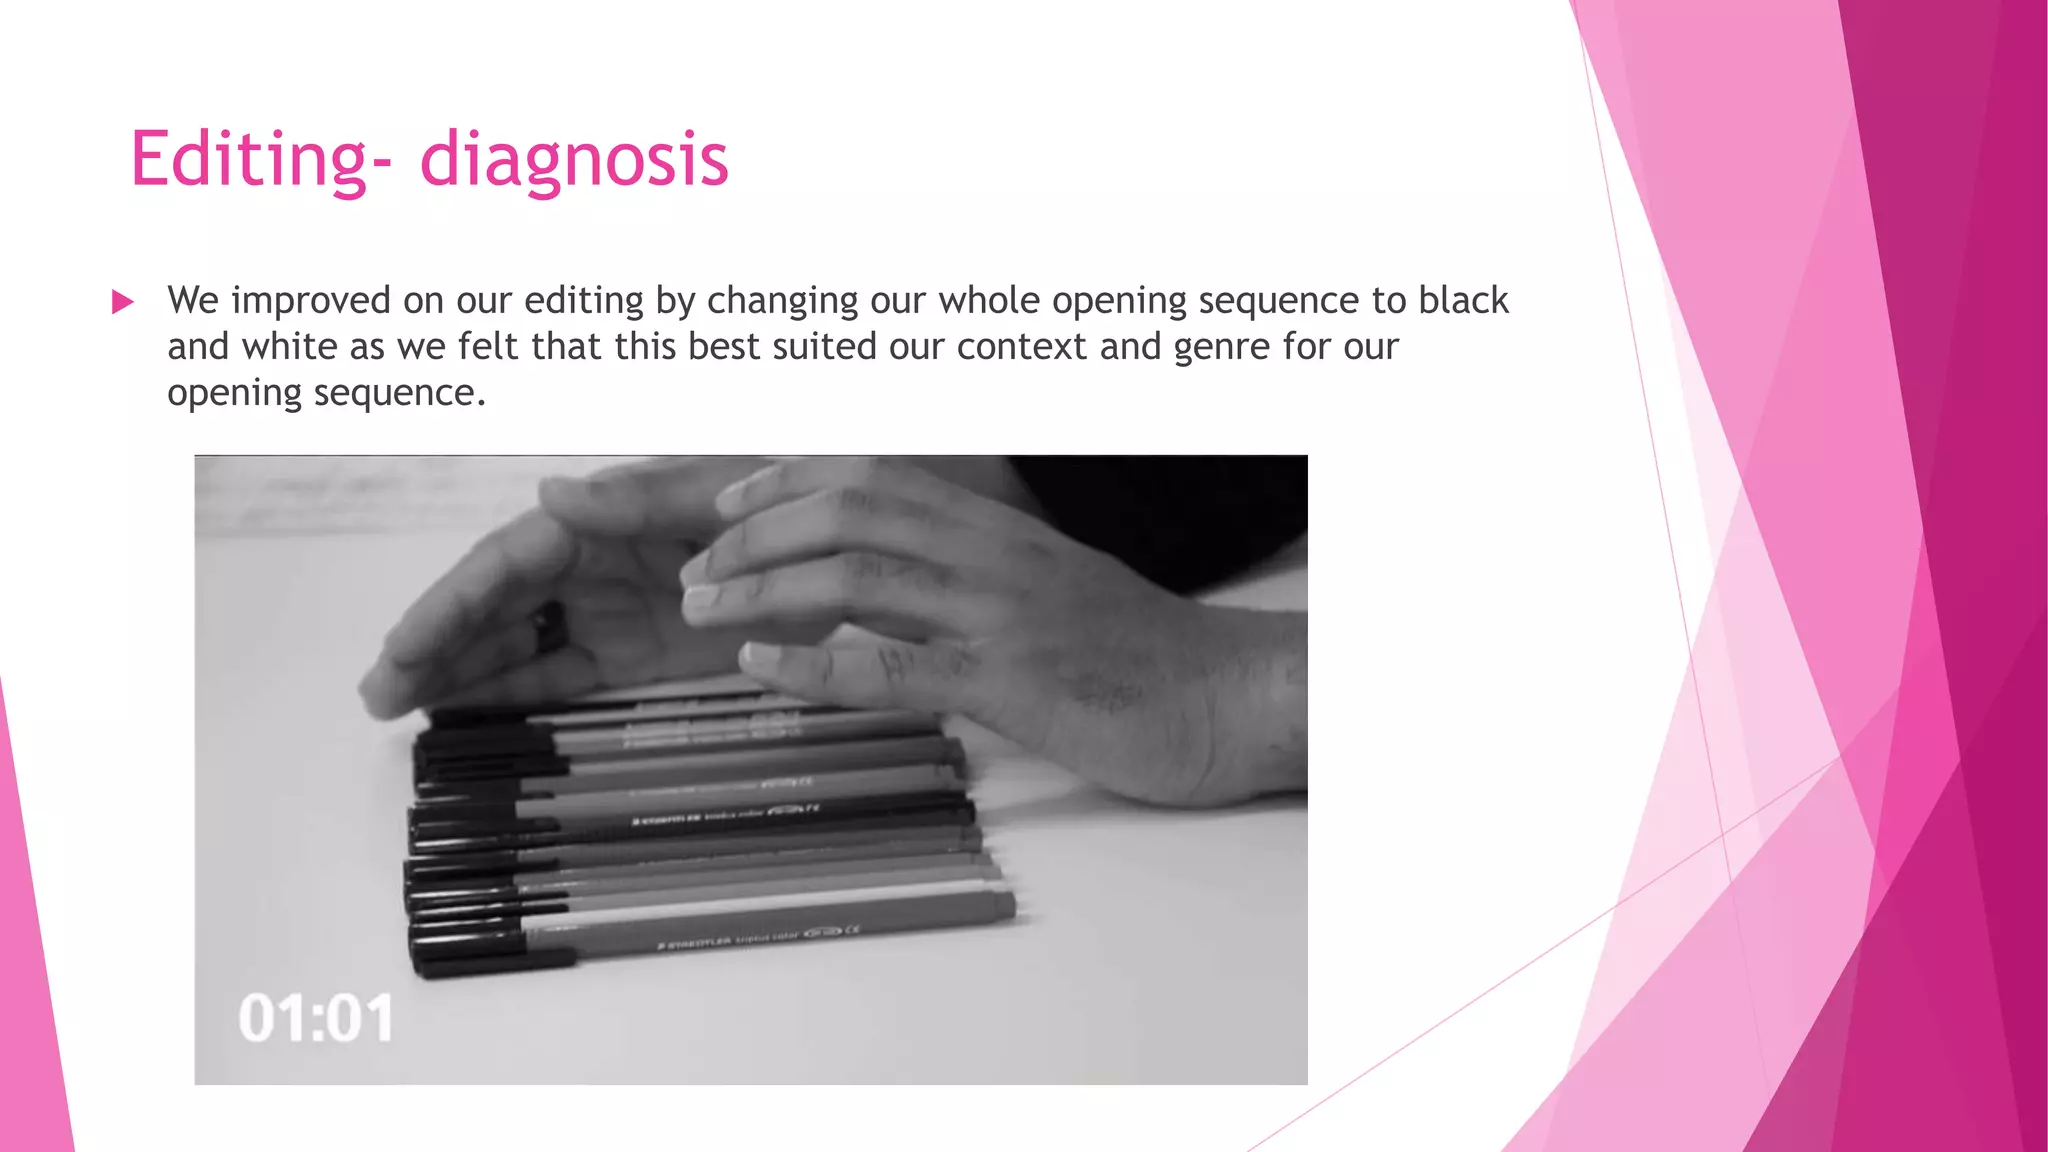
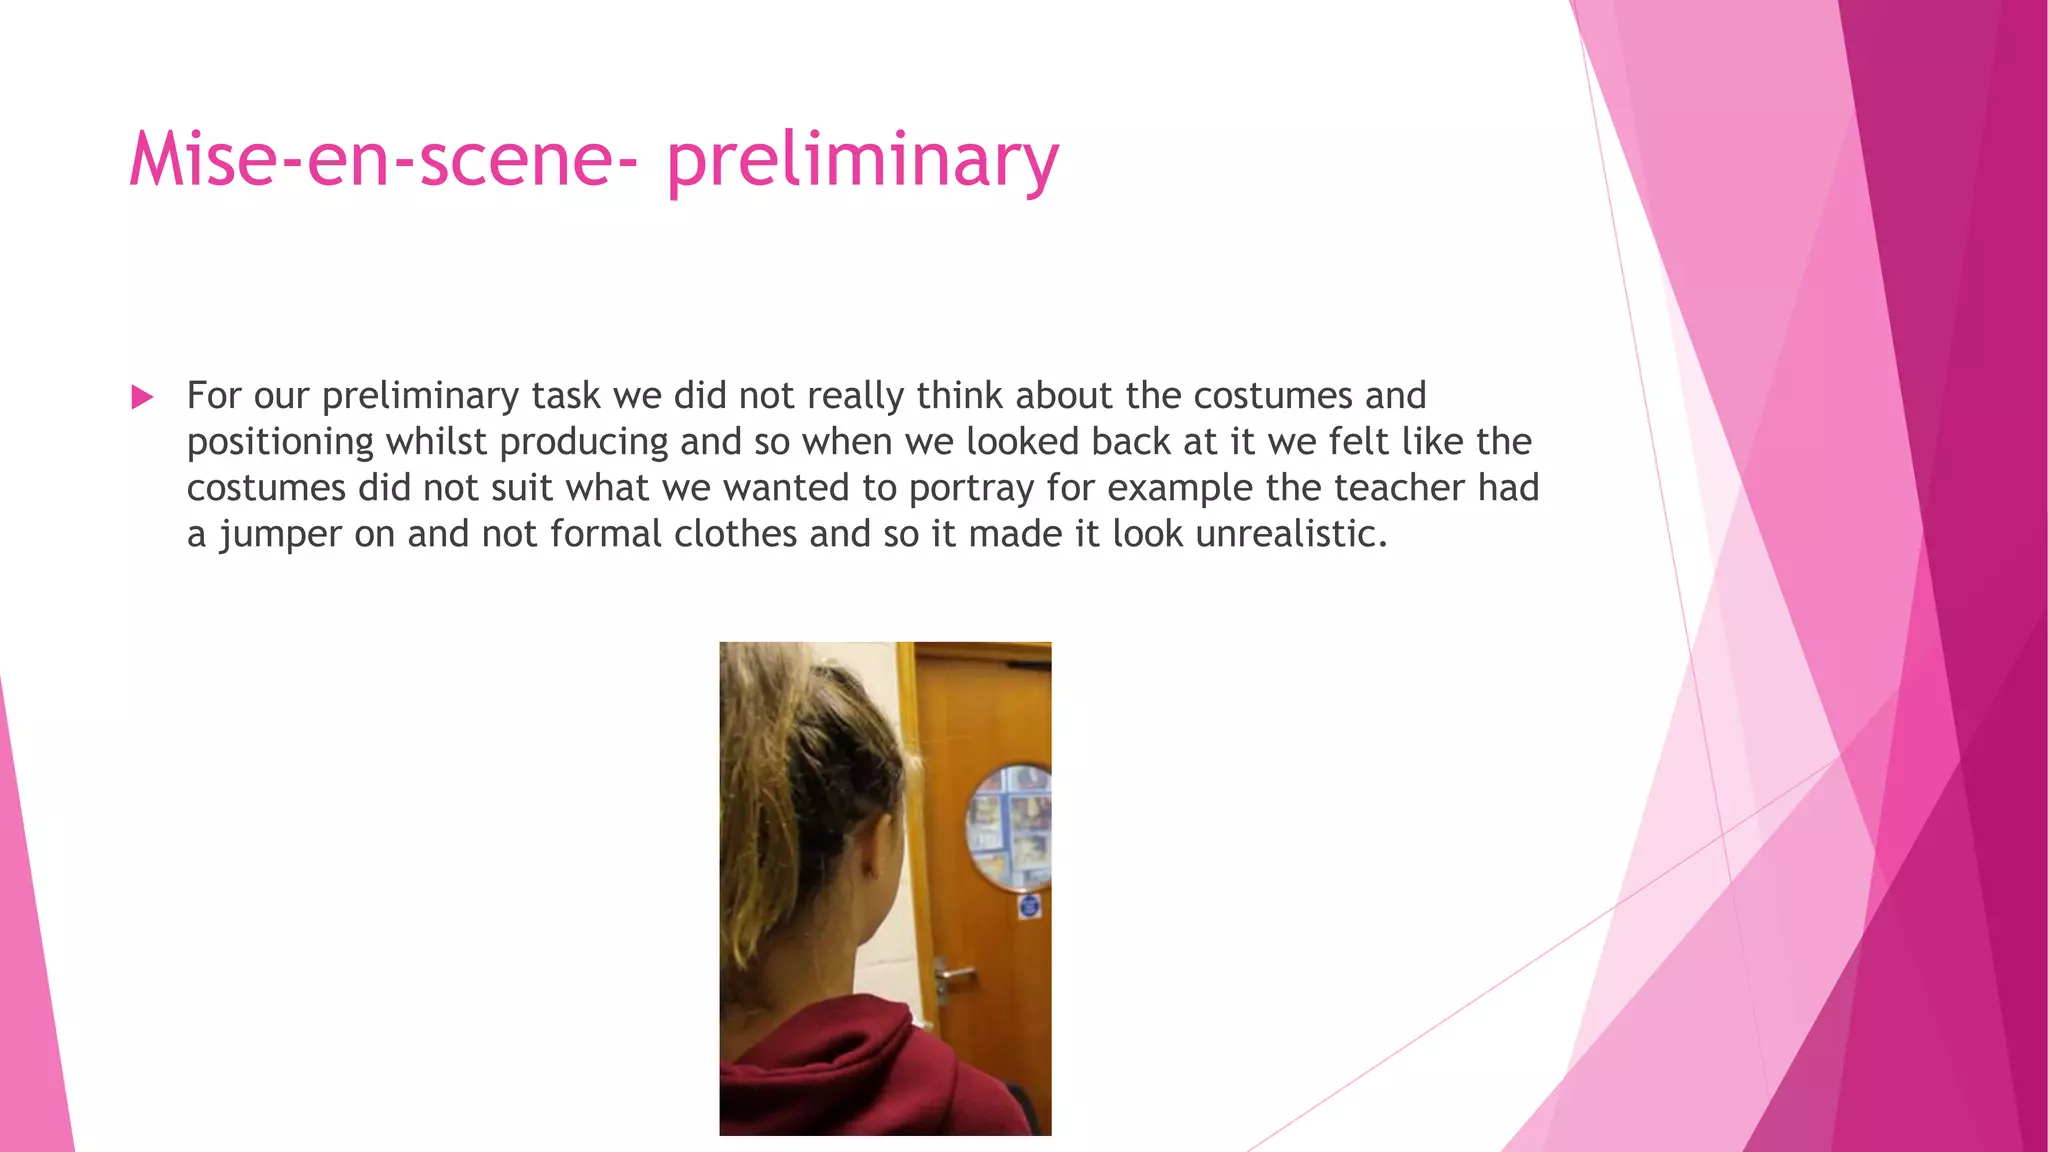
Evaluation Question 7
By Shauna Penfold
Continuity
 Continuity is a motion-picture scenario giving the complete action, scenes,
etc., in detail and in the order in which they are to be shown on the screen.
 Continuity is important because it shows the different scenes and how they
are meant to be set out in order for the audience to understand about the
different characters and the message that is trying to be portrayed.
180 degree rule
 The 180 degree rule is a where the camera should be placed and stay inside
180 degrees of a certain side of an invisible line of a certain shot containing
tow people.
 The camera should stay on the side that it is placed first throughout the shot
and not cross this invisible line as it would cause confusion for the views and
it makes it look like the people in the shot have switched places as the
audience are watching the film.
180 degree rule-preliminary task
In our preliminary task we used
the 180 degree rule, however as
we had not done this shot before
it did not go very well as from the
picture you can see that it was
blurry.
As our setting was in a small
history cupboard (as this is our
location we needed) it was hard to
move the camera and the tripod
together within the space without
it being a stable camera.
We tried to do the 180 degree shot without the
tripod but it was hard to keep the camera still
for the last shot so we had to leave it shaky.
180 degree rule-diagnosis
For our opening sequence we did not use the
180 degree shot as we felt that we would not
be able to move the camera and keep it stable
at the same time and as it did not go very well
in the Preliminary task we did not want to
have a shaky shot in our opening sequence so
we did not use it.
Our setting was a dressing room which we
represented as an isolation room. In the
room it had mirrors everywhere and so it was
going to be hard to do an 180 degree shot
without the camera seeing us in the mirrors
and so we felt it was best just not to do the
180 degree shot and do other shots instead.
Match on action
 Match on action is where the perspective of the camera changes during a scene and the
scene continues to flow.
 For example a person opening a door and filming can be stopped. The following day
filming could be continued as the same person enters a room. The audience would not
know that these shots have been taken separately as the scene will flow. However in order
for this to be successful and look realistic the character has to:
Be wearing the same clothes
Be appearing identical to the previous filming time
Have the same Lighting (time of day/weather)
Be the same time on the clocks if they are in frame
Leave on the right if the person is entering from the left or vice- versa
Match on action-preliminary task
In our preliminary task we did a
match on action shot where Shakir
was going through a door, so we did
two shots.
The first shot we filmed was outside
of the building so we could see
Shakir going through the door from
the outside.
The second shot we filmed was inside of the
building so we saw Shakir walking in from the
outside and going up the stairs.
Match on action-diagnosis
We did a similar match on action shot in our
opening sequence to our preliminary task as
we felt this was a big part in improving our
opening sequence.
Shot/reverse shot
 Shot reverse shot is a film technique wherein one character is show looking at
another character (often, off screen) and then the other character is shown
looking “back” at the character. Since the characters are showing facing in
opposite directions. The viewer assumes that they are looking at each other.
Shot/reverse shot- preliminary task
For this shot we did a shot/
reverse shot when the
teacher and the student
were talking to each other
so we could see the facial
expression of the student
whilst the teacher was
talking to
Shot/reverse shot- diagnosis We did a much better and much
improved shot reverse shot in our
opening sequence by firstly doing the
shot as if Mayson was looking in the
mirror which we felt was a much better
angle then a full body shot.
We also did this mirror shot so the
audience could see Mayson as
what he was seeing in the mirror
so the audience are relating to
the audience.
Improvements in cinematography
 We improved on our cinematography by making sure that the camera was not
shaky and that we would use a tripod throughout in order for this to happen.
 We also improved by using a wider range of shot types rather than using the
same old shots for each shot and by doing so we showed different meanings
whilst we were filming e.g. if we used an ECU it showed that the object/ the
feature we were filming was important as it was an ECU.
Cinematography- preliminary task
 For our cinematography in our preliminary task we did not use a variety of
shots/ angles and so our cinematography was very basic.
 There was a lot of static shots and so we did not really use a lot of movement
in our task but when we did we had a shaky camera and so it did not look very
professional or polished.
 We did not have much knowledge of the different shot types and so we just
mainly used the high level shot and over the shoulder shot and so our shots id
not fit with our context.
Cinematography- diagnosis
 We improved our cinematography in our diagnosis by doing many different
angles, shots and movement for example we used a high angle shot to show
the low status of Mayson.
Improvements of editing
 We made improvements on our editing skills by going onto final cut express
and having a play around and looking at the different tools we could use and
finding out what each one was and how we could use it, if we wanted to/
needed to.
 We also looked at clips on you tube on how to do different things on final cut
express, doing it step by step on the way in order for us to be able to do that
very well.
Editing- preliminary task
 We did not have an affect on the preliminary task as we did not feel it was
useful for our scene.
Editing- diagnosis
 We improved on our editing by changing our whole opening sequence to black
and white as we felt that this best suited our context and genre for our
opening sequence.
Improvements of mise-en-scene
 We made improvements to our mise-en-scene by researching more about
what the mise-en-scene was and what aspects of a film was linked in with the
mise-en-scene.
 We also researched the common and stereotypical mise-en-scene aspects for
our character in many different films for example the costumes, different
probs, the acting etc
Mise-en-scene- preliminary
 For our preliminary task we did not really think about the costumes and
positioning whilst producing and so when we looked back at it we felt like the
costumes did not suit what we wanted to portray for example the teacher had
a jumper on and not formal clothes and so it made it look unrealistic.
Mise-en-scene: diagnosis
 We improved our mise-en-scene in our opening sequence by making sure the
costume suited our film more than our preliminary task as we did not think
about the costumes much in the preliminary task.
 We also used the lighting to help with showing the importance of our
character.
Improvements on titles
 The improvements on the tiles was that we researched and looked at the
different fonts and sizes in our specific genre so we could get some ideas of
what we could use in our opening sequence.
 We also went on different font websites to see what fonts could be suitable
for our genre.
Examples from real media
 Opening titles from se7en:  Opening titles from insomnia:
Examples from diagnosis
Conclusion
 Overall I feel like I have learnt a lot of the process of making our opening
sequence. Firstly I have learnt to use may different technologies that I didn’t
know how to use before for example different aspects on the mac, final cut
express and different ways to make things for example garage band to make
our music. I have also learned the many different shots we could use and that
there are a lot that we can use to make it specific for our context and our
genre.
 I feel like I have improved massively on everything that we used as the
majority of things I did not know how to use for example how to use the mac,
the camera and tripod (in different ways I couldn’t do before).

Evaluation question 7-Shauna

  • 1.
  • 2.
    Continuity  Continuity isa motion-picture scenario giving the complete action, scenes, etc., in detail and in the order in which they are to be shown on the screen.  Continuity is important because it shows the different scenes and how they are meant to be set out in order for the audience to understand about the different characters and the message that is trying to be portrayed.
  • 3.
    180 degree rule The 180 degree rule is a where the camera should be placed and stay inside 180 degrees of a certain side of an invisible line of a certain shot containing tow people.  The camera should stay on the side that it is placed first throughout the shot and not cross this invisible line as it would cause confusion for the views and it makes it look like the people in the shot have switched places as the audience are watching the film.
  • 4.
    180 degree rule-preliminarytask In our preliminary task we used the 180 degree rule, however as we had not done this shot before it did not go very well as from the picture you can see that it was blurry. As our setting was in a small history cupboard (as this is our location we needed) it was hard to move the camera and the tripod together within the space without it being a stable camera. We tried to do the 180 degree shot without the tripod but it was hard to keep the camera still for the last shot so we had to leave it shaky.
  • 5.
    180 degree rule-diagnosis Forour opening sequence we did not use the 180 degree shot as we felt that we would not be able to move the camera and keep it stable at the same time and as it did not go very well in the Preliminary task we did not want to have a shaky shot in our opening sequence so we did not use it. Our setting was a dressing room which we represented as an isolation room. In the room it had mirrors everywhere and so it was going to be hard to do an 180 degree shot without the camera seeing us in the mirrors and so we felt it was best just not to do the 180 degree shot and do other shots instead.
  • 6.
    Match on action Match on action is where the perspective of the camera changes during a scene and the scene continues to flow.  For example a person opening a door and filming can be stopped. The following day filming could be continued as the same person enters a room. The audience would not know that these shots have been taken separately as the scene will flow. However in order for this to be successful and look realistic the character has to: Be wearing the same clothes Be appearing identical to the previous filming time Have the same Lighting (time of day/weather) Be the same time on the clocks if they are in frame Leave on the right if the person is entering from the left or vice- versa
  • 7.
    Match on action-preliminarytask In our preliminary task we did a match on action shot where Shakir was going through a door, so we did two shots. The first shot we filmed was outside of the building so we could see Shakir going through the door from the outside. The second shot we filmed was inside of the building so we saw Shakir walking in from the outside and going up the stairs.
  • 8.
    Match on action-diagnosis Wedid a similar match on action shot in our opening sequence to our preliminary task as we felt this was a big part in improving our opening sequence.
  • 9.
    Shot/reverse shot  Shotreverse shot is a film technique wherein one character is show looking at another character (often, off screen) and then the other character is shown looking “back” at the character. Since the characters are showing facing in opposite directions. The viewer assumes that they are looking at each other.
  • 10.
    Shot/reverse shot- preliminarytask For this shot we did a shot/ reverse shot when the teacher and the student were talking to each other so we could see the facial expression of the student whilst the teacher was talking to
  • 11.
    Shot/reverse shot- diagnosisWe did a much better and much improved shot reverse shot in our opening sequence by firstly doing the shot as if Mayson was looking in the mirror which we felt was a much better angle then a full body shot. We also did this mirror shot so the audience could see Mayson as what he was seeing in the mirror so the audience are relating to the audience.
  • 12.
    Improvements in cinematography We improved on our cinematography by making sure that the camera was not shaky and that we would use a tripod throughout in order for this to happen.  We also improved by using a wider range of shot types rather than using the same old shots for each shot and by doing so we showed different meanings whilst we were filming e.g. if we used an ECU it showed that the object/ the feature we were filming was important as it was an ECU.
  • 13.
    Cinematography- preliminary task For our cinematography in our preliminary task we did not use a variety of shots/ angles and so our cinematography was very basic.  There was a lot of static shots and so we did not really use a lot of movement in our task but when we did we had a shaky camera and so it did not look very professional or polished.  We did not have much knowledge of the different shot types and so we just mainly used the high level shot and over the shoulder shot and so our shots id not fit with our context.
  • 14.
    Cinematography- diagnosis  Weimproved our cinematography in our diagnosis by doing many different angles, shots and movement for example we used a high angle shot to show the low status of Mayson.
  • 15.
    Improvements of editing We made improvements on our editing skills by going onto final cut express and having a play around and looking at the different tools we could use and finding out what each one was and how we could use it, if we wanted to/ needed to.  We also looked at clips on you tube on how to do different things on final cut express, doing it step by step on the way in order for us to be able to do that very well.
  • 16.
    Editing- preliminary task We did not have an affect on the preliminary task as we did not feel it was useful for our scene.
  • 17.
    Editing- diagnosis  Weimproved on our editing by changing our whole opening sequence to black and white as we felt that this best suited our context and genre for our opening sequence.
  • 18.
    Improvements of mise-en-scene We made improvements to our mise-en-scene by researching more about what the mise-en-scene was and what aspects of a film was linked in with the mise-en-scene.  We also researched the common and stereotypical mise-en-scene aspects for our character in many different films for example the costumes, different probs, the acting etc
  • 19.
    Mise-en-scene- preliminary  Forour preliminary task we did not really think about the costumes and positioning whilst producing and so when we looked back at it we felt like the costumes did not suit what we wanted to portray for example the teacher had a jumper on and not formal clothes and so it made it look unrealistic.
  • 20.
    Mise-en-scene: diagnosis  Weimproved our mise-en-scene in our opening sequence by making sure the costume suited our film more than our preliminary task as we did not think about the costumes much in the preliminary task.  We also used the lighting to help with showing the importance of our character.
  • 21.
    Improvements on titles The improvements on the tiles was that we researched and looked at the different fonts and sizes in our specific genre so we could get some ideas of what we could use in our opening sequence.  We also went on different font websites to see what fonts could be suitable for our genre.
  • 22.
    Examples from realmedia  Opening titles from se7en:  Opening titles from insomnia:
  • 23.
  • 24.
    Conclusion  Overall Ifeel like I have learnt a lot of the process of making our opening sequence. Firstly I have learnt to use may different technologies that I didn’t know how to use before for example different aspects on the mac, final cut express and different ways to make things for example garage band to make our music. I have also learned the many different shots we could use and that there are a lot that we can use to make it specific for our context and our genre.  I feel like I have improved massively on everything that we used as the majority of things I did not know how to use for example how to use the mac, the camera and tripod (in different ways I couldn’t do before).