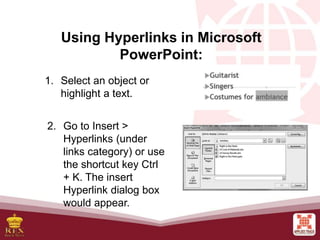
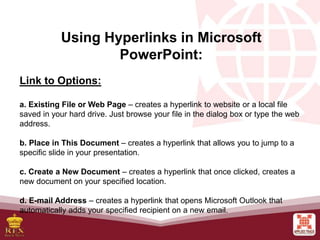
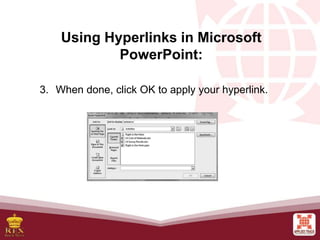
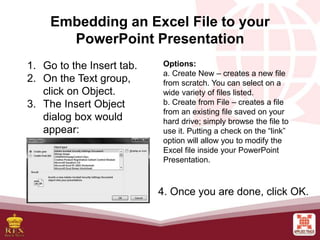
Advanced Presentation
Skills
• Hyperlinks
• Embedding files and data
At the end of this lesson, the students should
be able to:
1. use hyperlinks to improve their PowerPoint Presentation;
2. embed files and data to their PowerPoint Presentation;
and
3. maximize PowerPoint Presentation as an effective visual
aid tool.
Using Hyperlinks in Microsoft
PowerPoint:
1. Select an object or
highlight a text.
2. Go to Insert >
Hyperlinks (under
links category) or use
the shortcut key Ctrl
+ K. The insert
Hyperlink dialog box
would appear.
Using Hyperlinks in Microsoft
PowerPoint:
Link to Options:
a. Existing File or Web Page – creates a hyperlink to website or a local file
saved in your hard drive. Just browse your file in the dialog box or type the web
address.
b. Place in This Document – creates a hyperlink that allows you to jump to a
specific slide in your presentation.
c. Create a New Document – creates a hyperlink that once clicked, creates a
new document on your specified location.
d. E-mail Address – creates a hyperlink that opens Microsoft Outlook that
automatically adds your specified recipient on a new email.
3. When done, click OK to apply your hyperlink.
Using Hyperlinks in Microsoft
PowerPoint:
Embedding Objects in
Microsoft PowerPoint
Embedding objects is easy
using PowerPoint Presentation.
With this option, you can insert an
Excel file that would look like a
table to a PowerPoint Presentation.
Embedding an Excel File to your
PowerPoint Presentation
1. Go to the Insert tab.
2. On the Text group,
click on Object.
3. The Insert Object
dialog box would
appear:
Options:
a. Create New – creates a new file
from scratch. You can select on a
wide variety of files listed.
b. Create from File – creates a file
from an existing file saved on your
hard drive; simply browse the file to
use it. Putting a check on the “link”
option will allow you to modify the
Excel file inside your PowerPoint
Presentation.
4. Once you are done, click OK.

E-Tech L5 Advanced Presentation Skills.pptx

  • 1.
  • 2.
    At the endof this lesson, the students should be able to: 1. use hyperlinks to improve their PowerPoint Presentation; 2. embed files and data to their PowerPoint Presentation; and 3. maximize PowerPoint Presentation as an effective visual aid tool.
  • 3.
    Using Hyperlinks inMicrosoft PowerPoint: 1. Select an object or highlight a text. 2. Go to Insert > Hyperlinks (under links category) or use the shortcut key Ctrl + K. The insert Hyperlink dialog box would appear.
  • 4.
    Using Hyperlinks inMicrosoft PowerPoint: Link to Options: a. Existing File or Web Page – creates a hyperlink to website or a local file saved in your hard drive. Just browse your file in the dialog box or type the web address. b. Place in This Document – creates a hyperlink that allows you to jump to a specific slide in your presentation. c. Create a New Document – creates a hyperlink that once clicked, creates a new document on your specified location. d. E-mail Address – creates a hyperlink that opens Microsoft Outlook that automatically adds your specified recipient on a new email.
  • 5.
    3. When done,click OK to apply your hyperlink. Using Hyperlinks in Microsoft PowerPoint:
  • 6.
    Embedding Objects in MicrosoftPowerPoint Embedding objects is easy using PowerPoint Presentation. With this option, you can insert an Excel file that would look like a table to a PowerPoint Presentation.
  • 7.
    Embedding an ExcelFile to your PowerPoint Presentation 1. Go to the Insert tab. 2. On the Text group, click on Object. 3. The Insert Object dialog box would appear: Options: a. Create New – creates a new file from scratch. You can select on a wide variety of files listed. b. Create from File – creates a file from an existing file saved on your hard drive; simply browse the file to use it. Putting a check on the “link” option will allow you to modify the Excel file inside your PowerPoint Presentation. 4. Once you are done, click OK.

Editor's Notes

  • #3 Define “Hyperlink”. Tell the students the uses of hyperlinks.
  • #7 Define “embedding’.