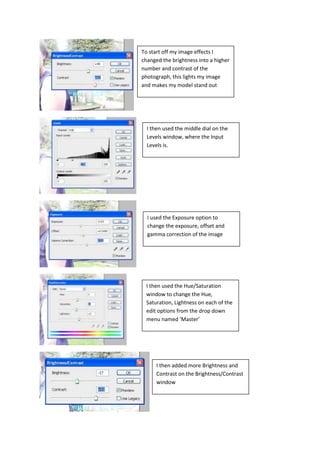
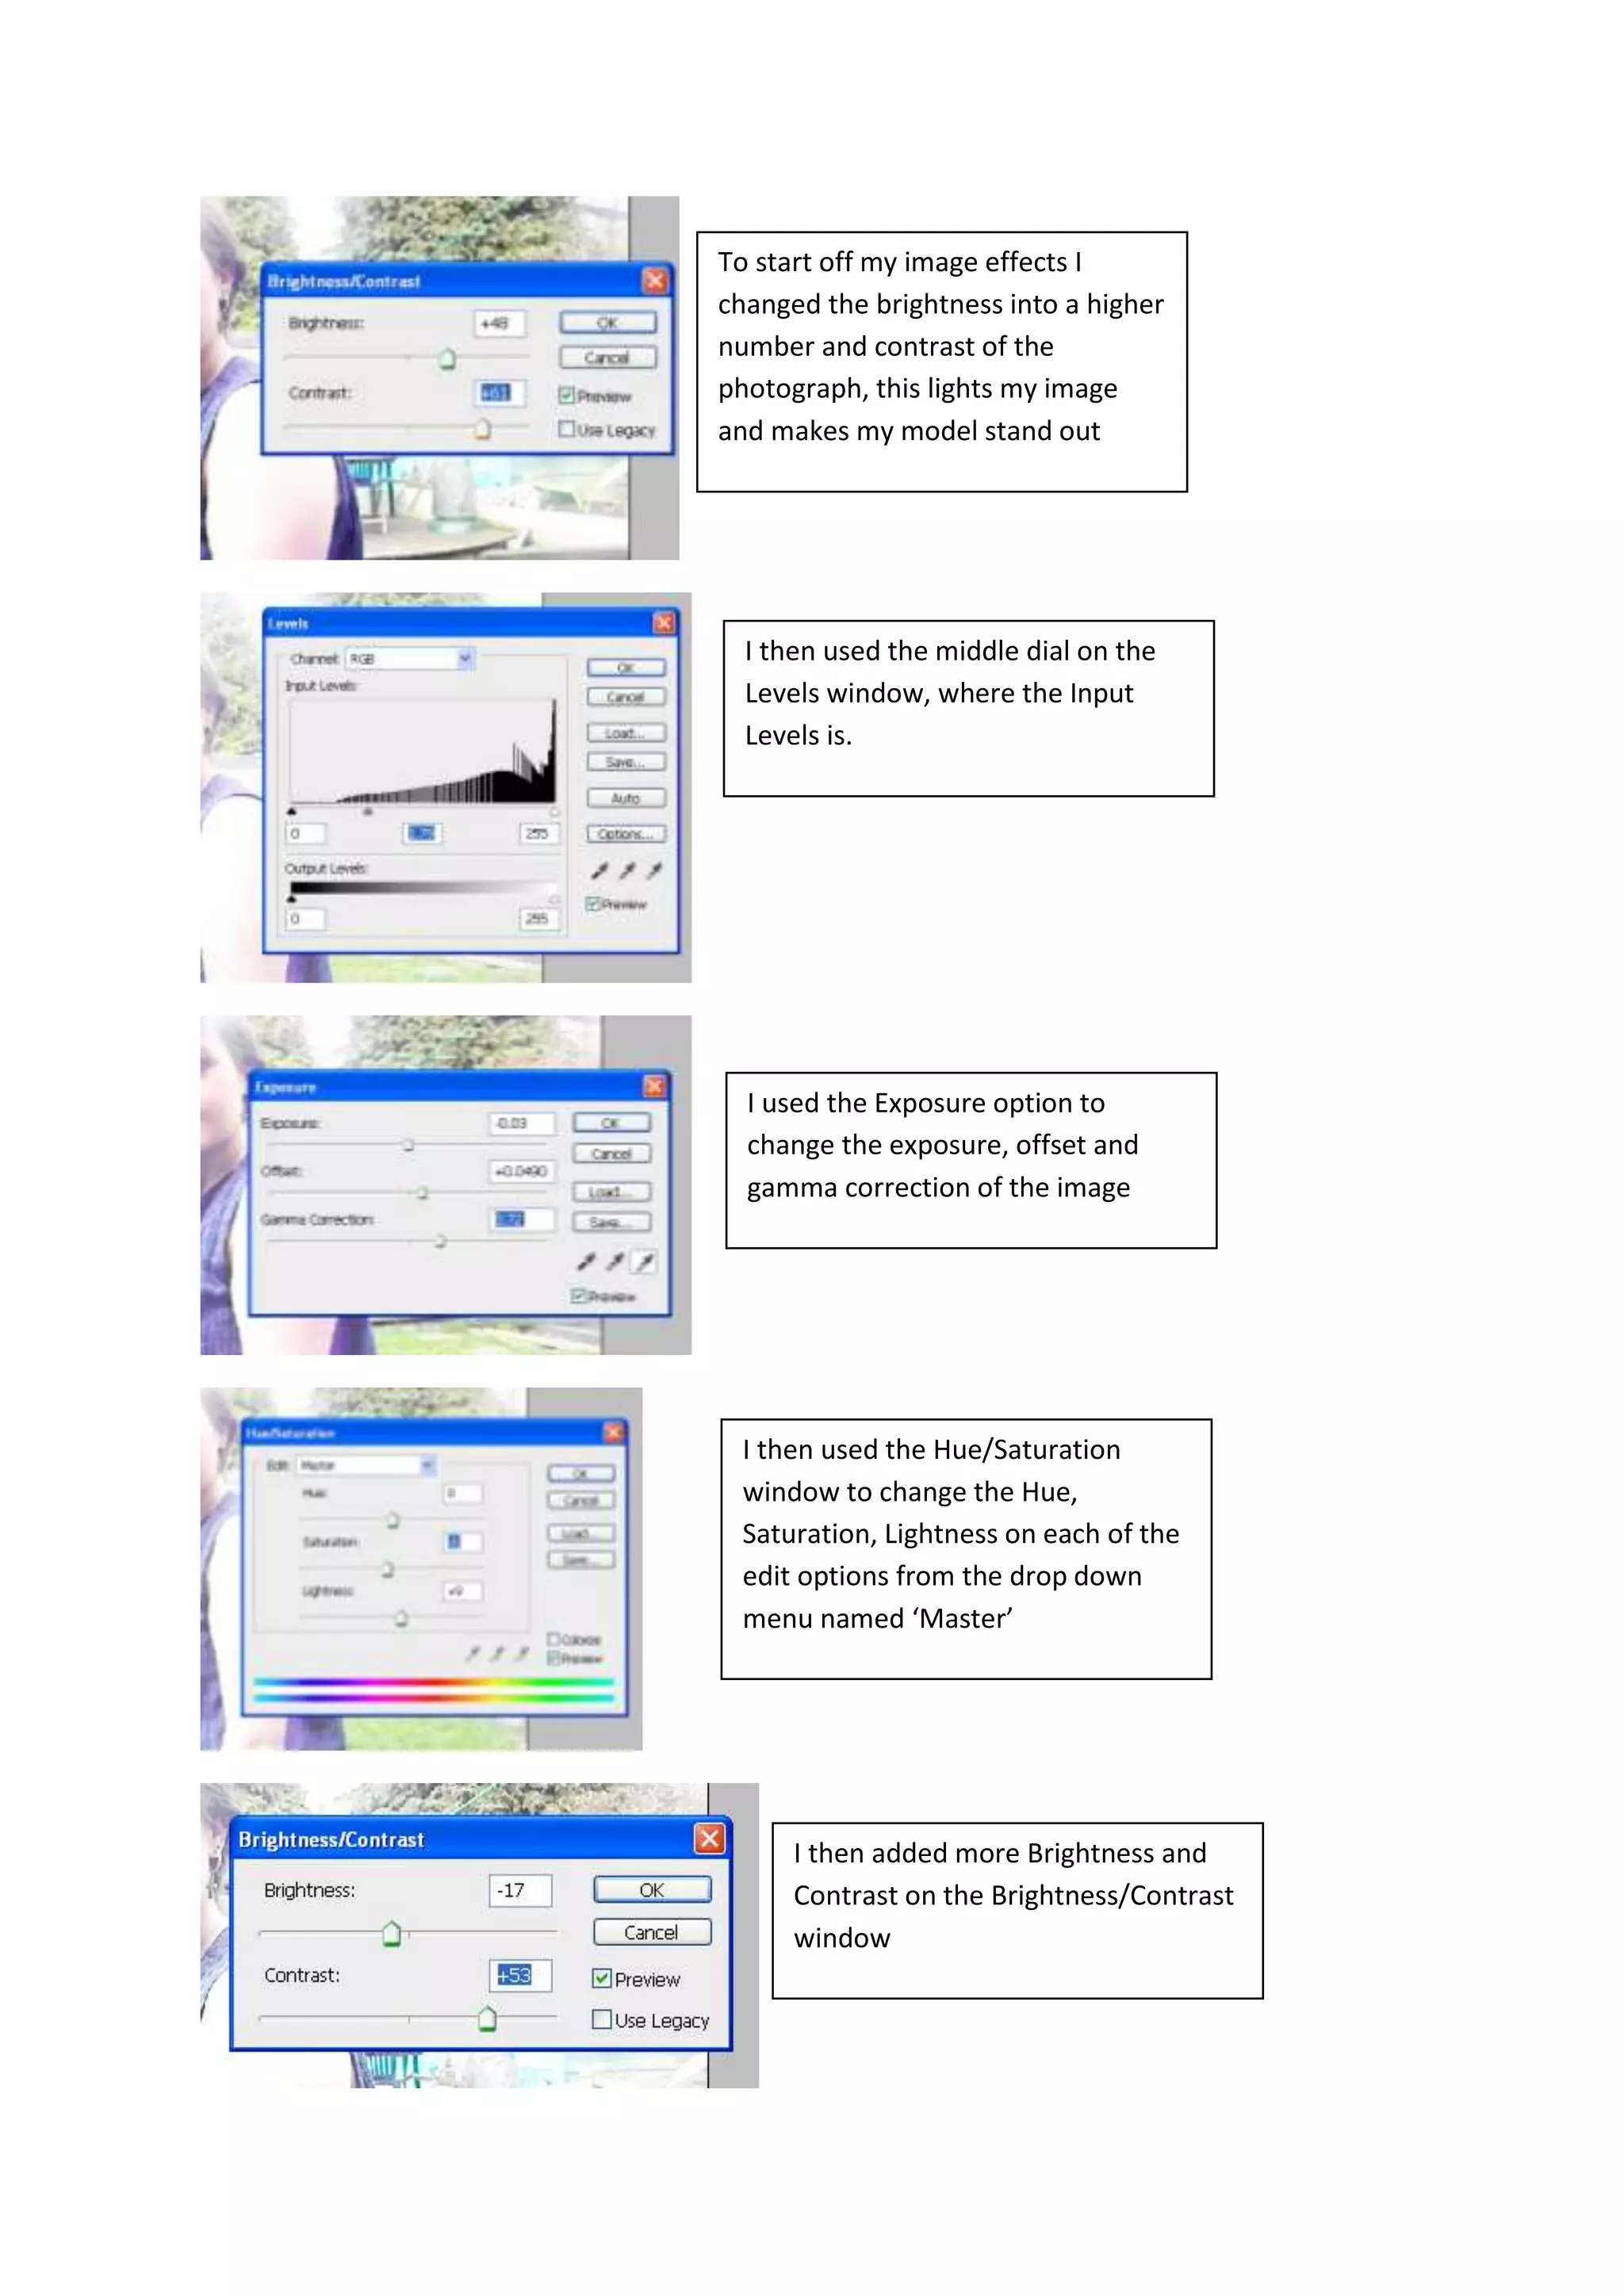
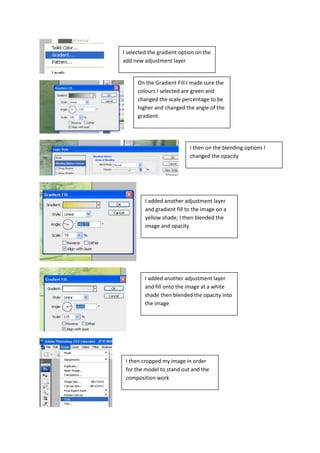
Hadoop Summit - Sanoma self service on hadoopSander Kieft
Hadoop Summit talk about the Big Data self service platform at Sanoma from April 16th, 2015.
This talk will take you through the past, present and future of the data platform in use by Sanoma. A few years ago Sanoma set out to build a self service data platform, using a mixture of open source and commercial technology. Centre to the platform are Hadoop, Hive, Python, R and QlikView. Today the platform is scaled and in use in various Sanoma Countries and being further integrated in with other EDW and BI systems. Central question: How did this platform came to be and does Big Data self service deliver on the promise of freeing the for everyone to use?
1. To start off my image effects I
changed the brightness into a higher
number and contrast of the
photograph, this lights my image
and makes my model stand out
I then used the middle dial on the
Levels window, where the Input
Levels is.
I used the Exposure option to
change the exposure, offset and
gamma correction of the image
I then used the Hue/Saturation
window to change the Hue,
Saturation, Lightness on each of the
edit options from the drop down
menu named ‘Master’
I then added more Brightness and
Contrast on the Brightness/Contrast
window
2. I selected the gradient option on the
add new adjustment layer
On the Gradient Fill I made sure the
colours I selected are green and
changed the scale percentage to be
higher and changed the angle of the
gradient.
I then on the blending options I
changed the opacity
I added another adjustment layer
and gradient fill to the image on a
yellow shade; I then blended the
image and opacity
I added another adjustment layer
and fill onto the image at a white
shade then blended the opacity into
the image
I then cropped my image in order
for the model to stand out and the
composition work
3. I changed the colour balance
options from each tone balance
option. I then used the lasso tool to
highlight the background of the
image
I selected Lens Blur and changed the
options in order to get the right
effect
Original
Edit