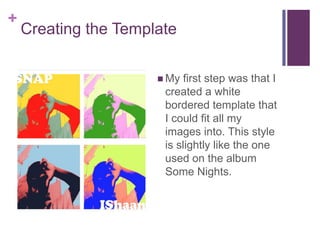
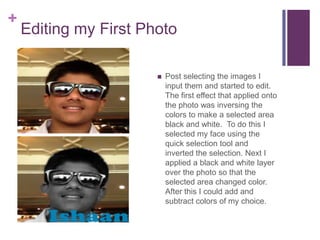
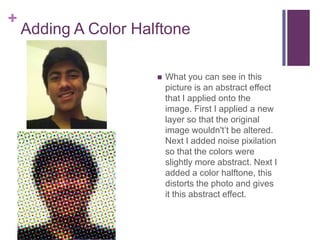
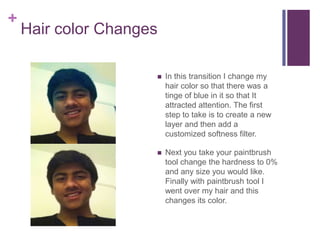
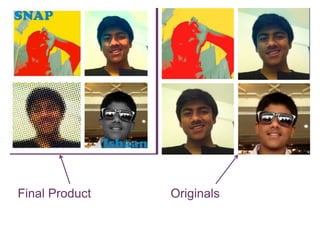
+


    SNAP Behind The Scenes
    Process
    By: Ishaan Laul 10F
+
    Creating the Template

                       My  first step was that I
                       created a white
                       bordered template that
                       I could fit all my
                       images into. This style
                       is slightly like the one
                       used on the album
                       Some Nights.
+
    Editing my First Photo

                          Post selecting the images I
                           input them and started to edit.
                           The first effect that applied onto
                           the photo was inversing the
                           colors to make a selected area
                           black and white. To do this I
                           selected my face using the
                           quick selection tool and
                           inverted the selection. Next I
                           applied a black and white layer
                           over the photo so that the
                           selected area changed color.
                           After this I could add and
                           subtract colors of my choice.
+
    Adding A Color Halftone

                         What you can see in this
                          picture is an abstract effect
                          that I applied onto the
                          image. First I applied a new
                          layer so that the original
                          image wouldn't’t be altered.
                          Next I added noise pixilation
                          so that the colors were
                          slightly more abstract. Next I
                          added a color halftone, this
                          distorts the photo and gives
                          it this abstract effect.
+
    Hair color Changes

                        In this transition I change my
                         hair color so that there was a
                         tinge of blue in it so that It
                         attracted attention. The first
                         step to take is to create a new
                         layer and then add a
                         customized softness filter.

                        Next you take your paintbrush
                         tool change the hardness to 0%
                         and any size you would like.
                         Finally with paintbrush tool I
                         went over my hair and this
                         changes its color.
+


Final Product   Originals

My album process

  • 1.
    + SNAP Behind The Scenes Process By: Ishaan Laul 10F
  • 2.
    + Creating the Template  My first step was that I created a white bordered template that I could fit all my images into. This style is slightly like the one used on the album Some Nights.
  • 3.
    + Editing my First Photo  Post selecting the images I input them and started to edit. The first effect that applied onto the photo was inversing the colors to make a selected area black and white. To do this I selected my face using the quick selection tool and inverted the selection. Next I applied a black and white layer over the photo so that the selected area changed color. After this I could add and subtract colors of my choice.
  • 4.
    + Adding A Color Halftone  What you can see in this picture is an abstract effect that I applied onto the image. First I applied a new layer so that the original image wouldn't’t be altered. Next I added noise pixilation so that the colors were slightly more abstract. Next I added a color halftone, this distorts the photo and gives it this abstract effect.
  • 5.
    + Hair color Changes  In this transition I change my hair color so that there was a tinge of blue in it so that It attracted attention. The first step to take is to create a new layer and then add a customized softness filter.  Next you take your paintbrush tool change the hardness to 0% and any size you would like. Finally with paintbrush tool I went over my hair and this changes its color.
  • 6.