The document summarizes three stages of photo manipulation:
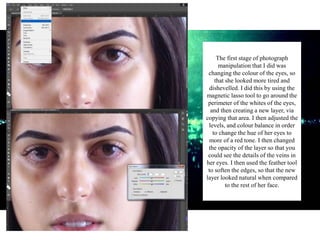
1) Changing the color of the subject's eyes to look more red and tired by selecting the eye area and adjusting levels and color balance on a new layer.
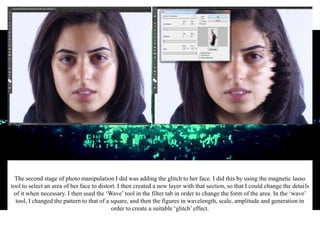
2) Adding a glitch effect to the subject's face by selecting an area, creating a new layer, and using the wave tool to distort the shape.
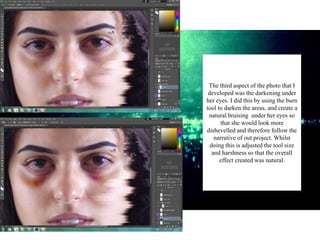
3) Darkening under the subject's eyes using the burn tool to create natural-looking bruising and make the subject appear more disheveled.