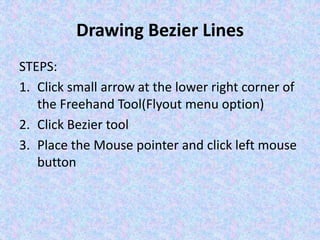
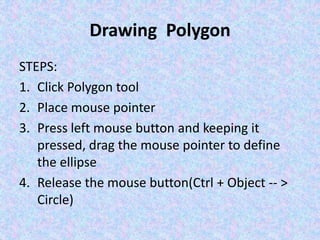
CorelDRAW
Presented by
V.Santhi,
Department of Computer
Application,
Bon Secours College for women,
Thanjavur
Drawing Basic Geometric Figures
• Drawing Freehand Lines
• Joining Freehand Lines
• Drawing Bezier Lines
• Drawing Ellipses and Circles
• Drawing Rectangles and Squares
Drawing Freehand Lines
STEPS:
1. Click Freehand Tool(F5)
2. Place the mouse-pointer
3. Click and Release left mouse-button
4. Move the mouse pointer
5. Finally click the left mouse button
Joining Freehand Lines
STEPS:
1. Click Freehand Tool
2. Place Mouse pointer
3. Move mouse pointer down, to the right of
the previous click and double click, end of
the first line and starting of second line
4. Follow these steps to create a zig zag pattern
Drawing Bezier Lines
STEPS:
1. Click small arrow at the lower right corner of
the Freehand Tool(Flyout menu option)
2. Click Bezier tool
3. Place the Mouse pointer and click left mouse
button
Drawing Ellipses and Circles
STEPS:
1. Click Ellipse tool
2. Place mouse pointer
3. Press left mouse button and keeping it
pressed, drag the mouse pointer to define
the ellipse
4. Release the mouse button
Drawing Rectangle and Squares
STEPS:
1. Click Rectangle tool
2. Place mouse pointer
3. Press left mouse button and keeping it
pressed, drag the mouse pointer to define
the ellipse
4. Release the mouse button
Drawing Polygon
STEPS:
1. Click Polygon tool
2. Place mouse pointer
3. Press left mouse button and keeping it
pressed, drag the mouse pointer to define
the ellipse
4. Release the mouse button(Ctrl + Object -- >
Circle)
Saving a File
STEPS:
1. Click on the File menu.
2. Click Save option, Save Drawing Dialog box
3. Type a name for the file
4. Click Save button
Closing a File
STEPS:
1. Click File Menu
2. Click Close option
Opening an Existing CorelDRAW
STEPS:
1. Click File Menu
2. Click Open option  open Drawing Dialog
box
3. Browse the file
4. Click Open
Views
• View refers the way of Viewing the
Documents.
• CorelDRAW provides 6 types of View modes.
1. Normal View
2. Full Screen Preview
3. Simple Wireframe View
4. Wireframe View
5. Enhanced View
6. Page Sorter View
Normal View
• Displays a drawing without PostScript fills or
high-resolution bitmaps. This mode refreshes
and opens slightly faster than the Enhanced
mode.
STEPS:
1. Click View Menu
2. Click Normal Option
Full Screen Preview
• Full Screen Preview Provides a full view of the
Work and hides all other components of the
screen.
STEPS:
1. Click View Menu
2. Click Full Screen Preview options.
Simple wireframe
• Hides all the complex object properties and
displays the bitmaps in black and white
• Useful for editing objects
• Displays an outline of the drawing by
hiding fills, extrusions, contours, drop
shadows, and intermediate blend shapes; also
displays the bitmaps in monochrome. This
mode lets you quickly preview basic elements
in a drawing.
Wireframe
• Displays a drawing in simple wireframe mode
plus intermediate blend shapes
• Allow us to edit our drawing quickly
• Displays the drawing in a Skeletal form
Enhanced View
• Best possible display of a document
• Displays a drawing with PostScript fills, high-
resolution bitmaps, and anti-aliased vector
graphics.
Page Sorter View
• View is useful in case of more than one pages
in our document on a single screen
STEPS:
1. Click View Menu
2. Click Page Sorter View
Undo, Redo and Repeating Action
STEPS:
1. Click Edit menu
2. Click Undo, Redo and Repeat
Undo, Redo a Series of Actions
STEPS:
1. Click on Tools menu
2. Select Undo Docker option
3. Undo window showing list of all the actions
performed will be displayed on the right side
of the application window
Drawing geometric figures

Drawing geometric figures

  • 1.
    CorelDRAW Presented by V.Santhi, Department ofComputer Application, Bon Secours College for women, Thanjavur
  • 2.
    Drawing Basic GeometricFigures • Drawing Freehand Lines • Joining Freehand Lines • Drawing Bezier Lines • Drawing Ellipses and Circles • Drawing Rectangles and Squares
  • 3.
    Drawing Freehand Lines STEPS: 1.Click Freehand Tool(F5) 2. Place the mouse-pointer 3. Click and Release left mouse-button 4. Move the mouse pointer 5. Finally click the left mouse button
  • 6.
    Joining Freehand Lines STEPS: 1.Click Freehand Tool 2. Place Mouse pointer 3. Move mouse pointer down, to the right of the previous click and double click, end of the first line and starting of second line 4. Follow these steps to create a zig zag pattern
  • 8.
    Drawing Bezier Lines STEPS: 1.Click small arrow at the lower right corner of the Freehand Tool(Flyout menu option) 2. Click Bezier tool 3. Place the Mouse pointer and click left mouse button
  • 10.
    Drawing Ellipses andCircles STEPS: 1. Click Ellipse tool 2. Place mouse pointer 3. Press left mouse button and keeping it pressed, drag the mouse pointer to define the ellipse 4. Release the mouse button
  • 12.
    Drawing Rectangle andSquares STEPS: 1. Click Rectangle tool 2. Place mouse pointer 3. Press left mouse button and keeping it pressed, drag the mouse pointer to define the ellipse 4. Release the mouse button
  • 14.
    Drawing Polygon STEPS: 1. ClickPolygon tool 2. Place mouse pointer 3. Press left mouse button and keeping it pressed, drag the mouse pointer to define the ellipse 4. Release the mouse button(Ctrl + Object -- > Circle)
  • 16.
    Saving a File STEPS: 1.Click on the File menu. 2. Click Save option, Save Drawing Dialog box 3. Type a name for the file 4. Click Save button
  • 17.
    Closing a File STEPS: 1.Click File Menu 2. Click Close option
  • 18.
    Opening an ExistingCorelDRAW STEPS: 1. Click File Menu 2. Click Open option  open Drawing Dialog box 3. Browse the file 4. Click Open
  • 19.
    Views • View refersthe way of Viewing the Documents. • CorelDRAW provides 6 types of View modes. 1. Normal View 2. Full Screen Preview 3. Simple Wireframe View 4. Wireframe View 5. Enhanced View 6. Page Sorter View
  • 20.
    Normal View • Displaysa drawing without PostScript fills or high-resolution bitmaps. This mode refreshes and opens slightly faster than the Enhanced mode. STEPS: 1. Click View Menu 2. Click Normal Option
  • 22.
    Full Screen Preview •Full Screen Preview Provides a full view of the Work and hides all other components of the screen. STEPS: 1. Click View Menu 2. Click Full Screen Preview options.
  • 24.
    Simple wireframe • Hidesall the complex object properties and displays the bitmaps in black and white • Useful for editing objects • Displays an outline of the drawing by hiding fills, extrusions, contours, drop shadows, and intermediate blend shapes; also displays the bitmaps in monochrome. This mode lets you quickly preview basic elements in a drawing.
  • 26.
    Wireframe • Displays adrawing in simple wireframe mode plus intermediate blend shapes • Allow us to edit our drawing quickly • Displays the drawing in a Skeletal form
  • 28.
    Enhanced View • Bestpossible display of a document • Displays a drawing with PostScript fills, high- resolution bitmaps, and anti-aliased vector graphics.
  • 30.
    Page Sorter View •View is useful in case of more than one pages in our document on a single screen STEPS: 1. Click View Menu 2. Click Page Sorter View
  • 32.
    Undo, Redo andRepeating Action STEPS: 1. Click Edit menu 2. Click Undo, Redo and Repeat
  • 33.
    Undo, Redo aSeries of Actions STEPS: 1. Click on Tools menu 2. Select Undo Docker option 3. Undo window showing list of all the actions performed will be displayed on the right side of the application window