Death by power point
•
5 likes•5,260 views

A booklet that accompanies the slideshow "Presentations that Work"

Recommended
More Related Content
What's hot
What's hot (20)
Similar to Death by power point
Similar to Death by power point (20)
More from Kay Oddone
More from Kay Oddone (20)
Recently uploaded
Recently uploaded (20)
Death by power point
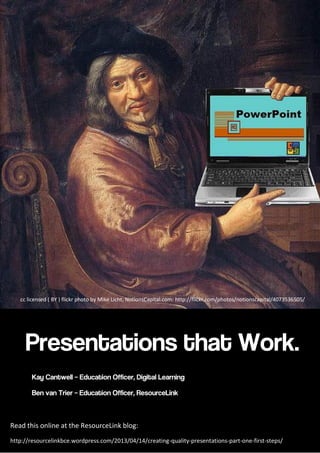
- 1. cc licensed ( BY ) flickr photo by Mike Licht, NotionsCapital.com: http://flickr.com/photos/notionscapital/4073536505/ Read this online at the ResourceLink blog: http://resourcelinkbce.wordpress.com/2013/04/14/creating-quality-presentations-part-one-first-steps/
- 2. Image used with permission: Frits Ahlefeldt http://www.hikingartist.net/media.details.php?mediaID=NTllODkwZGI1NWZm Every day, in conference rooms and offices around the world, people are dying. Death by PowerPoint is the commonly used term for presentations of endless slides, filled with dense text, complex diagrams and poor design. The simple tips in the following booklet will help you transform presentations into tools of communication that will engage the audience, and provide a memorable accompaniment to your message. The first half of this booklet will give you four simple steps to improve the overall impact of your presentations. The second half will focus on specific strategies to aid in the creation of effective presentations, as well as a tutorial for the PowerPoint alternative, Prezi. This booklet can be downloaded for additional copies at http://tinyurl.com/presentationsthatwork
- 3. Seth Godin, entrepreneur, author and public speaker admits that he has seen a lot of presentations in his cc licensed ( BY ) flickr photo by Thomas Leth-Olsen: http://flickr.com/photos/thomasletholsen/6050828458/ career; and is adamant that most are poor. His simple rules for creating effective presentations have formed the basis of what I call ‘First Steps’. One of the common issues with slides in a presentation is ‘cognitive load’. Cognitive load is essentially how much your brain can take in. cc licensed ( BY ) flickr photo by DonkeyHotey: Our working memory is limited, and http://flickr.com/photos/donkeyhotey/5713922 088/ we process words and images separately, and therefore, when a speaker is presenting to an audience, and there is a slide full of text behind them, the audience must make a subconscious choice about which to pay attention to. They simply can’t take in both. Seth Godin says absolutely no more than 6 words per slide; however if this is too rigid, at least try to limit the text to the main ideas. The audience came to hear the speaker. If all of the content is on the presentation, they could have just stayed at home and had the slideshow emailed to them!
- 4. Now that the text on each slide is minimised, you have room to include amazing images! The content of the presentation is made richer when it is accompanied by images that engage the audience emotionally. An image smokestacks belching into the sky is far more memorable than a list of dot points about pollution. One key thing to remember when choosing images is that the image should illustrate the point you are making – design, don’t decorate. For example:
- 5. PowerPoint is fitted out with many features that are not conducive to good design. Animations that have text swooshing across the slide, transitions that blink and flash and overdone backgrounds that distract from the text simply confuse your message. The best cc licensed ( BY ) flickr photo by a_whisper_of_unremitting_demand: presentations are simple, clean and free of http://flickr.com/photos/jpovey/3967341 366/ distractions. Like this! The audience will be relieved to know that all of the information being communicated during the presentation will be theirs to walk away with at the conclusion. This frees them up to truly listen to the presenter – rather than scribbling down notes. It also means your slides do not have to contain all of the information, and can be used to engage the audience using the tips above. It is important – vital! However, that it is handed out at the end of the presentation – otherwise the audience will simply read the document, and ignore the presenter. Presentations which contain the entirety of information being delivered are known as ‘slideuments’. They are a terrible hybrid of document and slideshow presentation. While it may take a little longer to create a document and an accompanying presentation, the results are worth it in audience engagement and quality communication.
- 6. cc licensed ( BY ) flickr photo by Pot Noodle: http://flickr.com/photos/maggiew/6121970836/ Your first decision when creating a presentation is deciding which tool best suits the purpose. The main players for presentations are PowerPoint (Windows), Keynote (Mac) and Prezi (Online).
- 7. There are also mobile apps that create presentations, which are useful if you are on the move. PowerPoint is the best known application in this area. Amazing presentations can be created using PowerPoint – Nancy Duarte has created an amazing example of just how far PowerPoint can be pushed, which can be viewed here. PowerPoint is easy to use, although it can sometimes be a little unreliable when embedding video, (more on this later) and many of its pre- designed themes and templates are less than appealing. Keynote is only available to those operating on the Mac platform. It performs the same role as PowerPoint, however some argue its design is sleeker and it is known to be able to handle video and music files more capably than PowerPoint. Prezi is a relative newcomer, but it is growing in popularity. Prezi is online, and stores your presentations ‘in the cloud’, although for a modest subscription you can download a desktop editor, which allows you to work in an offline mode. Prezi is not based on linear slides, but has an unlimited canvas, onto which you place your content. As you design your Prezi, you create a ‘path’ which directs the order in which this content
- 8. is presented. Being a canvas, Prezi is terrific for creating non- linear presentations, as you can zoom in and out to view the big picture or focus on smaller details, and the design is not limited by slide size. A tutorial on getting started with Prezi is included in this booklet. Click the image to view a brief Prezi on Prezi. A beautiful mobile device presentation app is Haiku Deck. The focus of Haiku Deck is to create image based slides, with minimal text. Built into the app is a search of Creative Commons licenced images, and it automatically places the attribution onto the image, which is a huge time saver. If you have access to an iPad, it is worth exploring. Below is an example of a Haiku Deck slide.
- 9. Avoid using the standard templates, if at all possible. There are a number of reasons for this. Firstly, they are not original or memorable. As PowerPoint is used so commonly, the layouts will make your slides seem just like everyone else’s. Secondly, the templates provided encourage the creation of slideuments – encouraging headings and subheadings, dot points and even two columns of information on the one slide. What looks amazing on the computer may not display as well when projected on a screen. The size and brightness of the room and strength of the projector can impact upon the colours, rendering some colour combinations unreadable. Another consideration is that approximately 8% of men suffer from colour-blindness (Victorian Department of Health and Safety,2013). Therefore the choice of background colour, text colour and the use of contrast are all important. These colours contrast These colours don’t contrast These colours don’t contrast These colours contrast (harder to read?)
- 10. The vast majority of images found through Google Images are copyrighted. When presenting to an audience, replicating images you do not have permission to use breaches copyright. Fortunately, there are a number of sources of images you can use, and these sources are growing. Creative Commons licenced images are an alternative to copyrighted images. Whereas copyright works on an all rights reserved model, Creative Commons licences allow the creator of the work to state which rights they choose to reserve (e.g. non- commercial indicates the creator reserves the right to prohibit commercial use of their creation). Images can also be labelled Public Domain, which means anyone is free to use them. These images are usually commonly used symbols, or images that have passed out of copyright. A comprehensive explanation of Creative Commons, Public Domain and Copyright is available on the Copyright and Copyleft wiki. If you have a budget for the presentation, you can purchase images from one of the many stock photo companies online. We have found iStockphoto to have an excellent range, and reasonably priced. If you have no funds, don’t despair! There are many other excellent sources of creative commons licenced and free images and quality clipart.
- 11. Flickr Creative Commons – a huge range of photos all licenced to be used under various CC Licences. Wikimedia Commons - a database of over 16 million freely usable media files to which anyone can contribute. ClClker provides royalty free public domain clip art in vector format and in image PNG format. It also allows you to make simple edits to these images.
- 12. Inserting video in PowerPoint can be problematic. PowerPoint offers three options for inserting video. Inserting a video from file is essentially the same as inserting an image. You browse to where the file is located, and click insert. There are a number of caveats on this simple process. a) Keep the video file and the PowerPoint file in the same folder. The video is not embedded into the PowerPoint, it ‘links’ to it, so if you move the PowerPoint (say onto a data key to transport to the presentation location) and you don’t move the video file as well, the video will fail to load. Moving the entire folder with all linked files goes some way to resolving this (although it is good to test at the presentation location, as sometimes videos need to be ‘reinserted’). b) If you have a video stored as a file on your hard drive, you should either own this video or have permission to store it. Downloading YouTube videos without the permission of the creator is a breach of copyright.
- 13. Inserting a video from a website can be problematic. There are multiple requests for assistance online from PowerPoint users for whom this process just simply doesn’t work. The process seems simple: Step 1:
- 14. Step 2: This process has never worked successfully for us, on a range of different computers. The video appears as a black box that will not play, or there is an error which requires Adobe Flash to be updated (even when the latest version is installed). Fortunately, there are two alternatives. a) Hyperlink to the video b) Use a third party plug-in such as AuthorStream Hyperlinking to the video means you temporarily leave the presentation, and go to where the video is situated to view. This can be disruptive during a presentation, however it does mean you can link to any video on any website (YouTube, Vimeo, TeacherTube etc). You can also link to a video edited on SafeShare TV, so that all of the annoying ads are removed. How to hyperlink to a SafeShare TV video:
- 15. Select the YouTube video and copy its hyperlink. Open SafeShare TV and paste the hyperlink into the field. Click generate safe link. If editing of the video is required, click customize video. Make the relevant edits. Open PowerPoint and create the slide. Highlight the text or image you wish to hyperlink from and click insert hyperlink.
- 16. A third party plug-in such as AuthorStream allows you to embed YouTube or Vimeo videos directly into the slideshow so that they can be seamlessly displayed as part of the presentation. Download Authorstream and follow the directions to install. Once it is installed, in PowerPoint a new tab will appear on the ribbon at the top of the screen. Embedding the video is simply a matter of pasting the video hyperlink (not the embed code) into the window, as below. Please note that embedded videos require an internet connection to operate. Embedding video from clipart is quite straight forward, however the limited range of videos available from clipart means this option is rarely chosen. The videos available are generally classified as animations, and add little to formal presentations. If you have many videos to embed, it may be easier to choose Prezi as your presentation tool. To embed video into Prezi, simply paste the link where you want the video to appear, and as long as you have an internet connection, the process is complete.
- 17. Choice of font is essential if you wish to have readable slides. If at all possible, choose no more than two fonts; a headline font and a text font. Make use of bold and italic options if you need further differentiation. Nancy Duarte explains font choice very well in her book, Slideology. Essentially, there are two types of fonts; serif and sans serif. Serifs are the small strokes at the end of letters that aid readability – you can see them Here Serif fonts are good for long chunks of text. San Serif fonts don’t have the serifs, and are cleaner and bolder . Once you have selected the font, don’t make the mistake of keeping it too small. Even though it may be readable on the computer screen, once projected this may change. As a general rule, stick to 24pt and above, larger if you are presenting in a large room and some audience members may be seated far from the screen.
- 18. Choice of font does not have to be limited to those available in the application. There are several websites where you can download free fonts for maximum impact. Two excellent sites are (click on the logos to go to the sites). One thing to note if you are using downloaded fonts – they will only work on the computer where the fonts are installed. This is vital to know, as many presentations are created on one computer and transferred for presentation onto a different computer. If you know the presentation is going to be moved, it is best to stick to one of the pre-installed fonts, or save the presentation in PDF format, which will prevent the fonts from changing no matter what computer is being used. Avoid the overuse of bullet points!
- 19. Step 1: Sign up for a Prezi Account. If using Prezi in Education, you can apply for a Student and Teacher Licence, which gives you 500Mb storage for free. Step 2: Log in, and click +New Prezi. Step 3: Choose from one of the many templates, or choose a blank prezi to start designing from scratch. You are ready to begin!
- 20. To move around the canvas zoom in and out by using your mouse’s scroll wheel or by clicking the + and - symbols on the right hand side of the screen. To move the prezi canvas left, right, up, or down, hold down the left button of your mouse and then move in the direction you want to go. The Transformation Tool is the main way to edit. Once you add anything to the canvas, click on it once to bring up the Transformation Tool. The tool allows you to move, size, and rotate your content. If you add a frame to your prezi, you can click on it once to bring up the Transformation Tool and move, scale, or rotate everything inside. Use the Theme Wizard to customize the colors of your prezi and to set your font choices from Prezi's font library.
- 21. Frames work like slides and can be used to group your ideas. Frames come in a variety of shapes and sizes, and you can change the color of them as well as their size and position. To create frames, choose 'Add Frames' from the top-center menu, or select the type of frame you want. Place the frame around the content you wish to group or feature. Adding a frame will automatically add another step to your prezi’s path. Quickly add content to your drawings, and duplicate them (using the right-click menu or keyboard shortcuts) to start filling your prezi with content. Click the ‘Shapes’ icon at the top of the screen to add shapes, lines, arrows, and more to your Prezi . Highlight text with the Highlighter. Jot down ideas and make sketches with the Pencil.
- 22. Creating a path gives your presentation direction. With the Left Sidebar, you can create a journey from one idea to the next. Edit your path and its points in Edit mode and take your audience along that path in Present mode. To set your path, click the ‘Edit Path’ button on the left-hand side of screen. Then click on the objects in your prezi canvas in the order you wish them to appear. Use the sidebar to rearrange and delete path points or to zoom to a specific path point. Creating smooth transitions from one path point to the next is an essential part of creating a good prezi. Some general tips include: 1. Don’t overdo rotation - it could make your audience a little nauseous. 2. Show an overview at regular intervals to give the your audience some context. 3. Create path points that are not long distances apart. Zooming and rotating from one side of the canvas to another can be disorienting for the people watching. Add URLS to your prezi To put live links into your prezi, copy and paste the desired URL into a text box. Then click away from the text box and your link will become active (you will see it automatically underline).
- 23. Your Prezi saves automatically as you create, however it is also good to save at regular intervals by simply clicking on the disc icon. If you have a free Public account, your prezis will always be available for others to view online. The free account for Educators allows you to keep a Prezi private. You can also choose to make a prezi available for others to reuse. This means that anyone can use the content in your prezi for themselves. Click the share button to access the weblink and embed codes for further sharing. A portable prezi is a downloaded version of a prezi, which you can view offline without either a Prezi account or Prezi Desktop. You can use it to present in a setting where you don't have access to the internet. It contains a non-editable version of your prezi, as well as software for Windows and Mac that will play your prezi. This is good for presenting where there is no internet connection, or for sharing with others who aren’t online. Further information can be found on the Prezi Support Page.
- 24. 5 Ways to Make PowerPoint Sing! (And Dance!). (n.d.). Duarte Blog. Retrieved April 12, 2013, from http://blog.duarte.com/2010/01/5-ways-to- make-powerpoint-sing-and-dance/ Department of Human Services, Victoria. (n.d.). Colour blindness. Better Health Channel. Retrieved April 12, 2013, from http://www.betterhealth.vic.gov.au/bhcv2/bhcarticles.nsf/pages/Colour_blindn ess Duarte, N. (2008). slide:ology: The Art and Science of Creating Great Presentations (1st ed.). O’Reilly Media. Godin, S. (2001, January 10). Really Bad PowerPoint: (and how to avoid it): Seth Godin: Amazon.com: Books. Do You Zoom Inc. Hooker, D. (2012, March 25). Get Started with Prezi. Prezi Support. Retrieved April 12, 2013, from https://prezi.zendesk.com/entries/23448918- Get-Started-with-Prezi Lessons from TED: 5 Simple Tweaks. (n.d.). Duarte Blog. Retrieved April 12, 2013, from http://blog.duarte.com/2009/02/lessons-from-ted-5-simple- tweaks/ Reynolds, G. (2011). Presentation Zen: Simple Ideas on Presentation Design and Delivery (2nd Edition) (2nd ed.). New Riders.