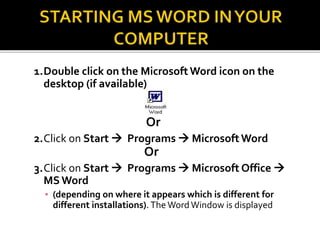
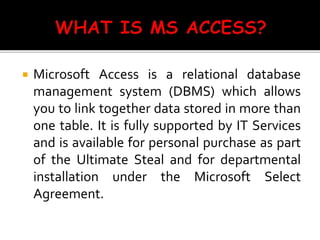
SlideShare a Scribd company logo
Diploma Course in Health Information Management,
Department of Management Studies,
Kaduna School of Health Information Management
(KSHIM), Kaduna State,
Nigeria.
By: Engr. Ochu IbrahimA.
 Course outline: Consult course Curriculum
(HIS 124)
 Materials: Computer Packages Lecture note.
By Engr. Ochu Ibrahim A.
 2 Hours for lectures
 1 Hour for seminar/tutorial
 All the lectures, Seminars and Reading Materials will be at your disposal
(ur email add)
 At the end of the semester we may try to expolre the practical aspect of
the course.
 To pass the course, you need to have atleast 70% attendance
 30% for CA
 10% for Course Manual
 60% for Exam as usual
 The exam will be 7Q, answer 5Q only (But this may change if any
circumstances arises)
 Are we ready?
 Application software is the general
designation of computer program for
performing user tasks.
 When a multiple applications software are
bundled together as one, is known as an
application package.
 Information worker software
 Educational software
 Simulation software
 Product engineering software
 Health software
 A word processor is a program that allows you
to create, edit, format, and print the
documents that a user have worked on.
 The main advantage of a word processor is
that it provides aWYSIWYG (WhatYou See Is
WhatYou Get) interface, which helps you
make changes quickly and easily to your
documents.
 MSWord 2003, Word XP, orWord 2007 are
word processor, which are just a version of
Microsoft Office suite. And it is a powerful
tool used in the creating and formatting
professional looking documents.
1.Double click on the MicrosoftWord icon on the
desktop (if available)
Or
2.Click on Start  Programs  MicrosoftWord
Or
3.Click on Start  Programs  Microsoft Office 
MSWord
▪ (depending on where it appears which is different for
different installations). The WordWindow is displayed
 The Ribbon: You use commands to tell
Microsoft Word what to do. In
Microsoft Word 2007, you use the
Ribbon to issue commands. The Ribbon is
located near the top of the screen,
below the Quick Access toolbar. At the
top of the Ribbon are several tabs;
clicking a tab displays several related
command groups. Within each group are
related command buttons. You click
buttons to issue commands or to access
menus and dialog boxes.
 The Title-bar: On the Title bar, Microsoft
Word displays the name of the document on
which you are currently working on.
 The Menu bar: The Menu bar is generally
found directly below the Title bar. The Menu
bar displays the menu. The Menu bar begins
with the word File and continues with Edit,
View, Insert, Format, Tools, Table, Window,
and Help.
 Toolbars: They are subdivided into; The
standard toolbar and The formatting toolbar.
Toolbars provide shortcuts to menu commands.
Toolbars are generally located just below the
Menu bar.
 The Ruler: The ruler is generally found
below the main toolbars. The ruler is used
to change the format of your document
quickly.
 The Window Menu: This are the three buttons
on the top right hand corner of the Window(On
the title bar) they are used to Minimise,
Maximize and Close the Window.
 The Marker (Cursor): This the blinking line that
guides you during typing or inputting data.
 The Status line: The Status line is at the life
bottom corner of the Window. It updates you on
the Number of words typed, the format of
language in use and the numbers of pages that
such document contains.
CREATING A NEW DOCUMENT
 There are two ways document could be created.
Namely;
▪ Normal (default) template
▪ Template wizard
 OPENING A DOCUMENT
 Click on the office button
 Click on Open from the List displayed(open
dialog box displayed)
 Select file of document that is to be opened
from the drop-down list
 If document is not on the list, you can navigate
to the document path to the desired folder or
location
 Click the Open button to open the selected
document
 SAVING AND CLOSING A DOCUMENT
 To save a document, there are three (3) ways.
Namely;
 Saving a document using the SAVE AS command
 Saving a document using the SAVE command
 Saving a document using the SAVE AUTO
RECOVER option.
 USINGTHE SAVE AS COMMAND
 This is used to save a file the first time
 You can also use it to save a document with a new
name or
 To save the document to a different location
 Steps involved in saving a document
 Click on the office button
 Click on either Save or Save As from the List
displayed(Save or Save As dialog box displayed)
 Select the desired location were you would like to
save this file or document from the Save in drop-down
list or navigation panel.
 In put a desired name for the file or document, (if you
are saving for the first time).Also take note of the
Save as type.
 Click the Save button to save the file or document.
 CLOSING A DOCUMENT
This is done after you have finished working
with a document, you will need to close the
document.To do this here are the steps
involved.
 Click on the office button
 Click on Close command.
 OR
 Holding down the Ctrl key and pressing the F4 key,
OR
 Clicking the Close button (x) from theTitle bar.
▪ (Note: If you make some changes to a document and then try
to close without saving,Word will prompt you to save the
document)
 To close all active documents, hold down the Shift
button and select the File Close All command (This
will only work for MSWord 2007 and below)
 Excel is a powerful spreadsheet application
that allows user to produce tables containing
calculation and graphs.These can range from
simple formula to complex functions and
mathematical models.
1. Double click on the Microsoft Excel icon on the
desktop (if available)
Or
2. Click on Start  Programs  Microsoft Excel
Or
3. Click on Start  Programs  Microsoft Office
 MS Excel
▪ (depending on where it appears which is different for
different installations).
 Title Bar: This displays the name of the current
program and workbook.
 Menu Bar:This displays the names of the Excel
menus.
 StandardToolbar: This displays the buttons of the
most frequently used functions.
 Name Box: This displays the coordinates of the active
cell.
 Formula Bar: This displays the contents of the active
cell.
 Status Bar: This displays information about a
selected command as well as the status of certain
keys, such as Caps Lock and Num. Lock.
 Scroll Bars: Used to move through the
worksheet.You can move up, down, left, and
right.
 Select All Button Selects every cell in a
worksheet.
 SheetTabs: This displays the names of the
worksheets within a workbook.
 Tab Scrolling Buttons: Used to scroll through
the worksheets in a workbook.
 Worksheet: A single page in a workbook,
divided into rows and columns. Columns and
rows intersect to form cells.
 Active Cell: The cell surrounded by a border
where you enter or edit data.
 Minimize button: Minimizes the window to a
button on theWindows taskbar.
 Maximize/Restore button: Toggles (switches
back and forth) between displaying a window in
its maximum size and restoring a window to its
previous size.
 Close Window Button: Closes the current
window.
 Close Button: Closes the current program.
 OPENING AND CLOSING AWORKBOOK
 Click on the File or Office button (depending on
the OS installed)
 Click on NEW from the displayed list
 From the displayed window click on NEW if you
are opening the document for the first time. And
then click on Create.
 For existing document you click on the “New from
Existing” to open an existing document.Then click
on open after selecting the Existing document.
SINGLE CELL
 Click on the desired cell. (The cell will have a black
border, which indicates that this is the active cell)
A RANGE OF CELL (USINGTHE MOUSE)
 Click on the cell in the upper, left-hand corner of
the range.
 Move /Drage the mouse pointer to the lower,
right-hand corner and release.
A RANGE OF CELL (USINGTHE
KEYBOARD)
 Click on the cell in the upper, left-hand corner of
the range.
 Hold down the SHIFT key
 Click on the cell in the lower, right-hand corner of
the range
 OR
 Hold down the SHIFT key while pressing the
arrow keys
 AWorkbook is series of pages of spread
sheets. It represent the various pages just like
the MSWord pages. Depending on the kind
of data you want to input on your spread
sheet, deferent workbooks can be used in
achieving these.
Entering Data
 Select a cell.
 Enter the data.
 Press ENTER or click on the in the formula bar
Entering a Range of Data
 Select the cells.
 Enter the date
 Press ENTER.
 Continue until all cells are filled.
 Editing Data
 Double-click the cell.
OR
 Click on the cell.
 Click on the formula bar.
OR
 Click on the cell
 Press F2.
NAVIGATING MS
EXCEL
 Formulas are those decoding variables used in solving problems.
Mostly calculating operations.
 The following mathematical operators can be used in a formula:
SIGN MEANING
= Equal to
^ Exponentiation
* Multiplication
/ Division
+ Addition
- Subtraction
> Greater than
< Less than
Note: Operations should be performed in the order of BODMAS,
when two or more operation signs are involved.
 1. Click on the desired cell.
 2.Type = and the cell names.
 3. Press ENTER.
OR
 1. Click on the desired cell.
 2.Type =
 3. Click on the appropriate cell.
 4. Enter the desired mathematical operator.
 5. Repeat steps 3 & 4 until the formula is complete.
 6. Press ENTER or click on the on the FORMULA
BAR.
 1. Select the cell with the formula you want to
copy.
 2. Point to the fill handle.
 3. Move the fill handle to the last cell in the
range.
1. Click on the appropriate cell.
 2. Position the insertion point in the
FORMULA BAR, or click on the EDIT
FORMULA button on the formula bar.
 3. Make the changes and press ENTER.
A function is a special formula, “built-in”. MS
Excel that will performs the specific task that is
responsible for the calculations.
 To achieve this, the following steps are to be
followed.
 1. Click on a cell.
 2, Click the PASTE FUNCTION button on the
toolbar.
 3. Select the desired function and enter
necessary information.
 4. Click OK.
 Using Autosum:
 Autosum is a button on the toolbar which
allows you to total adjacent cells.
 1. Select the cell that will contain the total.
 2. Click on the AUTOSUM button on the
toolbar.
 3. Modify the formula if needed.
 4. Press ENTER
DHIS is a tool (application
software) for collection, validation,
analysis and presentation of
aggregate and patient based
statistics data, tailoring or
integrated health information
management activities.
GIS – Geographical Information
System
HIS – Health Information System
DHIS – District Health Information
System
 The first form you see when starting
the application is the Control Centre,
also known as Home Page or the Map.
From here you can access the routine
monthly data module, as well as
change data files.
THE CONTROL CENTRE
•Routine Health Data Entry/Edit allows you
to add or edit existing routine data in the
system.
•Check/Archive/Merge/Interpolate Data
allows you to validate, archive, merge and
interpolate datasets.
•Database Maintenance allows you access to
a series of form pages used for basic
system maintenance and database creation.
•Global Options allows you to select either
short or long names for facilities and change
organisational unit level names.
•Back up/Restore Data file allows you to
•Export to Data Mart allows you to load the data
mart as a preliminary to either refreshing the
Pivot Tables or running the Report Generator.
•Import Data and Export Data to ASCII allows for
the importing and exporting of raw data and
organisational unit data to/from ASCII files.
•Standard and User-defined Reports allows you to
access a number of standard reports, as well as
create your own user-defined queries and reports.
•Compact Current Data File allows you to compact
the data files.
Change Data File allows you to change the data
files of provinces and regions. This is used to
select your own provincial or regional data file
 DHIS provide a comprehensive HIS solution
based on data warehousing principles and a
modular structure which can easily be
customised to the different needs of the
health systems and supports the idea of an
integrated HIS at all levels of the health
hierarchy.
 Customisation and local adaptation through
the user interface. No programming required
to start using DHIS in a new setting i.e.
Country, Region, Districts etc.
 Provide data entry tools which can either be
in the form of standard lists or tables, or
 Provides different kinds of tools for
data validation and improvement of data
quality.
 Provide easy to use – one – click reports
with charts and tables for selected
indicators or summary reports using the
design of the data collection tools.
Integration with popular external report
design tools like iReport allows super –
users to flexibly add more custom
reports accessible to all user.
 Flexible and dynamics data analysis in
the data visualize and the GIS modules.
 Integration with other software system
– using the DHIS web API (Application
Programming Interface) and the
Integration Engine.
 Functionalities of export – import of
data and metadata, supporting
synchronisation of offline installation as
well as interoperability with other
application.
 User can share and discuss their data in
charts and reports using
Interpretations, enabling an active
 Message can be sent to system users
for feedback and notifications.
Messages can also be delivered to email
and SMS.
 User management module for passwords,
security, and fine – grained access
control.
 Easy to user interfaces for metadata
management e.g. for adding/editing
datasets or health facilities. No
programming needed to set up the
system in a new setting.
 Functionality to design and modify
Questions
NAVIGATING MS
ACCESS
 A database is a computer program for storing
information in an easily retrievable form. It is
used mainly to store text and numbers (for
example, the Library catalogue, which
includes the author, title, class number and
accession number for each book).
 Also dates, hyperlinks, pictures and sounds
can be set. It can also help you in selecting
information quickly and easily.
 Microsoft Access is a relational database
management system (DBMS) which allows
you to link together data stored in more than
one table. It is fully supported by IT Services
and is available for personal purchase as part
of the Ultimate Steal and for departmental
installation under the Microsoft Select
Agreement.
 1. What information you will need to store.
 2. What information you want to get out.
 3. Who the data is intended for and how
other users will use it.
 4. Whether you want to restrict access to
parts of the data to some users only.
 5. Who is allowed to add or change data.
 6. If your data refers to actual people, it may
need to be registered under the Data
Protection Act.
 Essentially, Access is a database management system
(DBMS). Unlike MSWord and MS Excel, Access stores and
retrieves information (often referred to as data).
 Access also presents requested information, and
automates repetitive tasks (such as maintaining accounts
payable or a personnel system, and performing inventory
control and scheduling).
 With Access you can create easy – to – use input forms.
 Also one can display your information in any way that you
want and run powerful reports.
 And finally Access is also a powerful Windows database
application – probably the best end – user/ developer
product ever written.
 The Shortcut Method
Double Click on the Microsoft Access icon
on the desktop (if available)
 The Default Method
Click on Start  Programs  Microsoft Access
Or
Click on Start  Programs  Microsoft Office
 MSAccess
(Depending on where it appears which is
different for different installations?)
 1.Tables –This is what hold the raw data.
 2. Queries –This extract part of the raw data
to produce dynasts - dynamic sets of data
which can change each time the query is
run (to reflect any changes to the data in
the tables).
 3. Forms –This is a user-friendly layouts to
display data on the screen (either in a table
or from a query).
 4. Reports –This output files, ready for
printing.
 5. Pages –This is use for creating/editing
World WideWeb (www) pages.
 6. Macros –These are lists of commands use
to perform particular functions.
 7. Modules –These are programs which
expert users write in a programming
language called Access Basic to perform
tailor-made functions not generally available.
Questions
FOR THE PRACTICAL
ASPECT OF THIS
COURSE WE SHALL
BE IN OUR GROUPS.
Instruction: Answer ALL questions.(This is an open test.
Ensure that all answers are referenced from the page
of your print out).
QUESTIONS
1. As a newly employed HIM Officer deployed to the Electronic
Medical Record Section of Yusuf Dantsoho Memorial Hospital Kaduna,
justify the importance of Database Management System (DBMS). Also you
were asked to create a registration form for all patients who visit the
hospital as at the date you resumed, give full steps involved in designing
this form, taken note of the following: Patient name, sex, date of birth,
2. As a certified HIM Officer deployed from National Eye Centre
Kaduna to Yusuf Dantsoho Memorial Hospital Kaduna you were advised to
report to the Human Resources section to draft an acceptance letter and
further

More Related Content

What's hot

Microsoft excel training module
Microsoft excel training moduleMicrosoft excel training module
Microsoft excel training moduleJeff Piontek
 
Ms Word 2010 Training In Ambala ! Batra Computer Centre
Ms Word 2010 Training In Ambala ! Batra Computer CentreMs Word 2010 Training In Ambala ! Batra Computer Centre
Ms Word 2010 Training In Ambala ! Batra Computer Centre
jatin batra
 
Learn MS Powerpoint basics
Learn MS Powerpoint basicsLearn MS Powerpoint basics
Learn MS Powerpoint basics
vethics
 
Introduction to ms access database
Introduction to ms access databaseIntroduction to ms access database
Introduction to ms access database
Obuasi Senior High Technical School
 
Microsoft word
Microsoft wordMicrosoft word
Microsoft word
RoshanMaharjan13
 
MS Word Basics
MS Word BasicsMS Word Basics
MS Word Basics
Muhammad Yasir Bhutta
 
Introduction to powerpoint
Introduction to powerpointIntroduction to powerpoint
Introduction to powerpoint
BESOR ACADEMY
 
Ms excel ppt
Ms excel pptMs excel ppt
Ms excel ppt
Mousumi Biswas
 
System configuration
System configurationSystem configuration
System configuration
argusacademy
 
Introduction to Microsoft Office
Introduction to Microsoft OfficeIntroduction to Microsoft Office
Introduction to Microsoft OfficeCik Na Shohaili
 
Windows Basic
Windows BasicWindows Basic
Windows Basic
Jack Frost
 
Ms word 2010
Ms word 2010Ms word 2010
Ms word 2010
47ishu
 
Word processing
Word processingWord processing
Word processing
himabindukursam
 
Ms office introduction
Ms office introductionMs office introduction
Ms office introduction
Dheenathayalan Ramasamy
 
Introduction to Excel
Introduction to ExcelIntroduction to Excel
Introduction to ExcelNajma Alam
 
Intro. to PowerPoint
Intro. to PowerPointIntro. to PowerPoint
Intro. to PowerPoint
Gamal Abdel Hamid
 
Microsoft Word
Microsoft WordMicrosoft Word
Microsoft Word
Anup Chakraborty
 
All about shortcut keys
All about shortcut keysAll about shortcut keys
All about shortcut keysNilabh Verma
 
MS-OFFICE
MS-OFFICEMS-OFFICE
MS-OFFICE
MSND Prasad
 

What's hot (20)

Microsoft excel training module
Microsoft excel training moduleMicrosoft excel training module
Microsoft excel training module
 
Ms Word 2010 Training In Ambala ! Batra Computer Centre
Ms Word 2010 Training In Ambala ! Batra Computer CentreMs Word 2010 Training In Ambala ! Batra Computer Centre
Ms Word 2010 Training In Ambala ! Batra Computer Centre
 
Learn MS Powerpoint basics
Learn MS Powerpoint basicsLearn MS Powerpoint basics
Learn MS Powerpoint basics
 
Introduction to ms access database
Introduction to ms access databaseIntroduction to ms access database
Introduction to ms access database
 
Microsoft word
Microsoft wordMicrosoft word
Microsoft word
 
MS Word Basics
MS Word BasicsMS Word Basics
MS Word Basics
 
Introduction to powerpoint
Introduction to powerpointIntroduction to powerpoint
Introduction to powerpoint
 
Ms excel ppt
Ms excel pptMs excel ppt
Ms excel ppt
 
System configuration
System configurationSystem configuration
System configuration
 
Introduction to Microsoft Office
Introduction to Microsoft OfficeIntroduction to Microsoft Office
Introduction to Microsoft Office
 
Windows Basic
Windows BasicWindows Basic
Windows Basic
 
Ms word 2010
Ms word 2010Ms word 2010
Ms word 2010
 
Ms powerpoint
Ms powerpointMs powerpoint
Ms powerpoint
 
Word processing
Word processingWord processing
Word processing
 
Ms office introduction
Ms office introductionMs office introduction
Ms office introduction
 
Introduction to Excel
Introduction to ExcelIntroduction to Excel
Introduction to Excel
 
Intro. to PowerPoint
Intro. to PowerPointIntro. to PowerPoint
Intro. to PowerPoint
 
Microsoft Word
Microsoft WordMicrosoft Word
Microsoft Word
 
All about shortcut keys
All about shortcut keysAll about shortcut keys
All about shortcut keys
 
MS-OFFICE
MS-OFFICEMS-OFFICE
MS-OFFICE
 

Similar to Computer packages

MS Word Intermediate Training
MS Word Intermediate TrainingMS Word Intermediate Training
MS Word Intermediate Training
Michael Sheyahshe
 
Introduction microsoft excel 2007
Introduction microsoft excel 2007Introduction microsoft excel 2007
Introduction microsoft excel 2007Celia Bandelier
 
Com6 recalling ms word
Com6 recalling ms wordCom6 recalling ms word
Com6 recalling ms word
Jason Ruelo
 
Microsoft Word Basics2.pptx
Microsoft Word Basics2.pptxMicrosoft Word Basics2.pptx
Microsoft Word Basics2.pptx
SAStudio2
 
Word processing
Word processingWord processing
Word processing
Prof. Dr. K. Adisesha
 
Adv excel® 2013
Adv excel® 2013Adv excel® 2013
Adv excel® 2013Raghu nath
 
chapter1computers2-160923133049.pdf
chapter1computers2-160923133049.pdfchapter1computers2-160923133049.pdf
chapter1computers2-160923133049.pdf
jhoncarlvaldez
 
Microsoft Word 2010
Microsoft Word 2010Microsoft Word 2010
Microsoft Word 2010
home
 
MS WORD.pptxMS WORD.pptxMS WORD.pptxMS WORD.pptxMS WORD.pptxMS WORD.pptxMS WO...
MS WORD.pptxMS WORD.pptxMS WORD.pptxMS WORD.pptxMS WORD.pptxMS WORD.pptxMS WO...MS WORD.pptxMS WORD.pptxMS WORD.pptxMS WORD.pptxMS WORD.pptxMS WORD.pptxMS WO...
MS WORD.pptxMS WORD.pptxMS WORD.pptxMS WORD.pptxMS WORD.pptxMS WORD.pptxMS WO...
RegineManuel2
 
opc Info sheet 3 updated word.ppt (2).pptx
opc Info sheet 3 updated word.ppt (2).pptxopc Info sheet 3 updated word.ppt (2).pptx
opc Info sheet 3 updated word.ppt (2).pptx
AsterNegash3
 
WORD LESSON (1).pptx
WORD LESSON (1).pptxWORD LESSON (1).pptx
WORD LESSON (1).pptx
JustusEkeneNwaka
 
5-2 Introduction to Microsoft Excel Presentation.pdf
5-2 Introduction to Microsoft Excel Presentation.pdf5-2 Introduction to Microsoft Excel Presentation.pdf
5-2 Introduction to Microsoft Excel Presentation.pdf
BlueCharm1
 
Introduction to ms word
Introduction to ms wordIntroduction to ms word
Introduction to ms word
igwennabuike
 
Microsoft excel
Microsoft excelMicrosoft excel
Microsoft excel
GC University Faisalabad
 
Getting started with_microsoft_excel
Getting started with_microsoft_excelGetting started with_microsoft_excel
Getting started with_microsoft_excel
Deepak Chavan
 
introduction-microsoft-word-2013.13.pdf
introduction-microsoft-word-2013.13.pdfintroduction-microsoft-word-2013.13.pdf
introduction-microsoft-word-2013.13.pdf
Vida533595
 
Microsoft word 2007 part 1
Microsoft word 2007 part 1Microsoft word 2007 part 1
Microsoft word 2007 part 1kenjaneredz
 

Similar to Computer packages (20)

MS Word Intermediate Training
MS Word Intermediate TrainingMS Word Intermediate Training
MS Word Intermediate Training
 
Introduction microsoft excel 2007
Introduction microsoft excel 2007Introduction microsoft excel 2007
Introduction microsoft excel 2007
 
Form 1 Term 2 Week 1.2
Form 1   Term 2   Week 1.2Form 1   Term 2   Week 1.2
Form 1 Term 2 Week 1.2
 
Com6 recalling ms word
Com6 recalling ms wordCom6 recalling ms word
Com6 recalling ms word
 
Microsoft Word Basics2.pptx
Microsoft Word Basics2.pptxMicrosoft Word Basics2.pptx
Microsoft Word Basics2.pptx
 
Word processing
Word processingWord processing
Word processing
 
Adv excel® 2013
Adv excel® 2013Adv excel® 2013
Adv excel® 2013
 
Excel® 2013
Excel® 2013Excel® 2013
Excel® 2013
 
chapter1computers2-160923133049.pdf
chapter1computers2-160923133049.pdfchapter1computers2-160923133049.pdf
chapter1computers2-160923133049.pdf
 
Microsoft Word 2010
Microsoft Word 2010Microsoft Word 2010
Microsoft Word 2010
 
MS WORD.pptxMS WORD.pptxMS WORD.pptxMS WORD.pptxMS WORD.pptxMS WORD.pptxMS WO...
MS WORD.pptxMS WORD.pptxMS WORD.pptxMS WORD.pptxMS WORD.pptxMS WORD.pptxMS WO...MS WORD.pptxMS WORD.pptxMS WORD.pptxMS WORD.pptxMS WORD.pptxMS WORD.pptxMS WO...
MS WORD.pptxMS WORD.pptxMS WORD.pptxMS WORD.pptxMS WORD.pptxMS WORD.pptxMS WO...
 
opc Info sheet 3 updated word.ppt (2).pptx
opc Info sheet 3 updated word.ppt (2).pptxopc Info sheet 3 updated word.ppt (2).pptx
opc Info sheet 3 updated word.ppt (2).pptx
 
WORD LESSON (1).pptx
WORD LESSON (1).pptxWORD LESSON (1).pptx
WORD LESSON (1).pptx
 
5-2 Introduction to Microsoft Excel Presentation.pdf
5-2 Introduction to Microsoft Excel Presentation.pdf5-2 Introduction to Microsoft Excel Presentation.pdf
5-2 Introduction to Microsoft Excel Presentation.pdf
 
Introduction to ms word
Introduction to ms wordIntroduction to ms word
Introduction to ms word
 
Excel 2013
Excel 2013Excel 2013
Excel 2013
 
Microsoft excel
Microsoft excelMicrosoft excel
Microsoft excel
 
Getting started with_microsoft_excel
Getting started with_microsoft_excelGetting started with_microsoft_excel
Getting started with_microsoft_excel
 
introduction-microsoft-word-2013.13.pdf
introduction-microsoft-word-2013.13.pdfintroduction-microsoft-word-2013.13.pdf
introduction-microsoft-word-2013.13.pdf
 
Microsoft word 2007 part 1
Microsoft word 2007 part 1Microsoft word 2007 part 1
Microsoft word 2007 part 1
 

Recently uploaded

CLASS 11 CBSE B.St Project AIDS TO TRADE - INSURANCE
CLASS 11 CBSE B.St Project AIDS TO TRADE - INSURANCECLASS 11 CBSE B.St Project AIDS TO TRADE - INSURANCE
CLASS 11 CBSE B.St Project AIDS TO TRADE - INSURANCE
BhavyaRajput3
 
June 3, 2024 Anti-Semitism Letter Sent to MIT President Kornbluth and MIT Cor...
June 3, 2024 Anti-Semitism Letter Sent to MIT President Kornbluth and MIT Cor...June 3, 2024 Anti-Semitism Letter Sent to MIT President Kornbluth and MIT Cor...
June 3, 2024 Anti-Semitism Letter Sent to MIT President Kornbluth and MIT Cor...
Levi Shapiro
 
"Protectable subject matters, Protection in biotechnology, Protection of othe...
"Protectable subject matters, Protection in biotechnology, Protection of othe..."Protectable subject matters, Protection in biotechnology, Protection of othe...
"Protectable subject matters, Protection in biotechnology, Protection of othe...
SACHIN R KONDAGURI
 
Operation Blue Star - Saka Neela Tara
Operation Blue Star   -  Saka Neela TaraOperation Blue Star   -  Saka Neela Tara
Operation Blue Star - Saka Neela Tara
Balvir Singh
 
Synthetic Fiber Construction in lab .pptx
Synthetic Fiber Construction in lab .pptxSynthetic Fiber Construction in lab .pptx
Synthetic Fiber Construction in lab .pptx
Pavel ( NSTU)
 
1.4 modern child centered education - mahatma gandhi-2.pptx
1.4 modern child centered education - mahatma gandhi-2.pptx1.4 modern child centered education - mahatma gandhi-2.pptx
1.4 modern child centered education - mahatma gandhi-2.pptx
JosvitaDsouza2
 
Guidance_and_Counselling.pdf B.Ed. 4th Semester
Guidance_and_Counselling.pdf B.Ed. 4th SemesterGuidance_and_Counselling.pdf B.Ed. 4th Semester
Guidance_and_Counselling.pdf B.Ed. 4th Semester
Atul Kumar Singh
 
Unit 2- Research Aptitude (UGC NET Paper I).pdf
Unit 2- Research Aptitude (UGC NET Paper I).pdfUnit 2- Research Aptitude (UGC NET Paper I).pdf
Unit 2- Research Aptitude (UGC NET Paper I).pdf
Thiyagu K
 
Mule 4.6 & Java 17 Upgrade | MuleSoft Mysore Meetup #46
Mule 4.6 & Java 17 Upgrade | MuleSoft Mysore Meetup #46Mule 4.6 & Java 17 Upgrade | MuleSoft Mysore Meetup #46
Mule 4.6 & Java 17 Upgrade | MuleSoft Mysore Meetup #46
MysoreMuleSoftMeetup
 
aaaaaaaaaaaaaaaaaaaaaaaaaaaaaaaaaaaaaaaaa
aaaaaaaaaaaaaaaaaaaaaaaaaaaaaaaaaaaaaaaaaaaaaaaaaaaaaaaaaaaaaaaaaaaaaaaaaaaaaaaaaa
aaaaaaaaaaaaaaaaaaaaaaaaaaaaaaaaaaaaaaaaa
siemaillard
 
2024.06.01 Introducing a competency framework for languag learning materials ...
2024.06.01 Introducing a competency framework for languag learning materials ...2024.06.01 Introducing a competency framework for languag learning materials ...
2024.06.01 Introducing a competency framework for languag learning materials ...
Sandy Millin
 
Additional Benefits for Employee Website.pdf
Additional Benefits for Employee Website.pdfAdditional Benefits for Employee Website.pdf
Additional Benefits for Employee Website.pdf
joachimlavalley1
 
Unit 8 - Information and Communication Technology (Paper I).pdf
Unit 8 - Information and Communication Technology (Paper I).pdfUnit 8 - Information and Communication Technology (Paper I).pdf
Unit 8 - Information and Communication Technology (Paper I).pdf
Thiyagu K
 
BÀI TẬP BỔ TRỢ TIẾNG ANH GLOBAL SUCCESS LỚP 3 - CẢ NĂM (CÓ FILE NGHE VÀ ĐÁP Á...
BÀI TẬP BỔ TRỢ TIẾNG ANH GLOBAL SUCCESS LỚP 3 - CẢ NĂM (CÓ FILE NGHE VÀ ĐÁP Á...BÀI TẬP BỔ TRỢ TIẾNG ANH GLOBAL SUCCESS LỚP 3 - CẢ NĂM (CÓ FILE NGHE VÀ ĐÁP Á...
BÀI TẬP BỔ TRỢ TIẾNG ANH GLOBAL SUCCESS LỚP 3 - CẢ NĂM (CÓ FILE NGHE VÀ ĐÁP Á...
Nguyen Thanh Tu Collection
 
Adversarial Attention Modeling for Multi-dimensional Emotion Regression.pdf
Adversarial Attention Modeling for Multi-dimensional Emotion Regression.pdfAdversarial Attention Modeling for Multi-dimensional Emotion Regression.pdf
Adversarial Attention Modeling for Multi-dimensional Emotion Regression.pdf
Po-Chuan Chen
 
A Strategic Approach: GenAI in Education
A Strategic Approach: GenAI in EducationA Strategic Approach: GenAI in Education
A Strategic Approach: GenAI in Education
Peter Windle
 
The French Revolution Class 9 Study Material pdf free download
The French Revolution Class 9 Study Material pdf free downloadThe French Revolution Class 9 Study Material pdf free download
The French Revolution Class 9 Study Material pdf free download
Vivekanand Anglo Vedic Academy
 
Francesca Gottschalk - How can education support child empowerment.pptx
Francesca Gottschalk - How can education support child empowerment.pptxFrancesca Gottschalk - How can education support child empowerment.pptx
Francesca Gottschalk - How can education support child empowerment.pptx
EduSkills OECD
 
Phrasal Verbs.XXXXXXXXXXXXXXXXXXXXXXXXXX
Phrasal Verbs.XXXXXXXXXXXXXXXXXXXXXXXXXXPhrasal Verbs.XXXXXXXXXXXXXXXXXXXXXXXXXX
Phrasal Verbs.XXXXXXXXXXXXXXXXXXXXXXXXXX
MIRIAMSALINAS13
 
Overview on Edible Vaccine: Pros & Cons with Mechanism
Overview on Edible Vaccine: Pros & Cons with MechanismOverview on Edible Vaccine: Pros & Cons with Mechanism
Overview on Edible Vaccine: Pros & Cons with Mechanism
DeeptiGupta154
 

Recently uploaded (20)

CLASS 11 CBSE B.St Project AIDS TO TRADE - INSURANCE
CLASS 11 CBSE B.St Project AIDS TO TRADE - INSURANCECLASS 11 CBSE B.St Project AIDS TO TRADE - INSURANCE
CLASS 11 CBSE B.St Project AIDS TO TRADE - INSURANCE
 
June 3, 2024 Anti-Semitism Letter Sent to MIT President Kornbluth and MIT Cor...
June 3, 2024 Anti-Semitism Letter Sent to MIT President Kornbluth and MIT Cor...June 3, 2024 Anti-Semitism Letter Sent to MIT President Kornbluth and MIT Cor...
June 3, 2024 Anti-Semitism Letter Sent to MIT President Kornbluth and MIT Cor...
 
"Protectable subject matters, Protection in biotechnology, Protection of othe...
"Protectable subject matters, Protection in biotechnology, Protection of othe..."Protectable subject matters, Protection in biotechnology, Protection of othe...
"Protectable subject matters, Protection in biotechnology, Protection of othe...
 
Operation Blue Star - Saka Neela Tara
Operation Blue Star   -  Saka Neela TaraOperation Blue Star   -  Saka Neela Tara
Operation Blue Star - Saka Neela Tara
 
Synthetic Fiber Construction in lab .pptx
Synthetic Fiber Construction in lab .pptxSynthetic Fiber Construction in lab .pptx
Synthetic Fiber Construction in lab .pptx
 
1.4 modern child centered education - mahatma gandhi-2.pptx
1.4 modern child centered education - mahatma gandhi-2.pptx1.4 modern child centered education - mahatma gandhi-2.pptx
1.4 modern child centered education - mahatma gandhi-2.pptx
 
Guidance_and_Counselling.pdf B.Ed. 4th Semester
Guidance_and_Counselling.pdf B.Ed. 4th SemesterGuidance_and_Counselling.pdf B.Ed. 4th Semester
Guidance_and_Counselling.pdf B.Ed. 4th Semester
 
Unit 2- Research Aptitude (UGC NET Paper I).pdf
Unit 2- Research Aptitude (UGC NET Paper I).pdfUnit 2- Research Aptitude (UGC NET Paper I).pdf
Unit 2- Research Aptitude (UGC NET Paper I).pdf
 
Mule 4.6 & Java 17 Upgrade | MuleSoft Mysore Meetup #46
Mule 4.6 & Java 17 Upgrade | MuleSoft Mysore Meetup #46Mule 4.6 & Java 17 Upgrade | MuleSoft Mysore Meetup #46
Mule 4.6 & Java 17 Upgrade | MuleSoft Mysore Meetup #46
 
aaaaaaaaaaaaaaaaaaaaaaaaaaaaaaaaaaaaaaaaa
aaaaaaaaaaaaaaaaaaaaaaaaaaaaaaaaaaaaaaaaaaaaaaaaaaaaaaaaaaaaaaaaaaaaaaaaaaaaaaaaaa
aaaaaaaaaaaaaaaaaaaaaaaaaaaaaaaaaaaaaaaaa
 
2024.06.01 Introducing a competency framework for languag learning materials ...
2024.06.01 Introducing a competency framework for languag learning materials ...2024.06.01 Introducing a competency framework for languag learning materials ...
2024.06.01 Introducing a competency framework for languag learning materials ...
 
Additional Benefits for Employee Website.pdf
Additional Benefits for Employee Website.pdfAdditional Benefits for Employee Website.pdf
Additional Benefits for Employee Website.pdf
 
Unit 8 - Information and Communication Technology (Paper I).pdf
Unit 8 - Information and Communication Technology (Paper I).pdfUnit 8 - Information and Communication Technology (Paper I).pdf
Unit 8 - Information and Communication Technology (Paper I).pdf
 
BÀI TẬP BỔ TRỢ TIẾNG ANH GLOBAL SUCCESS LỚP 3 - CẢ NĂM (CÓ FILE NGHE VÀ ĐÁP Á...
BÀI TẬP BỔ TRỢ TIẾNG ANH GLOBAL SUCCESS LỚP 3 - CẢ NĂM (CÓ FILE NGHE VÀ ĐÁP Á...BÀI TẬP BỔ TRỢ TIẾNG ANH GLOBAL SUCCESS LỚP 3 - CẢ NĂM (CÓ FILE NGHE VÀ ĐÁP Á...
BÀI TẬP BỔ TRỢ TIẾNG ANH GLOBAL SUCCESS LỚP 3 - CẢ NĂM (CÓ FILE NGHE VÀ ĐÁP Á...
 
Adversarial Attention Modeling for Multi-dimensional Emotion Regression.pdf
Adversarial Attention Modeling for Multi-dimensional Emotion Regression.pdfAdversarial Attention Modeling for Multi-dimensional Emotion Regression.pdf
Adversarial Attention Modeling for Multi-dimensional Emotion Regression.pdf
 
A Strategic Approach: GenAI in Education
A Strategic Approach: GenAI in EducationA Strategic Approach: GenAI in Education
A Strategic Approach: GenAI in Education
 
The French Revolution Class 9 Study Material pdf free download
The French Revolution Class 9 Study Material pdf free downloadThe French Revolution Class 9 Study Material pdf free download
The French Revolution Class 9 Study Material pdf free download
 
Francesca Gottschalk - How can education support child empowerment.pptx
Francesca Gottschalk - How can education support child empowerment.pptxFrancesca Gottschalk - How can education support child empowerment.pptx
Francesca Gottschalk - How can education support child empowerment.pptx
 
Phrasal Verbs.XXXXXXXXXXXXXXXXXXXXXXXXXX
Phrasal Verbs.XXXXXXXXXXXXXXXXXXXXXXXXXXPhrasal Verbs.XXXXXXXXXXXXXXXXXXXXXXXXXX
Phrasal Verbs.XXXXXXXXXXXXXXXXXXXXXXXXXX
 
Overview on Edible Vaccine: Pros & Cons with Mechanism
Overview on Edible Vaccine: Pros & Cons with MechanismOverview on Edible Vaccine: Pros & Cons with Mechanism
Overview on Edible Vaccine: Pros & Cons with Mechanism
 

Computer packages

  • 1. Diploma Course in Health Information Management, Department of Management Studies, Kaduna School of Health Information Management (KSHIM), Kaduna State, Nigeria. By: Engr. Ochu IbrahimA.
  • 2.  Course outline: Consult course Curriculum (HIS 124)  Materials: Computer Packages Lecture note. By Engr. Ochu Ibrahim A.
  • 3.  2 Hours for lectures  1 Hour for seminar/tutorial  All the lectures, Seminars and Reading Materials will be at your disposal (ur email add)  At the end of the semester we may try to expolre the practical aspect of the course.  To pass the course, you need to have atleast 70% attendance  30% for CA  10% for Course Manual  60% for Exam as usual  The exam will be 7Q, answer 5Q only (But this may change if any circumstances arises)  Are we ready?
  • 4.  Application software is the general designation of computer program for performing user tasks.  When a multiple applications software are bundled together as one, is known as an application package.
  • 5.  Information worker software  Educational software  Simulation software  Product engineering software  Health software
  • 6.
  • 7.  A word processor is a program that allows you to create, edit, format, and print the documents that a user have worked on.  The main advantage of a word processor is that it provides aWYSIWYG (WhatYou See Is WhatYou Get) interface, which helps you make changes quickly and easily to your documents.
  • 8.  MSWord 2003, Word XP, orWord 2007 are word processor, which are just a version of Microsoft Office suite. And it is a powerful tool used in the creating and formatting professional looking documents.
  • 9. 1.Double click on the MicrosoftWord icon on the desktop (if available) Or 2.Click on Start  Programs  MicrosoftWord Or 3.Click on Start  Programs  Microsoft Office  MSWord ▪ (depending on where it appears which is different for different installations). The WordWindow is displayed
  • 10.
  • 11.
  • 12.
  • 13.
  • 14.  The Ribbon: You use commands to tell Microsoft Word what to do. In Microsoft Word 2007, you use the Ribbon to issue commands. The Ribbon is located near the top of the screen, below the Quick Access toolbar. At the top of the Ribbon are several tabs; clicking a tab displays several related command groups. Within each group are related command buttons. You click buttons to issue commands or to access menus and dialog boxes.
  • 15.  The Title-bar: On the Title bar, Microsoft Word displays the name of the document on which you are currently working on.  The Menu bar: The Menu bar is generally found directly below the Title bar. The Menu bar displays the menu. The Menu bar begins with the word File and continues with Edit, View, Insert, Format, Tools, Table, Window, and Help.
  • 16.  Toolbars: They are subdivided into; The standard toolbar and The formatting toolbar. Toolbars provide shortcuts to menu commands. Toolbars are generally located just below the Menu bar.  The Ruler: The ruler is generally found below the main toolbars. The ruler is used to change the format of your document quickly.
  • 17.  The Window Menu: This are the three buttons on the top right hand corner of the Window(On the title bar) they are used to Minimise, Maximize and Close the Window.  The Marker (Cursor): This the blinking line that guides you during typing or inputting data.  The Status line: The Status line is at the life bottom corner of the Window. It updates you on the Number of words typed, the format of language in use and the numbers of pages that such document contains.
  • 18.
  • 19. CREATING A NEW DOCUMENT  There are two ways document could be created. Namely; ▪ Normal (default) template ▪ Template wizard
  • 20.  OPENING A DOCUMENT  Click on the office button  Click on Open from the List displayed(open dialog box displayed)  Select file of document that is to be opened from the drop-down list  If document is not on the list, you can navigate to the document path to the desired folder or location  Click the Open button to open the selected document
  • 21.
  • 22.  SAVING AND CLOSING A DOCUMENT  To save a document, there are three (3) ways. Namely;  Saving a document using the SAVE AS command  Saving a document using the SAVE command  Saving a document using the SAVE AUTO RECOVER option.
  • 23.  USINGTHE SAVE AS COMMAND  This is used to save a file the first time  You can also use it to save a document with a new name or  To save the document to a different location
  • 24.  Steps involved in saving a document  Click on the office button  Click on either Save or Save As from the List displayed(Save or Save As dialog box displayed)  Select the desired location were you would like to save this file or document from the Save in drop-down list or navigation panel.  In put a desired name for the file or document, (if you are saving for the first time).Also take note of the Save as type.  Click the Save button to save the file or document.
  • 25.
  • 26.  CLOSING A DOCUMENT This is done after you have finished working with a document, you will need to close the document.To do this here are the steps involved.
  • 27.  Click on the office button  Click on Close command.  OR  Holding down the Ctrl key and pressing the F4 key, OR  Clicking the Close button (x) from theTitle bar. ▪ (Note: If you make some changes to a document and then try to close without saving,Word will prompt you to save the document)  To close all active documents, hold down the Shift button and select the File Close All command (This will only work for MSWord 2007 and below)
  • 28.
  • 29.
  • 30.  Excel is a powerful spreadsheet application that allows user to produce tables containing calculation and graphs.These can range from simple formula to complex functions and mathematical models.
  • 31. 1. Double click on the Microsoft Excel icon on the desktop (if available) Or 2. Click on Start  Programs  Microsoft Excel Or 3. Click on Start  Programs  Microsoft Office  MS Excel ▪ (depending on where it appears which is different for different installations).
  • 32.
  • 33.  Title Bar: This displays the name of the current program and workbook.  Menu Bar:This displays the names of the Excel menus.  StandardToolbar: This displays the buttons of the most frequently used functions.  Name Box: This displays the coordinates of the active cell.  Formula Bar: This displays the contents of the active cell.  Status Bar: This displays information about a selected command as well as the status of certain keys, such as Caps Lock and Num. Lock.
  • 34.  Scroll Bars: Used to move through the worksheet.You can move up, down, left, and right.  Select All Button Selects every cell in a worksheet.  SheetTabs: This displays the names of the worksheets within a workbook.  Tab Scrolling Buttons: Used to scroll through the worksheets in a workbook.  Worksheet: A single page in a workbook, divided into rows and columns. Columns and rows intersect to form cells.
  • 35.  Active Cell: The cell surrounded by a border where you enter or edit data.  Minimize button: Minimizes the window to a button on theWindows taskbar.  Maximize/Restore button: Toggles (switches back and forth) between displaying a window in its maximum size and restoring a window to its previous size.  Close Window Button: Closes the current window.  Close Button: Closes the current program.
  • 36.  OPENING AND CLOSING AWORKBOOK  Click on the File or Office button (depending on the OS installed)  Click on NEW from the displayed list  From the displayed window click on NEW if you are opening the document for the first time. And then click on Create.  For existing document you click on the “New from Existing” to open an existing document.Then click on open after selecting the Existing document.
  • 37. SINGLE CELL  Click on the desired cell. (The cell will have a black border, which indicates that this is the active cell) A RANGE OF CELL (USINGTHE MOUSE)  Click on the cell in the upper, left-hand corner of the range.  Move /Drage the mouse pointer to the lower, right-hand corner and release.
  • 38. A RANGE OF CELL (USINGTHE KEYBOARD)  Click on the cell in the upper, left-hand corner of the range.  Hold down the SHIFT key  Click on the cell in the lower, right-hand corner of the range  OR  Hold down the SHIFT key while pressing the arrow keys
  • 39.  AWorkbook is series of pages of spread sheets. It represent the various pages just like the MSWord pages. Depending on the kind of data you want to input on your spread sheet, deferent workbooks can be used in achieving these.
  • 40. Entering Data  Select a cell.  Enter the data.  Press ENTER or click on the in the formula bar Entering a Range of Data  Select the cells.  Enter the date  Press ENTER.  Continue until all cells are filled.
  • 41.  Editing Data  Double-click the cell. OR  Click on the cell.  Click on the formula bar. OR  Click on the cell  Press F2.
  • 42.
  • 44.  Formulas are those decoding variables used in solving problems. Mostly calculating operations.  The following mathematical operators can be used in a formula: SIGN MEANING = Equal to ^ Exponentiation * Multiplication / Division + Addition - Subtraction > Greater than < Less than Note: Operations should be performed in the order of BODMAS, when two or more operation signs are involved.
  • 45.  1. Click on the desired cell.  2.Type = and the cell names.  3. Press ENTER. OR  1. Click on the desired cell.  2.Type =  3. Click on the appropriate cell.  4. Enter the desired mathematical operator.  5. Repeat steps 3 & 4 until the formula is complete.  6. Press ENTER or click on the on the FORMULA BAR.
  • 46.  1. Select the cell with the formula you want to copy.  2. Point to the fill handle.  3. Move the fill handle to the last cell in the range.
  • 47. 1. Click on the appropriate cell.  2. Position the insertion point in the FORMULA BAR, or click on the EDIT FORMULA button on the formula bar.  3. Make the changes and press ENTER.
  • 48. A function is a special formula, “built-in”. MS Excel that will performs the specific task that is responsible for the calculations.  To achieve this, the following steps are to be followed.  1. Click on a cell.  2, Click the PASTE FUNCTION button on the toolbar.  3. Select the desired function and enter necessary information.  4. Click OK.
  • 49.  Using Autosum:  Autosum is a button on the toolbar which allows you to total adjacent cells.  1. Select the cell that will contain the total.  2. Click on the AUTOSUM button on the toolbar.  3. Modify the formula if needed.  4. Press ENTER
  • 50.
  • 51. DHIS is a tool (application software) for collection, validation, analysis and presentation of aggregate and patient based statistics data, tailoring or integrated health information management activities. GIS – Geographical Information System HIS – Health Information System DHIS – District Health Information System
  • 52.  The first form you see when starting the application is the Control Centre, also known as Home Page or the Map. From here you can access the routine monthly data module, as well as change data files.
  • 54. •Routine Health Data Entry/Edit allows you to add or edit existing routine data in the system. •Check/Archive/Merge/Interpolate Data allows you to validate, archive, merge and interpolate datasets. •Database Maintenance allows you access to a series of form pages used for basic system maintenance and database creation. •Global Options allows you to select either short or long names for facilities and change organisational unit level names. •Back up/Restore Data file allows you to
  • 55. •Export to Data Mart allows you to load the data mart as a preliminary to either refreshing the Pivot Tables or running the Report Generator. •Import Data and Export Data to ASCII allows for the importing and exporting of raw data and organisational unit data to/from ASCII files. •Standard and User-defined Reports allows you to access a number of standard reports, as well as create your own user-defined queries and reports. •Compact Current Data File allows you to compact the data files. Change Data File allows you to change the data files of provinces and regions. This is used to select your own provincial or regional data file
  • 56.
  • 57.
  • 58.  DHIS provide a comprehensive HIS solution based on data warehousing principles and a modular structure which can easily be customised to the different needs of the health systems and supports the idea of an integrated HIS at all levels of the health hierarchy.  Customisation and local adaptation through the user interface. No programming required to start using DHIS in a new setting i.e. Country, Region, Districts etc.  Provide data entry tools which can either be in the form of standard lists or tables, or
  • 59.  Provides different kinds of tools for data validation and improvement of data quality.  Provide easy to use – one – click reports with charts and tables for selected indicators or summary reports using the design of the data collection tools. Integration with popular external report design tools like iReport allows super – users to flexibly add more custom reports accessible to all user.  Flexible and dynamics data analysis in the data visualize and the GIS modules.
  • 60.  Integration with other software system – using the DHIS web API (Application Programming Interface) and the Integration Engine.  Functionalities of export – import of data and metadata, supporting synchronisation of offline installation as well as interoperability with other application.  User can share and discuss their data in charts and reports using Interpretations, enabling an active
  • 61.  Message can be sent to system users for feedback and notifications. Messages can also be delivered to email and SMS.  User management module for passwords, security, and fine – grained access control.  Easy to user interfaces for metadata management e.g. for adding/editing datasets or health facilities. No programming needed to set up the system in a new setting.  Functionality to design and modify
  • 64.  A database is a computer program for storing information in an easily retrievable form. It is used mainly to store text and numbers (for example, the Library catalogue, which includes the author, title, class number and accession number for each book).  Also dates, hyperlinks, pictures and sounds can be set. It can also help you in selecting information quickly and easily.
  • 65.  Microsoft Access is a relational database management system (DBMS) which allows you to link together data stored in more than one table. It is fully supported by IT Services and is available for personal purchase as part of the Ultimate Steal and for departmental installation under the Microsoft Select Agreement.
  • 66.  1. What information you will need to store.  2. What information you want to get out.  3. Who the data is intended for and how other users will use it.  4. Whether you want to restrict access to parts of the data to some users only.
  • 67.  5. Who is allowed to add or change data.  6. If your data refers to actual people, it may need to be registered under the Data Protection Act.
  • 68.  Essentially, Access is a database management system (DBMS). Unlike MSWord and MS Excel, Access stores and retrieves information (often referred to as data).  Access also presents requested information, and automates repetitive tasks (such as maintaining accounts payable or a personnel system, and performing inventory control and scheduling).  With Access you can create easy – to – use input forms.  Also one can display your information in any way that you want and run powerful reports.  And finally Access is also a powerful Windows database application – probably the best end – user/ developer product ever written.
  • 69.  The Shortcut Method Double Click on the Microsoft Access icon on the desktop (if available)  The Default Method Click on Start  Programs  Microsoft Access Or Click on Start  Programs  Microsoft Office  MSAccess (Depending on where it appears which is different for different installations?)
  • 70.
  • 71.
  • 72.  1.Tables –This is what hold the raw data.  2. Queries –This extract part of the raw data to produce dynasts - dynamic sets of data which can change each time the query is run (to reflect any changes to the data in the tables).  3. Forms –This is a user-friendly layouts to display data on the screen (either in a table or from a query).
  • 73.  4. Reports –This output files, ready for printing.  5. Pages –This is use for creating/editing World WideWeb (www) pages.  6. Macros –These are lists of commands use to perform particular functions.  7. Modules –These are programs which expert users write in a programming language called Access Basic to perform tailor-made functions not generally available.
  • 75. FOR THE PRACTICAL ASPECT OF THIS COURSE WE SHALL BE IN OUR GROUPS.
  • 76. Instruction: Answer ALL questions.(This is an open test. Ensure that all answers are referenced from the page of your print out). QUESTIONS 1. As a newly employed HIM Officer deployed to the Electronic Medical Record Section of Yusuf Dantsoho Memorial Hospital Kaduna, justify the importance of Database Management System (DBMS). Also you were asked to create a registration form for all patients who visit the hospital as at the date you resumed, give full steps involved in designing this form, taken note of the following: Patient name, sex, date of birth, 2. As a certified HIM Officer deployed from National Eye Centre Kaduna to Yusuf Dantsoho Memorial Hospital Kaduna you were advised to report to the Human Resources section to draft an acceptance letter and further

Editor's Notes

  1. The first form you see when starting the application is the Control Centre, also known as Home Page or the Map. From here you can access the routine monthly data module, as well as change data files.