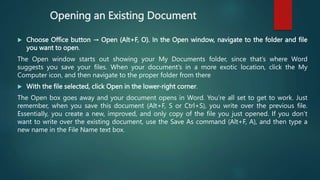
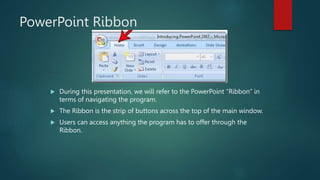
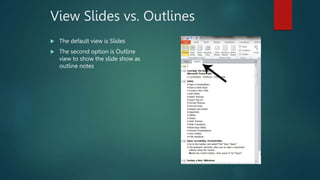
This document provides an overview of the basic interface and features of Microsoft Word. It describes the title bar, quick access toolbar, tabs, ribbon interface, contextual tabs, tell me search bar, program management icons, working area, scroll bars, and status bar. It then provides instructions for creating new blank documents, documents from existing templates or files, and opening existing documents. Finally, it outlines the different document views in Word including print layout, full screen reading, web layout, and outline views.

![Creating a New Document from a Template
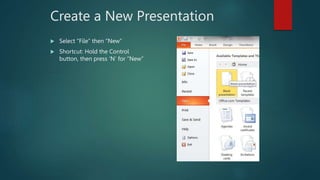
Choose Office button → New (Alt+F, N) to open the New Document window.
On the left of the New Document box is a Template Categories list. The top entry on this list is
Installed Templates—the ones Word has installed on your computer.
Scroll down the Template Categories list to the Microsoft Office Online heading. Under this
heading, select Minutes.
In the center pane, you’ll see all different types of minutes templates, from PTA minutes to Annual
shareholder’s meeting minutes. When you click a template’s icon, a preview appears in the pane
on the right. When you’re done perusing the various styles, click the Formal Meeting Minutes
icon. (After all, CEOSA is a very formal organization.) Then click Download.
Word downloads and opens the document.
Start writing up the minutes for the CEO Surfers.
To follow the template’s structure, replace all the words in square brackets ([ ]) with text relevant to
CEOSA.](https://image.slidesharecdn.com/wordlesson1-221028154453-1c43ab26/85/WORD-LESSON-1-pptx-7-320.jpg)