Download to read offline


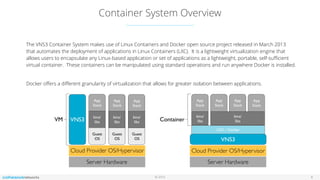
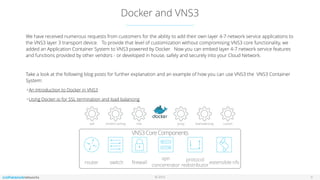


The document outlines the features and setup of the vns3 container system, which utilizes Linux containers and Docker to deploy applications securely within a cloud network. It explains how users can upload container images, allocate containers, and manage network access, emphasizing customization capabilities while maintaining core functionality. Important guidelines for instance sizing, networking setup, and access considerations for different environments are also provided.