


The document provides step-by-step instructions for setting up a computer server including installing Active Directory Domain Services, DNS, DHCP, and file services. It also describes how to create user accounts, enable remote desktop access, set up folder redirection for desktop files, and apply a group policy for redirection. The overall process takes approximately 1.5 hours and allows multiple client computers to access shared files and settings hosted on the new computer server.
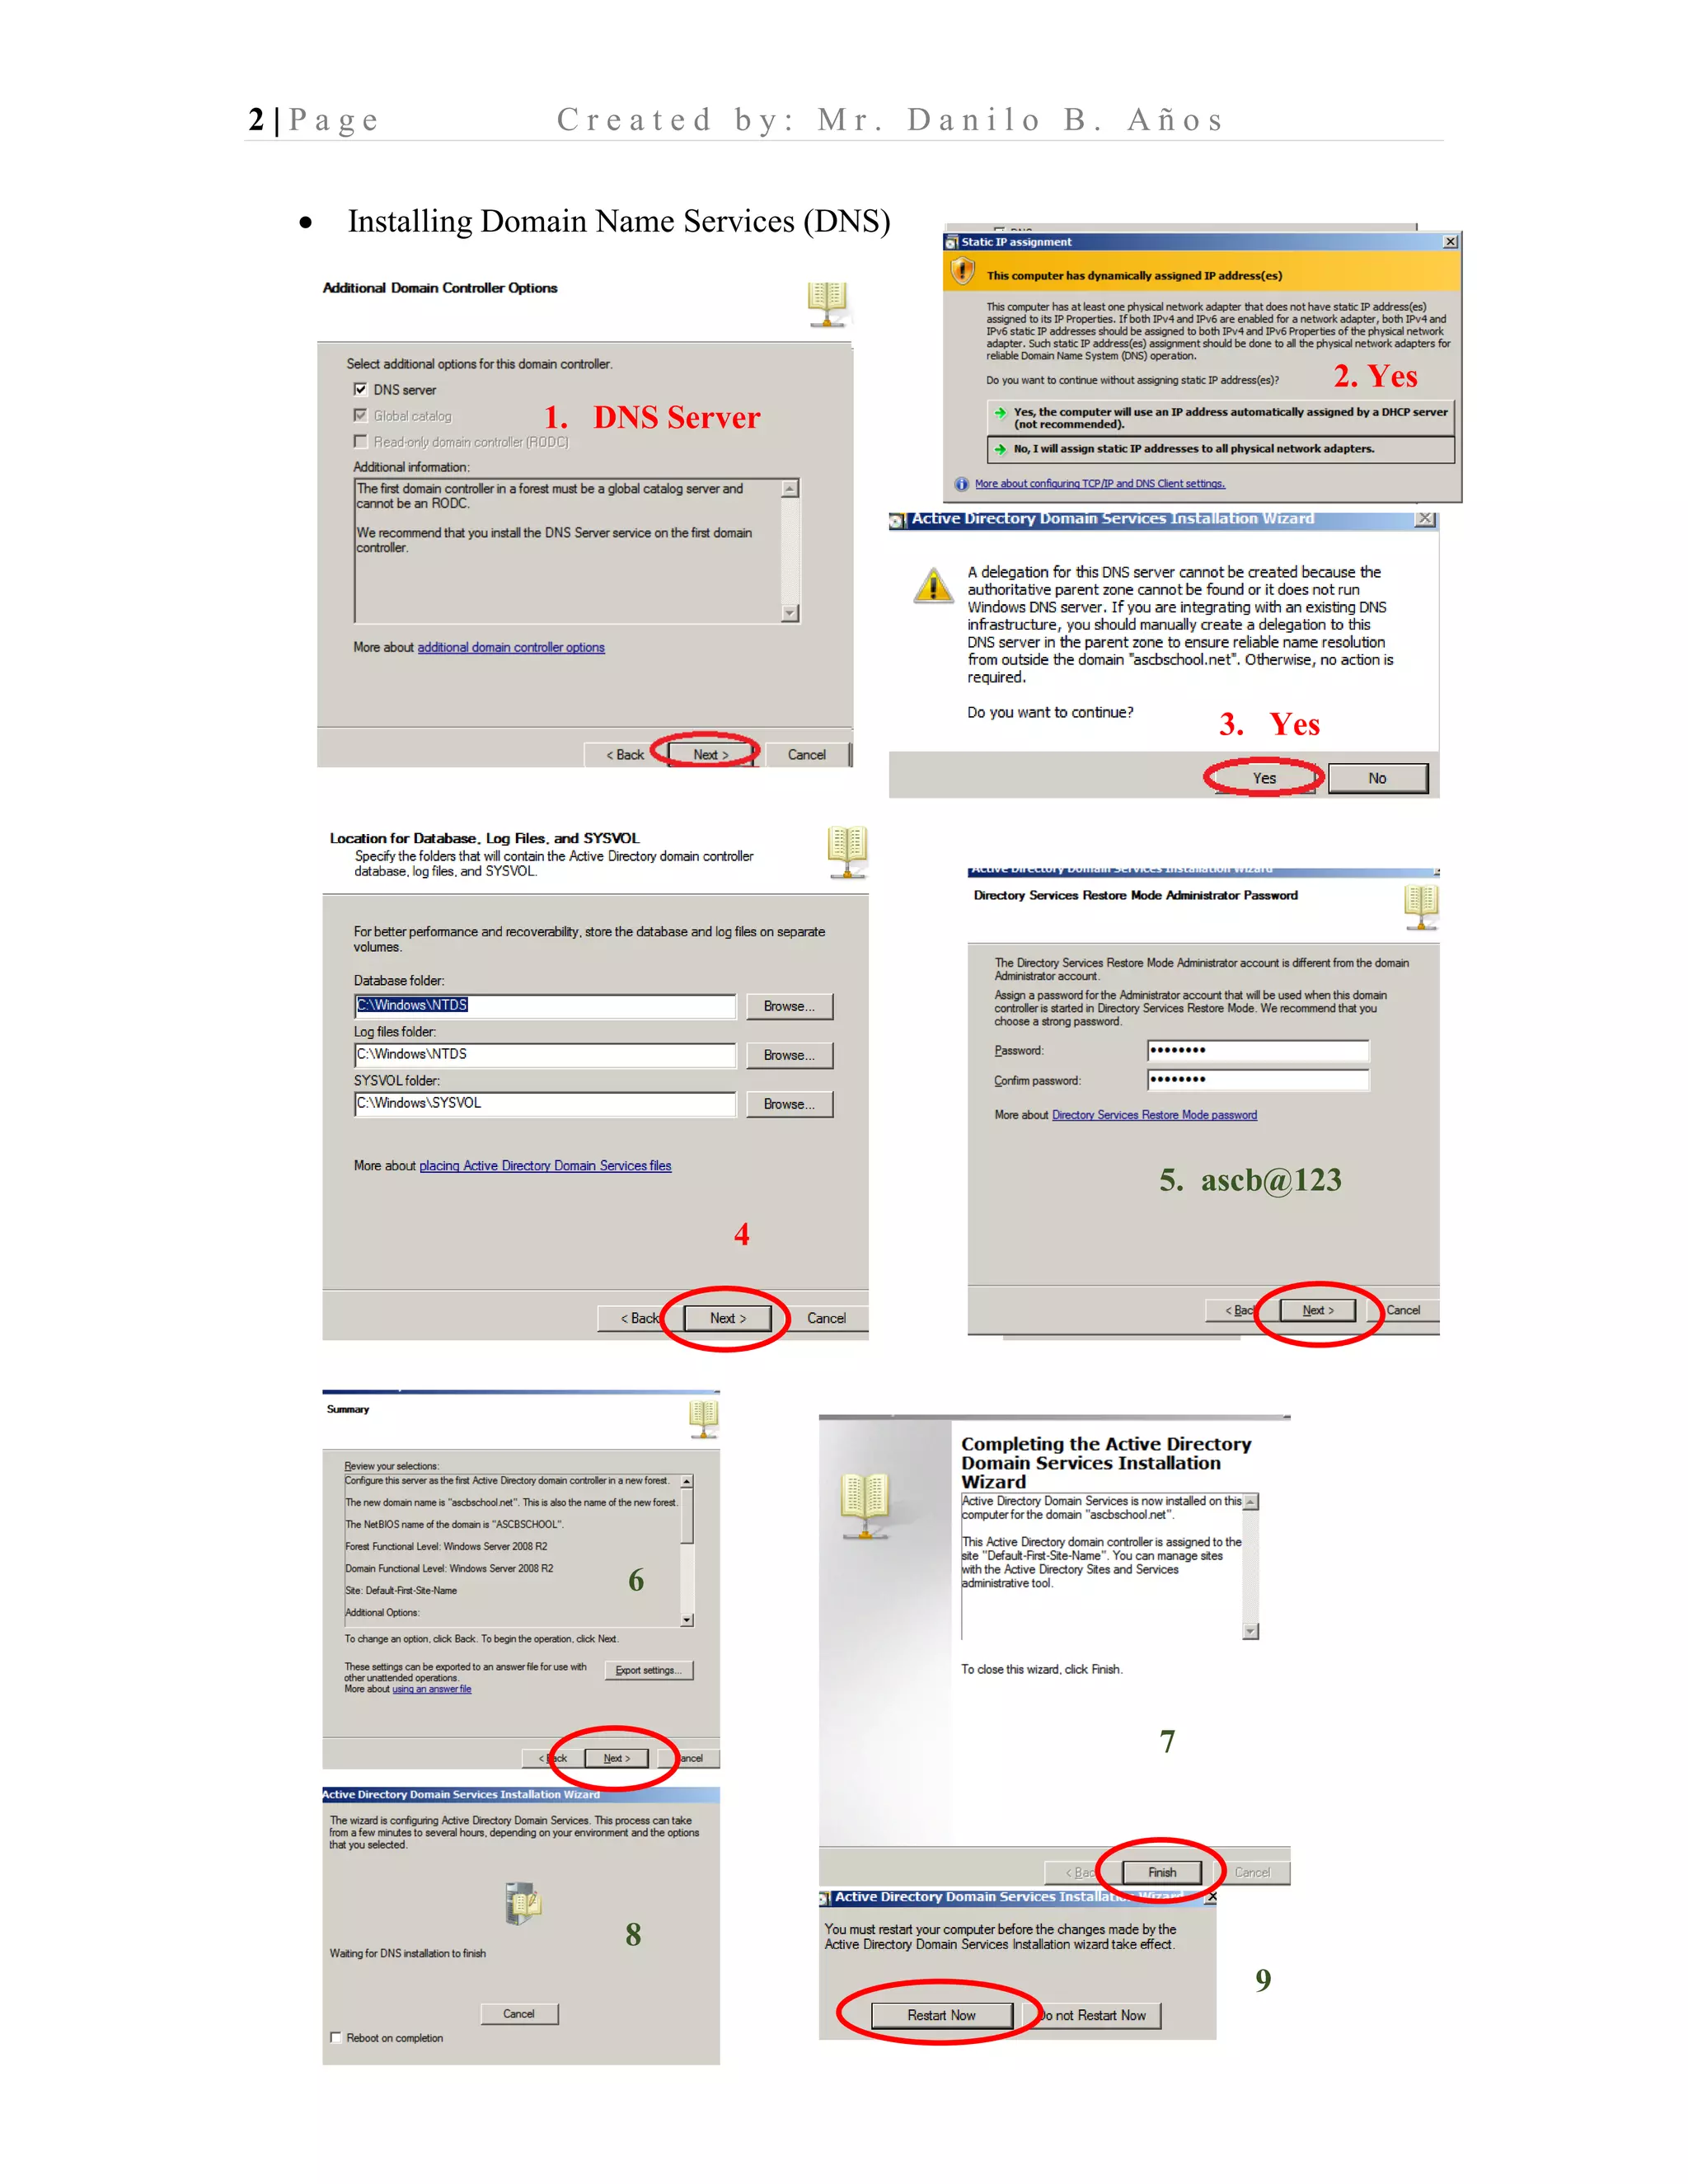
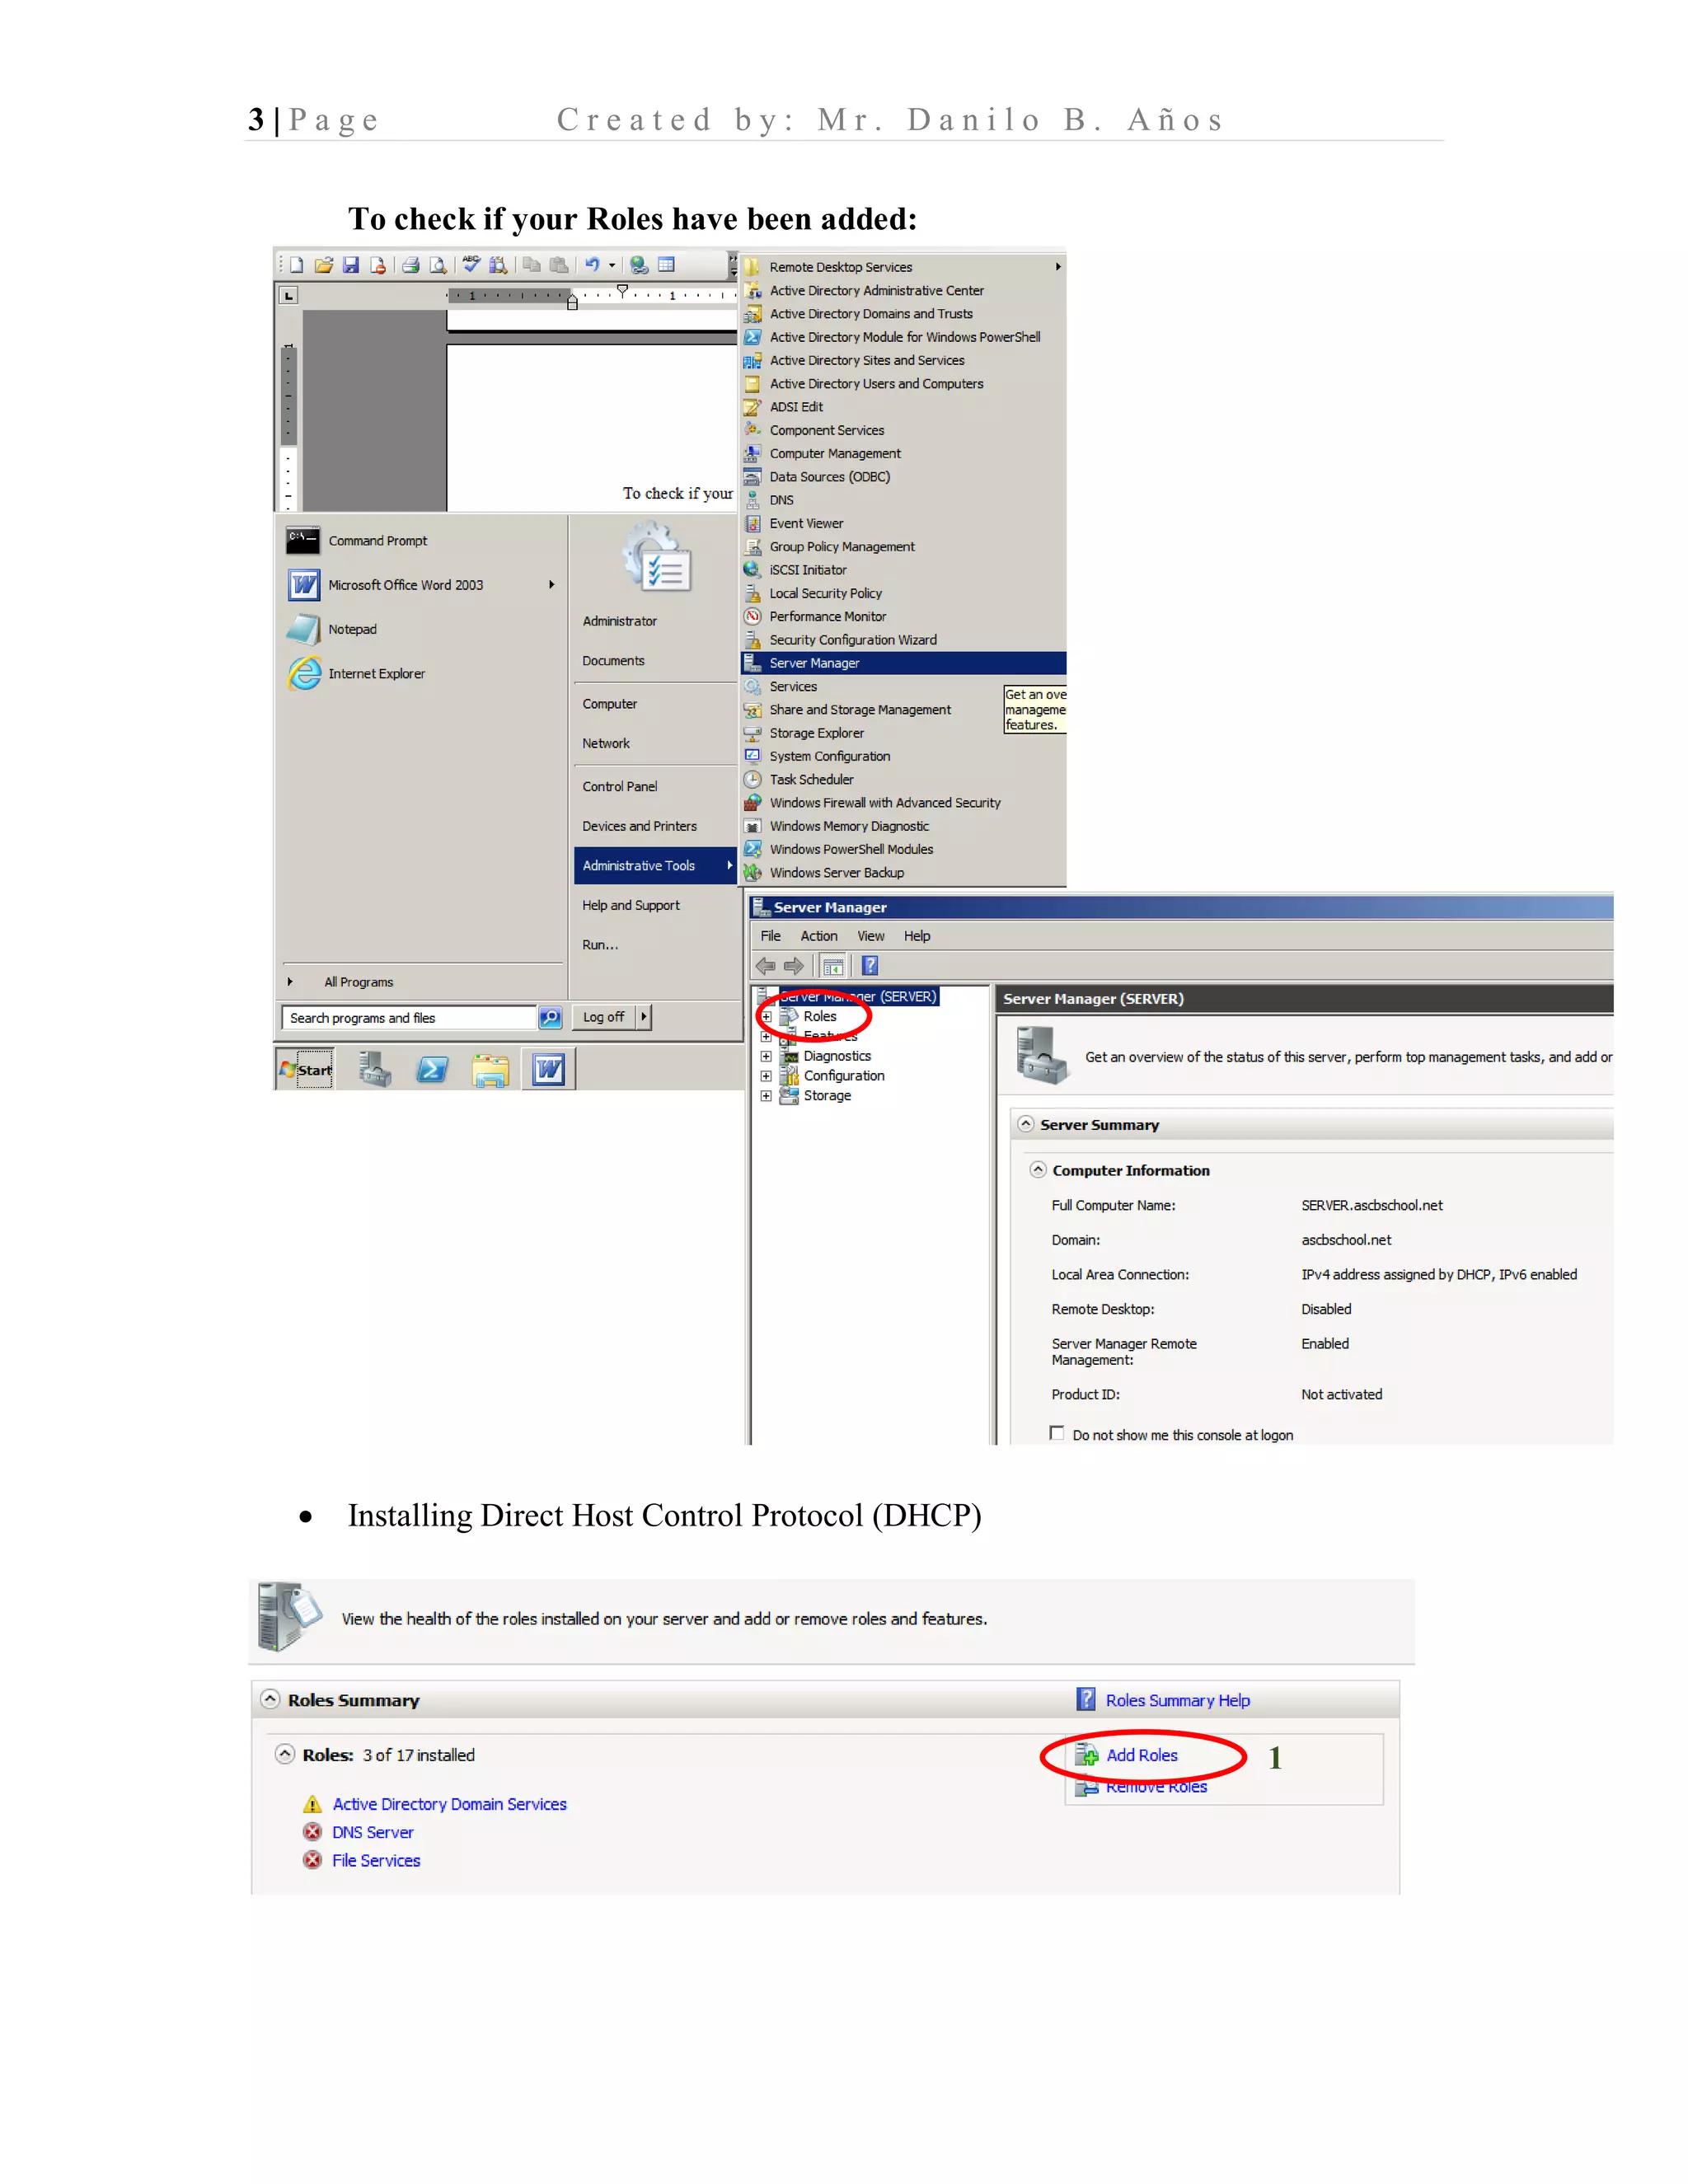
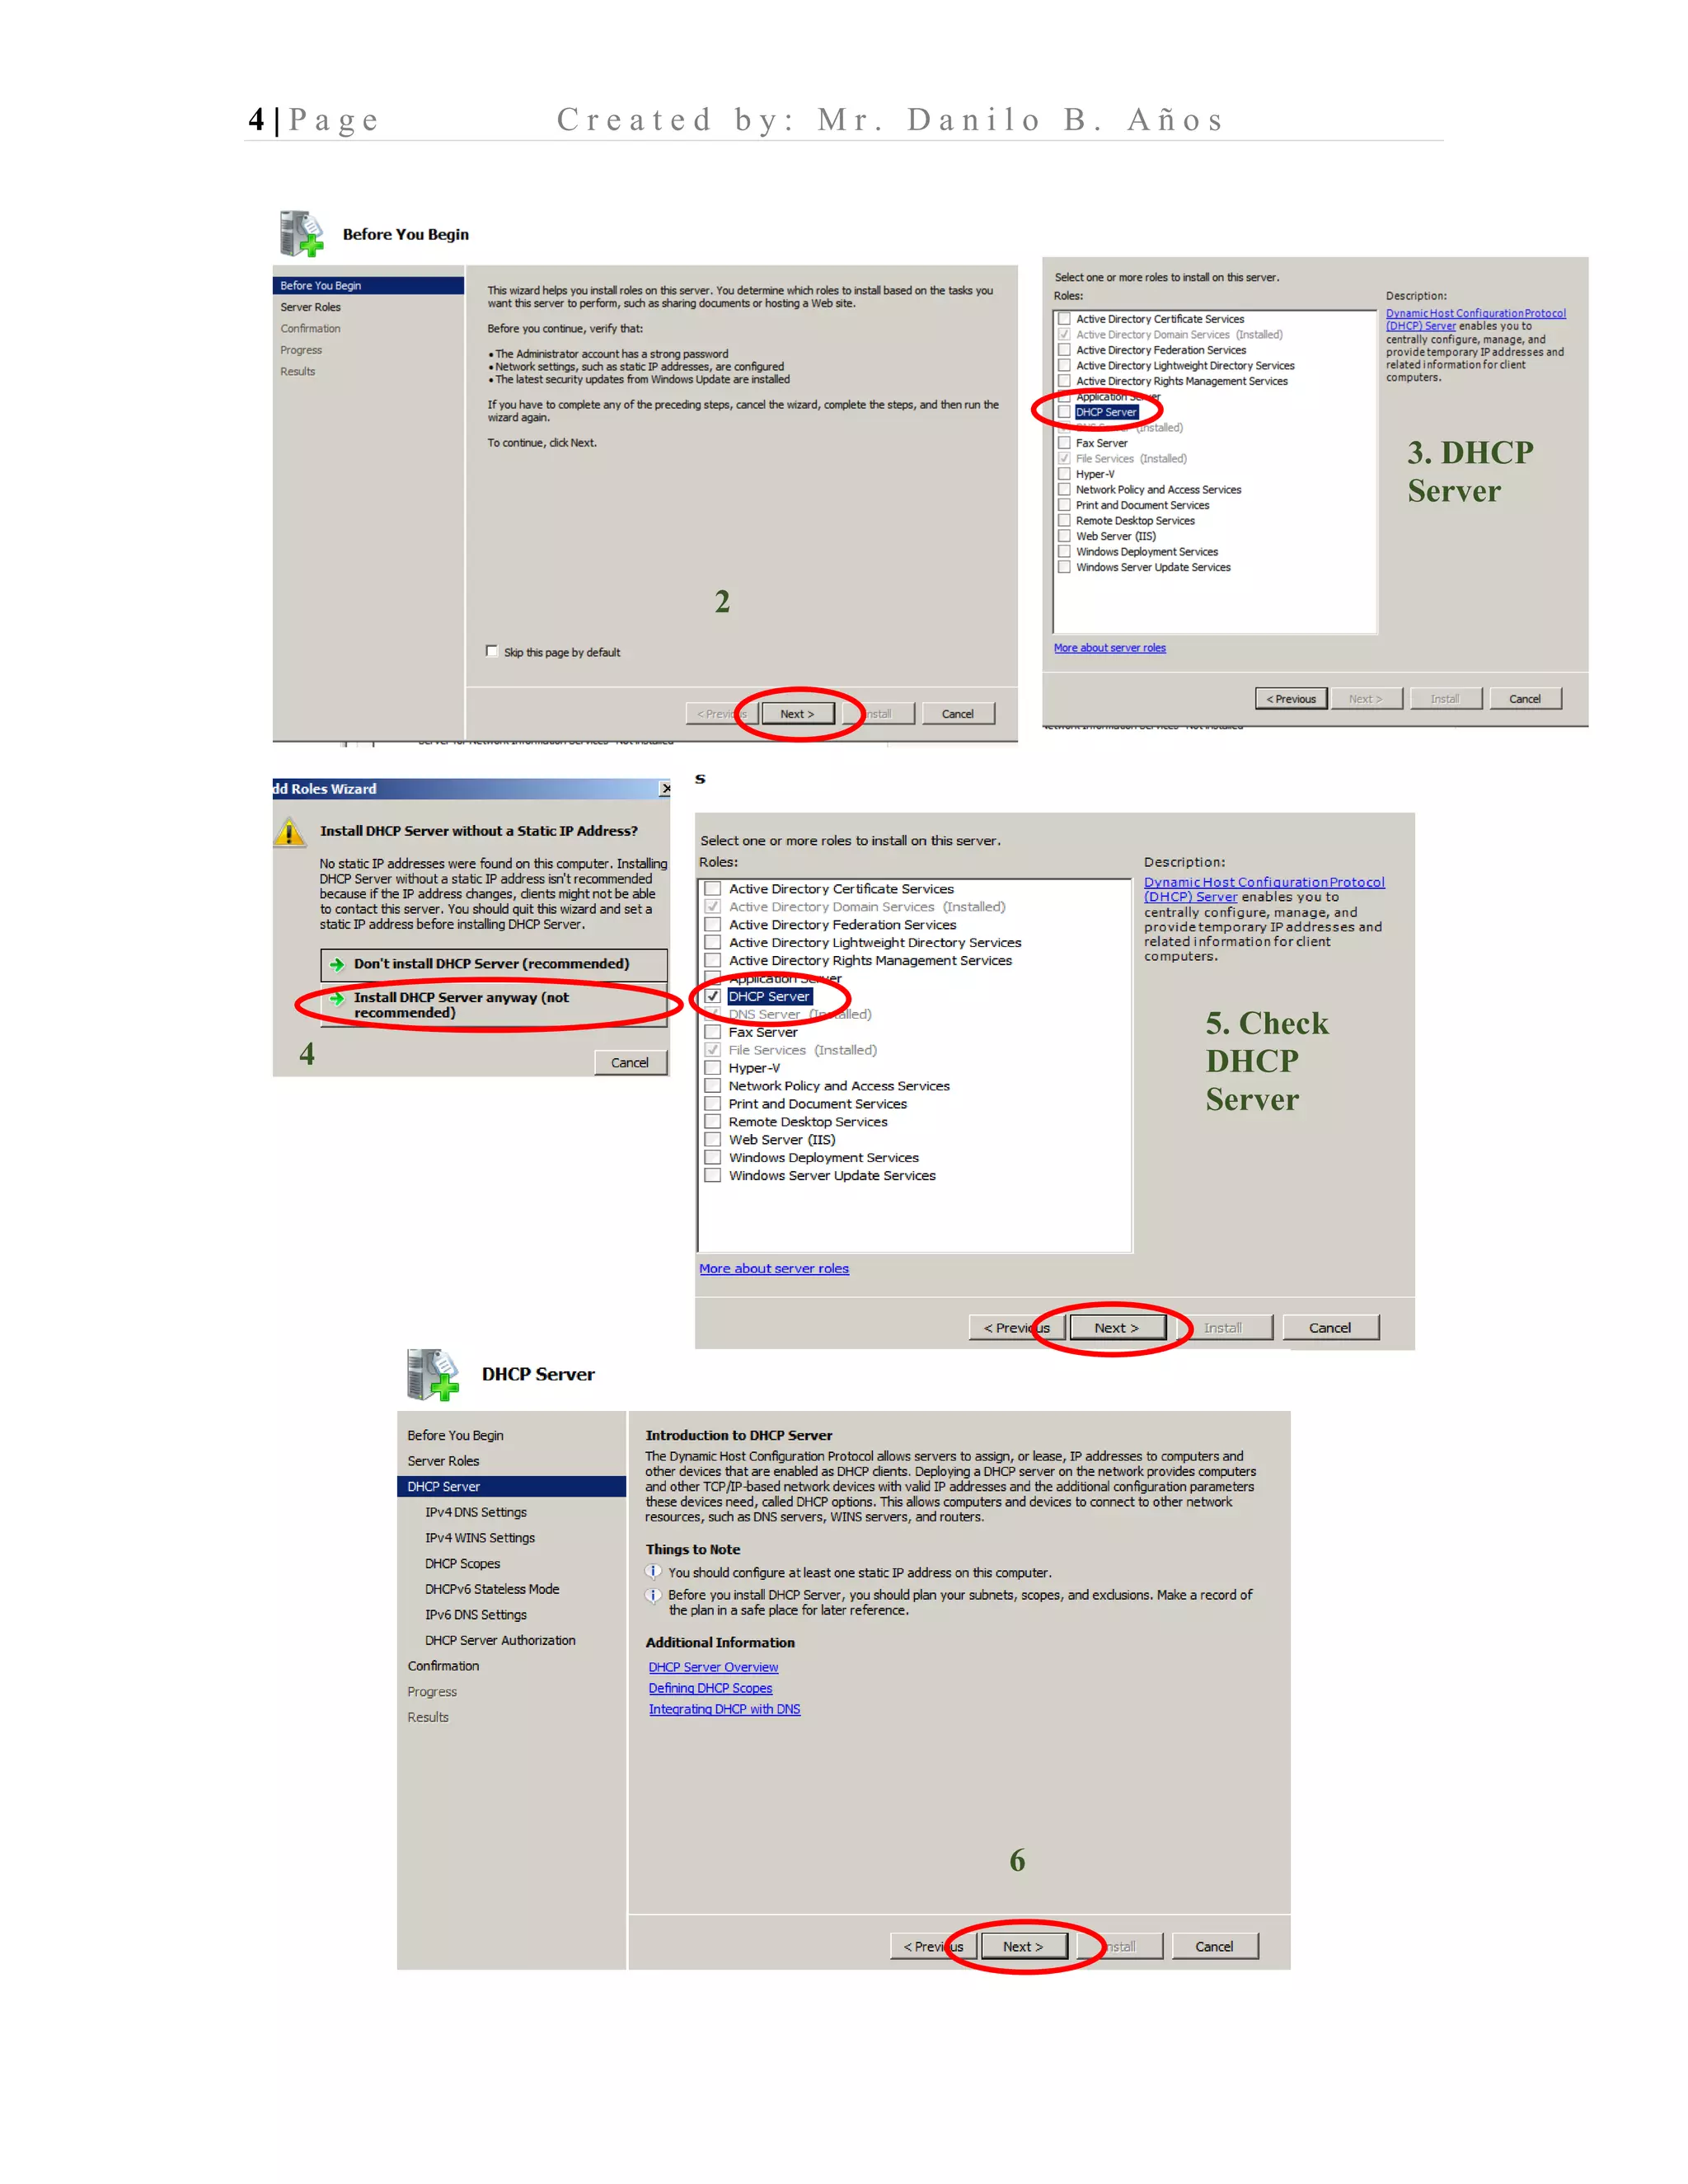
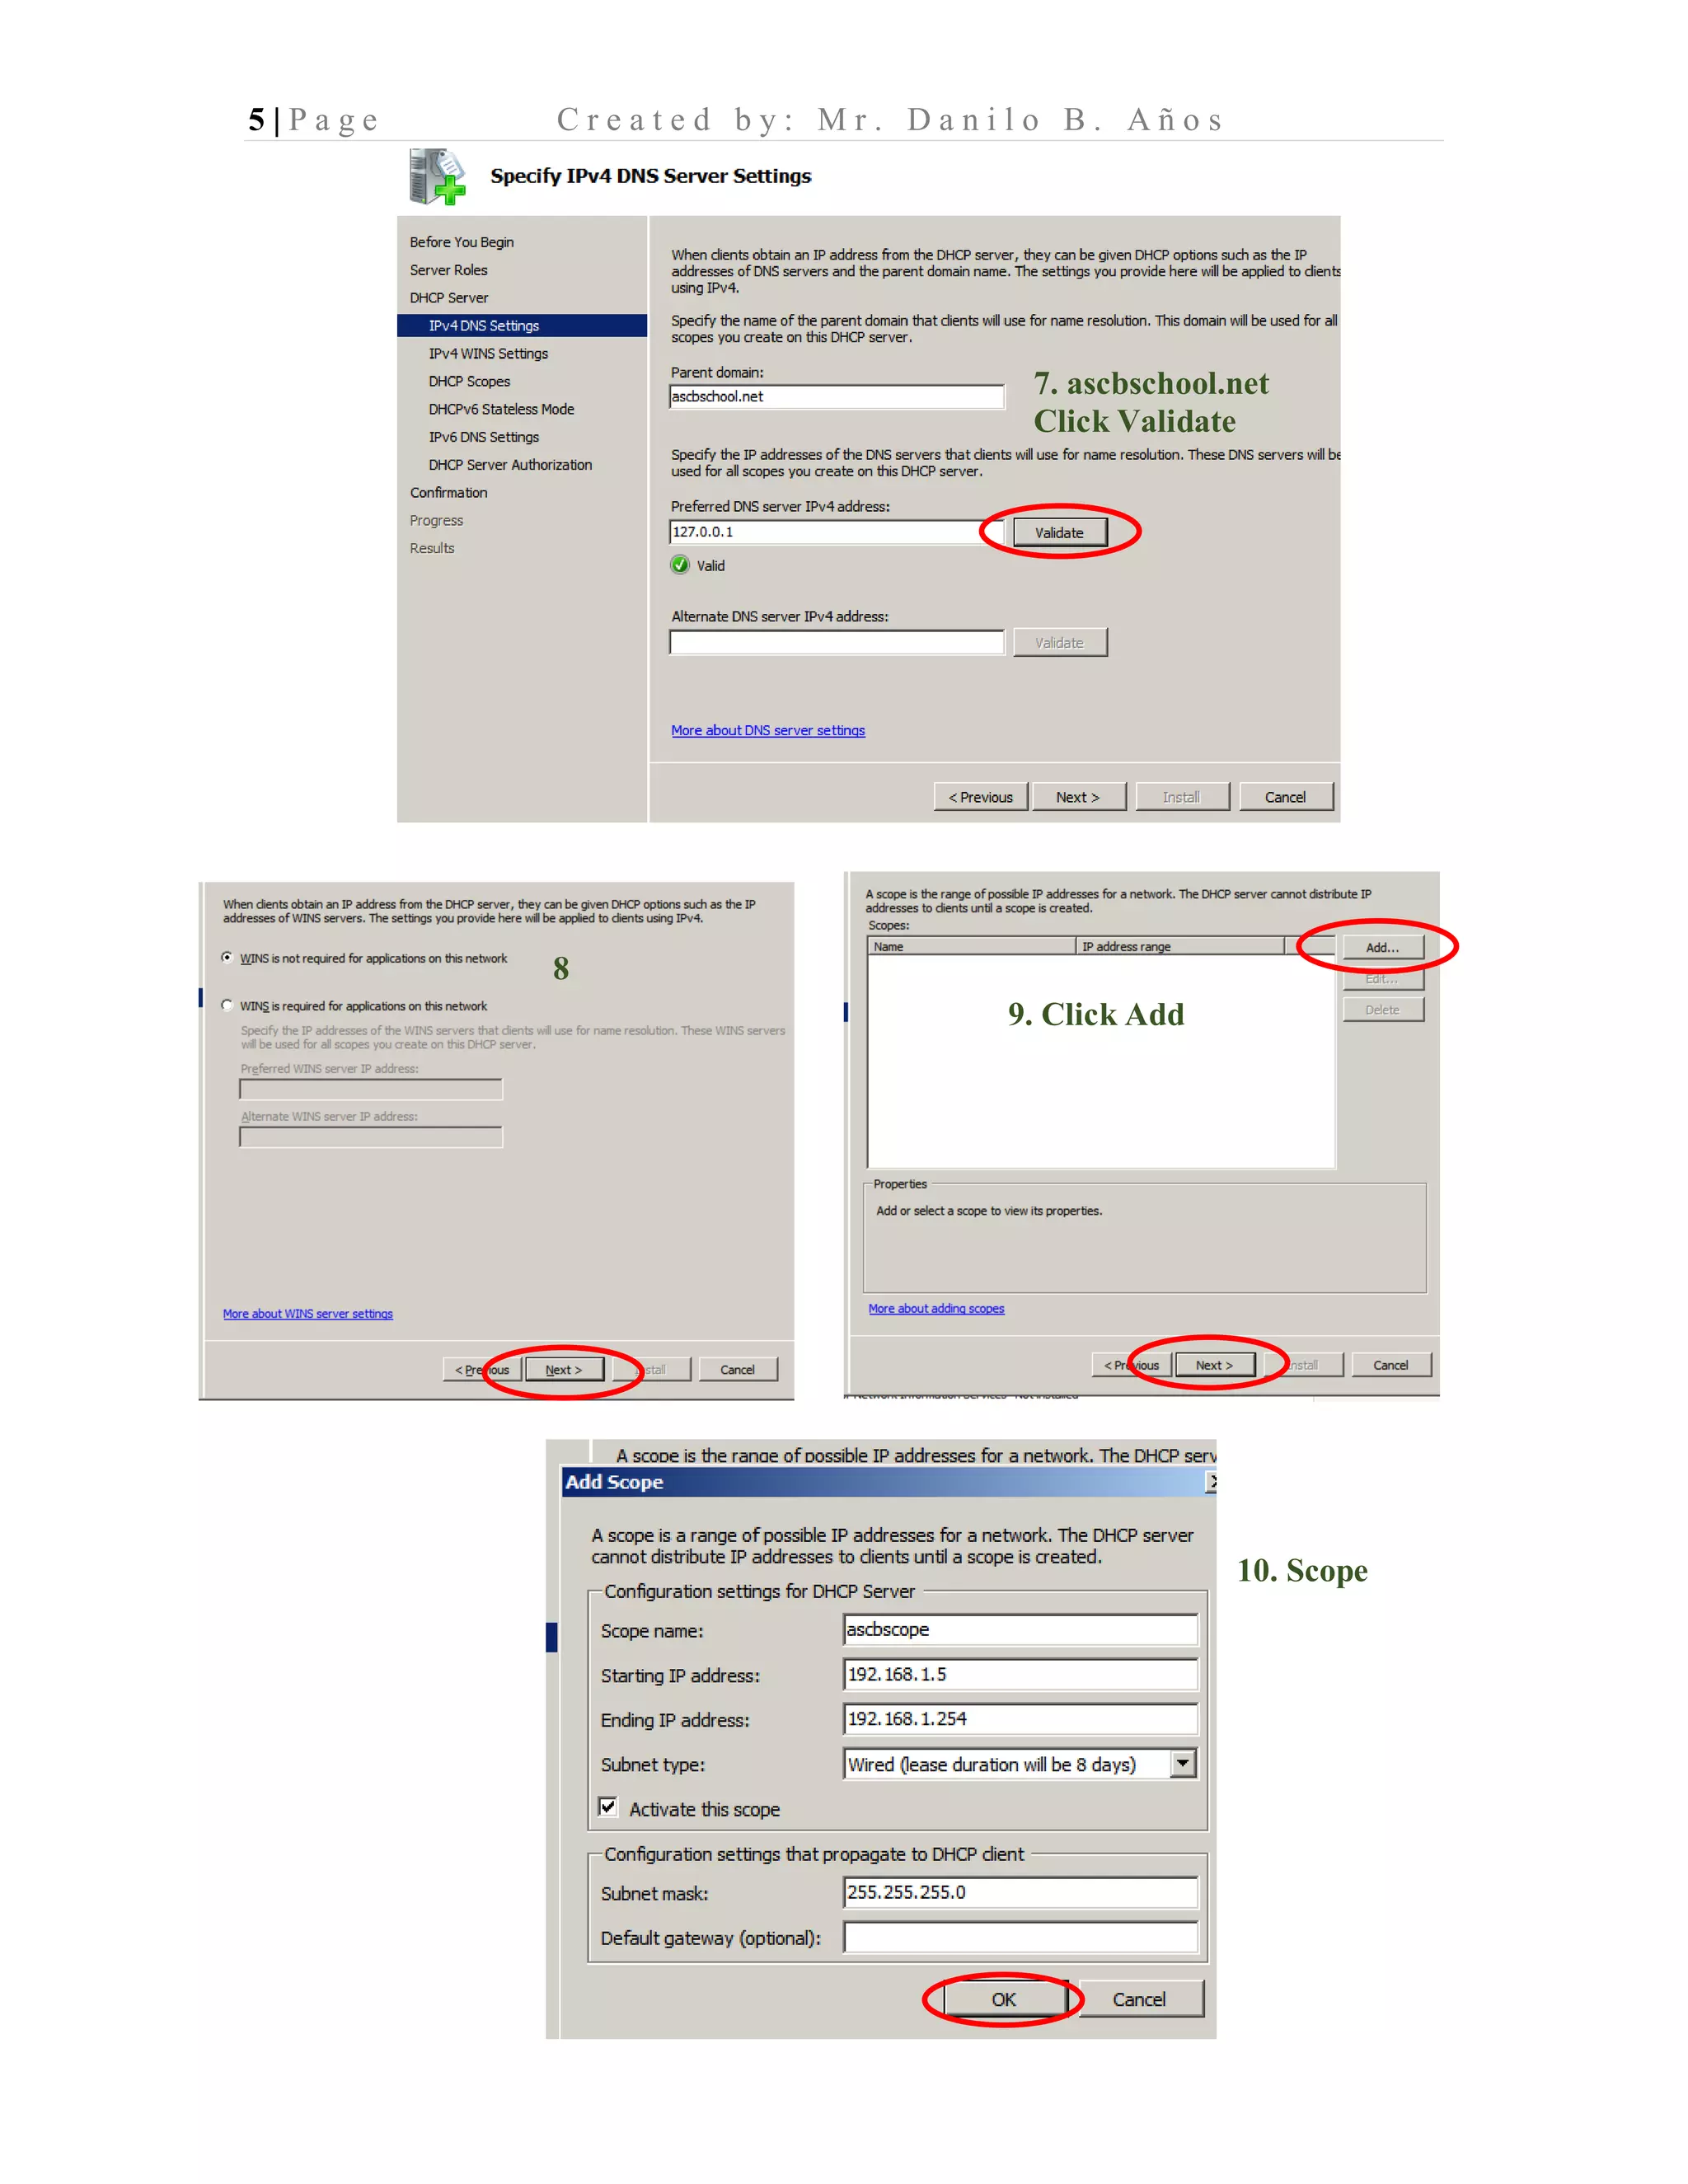
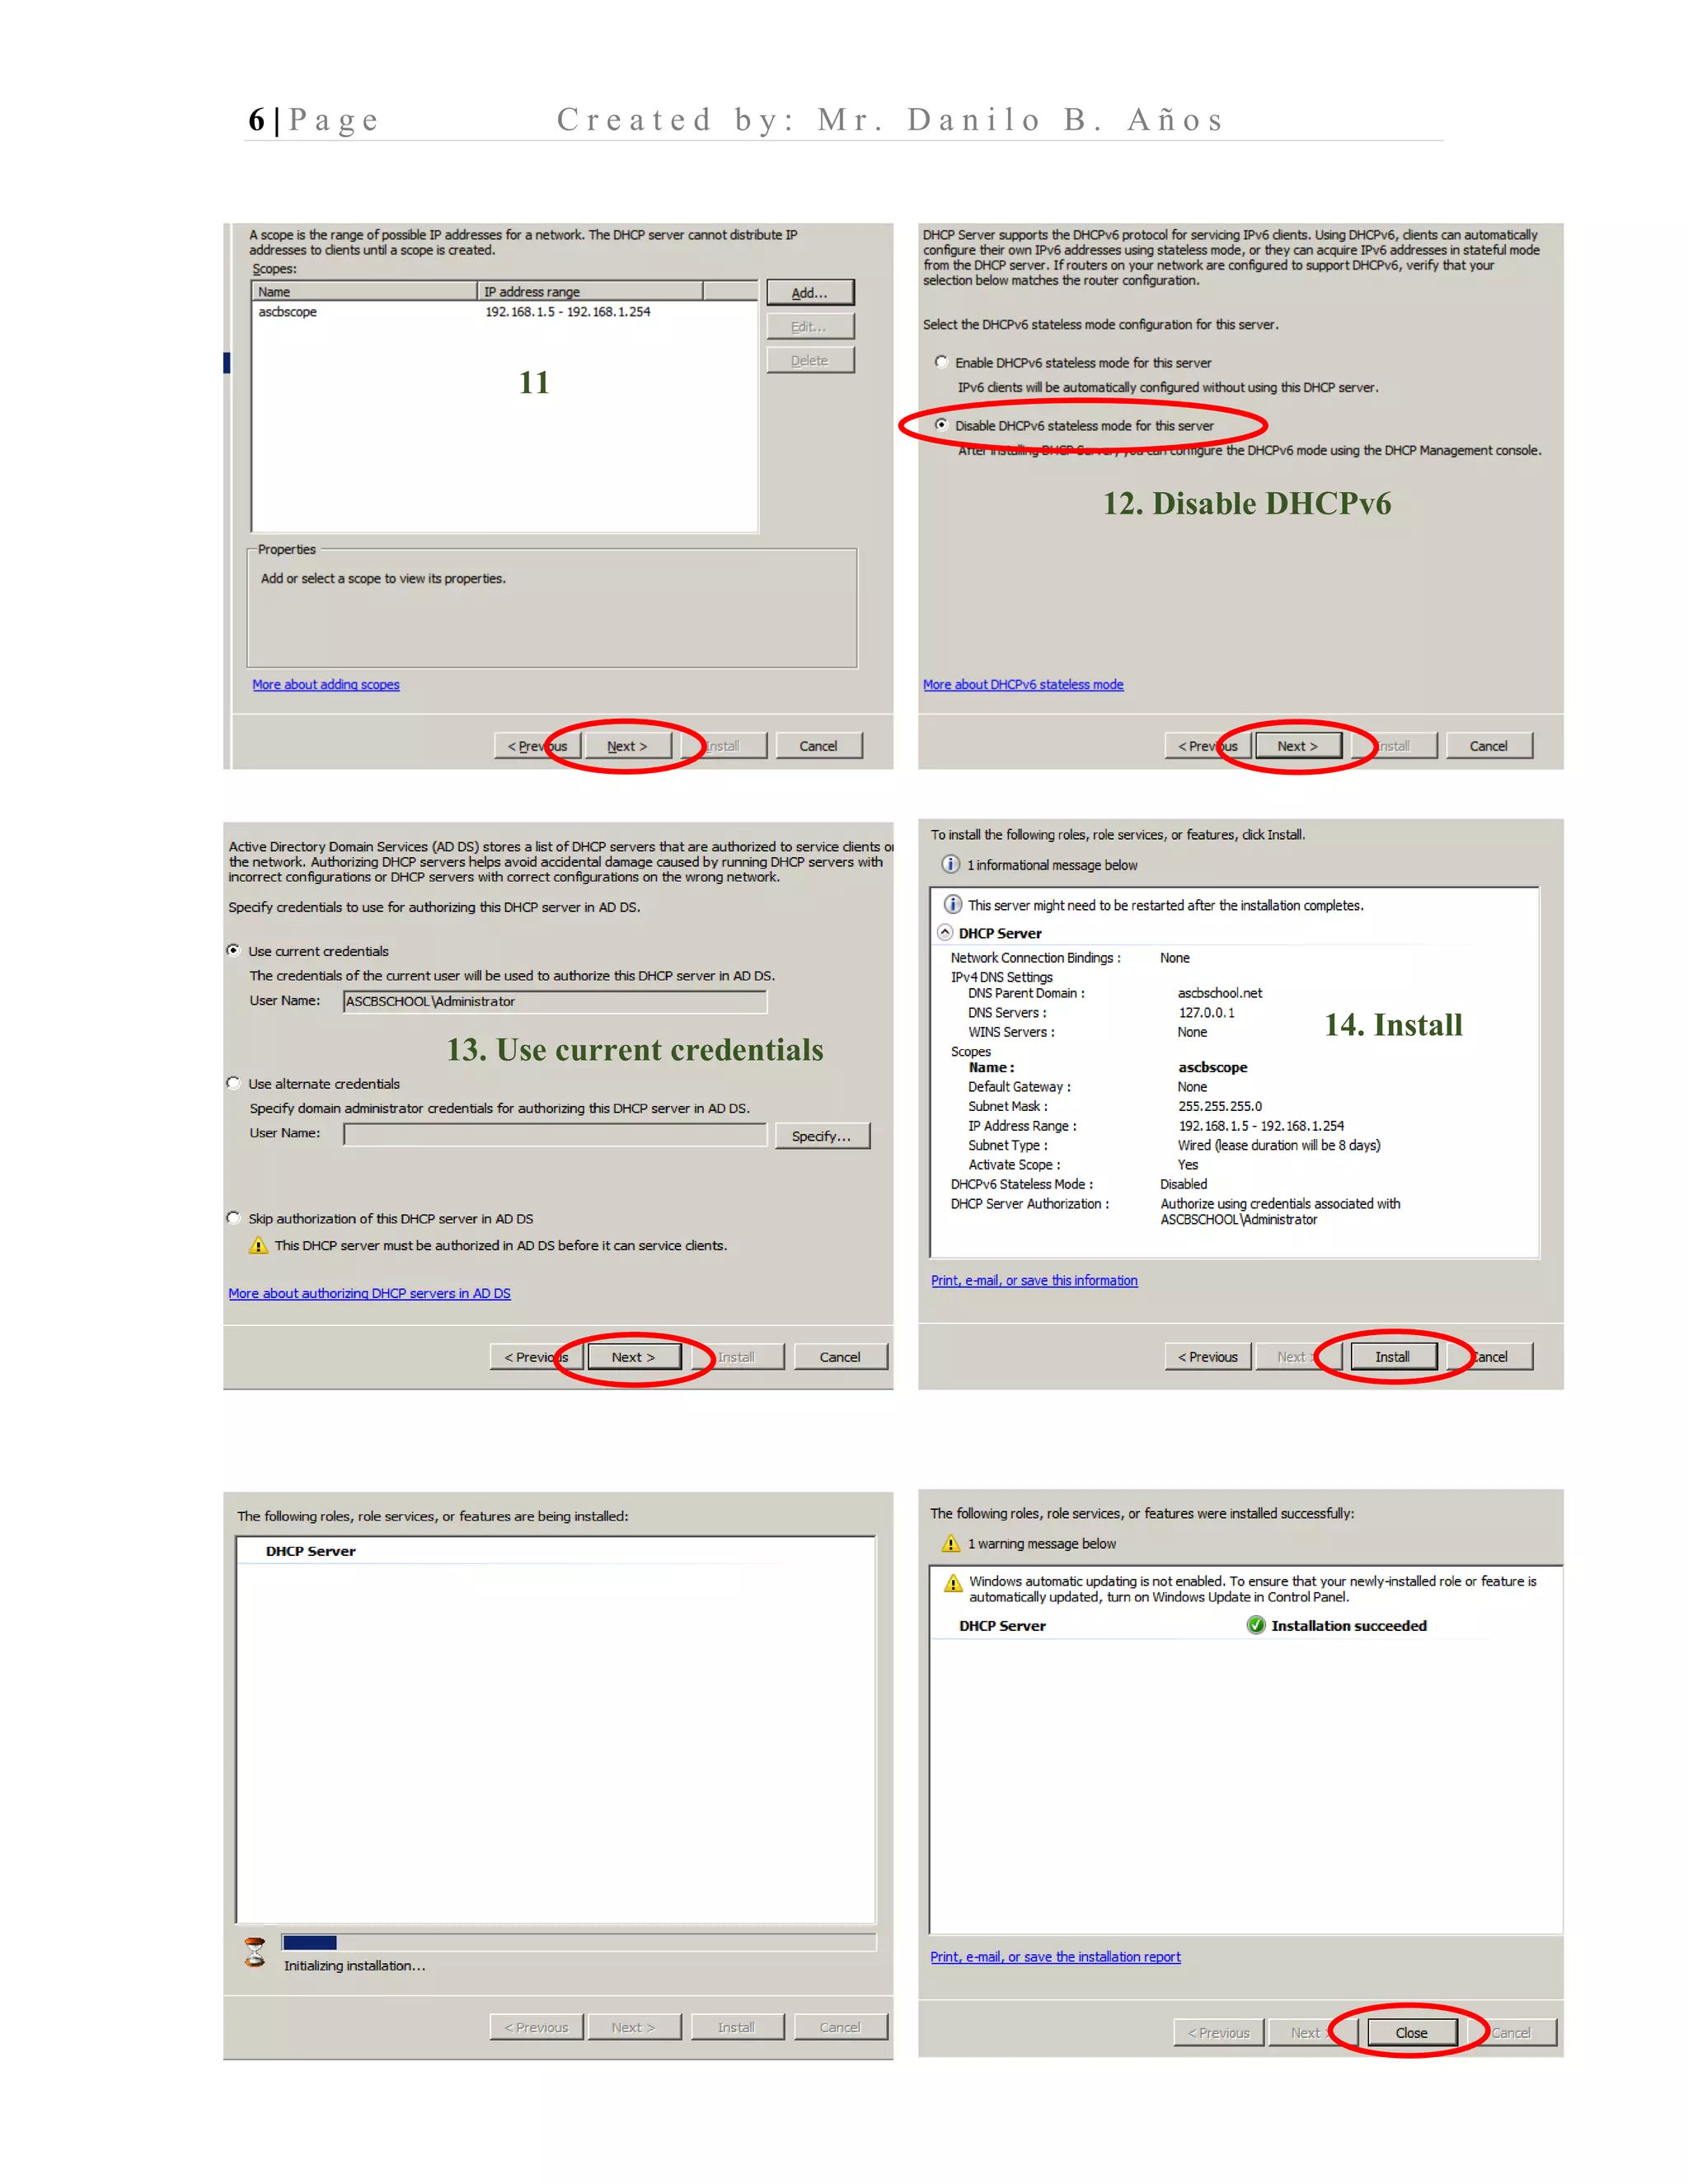
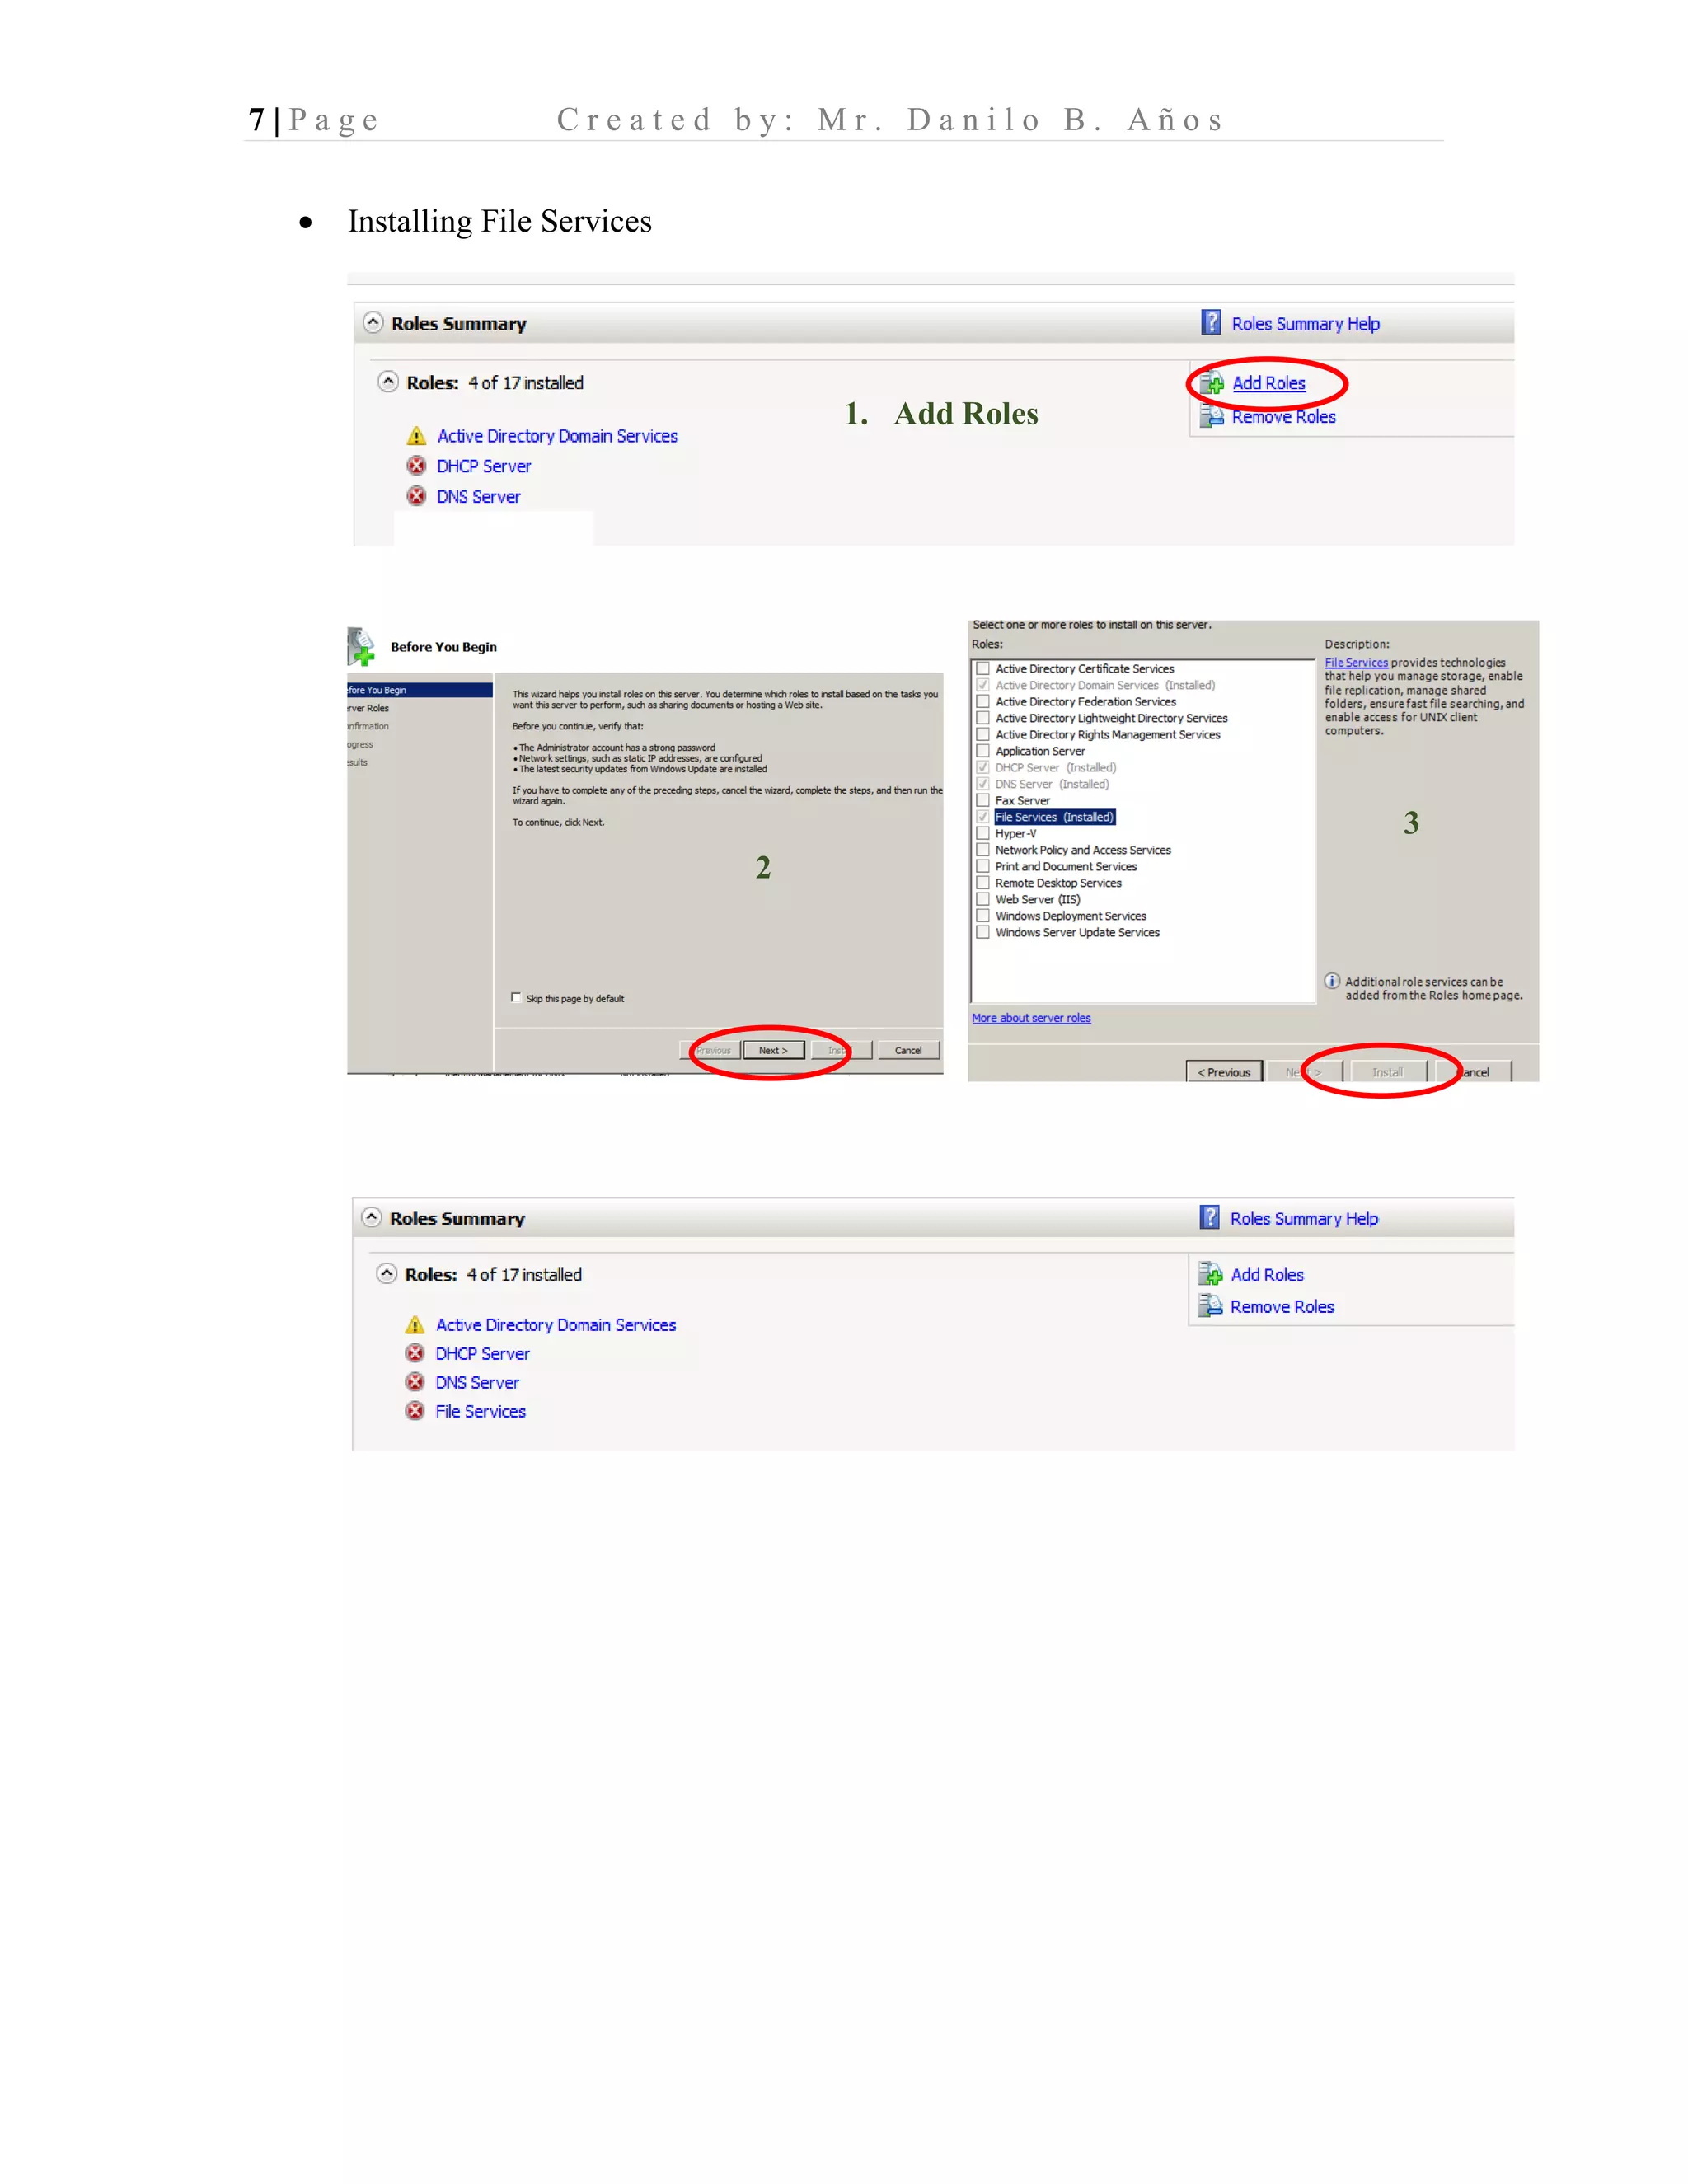
Introduction to setting up server roles including DNS, DHCP, and File Services for ascbschool.net using Windows Server 2008R2.
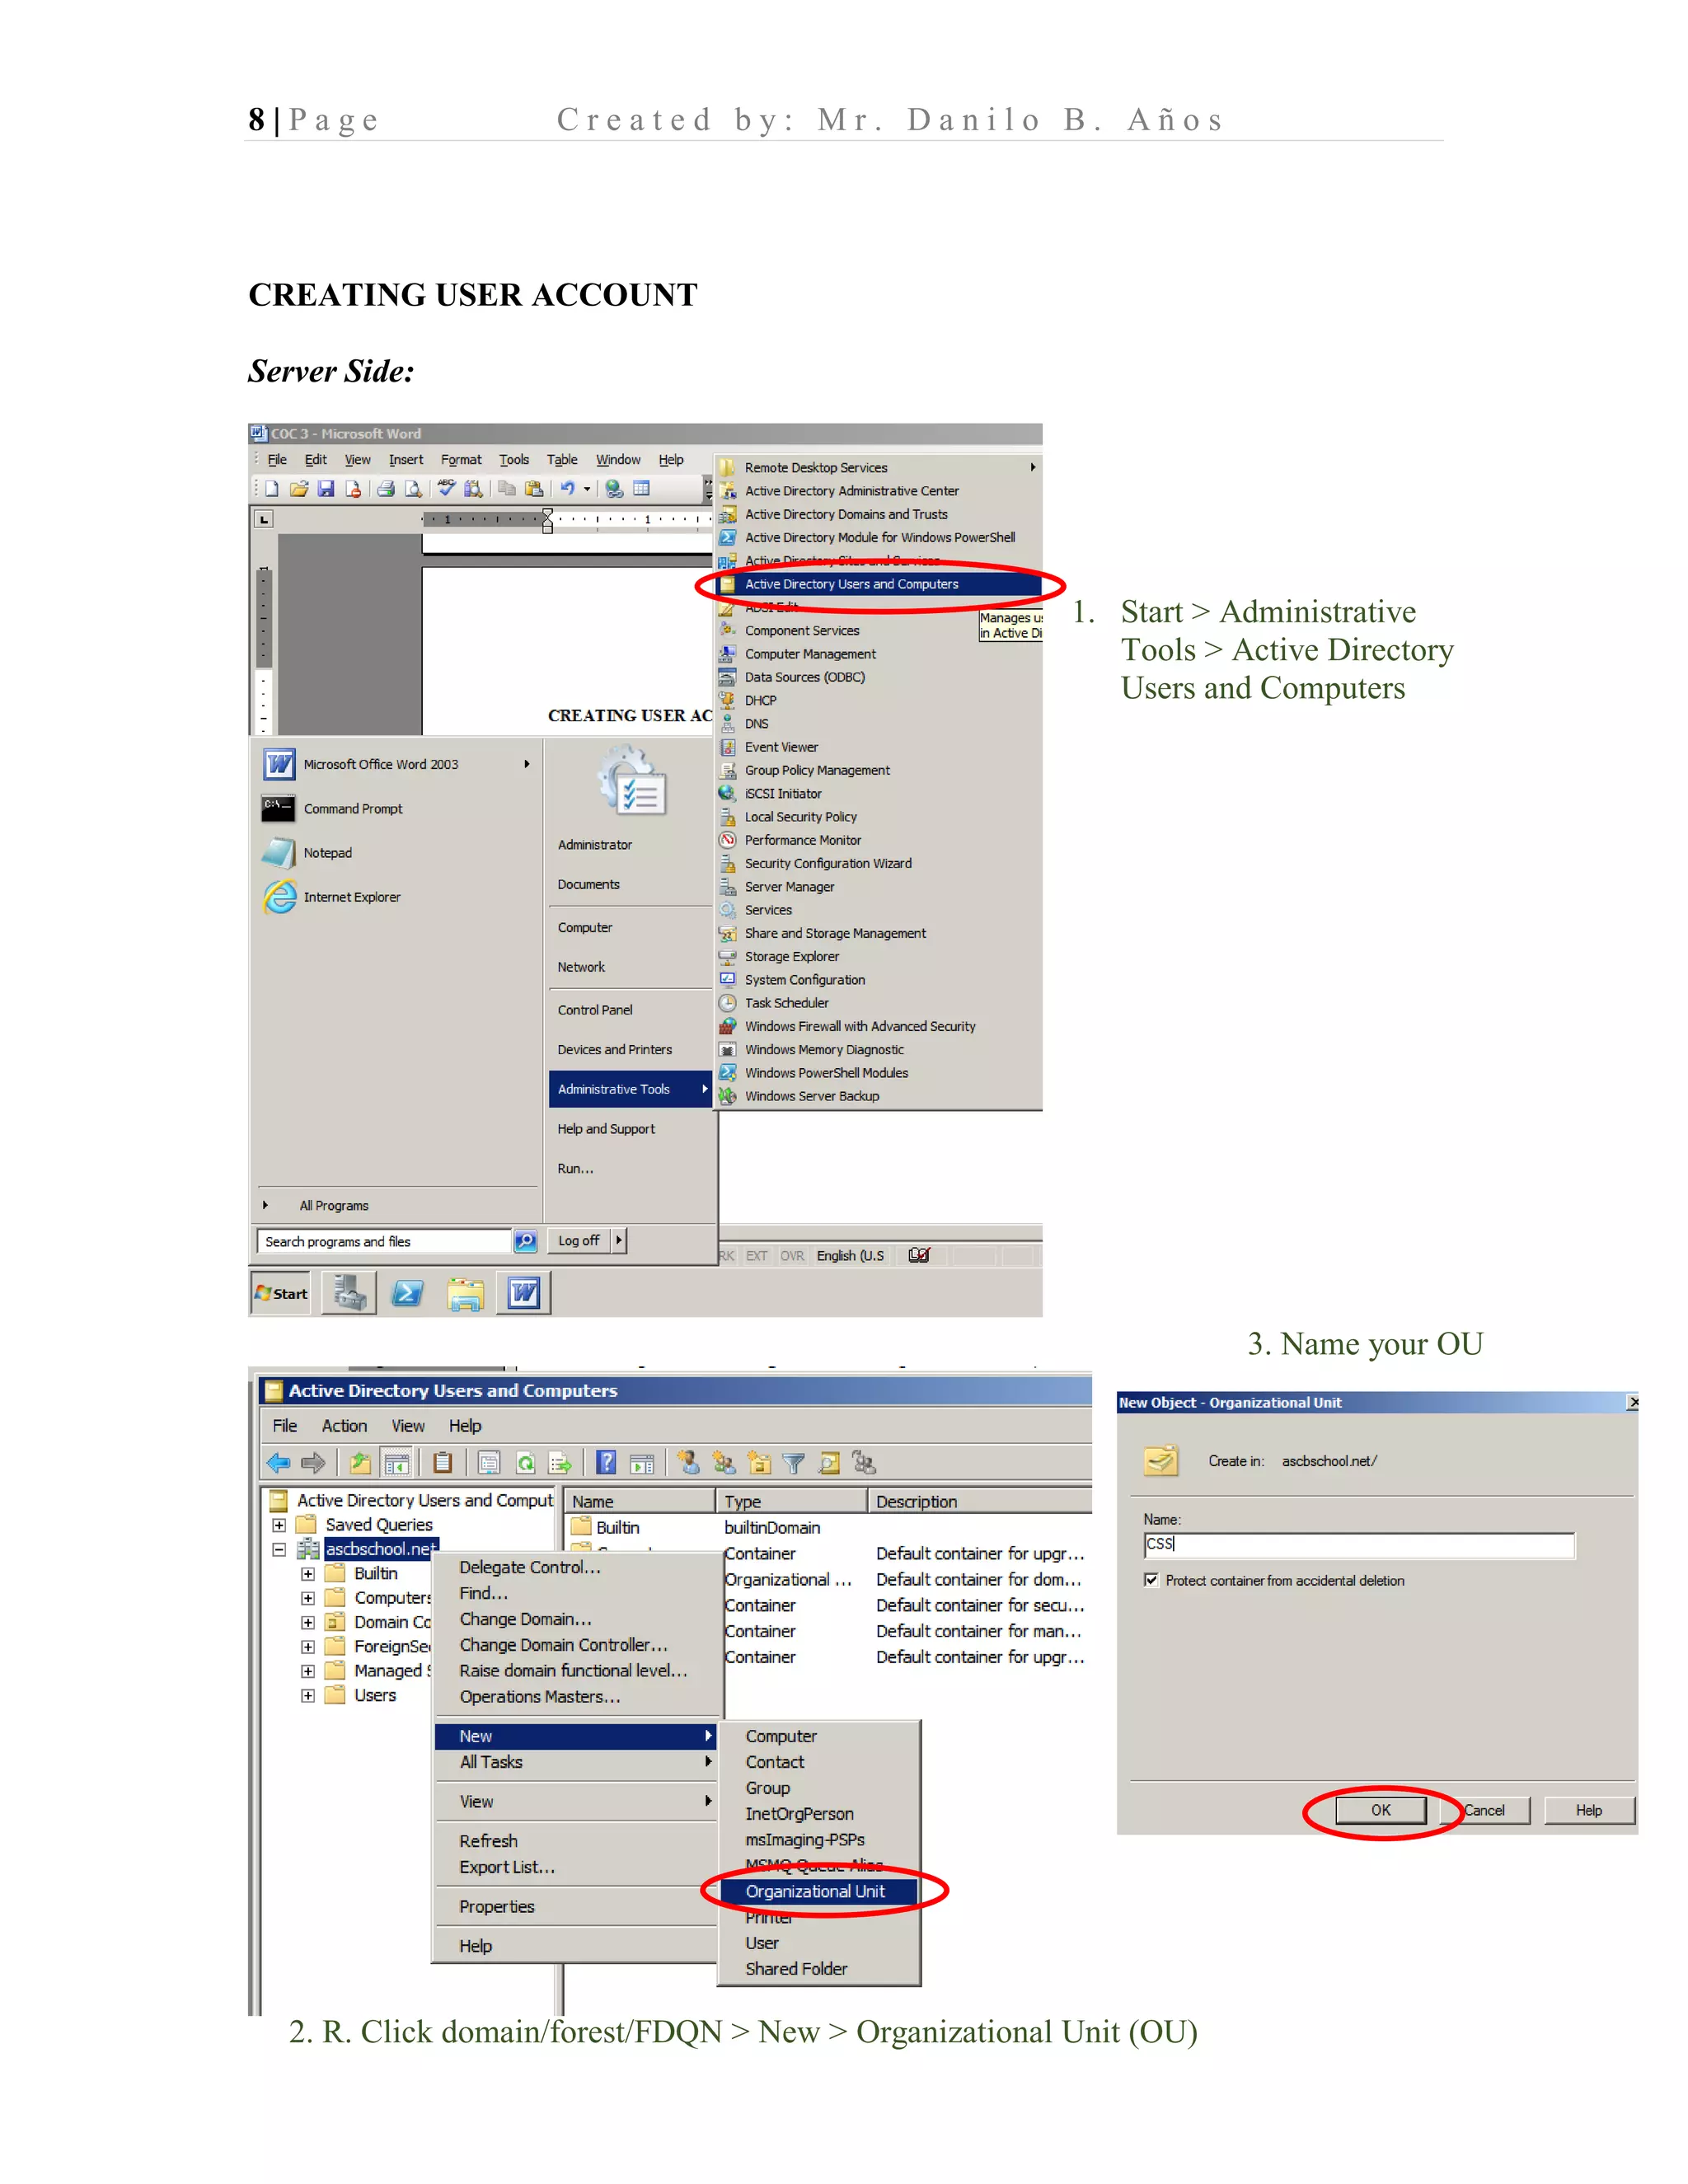
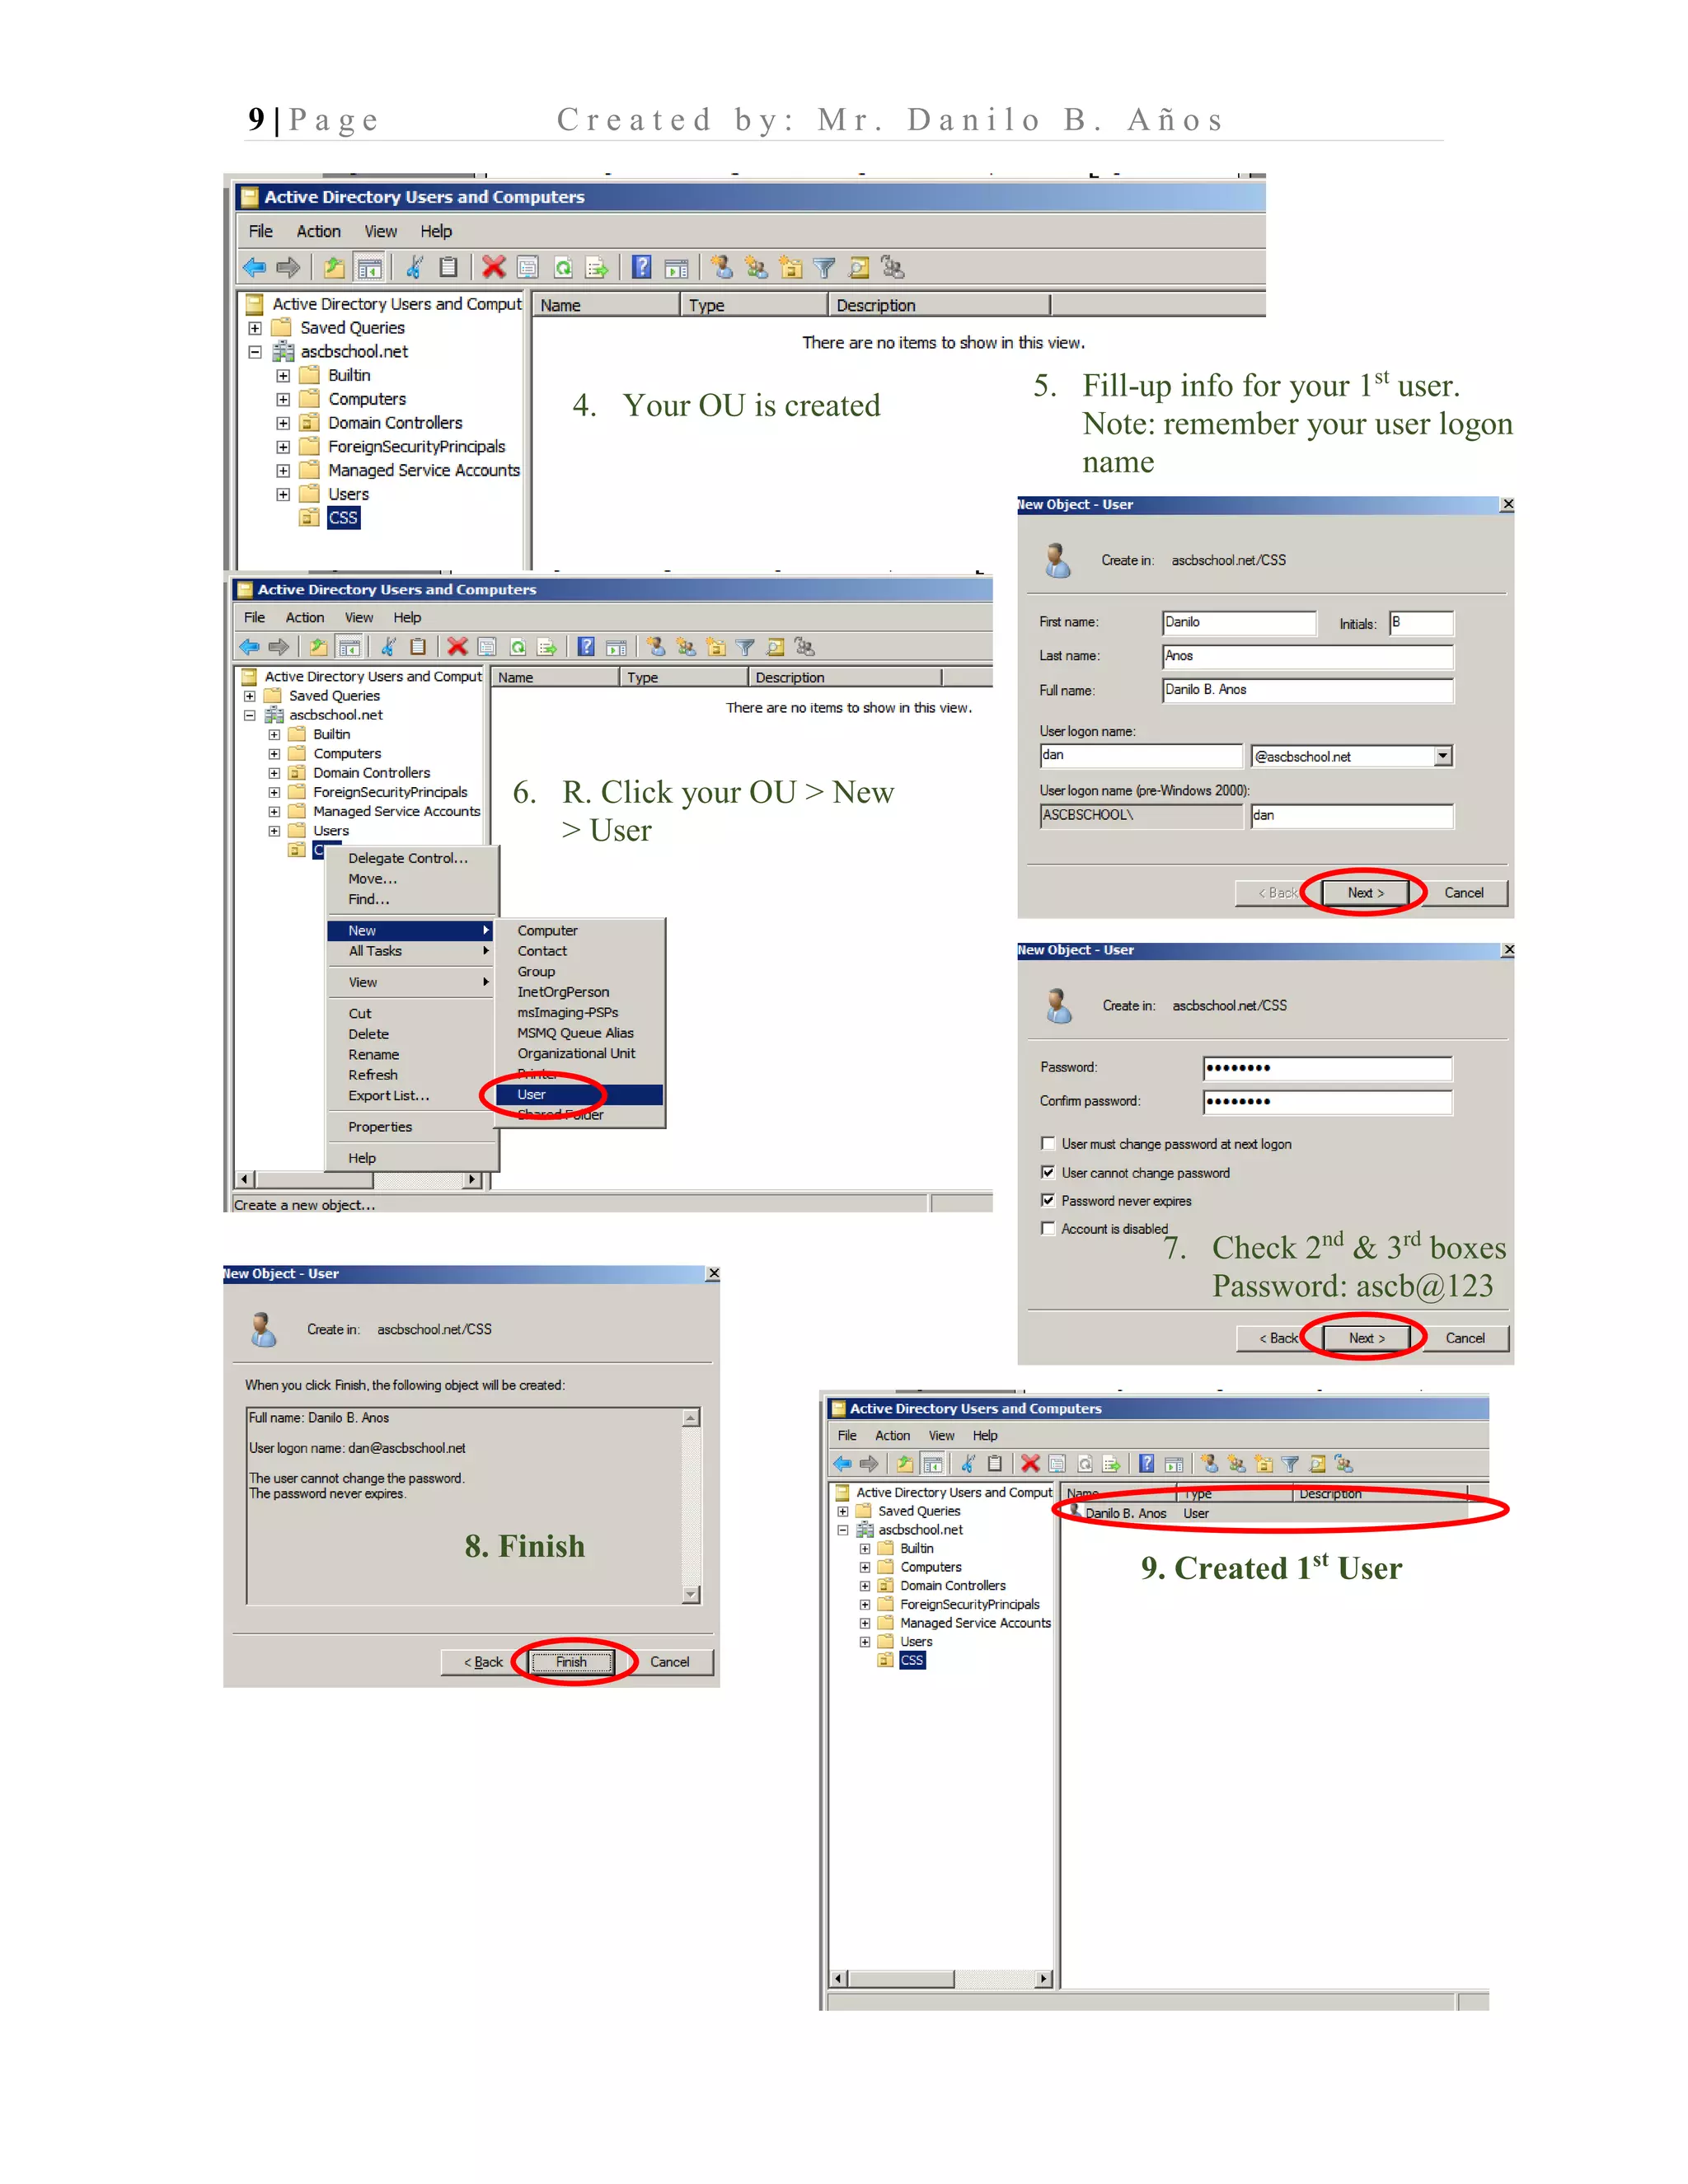
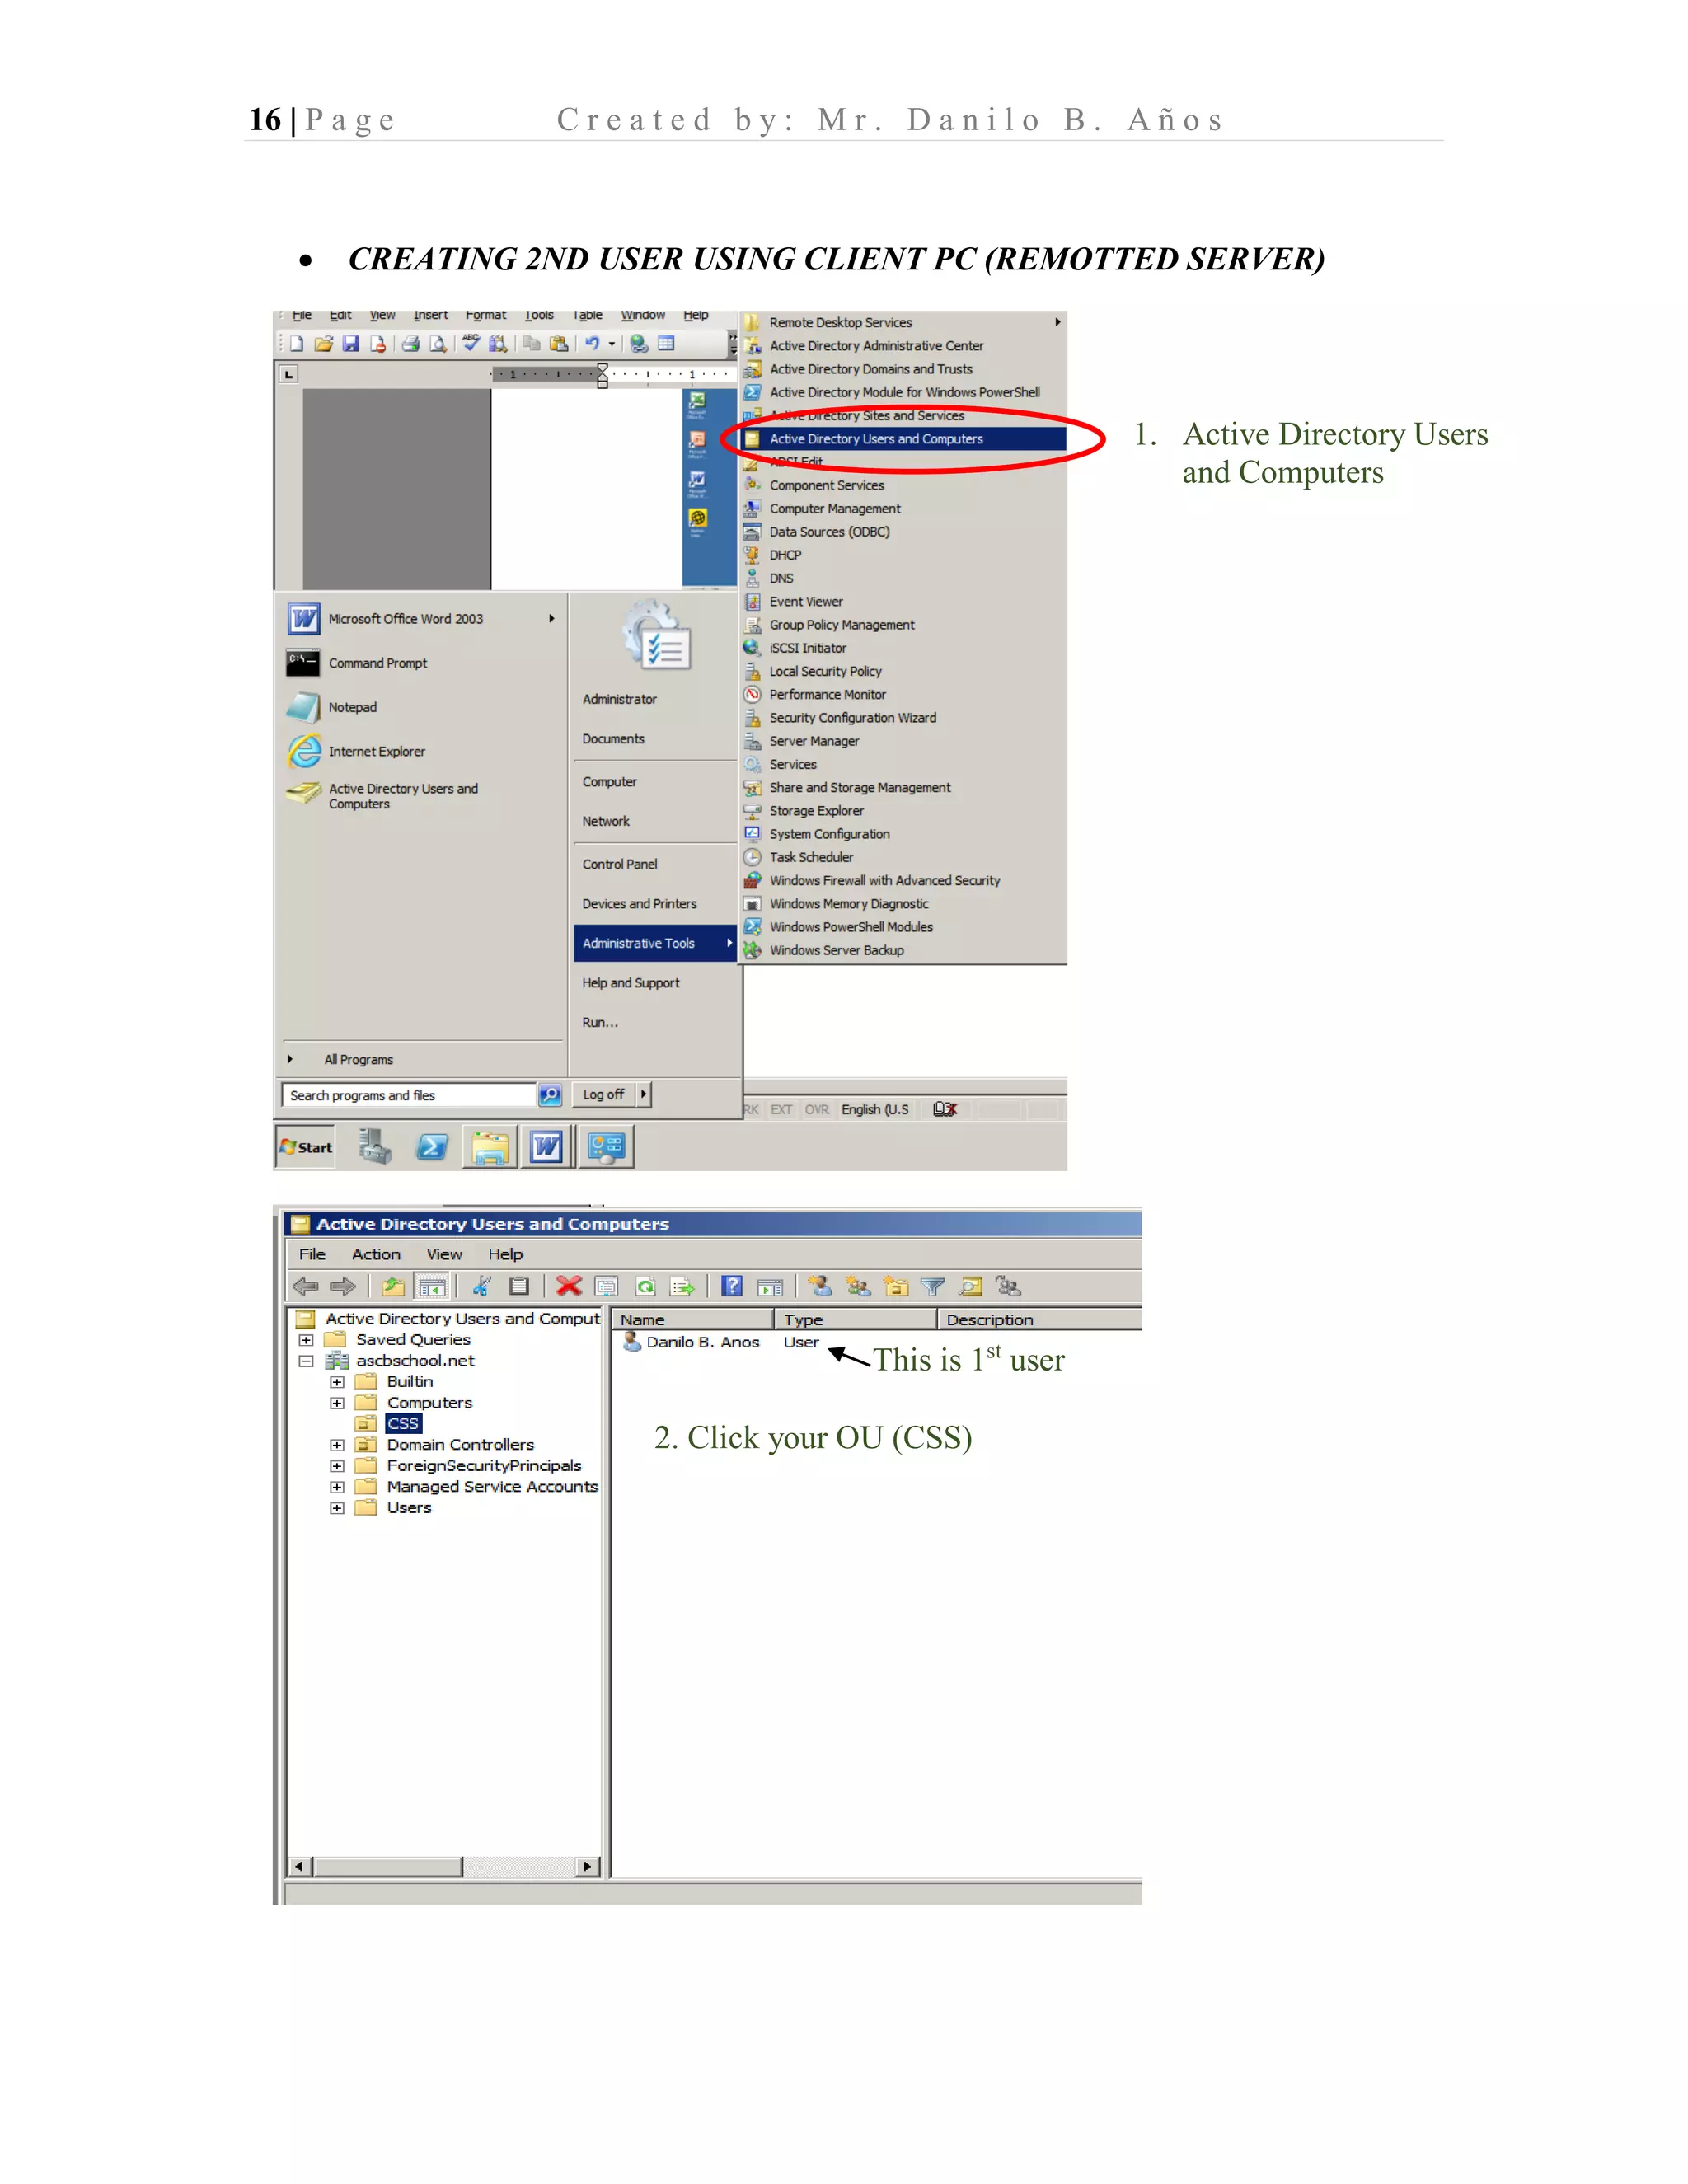
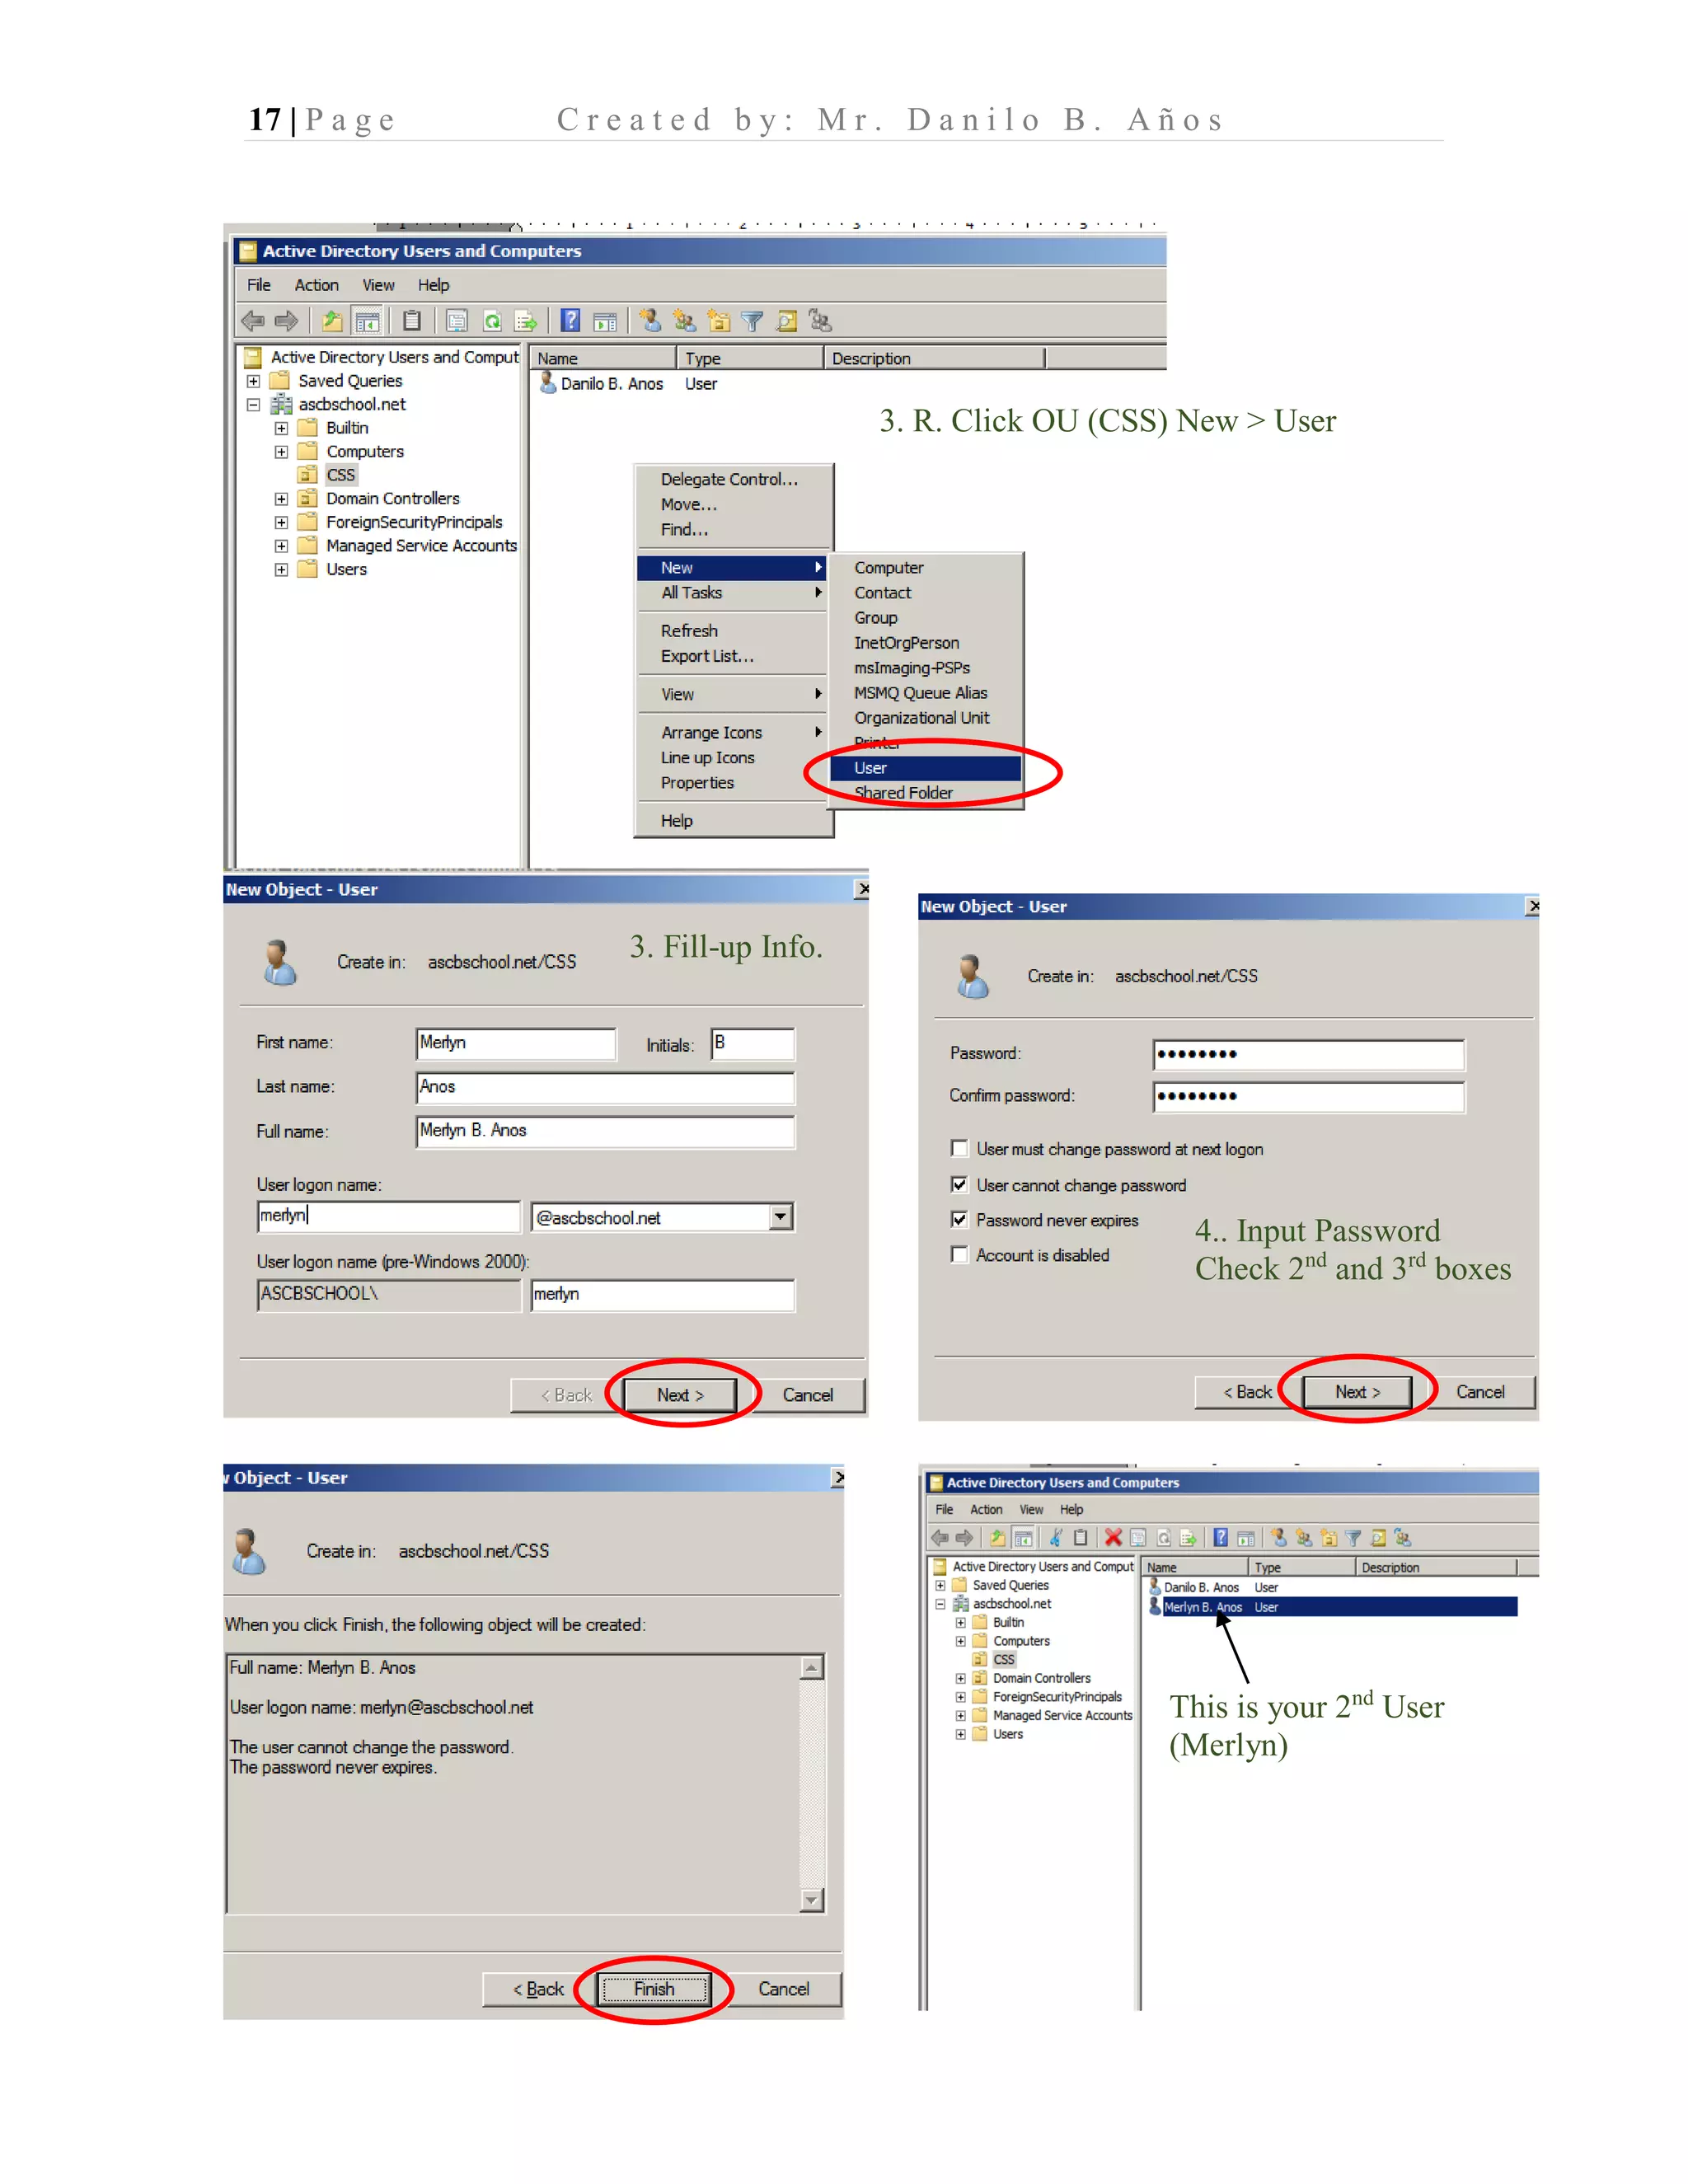
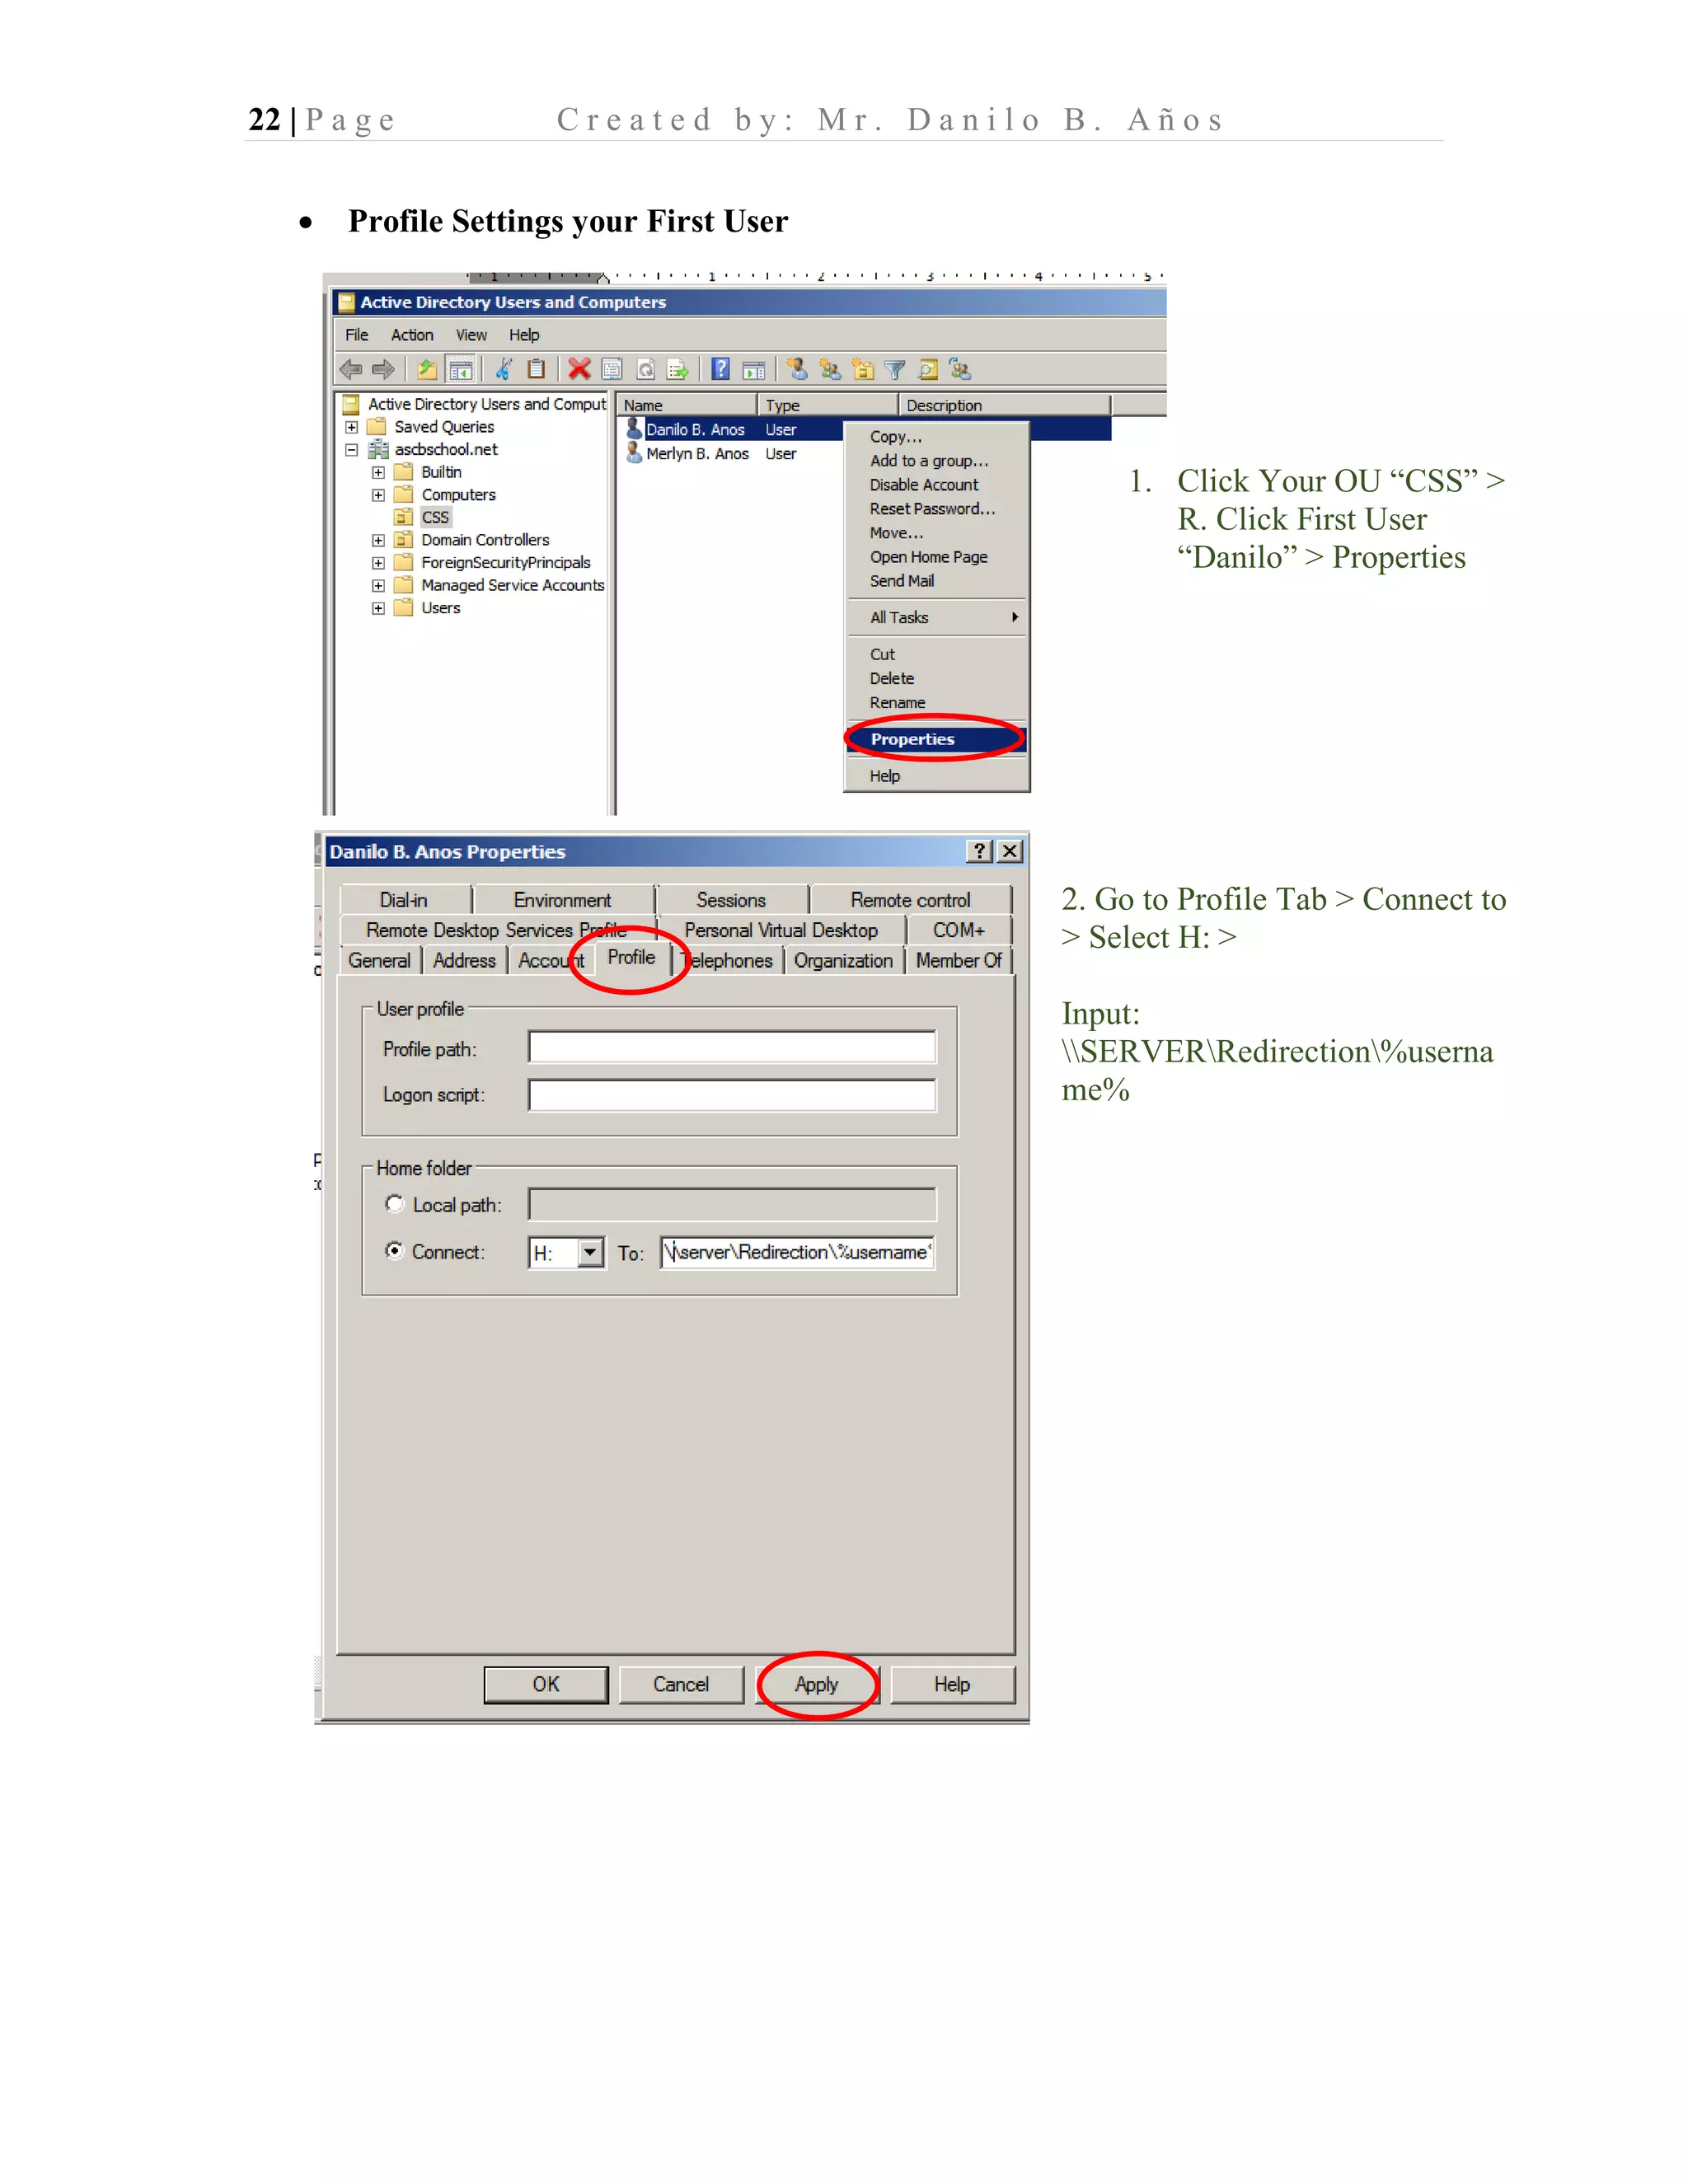
Process of creating user accounts in Active Directory and adding them under Organizational Units.
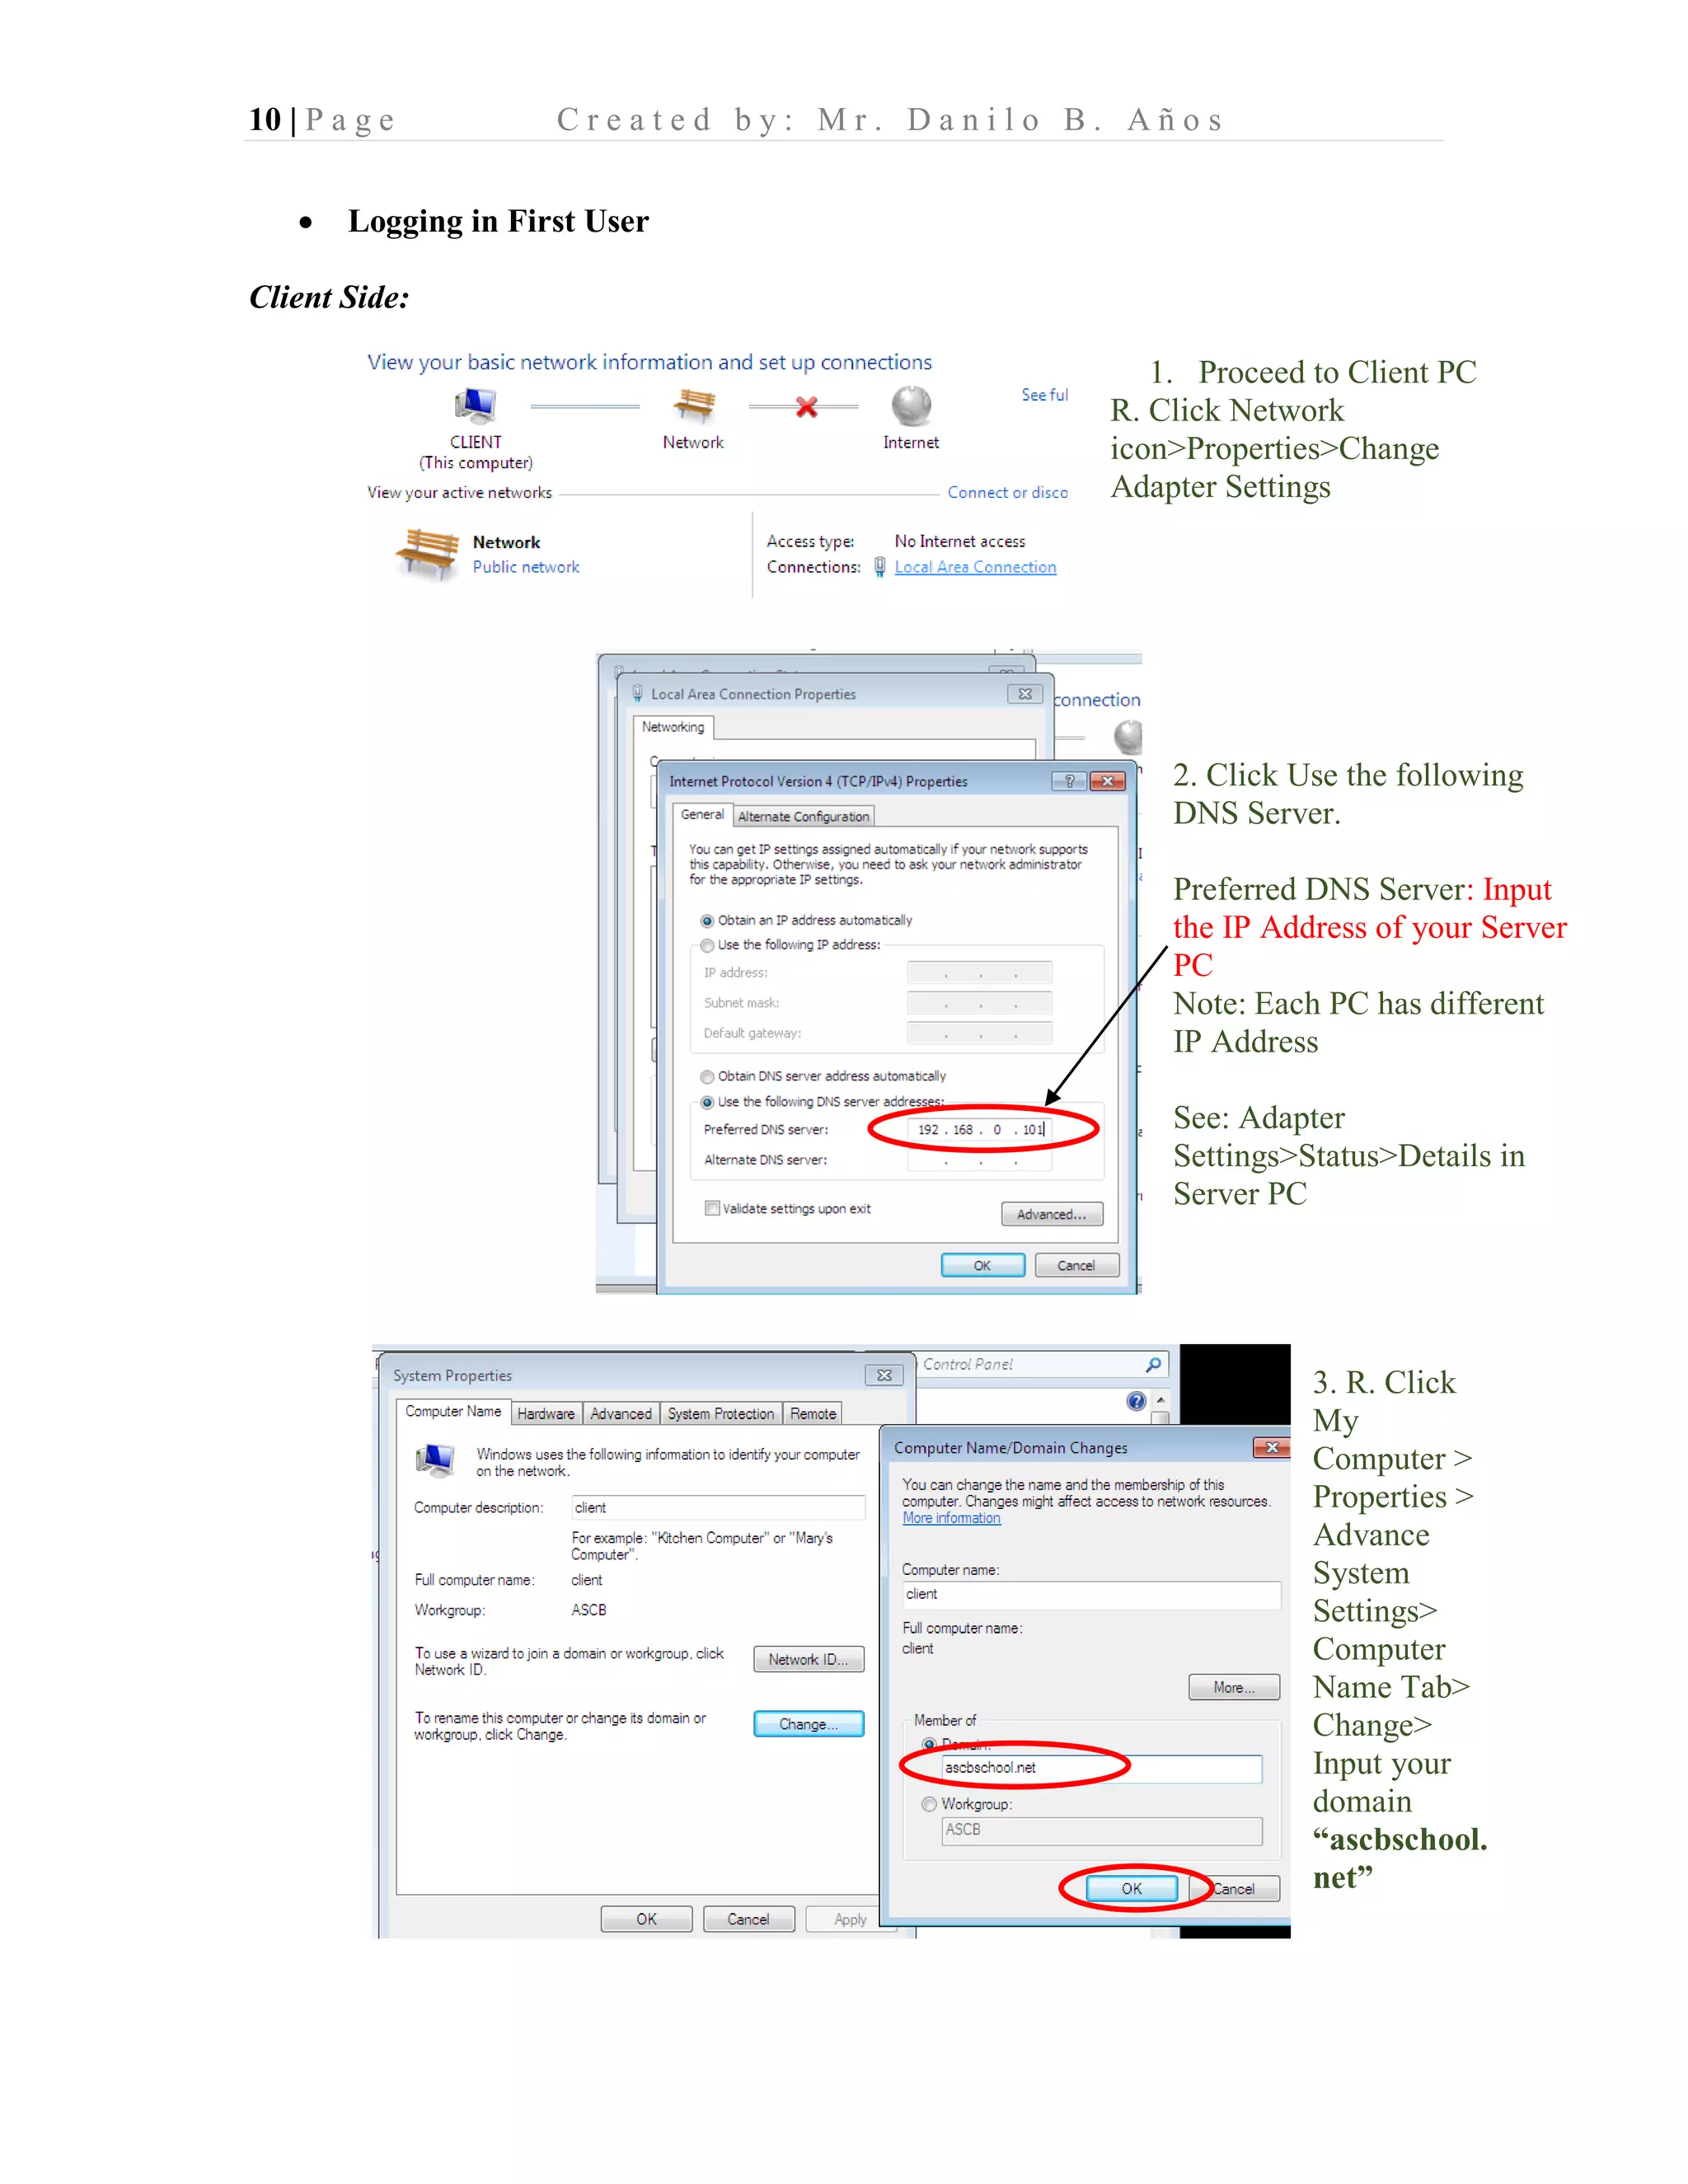
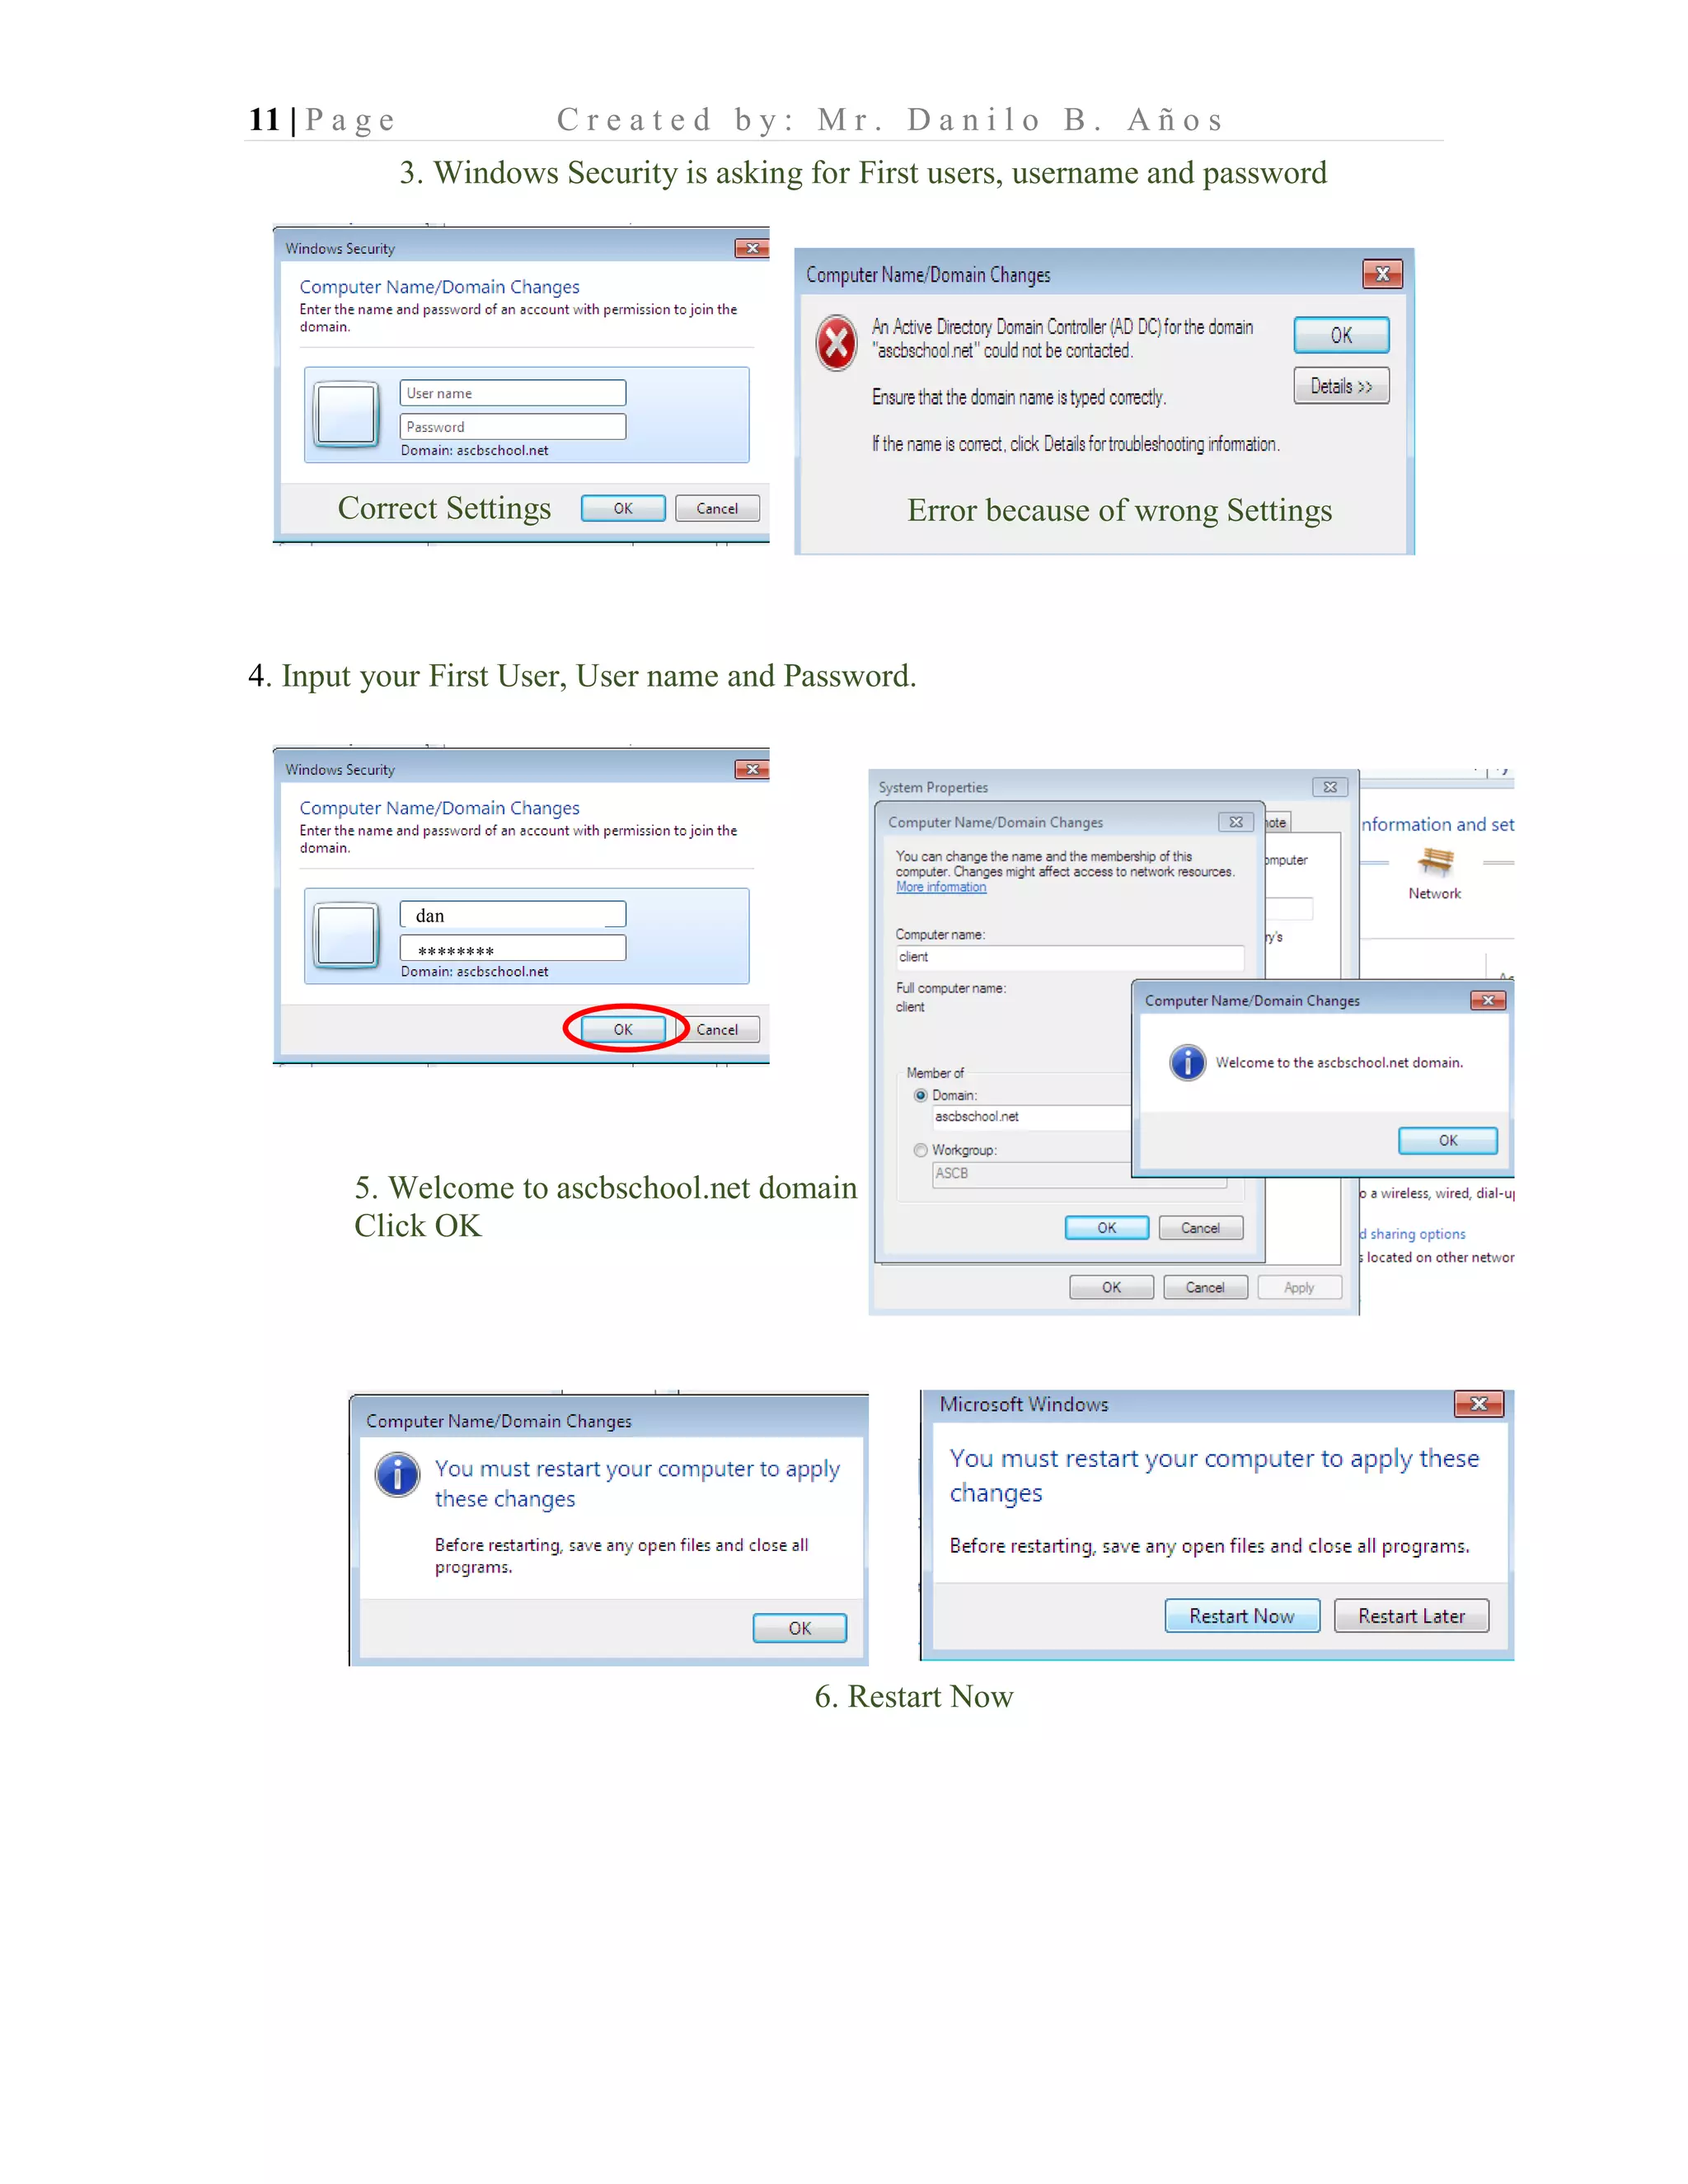
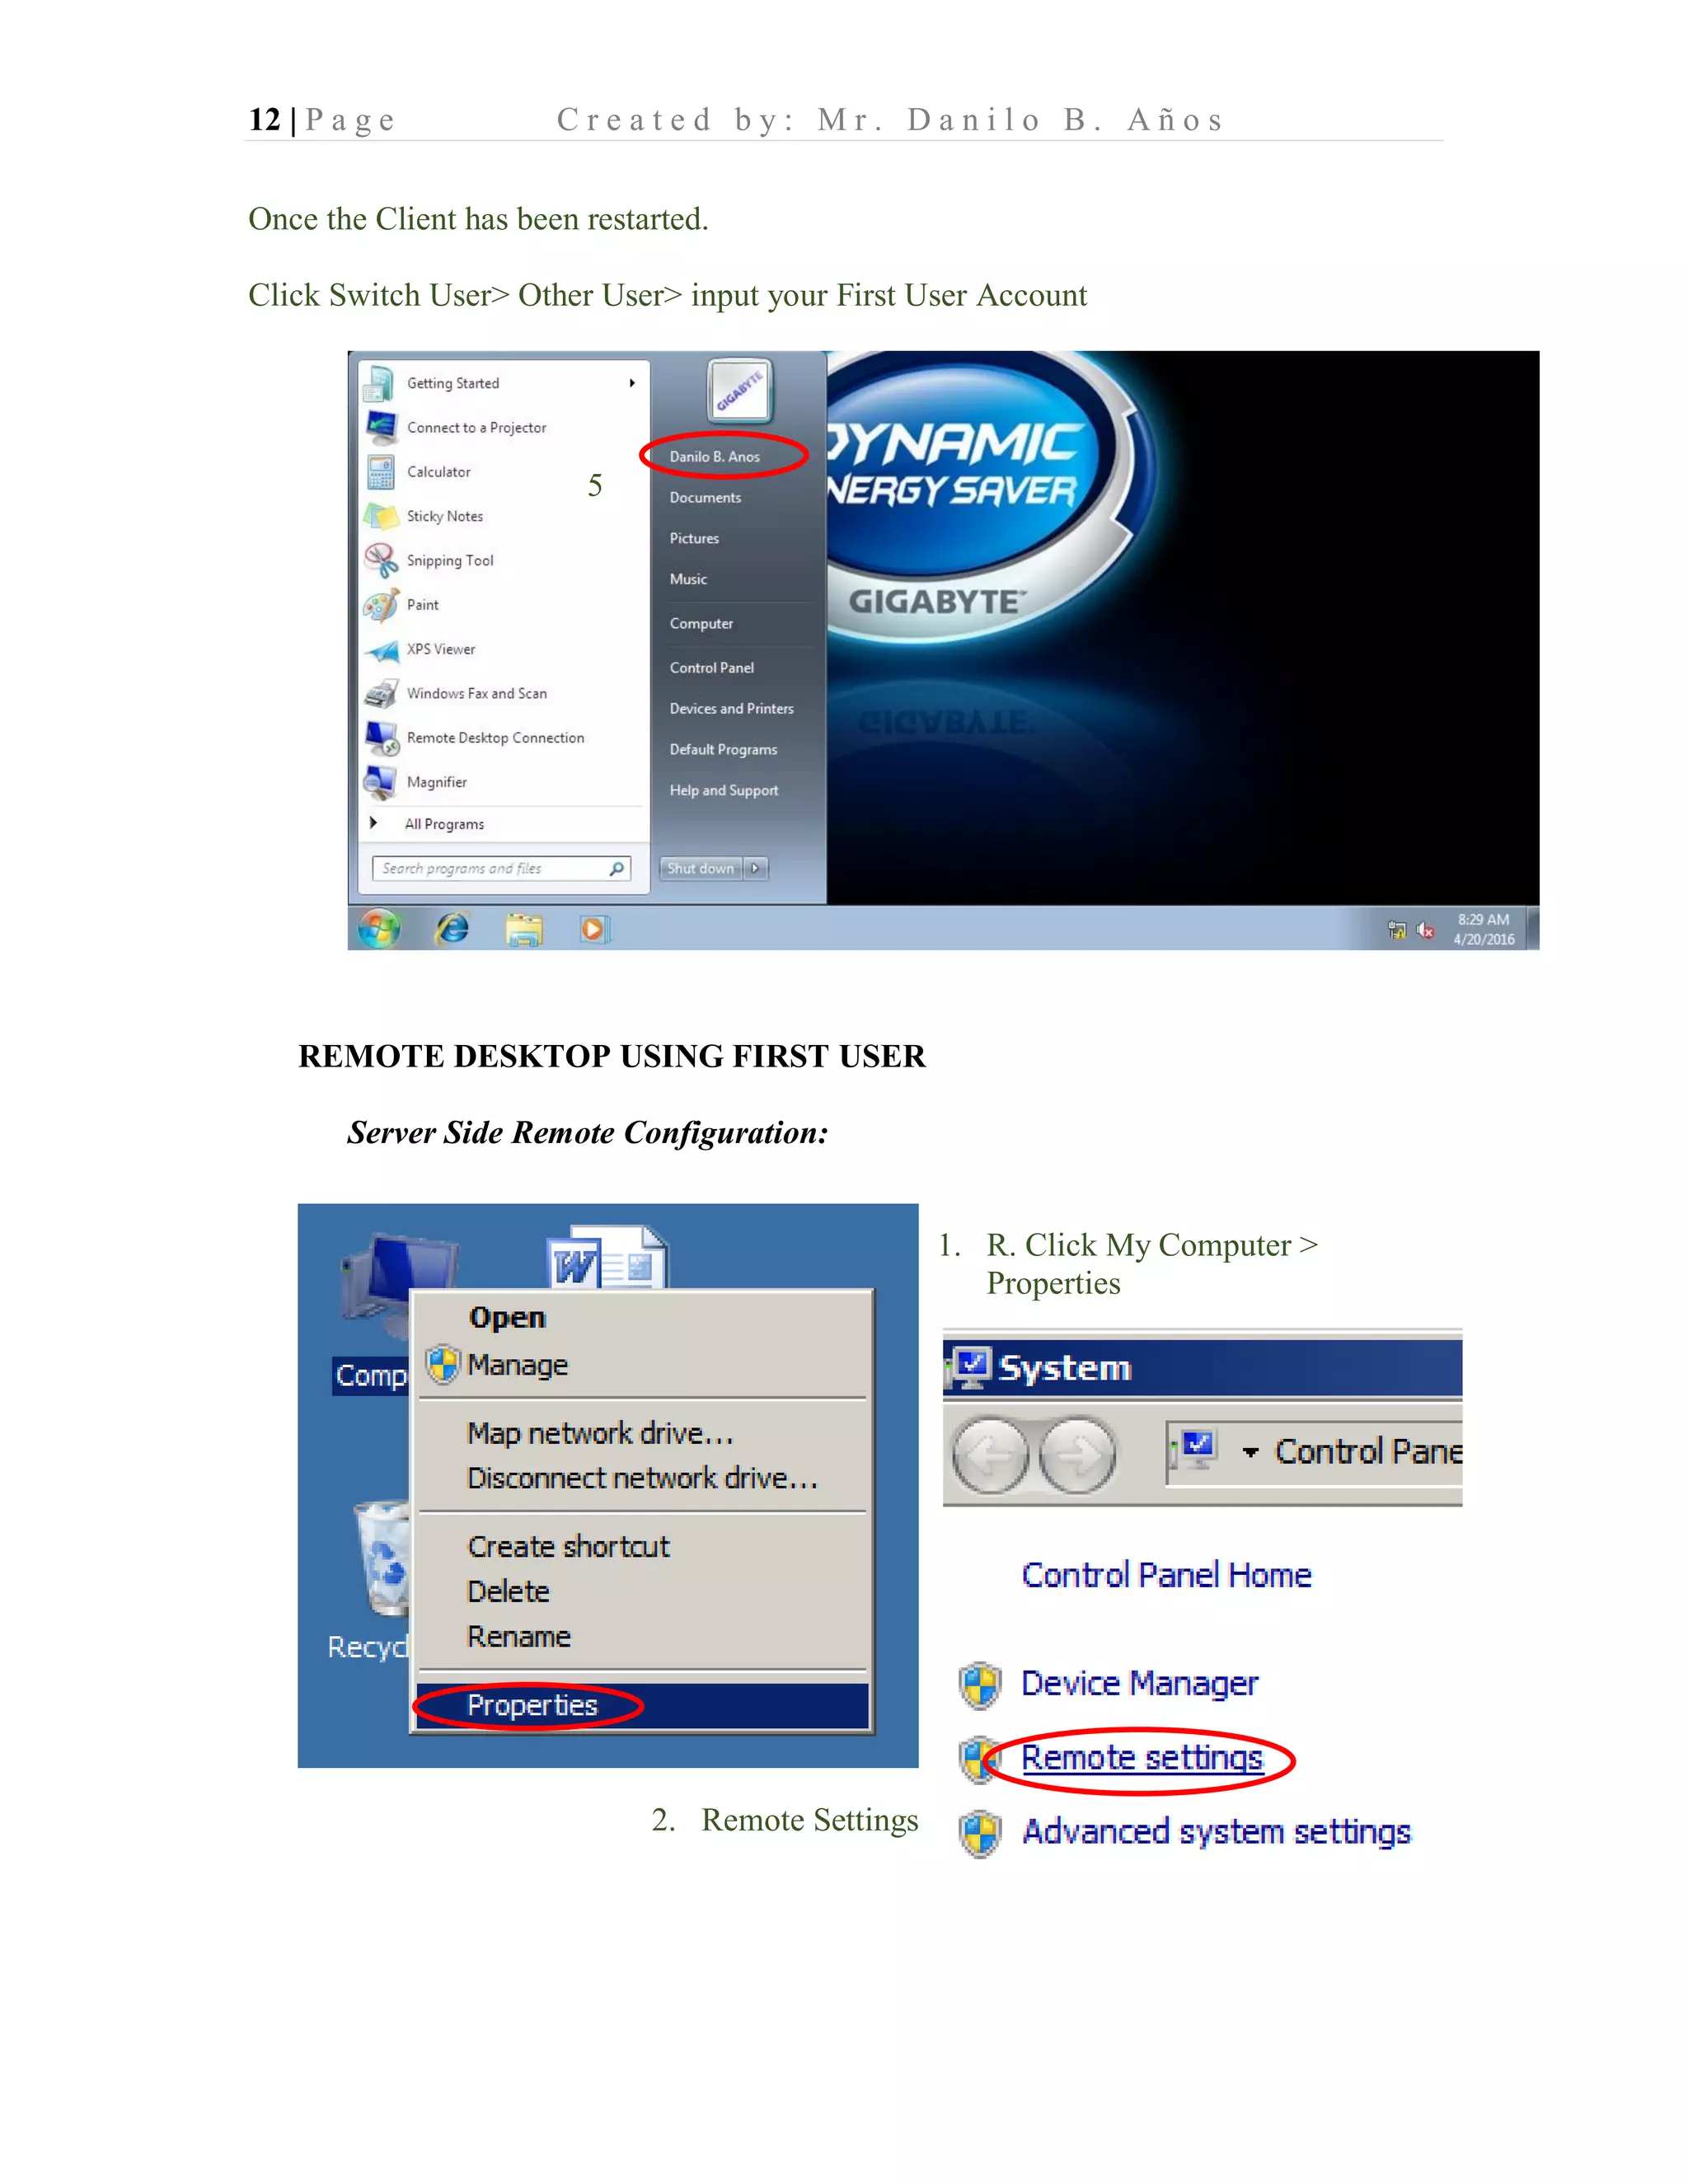
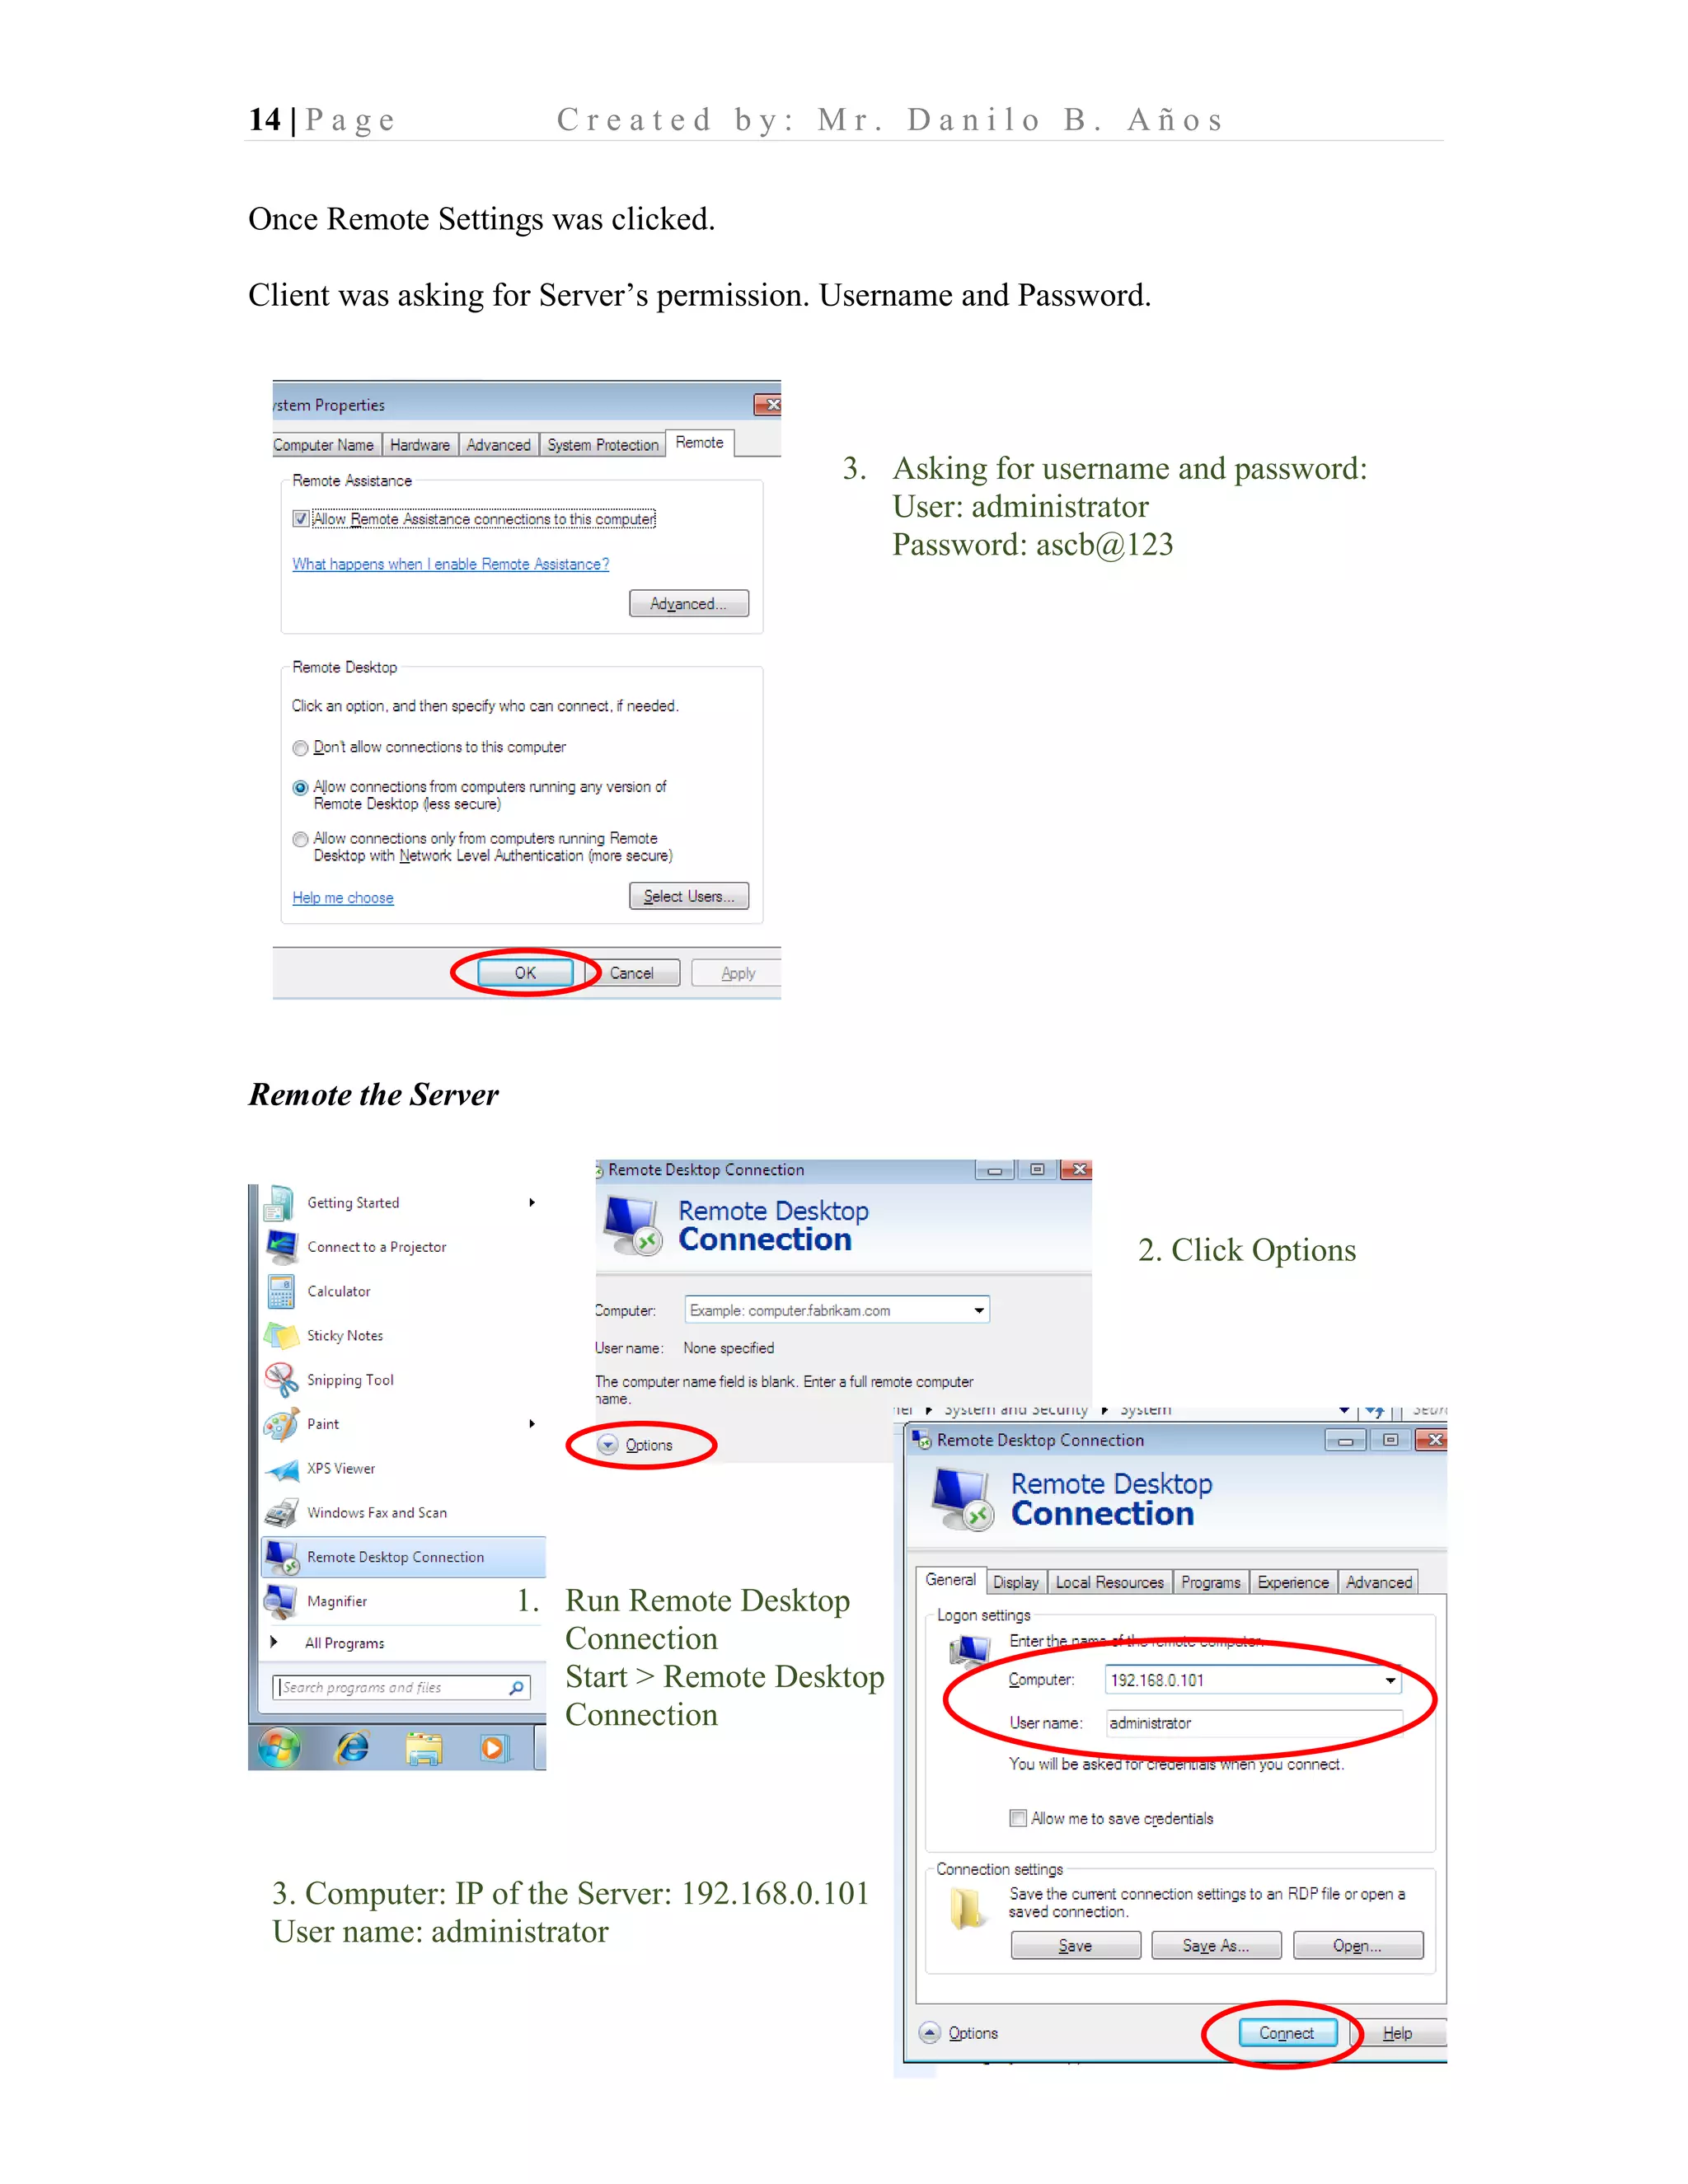
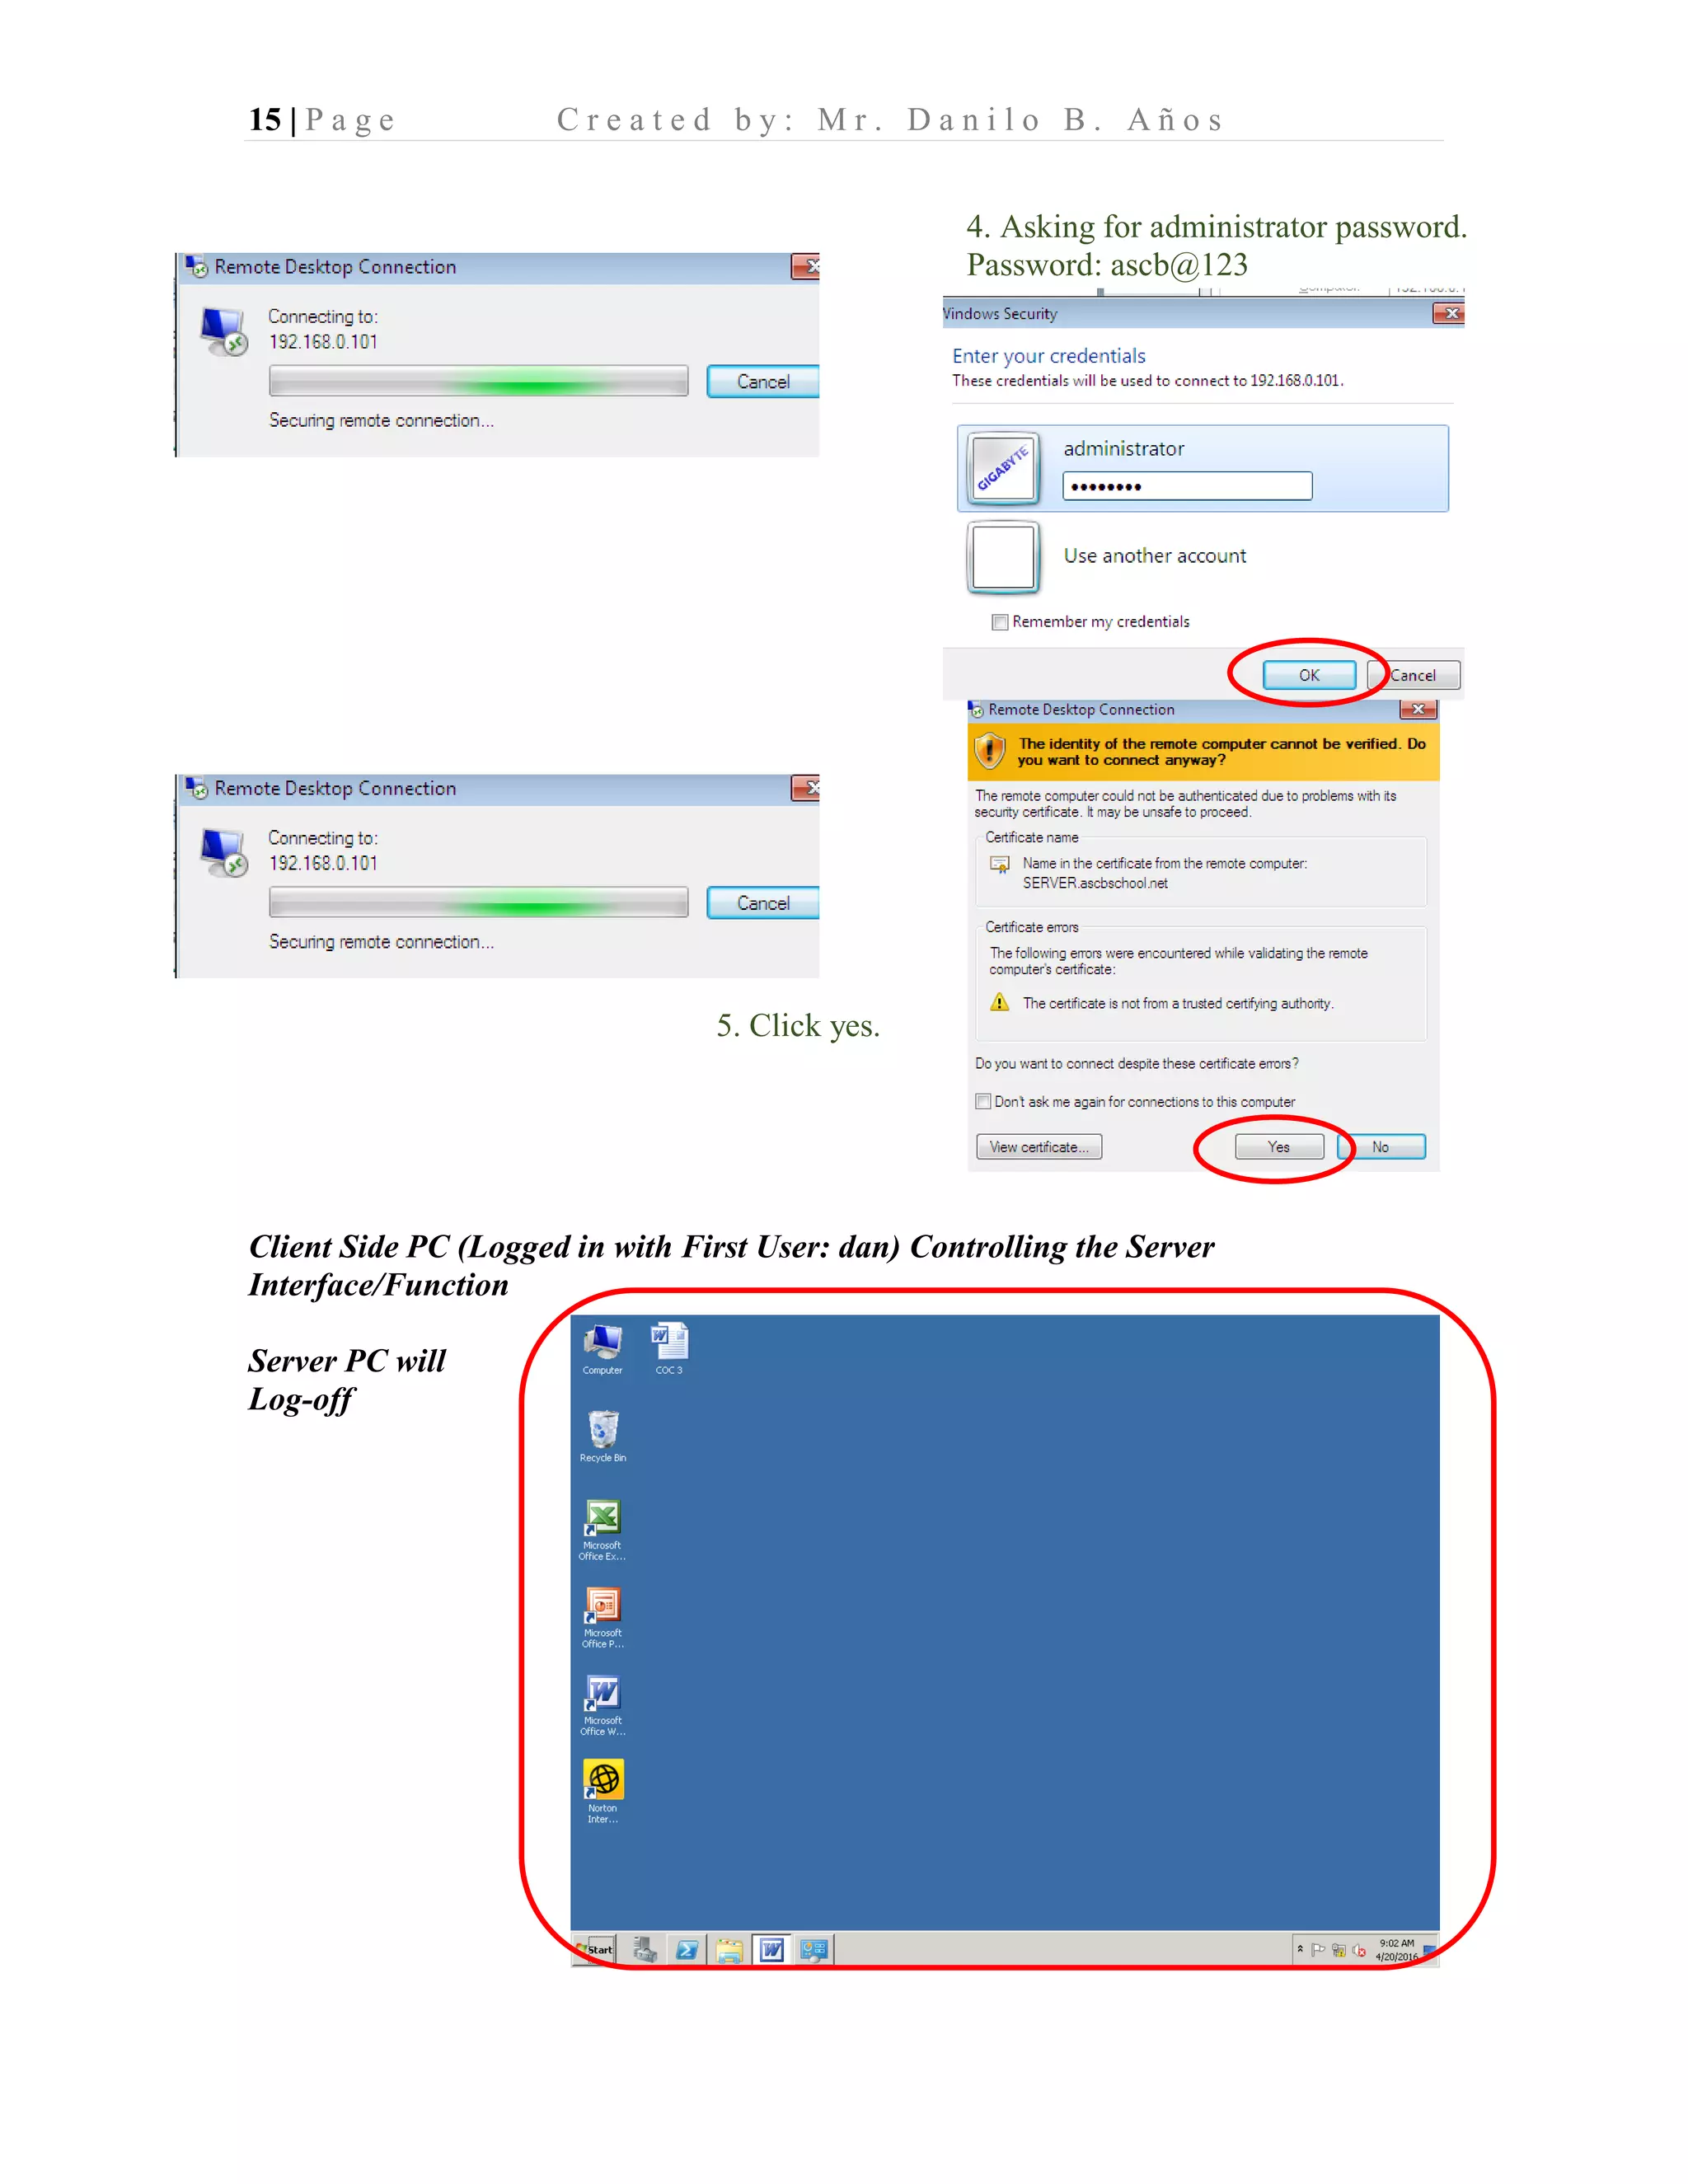
Instructions on how to log in the first user on the client PC, configure Remote Desktop settings, and establish a remote connection.
Steps to create a second user account remotely and the process of logging in to the netbook using Remote Desktop.
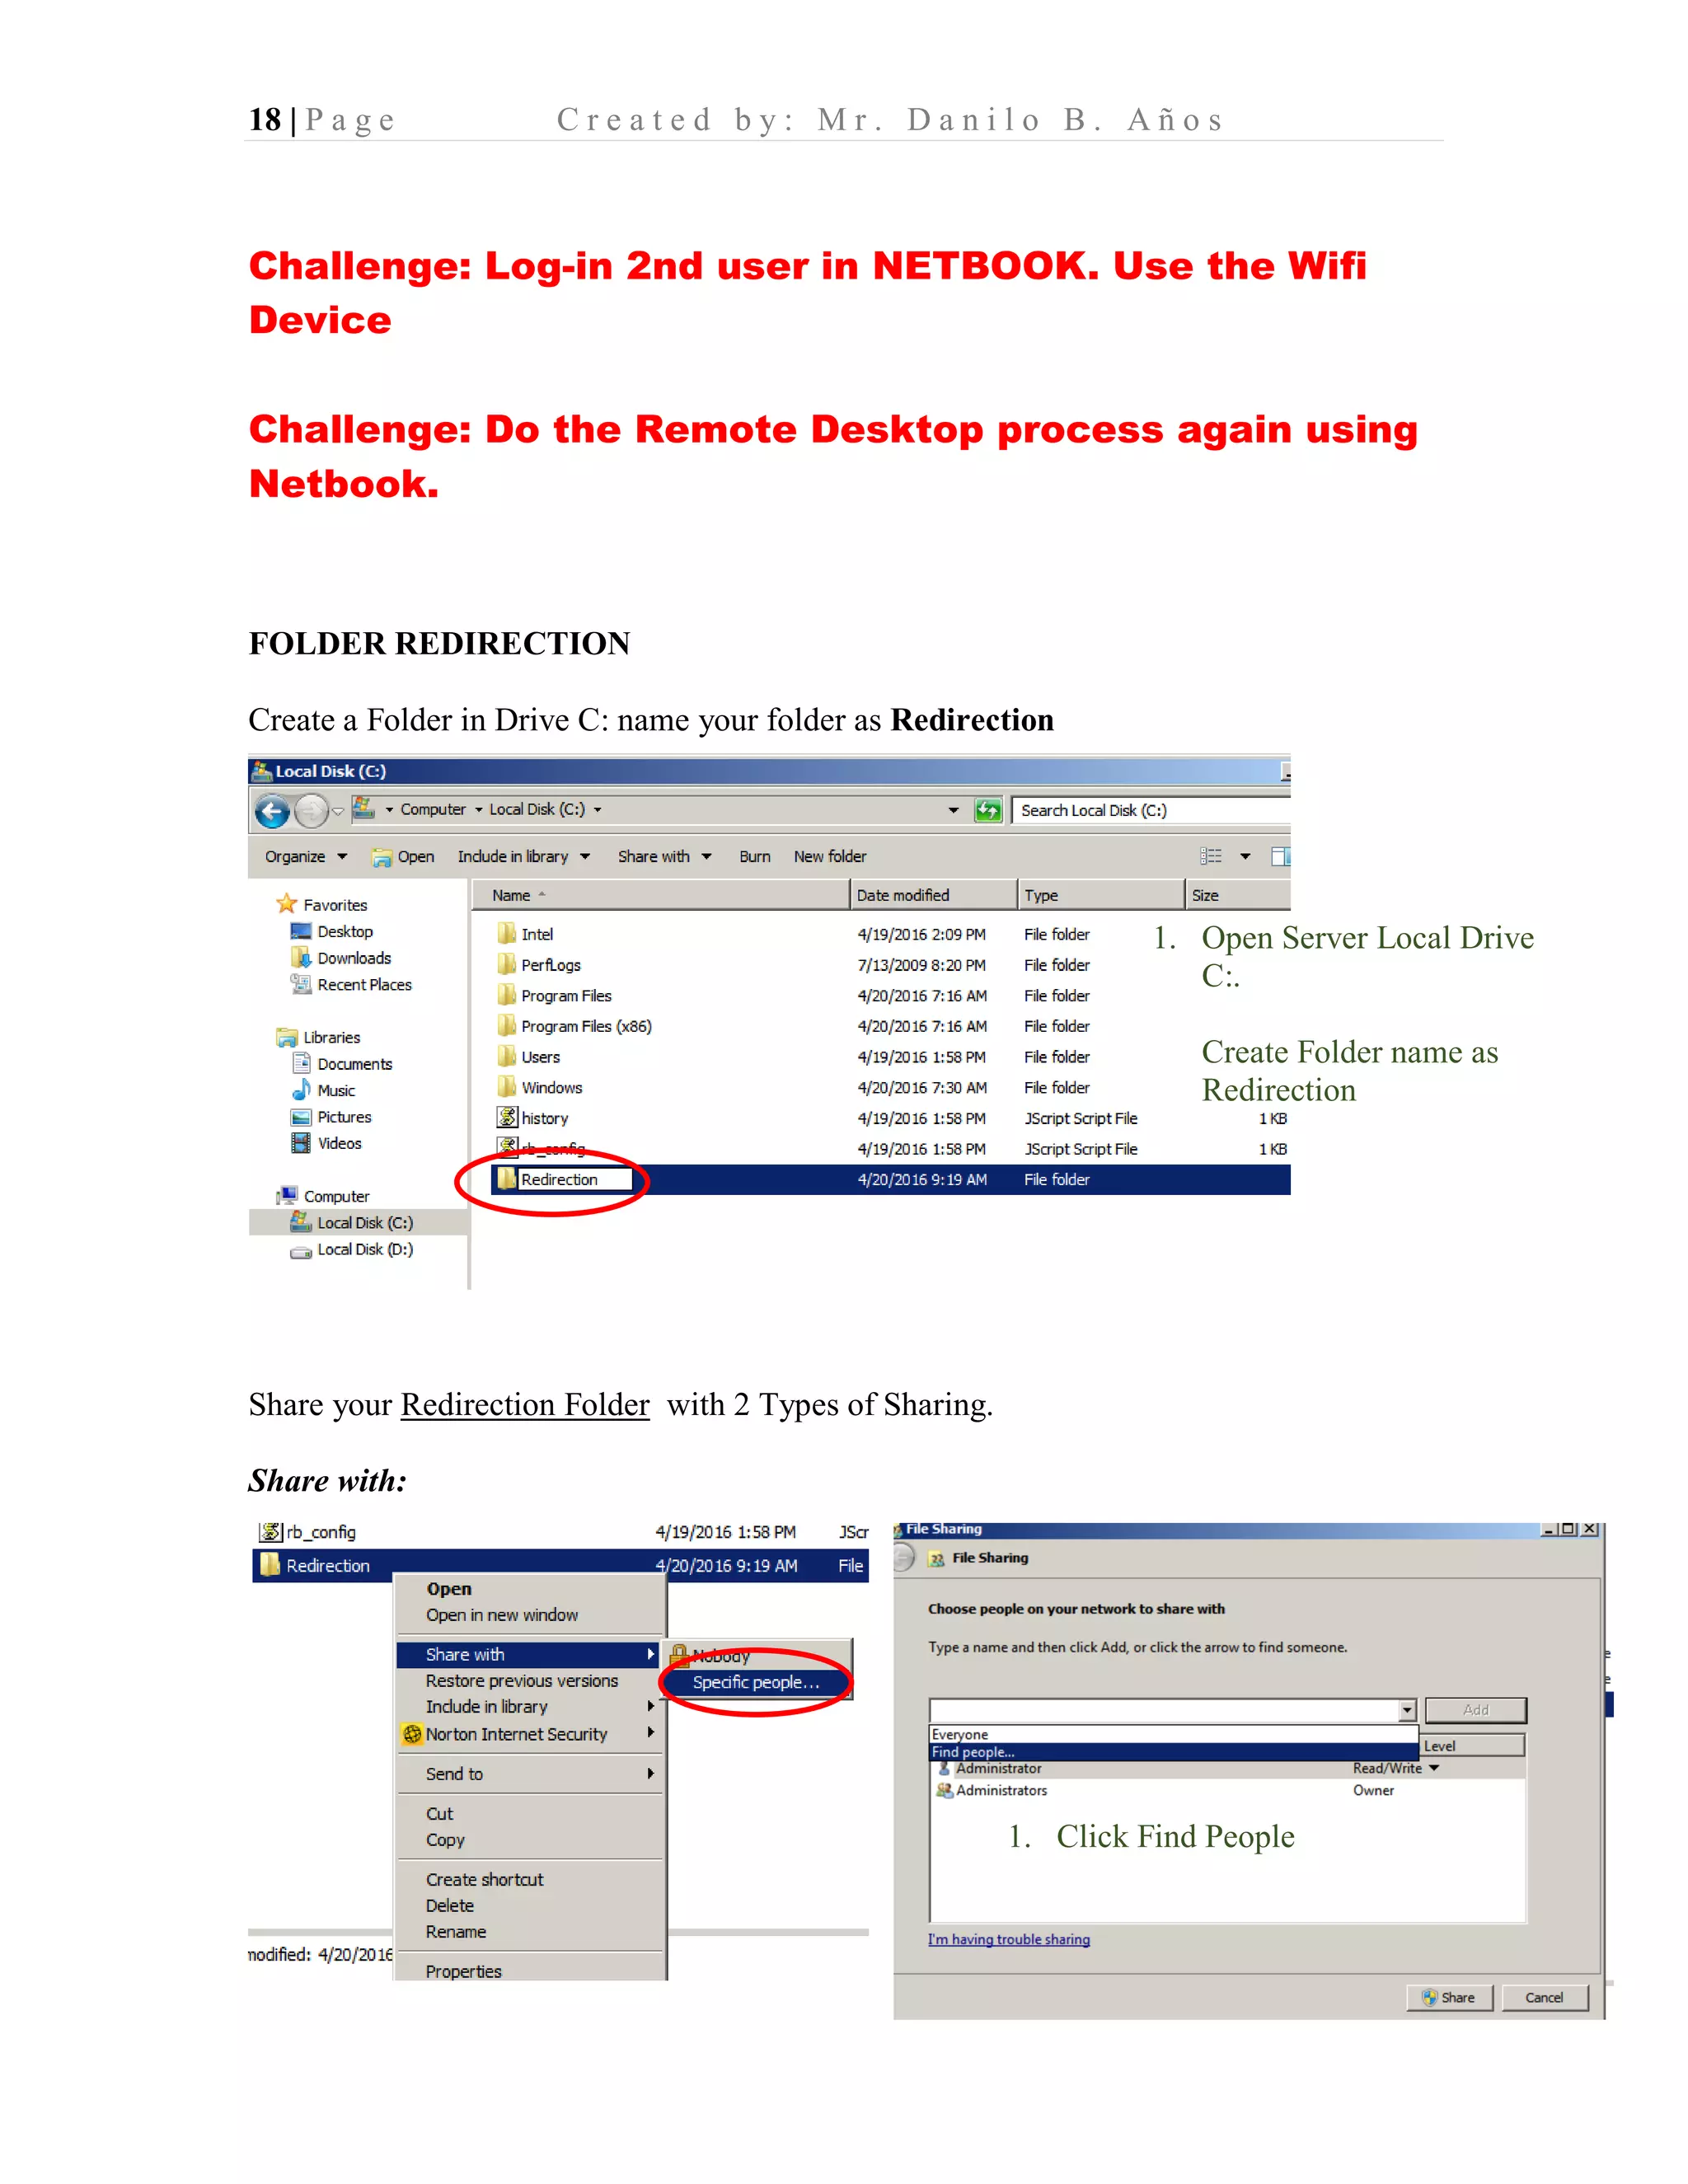
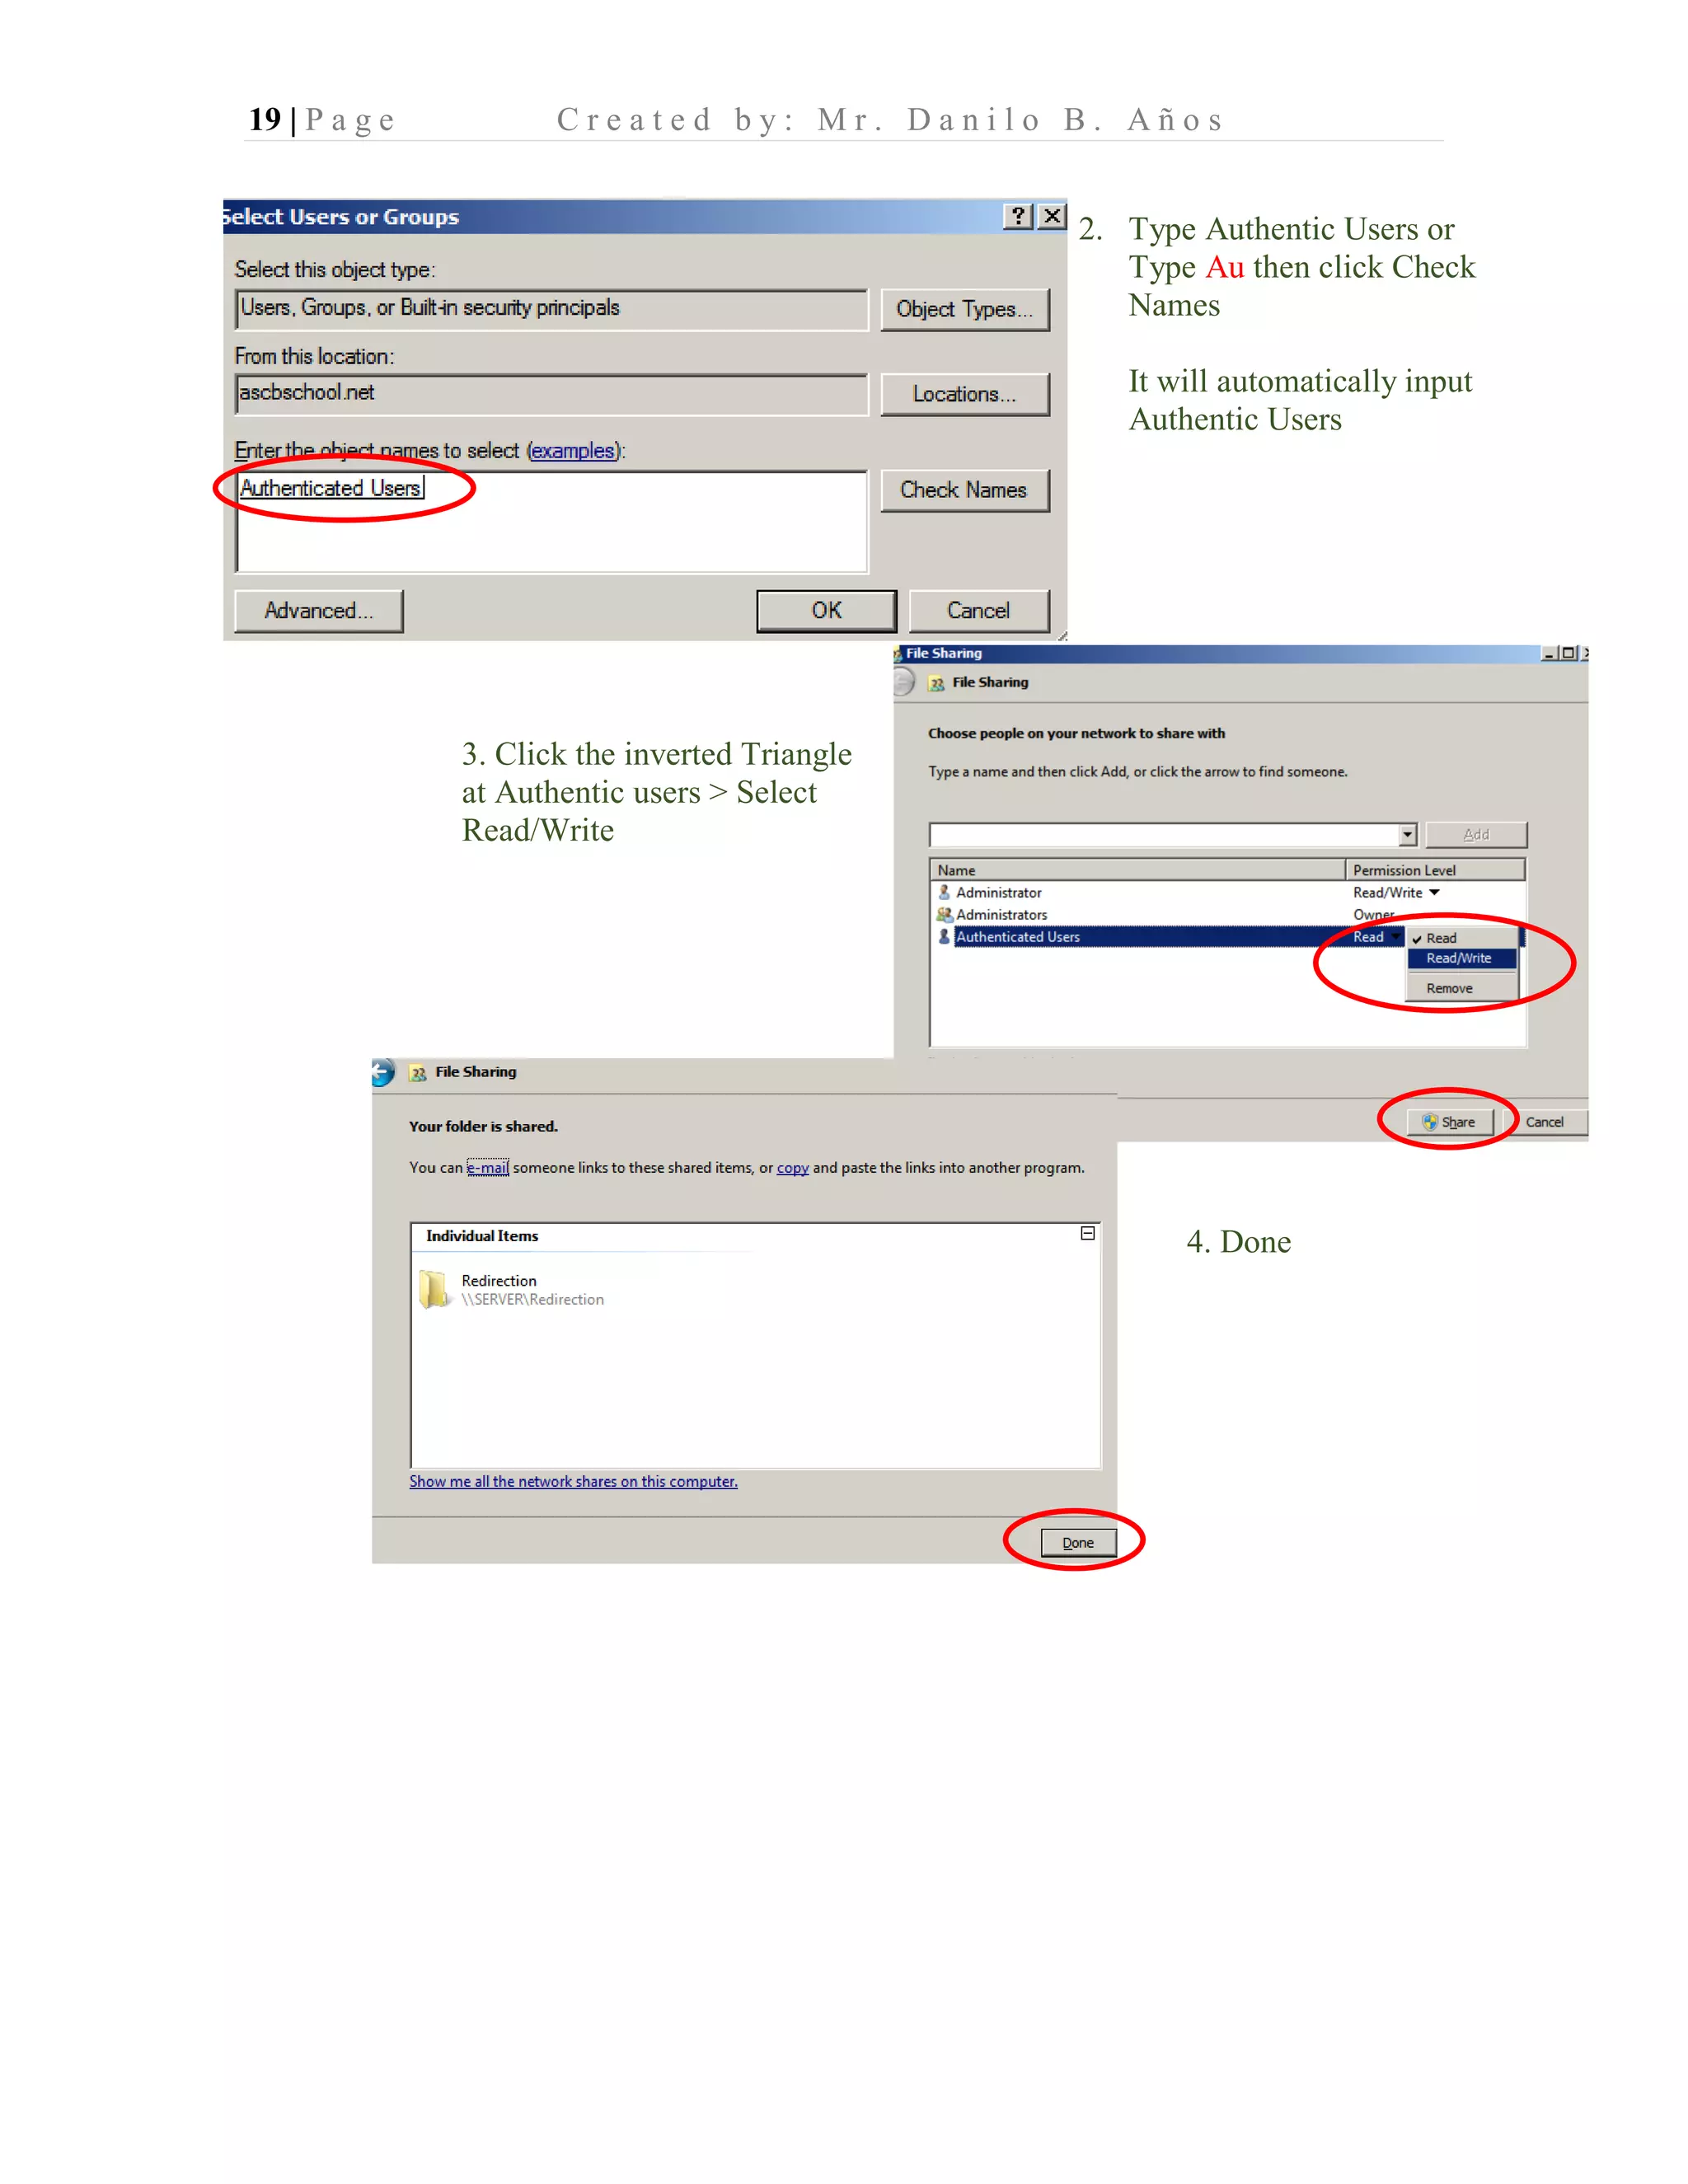
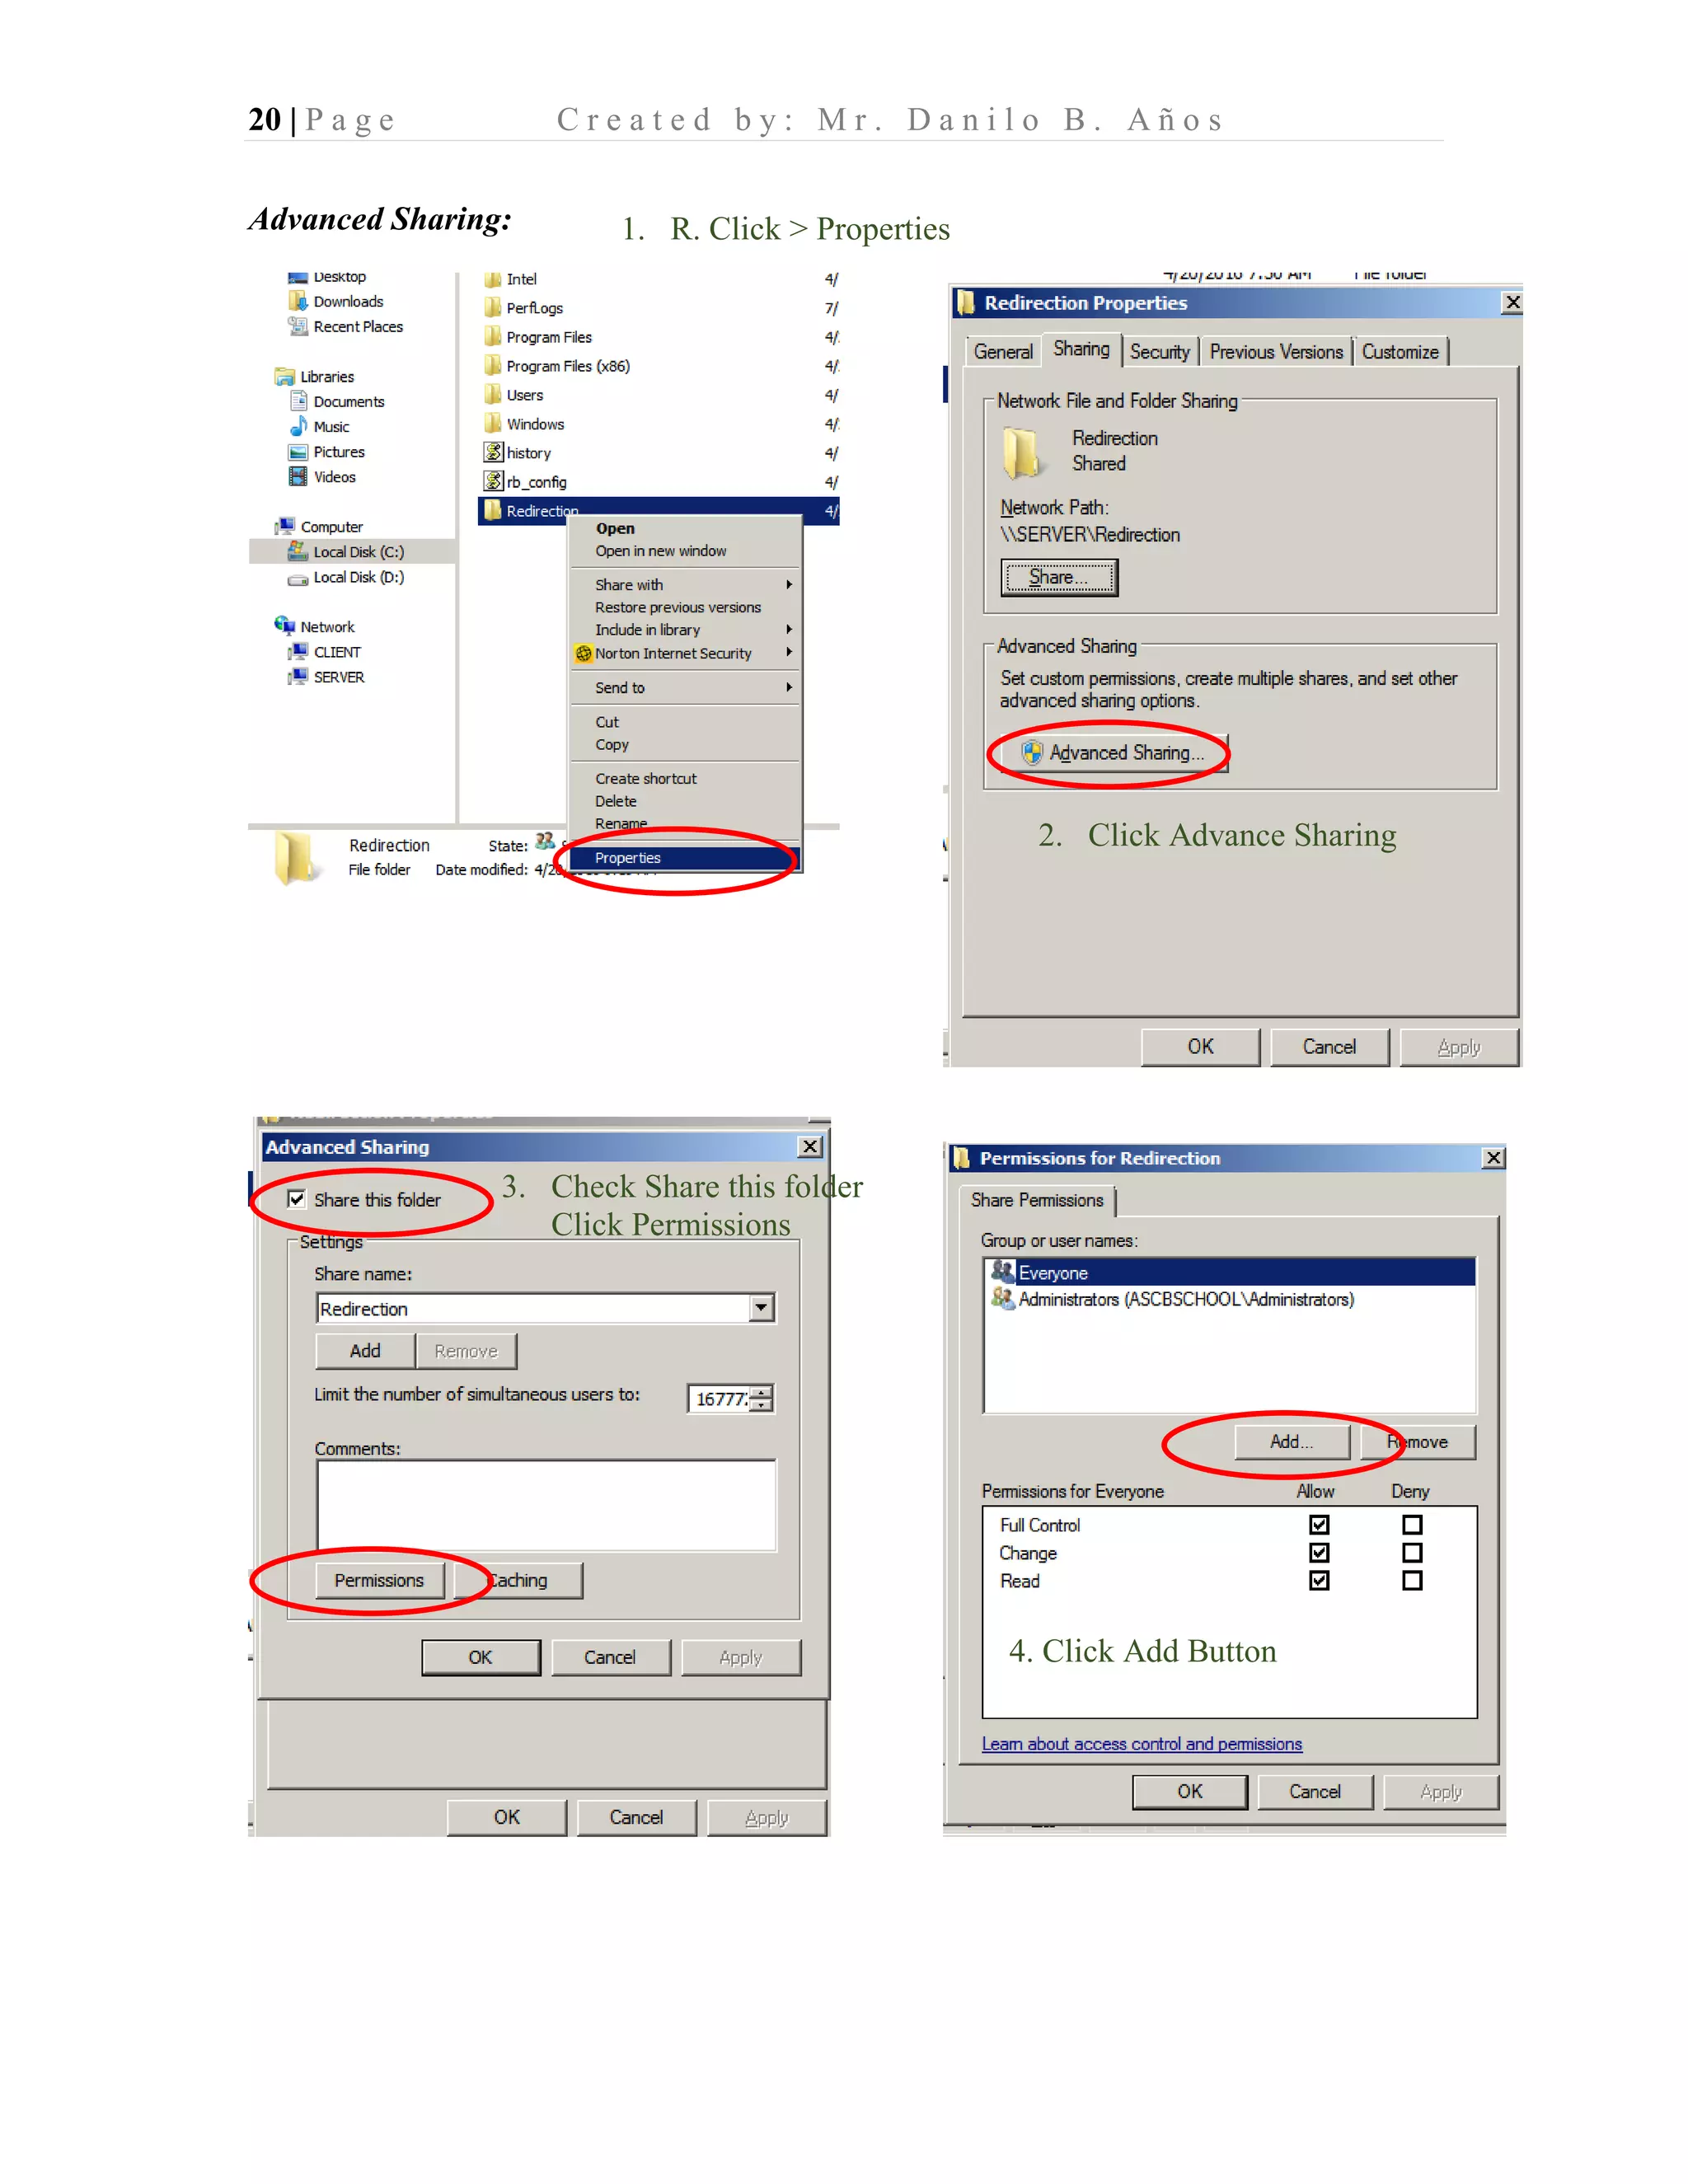
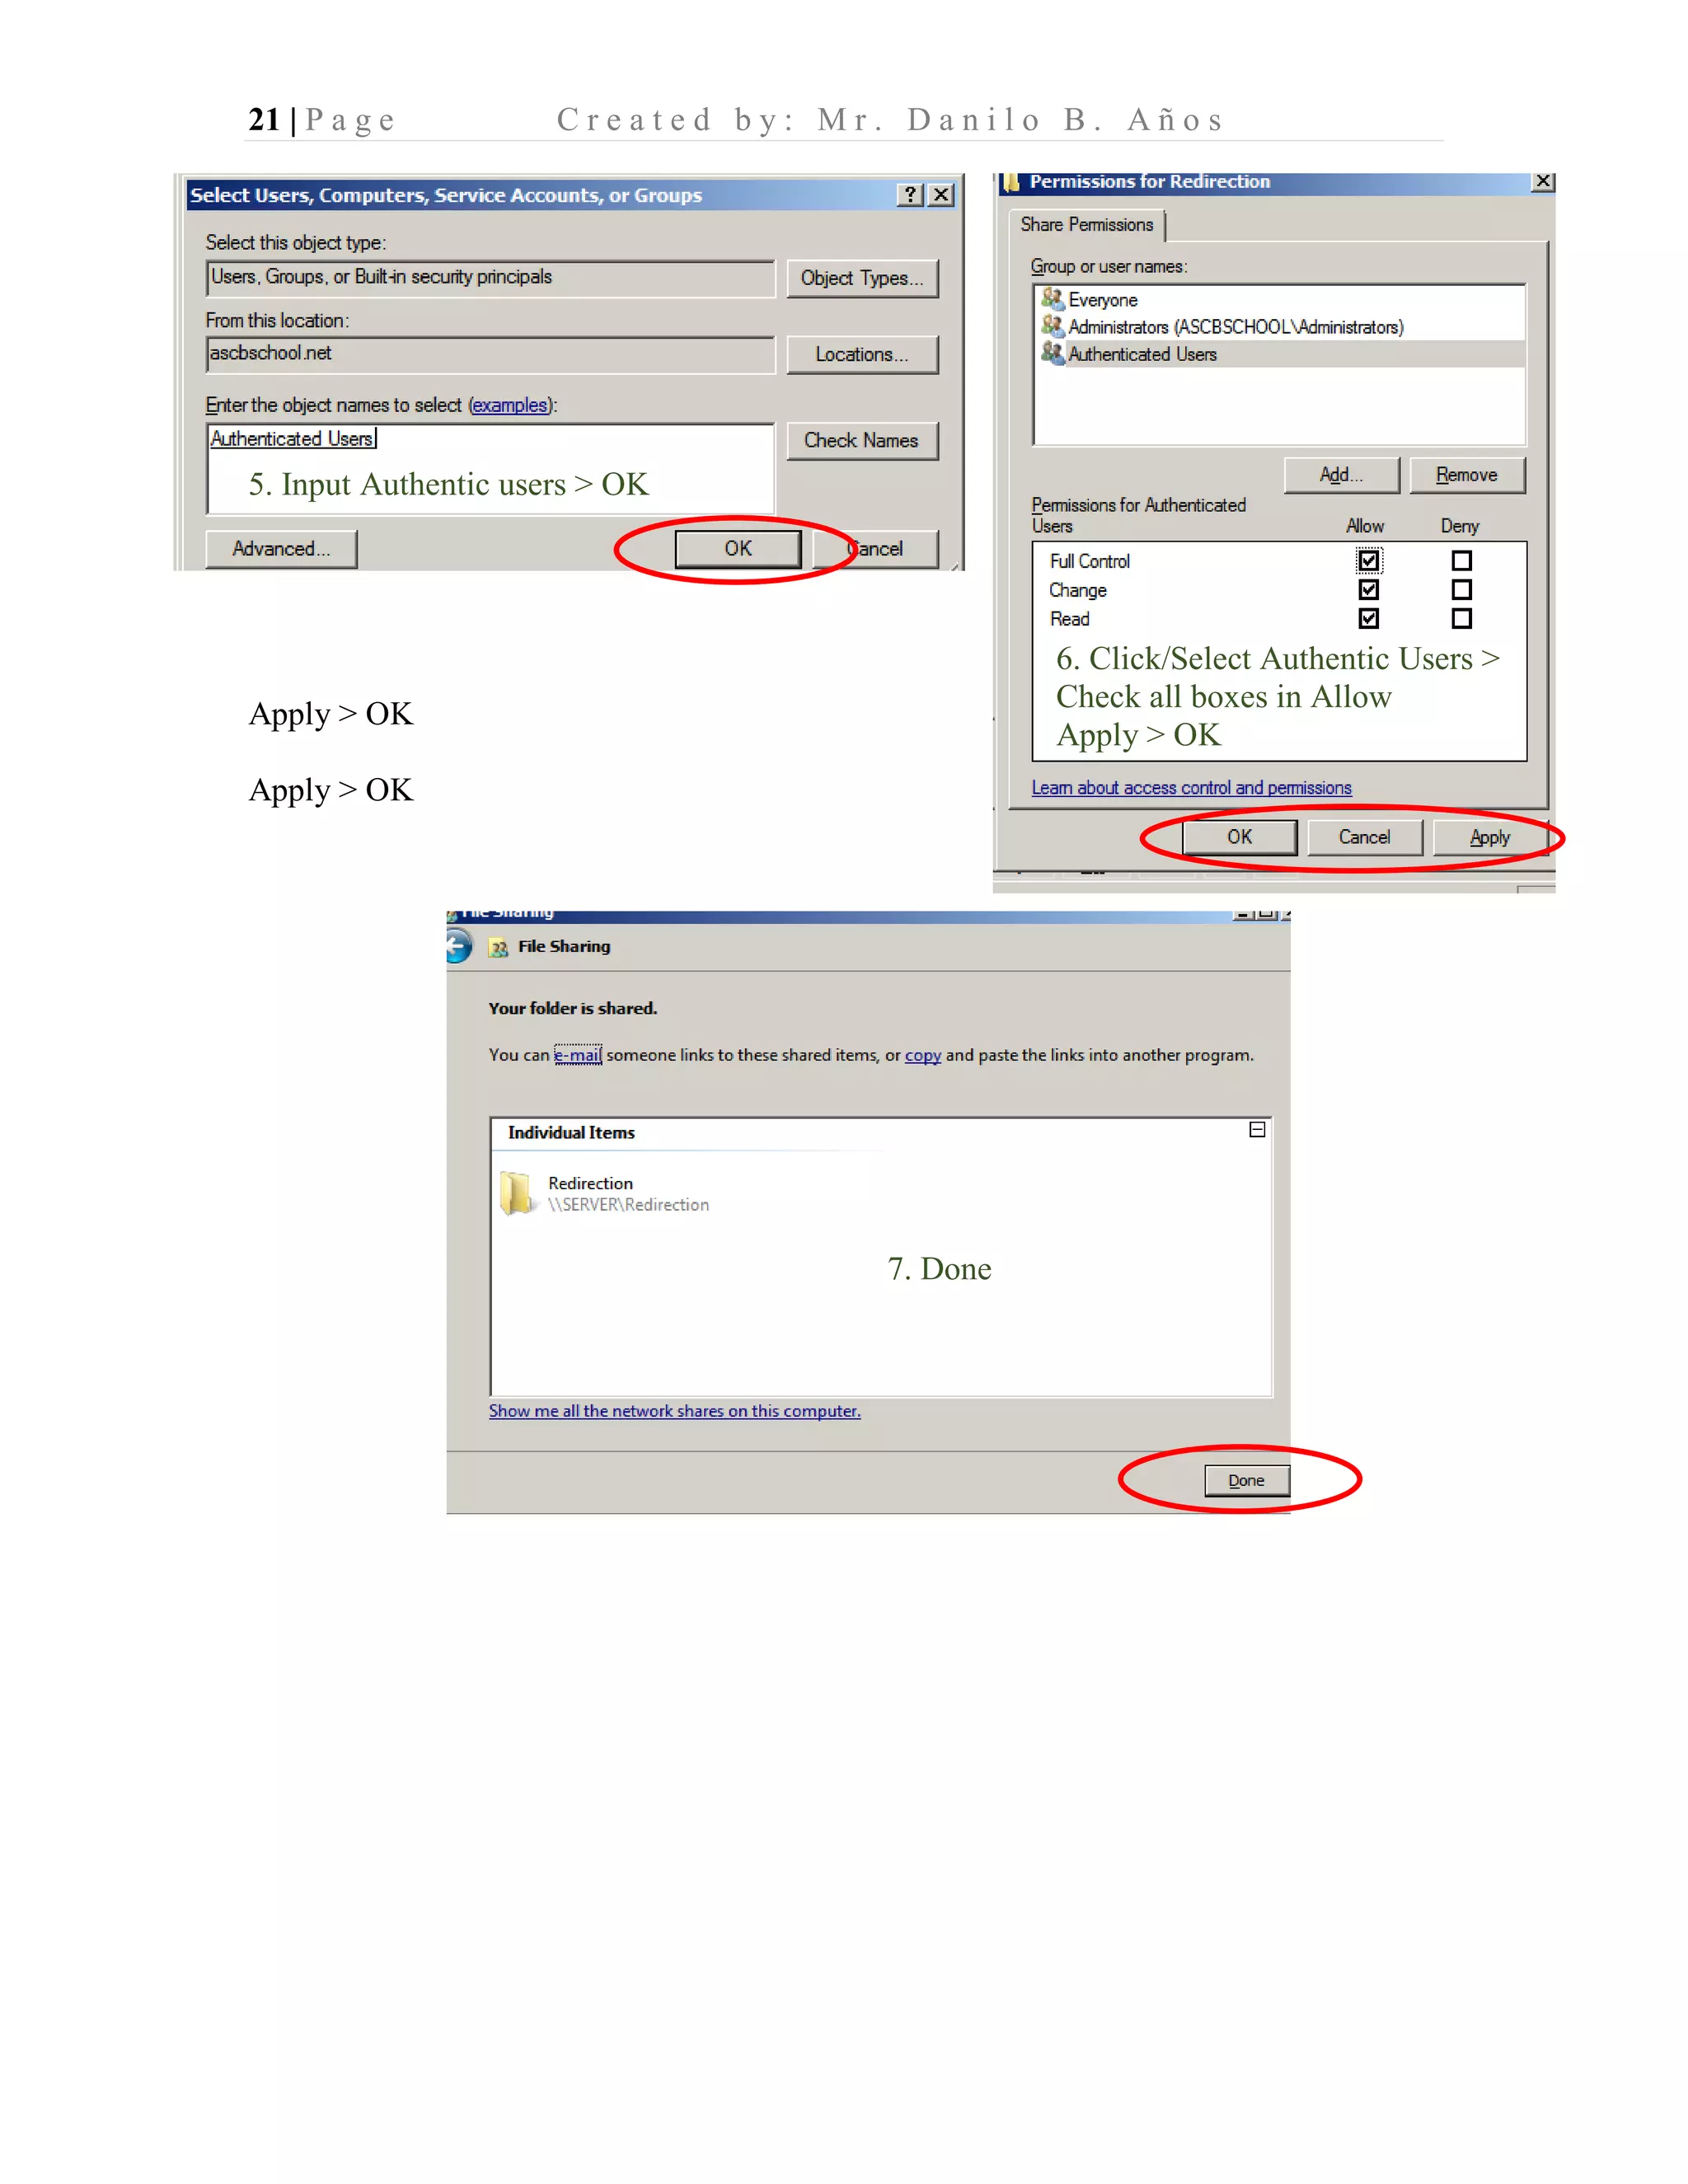
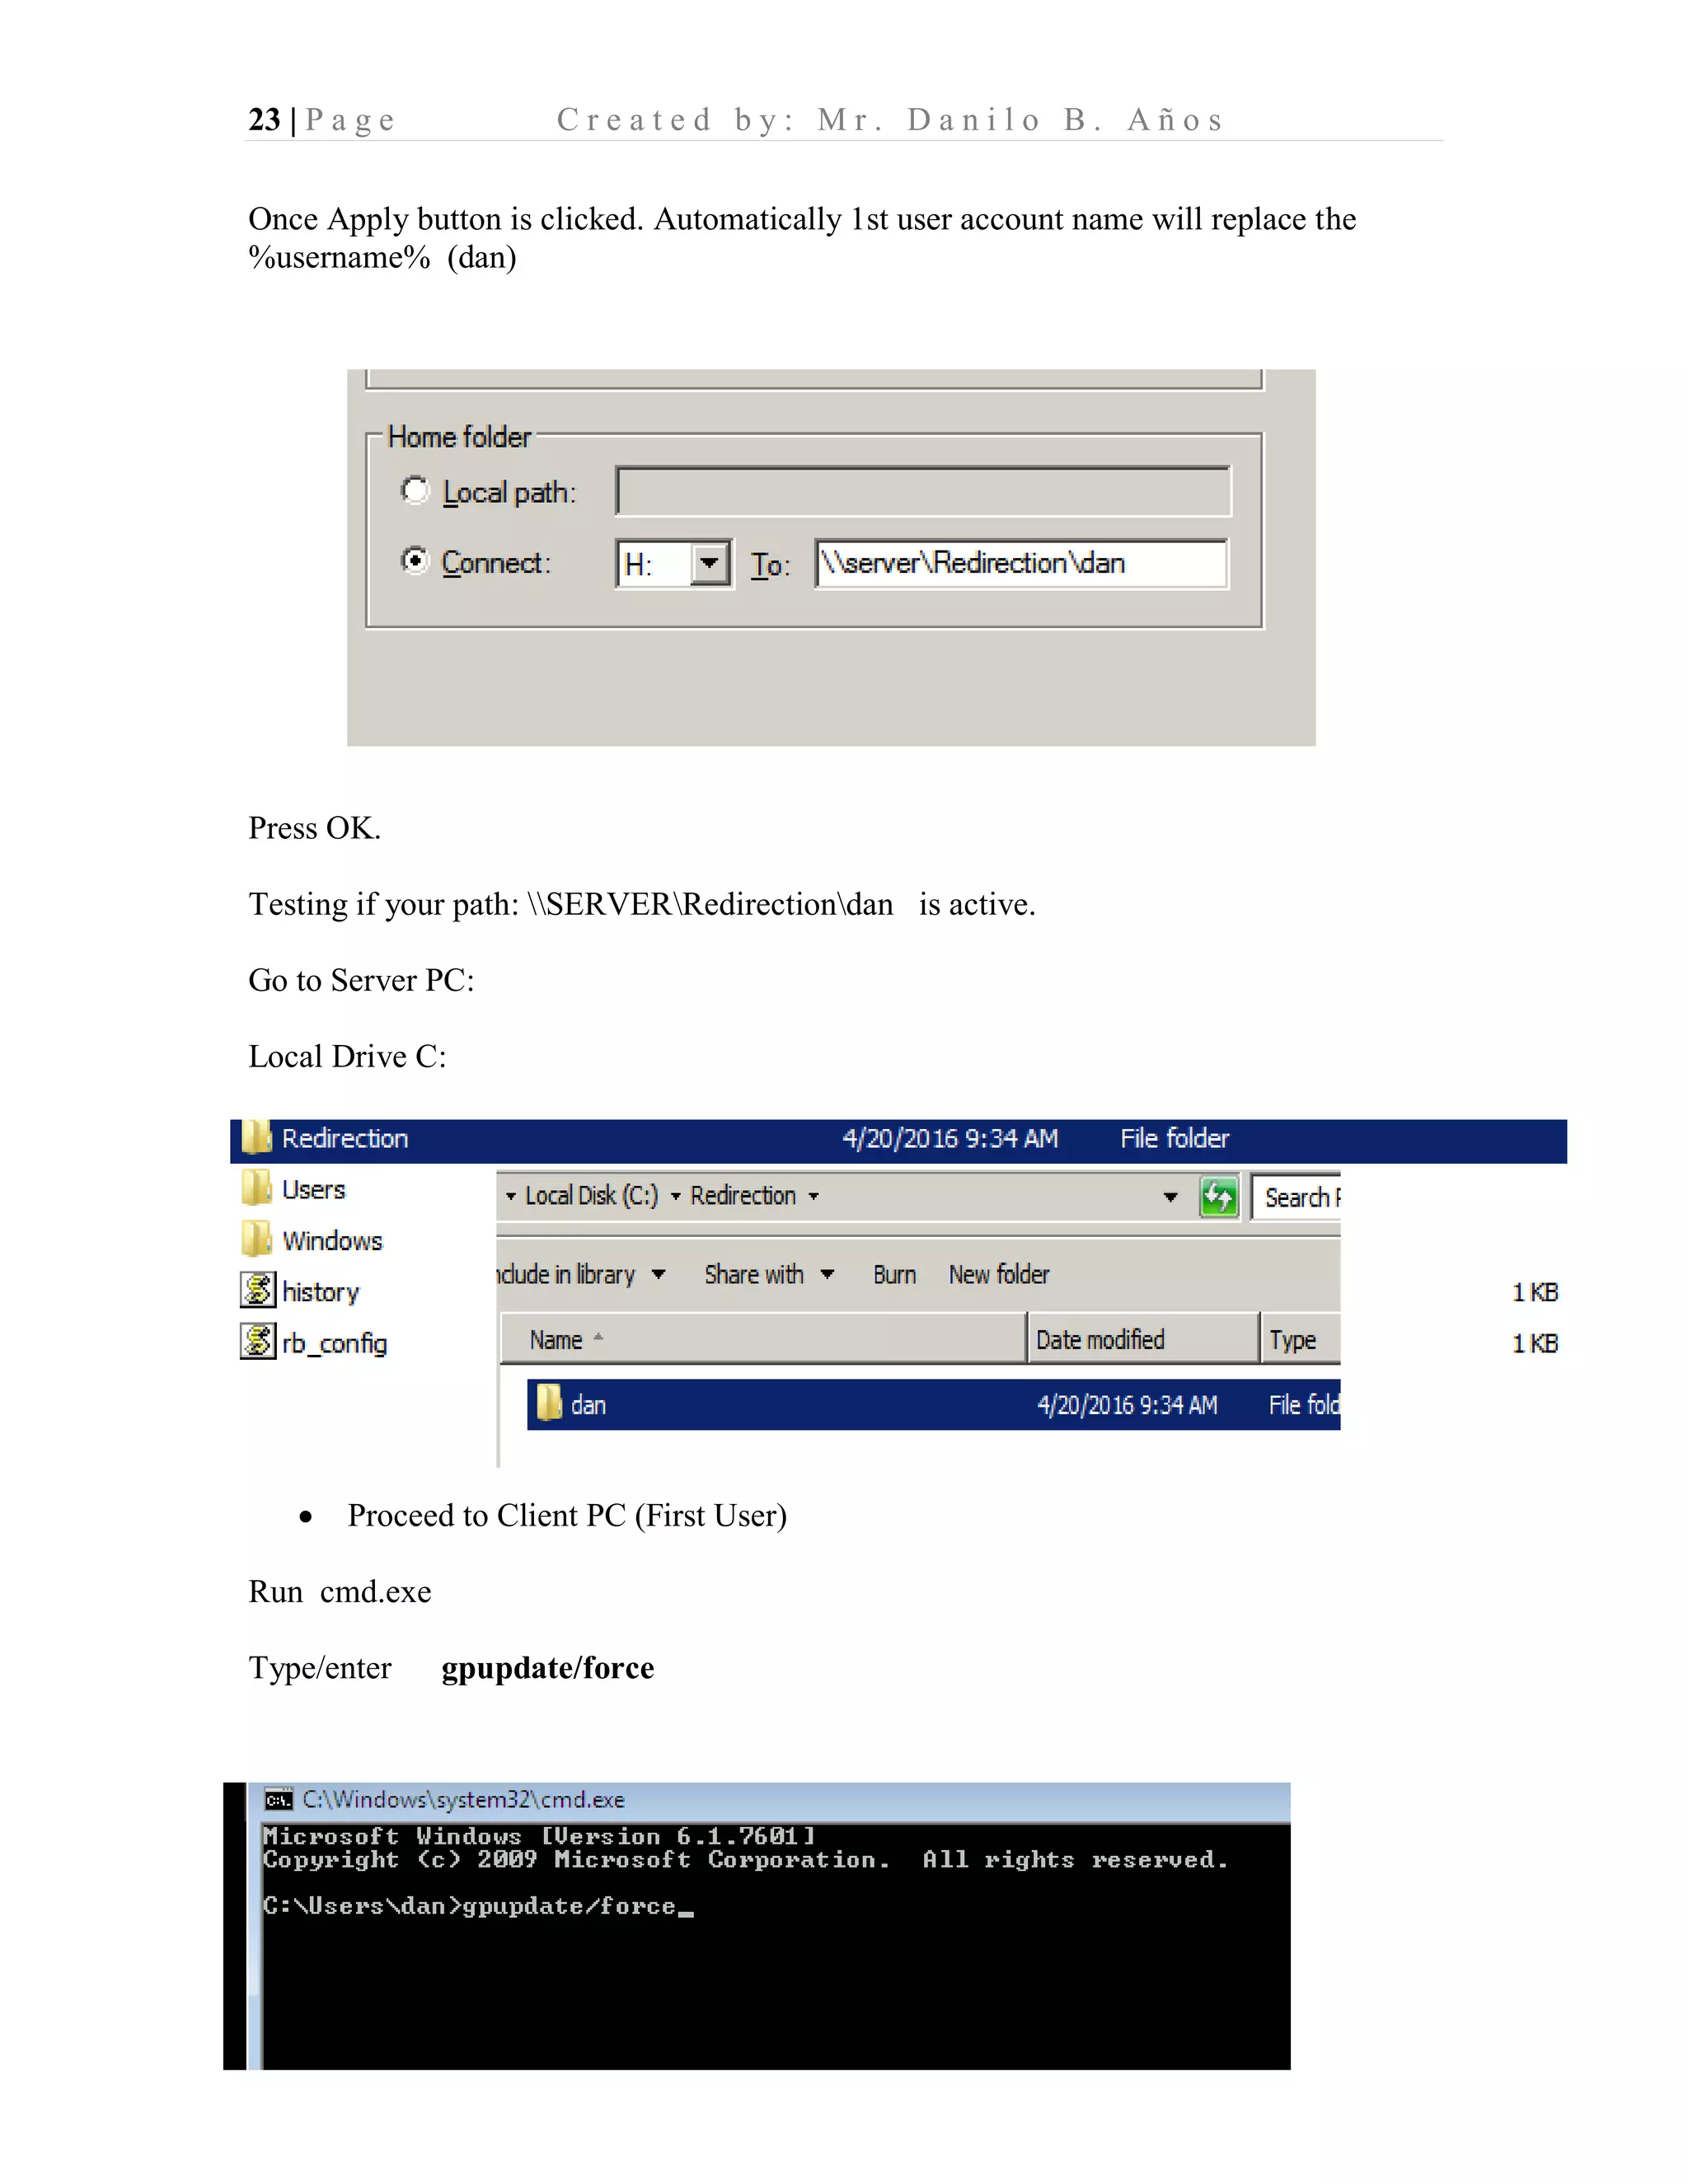
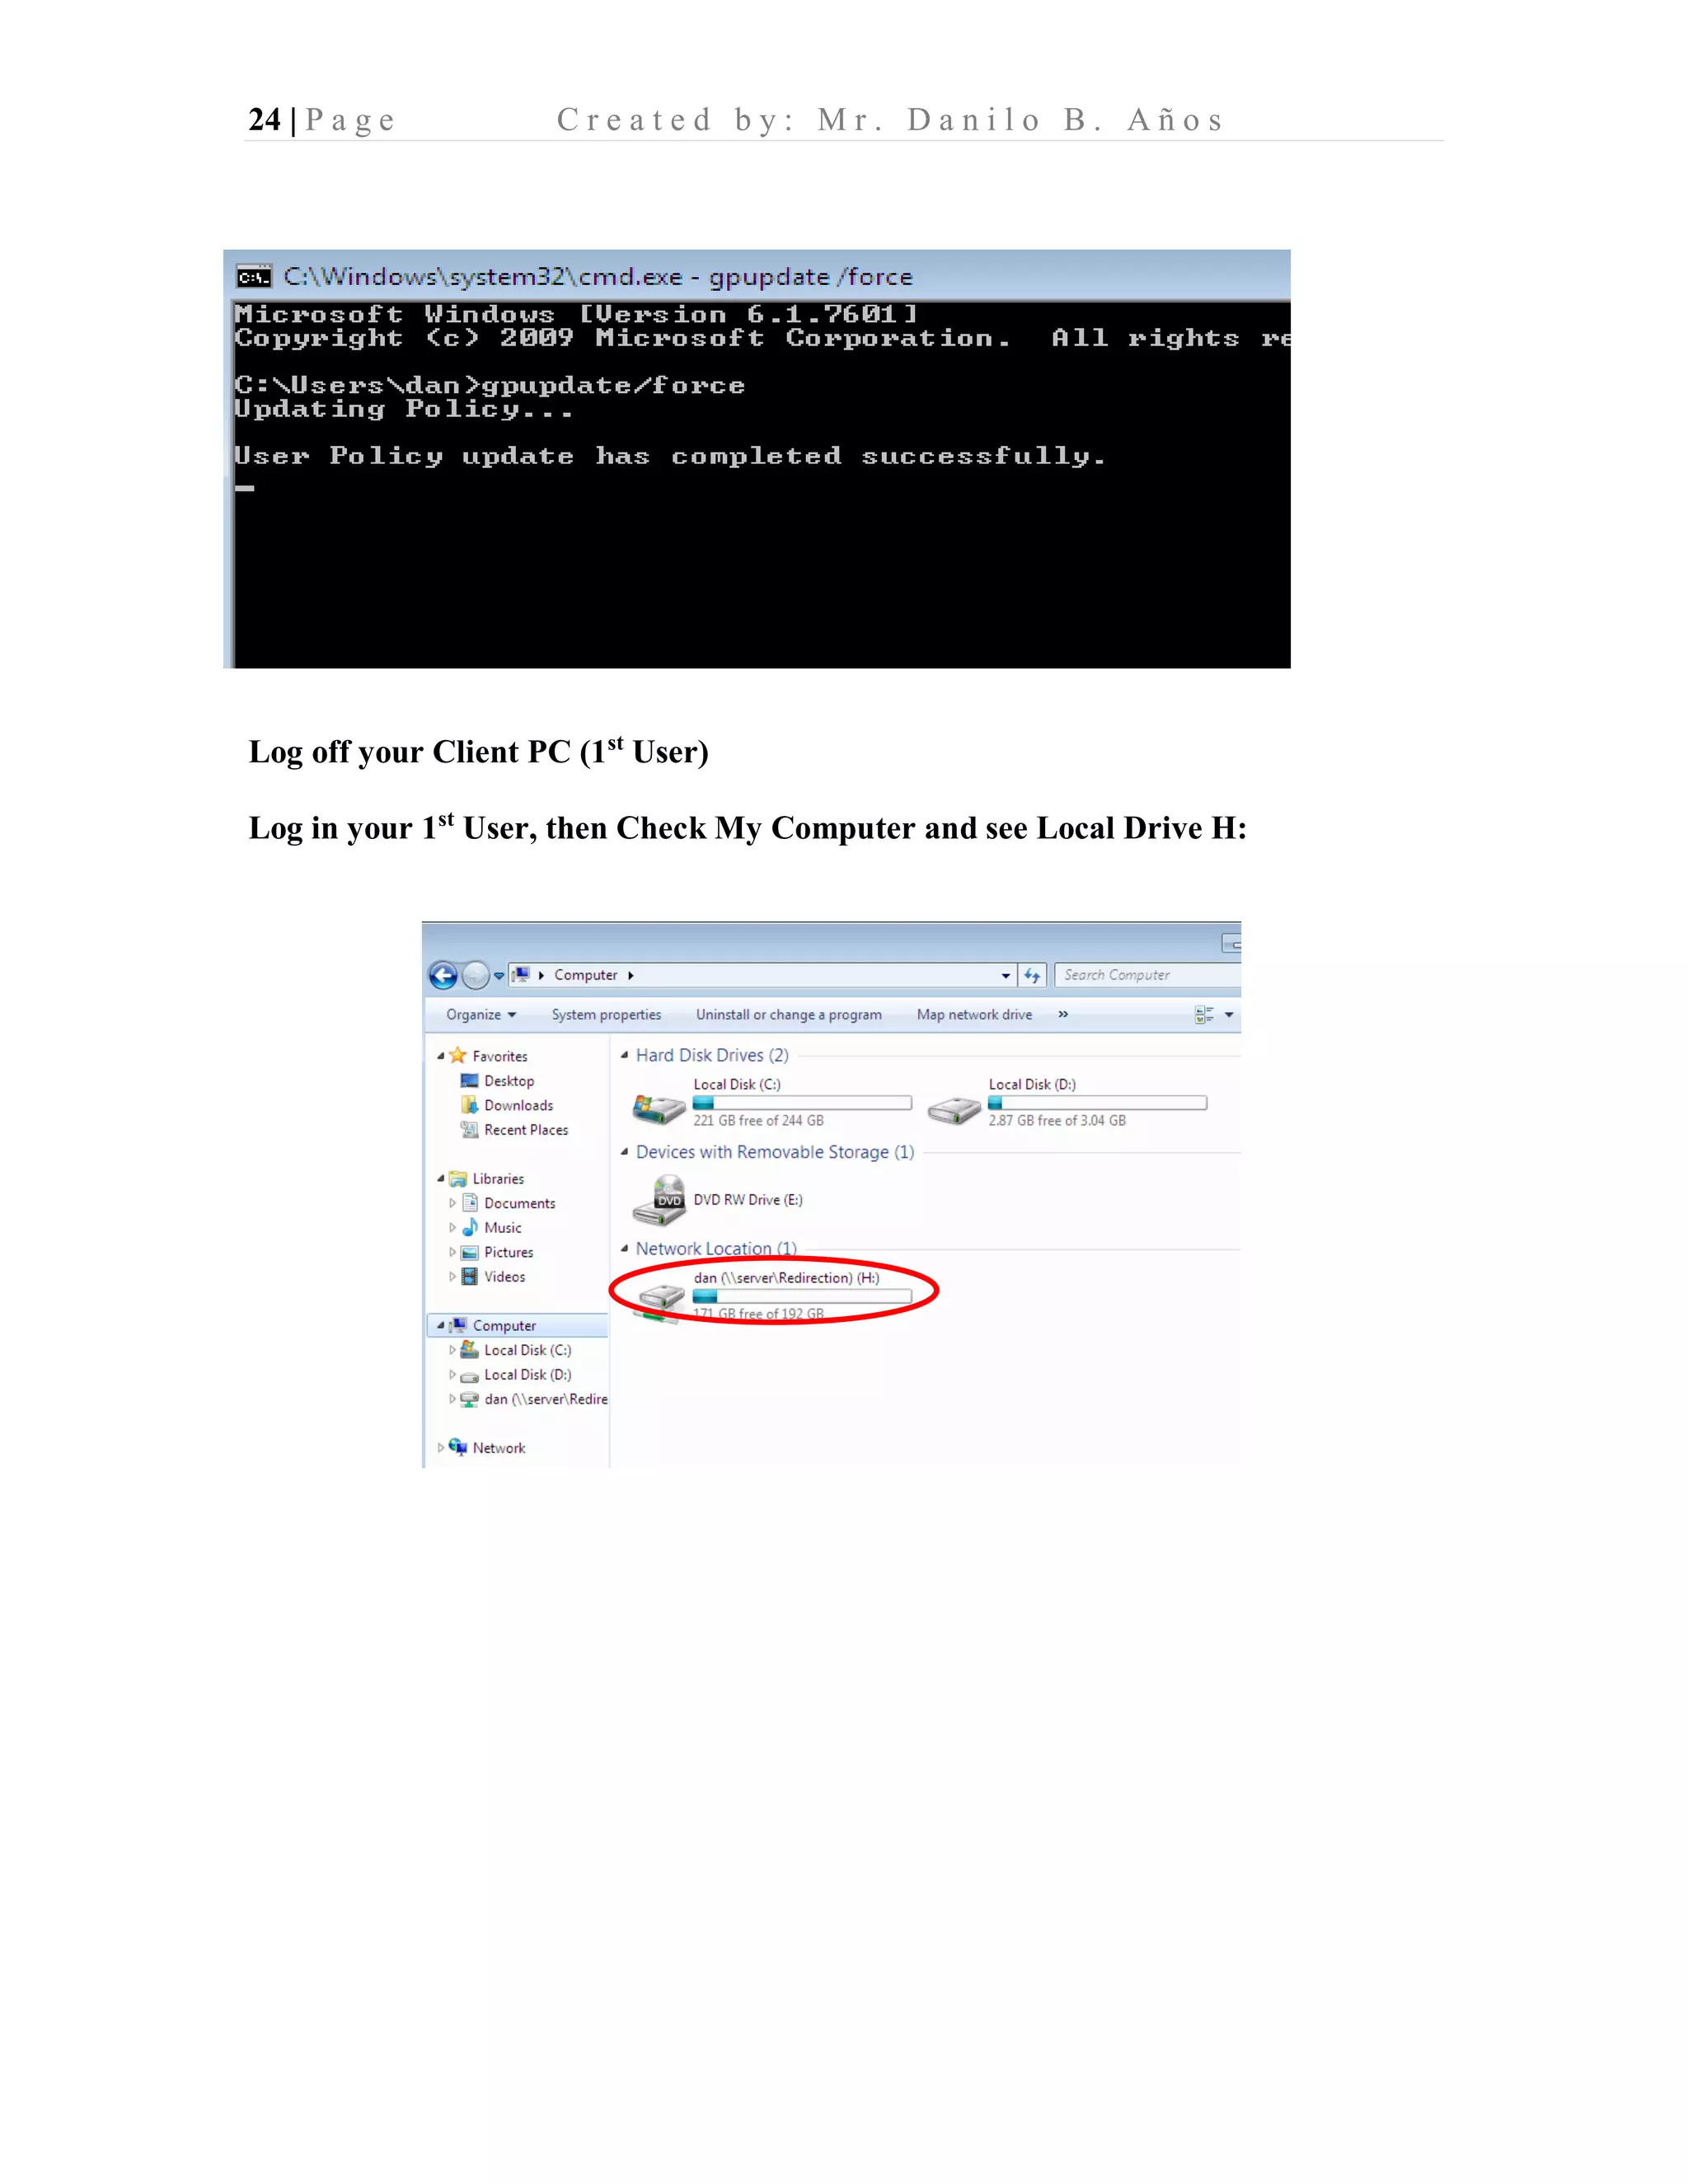
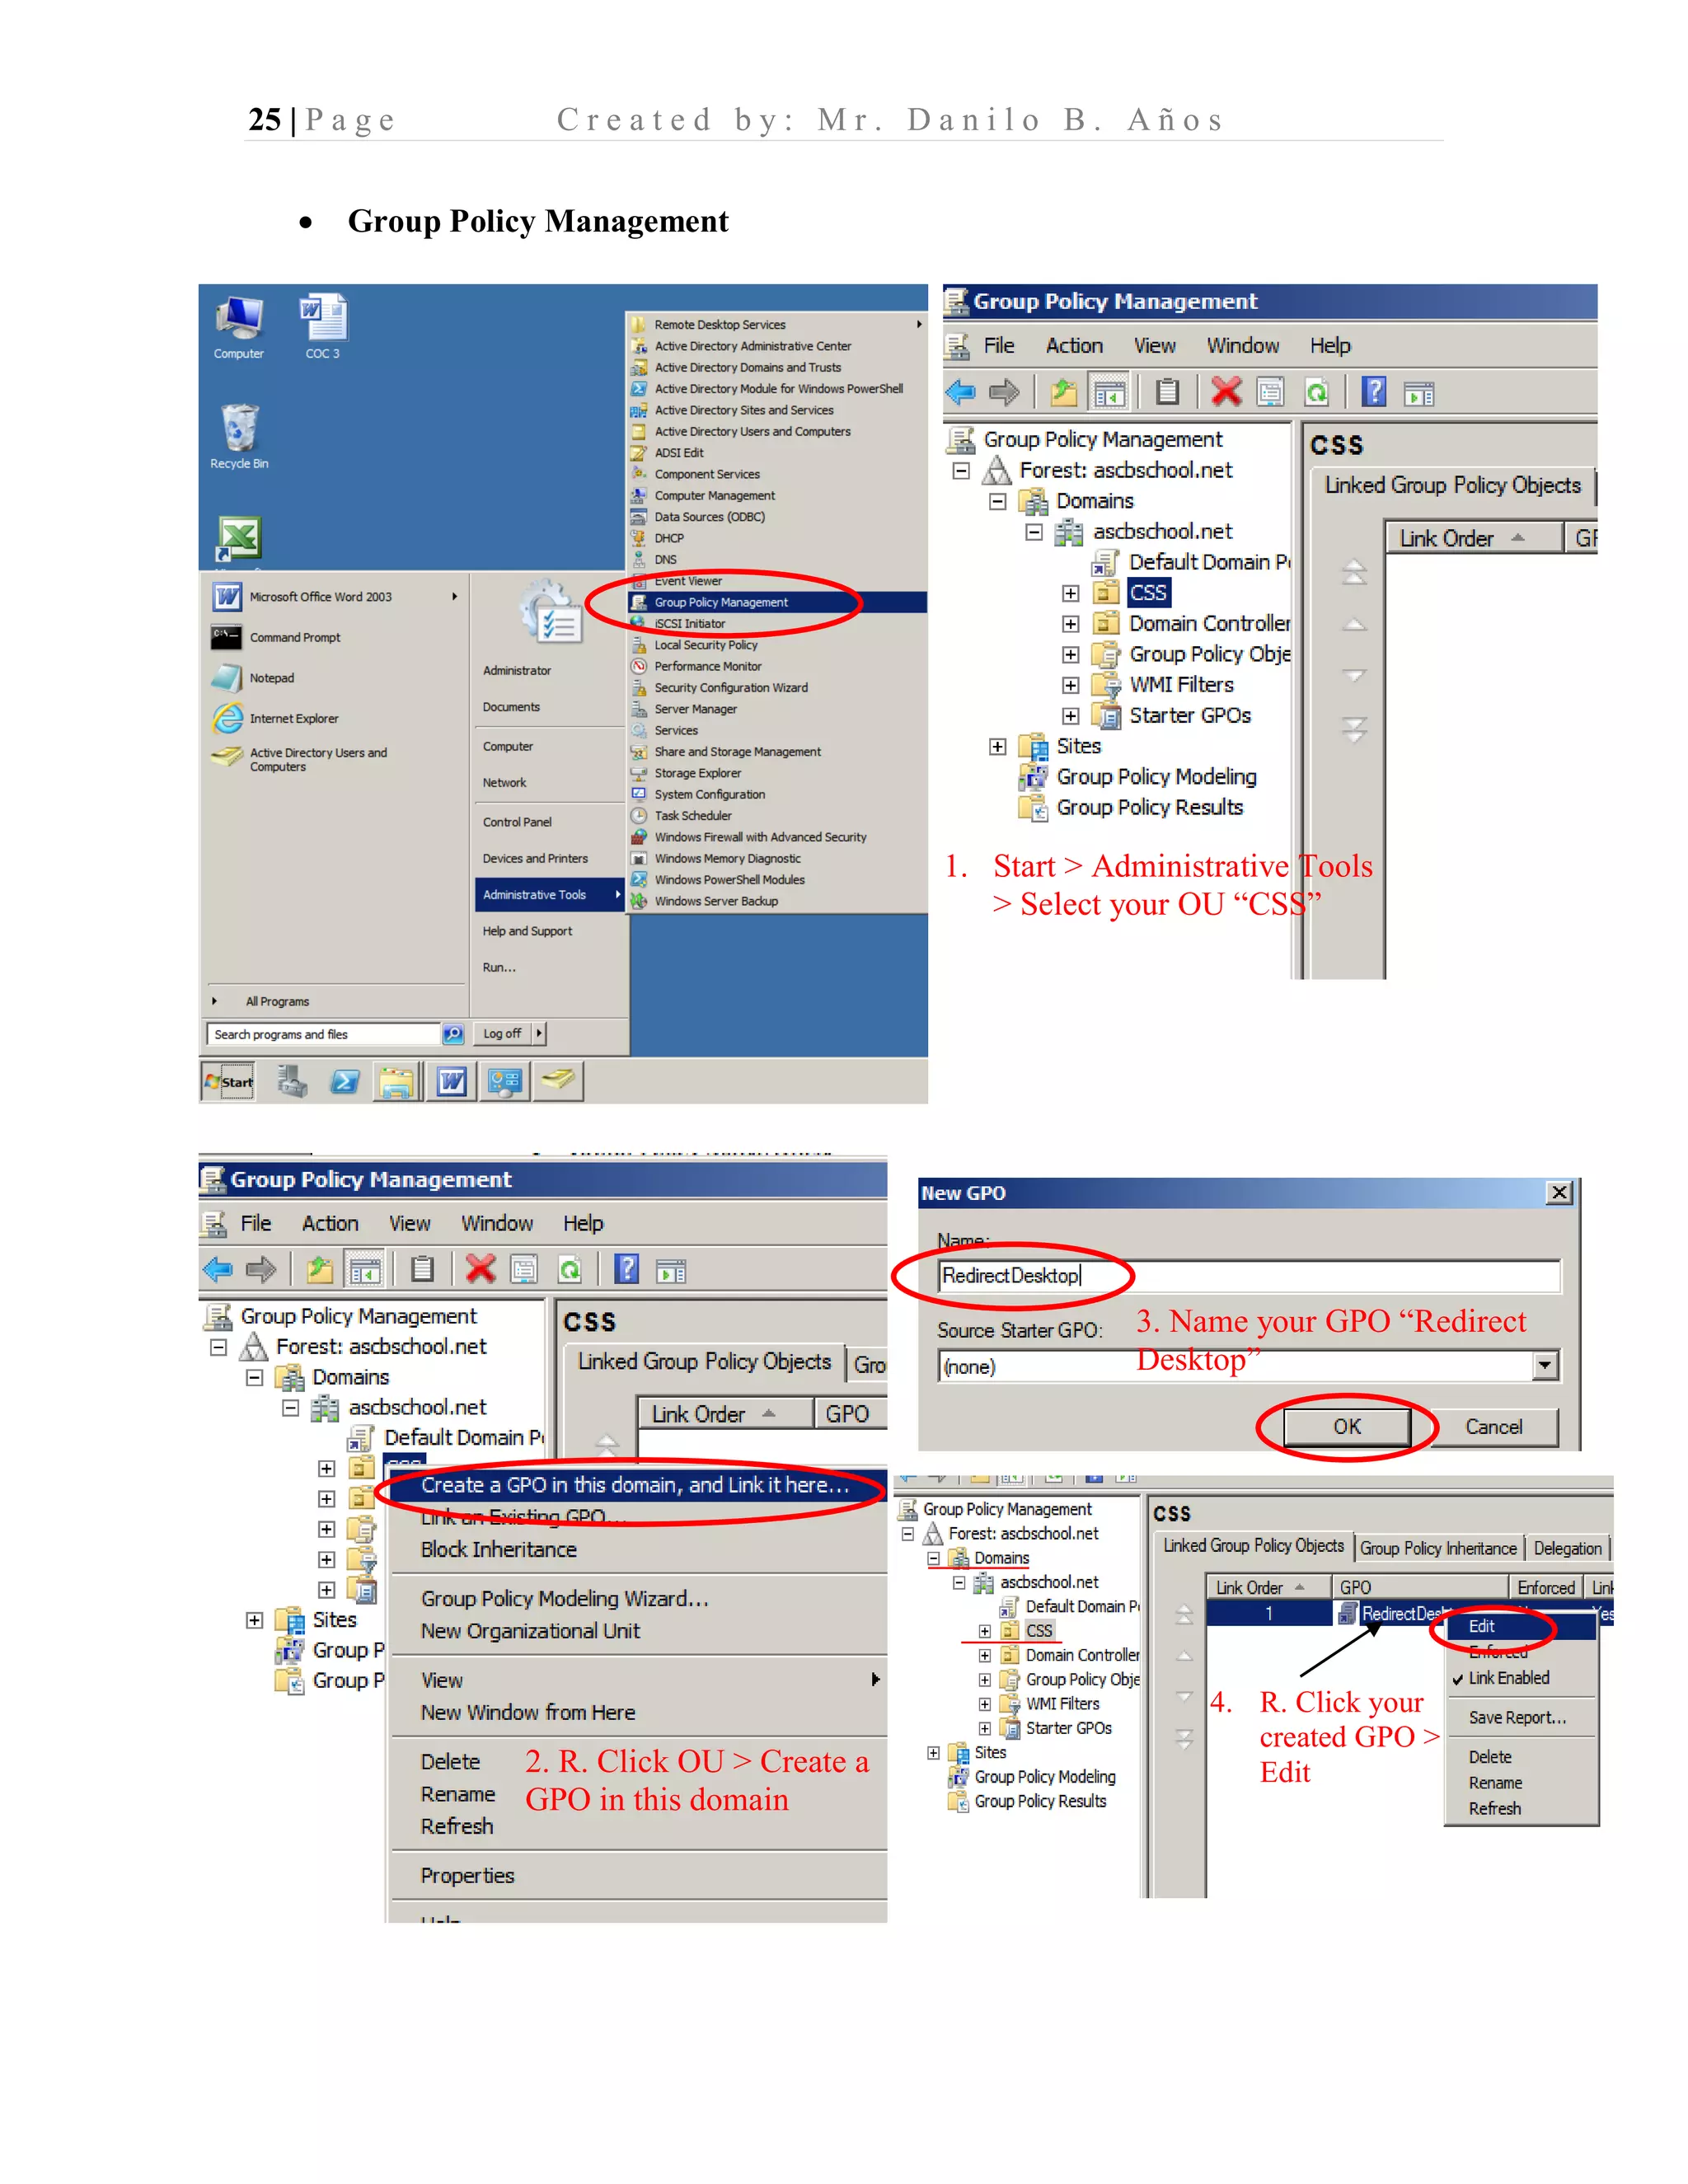
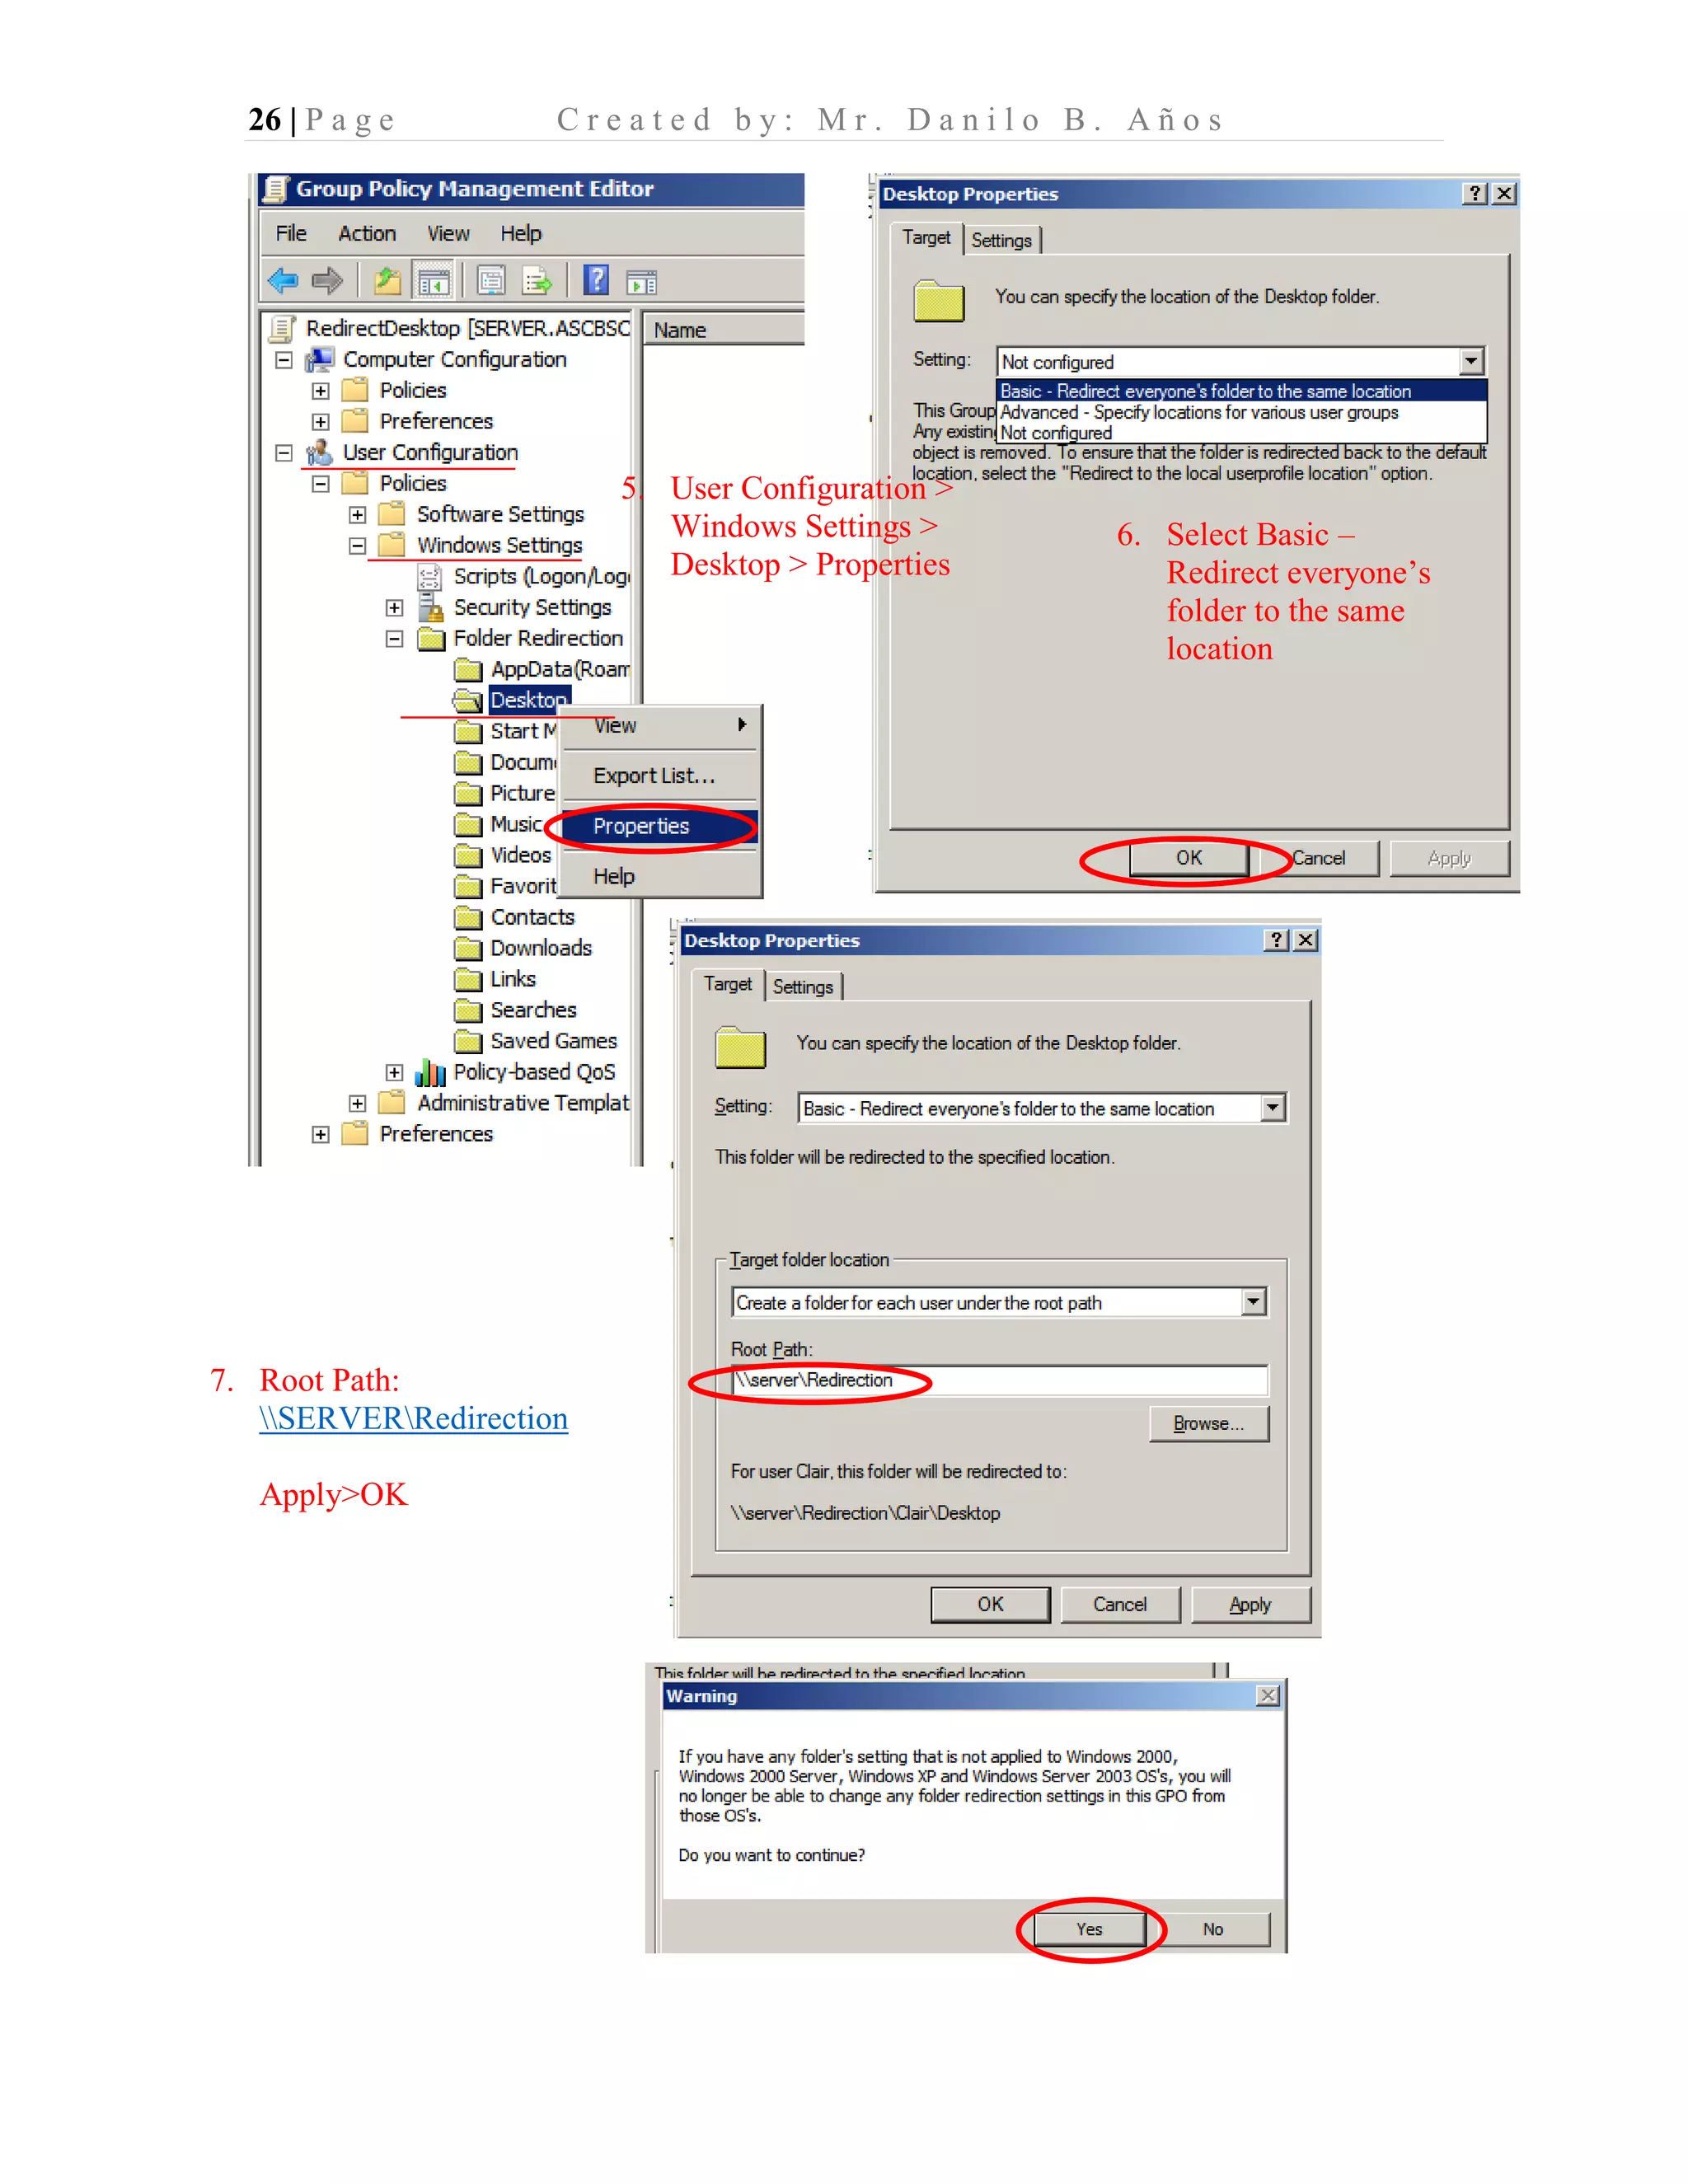
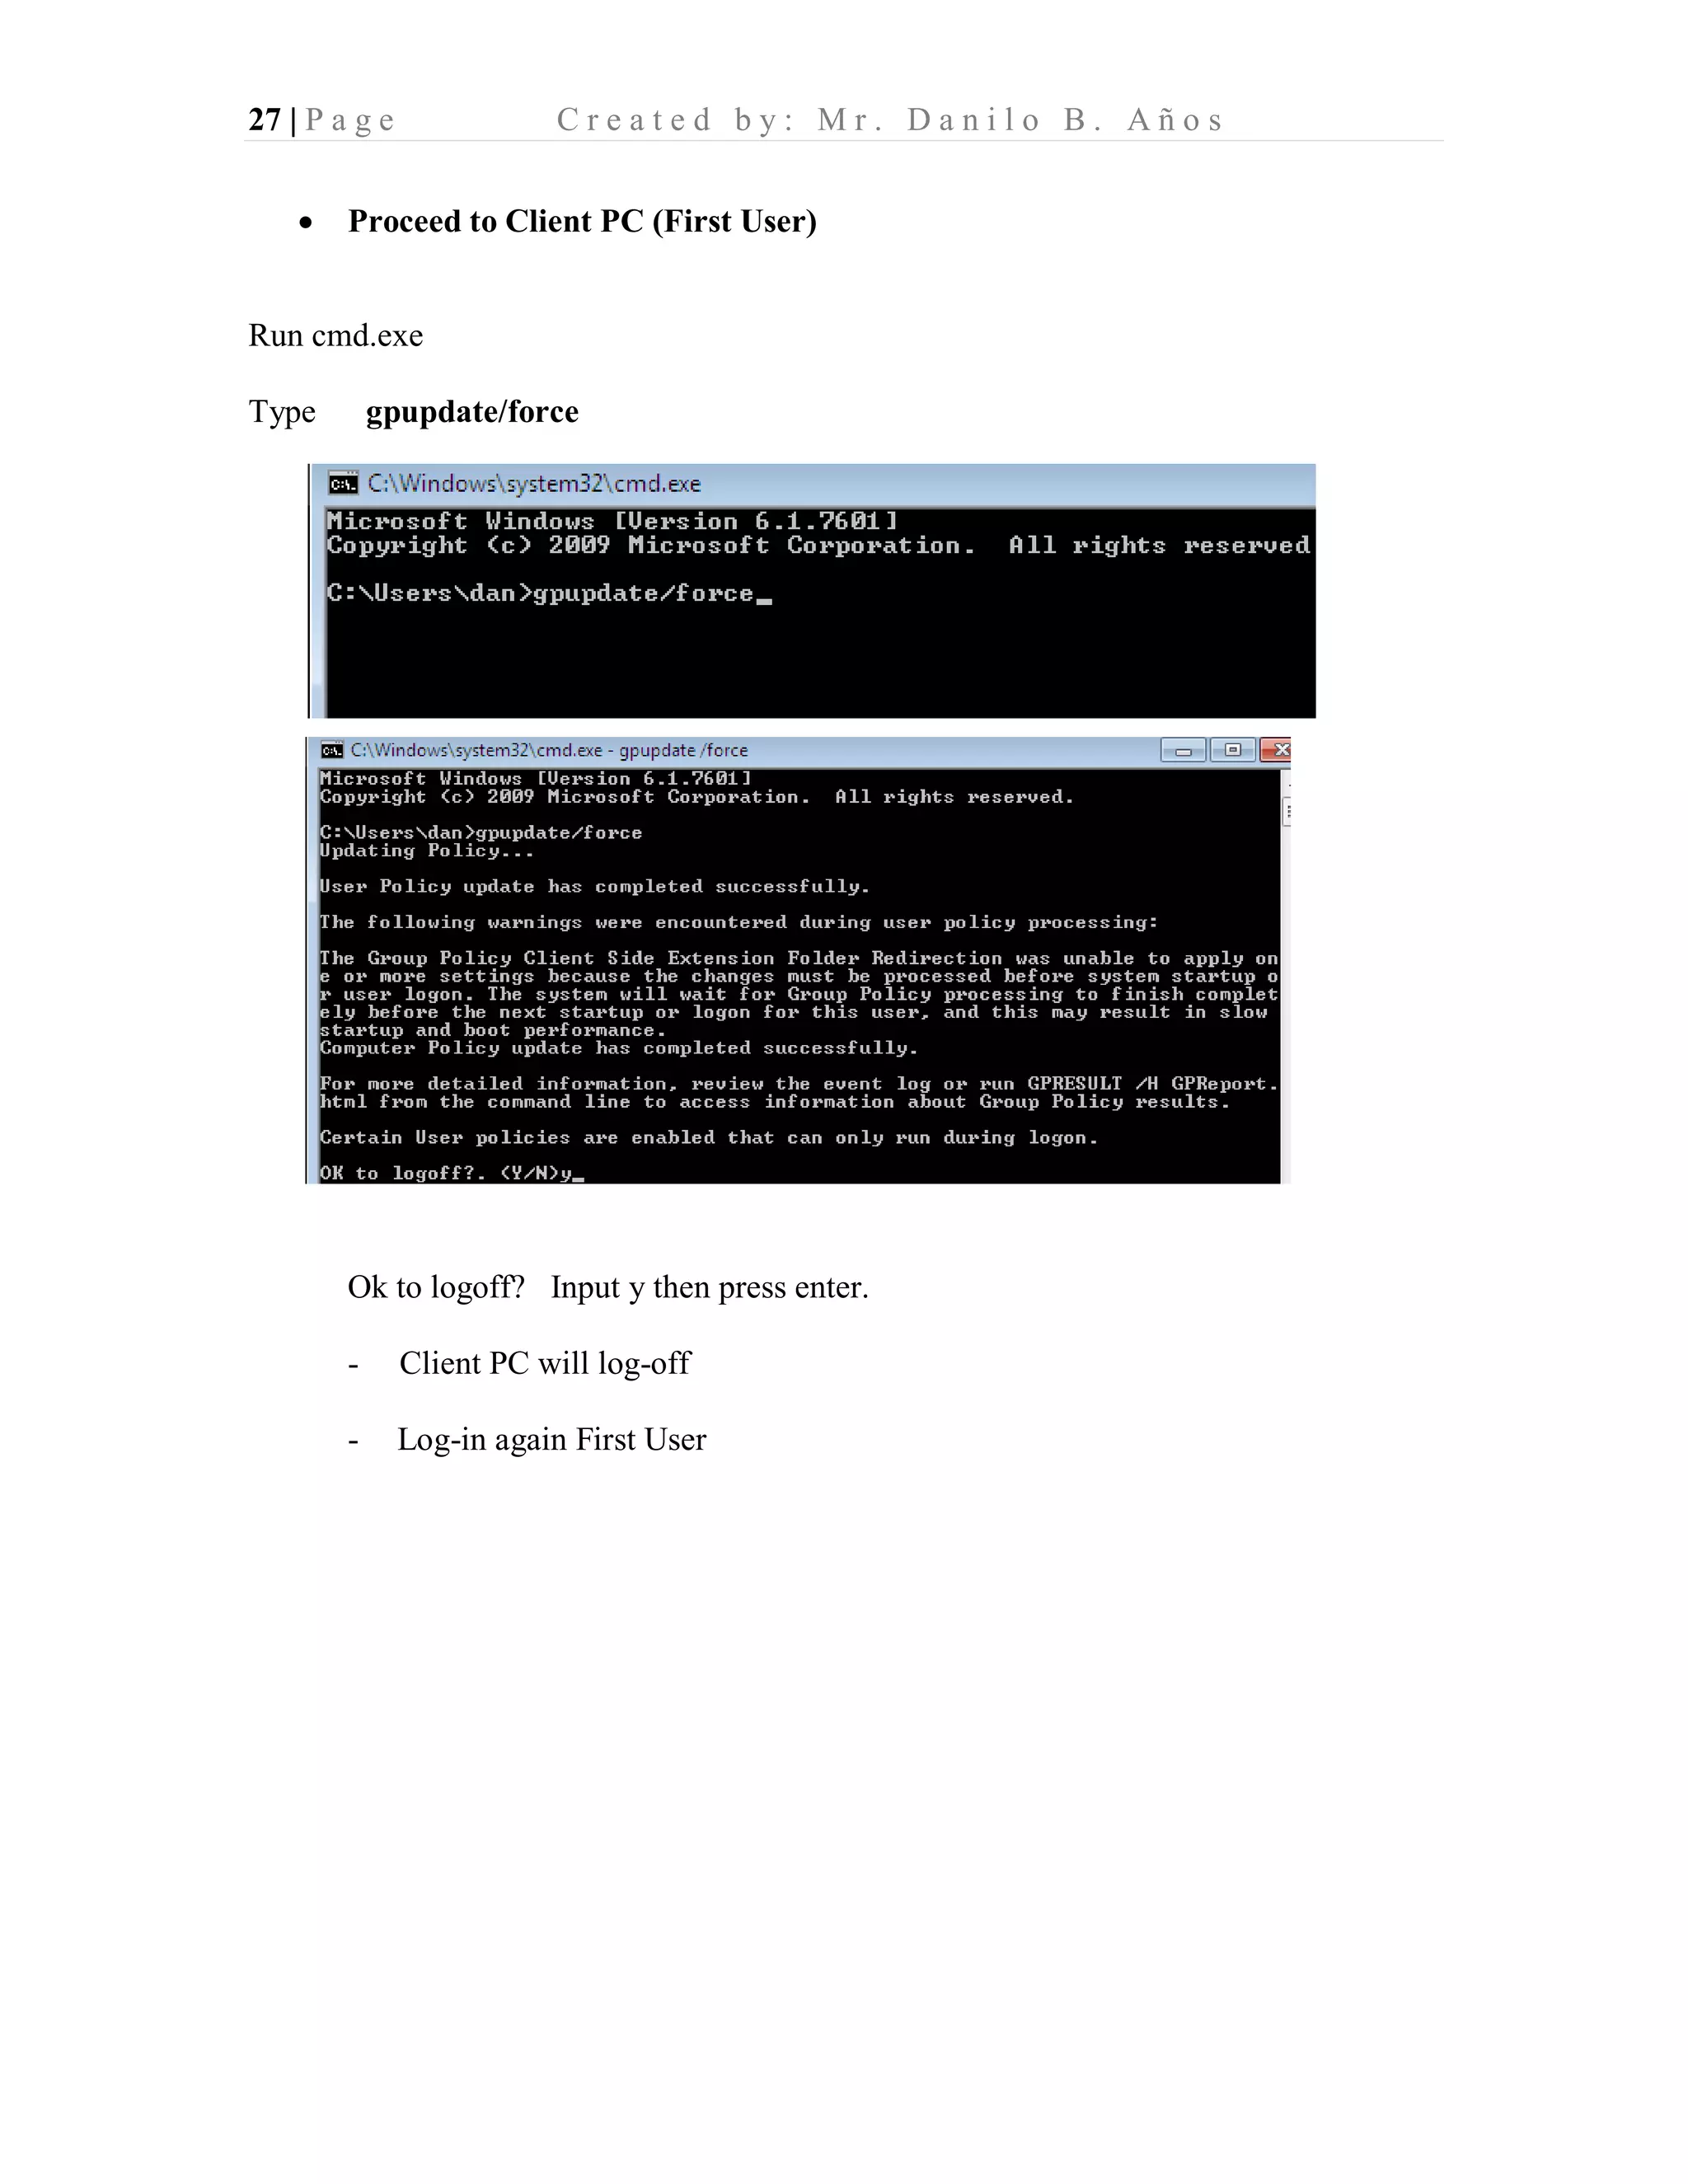
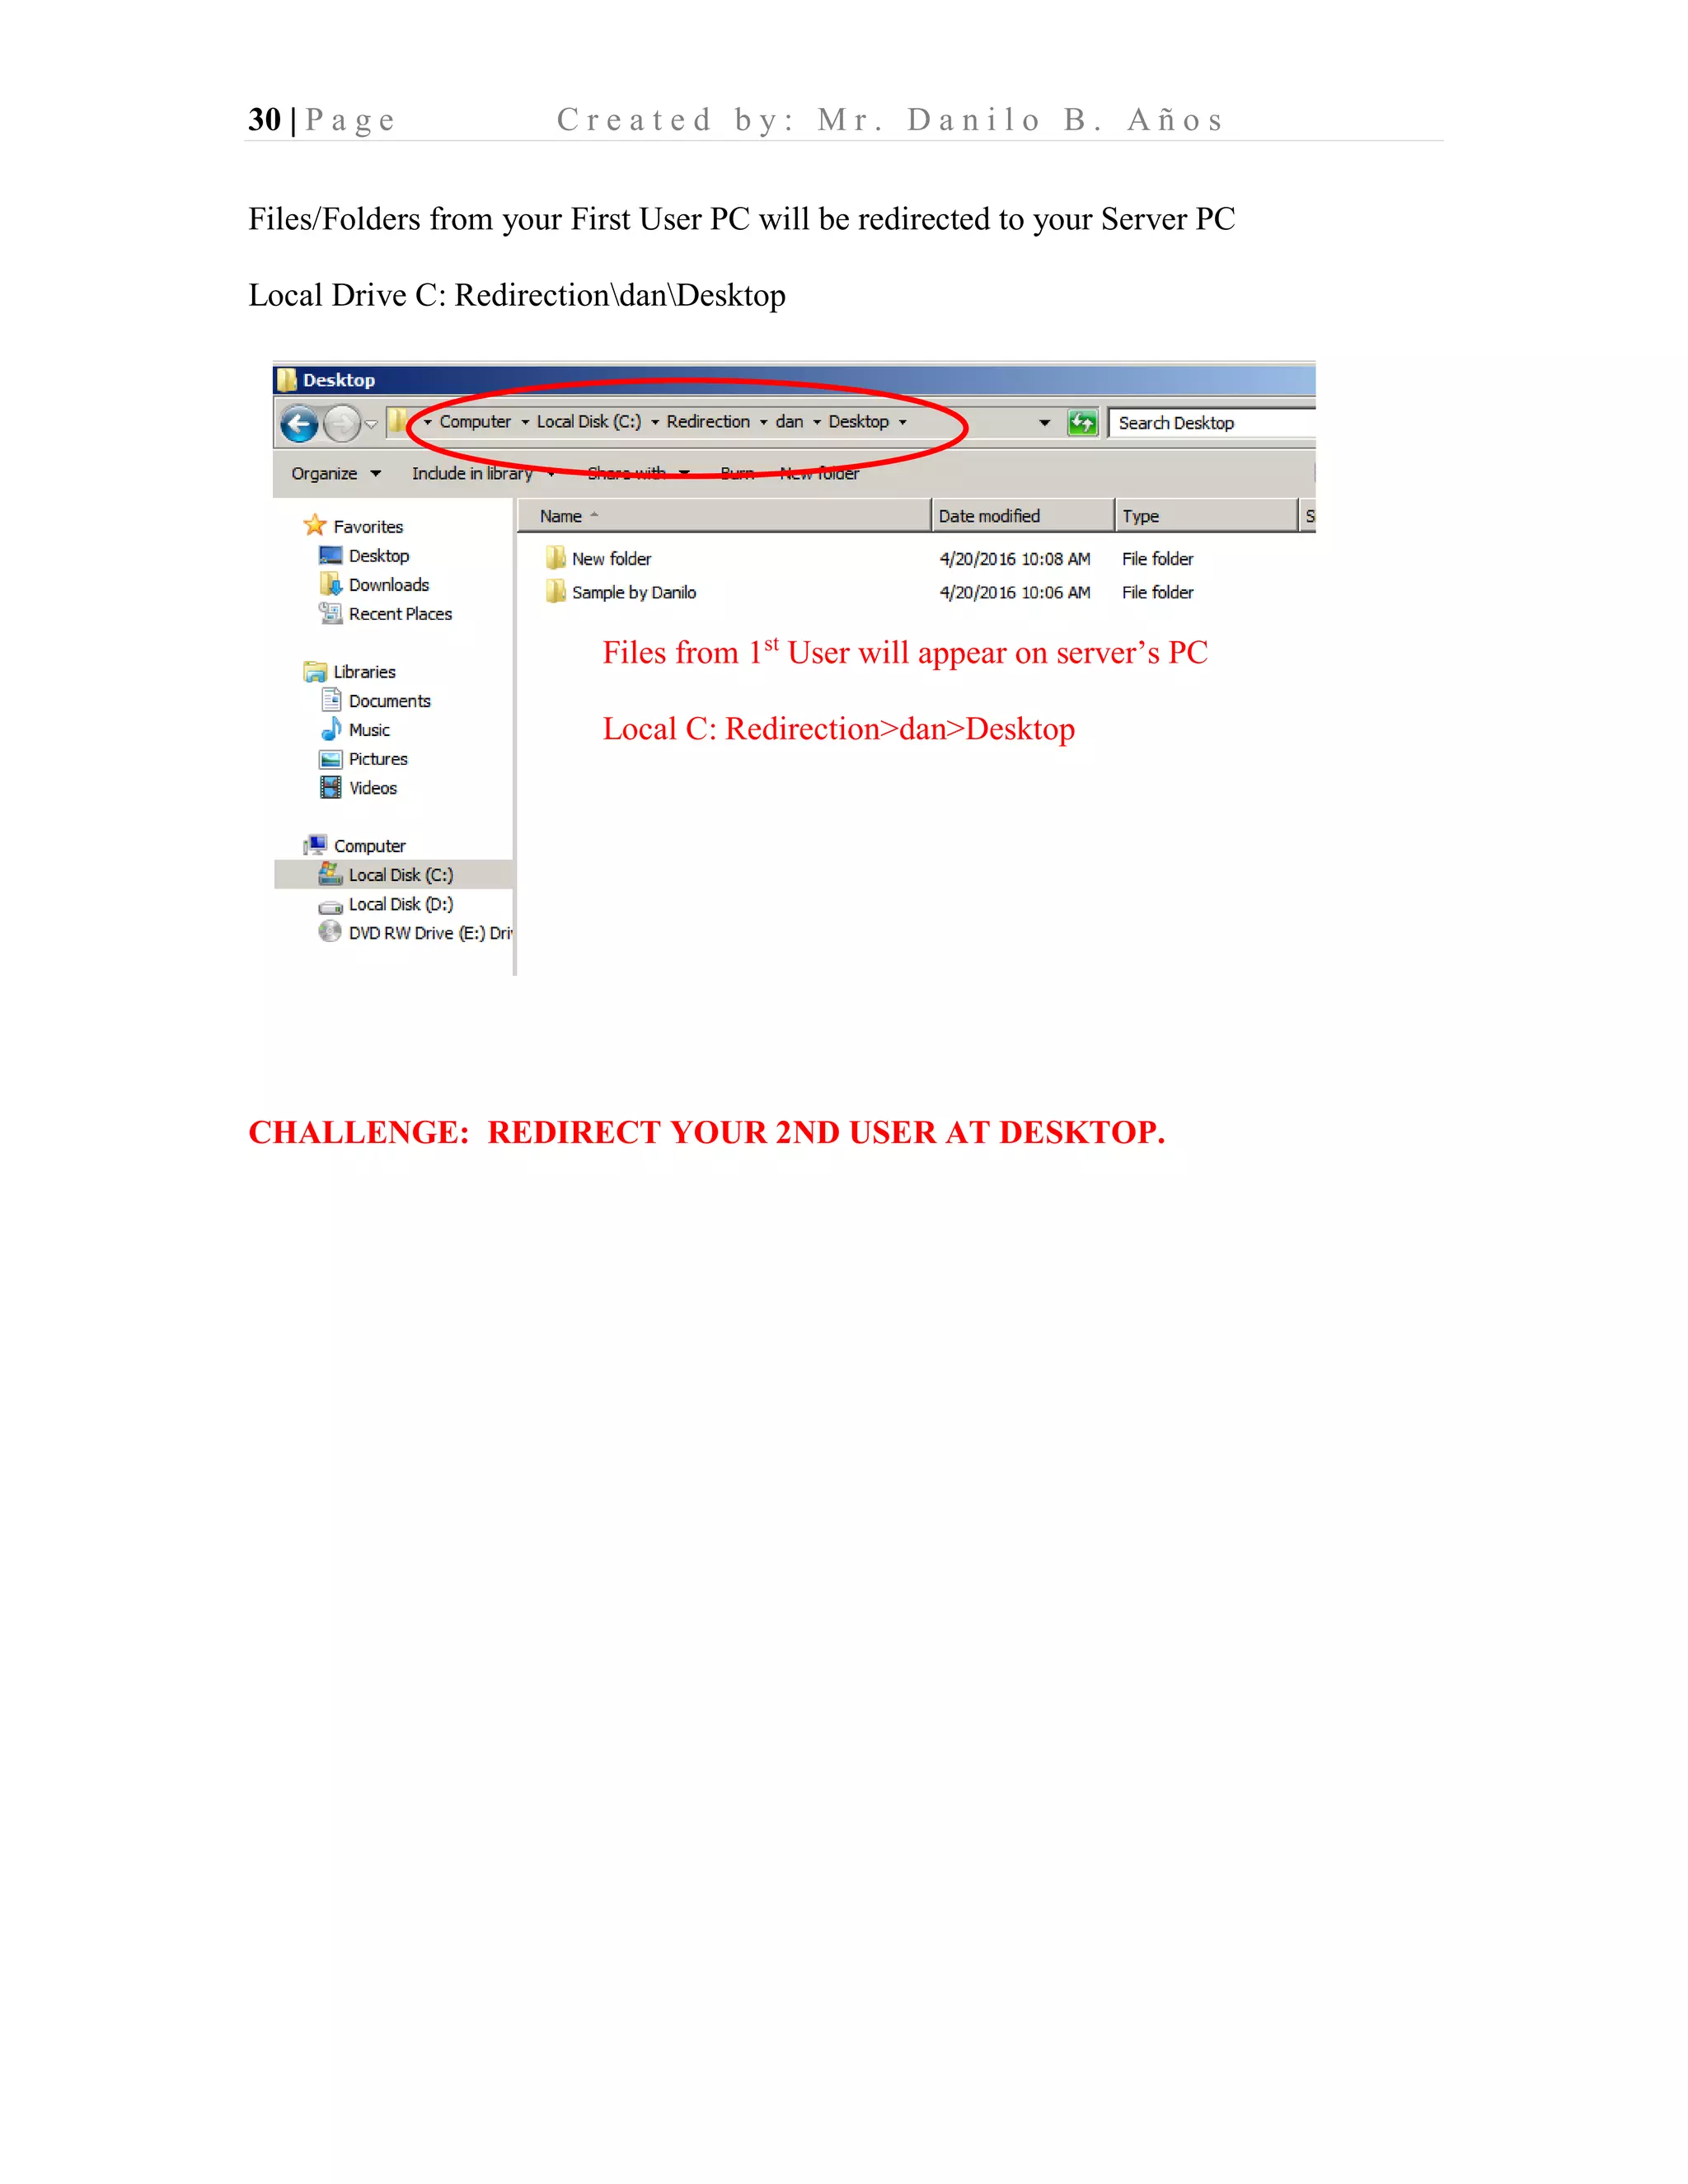
Methods to create and manage folder redirection, including sharing settings, group policy settings, and testing folder accessibility.