Downloaded 1,293 times


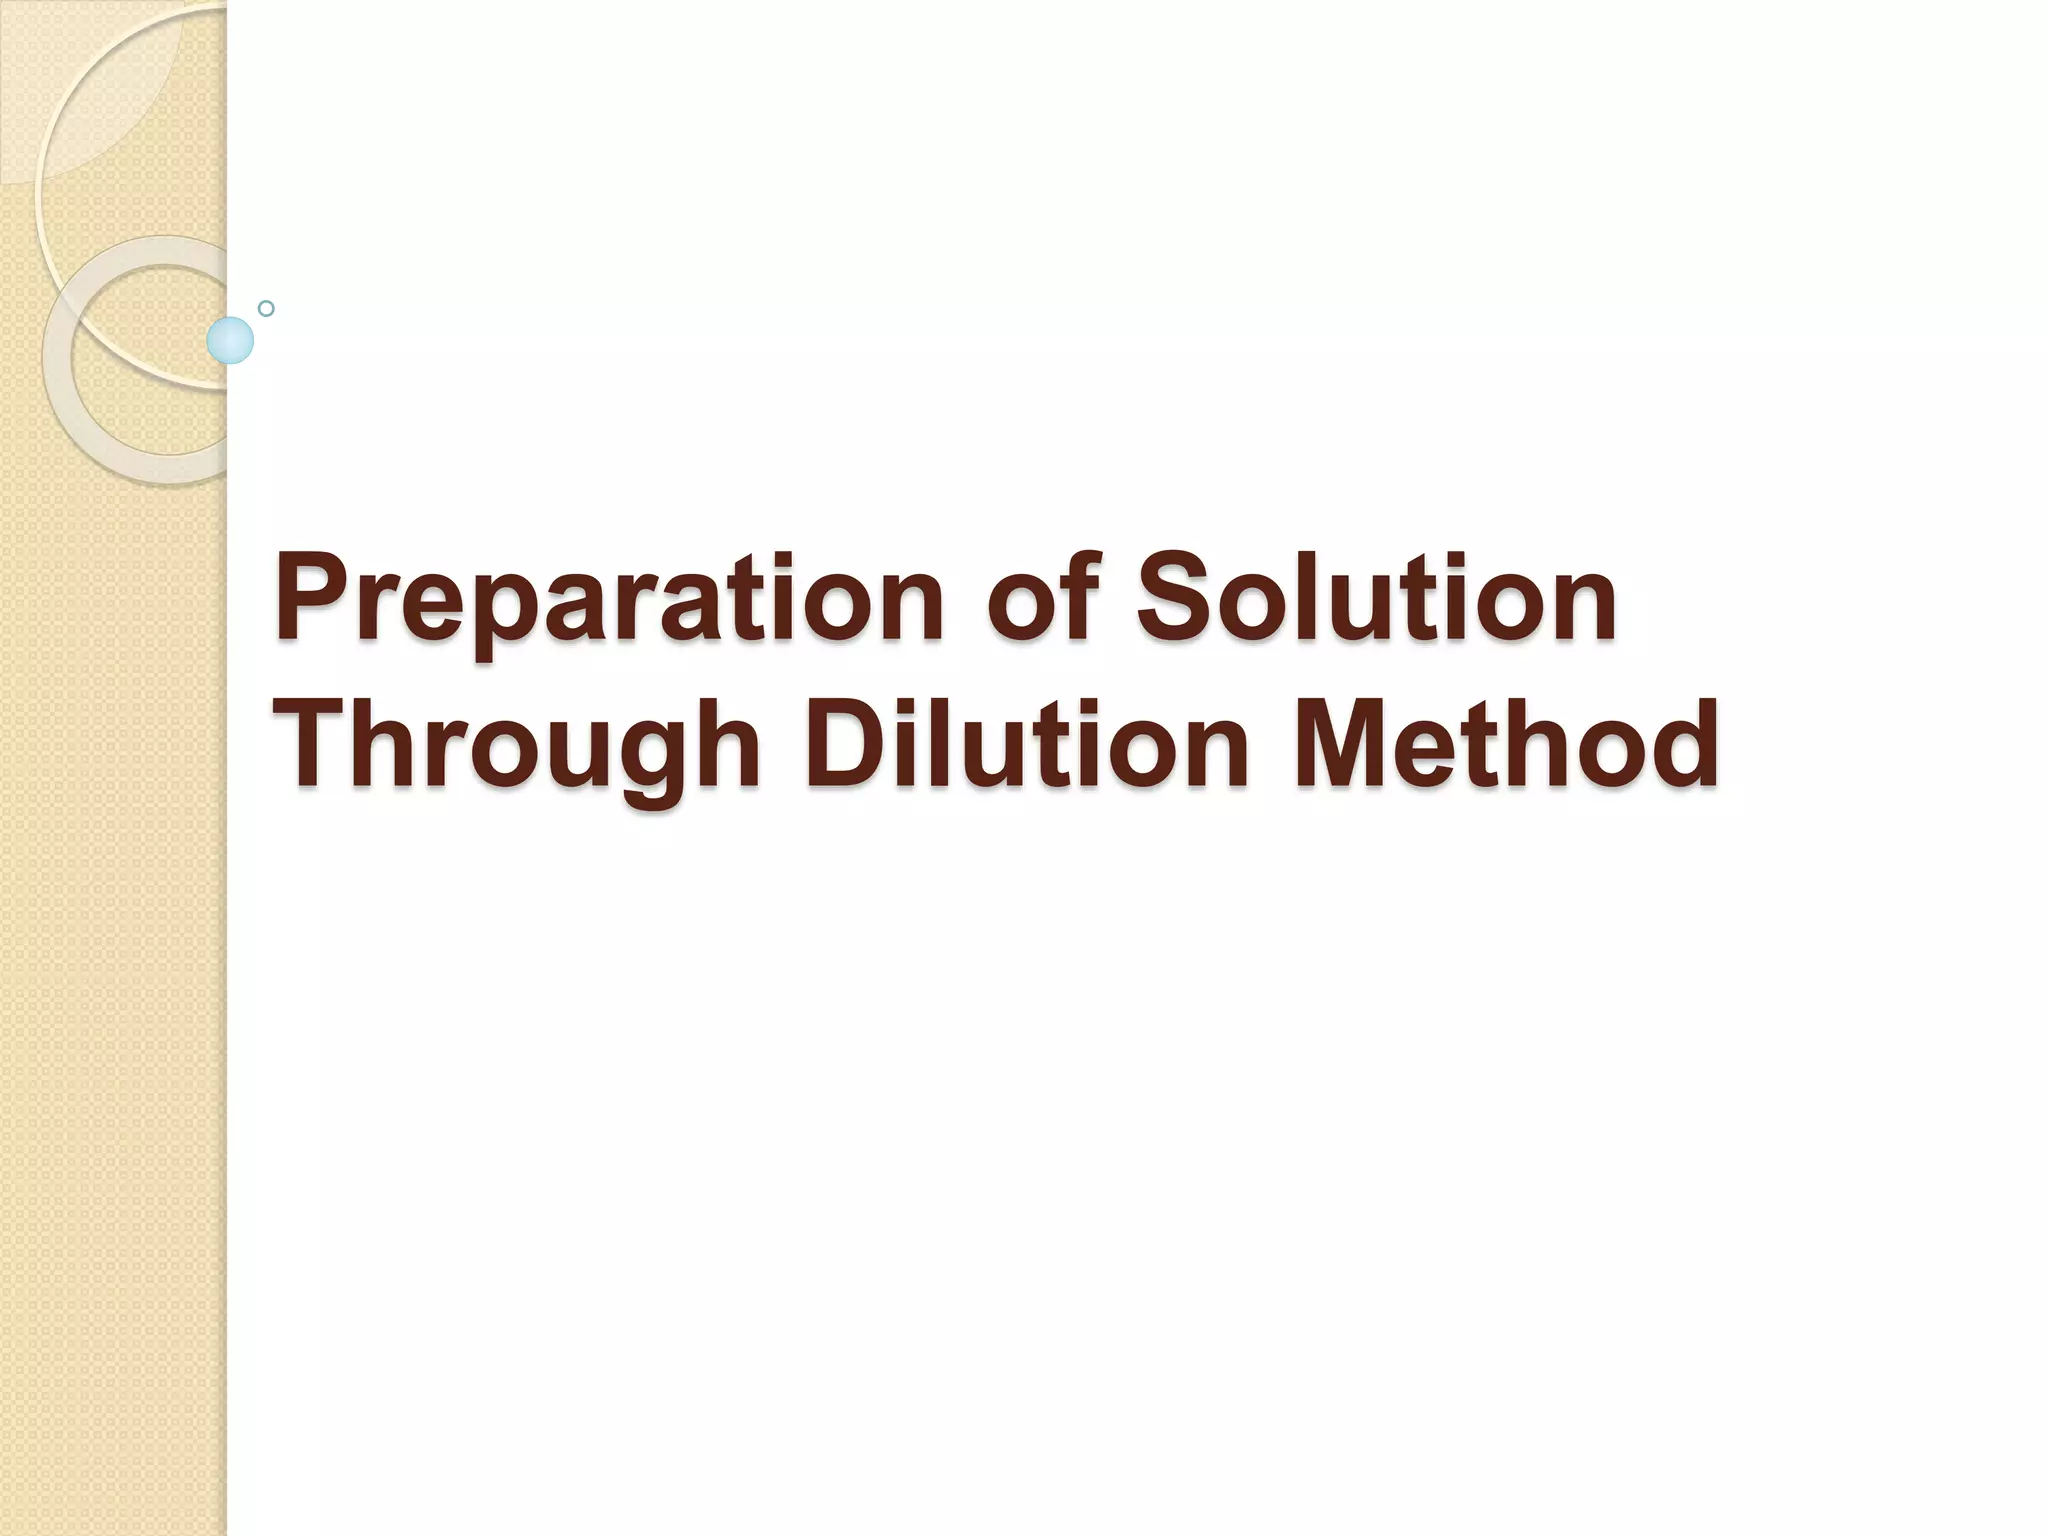
![EXAMPLE 1
Step 1. The labeled scale markings are 8
mL and 6 mL. There are 10 divisions
between the numeric labels. [(8-6)/10] mL
= 0.2 mL is the increment value.
Step 2. The first certain digit is 6 mL since
the meniscus is below 8 mL. There are
three smaller scale divisions below the
meniscus: 3 x 0.2 mL/division = 0.6
mL The known digits are (6 + 0.6 ) mL =
6.6 mL
Step 3. The meniscus lies 0.1 of the
distance between the markings: 0.1 x 0.2
mL = 0.02 mL The volume should be
recorded as (6.6 + 0.02) mL = 6.62 mL](https://image.slidesharecdn.com/preparationofsolutionedited2-140804105753-phpapp02/75/chemistry-Preparation-of-solution-20-2048.jpg)

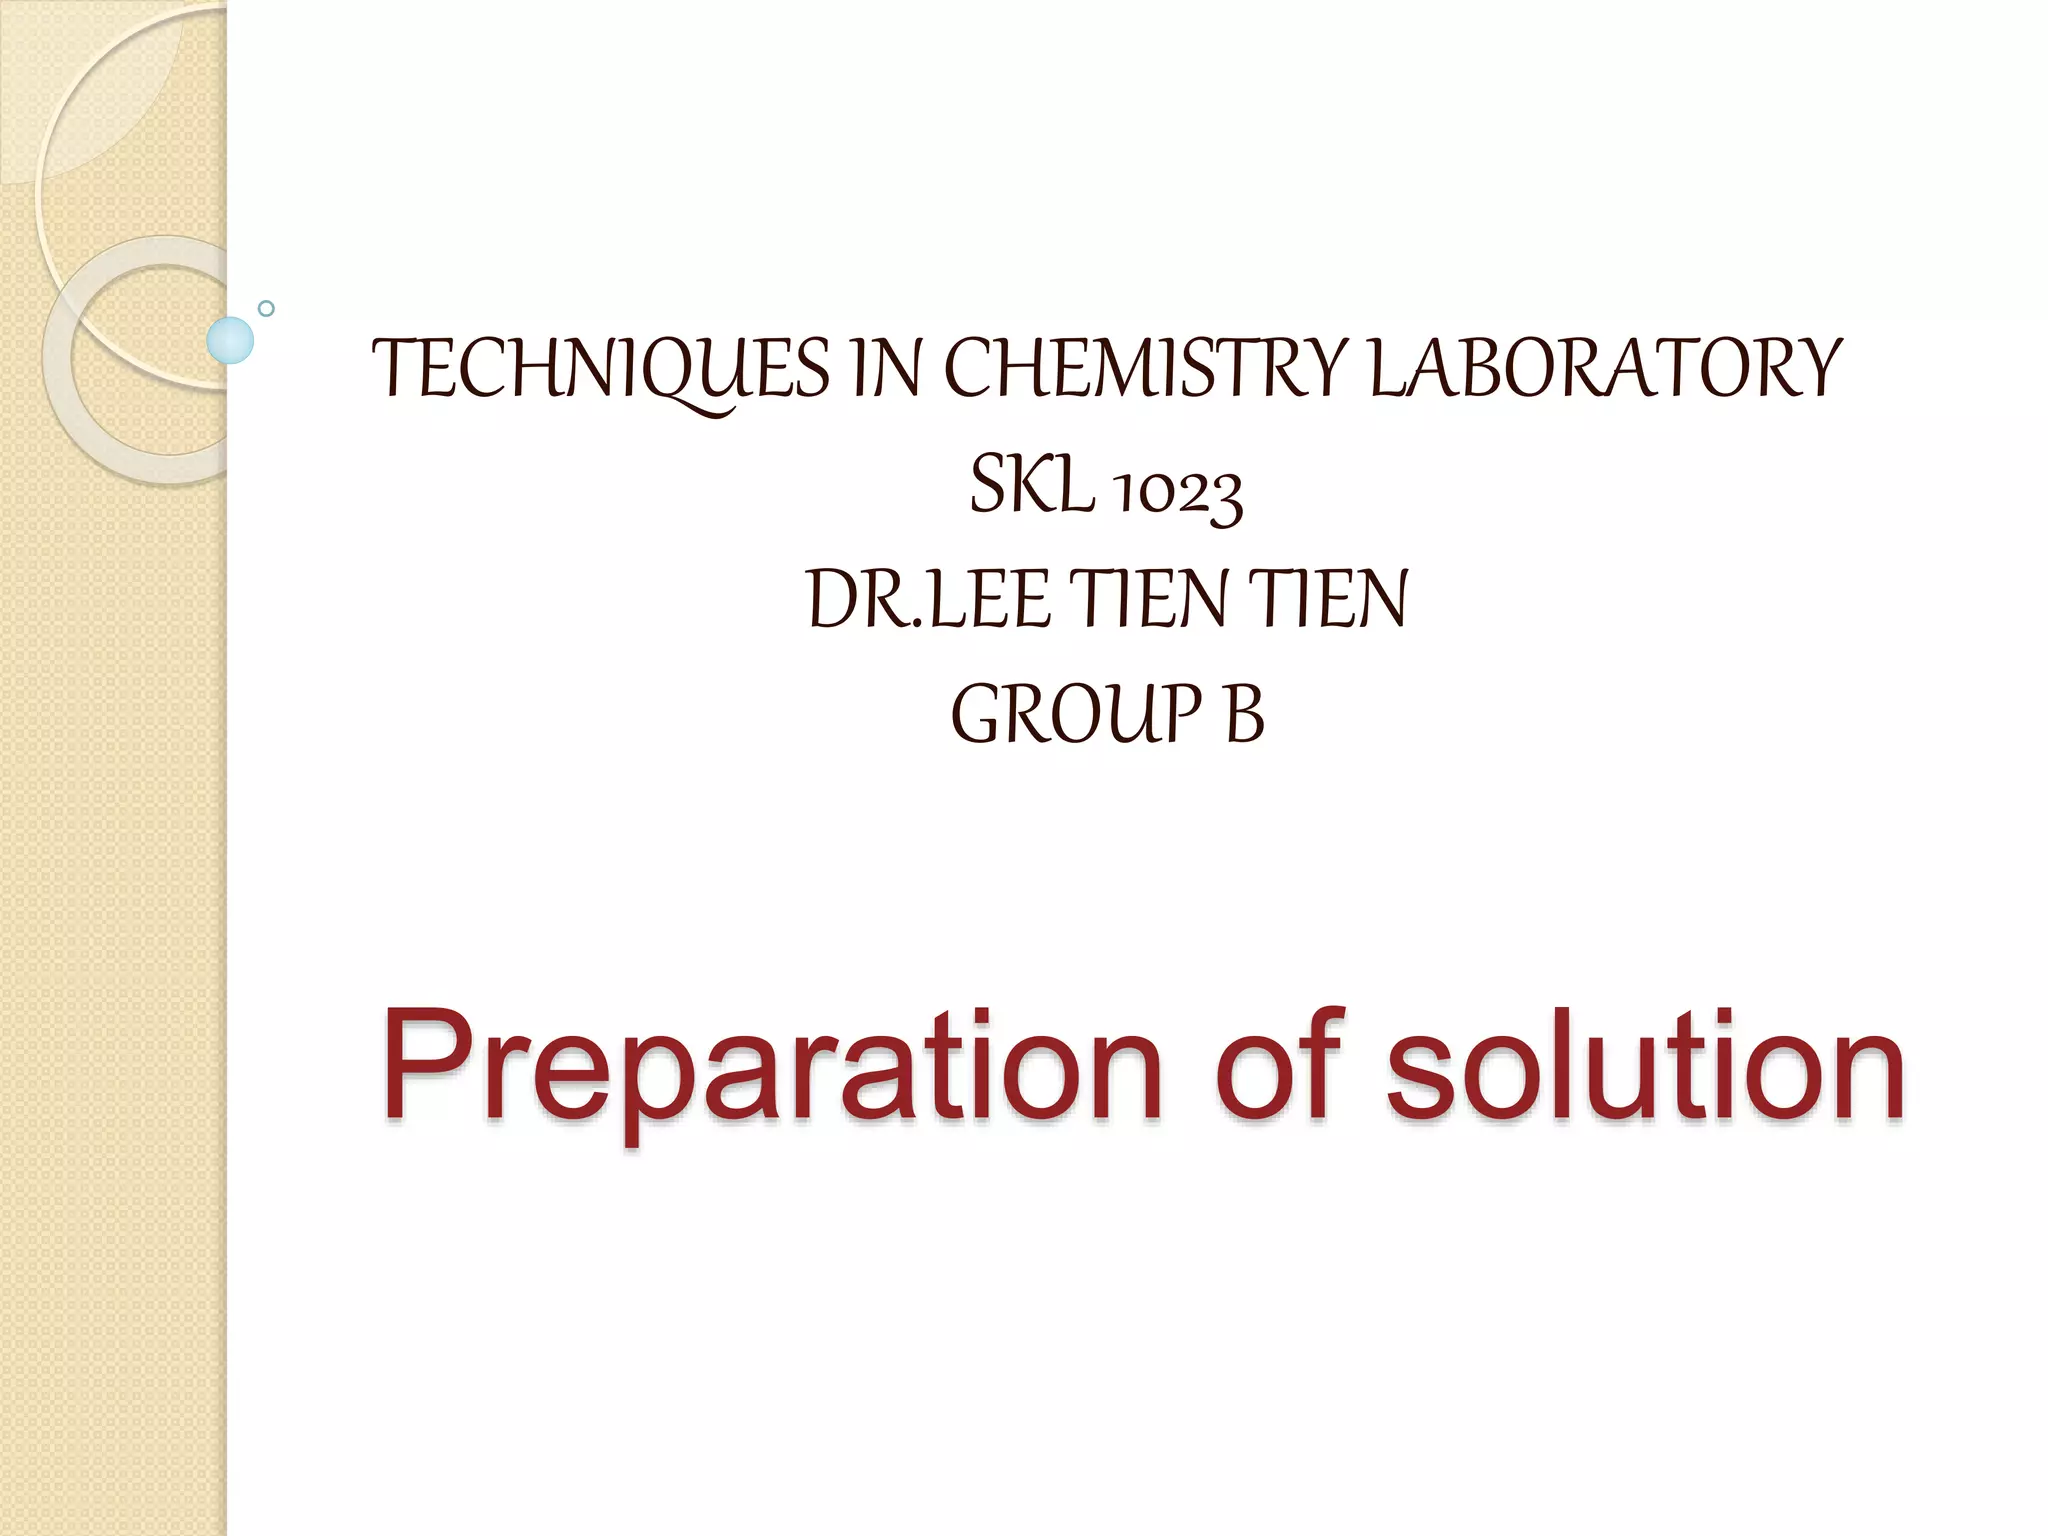
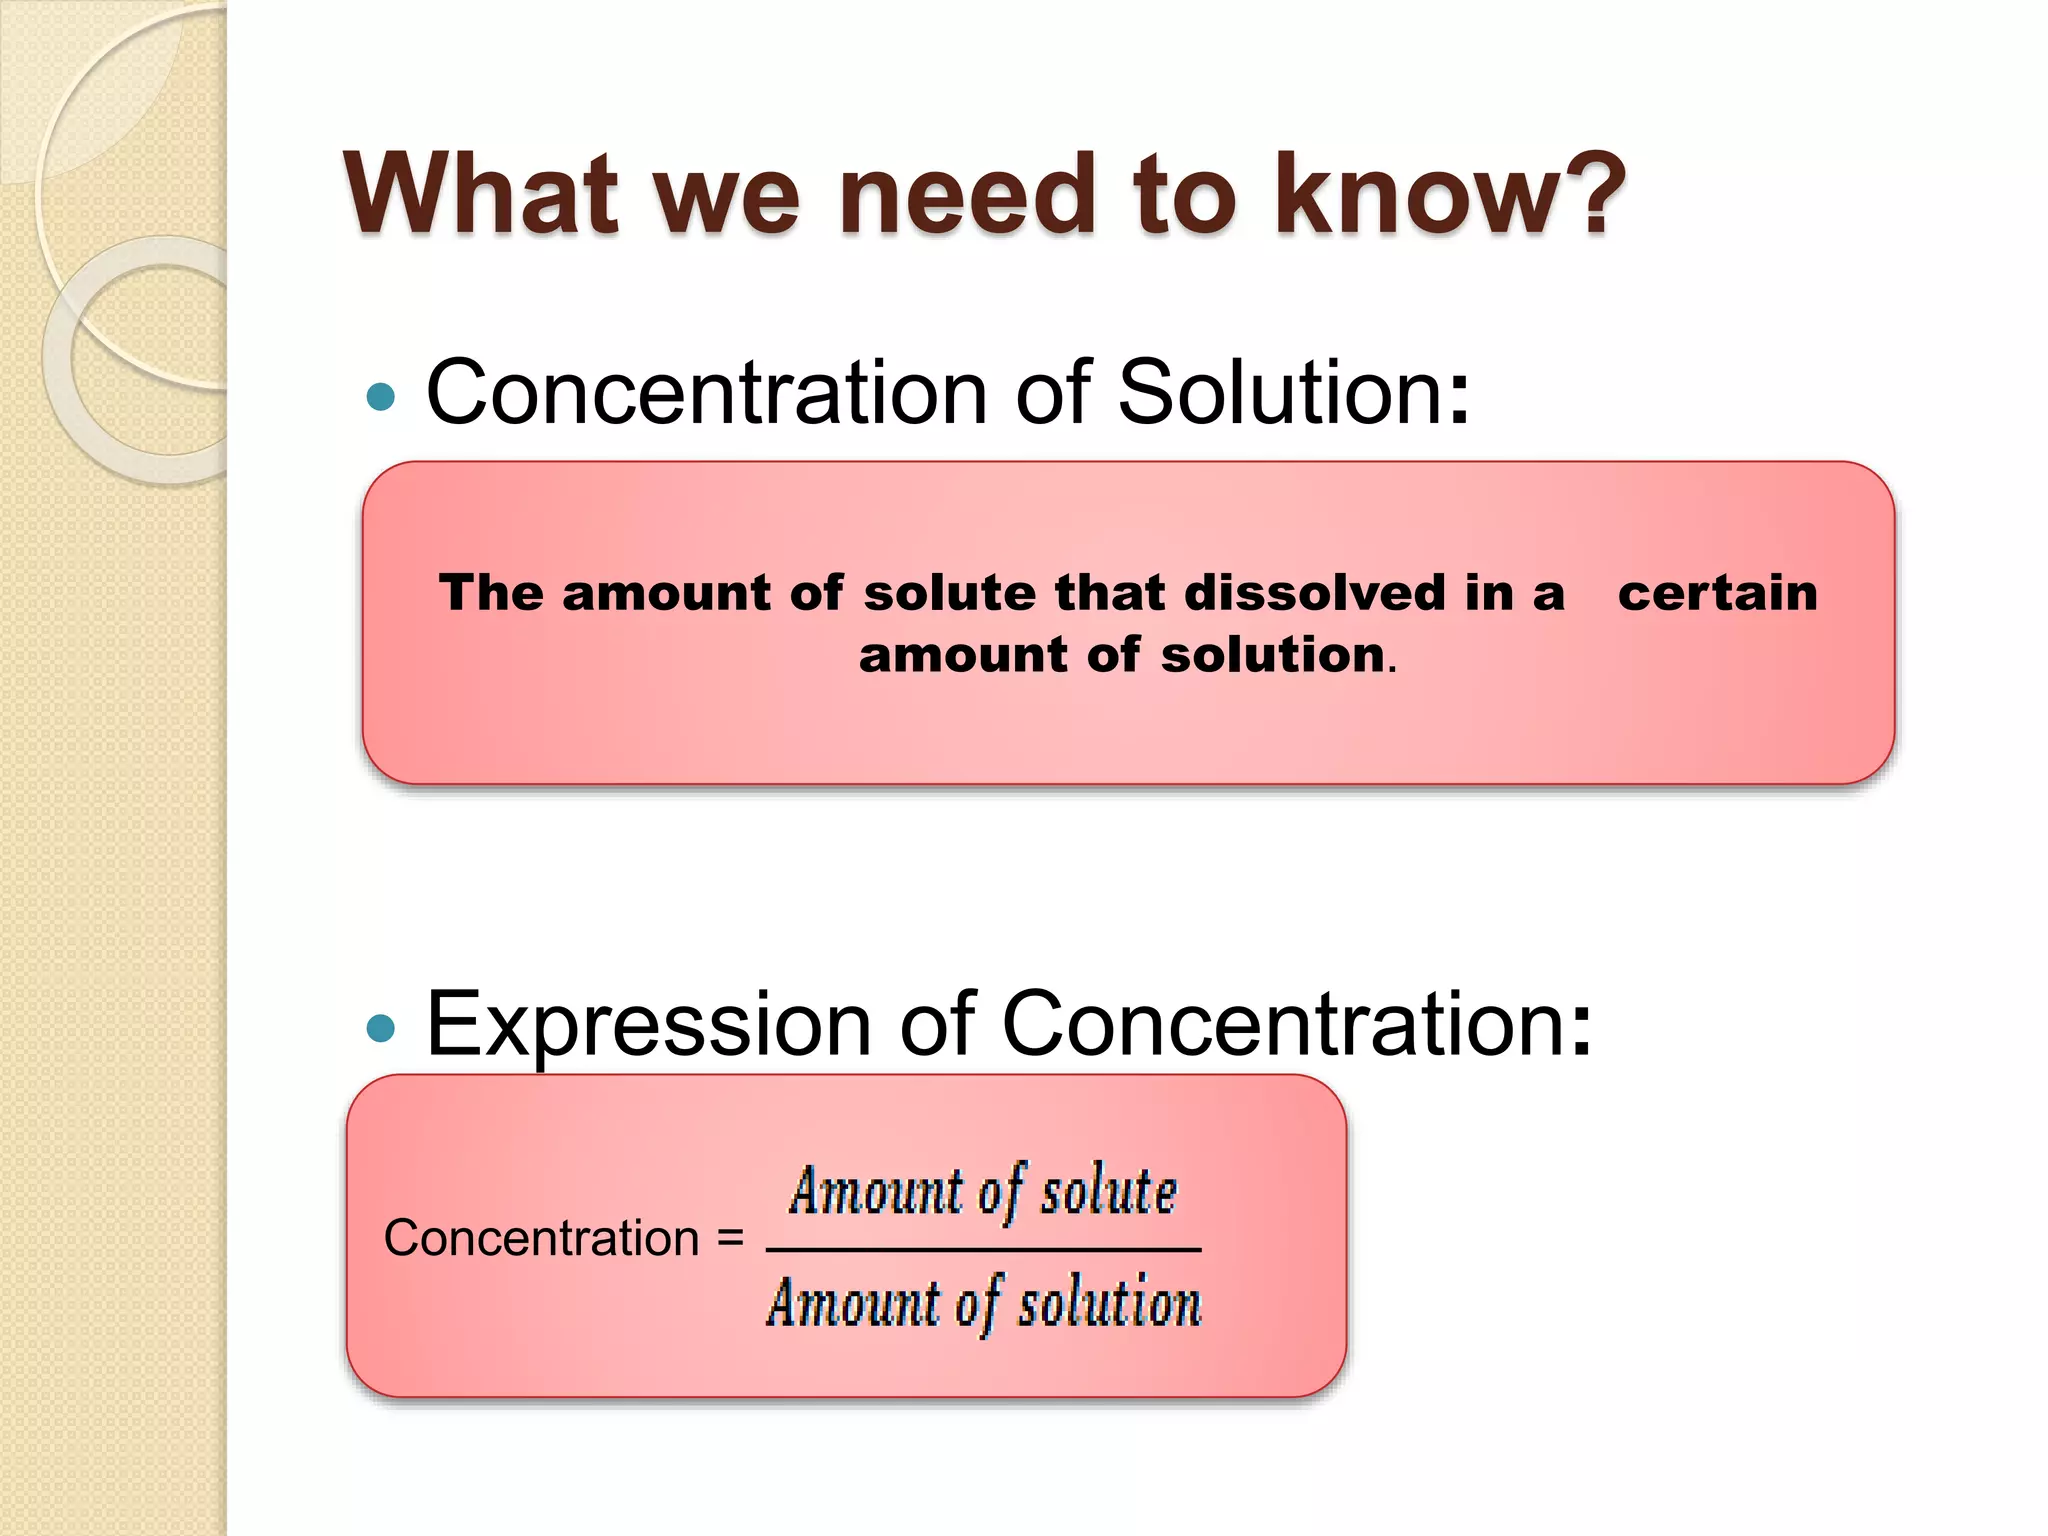
![EXAMPLE 1
Step 1. The labeled scale markings
are 14 mL and 15 mL. There are 10
divisions between the numeric
labels. [(15-14)/10] mL = 0.1 ml is the
increment value.
Step 2. The first
certain digit is 14 mL
since the meniscus is
below 14 mL. There
are zero smaller scale
division above the
meniscus: 0 x 0.1
mL/division = 0.0 mL
The known digits are
(14 + 0.0 ) mL = 14.0 mL
Step 3. The meniscus
lies 0.5 of the distance
between the markings:
0.5 x 0.1 mL = 0.05 mL
The volume should be
recorded as (14.0 + 0.05)
mL = 14.05 mL](https://image.slidesharecdn.com/preparationofsolutionedited2-140804105753-phpapp02/75/chemistry-Preparation-of-solution-23-2048.jpg)


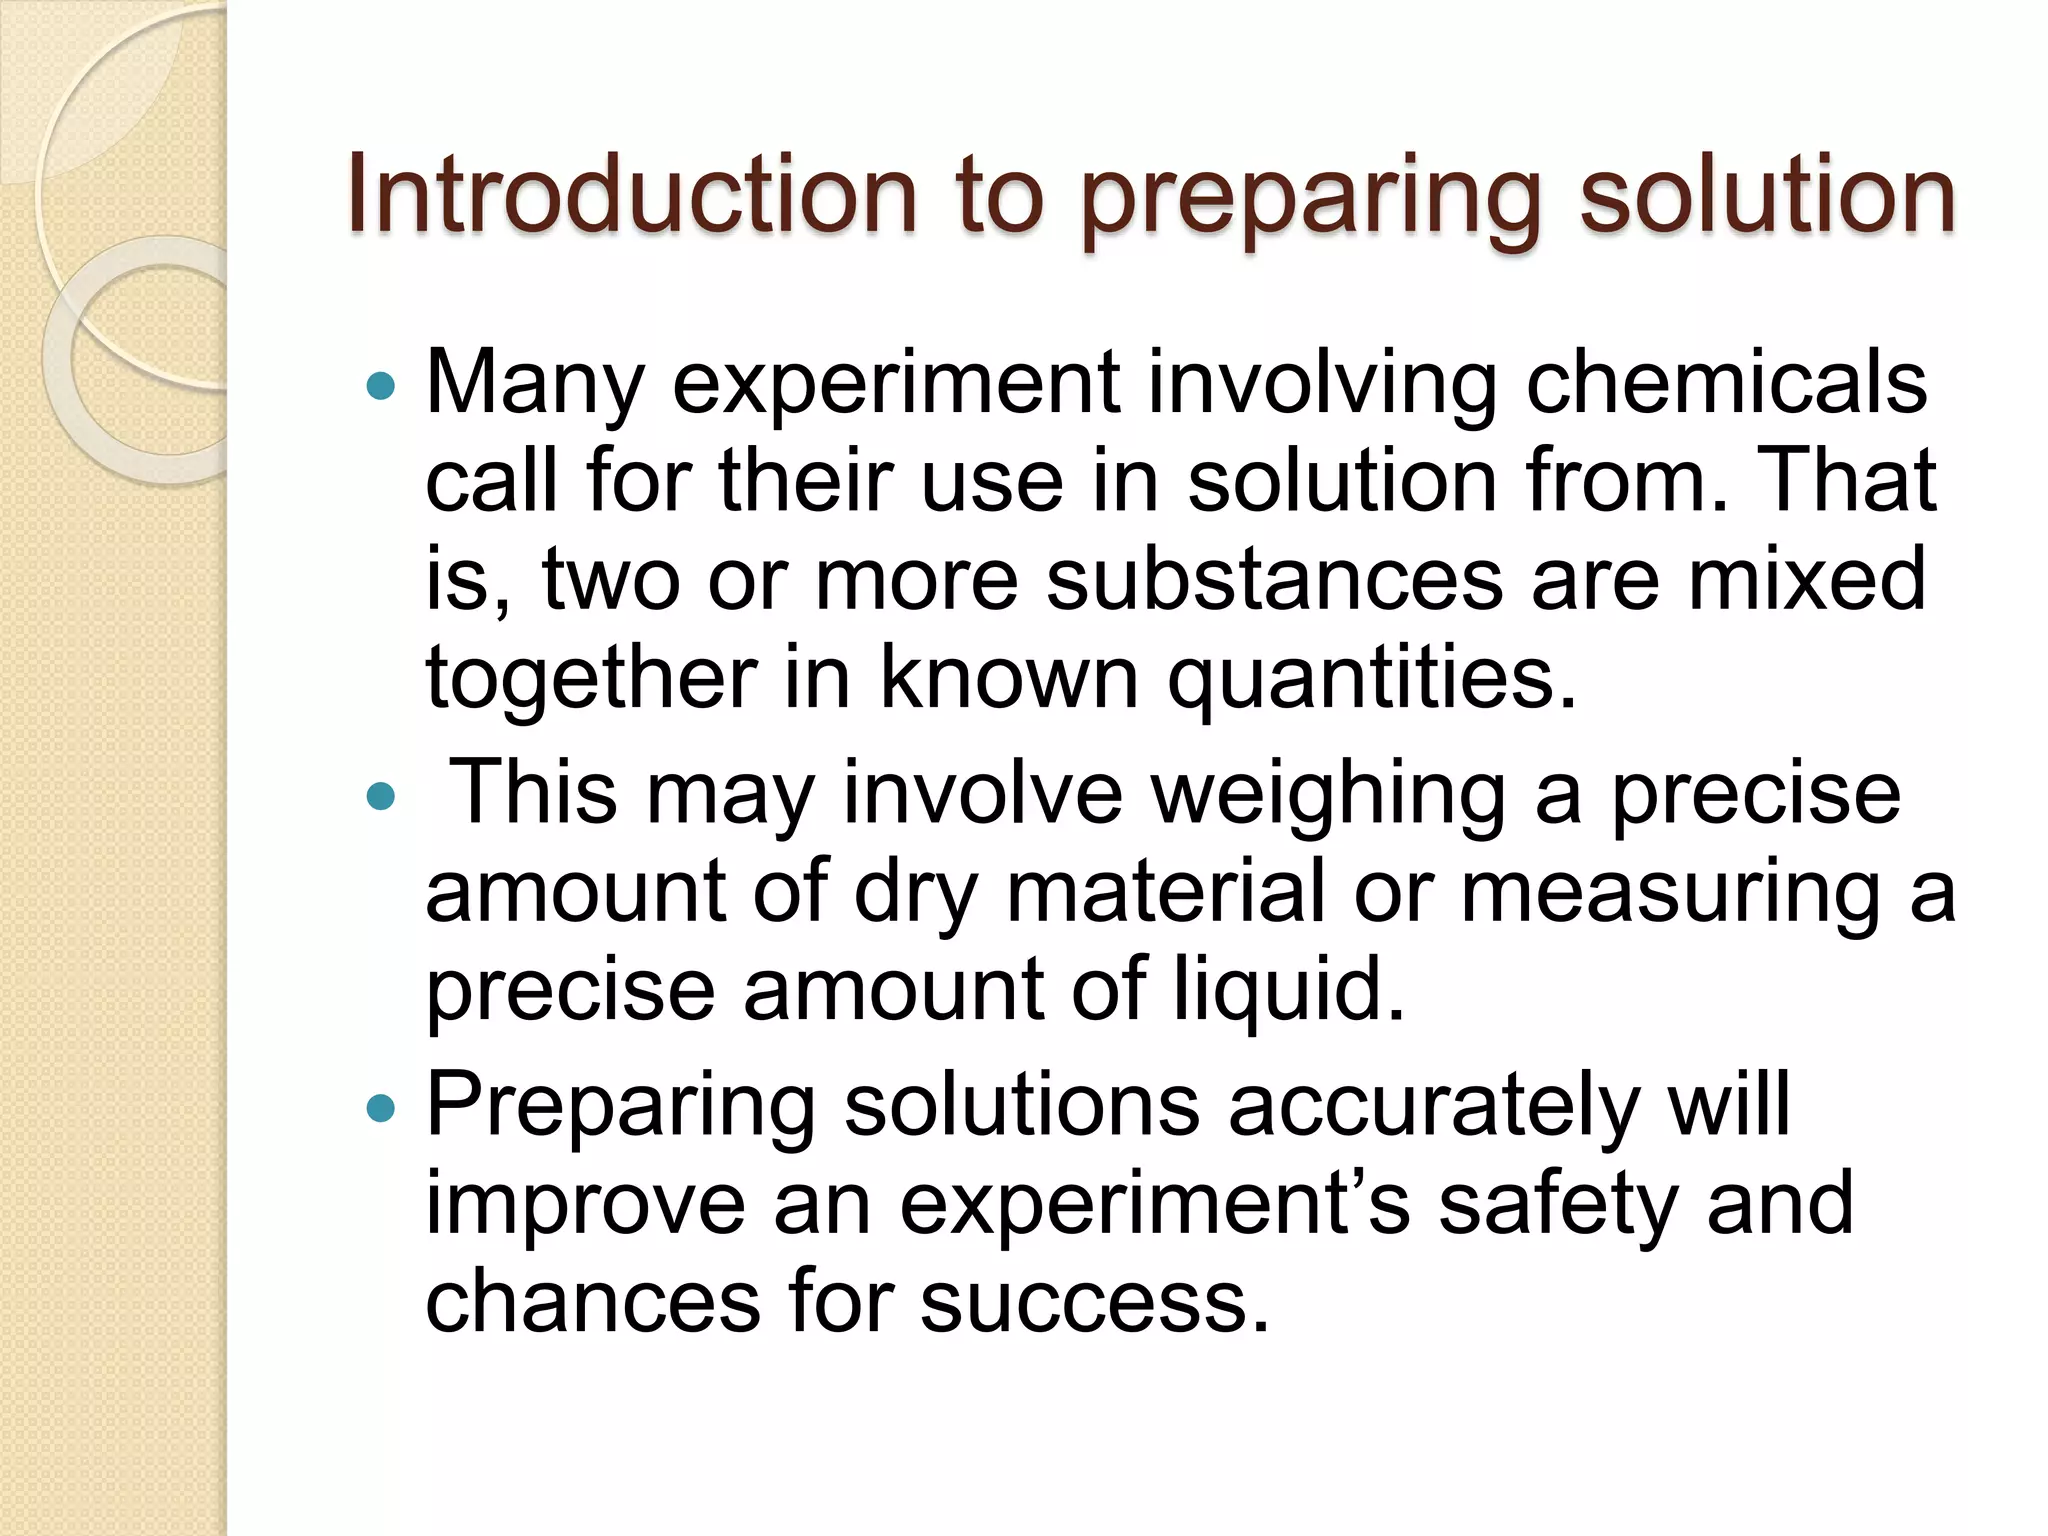
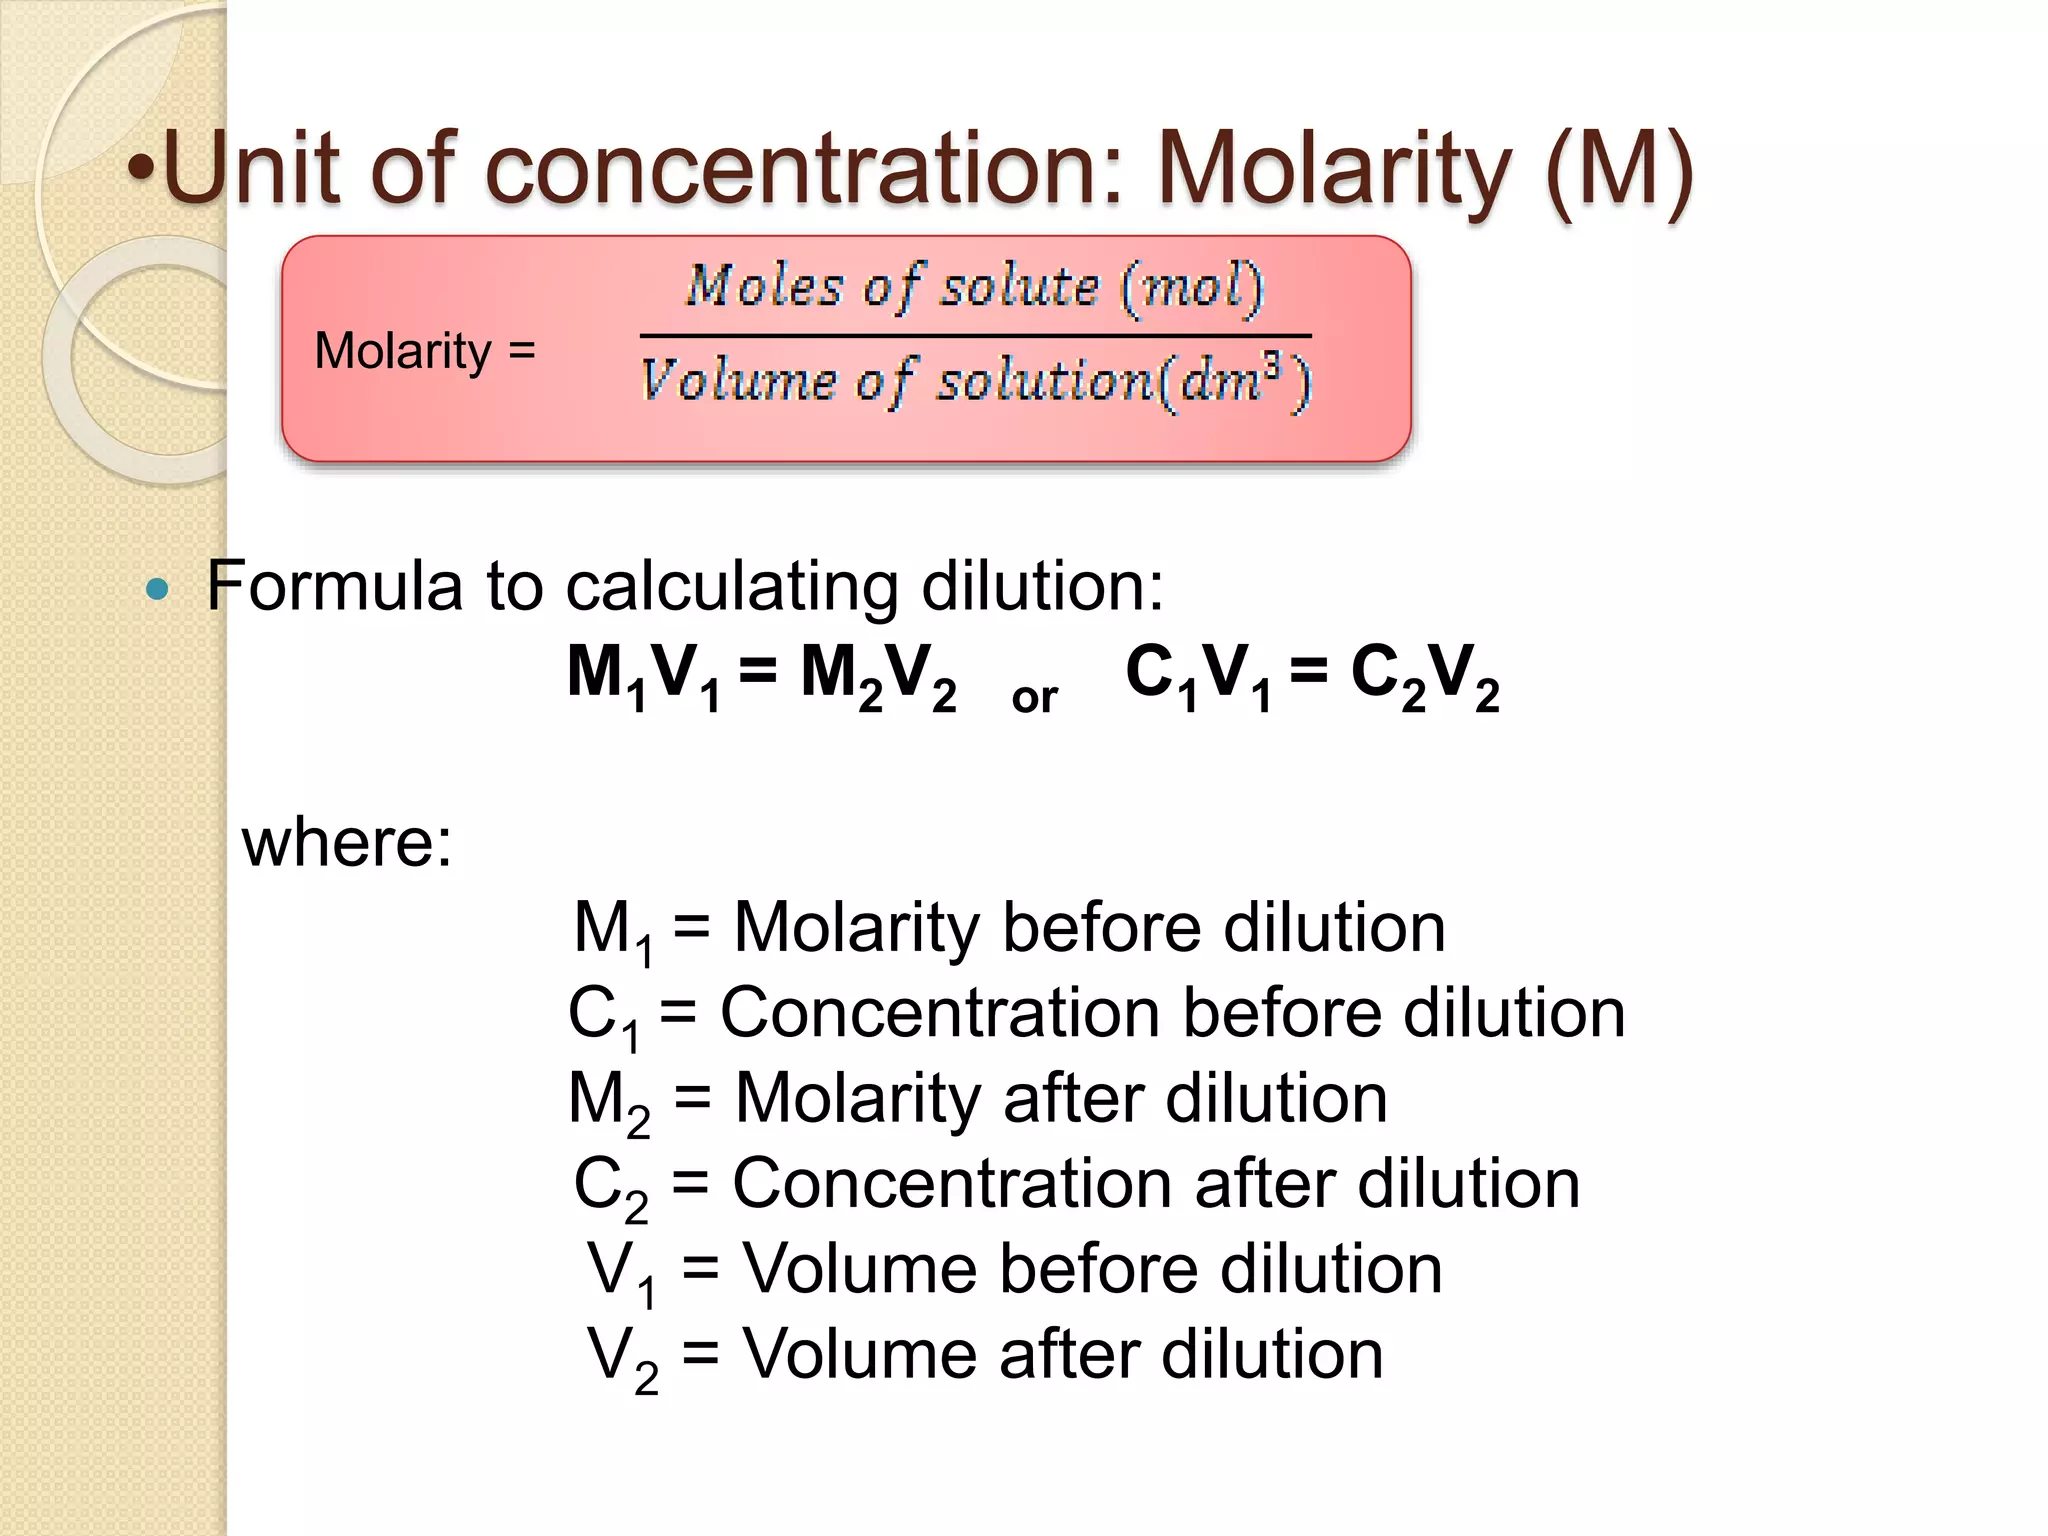
![Solution 1: Using percentage
by weight (w/v)
Formula :
The formula for weight percent (w/v) is:
[Mass of solute (g) / Volume of solution (mL)]x
100](https://image.slidesharecdn.com/preparationofsolutionedited2-140804105753-phpapp02/75/chemistry-Preparation-of-solution-36-2048.jpg)


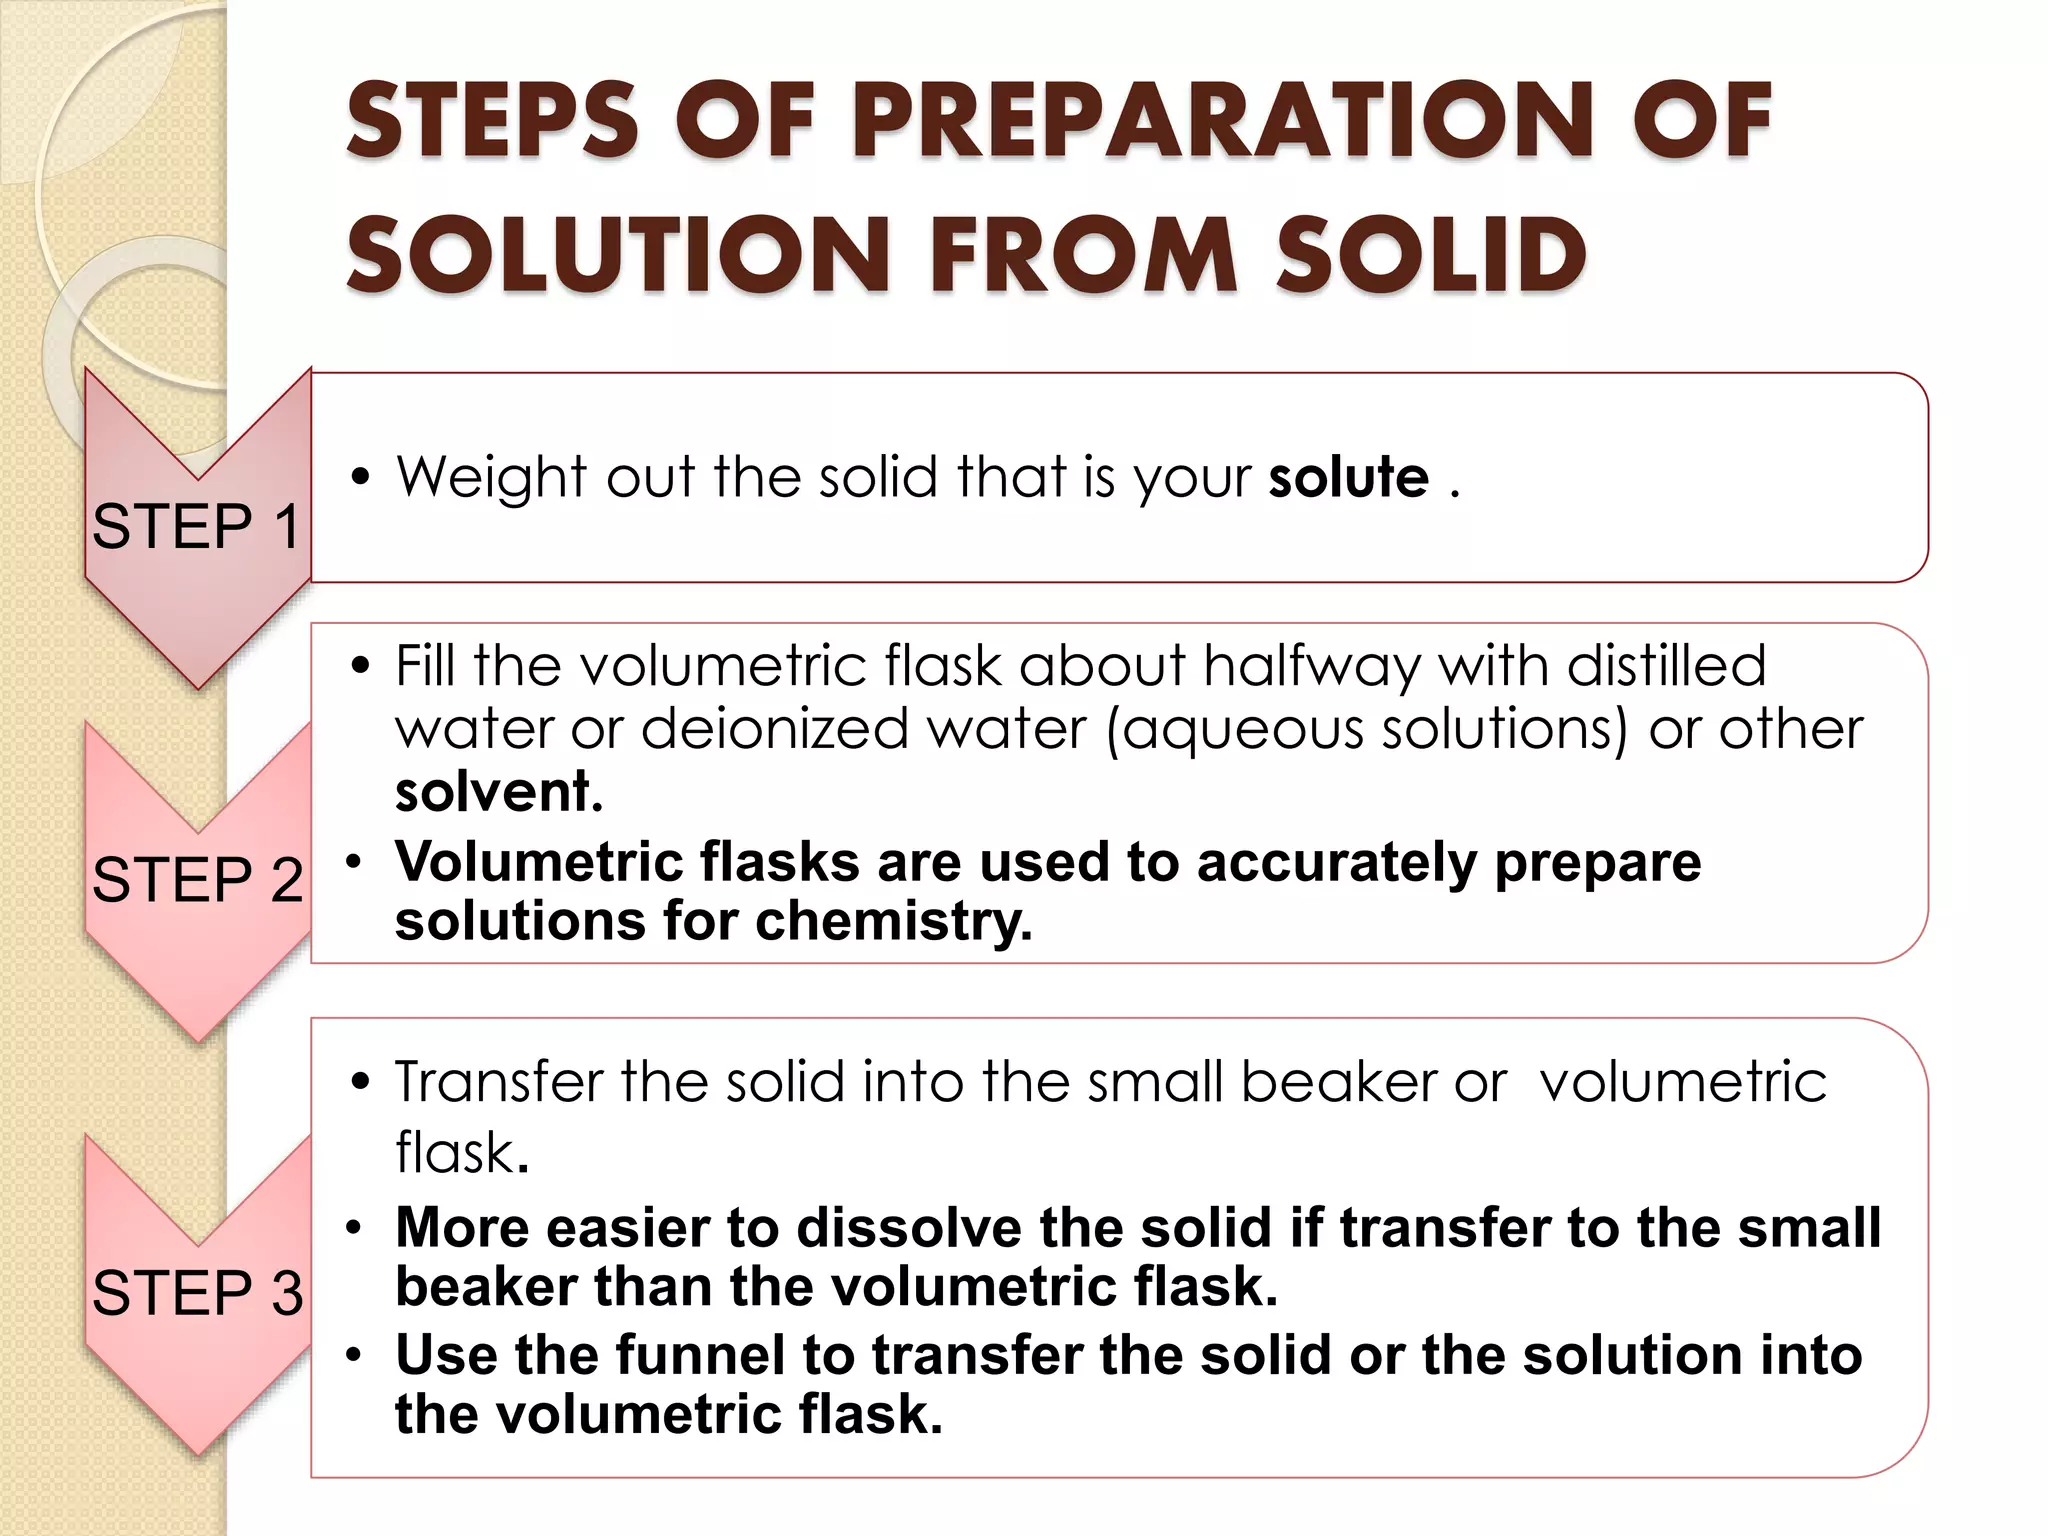
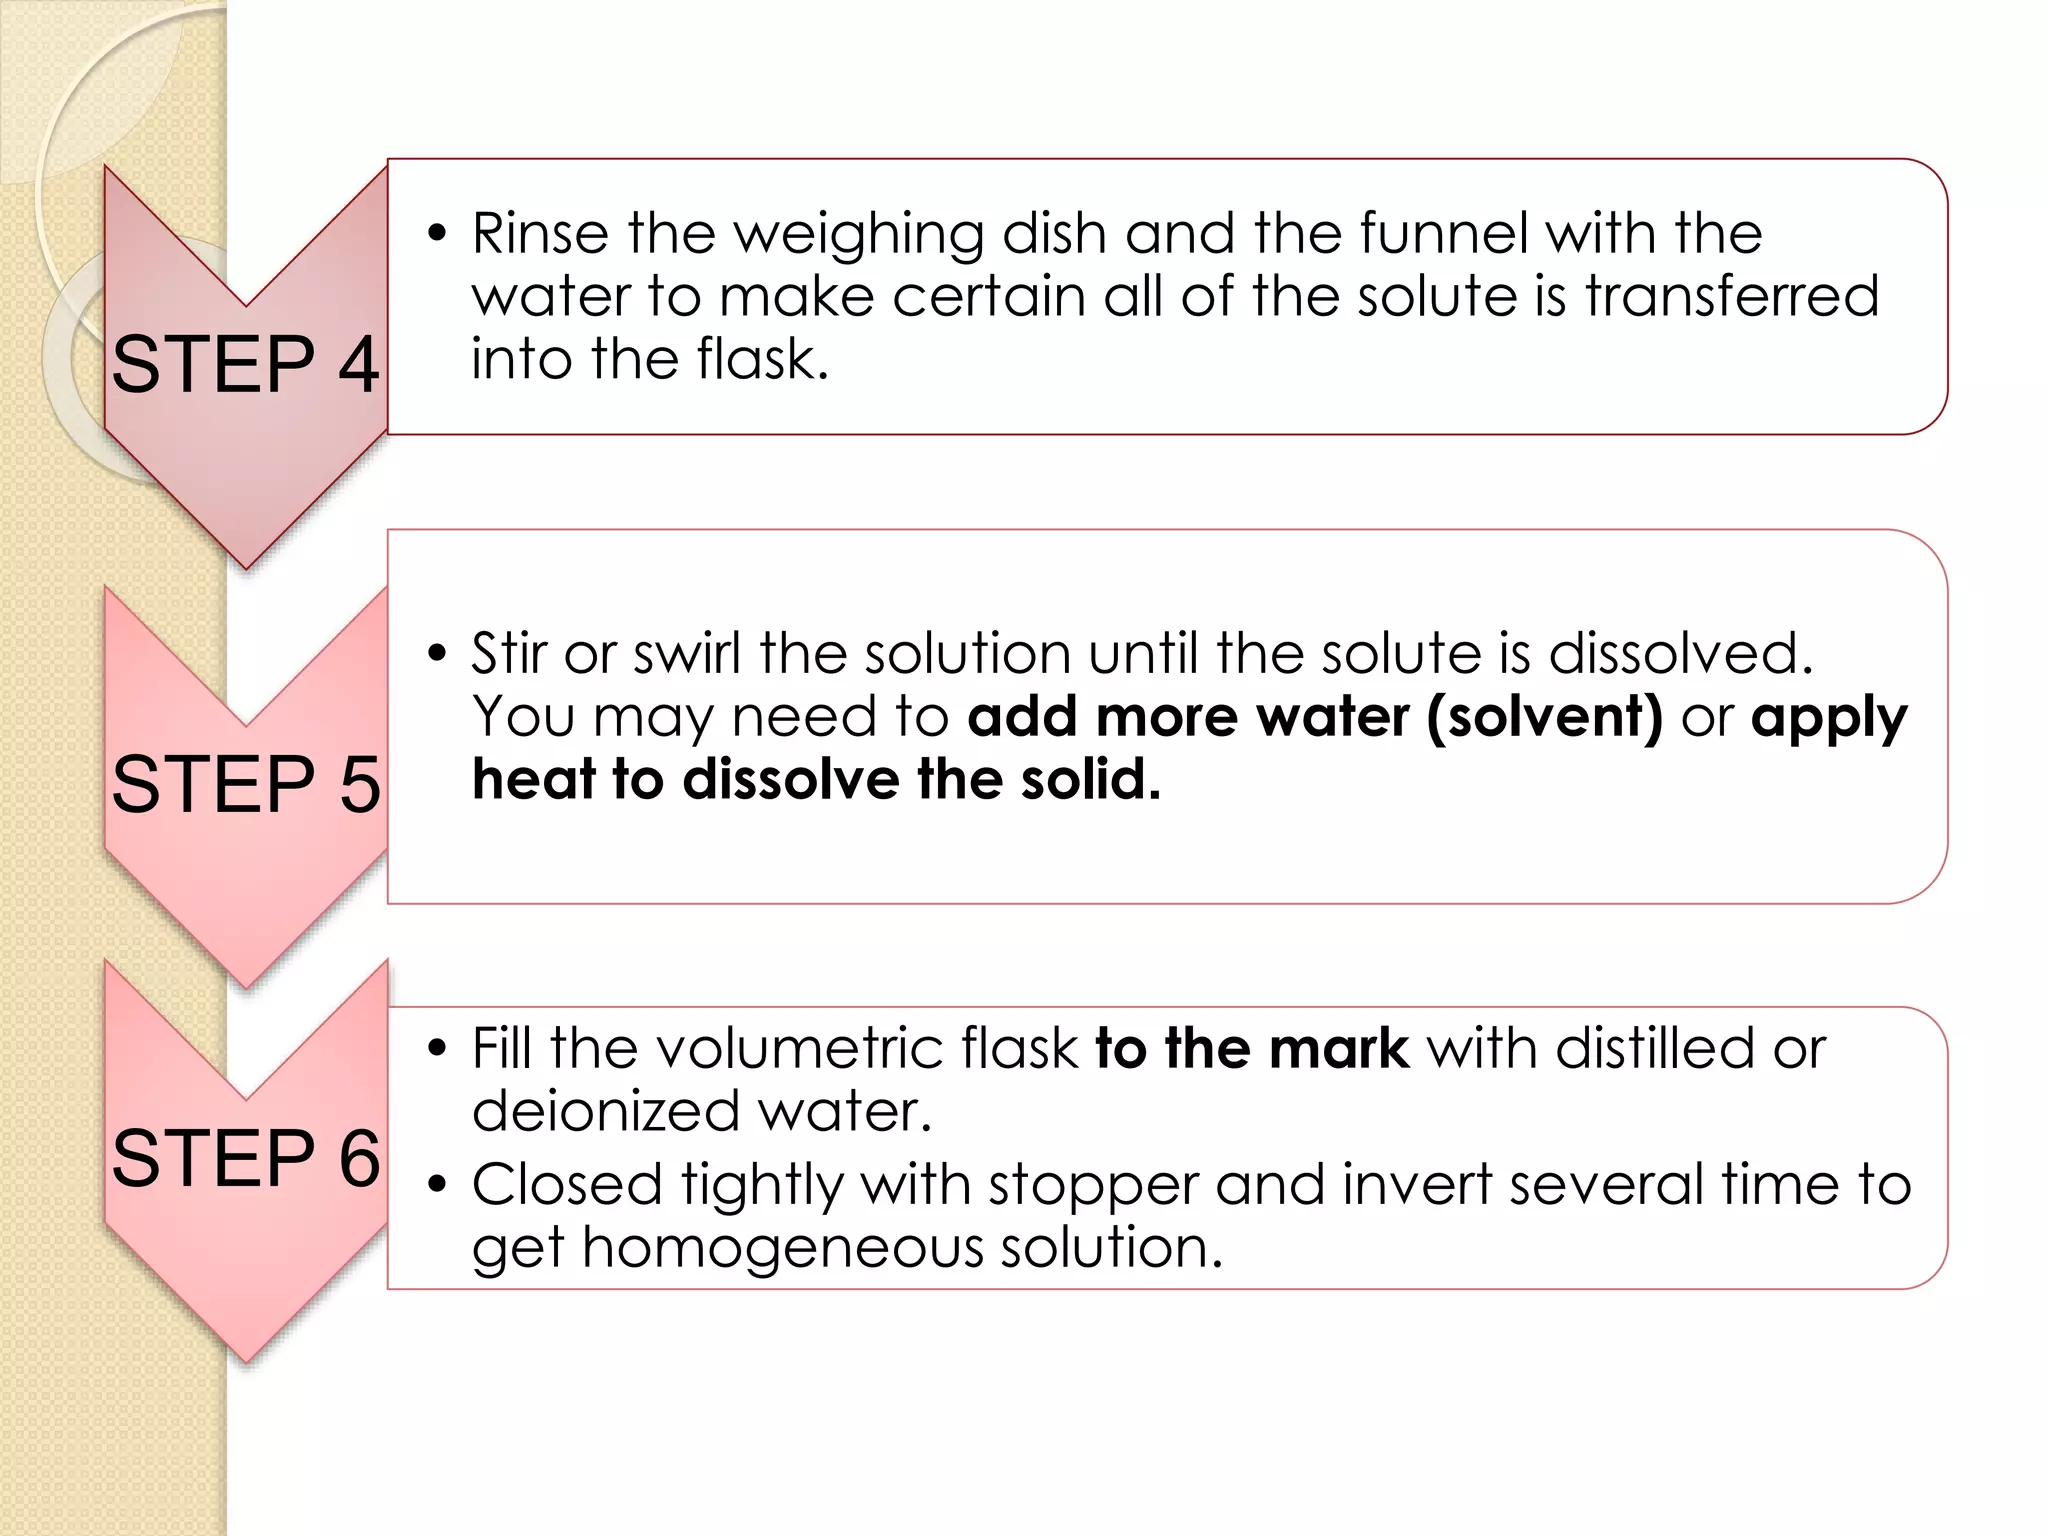
The document provides instructions for preparing solutions in a chemistry laboratory. It discusses weighing solids and measuring liquids accurately, using equipment like volumetric flasks, graduated cylinders, and balances. The key steps are to weigh the solute, add it to part of the solvent in a volumetric flask, dissolve the solute, then fill the flask to the mark and mix thoroughly to obtain a homogeneous solution of known concentration. Proper technique and significant figures are important for obtaining precise results.