Download to read offline


![00ALPINE.book Page 22 Wednesday, January 20, 2010 2:30 PM
2 To cancel repeat play, select (off) with the above
procedure. Searching by artist name
Note
• During repeat play, setting M.I.X. to ON will cancel the repeat play.
1 Press ENTER to activate the search selection mode.
2 Turn the Rotary encoder to select a desired Bank, and
then press ENTER.
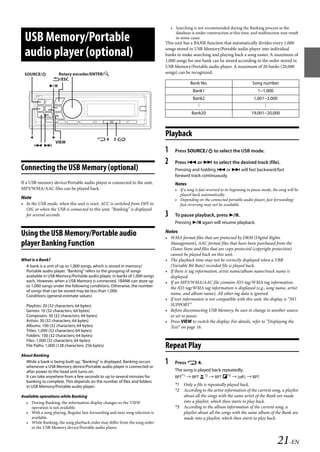
M.I.X. (Random Play) The “Banking” may be displayed for a few seconds.
1 Press 5 . 3 Turn the Rotary encoder to select the Artist search mode,
and then press ENTER.
The songs are played back in random sequence.
Playlist Artist Album Song Genre Composer
MIX*1 MIX ALL*2 (off ) MIX
Folder File Playlist
*1 Song shuffle randomly plays back songs within a selected
category (playlist, album, etc.). The songs within the category
are played just once until all songs have been played.
4 Turn the Rotary encoder to select the desired Artist, and
then press ENTER.
*2 All songs in the current Bank are played back in random
sequence. Any one song does not play back again until all songs
have been played back.
5 Turn the Rotary encoder to select an album, and then
press ENTER.
2 To cancel M.I.X. play, select (off) with the above procedure.
6 Turn the Rotary encoder to select a song and press
Notes ENTER.
• When a song is played back during Random (M.I.X.) play in the USB The selected song is played back.
mode, the song can be played back again randomly even if not all songs
in the current Bank have been played back. Notes
• During M.I.X. play, setting repeat play to ON will cancel the M.I.X. • After pressing and holding ENTER for at least 2 seconds while in
play. each hierarchy (except Song and File hierarchy), all songs of the selected
• During repeat play, etc., the track number display for M.I.X. play may hierarchy are played back.
be incorrect. • After selecting [ALL] in the search mode with “*”, press and hold
ENTER for at least 2 seconds to play back all songs in the selected
search mode.
• While in the search mode, if you press and hold ESC for at least
Searching for a desired Song 2 seconds, or no operation is performed for 60 seconds, the search mode
is cancelled.
A USB Memory or Portable audio player can contain hundreds of songs. • The root folder of USB Memory/Portable audio player is displayed as
By using file tag information and keeping these songs organised in “ROOT”.
playlists, this unit’s search functions will ease song searches. • When the bank is changed during Repeat play, the Repeat play will be
Each music category has its own individual hierarchy. Use the Bank/ cancelled.
Playlists*1/Artists/Albums/Songs/Genres/Composers/Folders/Files • In the search mode, pressing ESC will return to the previous
search mode to narrow searches based on the table below. mode.
• When search is made during M.I.X. play, the M.I.X. play mode will be
Hierarchy Hierarchy Hierarchy Hierarchy Hierarchy cancelled.
1 2 3 4 5 • In the search mode, a search can be made quickly by Alphabet skip
function to find the desired artist or song, etc. For details, refer to
Bank Playlist*1 Song — —
“Alphabet Skip Function” on page 23.
Bank Artist* Album* Song — • When searching for a song, artist, etc., in a USB Memory, the display
Bank Album* Song — — order may be incorrect if the character code of the file tag information is
mixed.
Bank Song — — —
Bank Genre* Artist* Album* Song
Bank Composer* Album* Song — Select Playlist*/Artist/Album/Genre/
Bank Folder File — —
Bank File — — —
Composer/Folder
*1 Playlist search is not available when a Portable audio player is Playlist*/Artist/Album/Genre/Composer/Folder can be easily changed.
connected. For example, if you listen to a song from a selected album, the album can
be changed.
For example:
Searching by Artist name
The following example explains how an Artists search is performed. 1 Press or to select the desired Playlist*/Artist/Album/
Another search mode can be used for the same operation, although the Genre/Composer/Folder.
hierarchy differs. * This item is invalid when a portable audio player is connected.
Notes
• If the song search mode was used to select a song, this function is
inactive.
• If an album is selected during an artist search, other albums by that
artist are searchable.
• This function is inactive during shuffle (M.I.X.) playback.
22-EN
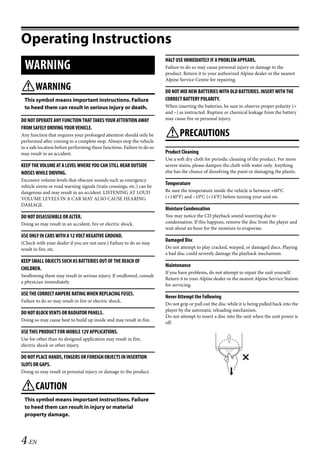
ALPINE CDA-117E 68-14470Z54-B (EN)](https://image.slidesharecdn.com/cda117eapvers-121220021022-phpapp02/85/Cda-117e-apvers-22-320.jpg)
![00ALPINE.book Page 24 Wednesday, January 20, 2010 2:30 PM
3 To pause playback, press . • While in the search mode, if you press and hold ESC for 2 seconds,
Pressing again will resume playback. or no operation is performed for 60 seconds, the search mode is
cancelled.
Notes • In the search mode, pressing ESC will return to the previous
• A song playing on the iPhone/iPod while it is connected to this unit will mode.
continue to play from where it was paused after disconnection. • When search is made during M.I.X. play, the M.I.X. play mode will be
• If you listen to an episode from a selected podcast or audiobook, the cancelled.
episode can be changed by pressing or . • “No Song” will be displayed if there are no songs in the selected playlist
• An episode may have several chapters. The chapter can be changed by in the Playlist search mode.
pressing or . • “No Podcast” will be displayed if there is no podcast data in the iPhone/
• When an iPhone 3GS or an iPod (Ver.3.x) is connected to this unit, iPod in the Podcast search mode.
after changing the source or received interruption, etc., to return to USB • “No Audiobook” will be displayed if there is no audiobook data in the
iPod mode, “No USB Unit” may be displayed. In this case, reconnect the iPhone/iPod in the Audiobook search mode.
iPhone 3GS/iPod. • If “iPod name” stored in the iPhone/iPod is selected in the desired
Playlist search mode, and ENTER is pressed, you can search for all
songs in the iPhone/iPod. Also, if you press and hold ENTER for at
least 2 seconds, all songs in the iPhone/iPod are played back.
Searching for a desired Song • Depending on the iPhone/iPod, podcast search is not supported.
• If Alphabet Skip Function is activated in the search mode, a search can
An iPhone/iPod can contain hundreds of songs. By using file tag be made quickly by Alphabet skip function to find the desired artist or
information and keeping these songs organised in playlists, this unit’s song, etc. For details, refer to “Alphabet Skip Function” on page 25.
search functions will ease song searches. • If any one of the preset buttons (1 through 6) is pressed in the
Each music category has its own individual hierarchy. Use the Playlist/ search mode, a search can be made quickly by skipping to the specified
Artist/Album/Song/Podcast/Genre/Composer/Audiobook search mode location. For details, refer to “Direct Search Function” on page 24.
to narrow searches based on the table below.
Hierarchy 1 Hierarchy 2 Hierarchy 3 Hierarchy 4 Quick Search
Playlist Song — —
Artist* Album* Song — You can search a song from all songs in the iPhone/iPod without
Album* Song — — selecting an album, artist, etc.
Song — — —
1 Press and hold ENTER for at least 2 seconds to activate
Podcast Episode — — the Quick Search mode.
Genre* Artist* Album* Song
Composer* Album* Song —
2 Turn the Rotary encoder to select a desired song.
The selected song is played back immediately.
Audiobook — — —
Notes
For example: • Press ESC in the search mode to cancel. Or, the search mode is
Searching by Artist name. cancelled if no operation is performed for 10 seconds.
The following example explains how an Artist search is performed. • If many songs are in iPhone/iPod, it takes time to search for songs.
Another search mode can be used for the same operation, although the • If any one of the preset buttons (1 through 6) is pressed in the
hierarchy differs. search mode, a search can be made quickly by skipping to the specified
location. For details, refer to “Direct Search Function” on page 24.
Searching by artist name • This function is inactive during repeat (RPT) playback.
1 Press ENTER to activate the search selection mode.
Direct Search Function
2 Turn the Rotary encoder to select the Artist search mode,
and then press ENTER.
The unit’s direct search function can be used to search for an album,
Playlist Artist Album Song Podcast Genre song, etc., more efficiently. In Playlist/Artist/Album/Song/Podcast/
Composer Audiobook Playlist Genre/Composer/Audiobook mode, you can quickly target any song.
3 Turn the Rotary encoder to select the desired Artist, and 1 In the search mode, press any one of the preset buttons (1
then press ENTER. through 6) to quickly skip over a designated percent of
your song content.
4 Turn the Rotary encoder to select the desired Album, and
then press ENTER. Song search example:
If there are 100 songs in your iPhone/iPod, they are divided into 6
5 Turn the Rotary encoder to select the desired Song, and groups using percentages (shown below). These groups are
then press ENTER. assigned to preset buttons 1 through 6.
The selected song is played back. Example 1:
Suppose the song you are searching for is located at around the
Notes middle (50%) of your library: press button 4 to jump to the 50th
• After pressing and holding ENTER for at least 2 seconds while in song and turn the Rotary encoder to find the desired song.
each hierarchy (except Song and Audiobook hierarchy), all songs of the
selected hierarchy are played back.
• After selecting [ALL] in the search mode with “*”, press and hold
ENTER for at least 2 seconds to play back all songs in the iPhone/
iPod or selected search mode.
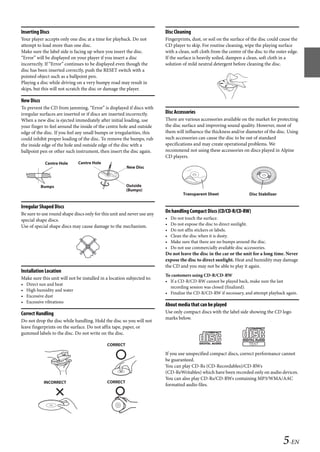
24-EN
ALPINE CDA-117E 68-14470Z54-B (EN)](https://image.slidesharecdn.com/cda117eapvers-121220021022-phpapp02/85/Cda-117e-apvers-24-320.jpg)

![00ALPINE.book Page 39 Wednesday, January 20, 2010 2:30 PM
Installation and Connections
Before installing or connecting the unit, please read the following
and refer to “Operating Instructions” on page 4 for proper use. USE SPECIFIED ACCESSORY PARTS AND INSTALL THEM SECURELY.
Be sure to use only the specified accessory parts. Use of other than
designated parts may damage this unit internally or may not
Warning securely install the unit in place. This may cause parts to become
loose resulting in hazards or product failure.
MAKE THE CORRECT CONNECTIONS. ARRANGE THE WIRING SO IT IS NOT CRIMPED OR PINCHED BY A SHARP
Failure to make the proper connections may result in fire or product
METAL EDGE.
damage.
Route the cables and wiring away from moving parts (like the seat
USE ONLY IN CARS WITH A 12 VOLT NEGATIVE GROUND. rails) or sharp or pointed edges. This will prevent crimping and
damage to the wiring. If wiring passes through a hole in metal, use a
(Check with your dealer if you are not sure.) Failure to do so may
rubber grommet to prevent the wire’s insulation from being cut by
result in fire, etc.
the metal edge of the hole.
BEFORE WIRING, DISCONNECT THE CABLE FROM THE NEGATIVE BATTERY
DO NOT INSTALL IN LOCATIONS WITH HIGH MOISTURE OR DUST.
TERMINAL.
Avoid installing the unit in locations with high incidence of
Failure to do so may result in electric shock or injury due to moisture or dust. Moisture or dust that penetrates into this unit may
electrical shorts. result in product failure.
DO NOT SPLICE INTO ELECTRICAL CABLES.
Never cut away cable insulation to supply power to other Precautions
equipment. Doing so will exceed the current carrying capacity of
the wire and result in fire or electric shock. • Be sure to disconnect the cable from the (–) battery post before
installing your CDA-117E. This will reduce any chance of damage to
DO NOT DAMAGE PIPE OR WIRING WHEN DRILLING HOLES. the unit in case of a short-circuit.
• Be sure to connect the colour coded leads according to the diagram.
When drilling holes in the chassis for installation, take precautions
Incorrect connections may cause the unit to malfunction or damage
so as not to contact, damage or obstruct pipes, fuel lines, tanks or to the vehicle’s electrical system.
electrical wiring. Failure to take such precautions may result in fire. • When making connections to the vehicle’s electrical system, be aware
of the factory installed components (e.g. on-board computer). Do not
DO NOT USE BOLTS OR NUTS IN THE BRAKE OR STEERING SYSTEMS TO tap into these leads to provide power for this unit. When connecting
MAKE GROUND CONNECTIONS. the CDA-117E to the fuse box, make sure the fuse for the intended
Bolts or nuts used for the brake or steering systems (or any other circuit of the CDA-117E has the appropriate amperage. Failure to do
safety-related system), or tanks should NEVER be used for so may result in damage to the unit and/or the vehicle. When in
installations or ground connections. Using such parts could disable doubt, consult your Alpine dealer.
control of the vehicle and cause fire etc. • The CDA-117E uses female RCA-type jacks for connection to other
units (e.g. amplifier) having RCA connectors. You may need an
KEEP SMALL OBJECTS SUCH AS BATTERIES OUT OF THE REACH OF adaptor to connect other units. If so, please contact your authorized
Alpine dealer for assistance.
CHILDREN. • Be sure to connect the speaker (–) leads to the speaker (–) terminal.
Swallowing them may result in serious injury. If swallowed, consult Never connect left and right channel speaker cables to each other or
a physician immediately. to the vehicle body.
DO NOT INSTALL IN LOCATIONS WHICH MIGHT HINDER VEHICLE IMPORTANT
OPERATION, SUCH AS THE STEERING WHEEL OR SHIFT LEVER. Please record the serial number of your unit in the space provided
Doing so may obstruct forward vision or hamper movement etc. below and keep it as a permanent record. The serial number or the
and results in serious accident. engraved serial number is located on the bottom of the unit.
SERIAL NUMBER: [ ]
INSTALLATION DATE: [ ]
Caution INSTALLATION TECHNICIAN: [ ]
PLACE OF PURCHASE: [ ]
HAVE THE WIRING AND INSTALLATION DONE BY EXPERTS.
The wiring and installation of this unit requires special technical
skill and experience. To ensure safety, always contact the dealer
where you purchased this product to have the work done.
39-EN
ALPINE CDA-117E 68-14470Z54-B (EN)](https://image.slidesharecdn.com/cda117eapvers-121220021022-phpapp02/85/Cda-117e-apvers-39-320.jpg)

This document provides instructions for operating an Alpine car stereo system. It describes how to: - Turn the subwoofer and system on/off and adjust settings like level, balance, and phase. - Adjust sound fields using tools like parametric equalizer, graphic equalizer, and time correction. - Store and recall sound field adjustment settings. - Display text and time information on the stereo. - Configure Bluetooth, general, display, and tuner settings in the stereo's setup menu. - Play audio from USB memory devices or portable audio players connected to the stereo.