Download as PDF, PPTX


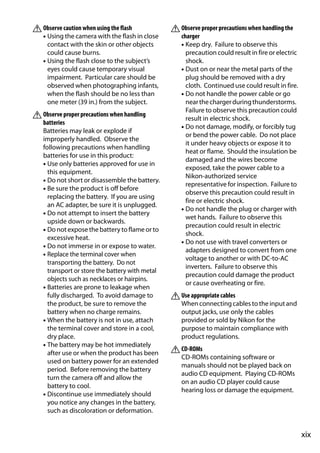


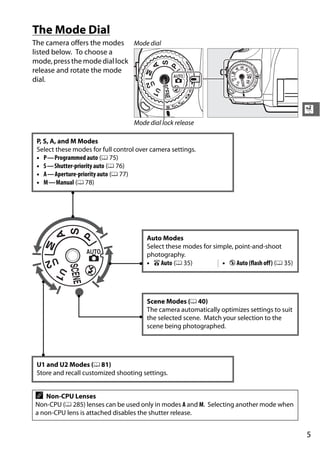


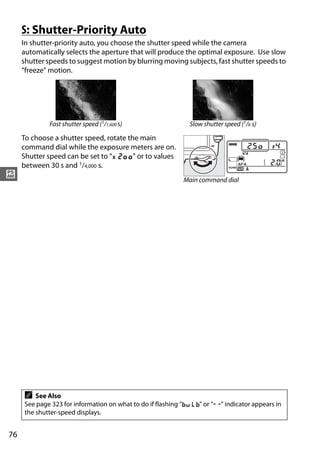
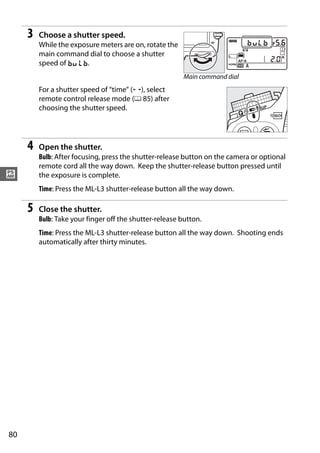

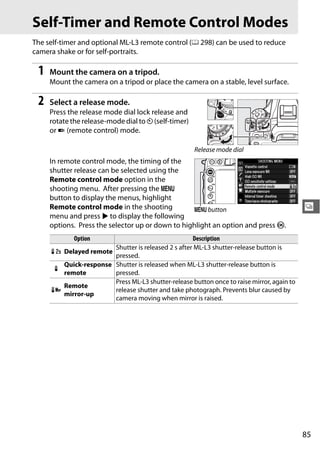


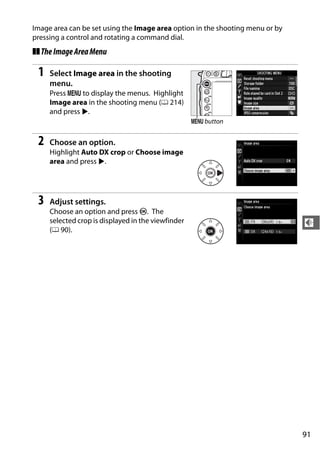
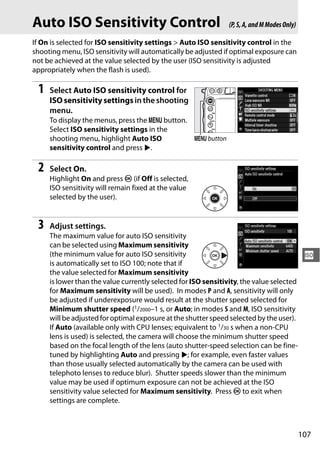
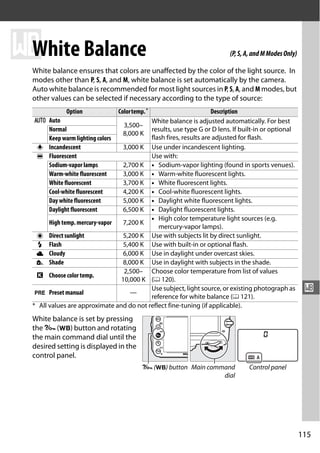
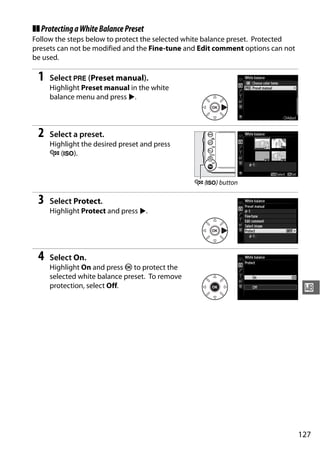

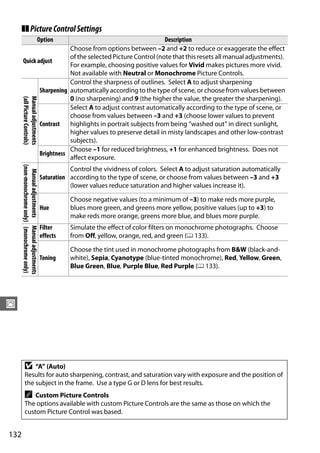


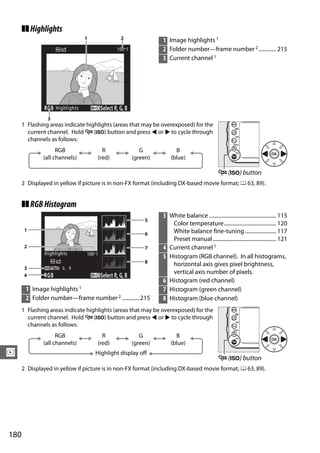


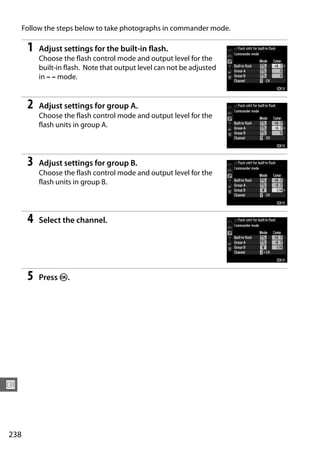


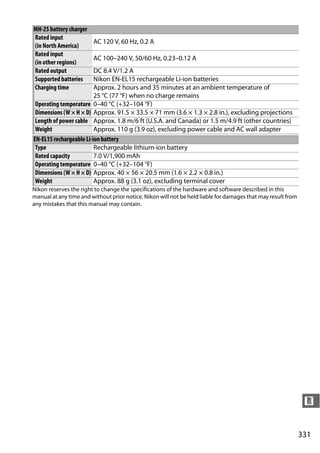
![Exposure Program (Mode P)
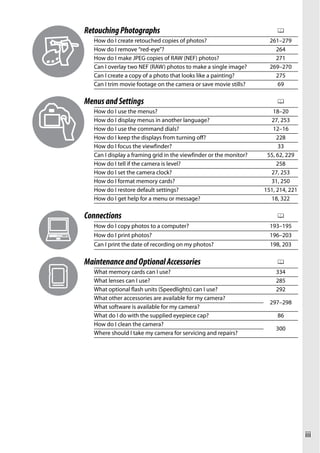
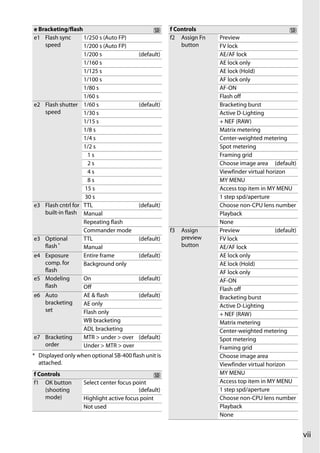
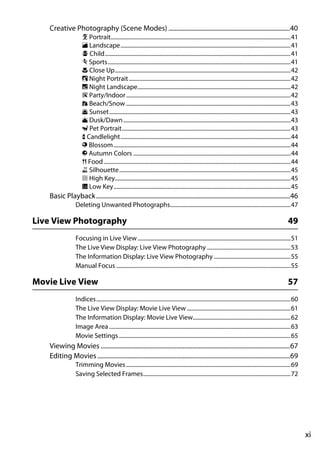
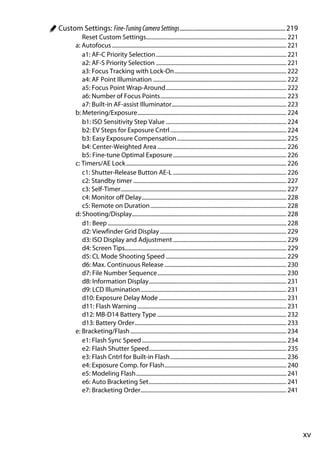
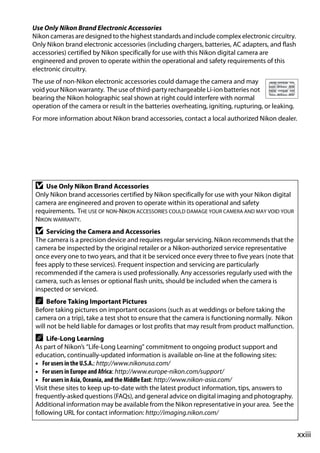
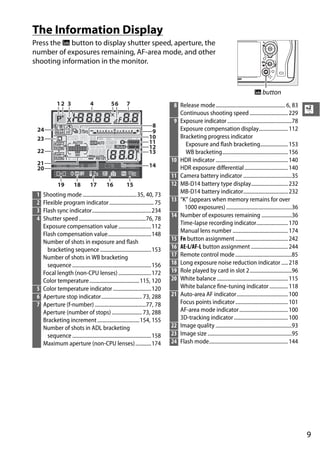
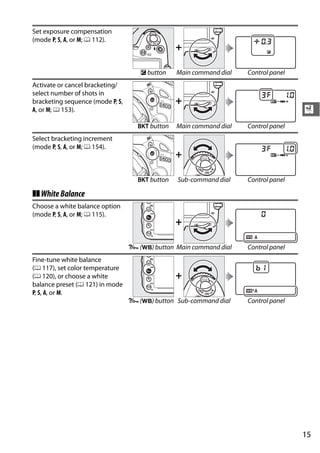
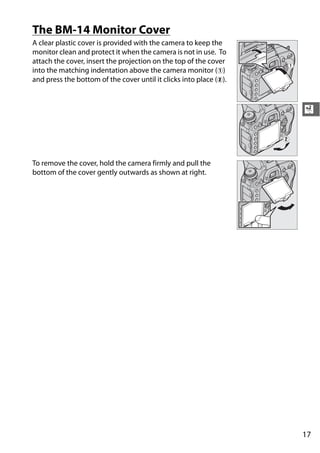
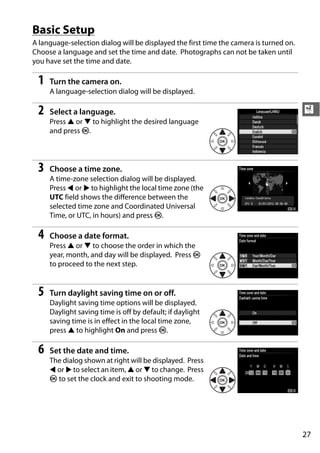
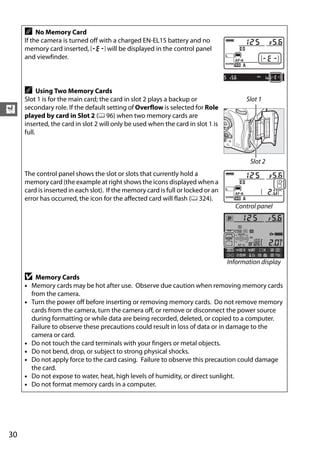
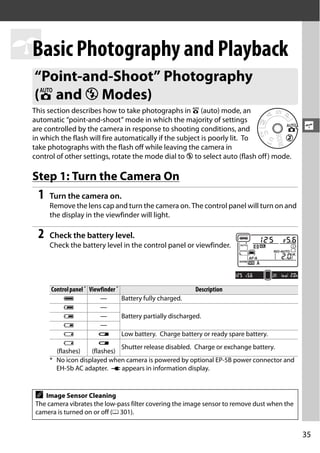
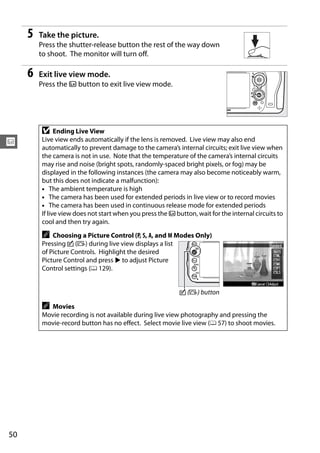
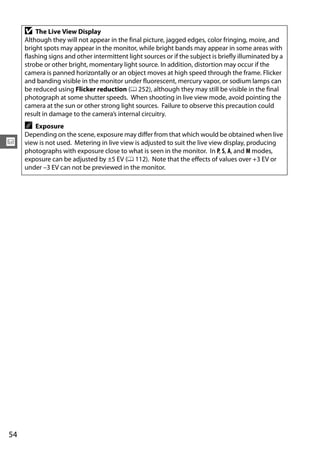
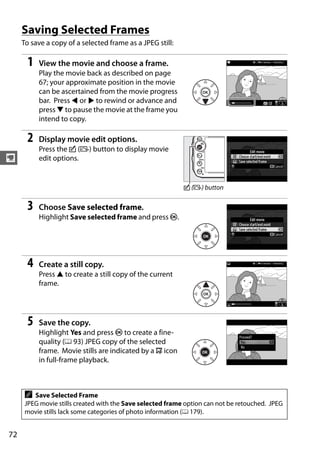
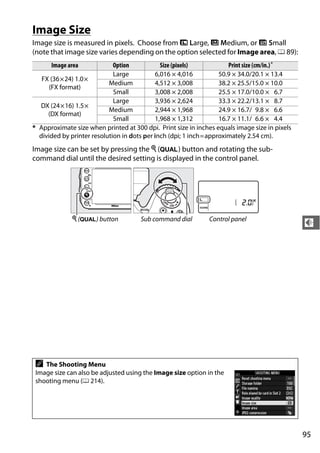
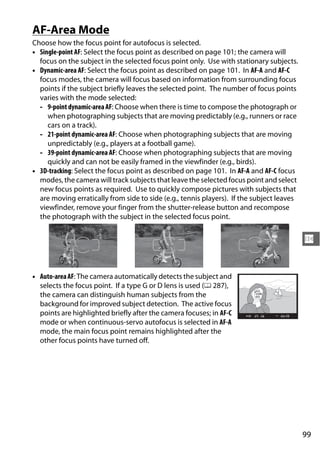
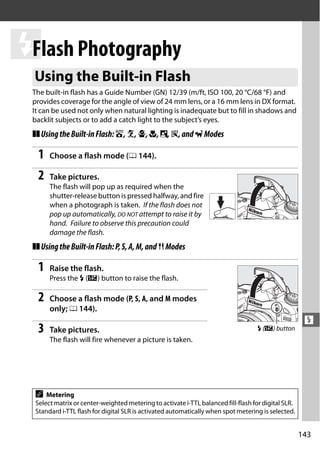
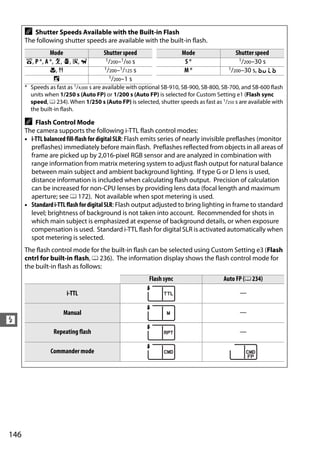
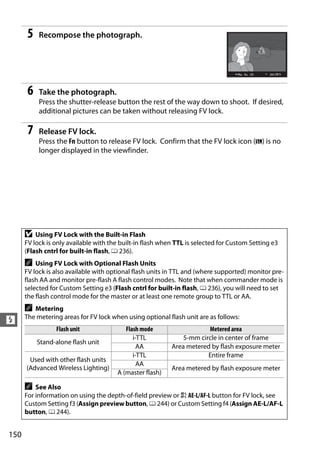
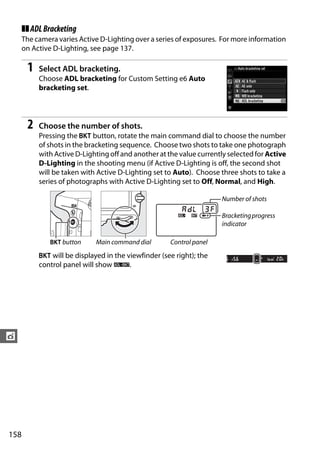
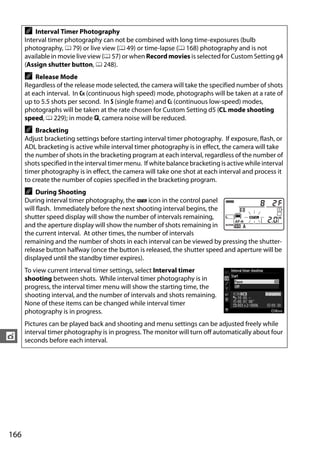
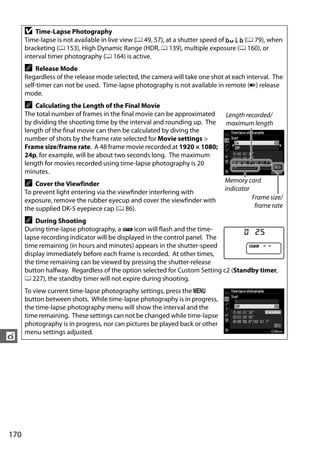
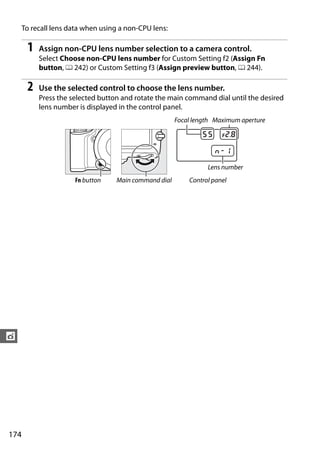
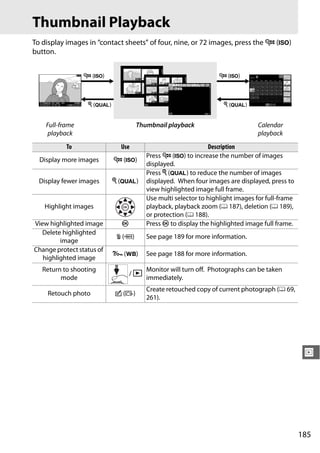
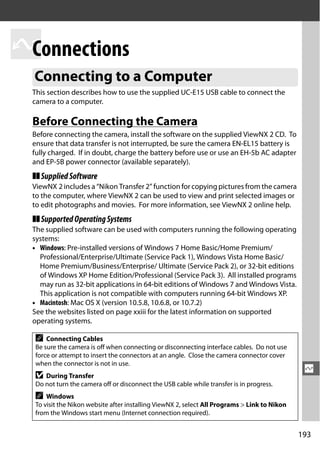
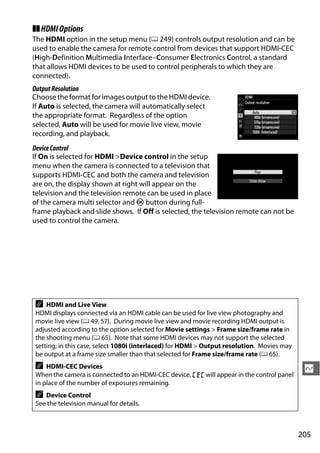
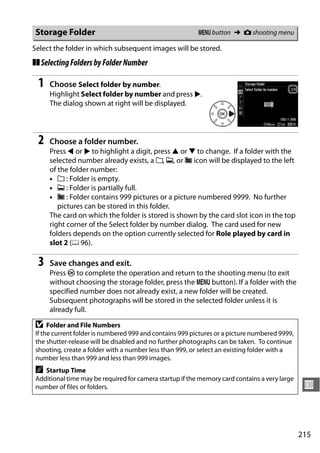
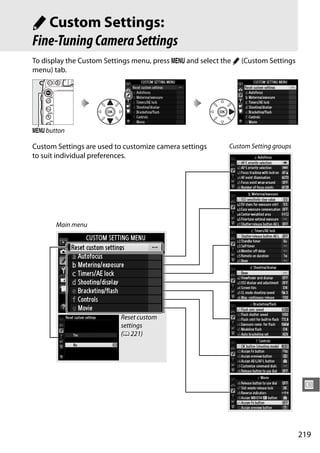
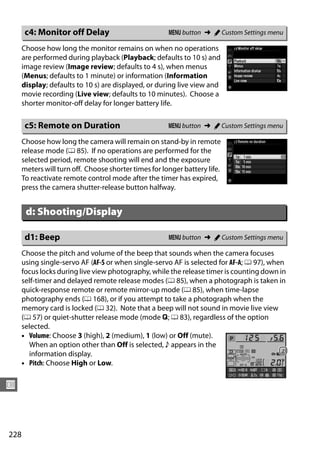
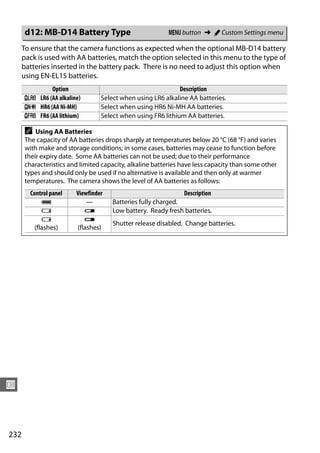
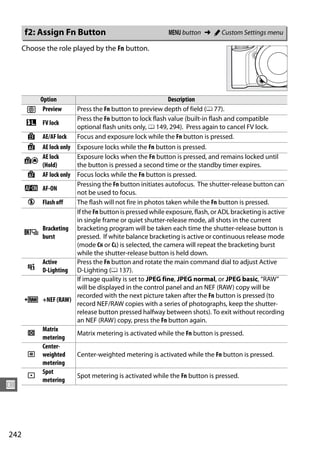
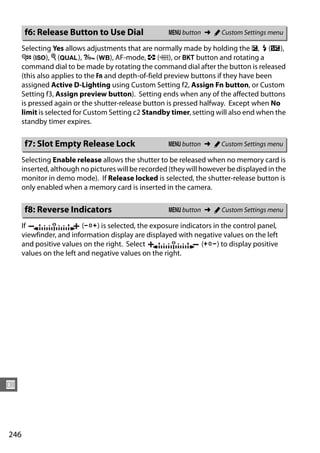
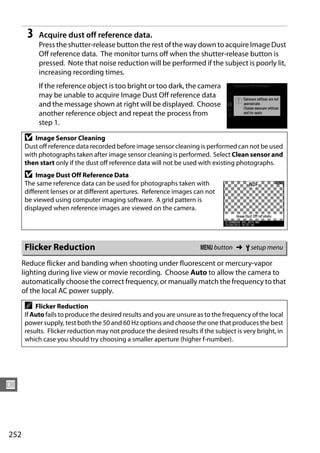
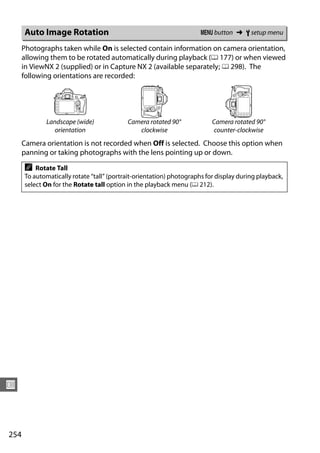
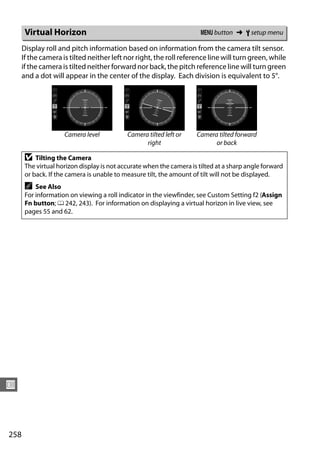
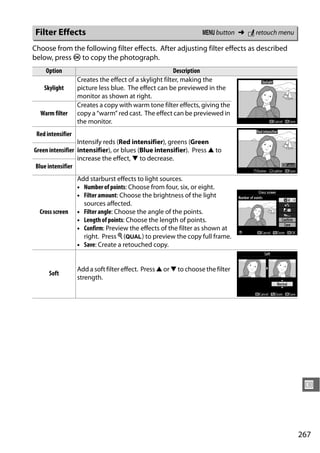
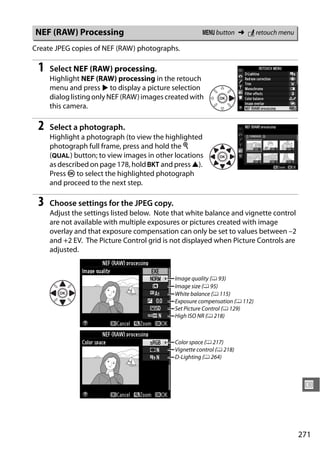
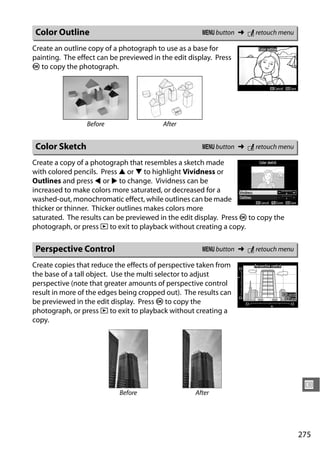
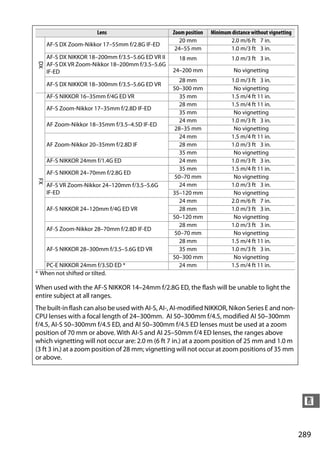
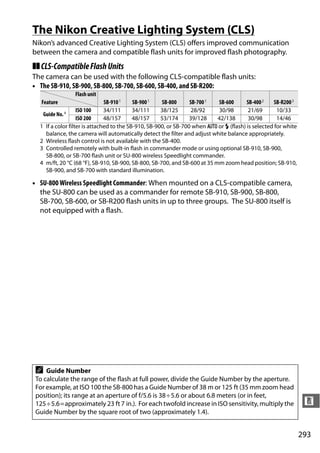
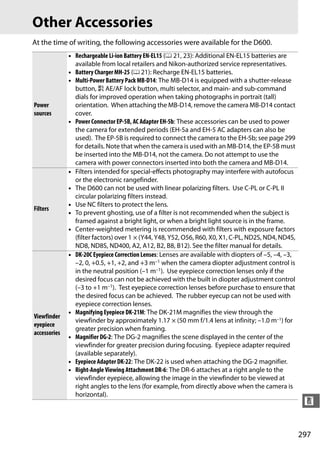
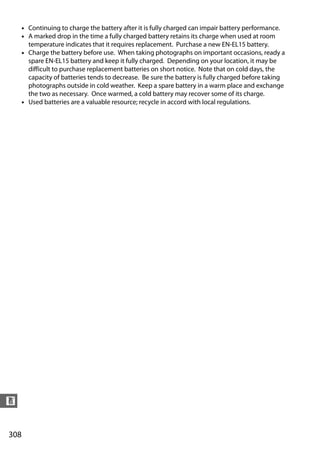
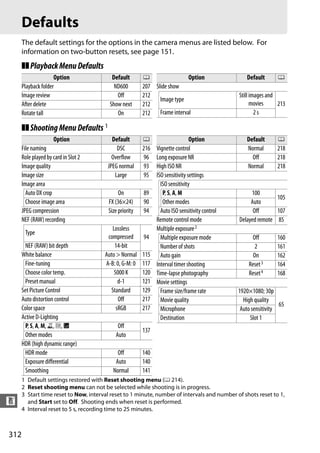
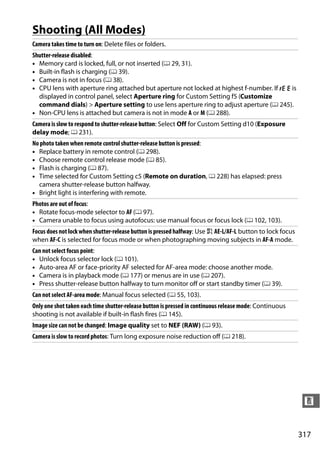
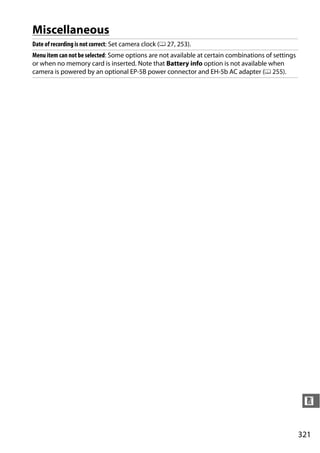
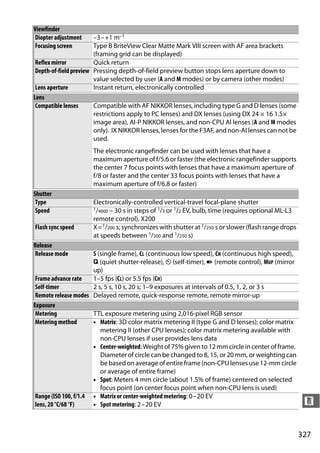
The exposure program for mode P is shown in the following graph:
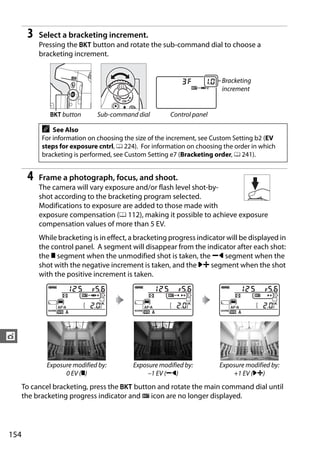
ISO 100; lens with maximum aperture of f/1.4 and minimum
aperture of f/16 (e.g., AF-S NIKKOR 50mm f/1.4G)
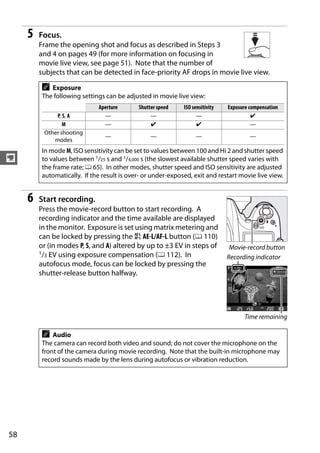
]
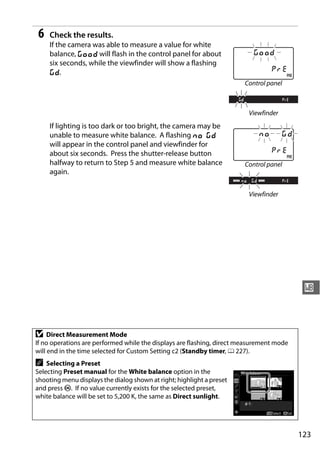
V
10
11
12
-5
-4
-3
-1
[E
-2
13
0
3
5
9
1
4
6
7
8
2
f/1
14
f/1.4
16 15
f/2
Aperture
/3
1
16
f/2.8 f/1.4 − f/16
17
f/4
18
f/5.6
19
f/8
20
f/11
21
f/16
22
f/22
23
f/32
30" 15" 8" 4" 2" 1" 2 4 8 15 30 60 125 250 500 1000 2000 4000 8000
Shutter speed (seconds)
The maximum and minimum values for EV vary with ISO sensitivity; the above graph
assumes an ISO sensitivity of ISO 100 equivalent. When matrix metering is used,
values over 161/3 EV are reduced to 161/3 EV.
n
315](https://image.slidesharecdn.com/d600en-121205231017-phpapp02/85/D600-en-341-320.jpg)

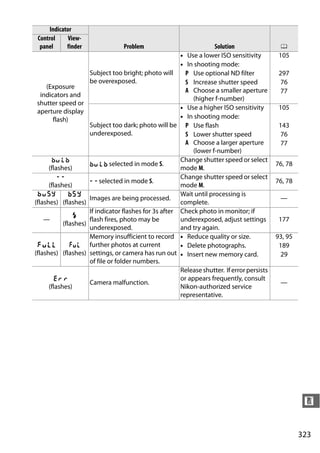
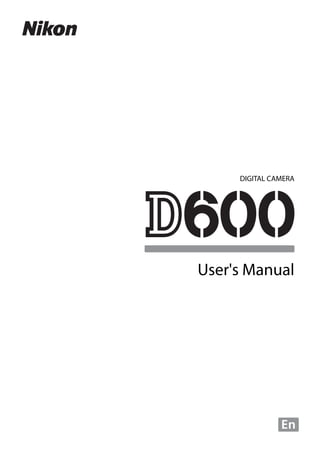
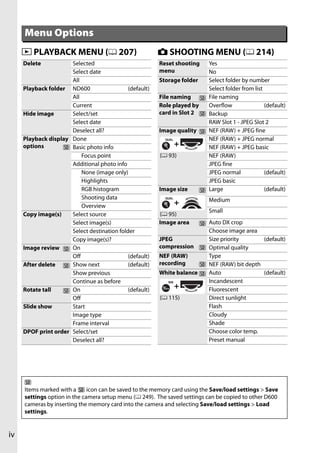
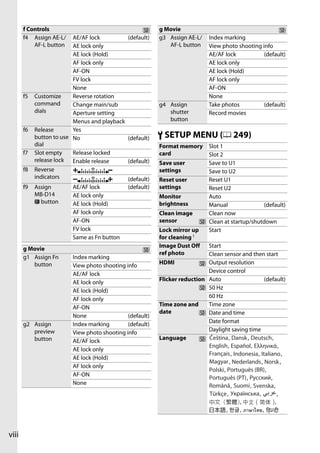
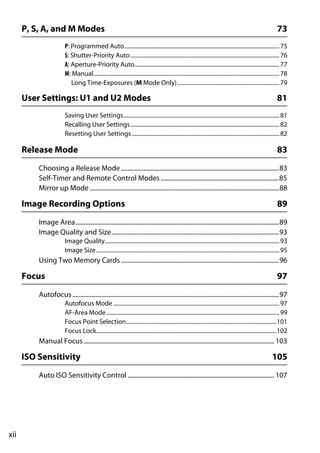
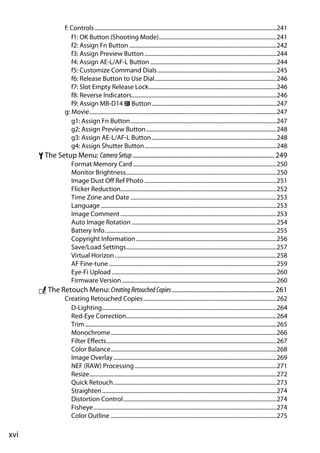
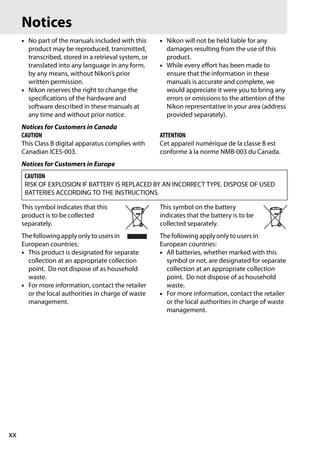
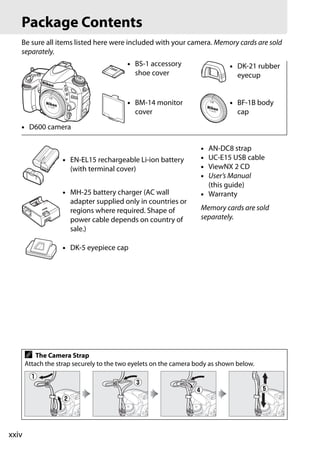
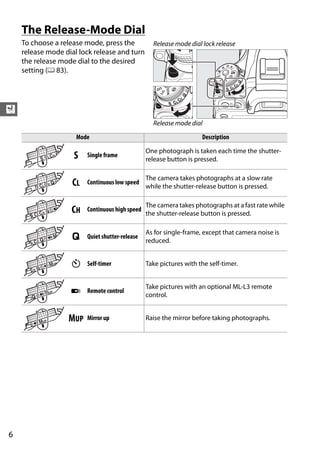
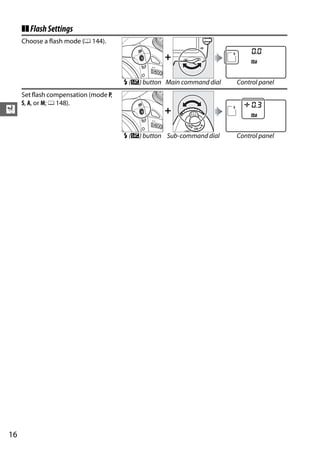
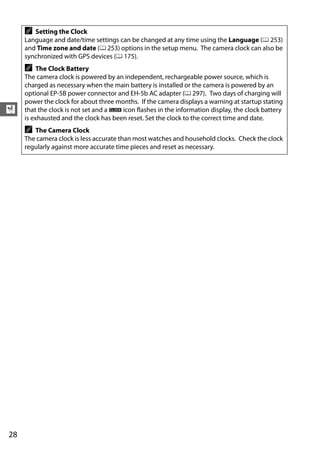
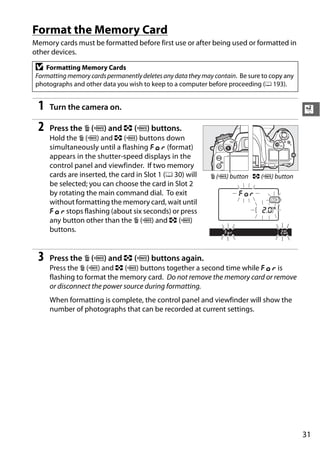
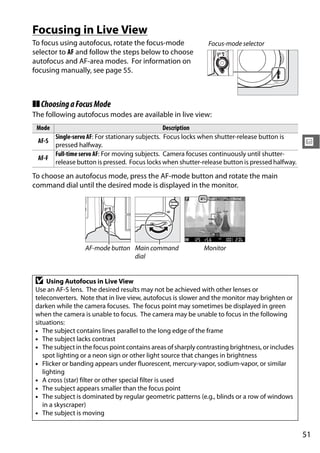
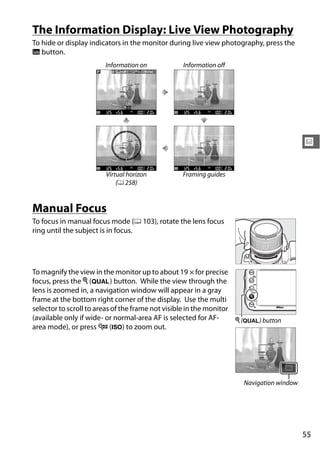
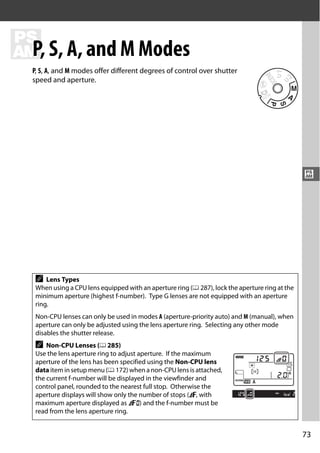
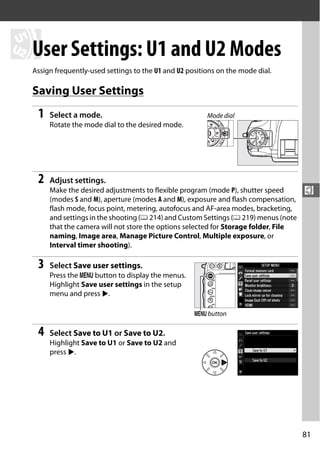
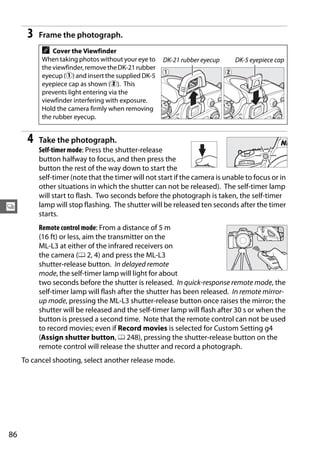
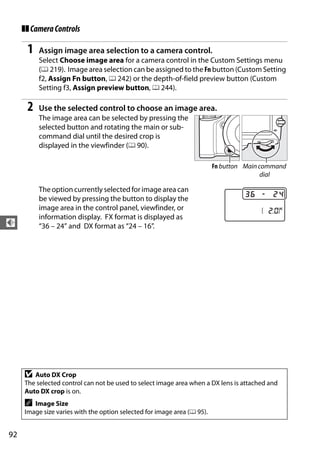
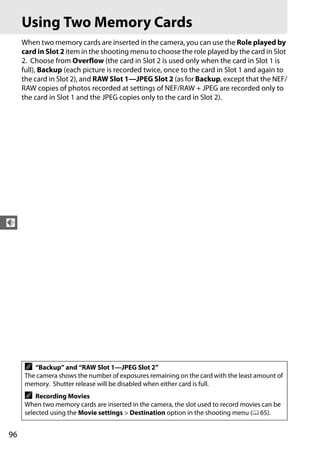
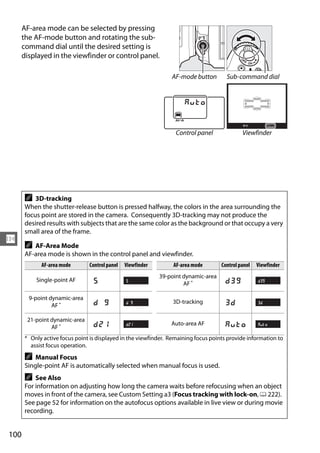
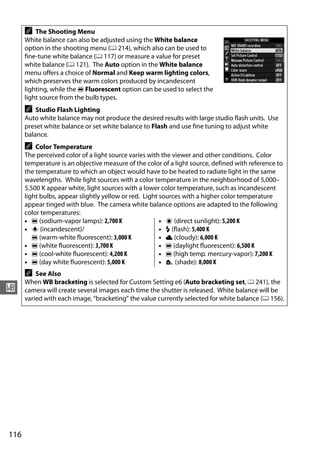
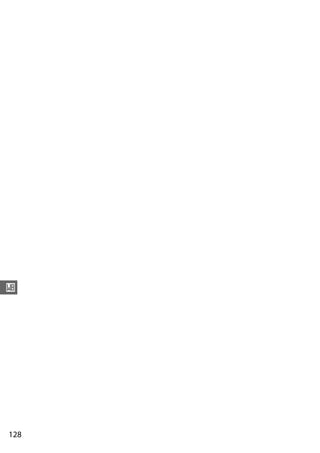
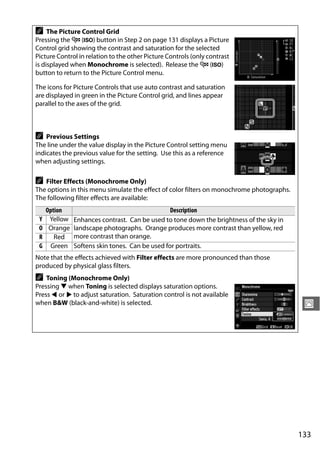
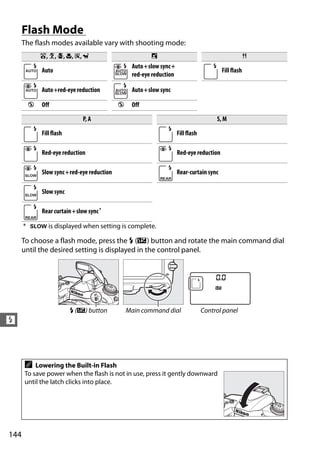
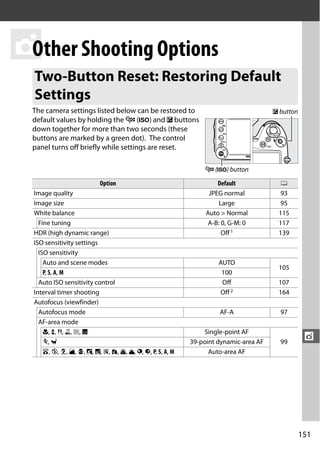
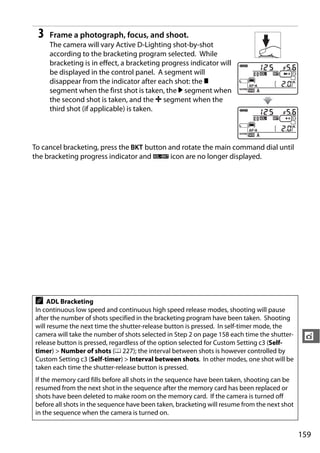
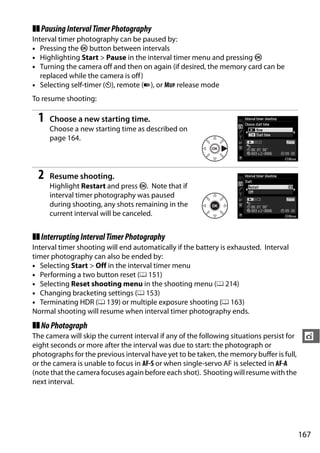
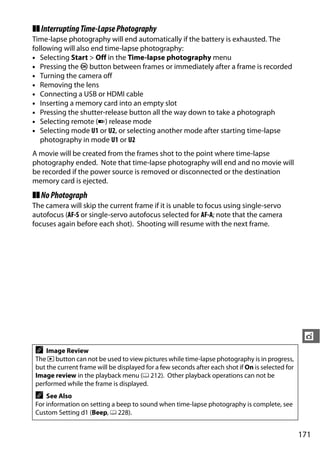
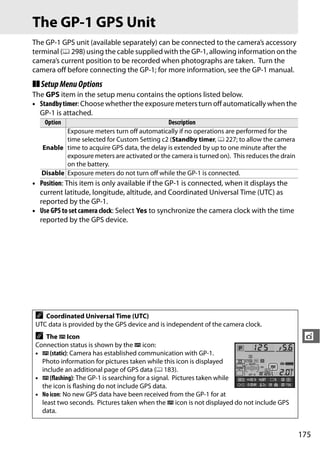
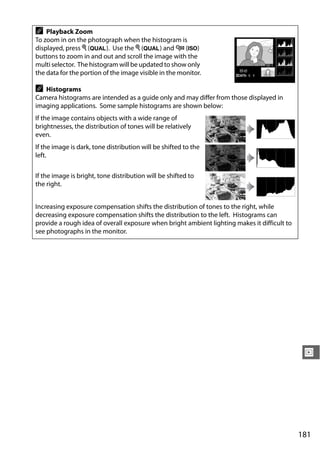
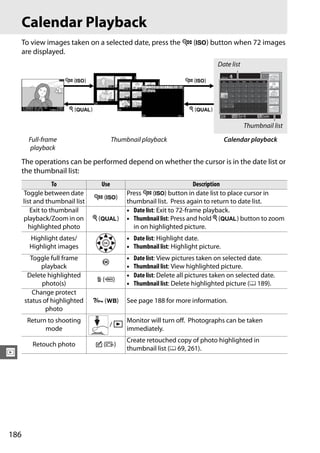
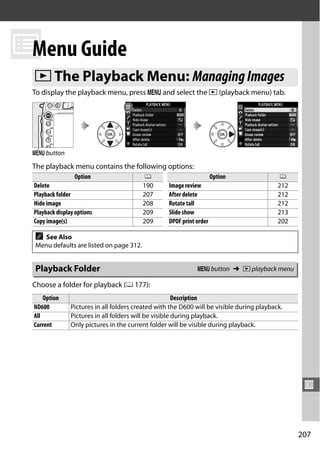
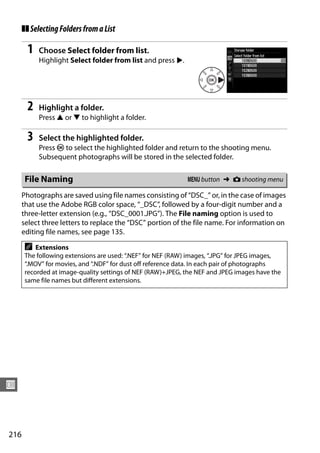
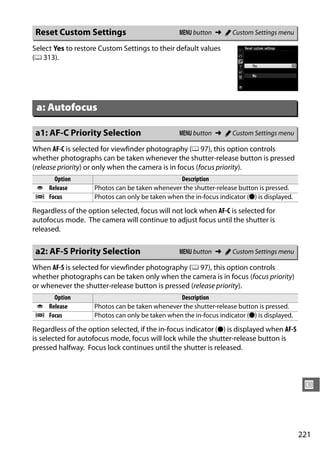
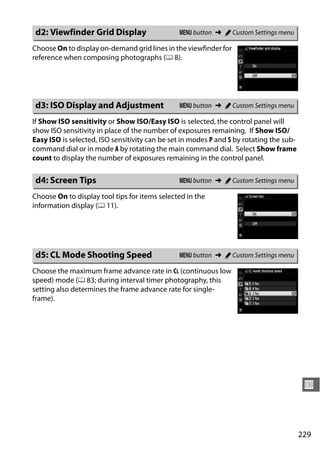
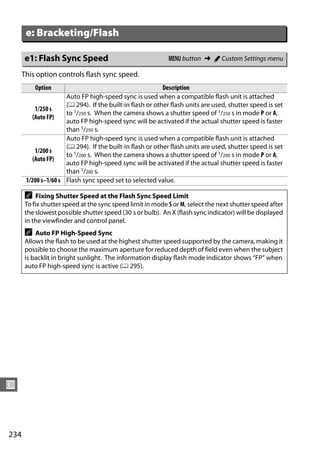
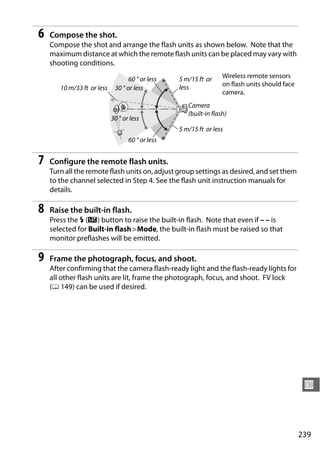
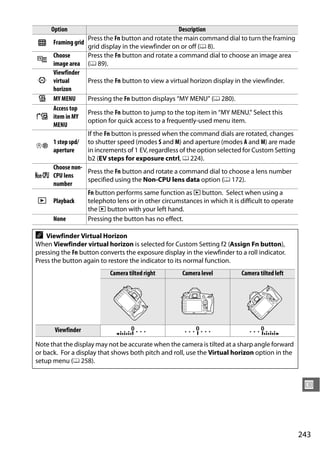
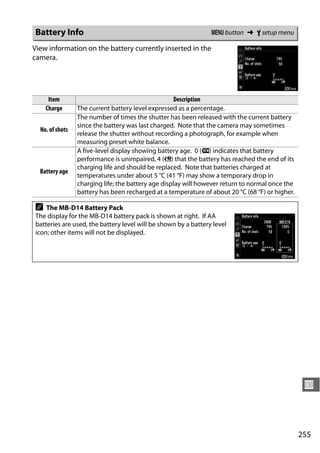
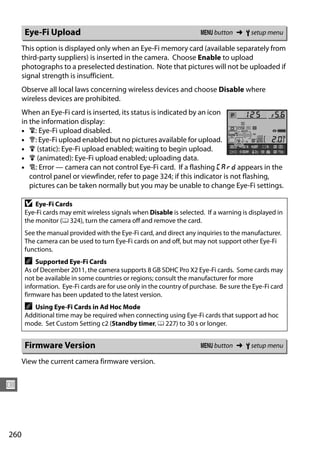
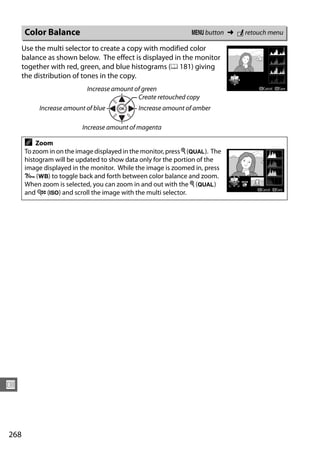
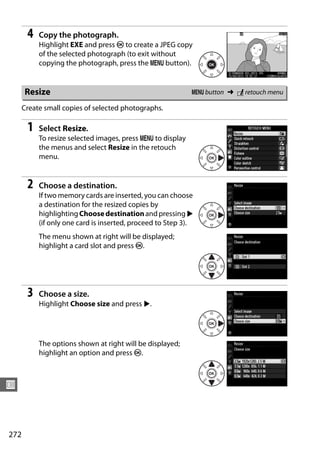
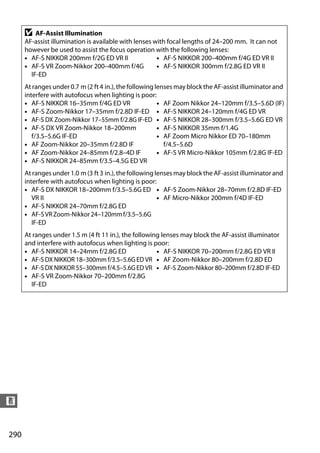
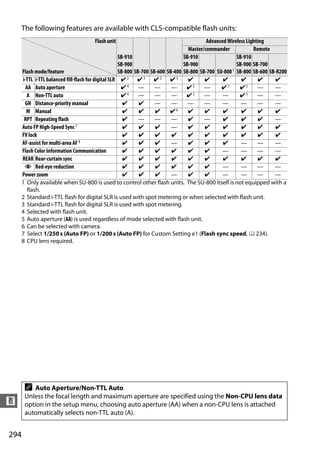
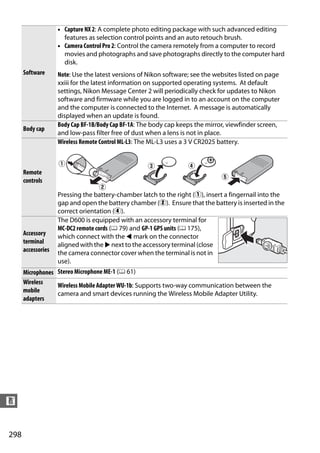
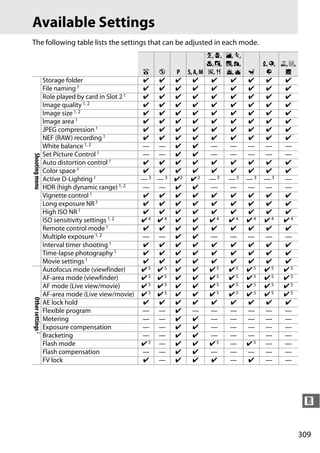
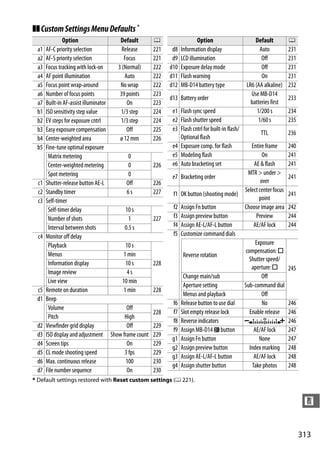
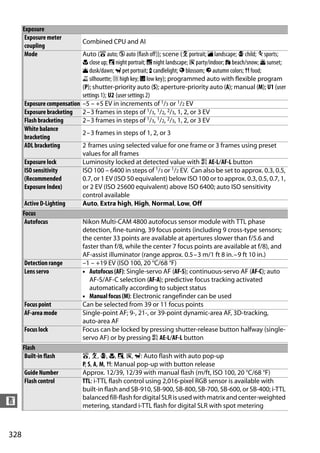
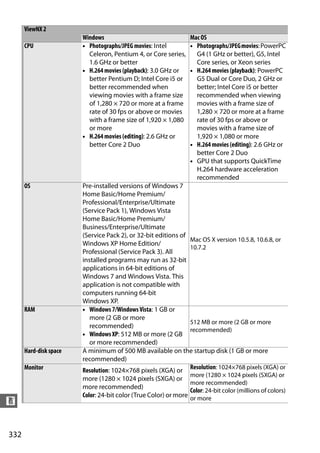
![Indicator
Control
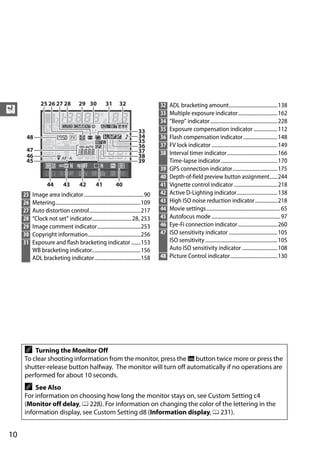
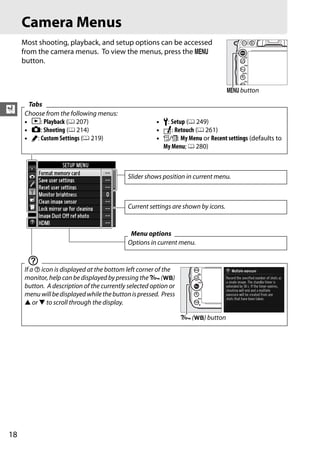
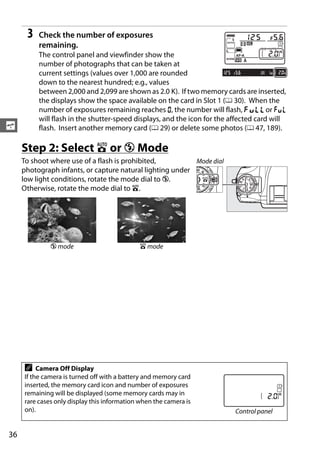
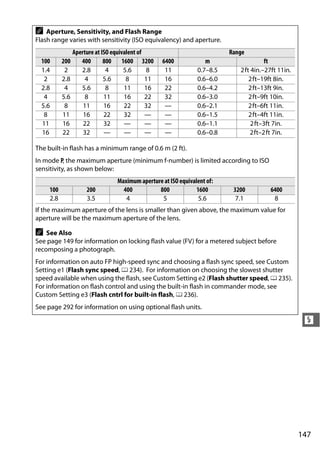
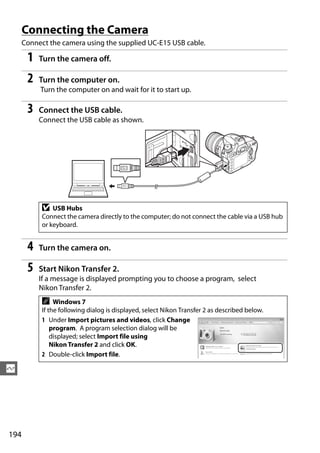
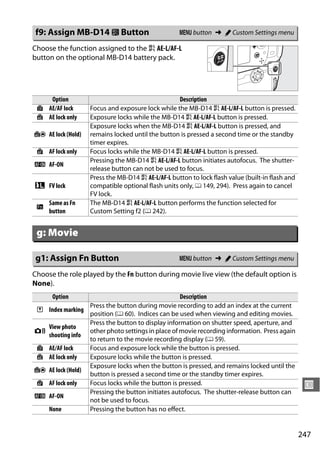
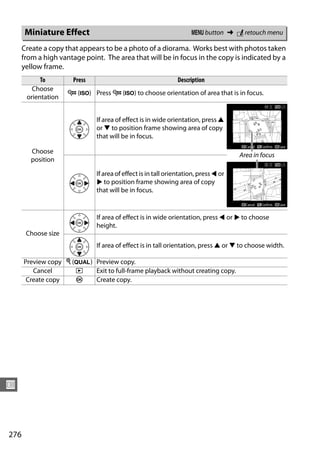
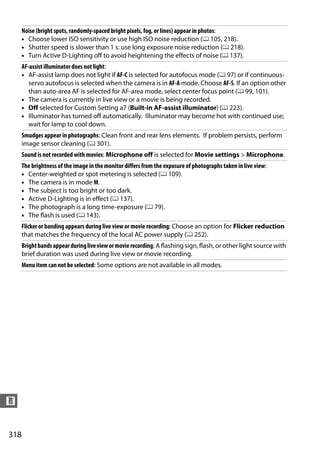
Monitor panel Problem Solution 0
Camera cannot detect Turn camera off and confirm
No memory card. S 29
memory card. that card is correctly inserted.
• Error accessing • Use Nikon-approved card. 334
memory card. • Check that contacts are —
clean. If card is damaged,
This memory card
contact retailer or Nikon-
cannot be used. W,
authorized service
Card may be O
representative.
damaged. (flashes)
• Unable to create new • Delete files or insert new 29, 189
Insert another card.
folder. memory card after copying
important images to
computer or other device.
• Check that Eye-Fi card 260
firmware is up to date.
W,
Camera can not control • Copy files on Eye-Fi card to 29, 31,
g O
Eye-Fi card. a computer or other device 193
(flashes)
and format card, or insert
new card.
Memory card is W,
Memory card is locked
locked. Slide lock to X
(write protected).
“write” position. (flashes) Slide card write-protect
32
W, switch to “write” position.
Not available if Eye-Fi card is locked
O
Eye-Fi card is locked. (write protected).
(flashes)
This card is not Memory card has not
[C] Format memory card or insert
formatted. been formatted for use in 29, 31
(flashes) new memory card.
Format the card. camera.
Clock has been reset — Camera clock is not set. Set camera clock. 27, 253
Failed to update
flash unit firmware.
Flash cannot be Firmware for flash unit
Contact a Nikon-authorized
used. — mounted on camera was —
service representative.
Contact a Nikon- not updated correctly.
authorized service
representative.
Wait for the internal circuits
Unable to start live The internal temperature
— to cool before resuming live 64
view. Please wait. of the camera is high.
view or movie recording.
n
324](https://image.slidesharecdn.com/d600en-121205231017-phpapp02/85/D600-en-350-320.jpg)

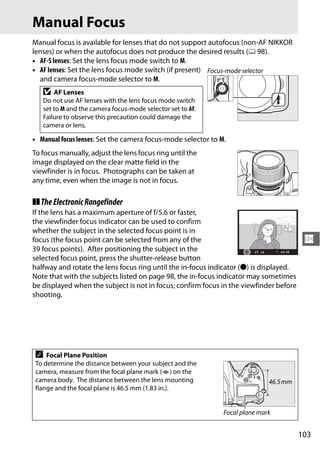
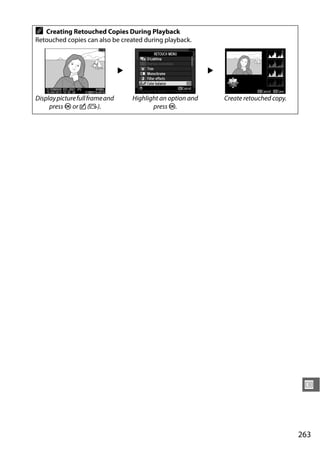
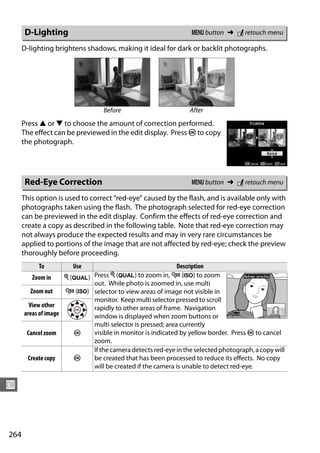
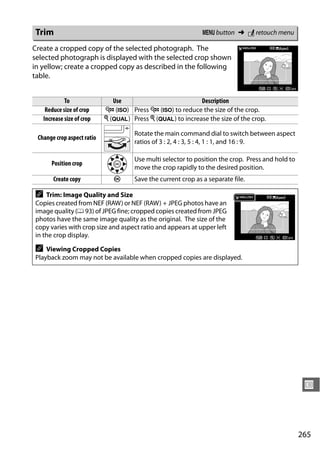
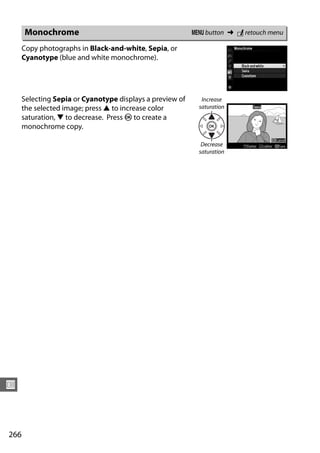
The document is the user manual for a Nikon D600 digital SLR camera. It provides instructions on basic camera operation, modes, menus, connections, maintenance and more. Key sections include an introduction, chapters on shooting modes, playback, retouching photos, custom settings menus, and connections. Symbols are used to mark important information and references to other pages. Camera settings assume default options are used.


![[Samsung NX100] New way to shoot with i-Function as a mirrorless camera](https://cdn.slidesharecdn.com/ss_thumbnails/samsungnx100-newwaytoshootwithi-functionasamirrorlesscamera-110705010802-phpapp02-thumbnail.jpg?width=640&height=640&fit=bounds)