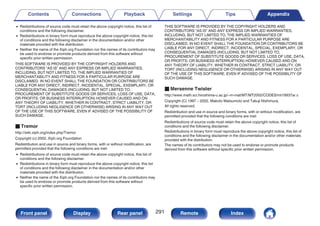
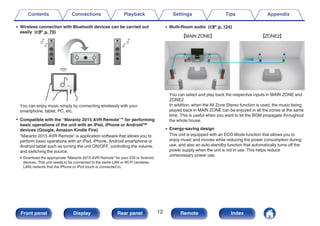
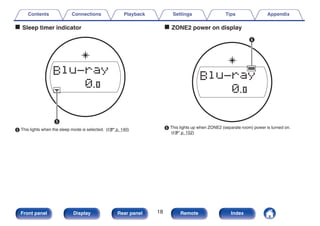
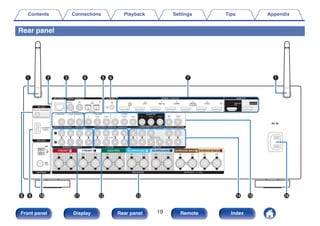
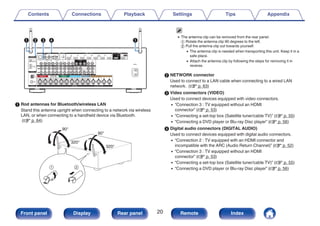
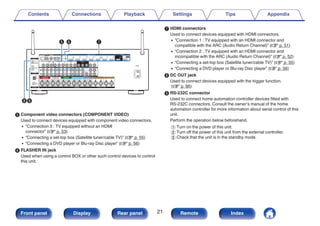
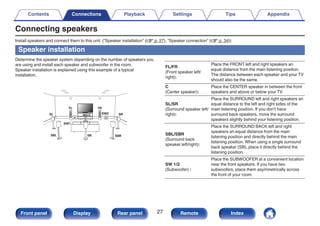
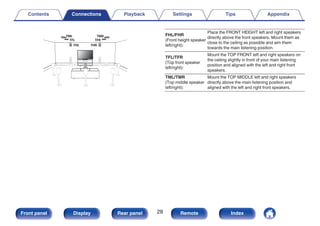
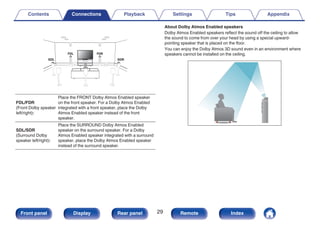
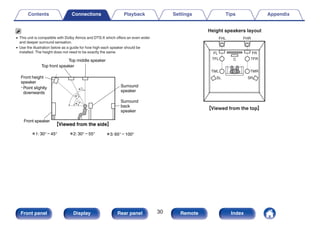
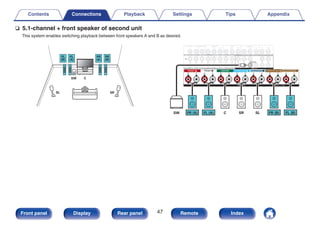
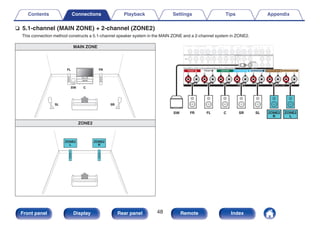
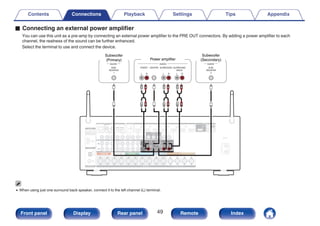
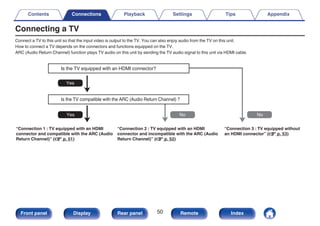
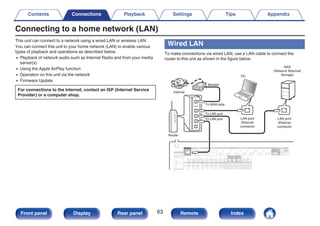
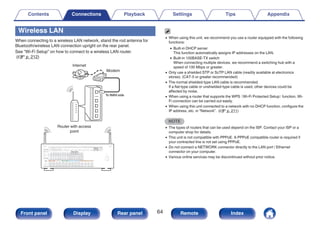
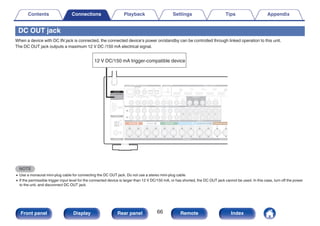
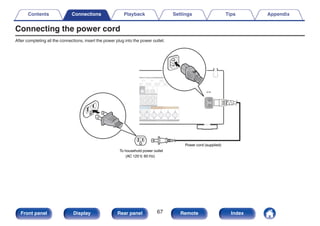
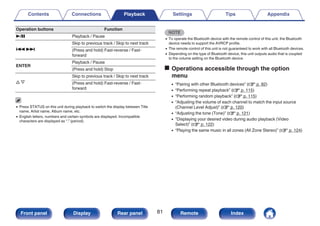
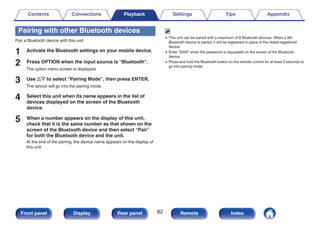
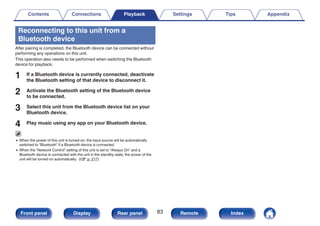
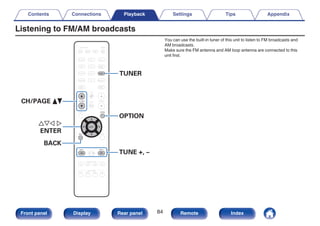
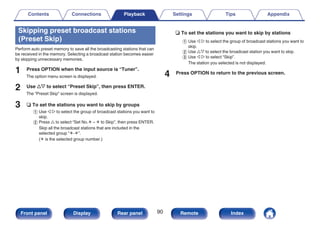
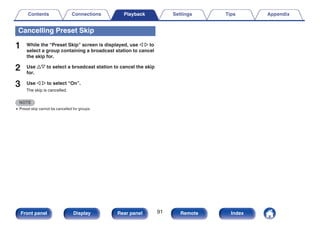
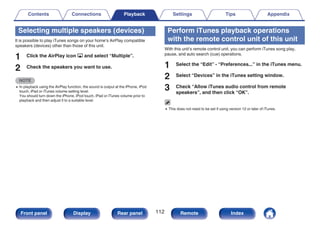
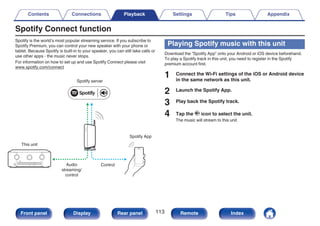
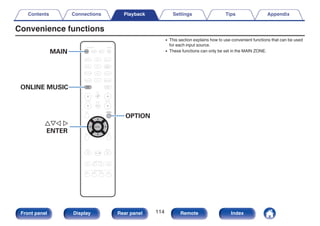
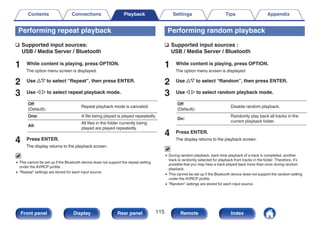
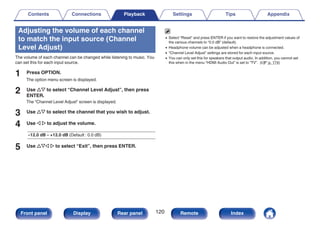
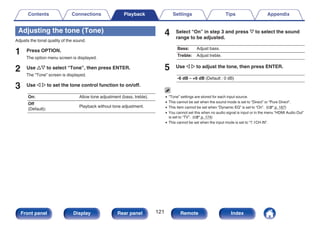
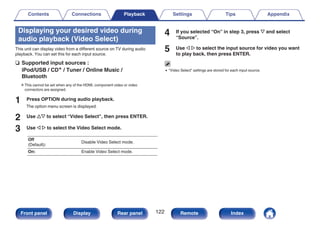
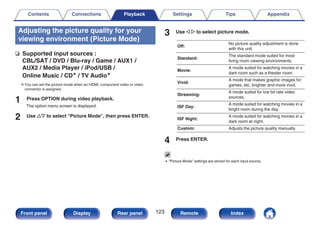
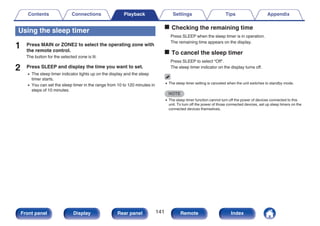
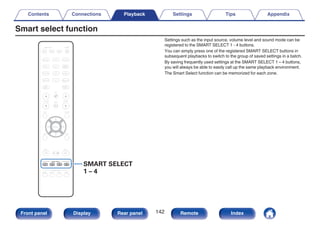
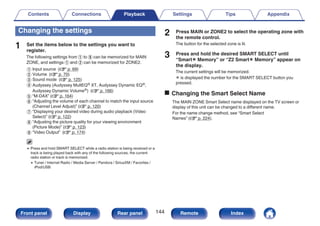
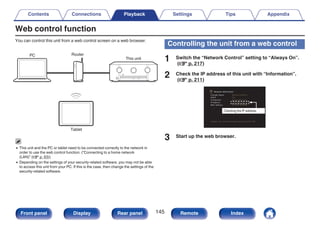
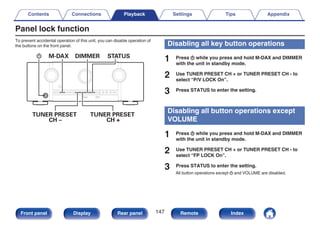
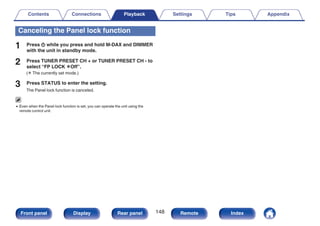
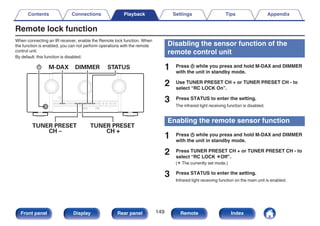
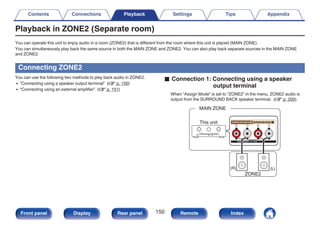
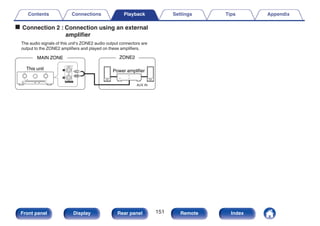
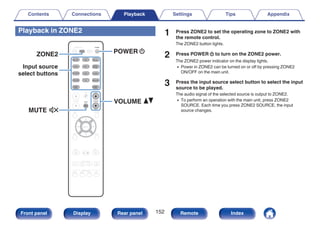
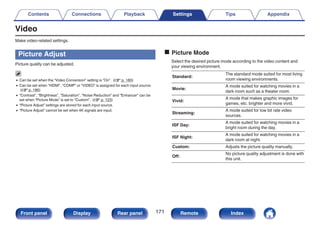
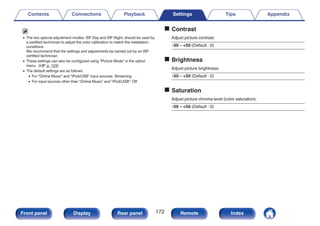
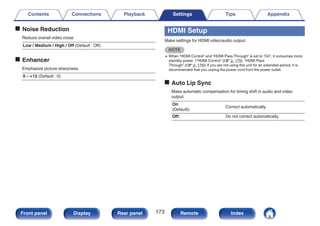
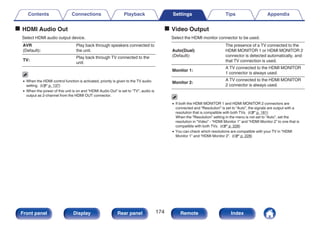
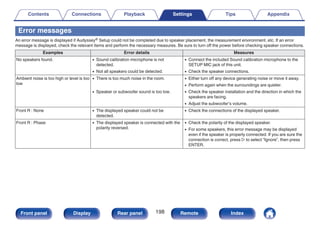
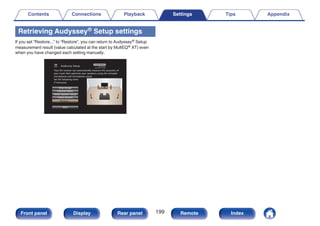
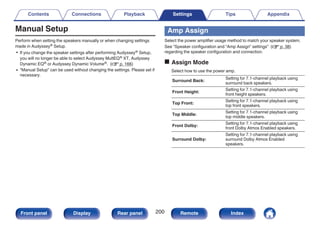
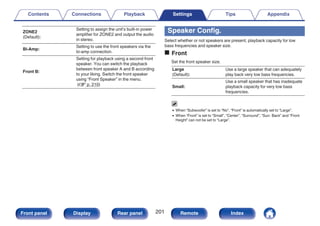
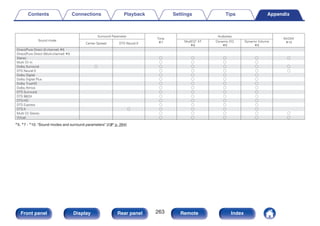
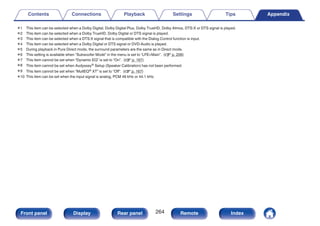
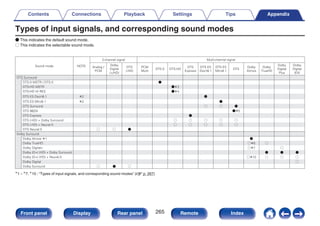
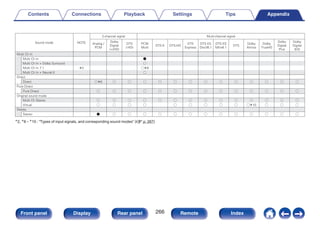
This document is the owner's manual for the Marantz SR5010 AV Surround Receiver. It contains information about included accessories, features of the receiver like high quality sound and high performance, part names and functions of the front panel and rear panel, instructions for connections and playback, settings menu options, and troubleshooting tips. The manual provides a comprehensive guide to installing and operating the AV receiver.


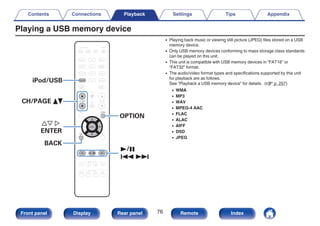
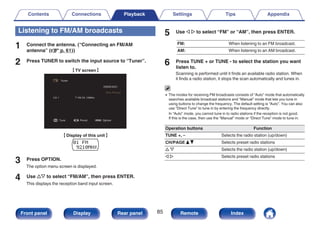
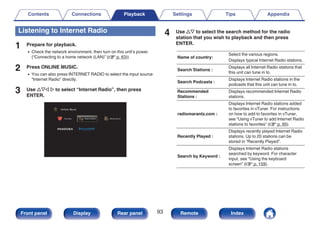
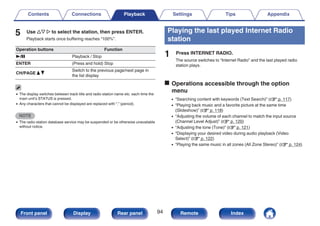
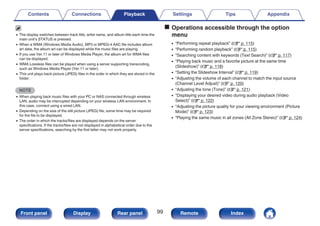
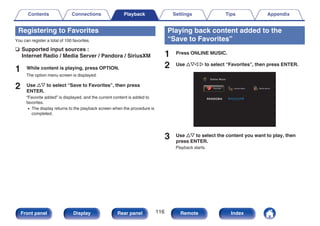
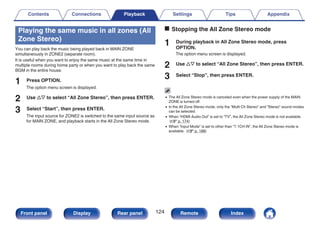
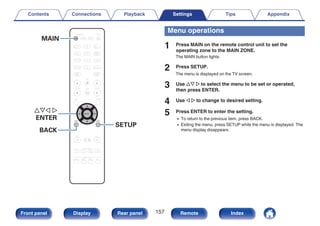
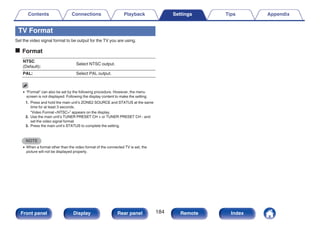
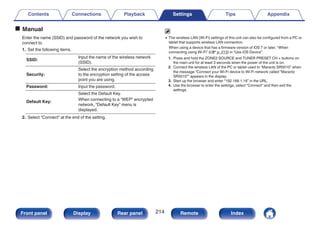
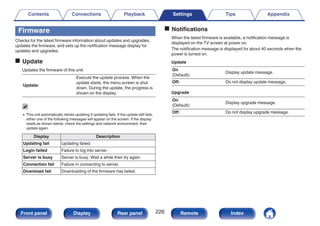
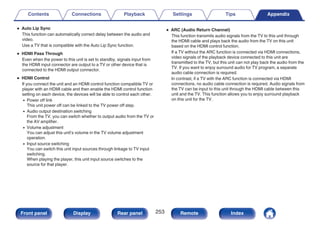
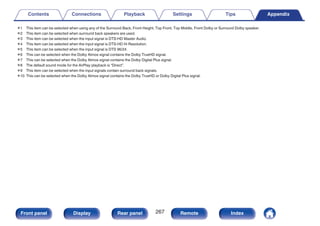
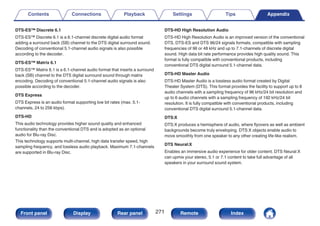
![Playing files stored on USB memory
devices
1 Connect the USB memory device to the USB port.
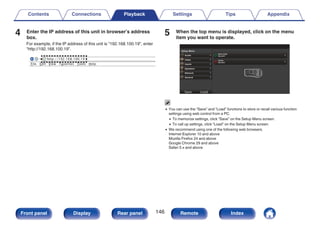
(v p. 59)
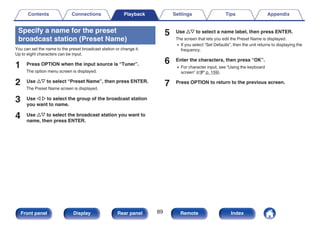
2 Press iPod/USB to switch the input source to “iPod/
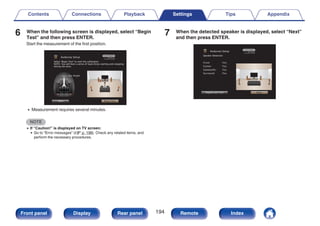
USB”.
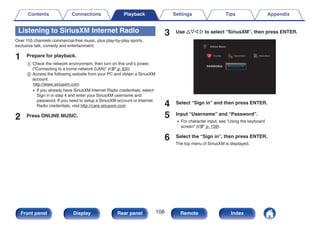
.
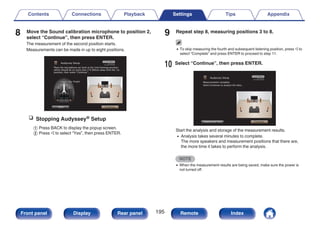
Folder1
Folder2
Folder3
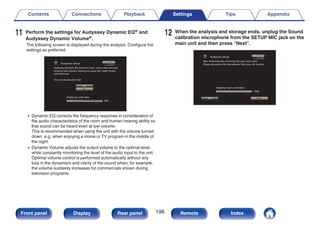
Music1
Music2
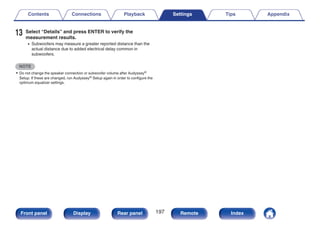
Music3
Music4
OPTION
OPTION
USB [1/9]
Option
3 Use ui p to select the file to be played, then press
ENTER.
Playback starts.
Operation buttons Function
1/3 Playback / Pause
8 9
Skip to previous track / Skip to next track
(Press and hold) Fast-reverse / Fast-
forward
ENTER
Playback / Pause
(Press and hold) Stop
u i
Skip to previous track / Skip to next track
(Press and hold) Fast-reverse / Fast-
forward
CH/PAGE d f
Switch to the previous page/next page in
the list display
0 When an MP3 music file includes album art data, the album art can be displayed while
playing the file.
0 This unit plays back picture (JPEG) files in the order in which they are stored in the
folder.
NOTE
0 Note that Marantz will accept no responsibility whatsoever for any problems arising
with the data on a USB memory device when using this unit in conjunction with the
USB memory device.
Contents Connections Playback Settings Tips Appendix
77
Front panel Display Rear panel Remote Index](https://image.slidesharecdn.com/marantzsr5010naen-240107002222-7bfe8e52/85/Marantz-SR5010-Receiver-Owners-Manual_NA_EN-pdf-77-320.jpg)
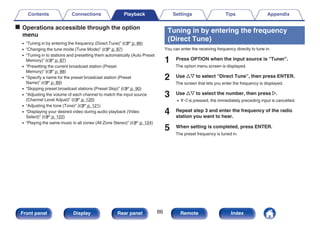

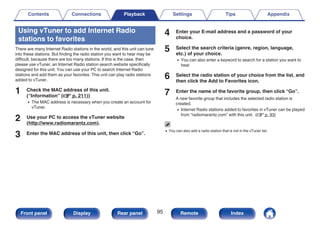

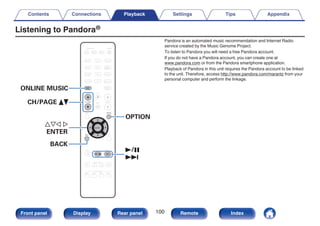
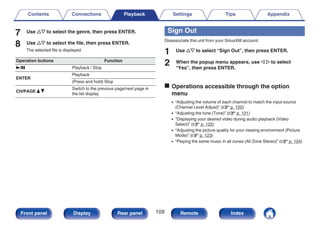
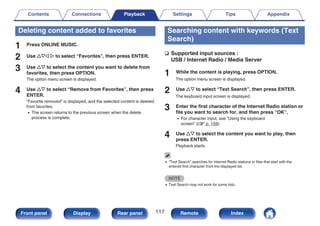
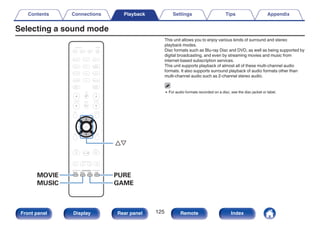
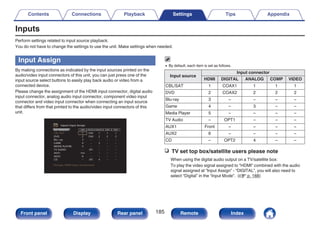
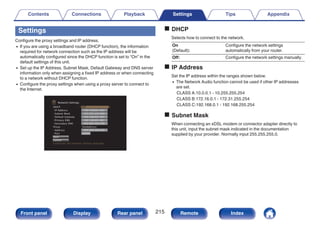
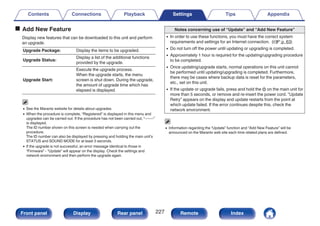
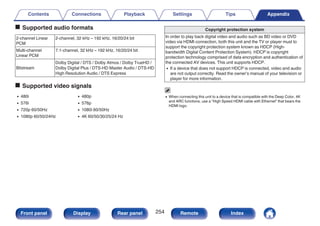
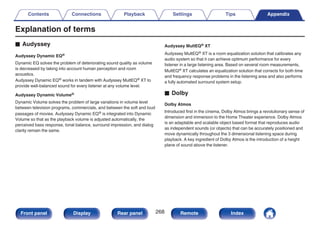
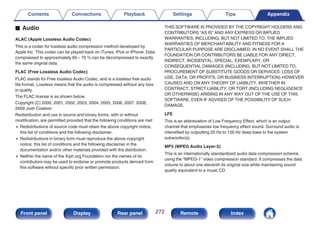
![5 Input “Email address” and “Password”.
0 For character input, see “Using the keyboard
screen” (v p. 159).
0 Press BACK to cancel the input. When “Cancel input?” is
displayed, select “Yes”, then press ENTER.
6 After inputting the “Email address” and “Password”,
select “OK”, then press ENTER.
If the “Email address” and “Password” match, the top menu for
Pandora is displayed.
.
OPTION
OPTION
My Station [1/4]
Option
New Station
Shuffle
Music1 Radio
Sign Out
Contents Connections Playback Settings Tips Appendix
102
Front panel Display Rear panel Remote Index](https://image.slidesharecdn.com/marantzsr5010naen-240107002222-7bfe8e52/85/Marantz-SR5010-Receiver-Owners-Manual_NA_EN-pdf-102-320.jpg)
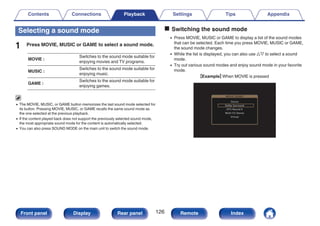


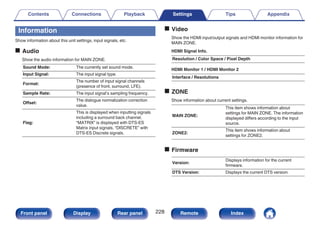


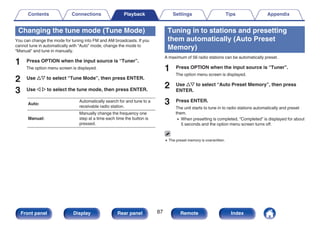
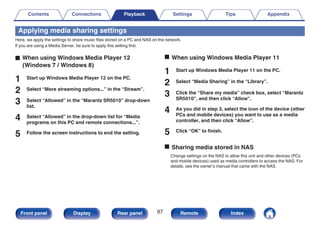
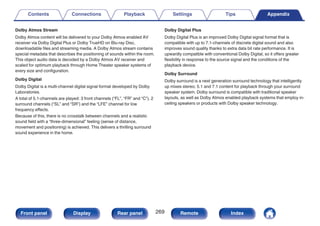
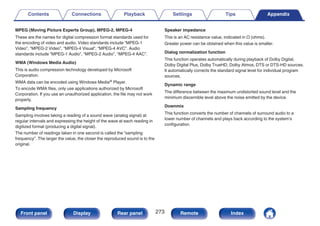
![Playing back a USB memory devices
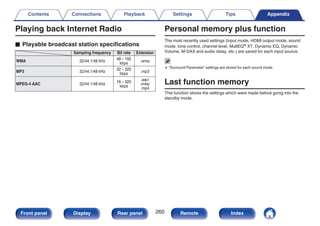
0 This unit is compatible with MP3 ID3-Tag (Ver. 2) standard.
0 This unit can show the artwork that was embedded by using MP3 ID3-Tag Ver. 2.3 or 2.4.
0 This unit is compatible with WMA META tags.
0 If the image size (pixels) of an album artwork exceeds 500 × 500 (WMA/MP3/WAV/FLAC) or 349 × 349 (MPEG-4 AAC), then music may not be played
back properly.
o Compatible formats
Sampling frequency Bit rate Extension
WMAz1 32/44.1/48 kHz 48 – 192
kbps .wma
MP3 32/44.1/48 kHz 32 – 320
kbps .mp3
WAV 32/44.1/48/88.2/
96/176.4/192 kHz – .wav
MPEG-4 AACz1 32/44.1/48 kHz 16 – 320
kbps
.aac/
.m4a/
.mp4
FLAC 32/44.1/48/88.2/
96/176.4/192 kHz – .flac
ALACz2
32/44.1/48/88.2/
96 kHz – .m4a
DSD 2.8 MHz – .dsf/
.dff
AIFF 32/44.1/48/88.2/
96/176.4/192 kHz – .aif/
.aiff
z1 Only files that are not protected by copyright can be played on this unit.
Content downloaded from pay sites on the Internet are copyright protected.
Also, files encoded in WMA format when ripped from a CD, etc. on a computer
may be copyright protected, depending on the computer’s settings.
z2 Copyright [2012] [DM Holdings. Inc.]
Licensed under the Apache License, Version 2.0 (the “License”); you may not
use this file except in compliance with the License. You may obtain a copy of
the License at
http://www.apache.org/licenses/LICENSE-2.0
0 In ZONE2, it is not possible to play the DSD signal.
Contents Connections Playback Settings Tips Appendix
257
Front panel Display Rear panel Remote Index](https://image.slidesharecdn.com/marantzsr5010naen-240107002222-7bfe8e52/85/Marantz-SR5010-Receiver-Owners-Manual_NA_EN-pdf-257-320.jpg)
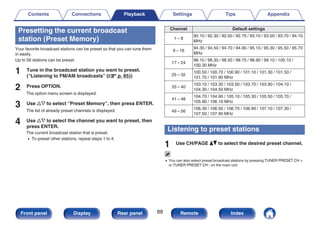
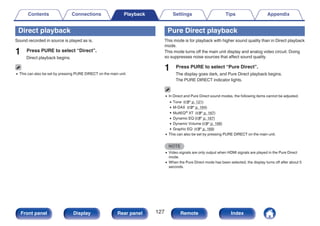
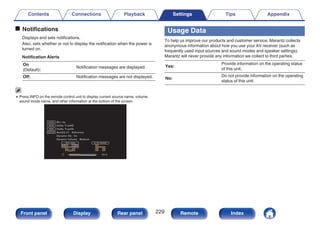
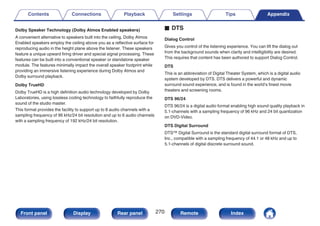
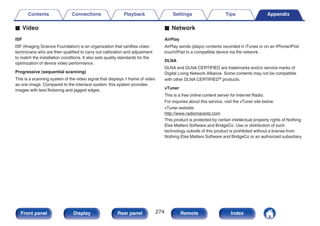
![Playing back a file saved on a PC or NAS
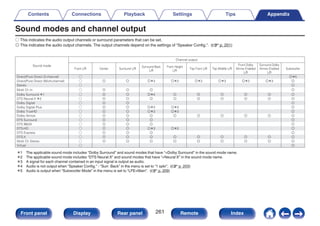
0 This unit is compatible with MP3 ID3-Tag (Ver. 2) standard.
0 This unit can show the artwork that was embedded by using MP3 ID3-Tag Ver. 2.3 or 2.4.
0 This unit is compatible with WMA META tags.
0 If the image size (pixels) of an album artwork exceeds 500 × 500 (WMA/MP3/WAV/FLAC) or 349 × 349 (MPEG-4 AAC), then music may not be played
back properly.
0 A server or server software compatible with distribution in the corresponding formats is required to play music files via a network.
o Specifications of supported files
Sampling frequency Bit rate Extension
WMAz1 32/44.1/48 kHz
48 – 192
kbps
.wma
MP3 32/44.1/48 kHz
32 – 320
kbps
.mp3
WAV
32/44.1/48/88.2/
96/176.4/192 kHz
– .wav
MPEG-4 AACz1 32/44.1/48 kHz
16 – 320
kbps
.aac/
.m4a/
.mp4
FLAC
32/44.1/48/88.2/
96/176.4/192 kHz
– .flac
ALACz2
32/44.1/48/88.2/
96 kHz
– .m4a
DSD 2.8 MHz –
.dsf/
.dff
AIFF
32/44.1/48/88.2/
96/176.4/192 kHz
–
.aif/
.aiff
z1 Only files that are not protected by copyright can be played on this unit.
Content downloaded from pay sites on the Internet are copyright protected.
Also, files encoded in WMA format when ripped from a CD, etc. on a computer
may be copyright protected, depending on the computer’s settings.
z2 Copyright [2012] [DM Holdings. Inc.]
Licensed under the Apache License, Version 2.0 (the “License”); you may not
use this file except in compliance with the License. You may obtain a copy of
the License at
http://www.apache.org/licenses/LICENSE-2.0
0 In ZONE2, it is not possible to play the DSD signal.
Contents Connections Playback Settings Tips Appendix
259
Front panel Display Rear panel Remote Index](https://image.slidesharecdn.com/marantzsr5010naen-240107002222-7bfe8e52/85/Marantz-SR5010-Receiver-Owners-Manual_NA_EN-pdf-259-320.jpg)
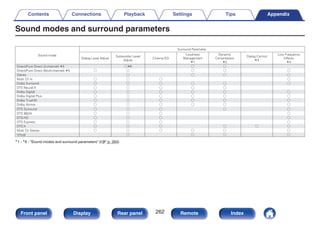
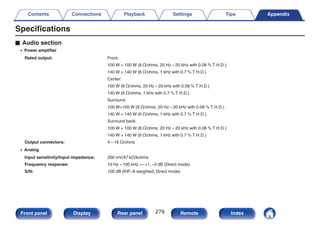
![o Video section
0 Standard video connectors
Input/output level and impedance: 1 Vp-p, 75 Ω/ohms
Frequency response: 5 Hz – 10 MHz — 0, –3 dB
0 Color component video connector
Input/output level and impedance: Y signal — 1 Vp-p, 75 Ω/ohms
PB / CB signal — 0.7 Vp-p, 75 Ω/ohms
PR / CR signal — 0.7 Vp-p, 75 Ω/ohms
Frequency response: 5 Hz – 60 MHz — 0, –3 dB
o Tuner section [FM] [AM]
(Note: μV at 75 Ω/ohms, 0 dBf = 1 x 10 –15 W)
Reception frequency range: 87.5 MHz – 107.9 MHz 520 kHz – 1710 kHz
Effective sensitivity: 1.2 μV (12.8 dBf) 18 μV
50 dB sensitivity: MONO ― 2.8 μV (20.2 dBf)
S/N ratio: MONO ― 70 dB (IHF–A weighted, Direct mode)
STEREO ― 67 dB (IHF–A weighted, Direct mode)
Distortion: MONO ― 0.7 % (1 kHz)
STEREO ― 1.0 % (1 kHz)
Contents Connections Playback Settings Tips Appendix
280
Front panel Display Rear panel Remote Index](https://image.slidesharecdn.com/marantzsr5010naen-240107002222-7bfe8e52/85/Marantz-SR5010-Receiver-Owners-Manual_NA_EN-pdf-280-320.jpg)