Arduino uno lcd display 16x2
•Download as PPTX, PDF•
5 likes•3,214 views
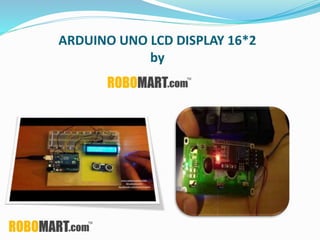
Buy best quality LCD Display 16*2 for Arduino Uno at affordable price only at Robomart "Best Store to buy Robotics products" URL: https://www.robomart.com/16x2-character-lcd-display
Report
Share
Report
Share

Recommended
Introduction to Arduino Hardware and Programming
Introduction to Arduino Hardware and Programming:
Arduino is an open-source electronics platform based on easy-to-use hardware and software. It's intended for anyone making interactive projects.
Teachers and students use it to build low cost scientific instruments, to prove chemistry and physics principles, or to get started with programming and robotics. Designers and architects build interactive prototypes, musicians and artists use it for installations and to experiment with new musical instruments. Makers, of course, use it to build many of the projects exhibited at the Maker Faire. Arduino is a key tool to learn new things. Anyone - children, hobbyists, artists, programmers can use it to build an interactive device.
Microcontroller
A microcontroller is a self-contained system with peripherals, memory and a processor that can be embedded in consumer products and machinery. Microcontrollers contain CPU, RAM, ROM, I/O ports, timers and counters to control input and output devices like sensors, displays and relays. They are used in applications where cost, power and space are critical constraints.
Introduction to Arduino
The document provides an introduction to programming with Arduino. It explains that Arduino is an open-source hardware and software platform used to build interactive electronic projects. It consists of a microcontroller board that can be programmed and used to read and control sensors, LEDs, motors and more. The document outlines the basic steps to get started which include downloading the Arduino IDE, installing drivers, selecting the board type, and uploading a test "Blink" program to make an LED turn on and off. It also provides explanations of some core electronic components like resistors, LEDs, sensors and describes how to set up a simple temperature sensing project and store the sensor readings in a database.
Ardui no
This document provides an overview of microcontrollers and the Arduino platform. It discusses what a microcontroller is and some common types. It then introduces Arduino as an open-source prototyping platform using easy hardware and software. Several Arduino boards are described and the ATmega328p microcontroller chip is specified. The document outlines how to download the Arduino software and write programs. It provides examples of basic Arduino projects like blinking LEDs, reading sensors, and creating sounds.
Wi-Fi Esp8266 nodemcu
The NodeMCU is an open-source IoT development kit that allows users to prototype IoT products using a few lines of Lua script. It contains an ESP8266 WiFi SoC, programmable GPIO pins, 32KB RAM, 80KB DRAM, and 200KB flash memory. The NodeMCU can be programmed via C or Lua and connect to devices via WiFi or by connecting pins to sensors and actuators. It provides a low-cost way to build an interactive and programmable smart device with WiFi connectivity.
Lcd & led tv technologies
This document compares and contrasts LCD and LED display technologies. It discusses the basic principles of liquid crystals and how they enable LCD displays. It describes the different types of LCDs including passive matrix and active matrix. It then discusses LED display technology, including the types of LED driving and different LED displays. It provides the advantages and disadvantages of both LCD and LED as well as common applications for each type of display technology. Finally, it summarizes the key differences between LCD and LED displays.
Arduino Microcontroller
Arduino is the popular open-source electronics prototyping platform based on easy-to-use hardware and software. It's intended for artists, designers, hobbyists, and anyone interested in creating interactive objects or environments and is designed to be as flexible as possible to fit your project's needs.
Arduino presentation by_warishusain
The document discusses Arduino, an open-source hardware platform used for building electronics projects. It notes that Arduino is a microcontroller board that can be programmed to read input and control output from various sensors and actuators. The document provides details on Arduino components, programming, common shields and expansions, applications in different domains, and its popularity as an accessible platform for physical computing.
Introduction to Arduino
This document introduces Arduino, an open-source electronics prototyping platform. It discusses that Arduino is intended for artists, designers, hobbyists to create interactive objects. It then describes the Arduino hardware, including the microcontroller, I/O pins, and official and third party boards. It also covers the Arduino programming environment and language, and provides examples of common tasks like reading buttons and displaying to serial. Finally, it discusses common sensors, motors, and modules used with Arduino and points to the active Arduino community for support.
Introduction to Arduino Programming
This document provides an overview of Arduino programming concepts including:
- The Arduino programming language is based on C/C++ and includes libraries for interfacing with hardware.
- Examples are provided for basic blink programs, using variables, functions, control structures like if statements and loops, reading analog/digital pins, and using the serial monitor.
- Key concepts covered include variable scope, data types, naming conventions, pin modes, analog/digital reading and writing, functions, arrays, and different loop structures.
Introduction to Arduino
Arduino is an open-source hardware and software prototyping platform used for building electronics projects. It consists of a microcontroller board and an IDE used to write code. The board can be connected to sensors, actuators and other hardware components. There are many Arduino boards and derivatives that vary in size, capability, and function. The Arduino IDE uses a simplified version of C/C++ and provides an easy way to compile and upload code to the board.
Smart Door locking system using arduino
This document describes a smart door locking system using an Arduino board. The system uses a keypad to enter a password, which is checked by the Arduino. If the correct password is entered, the Arduino sends a signal to a servo motor to unlock the door. The system aims to provide secure, password-protected access to restricted areas. It uses an Arduino board along with a keypad, servo motor, and LCD display to control a door lock. The document outlines the hardware, software, working mechanism, and concludes the system provides a cost-effective, easy to install smart locking alternative to conventional door locks.
Arduino for beginners- Introduction to Arduino (presentation) - codewithgauri
The document provides an overview of the Arduino platform for beginners. It defines Arduino as an open-source platform used for building electronics projects. All Arduino boards contain a microcontroller, which is a small computer. It then describes some popular Arduino boards like the Uno, Nano, Due, and Mega and their key specs and applications. The document proceeds to explain the main components of an Arduino Uno board such as the power supply, USB port, microcontroller, analog and digital pins. It provides details on the functions of these components and how they enable the Arduino board to operate.
Lesson sample introduction to arduino
This document introduces Arduino by defining what it is, the parts of an Arduino board, and how to program it. An Arduino is a microcontroller board that can be used to develop interactive objects by taking various inputs (e.g. sensors) and controlling physical outputs (e.g. lights, motors). It explains the basic components of an Arduino board and how Arduino code is uploaded and run. A simple example is provided to blink an LED using Arduino code and by changing the delay times, the blinking speed can be adjusted. Keywords like Arduino board, sketch, and LED are also defined.
FPGA
FPGA are a special form of Programmable logic devices(PLDs) with higher densities as compared to custom ICs and capable of implementing functionality in a short period of time using computer aided design (CAD) software....by mathewsubin3388@gmail.com
Arduino dc motor
This document discusses how to connect and control a DC motor using an Arduino Uno board. It explains the components needed like the motor, MOSFET transistor, diode rectifier and resistor. It describes how the motor works using electromagnetic principles and how the diode rectifier converts AC to DC power. It shows the pin connections and provides an example Arduino code using PWM to control the motor's speed by writing analog values to the motor control pin.
Introduction to the Arduino
The document provides an introduction to Arduino and physical computing using microcontrollers. It describes that Arduino boards use ATmega microcontrollers and can be programmed to sense the physical world using sensors, process data, and control physical devices using actuators. The document outlines the basic components of a microcontroller, how the Arduino programming environment works, and the basic structure and functions used in Arduino programs.
PLDs
This document discusses programmable logic devices (PLDs). It describes the different types of PLDs including SPLDs, CPLDs, and FPGAs. SPLDs are the least complex, while CPLDs have higher capacity than SPLDs and allow for more complex logic circuits. FPGAs have the greatest logic capacity and consist of an array of configurable logic blocks and programmable interconnects. The document also covers how PLDs are programmed using schematic entry or text-based entry along with required programming software and hardware.
Arduino Workshop Day 1 - Basic Arduino
Arduino Workshop Day 1 Slides
Basics of Arduino - Introduction, Basics of Circuits, Signals & Electronics, LED Interfacing, Switch, Buzzer, LCD & Bluetooth Communication.
Introduction to Node MCU
1. Explaining the importance of platform based development
2. Understanding The importance of NodeMCU and demonstrate its interfacing with various devices and sensors.
Bcd to 7 segment display
This document describes a circuit that uses IC 7490 and IC 7447 to convert binary coded decimal (BCD) to a 7-segment display. IC 7490 is a decade counter that generates a 4-bit BCD code when a clock pulse is applied. This BCD code is input to IC 7447, which drives the pins of a 7-segment LED display to display the corresponding number. The circuit diagram shows how the ICs are connected along with a push button and 7-segment display. When the button is pressed it provides the clock input, causing the decade counter to increment and display the numbers 0-9 in sequence on the 7-segment display.
What is Arduino ?
The document discusses the Arduino open-source electronics prototyping platform. It describes what Arduino is, its programming environment, advantages, features, applications, and how it compares to other prototyping platforms. Arduino is an affordable and easy to use platform for creating interactive electronic projects through an open-source hardware board and software. It allows users to prototype sensors and control devices through code.
Solar tracking system
This document describes a solar tracking system that uses sensors and a programmable logic controller (PLC) to automatically orient solar panels towards the sun. It discusses the need for solar trackers to maximize solar panel output and efficiency. There are two main types of trackers: single-axis trackers that rotate around one axis, and dual-axis trackers that rotate around two axes to precisely follow the sun's movement. The tracking system works by using light sensors to detect sunlight intensity and signal the PLC to rotate stepper motors and align the panels accordingly. This allows it to capture 35% more energy than stationary panels.
Introduction to Microcontroller
The document discusses microcontrollers, including:
- What a microcontroller is, its basic anatomy and how it works to serve as a bridge between the physical and digital worlds.
- The main components of a microcontroller including the CPU, memory, I/O ports, timers, and ADC/DAC.
- Types of microcontrollers such as 8-bit, 16-bit, and 32-bit varieties as well as external vs embedded memory architectures.
- Popular microcontroller families like 8051, PIC, AVR, and ARM.
- Applications of microcontrollers in devices like home appliances, industrial equipment, and computers.
Arduino uno
The Arduino Uno is a microcontroller board based on the ATmega328P chip. It has 32KB of flash memory, 2KB of SRAM, and 1KB of EEPROM. The board has 14 digital input/output pins (of which 6 can be used as PWM outputs), 6 analog inputs, a 16 MHz crystal oscillator, a USB connection, a power jack, an ICSP header, and a reset button. It contains everything needed to support the microcontroller; simply connect it to a computer with a USB cable or power it with a AC-to-DC adapter to get started.
1. Introduction to Embedded Systems & IoT
This document provides an introduction to embedded systems and the Internet of Things (IoT). It defines embedded systems as hardware and software components that perform dedicated tasks as part of larger machines. Embedded systems are designed for specific tasks without human intervention and must meet real-time performance constraints. Examples are given of embedded systems applications. It then discusses microprocessors versus microcontrollers. The document introduces Arduino, an open-source hardware and software platform used to build electronics projects, and describes its various components. It defines IoT as the network of physical objects embedded with electronics that collect and share data over the internet. Applications and evolution of IoT are briefly outlined.
Intro to Arduino
The document provides an overview of the Arduino platform, including what it is, what it is used for, and how to get started using it. Key points:
- Arduino is an open-source hardware and software platform for building interactive electronic projects through a simple programming language.
- It is used for physical computing projects, interactive installations, and rapid prototyping. Projects can include sensors and actuators.
- Getting started requires an Arduino board, USB cable, power supply, and downloading the IDE (integrated development environment) to write and upload code. Basic electrical safety knowledge is also important.
Arduino lcd display
An LCD display uses liquid crystal technology to display data. It is commonly used with Arduino by interfacing a 16x2 LCD display. The code initializes a 16x2 LCD display using specific pin connections, sets the cursor position, and prints text to demonstrate printing on the first and second rows.
Lcd with arduino uno
LCD Keypad shield for Arduino includes a 16x2 LCD module and a 5 push button keypad for menu selection and user interface programming .All types of arduino boards,lcd with arduino board,diy robotics kits are available on robomart in cheap price and best quality.the link is given below https://www.robomart.com/robomart-arduino-uno-r3-1602-lcd-starter-kit-with-17-basic-arduino-projects
Interfacing bluetooth with arduino
In this presentation, Interfacing Bluetooth(HC-05) with Arduino is explained with some AT commands to configure and initialize the Bluetooth module(HC-05).
Code for Arduino:
#include <SoftwareSerial.h>
SoftwareSerial mySerial(10, 11); // RX, TX
void setup()
{
Serial.begin(9600);
pinMode(9,OUTPUT); digitalWrite(9,HIGH);
Serial.println("Enter AT commands:");
mySerial.begin(38400);
}
void loop()
{
if (mySerial.available())
Serial.write(mySerial.read());
if (Serial.available())
mySerial.write(Serial.read());
}
More Related Content
What's hot
Introduction to Arduino
This document introduces Arduino, an open-source electronics prototyping platform. It discusses that Arduino is intended for artists, designers, hobbyists to create interactive objects. It then describes the Arduino hardware, including the microcontroller, I/O pins, and official and third party boards. It also covers the Arduino programming environment and language, and provides examples of common tasks like reading buttons and displaying to serial. Finally, it discusses common sensors, motors, and modules used with Arduino and points to the active Arduino community for support.
Introduction to Arduino Programming
This document provides an overview of Arduino programming concepts including:
- The Arduino programming language is based on C/C++ and includes libraries for interfacing with hardware.
- Examples are provided for basic blink programs, using variables, functions, control structures like if statements and loops, reading analog/digital pins, and using the serial monitor.
- Key concepts covered include variable scope, data types, naming conventions, pin modes, analog/digital reading and writing, functions, arrays, and different loop structures.
Introduction to Arduino
Arduino is an open-source hardware and software prototyping platform used for building electronics projects. It consists of a microcontroller board and an IDE used to write code. The board can be connected to sensors, actuators and other hardware components. There are many Arduino boards and derivatives that vary in size, capability, and function. The Arduino IDE uses a simplified version of C/C++ and provides an easy way to compile and upload code to the board.
Smart Door locking system using arduino
This document describes a smart door locking system using an Arduino board. The system uses a keypad to enter a password, which is checked by the Arduino. If the correct password is entered, the Arduino sends a signal to a servo motor to unlock the door. The system aims to provide secure, password-protected access to restricted areas. It uses an Arduino board along with a keypad, servo motor, and LCD display to control a door lock. The document outlines the hardware, software, working mechanism, and concludes the system provides a cost-effective, easy to install smart locking alternative to conventional door locks.
Arduino for beginners- Introduction to Arduino (presentation) - codewithgauri
The document provides an overview of the Arduino platform for beginners. It defines Arduino as an open-source platform used for building electronics projects. All Arduino boards contain a microcontroller, which is a small computer. It then describes some popular Arduino boards like the Uno, Nano, Due, and Mega and their key specs and applications. The document proceeds to explain the main components of an Arduino Uno board such as the power supply, USB port, microcontroller, analog and digital pins. It provides details on the functions of these components and how they enable the Arduino board to operate.
Lesson sample introduction to arduino
This document introduces Arduino by defining what it is, the parts of an Arduino board, and how to program it. An Arduino is a microcontroller board that can be used to develop interactive objects by taking various inputs (e.g. sensors) and controlling physical outputs (e.g. lights, motors). It explains the basic components of an Arduino board and how Arduino code is uploaded and run. A simple example is provided to blink an LED using Arduino code and by changing the delay times, the blinking speed can be adjusted. Keywords like Arduino board, sketch, and LED are also defined.
FPGA
FPGA are a special form of Programmable logic devices(PLDs) with higher densities as compared to custom ICs and capable of implementing functionality in a short period of time using computer aided design (CAD) software....by mathewsubin3388@gmail.com
Arduino dc motor
This document discusses how to connect and control a DC motor using an Arduino Uno board. It explains the components needed like the motor, MOSFET transistor, diode rectifier and resistor. It describes how the motor works using electromagnetic principles and how the diode rectifier converts AC to DC power. It shows the pin connections and provides an example Arduino code using PWM to control the motor's speed by writing analog values to the motor control pin.
Introduction to the Arduino
The document provides an introduction to Arduino and physical computing using microcontrollers. It describes that Arduino boards use ATmega microcontrollers and can be programmed to sense the physical world using sensors, process data, and control physical devices using actuators. The document outlines the basic components of a microcontroller, how the Arduino programming environment works, and the basic structure and functions used in Arduino programs.
PLDs
This document discusses programmable logic devices (PLDs). It describes the different types of PLDs including SPLDs, CPLDs, and FPGAs. SPLDs are the least complex, while CPLDs have higher capacity than SPLDs and allow for more complex logic circuits. FPGAs have the greatest logic capacity and consist of an array of configurable logic blocks and programmable interconnects. The document also covers how PLDs are programmed using schematic entry or text-based entry along with required programming software and hardware.
Arduino Workshop Day 1 - Basic Arduino
Arduino Workshop Day 1 Slides
Basics of Arduino - Introduction, Basics of Circuits, Signals & Electronics, LED Interfacing, Switch, Buzzer, LCD & Bluetooth Communication.
Introduction to Node MCU
1. Explaining the importance of platform based development
2. Understanding The importance of NodeMCU and demonstrate its interfacing with various devices and sensors.
Bcd to 7 segment display
This document describes a circuit that uses IC 7490 and IC 7447 to convert binary coded decimal (BCD) to a 7-segment display. IC 7490 is a decade counter that generates a 4-bit BCD code when a clock pulse is applied. This BCD code is input to IC 7447, which drives the pins of a 7-segment LED display to display the corresponding number. The circuit diagram shows how the ICs are connected along with a push button and 7-segment display. When the button is pressed it provides the clock input, causing the decade counter to increment and display the numbers 0-9 in sequence on the 7-segment display.
What is Arduino ?
The document discusses the Arduino open-source electronics prototyping platform. It describes what Arduino is, its programming environment, advantages, features, applications, and how it compares to other prototyping platforms. Arduino is an affordable and easy to use platform for creating interactive electronic projects through an open-source hardware board and software. It allows users to prototype sensors and control devices through code.
Solar tracking system
This document describes a solar tracking system that uses sensors and a programmable logic controller (PLC) to automatically orient solar panels towards the sun. It discusses the need for solar trackers to maximize solar panel output and efficiency. There are two main types of trackers: single-axis trackers that rotate around one axis, and dual-axis trackers that rotate around two axes to precisely follow the sun's movement. The tracking system works by using light sensors to detect sunlight intensity and signal the PLC to rotate stepper motors and align the panels accordingly. This allows it to capture 35% more energy than stationary panels.
Introduction to Microcontroller
The document discusses microcontrollers, including:
- What a microcontroller is, its basic anatomy and how it works to serve as a bridge between the physical and digital worlds.
- The main components of a microcontroller including the CPU, memory, I/O ports, timers, and ADC/DAC.
- Types of microcontrollers such as 8-bit, 16-bit, and 32-bit varieties as well as external vs embedded memory architectures.
- Popular microcontroller families like 8051, PIC, AVR, and ARM.
- Applications of microcontrollers in devices like home appliances, industrial equipment, and computers.
Arduino uno
The Arduino Uno is a microcontroller board based on the ATmega328P chip. It has 32KB of flash memory, 2KB of SRAM, and 1KB of EEPROM. The board has 14 digital input/output pins (of which 6 can be used as PWM outputs), 6 analog inputs, a 16 MHz crystal oscillator, a USB connection, a power jack, an ICSP header, and a reset button. It contains everything needed to support the microcontroller; simply connect it to a computer with a USB cable or power it with a AC-to-DC adapter to get started.
1. Introduction to Embedded Systems & IoT
This document provides an introduction to embedded systems and the Internet of Things (IoT). It defines embedded systems as hardware and software components that perform dedicated tasks as part of larger machines. Embedded systems are designed for specific tasks without human intervention and must meet real-time performance constraints. Examples are given of embedded systems applications. It then discusses microprocessors versus microcontrollers. The document introduces Arduino, an open-source hardware and software platform used to build electronics projects, and describes its various components. It defines IoT as the network of physical objects embedded with electronics that collect and share data over the internet. Applications and evolution of IoT are briefly outlined.
Intro to Arduino
The document provides an overview of the Arduino platform, including what it is, what it is used for, and how to get started using it. Key points:
- Arduino is an open-source hardware and software platform for building interactive electronic projects through a simple programming language.
- It is used for physical computing projects, interactive installations, and rapid prototyping. Projects can include sensors and actuators.
- Getting started requires an Arduino board, USB cable, power supply, and downloading the IDE (integrated development environment) to write and upload code. Basic electrical safety knowledge is also important.
Arduino lcd display
An LCD display uses liquid crystal technology to display data. It is commonly used with Arduino by interfacing a 16x2 LCD display. The code initializes a 16x2 LCD display using specific pin connections, sets the cursor position, and prints text to demonstrate printing on the first and second rows.
What's hot (20)
Arduino for beginners- Introduction to Arduino (presentation) - codewithgauri
Arduino for beginners- Introduction to Arduino (presentation) - codewithgauri
Viewers also liked
Lcd with arduino uno
LCD Keypad shield for Arduino includes a 16x2 LCD module and a 5 push button keypad for menu selection and user interface programming .All types of arduino boards,lcd with arduino board,diy robotics kits are available on robomart in cheap price and best quality.the link is given below https://www.robomart.com/robomart-arduino-uno-r3-1602-lcd-starter-kit-with-17-basic-arduino-projects
Interfacing bluetooth with arduino
In this presentation, Interfacing Bluetooth(HC-05) with Arduino is explained with some AT commands to configure and initialize the Bluetooth module(HC-05).
Code for Arduino:
#include <SoftwareSerial.h>
SoftwareSerial mySerial(10, 11); // RX, TX
void setup()
{
Serial.begin(9600);
pinMode(9,OUTPUT); digitalWrite(9,HIGH);
Serial.println("Enter AT commands:");
mySerial.begin(38400);
}
void loop()
{
if (mySerial.available())
Serial.write(mySerial.read());
if (Serial.available())
mySerial.write(Serial.read());
}
Interfacing keypad
The document discusses interfacing a 4x4 keypad with a microcontroller. It explains that a keypad works by conducting when a button is pressed. It then describes two methods for scanning the keypad as a matrix to determine which key is pressed. The first method grounds rows and columns individually and checks for input on the other pins. The second method grounds a single row pin and checks the column pins for input. Both allow determining the row and column of the pressed key.
Buzzer
The document discusses piezo buzzers, which are electronic devices that produce sound. It explains that piezo buzzers use piezoelectric materials, which generate electricity when pressure is applied. Common piezoelectric materials include piezoceramics, which change shape with alternating electric fields to produce sound. The document also provides code examples to control a piezo buzzer from an Arduino and detect knocks with a sensor.
Liquid Crystal Display (LCD)
LCDs use liquid crystals and polarized light to display images on a thin, flat screen. They have advantages over older CRT displays like smaller size, lower power consumption, and lighter weight. LCD pixels use liquid crystals that can be aligned by electric fields to allow light to pass through polarized filters, turning pixels on and off. Active matrix LCDs provide higher resolution by adding a transistor to each sub-pixel for individual control.
Bluetooth Module
A Bluetooth module presentation as a part of one complete course about using communication modules along with PIC-Micro-controller
Thanks.
Bluetooth Module HC-06
This module enables you to wireless transmit & receive serial data. It is a drop in replacement for wired serial connections allowing transparent two way data communication. You can simply use it for serial port replacement to establish connection between MCU or embedded project and PC for data transfer. This board operates on 5V and has LED indication and 3V regulator.
Interfacing LCD with 8051 Microcontroller
An LCD display is specifically designed to interface with microcontrollers and not standard ICs. It can display letters, symbols, and user-defined characters. Interfacing an LCD with an 8051 microcontroller involves understanding the LCD's pins and commands, and using C or assembly code to control write and read operations to the LCD. More details on interfacing LCDs with 8051 microcontrollers can be found on the listed websites.
LinkedIn SlideShare: Knowledge, Well-Presented
70 million professionals use LinkedIn SlideShare to learn about any topic quickly and stand out.
Top 5 Deep Learning and AI Stories - October 6, 2017
Read this week's top 5 news updates in deep learning and AI: Gartner predicts top 10 strategic technology trends for 2018; Oracle adds GPU Accelerated Computing to Oracle Cloud Infrastructure; chemistry and physics Nobel Prizes are awarded to teams supported by GPUs; MIT uses deep learning to help guide decisions in ICU; and portfolio management firms are using AI to seek alpha.
Viewers also liked (10)
Top 5 Deep Learning and AI Stories - October 6, 2017
Top 5 Deep Learning and AI Stories - October 6, 2017
Similar to Arduino uno lcd display 16x2
Aircraft Anti collision system using ZIGBEE Communication
This document describes an aircraft anti-collision system using Zigbee communication. The system uses an Arduino microcontroller, Zigbee modules, ultrasonic sensors, an LCD display, LEDs, and a buzzer. The ultrasonic sensors detect the distance to nearby aircraft and this information is transmitted via Zigbee modules and displayed on the LCD screens of both aircraft to alert pilots. The system aims to help pilots avoid collisions by informing them about approaching aircraft. It has advantages like considering all threats but is limited by only detecting aircraft in one direction. Potential applications include widespread use in airlines to improve aircraft safety.
TECH TALK-4TH SEM.pptx the arduino haha
The document presents an overview of Arduino. It defines Arduino as an open-source physical computing platform using a simple input/output board and Processing/Wiring language development environment. It describes common Arduino boards like Uno, Mega 2560, and Duemilanove. Features of the Arduino Uno are outlined, including basic terminology in Arduino like analog to digital conversion and pulse width modulation. Examples of interfacing Arduino with DC motors and RC car motors are provided. The document concludes with advantages of Arduino like low cost and cross-platform IDE.
TECH TALK-4TH SEM.pptx.which is about the arduino uno types and uses.
The document presents an overview of Arduino. It defines Arduino as an open-source physical computing platform using a simple input/output board and Processing/Wiring language development environment. It describes common Arduino boards like Uno, Mega 2560, and Duemilanove. Features of the Arduino Uno are outlined, including analog/digital pins and memory specifications. Basic Arduino terminology is defined, such as analog-to-digital conversion and pulse width modulation. Examples of interfacing Arduino with DC motors and RC car motors are provided. The document concludes with advantages of Arduino like low cost and cross-platform IDE.
Zigbee enabled hotel menu ordering system
PROJECT PRESENTATION ON Zigbee enabled hotel menu ordering system. Advanced hotel menu ordering system using Graphical LCD and Touch screen.
Lcd interfacing1
This document discusses interfacing an LCD with an 8051 microcontroller. It begins by defining what an LCD is and describing its pin diagram. It then lists the common commands used to control an LCD, including commands to clear the display, move the cursor, and turn the display on/off. The document presents the pin connections and an interfacing diagram for connecting an LCD to an 8051. It provides an assembly language program example to initialize the LCD, display text, and include delays. The program uses ports P1, P2, and subroutines to send commands and data to control the LCD display.
PPT ON Arduino
This presentation summarizes a summer training on Arduino. It defines Arduino as an open-source hardware and software platform for building electronics projects. It describes the main types of Arduino boards including the Arduino Uno, Mega 2560, Duemilanove, and Fio. It also outlines some key features of the Arduino Uno board. Furthermore, it provides examples of interfacing Arduino with a DC motor and RC car motor. The presentation concludes by listing some common applications of Arduino and its advantages.
Secured voting machine with touch screen & smart card
Secured voting machine with touch screen and smart card embedded system project main idea is
to develop a voting machine which can increase security of voting. This secured voting machine
will provide a easy user friendly display and high security where there will be no chances of
malpractice.
By developing this touch screen voting system project users can overcome disadvantages that
are seen in present system. This system provides simple and easy procedure for voting where
villagers can use it easily. And this will reduce rigging procedure in voting.
Digital Bangladesh - Touch in Life (By EEE, University Of Chittagong)
The document describes a digital notice board project created by a student team. The main objectives of the project were to develop a notice board whose contents could be updated through a mobile app instead of traditional printing. The notice board uses an Arduino microcontroller connected to an LCD display to show schedules and notices. It allows for quick updates without printing costs. In the future, the team hopes to add features like supporting multiple languages, graphical displays, and connecting to the internet through GSM modules. A survey found students were much more likely to support a digital notice board that could update notices within minutes compared to traditional boards that take days.
Batch-10 (B).pptx
This document describes a portable Bluetooth-enabled scrolling LED matrix display created by students under the guidance of K. Shailaja Madam. The display uses an Arduino Uno to control four 8x8 LED matrices and receive text messages over Bluetooth from an Android phone app. The text is sent from the phone and scrolls across the LED matrices from right to left. The document outlines the components used, including the Bluetooth module, Arduino, LED matrices, and shift registers. It provides the block diagram, circuit diagram, and explains how the display works and its potential applications in schools, businesses, and transportation.
Power Windows Using Touch Screen
The document proposes a touch screen interface to control power windows in vehicles, replacing conventional button and crank mechanisms. A resistive touch screen would be mounted in the vehicle and connected to an Arduino microcontroller to detect finger swipes and adjust the position of windows by controlling an H-bridge and motor for the appropriate amount of time. The aim is to provide a graphical display of window positions and allow windows to be adjusted with touch swipes instead of pressing and holding buttons.
A Report on Bidirectional Visitor Counter using IR sensors and Arduino Uno R3
The aim of our project is to make a controller which can sense if any person enters the room and it lights up the room automatically and also counts how many person are entering the room or going out of it.
A010310105
This document provides a review of the design of an intelligent restaurant system with a touch screen-based menu ordering system. It discusses using technologies like a multi-touch LCD screen connected to an Arduino mega microcontroller, an RF module for wireless connectivity, a database, and a line-following robot. The system allows customers to browse menus and place orders directly on the touchscreen. Their order is then sent to the database and kitchen display. A line-following robot delivers meals along a predetermined path. The document also reviews related works and discusses the hardware and software components of the proposed system in more detail.
Design connected thermometer
The document summarizes the key components used to design a connected thermometer, including an HC-06 Bluetooth module, DHT11 temperature and humidity sensor, Arduino Uno microcontroller, LCD display, and LED battery. It also discusses the Arduino programming language and environment. The demonstration section shows how to connect the components and display real-time temperature and humidity readings over Bluetooth on a smartphone. The conclusion reflects on learning about IoT systems and their business models.
1.39 inch Round Amoled(400x400) Datasheet
Model: H139BLN01.0/ H139BLN01.1/ E1392AM1
AUO/EDO 1.39 inch Amoled Display
Design for wearable device
Display Type:Amoled
Interface:MIPI
Active Area(mm):35.4 × 35.4 (H×V) ) mm
Luminance:350 cd/m² (Typ.)
Color Depth:16.7M 101% (CIE1931)
Learn more about 1.39 inch Amoled:
https://www.panoxdisplay.com/html/products/amoled-32-1.html
Smart Cart With AUtomated Biliing .pptx
Now a days Shopping is one of the most fascinating and alluring things. At the very same time, it involves getting tired due to standing in a long queue for the bill and payment process. At billing counter, they get confused while comparing the total price of all the products with the budget in the pocket before billing. To overcome these problems, we have designed a Smart Cart using an Arduino. Each shopping cart is implemented with a Product Identification Device (PID) that contains a microcontroller, an LCD, LDR Module, RFID reader, Bluetooth module and Push buttons. Here each item consists of a RFID tag and each item is scanned with the help of RFID reader before dropping into the cart. There is a chance to revert the product depending on our need and budget. This can be done by using a push button. If the item is not scanned and is dropped into the cart, an alert is given through the buzzer. This is done with the help of LDR module and Laser diode. The total bill and the number of items will be displayed on the LCD once we are done with shopping and the total bill will be sent to the android device with the help of the Bluetooth module.
IRJET - Ingenious Menu Ordering System for Restaurants
This document describes an ingenious menu ordering system for restaurants using an Arduino UNO microcontroller, XBee wireless communication modules, and a GLCD touchscreen display. The system allows customers to order food from their table using the GLCD. Their order is then wirelessly transmitted to the kitchen and billing sections. The system is intended to automate the ordering process and reduce the need for wait staff. It provides a more convenient experience for customers to order on their own schedule while improving restaurants' operational efficiency.
LG L206 Product manual
The document introduces a new wide monitor series called L206WU/L206WD that features optimized multi-tasking capabilities and easy connectivity through USB input. It has a slim and narrow design inspired by Windows Vista, along with a high contrast ratio, fast response time, and pivot height stand for improved ergonomics.
L206 Wu Wd Product Manual Ver2
L206WU 20" LCD breedbeeldmonitor met USB aansluitgemak
tot 6 beeldschermen aan notebook of pc
Voor grafische designbureaus, ict-bedrijven, beveiligingsbedrijven of datacenters is de L206WU een uitkomst. Dank zij de innovatieve USB Multilink technologie kunnen in een handomdraai meerdere beeldschermen worden aangesloten. Installatie van extra beeldschermadapters of extra driversoftware is niet nodig. De beeldschermen configureren zichzelf.
Meer informatie: http://www.lg-playwide.nl
OLED Display 1.2 inch 60 Hz 390x390 QSPI
Model Name E120A390QSR
Screen Size 1.2 inch
Interface QSPI,MIPI
Active Area 30.42(W)×30.42(H) mm
Resolution 390x390 325 PPI
Contrast Ratio 100000:1 (Typ.) (TM)
OLED information
https://www.panoxdisplay.com/amoled/1-2-inch-round-oled-390-spi-60hz.html
Similar to Arduino uno lcd display 16x2 (20)
Aircraft Anti collision system using ZIGBEE Communication
Aircraft Anti collision system using ZIGBEE Communication
TECH TALK-4TH SEM.pptx.which is about the arduino uno types and uses.
TECH TALK-4TH SEM.pptx.which is about the arduino uno types and uses.
Secured voting machine with touch screen & smart card
Secured voting machine with touch screen & smart card
Digital Bangladesh - Touch in Life (By EEE, University Of Chittagong)
Digital Bangladesh - Touch in Life (By EEE, University Of Chittagong)
A Report on Bidirectional Visitor Counter using IR sensors and Arduino Uno R3
A Report on Bidirectional Visitor Counter using IR sensors and Arduino Uno R3
IRJET - Ingenious Menu Ordering System for Restaurants
IRJET - Ingenious Menu Ordering System for Restaurants
Recently uploaded
HCL Notes and Domino License Cost Reduction in the World of DLAU
Webinar Recording: https://www.panagenda.com/webinars/hcl-notes-and-domino-license-cost-reduction-in-the-world-of-dlau/
The introduction of DLAU and the CCB & CCX licensing model caused quite a stir in the HCL community. As a Notes and Domino customer, you may have faced challenges with unexpected user counts and license costs. You probably have questions on how this new licensing approach works and how to benefit from it. Most importantly, you likely have budget constraints and want to save money where possible. Don’t worry, we can help with all of this!
We’ll show you how to fix common misconfigurations that cause higher-than-expected user counts, and how to identify accounts which you can deactivate to save money. There are also frequent patterns that can cause unnecessary cost, like using a person document instead of a mail-in for shared mailboxes. We’ll provide examples and solutions for those as well. And naturally we’ll explain the new licensing model.
Join HCL Ambassador Marc Thomas in this webinar with a special guest appearance from Franz Walder. It will give you the tools and know-how to stay on top of what is going on with Domino licensing. You will be able lower your cost through an optimized configuration and keep it low going forward.
These topics will be covered
- Reducing license cost by finding and fixing misconfigurations and superfluous accounts
- How do CCB and CCX licenses really work?
- Understanding the DLAU tool and how to best utilize it
- Tips for common problem areas, like team mailboxes, functional/test users, etc
- Practical examples and best practices to implement right away
Infrastructure Challenges in Scaling RAG with Custom AI models
Building Retrieval-Augmented Generation (RAG) systems with open-source and custom AI models is a complex task. This talk explores the challenges in productionizing RAG systems, including retrieval performance, response synthesis, and evaluation. We’ll discuss how to leverage open-source models like text embeddings, language models, and custom fine-tuned models to enhance RAG performance. Additionally, we’ll cover how BentoML can help orchestrate and scale these AI components efficiently, ensuring seamless deployment and management of RAG systems in the cloud.
Fueling AI with Great Data with Airbyte Webinar
This talk will focus on how to collect data from a variety of sources, leveraging this data for RAG and other GenAI use cases, and finally charting your course to productionalization.
“I’m still / I’m still / Chaining from the Block”
“An Outlook of the Ongoing and Future Relationship between Blockchain Technologies and Process-aware Information Systems.” Invited talk at the joint workshop on Blockchain for Information Systems (BC4IS) and Blockchain for Trusted Data Sharing (B4TDS), co-located with with the 36th International Conference on Advanced Information Systems Engineering (CAiSE), 3 June 2024, Limassol, Cyprus.
Ocean lotus Threat actors project by John Sitima 2024 (1).pptx
Ocean Lotus cyber threat actors represent a sophisticated, persistent, and politically motivated group that poses a significant risk to organizations and individuals in the Southeast Asian region. Their continuous evolution and adaptability underscore the need for robust cybersecurity measures and international cooperation to identify and mitigate the threats posed by such advanced persistent threat groups.
Microsoft - Power Platform_G.Aspiotis.pdf
Revolutionizing Application Development
with AI-powered low-code, presentation by George Aspiotis, Sr. Partner Development Manager, Microsoft
Programming Foundation Models with DSPy - Meetup Slides
Prompting language models is hard, while programming language models is easy. In this talk, I will discuss the state-of-the-art framework DSPy for programming foundation models with its powerful optimizers and runtime constraint system.
20240607 QFM018 Elixir Reading List May 2024
Everything I found interesting about the Elixir programming ecosystem in May 2024
“Building and Scaling AI Applications with the Nx AI Manager,” a Presentation...
“Building and Scaling AI Applications with the Nx AI Manager,” a Presentation...Edge AI and Vision Alliance
For the full video of this presentation, please visit: https://www.edge-ai-vision.com/2024/06/building-and-scaling-ai-applications-with-the-nx-ai-manager-a-presentation-from-network-optix/
Robin van Emden, Senior Director of Data Science at Network Optix, presents the “Building and Scaling AI Applications with the Nx AI Manager,” tutorial at the May 2024 Embedded Vision Summit.
In this presentation, van Emden covers the basics of scaling edge AI solutions using the Nx tool kit. He emphasizes the process of developing AI models and deploying them globally. He also showcases the conversion of AI models and the creation of effective edge AI pipelines, with a focus on pre-processing, model conversion, selecting the appropriate inference engine for the target hardware and post-processing.
van Emden shows how Nx can simplify the developer’s life and facilitate a rapid transition from concept to production-ready applications.He provides valuable insights into developing scalable and efficient edge AI solutions, with a strong focus on practical implementation.Things to Consider When Choosing a Website Developer for your Website | FODUU
Choosing the right website developer is crucial for your business. This article covers essential factors to consider, including experience, portfolio, technical skills, communication, pricing, reputation & reviews, cost and budget considerations and post-launch support. Make an informed decision to ensure your website meets your business goals.
Cosa hanno in comune un mattoncino Lego e la backdoor XZ?
ABSTRACT: A prima vista, un mattoncino Lego e la backdoor XZ potrebbero avere in comune il fatto di essere entrambi blocchi di costruzione, o dipendenze di progetti creativi e software. La realtà è che un mattoncino Lego e il caso della backdoor XZ hanno molto di più di tutto ciò in comune.
Partecipate alla presentazione per immergervi in una storia di interoperabilità, standard e formati aperti, per poi discutere del ruolo importante che i contributori hanno in una comunità open source sostenibile.
BIO: Sostenitrice del software libero e dei formati standard e aperti. È stata un membro attivo dei progetti Fedora e openSUSE e ha co-fondato l'Associazione LibreItalia dove è stata coinvolta in diversi eventi, migrazioni e formazione relativi a LibreOffice. In precedenza ha lavorato a migrazioni e corsi di formazione su LibreOffice per diverse amministrazioni pubbliche e privati. Da gennaio 2020 lavora in SUSE come Software Release Engineer per Uyuni e SUSE Manager e quando non segue la sua passione per i computer e per Geeko coltiva la sua curiosità per l'astronomia (da cui deriva il suo nickname deneb_alpha).
Taking AI to the Next Level in Manufacturing.pdf
Read Taking AI to the Next Level in Manufacturing to gain insights on AI adoption in the manufacturing industry, such as:
1. How quickly AI is being implemented in manufacturing.
2. Which barriers stand in the way of AI adoption.
3. How data quality and governance form the backbone of AI.
4. Organizational processes and structures that may inhibit effective AI adoption.
6. Ideas and approaches to help build your organization's AI strategy.
Mind map of terminologies used in context of Generative AI
Mind map of common terms used in context of Generative AI.
National Security Agency - NSA mobile device best practices
Threats to mobile devices are more prevalent and increasing in scope and complexity. Users of mobile devices desire to take full advantage of the features
available on those devices, but many of the features provide convenience and capability but sacrifice security. This best practices guide outlines steps the users can take to better protect personal devices and information.
Artificial Intelligence for XMLDevelopment
In the rapidly evolving landscape of technologies, XML continues to play a vital role in structuring, storing, and transporting data across diverse systems. The recent advancements in artificial intelligence (AI) present new methodologies for enhancing XML development workflows, introducing efficiency, automation, and intelligent capabilities. This presentation will outline the scope and perspective of utilizing AI in XML development. The potential benefits and the possible pitfalls will be highlighted, providing a balanced view of the subject.
We will explore the capabilities of AI in understanding XML markup languages and autonomously creating structured XML content. Additionally, we will examine the capacity of AI to enrich plain text with appropriate XML markup. Practical examples and methodological guidelines will be provided to elucidate how AI can be effectively prompted to interpret and generate accurate XML markup.
Further emphasis will be placed on the role of AI in developing XSLT, or schemas such as XSD and Schematron. We will address the techniques and strategies adopted to create prompts for generating code, explaining code, or refactoring the code, and the results achieved.
The discussion will extend to how AI can be used to transform XML content. In particular, the focus will be on the use of AI XPath extension functions in XSLT, Schematron, Schematron Quick Fixes, or for XML content refactoring.
The presentation aims to deliver a comprehensive overview of AI usage in XML development, providing attendees with the necessary knowledge to make informed decisions. Whether you’re at the early stages of adopting AI or considering integrating it in advanced XML development, this presentation will cover all levels of expertise.
By highlighting the potential advantages and challenges of integrating AI with XML development tools and languages, the presentation seeks to inspire thoughtful conversation around the future of XML development. We’ll not only delve into the technical aspects of AI-powered XML development but also discuss practical implications and possible future directions.
June Patch Tuesday
Ivanti’s Patch Tuesday breakdown goes beyond patching your applications and brings you the intelligence and guidance needed to prioritize where to focus your attention first. Catch early analysis on our Ivanti blog, then join industry expert Chris Goettl for the Patch Tuesday Webinar Event. There we’ll do a deep dive into each of the bulletins and give guidance on the risks associated with the newly-identified vulnerabilities.
HCL Notes und Domino Lizenzkostenreduzierung in der Welt von DLAU
Webinar Recording: https://www.panagenda.com/webinars/hcl-notes-und-domino-lizenzkostenreduzierung-in-der-welt-von-dlau/
DLAU und die Lizenzen nach dem CCB- und CCX-Modell sind für viele in der HCL-Community seit letztem Jahr ein heißes Thema. Als Notes- oder Domino-Kunde haben Sie vielleicht mit unerwartet hohen Benutzerzahlen und Lizenzgebühren zu kämpfen. Sie fragen sich vielleicht, wie diese neue Art der Lizenzierung funktioniert und welchen Nutzen sie Ihnen bringt. Vor allem wollen Sie sicherlich Ihr Budget einhalten und Kosten sparen, wo immer möglich. Das verstehen wir und wir möchten Ihnen dabei helfen!
Wir erklären Ihnen, wie Sie häufige Konfigurationsprobleme lösen können, die dazu führen können, dass mehr Benutzer gezählt werden als nötig, und wie Sie überflüssige oder ungenutzte Konten identifizieren und entfernen können, um Geld zu sparen. Es gibt auch einige Ansätze, die zu unnötigen Ausgaben führen können, z. B. wenn ein Personendokument anstelle eines Mail-Ins für geteilte Mailboxen verwendet wird. Wir zeigen Ihnen solche Fälle und deren Lösungen. Und natürlich erklären wir Ihnen das neue Lizenzmodell.
Nehmen Sie an diesem Webinar teil, bei dem HCL-Ambassador Marc Thomas und Gastredner Franz Walder Ihnen diese neue Welt näherbringen. Es vermittelt Ihnen die Tools und das Know-how, um den Überblick zu bewahren. Sie werden in der Lage sein, Ihre Kosten durch eine optimierte Domino-Konfiguration zu reduzieren und auch in Zukunft gering zu halten.
Diese Themen werden behandelt
- Reduzierung der Lizenzkosten durch Auffinden und Beheben von Fehlkonfigurationen und überflüssigen Konten
- Wie funktionieren CCB- und CCX-Lizenzen wirklich?
- Verstehen des DLAU-Tools und wie man es am besten nutzt
- Tipps für häufige Problembereiche, wie z. B. Team-Postfächer, Funktions-/Testbenutzer usw.
- Praxisbeispiele und Best Practices zum sofortigen Umsetzen
TrustArc Webinar - 2024 Global Privacy Survey
How does your privacy program stack up against your peers? What challenges are privacy teams tackling and prioritizing in 2024?
In the fifth annual Global Privacy Benchmarks Survey, we asked over 1,800 global privacy professionals and business executives to share their perspectives on the current state of privacy inside and outside of their organizations. This year’s report focused on emerging areas of importance for privacy and compliance professionals, including considerations and implications of Artificial Intelligence (AI) technologies, building brand trust, and different approaches for achieving higher privacy competence scores.
See how organizational priorities and strategic approaches to data security and privacy are evolving around the globe.
This webinar will review:
- The top 10 privacy insights from the fifth annual Global Privacy Benchmarks Survey
- The top challenges for privacy leaders, practitioners, and organizations in 2024
- Key themes to consider in developing and maintaining your privacy program
CAKE: Sharing Slices of Confidential Data on Blockchain
Presented at the CAiSE 2024 Forum, Intelligent Information Systems, June 6th, Limassol, Cyprus.
Synopsis: Cooperative information systems typically involve various entities in a collaborative process within a distributed environment. Blockchain technology offers a mechanism for automating such processes, even when only partial trust exists among participants. The data stored on the blockchain is replicated across all nodes in the network, ensuring accessibility to all participants. While this aspect facilitates traceability, integrity, and persistence, it poses challenges for adopting public blockchains in enterprise settings due to confidentiality issues. In this paper, we present a software tool named Control Access via Key Encryption (CAKE), designed to ensure data confidentiality in scenarios involving public blockchains. After outlining its core components and functionalities, we showcase the application of CAKE in the context of a real-world cyber-security project within the logistics domain.
Paper: https://doi.org/10.1007/978-3-031-61000-4_16
Recently uploaded (20)
HCL Notes and Domino License Cost Reduction in the World of DLAU
HCL Notes and Domino License Cost Reduction in the World of DLAU
Infrastructure Challenges in Scaling RAG with Custom AI models
Infrastructure Challenges in Scaling RAG with Custom AI models
Ocean lotus Threat actors project by John Sitima 2024 (1).pptx
Ocean lotus Threat actors project by John Sitima 2024 (1).pptx
Programming Foundation Models with DSPy - Meetup Slides
Programming Foundation Models with DSPy - Meetup Slides
“Building and Scaling AI Applications with the Nx AI Manager,” a Presentation...
“Building and Scaling AI Applications with the Nx AI Manager,” a Presentation...
Things to Consider When Choosing a Website Developer for your Website | FODUU
Things to Consider When Choosing a Website Developer for your Website | FODUU
Cosa hanno in comune un mattoncino Lego e la backdoor XZ?
Cosa hanno in comune un mattoncino Lego e la backdoor XZ?
Mind map of terminologies used in context of Generative AI
Mind map of terminologies used in context of Generative AI
National Security Agency - NSA mobile device best practices
National Security Agency - NSA mobile device best practices
HCL Notes und Domino Lizenzkostenreduzierung in der Welt von DLAU
HCL Notes und Domino Lizenzkostenreduzierung in der Welt von DLAU
CAKE: Sharing Slices of Confidential Data on Blockchain
CAKE: Sharing Slices of Confidential Data on Blockchain
Arduino uno lcd display 16x2
- 1. ARDUINO UNO LCD DISPLAY 16*2 by
- 2. DESCRIPTION The Liquid Crystal library allows you to control LCD displays that are compatible with the Hitachi HD44780 driver. The LCDs have a parallel interface, meaning that the microcontroller has to manipulate several interface pins at once to control the display.
- 3. HOW IT LOOKS Product Code: RM0122
- 4. FEATURES OF 16*2 ARDUINO LCD DISPLAY Operating Voltage:5V. Backlight Colour: Green. Horizontal Characters: 16. No of lines:2. Supports MCU speeds up to 2Mhz.
- 5. APPLICATIONS OF 16*2 ARDUINO LCD DISPLAY As a Display Device. Displaying data on Backlit Screen. DIY projects requiring need for a display Device.
- 6. B5, C-Block, Above IOB Bank, Sec-31, Noida-201301(UP) India 0120-4317229 +91-8744000555 admin@robomart.com www.robomart.com CONTACT US
- 7. Thank you!!!