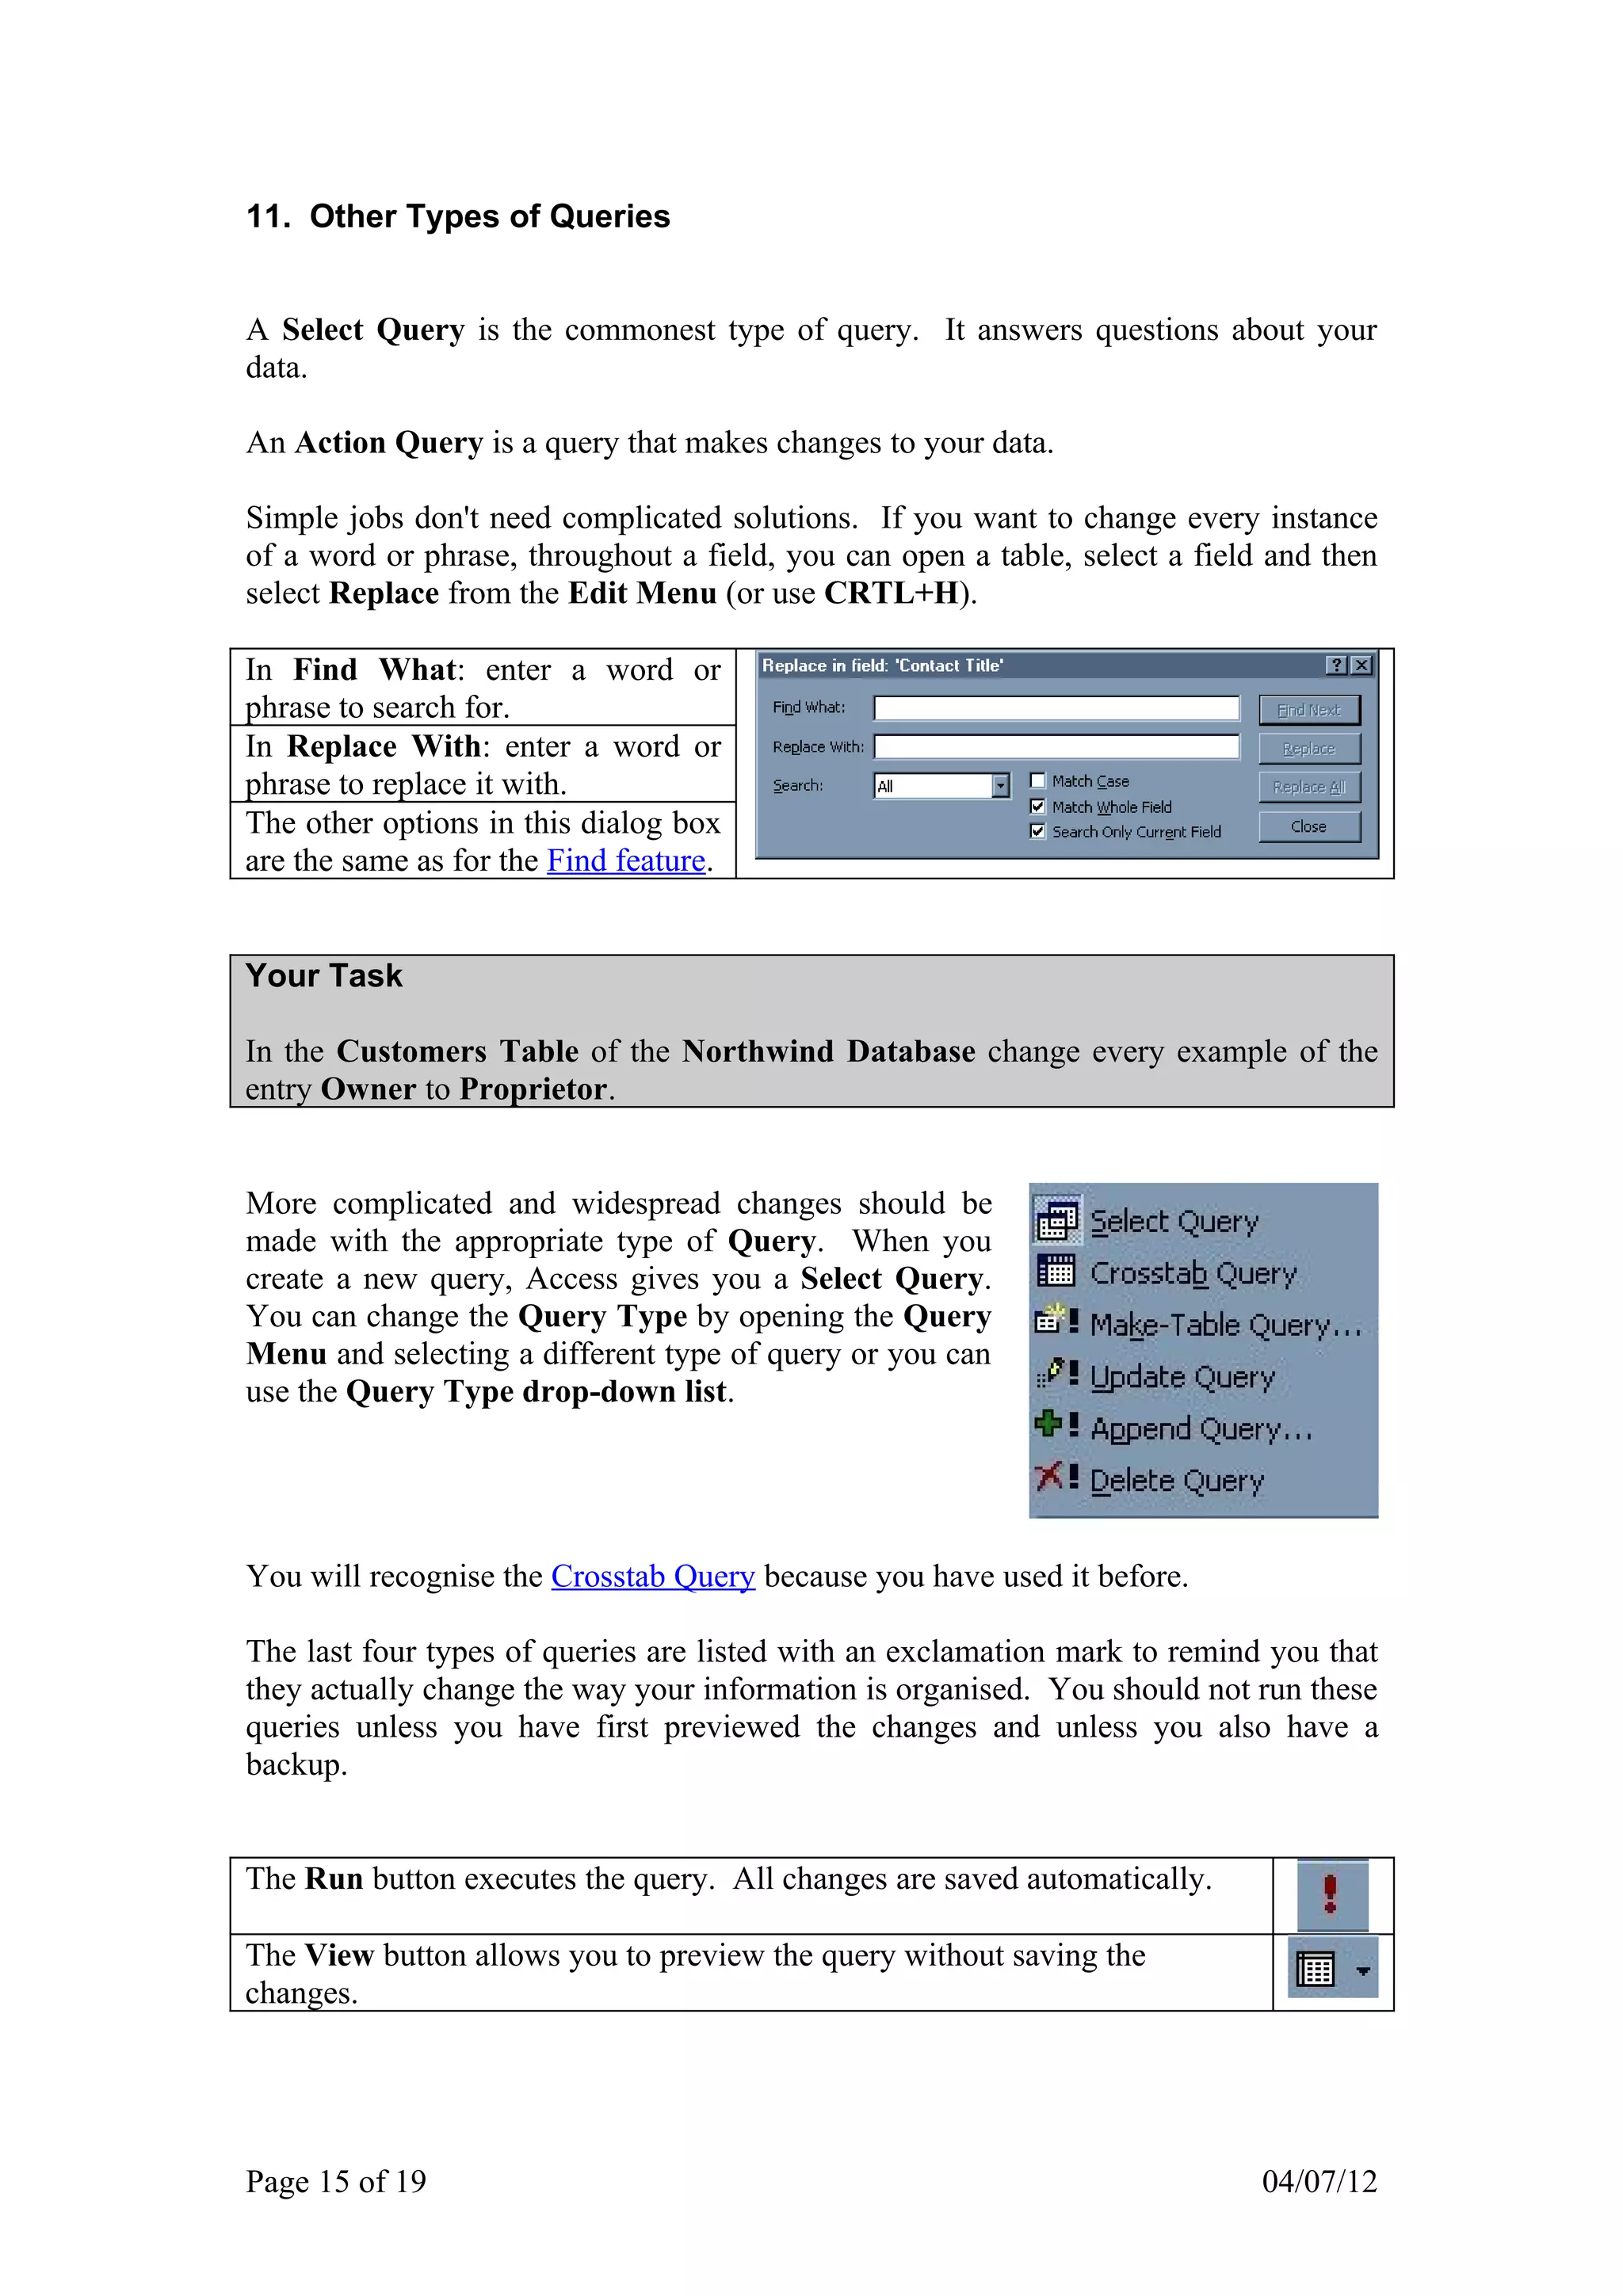
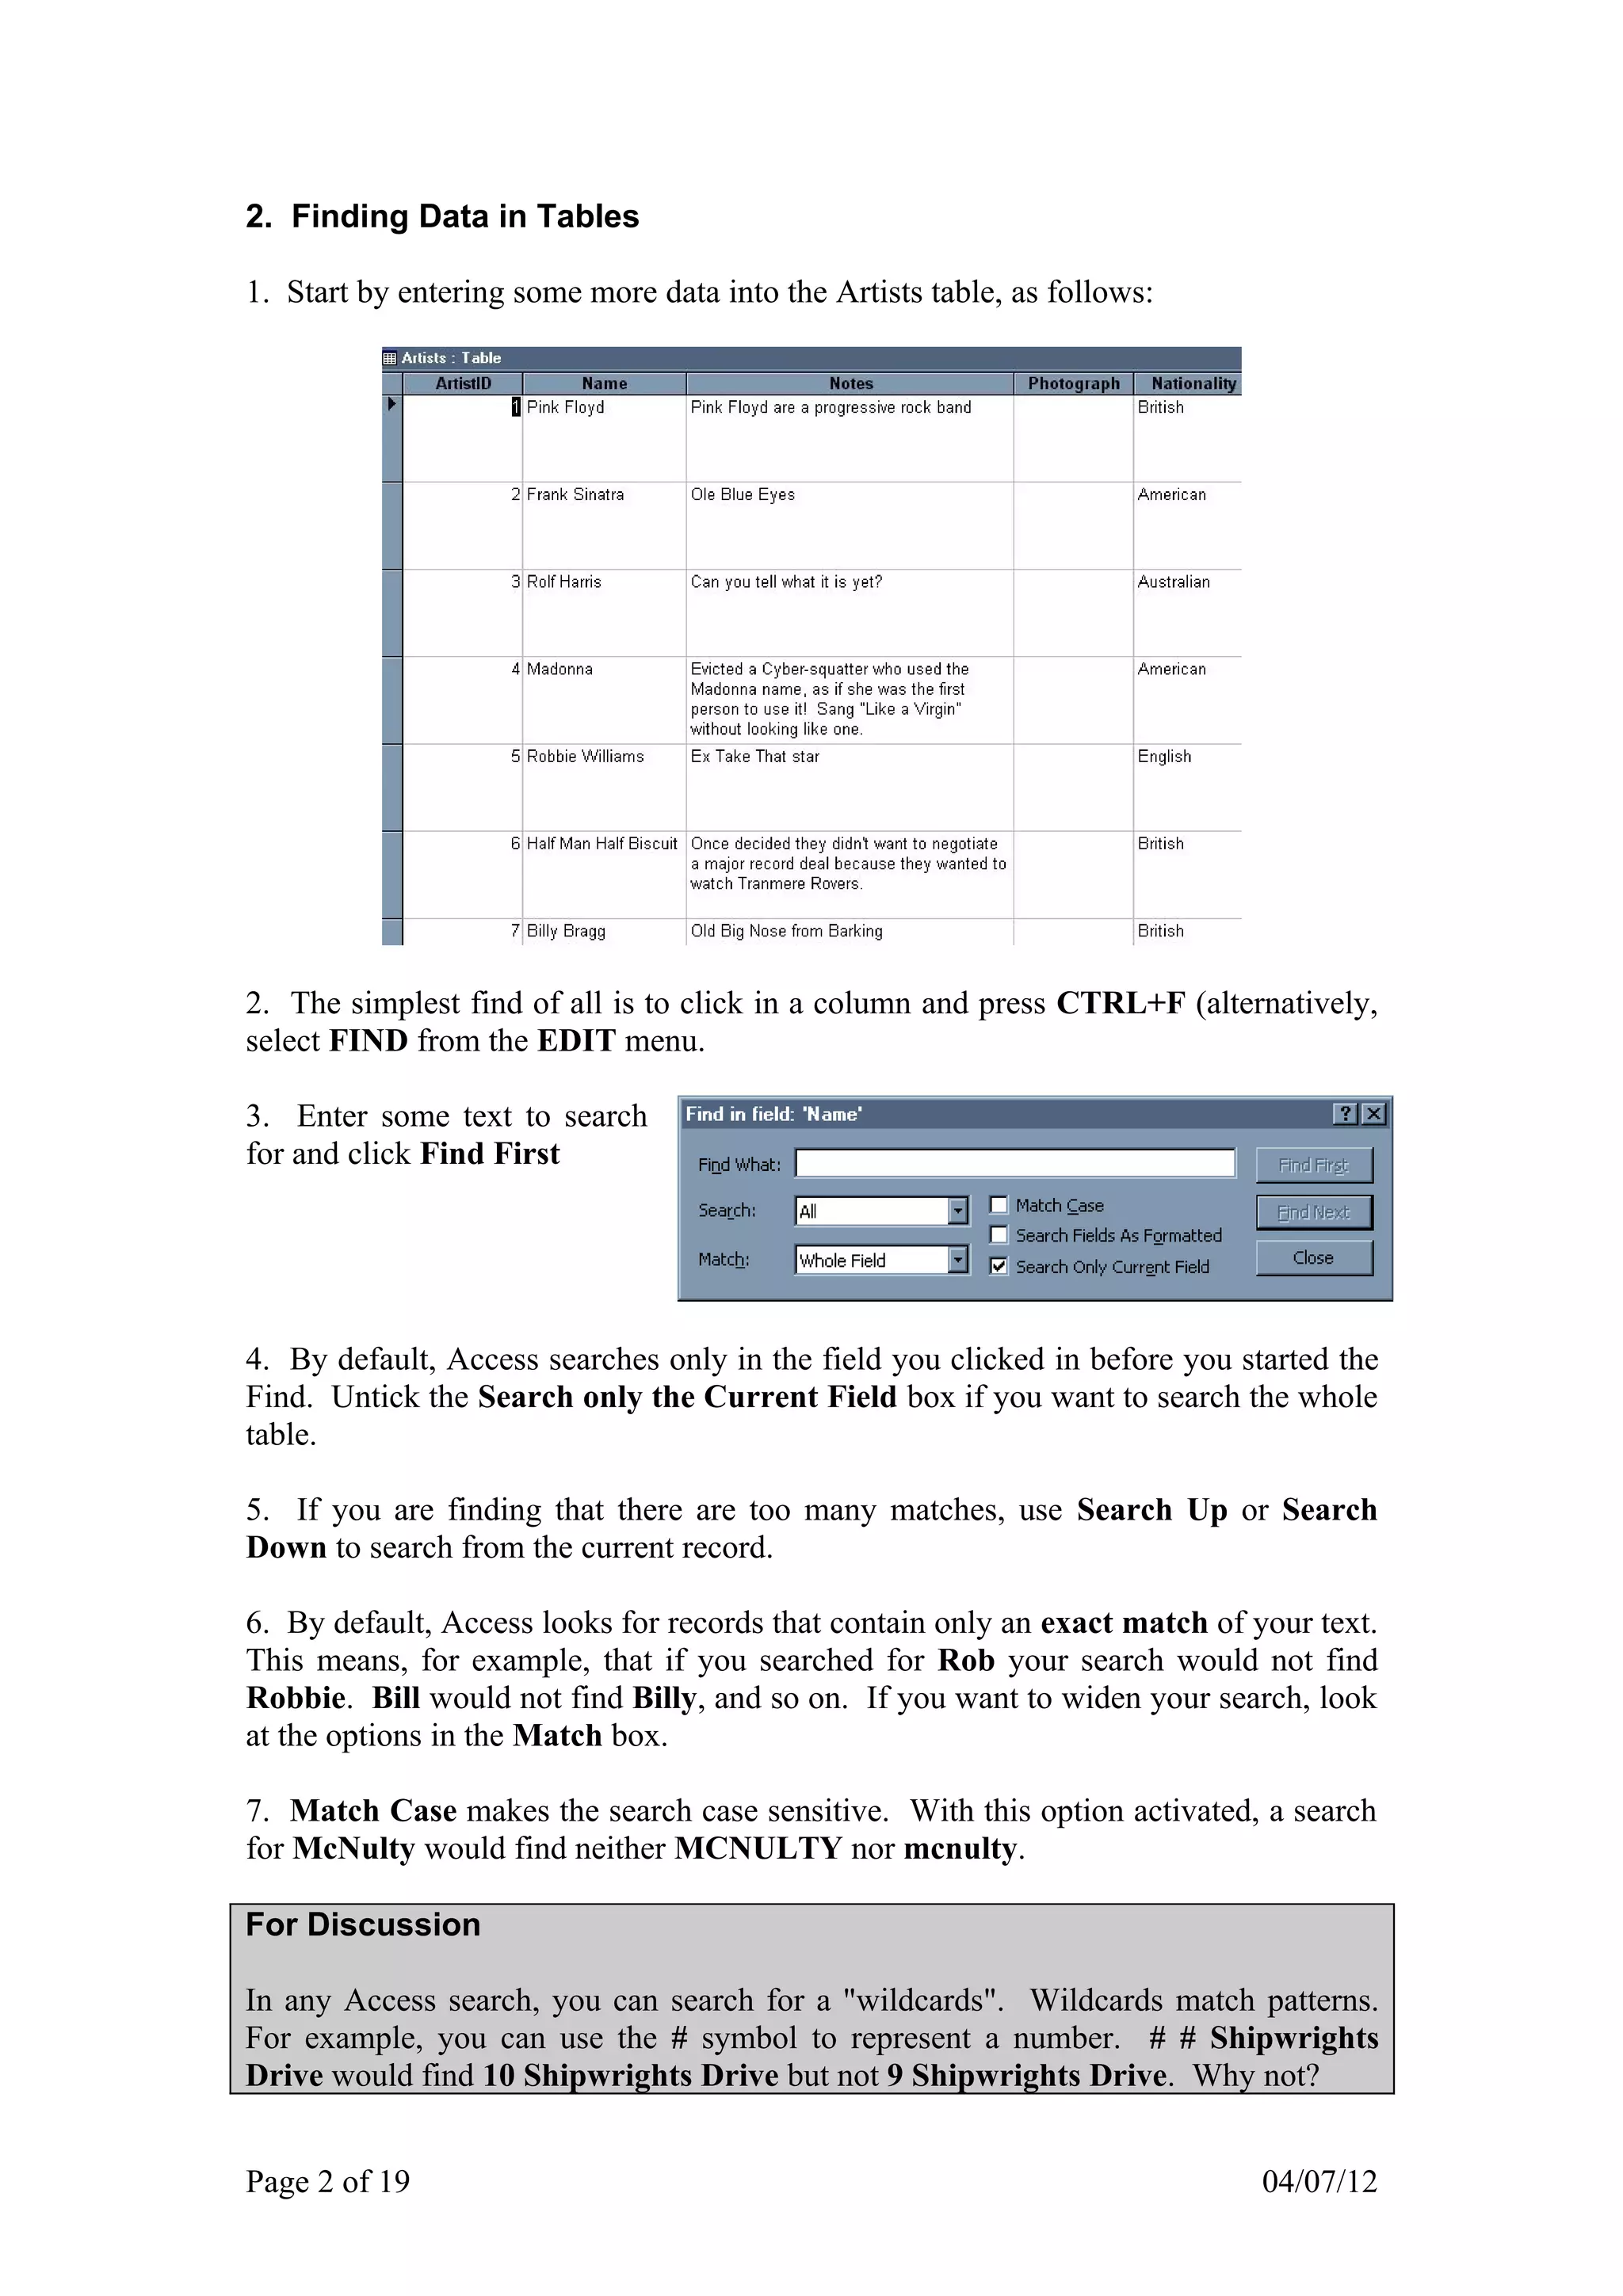
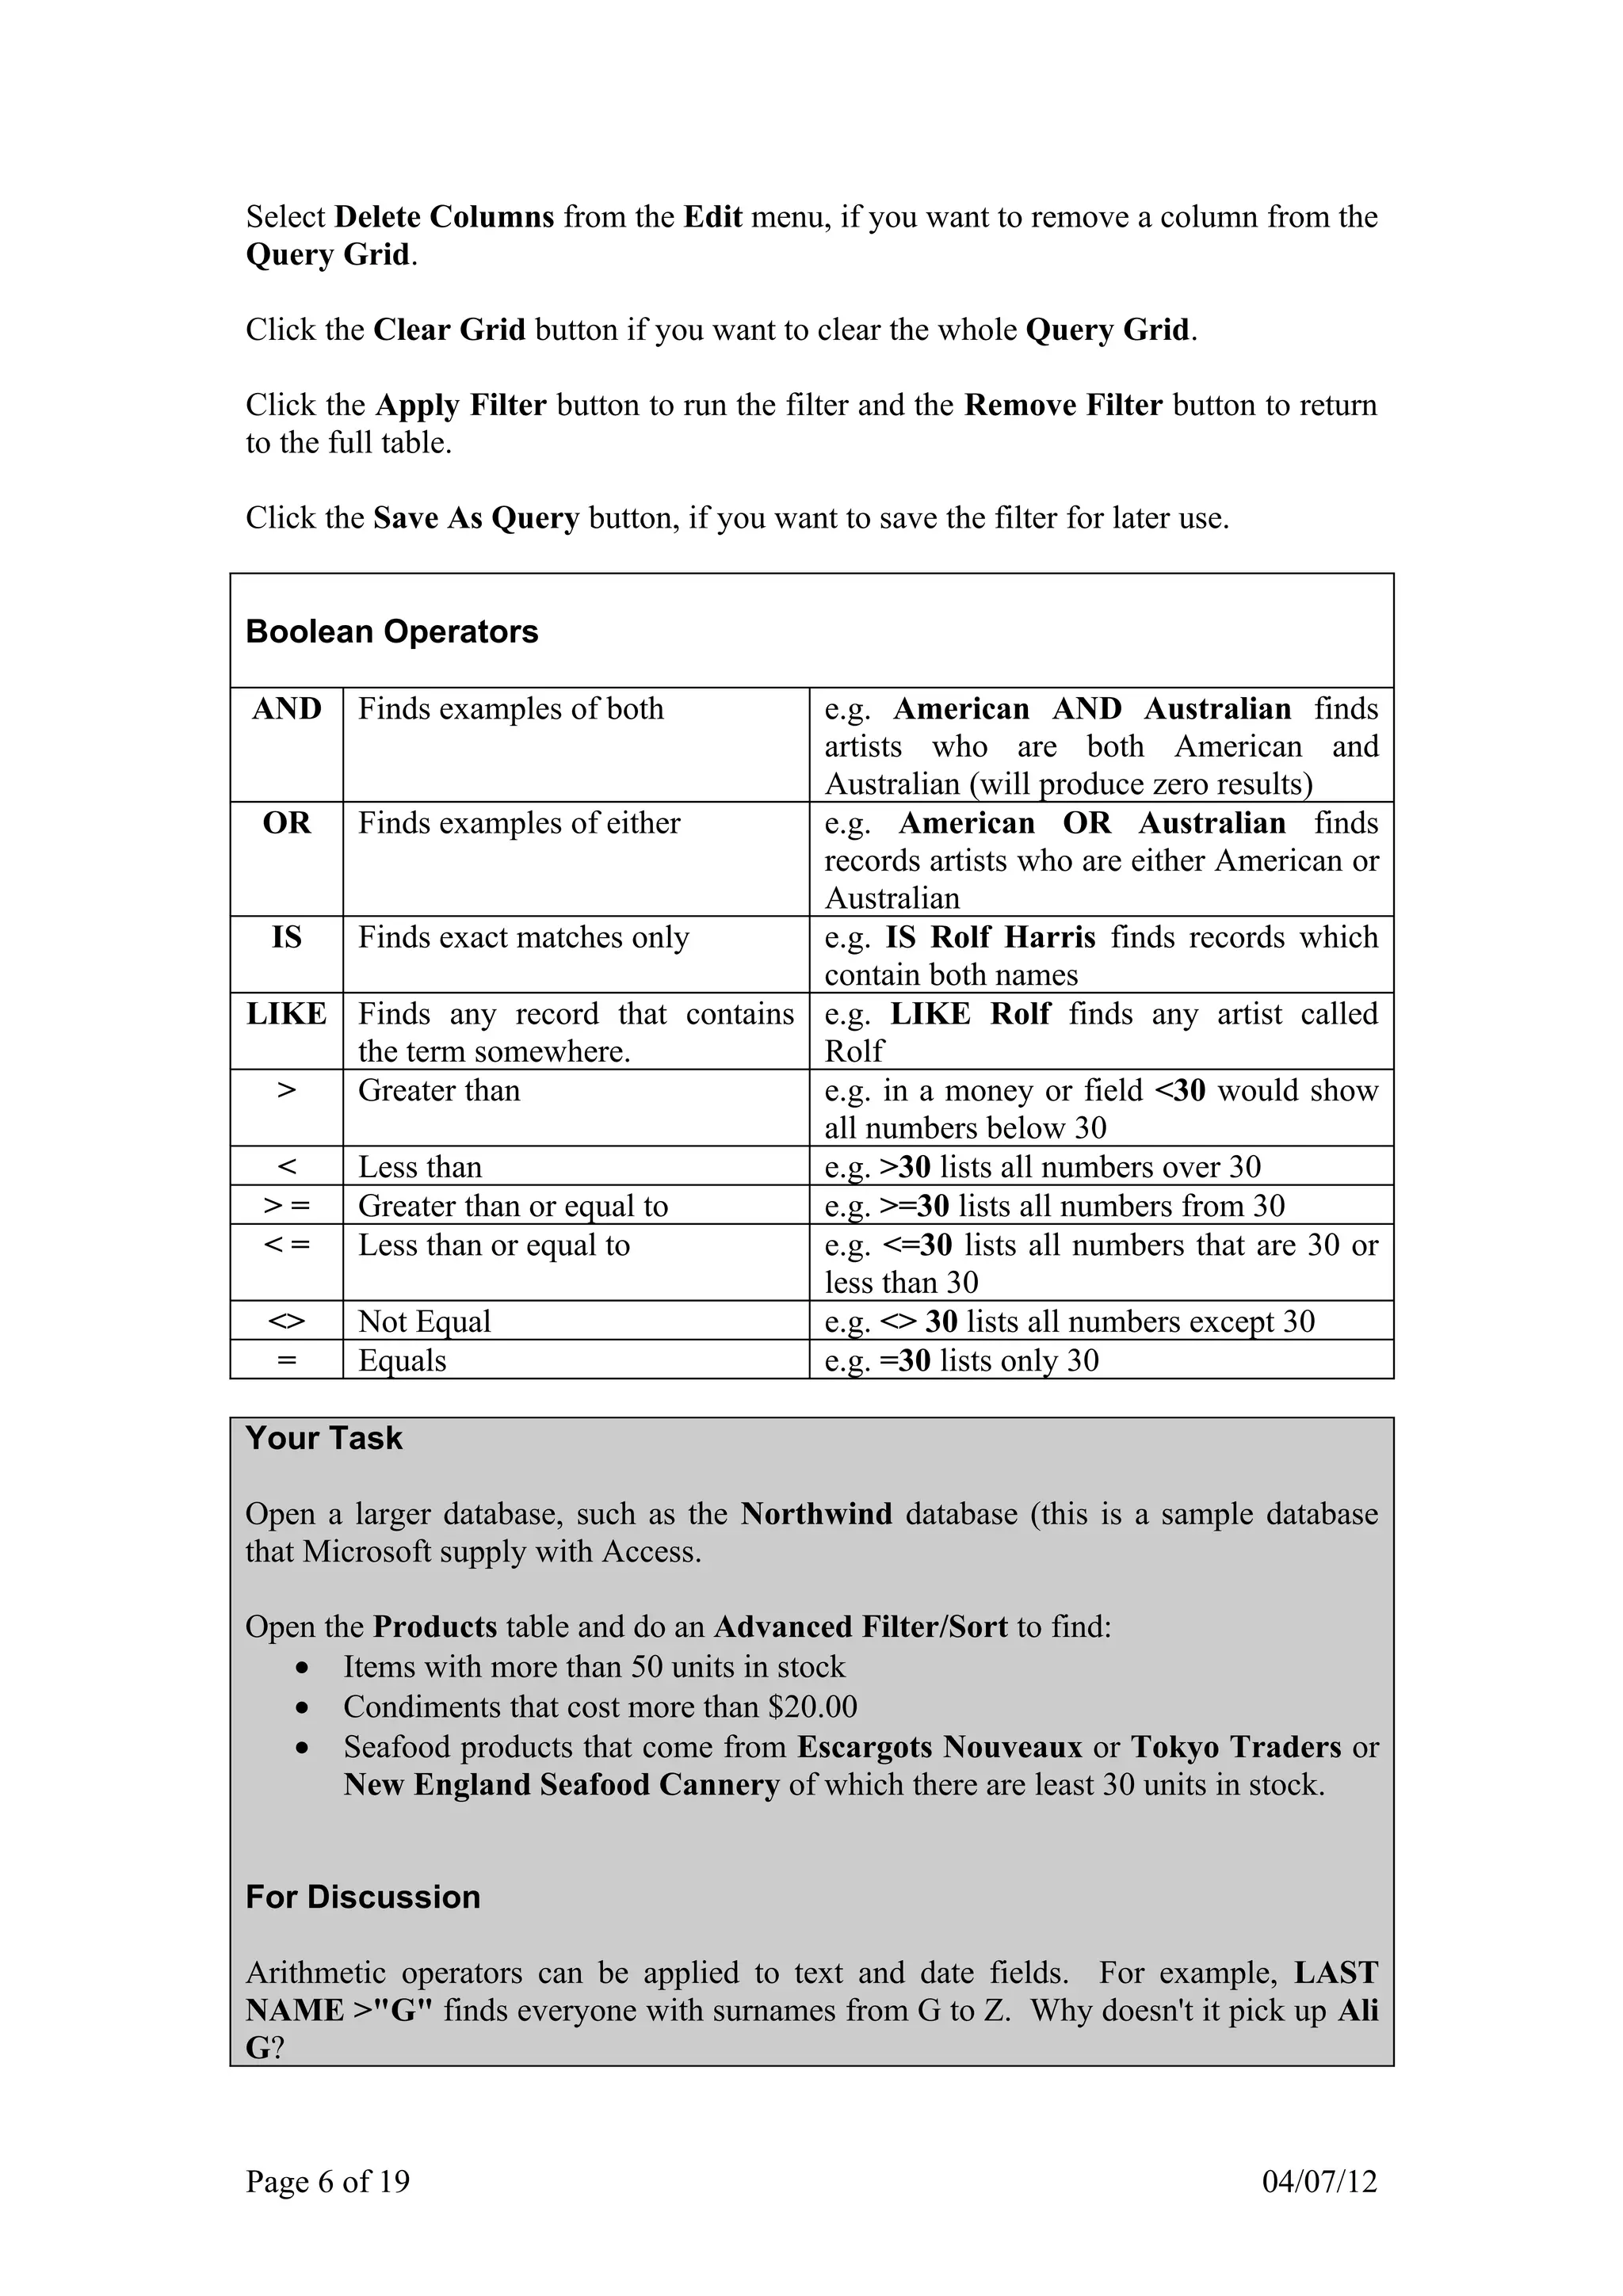
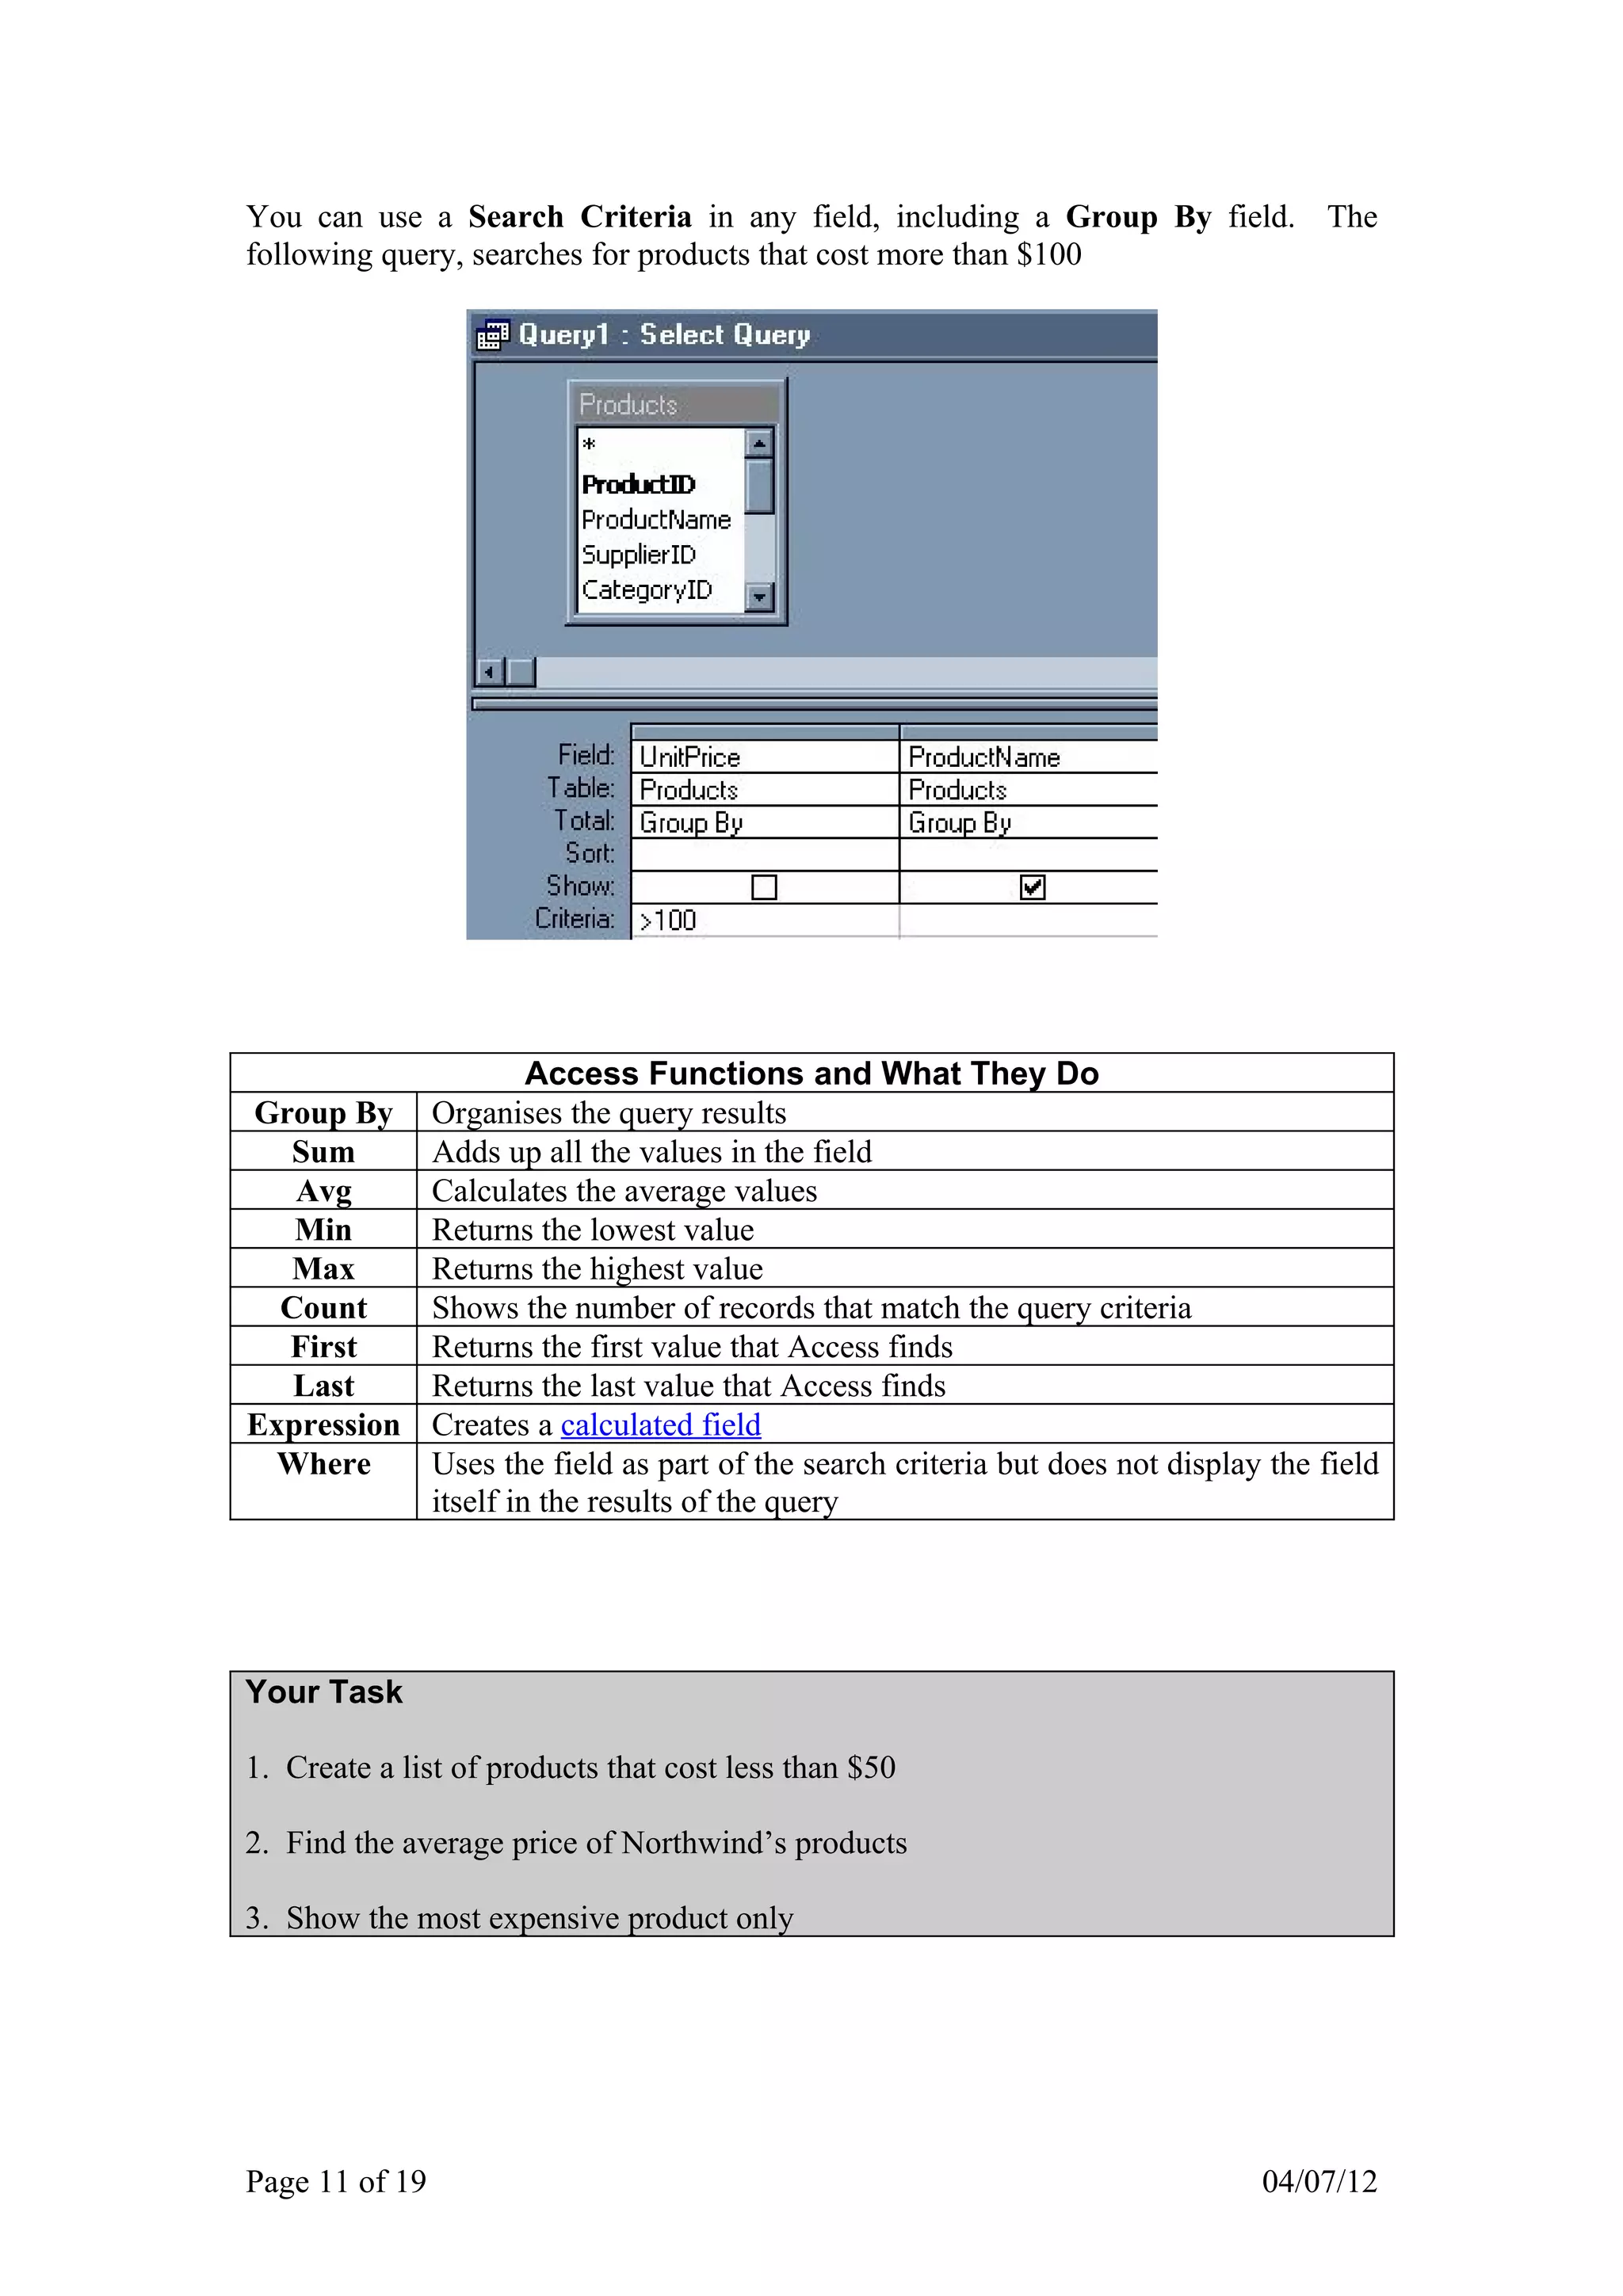
The document provides an introduction to queries in Microsoft Access. It discusses:
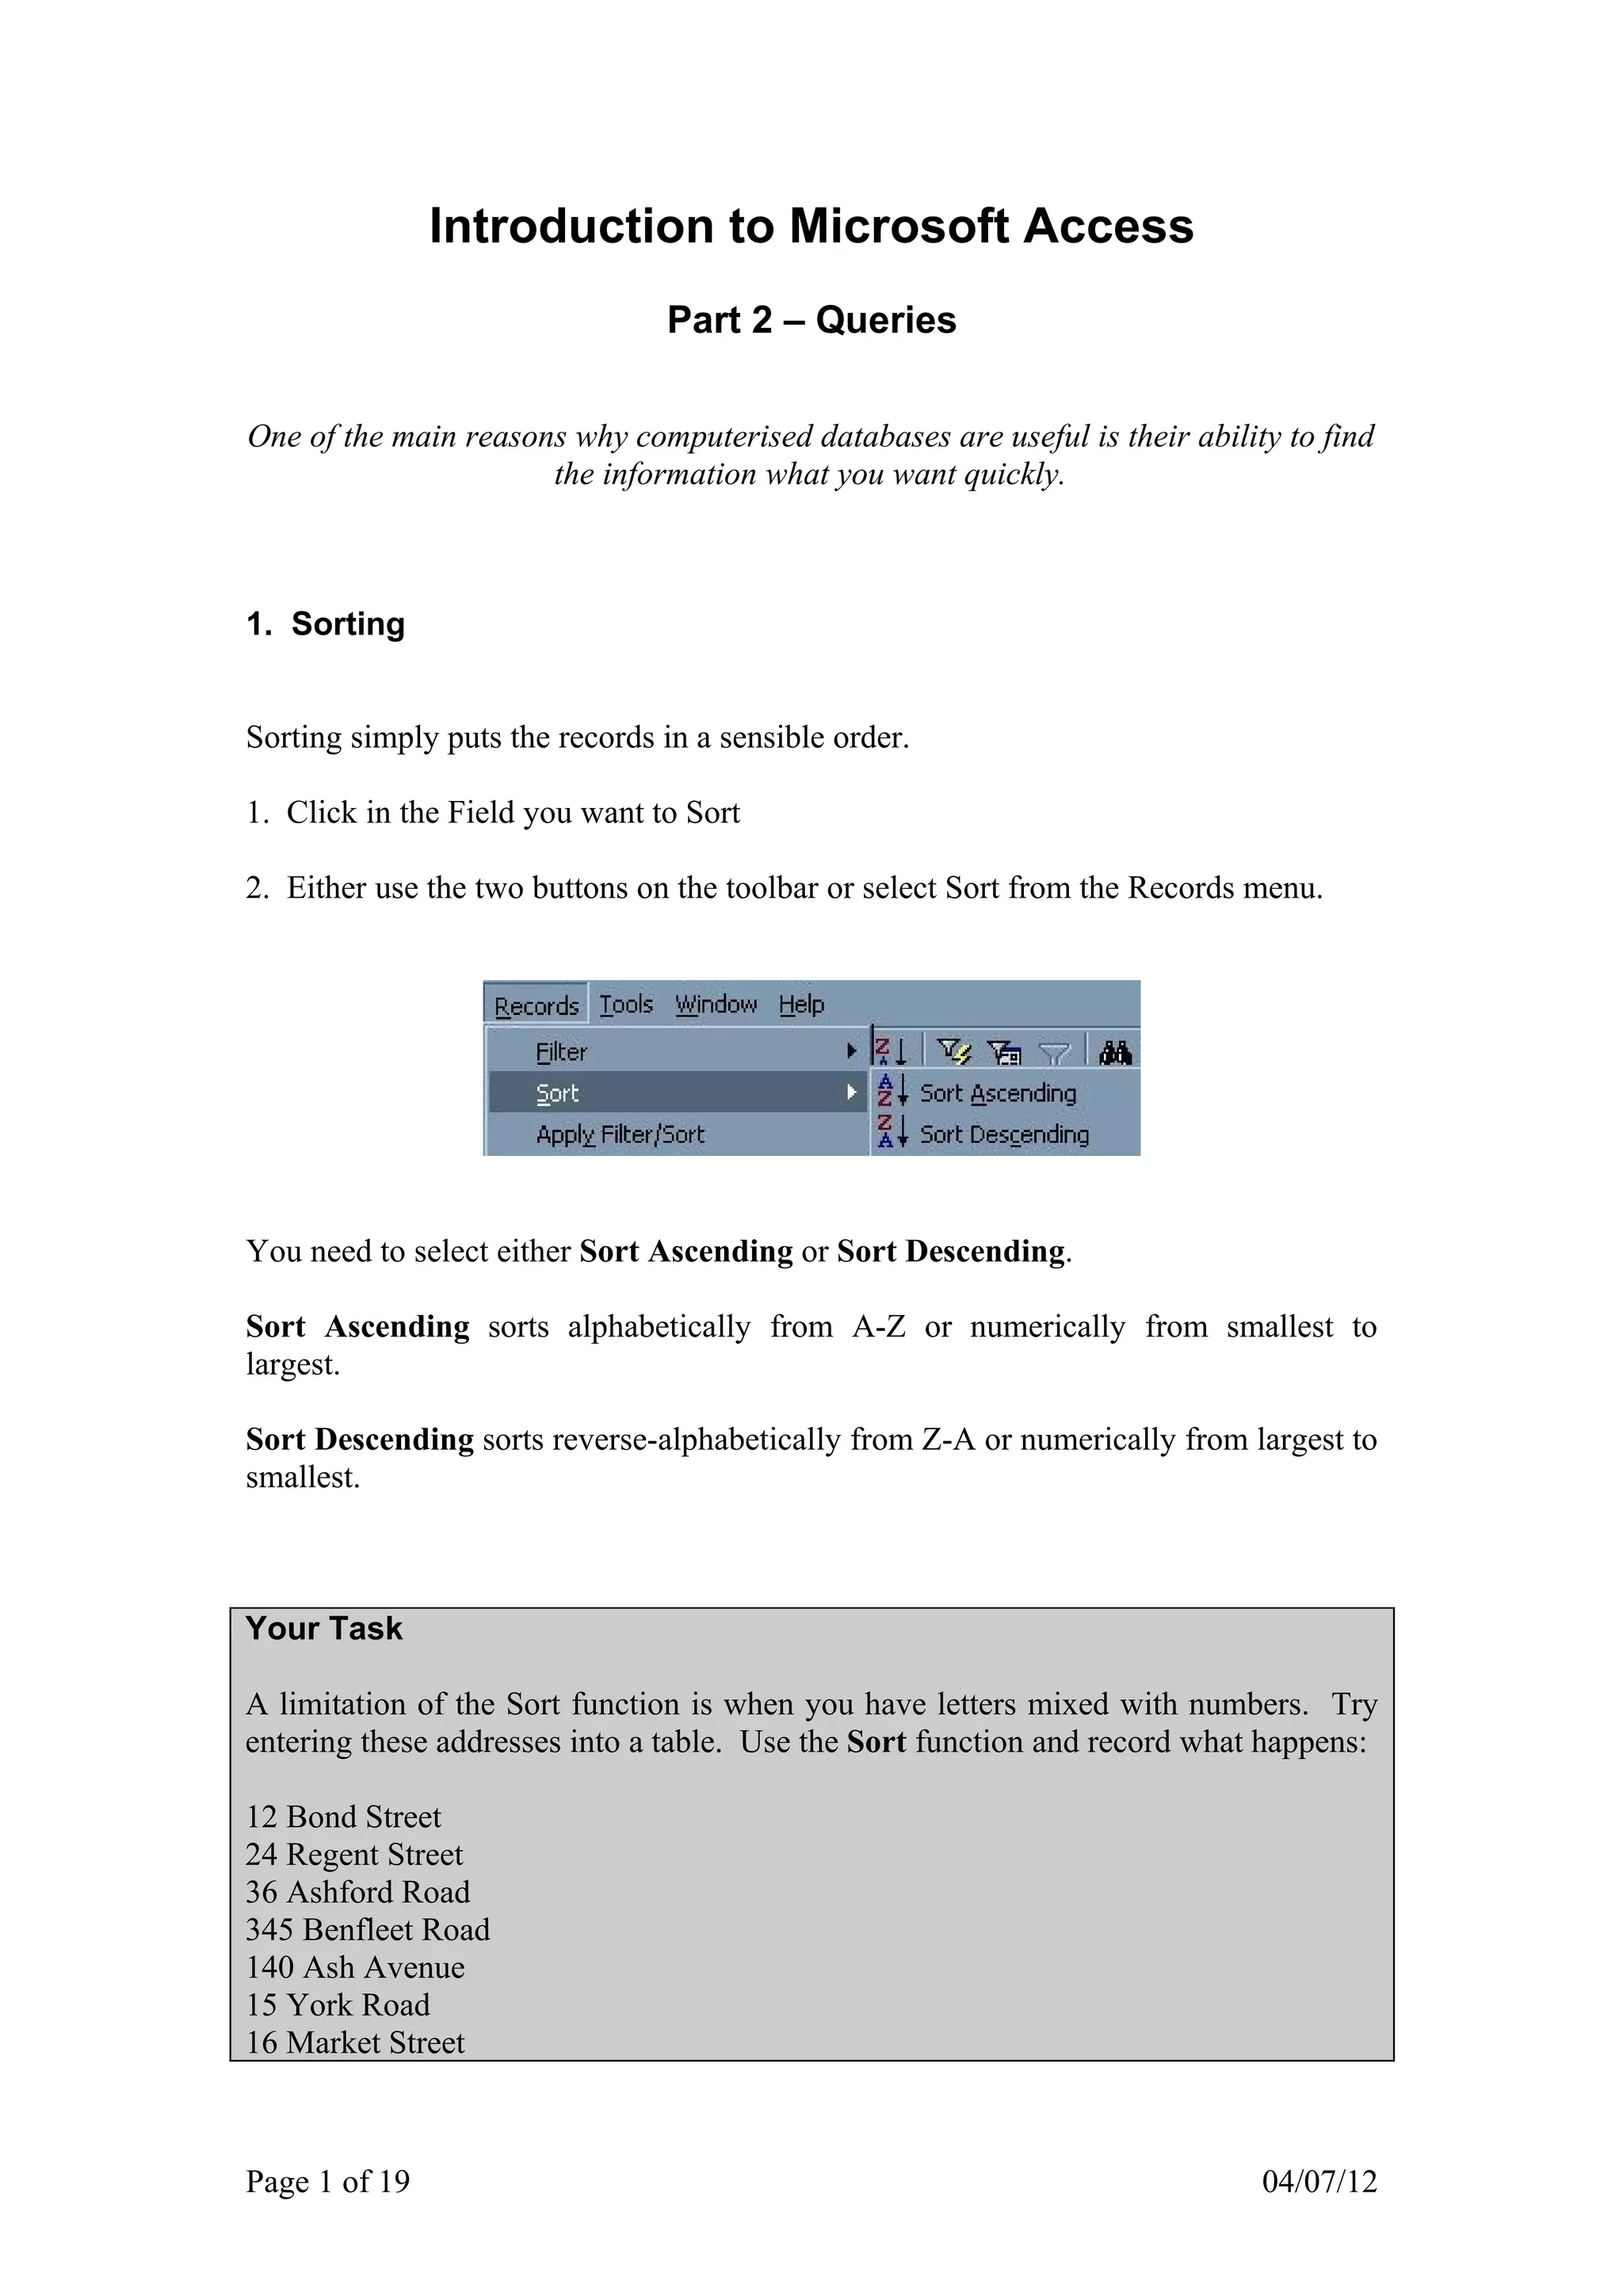
1. Sorting records in ascending or descending alphabetical or numerical order.
2. Finding data in tables using search tools like Find and wildcards.
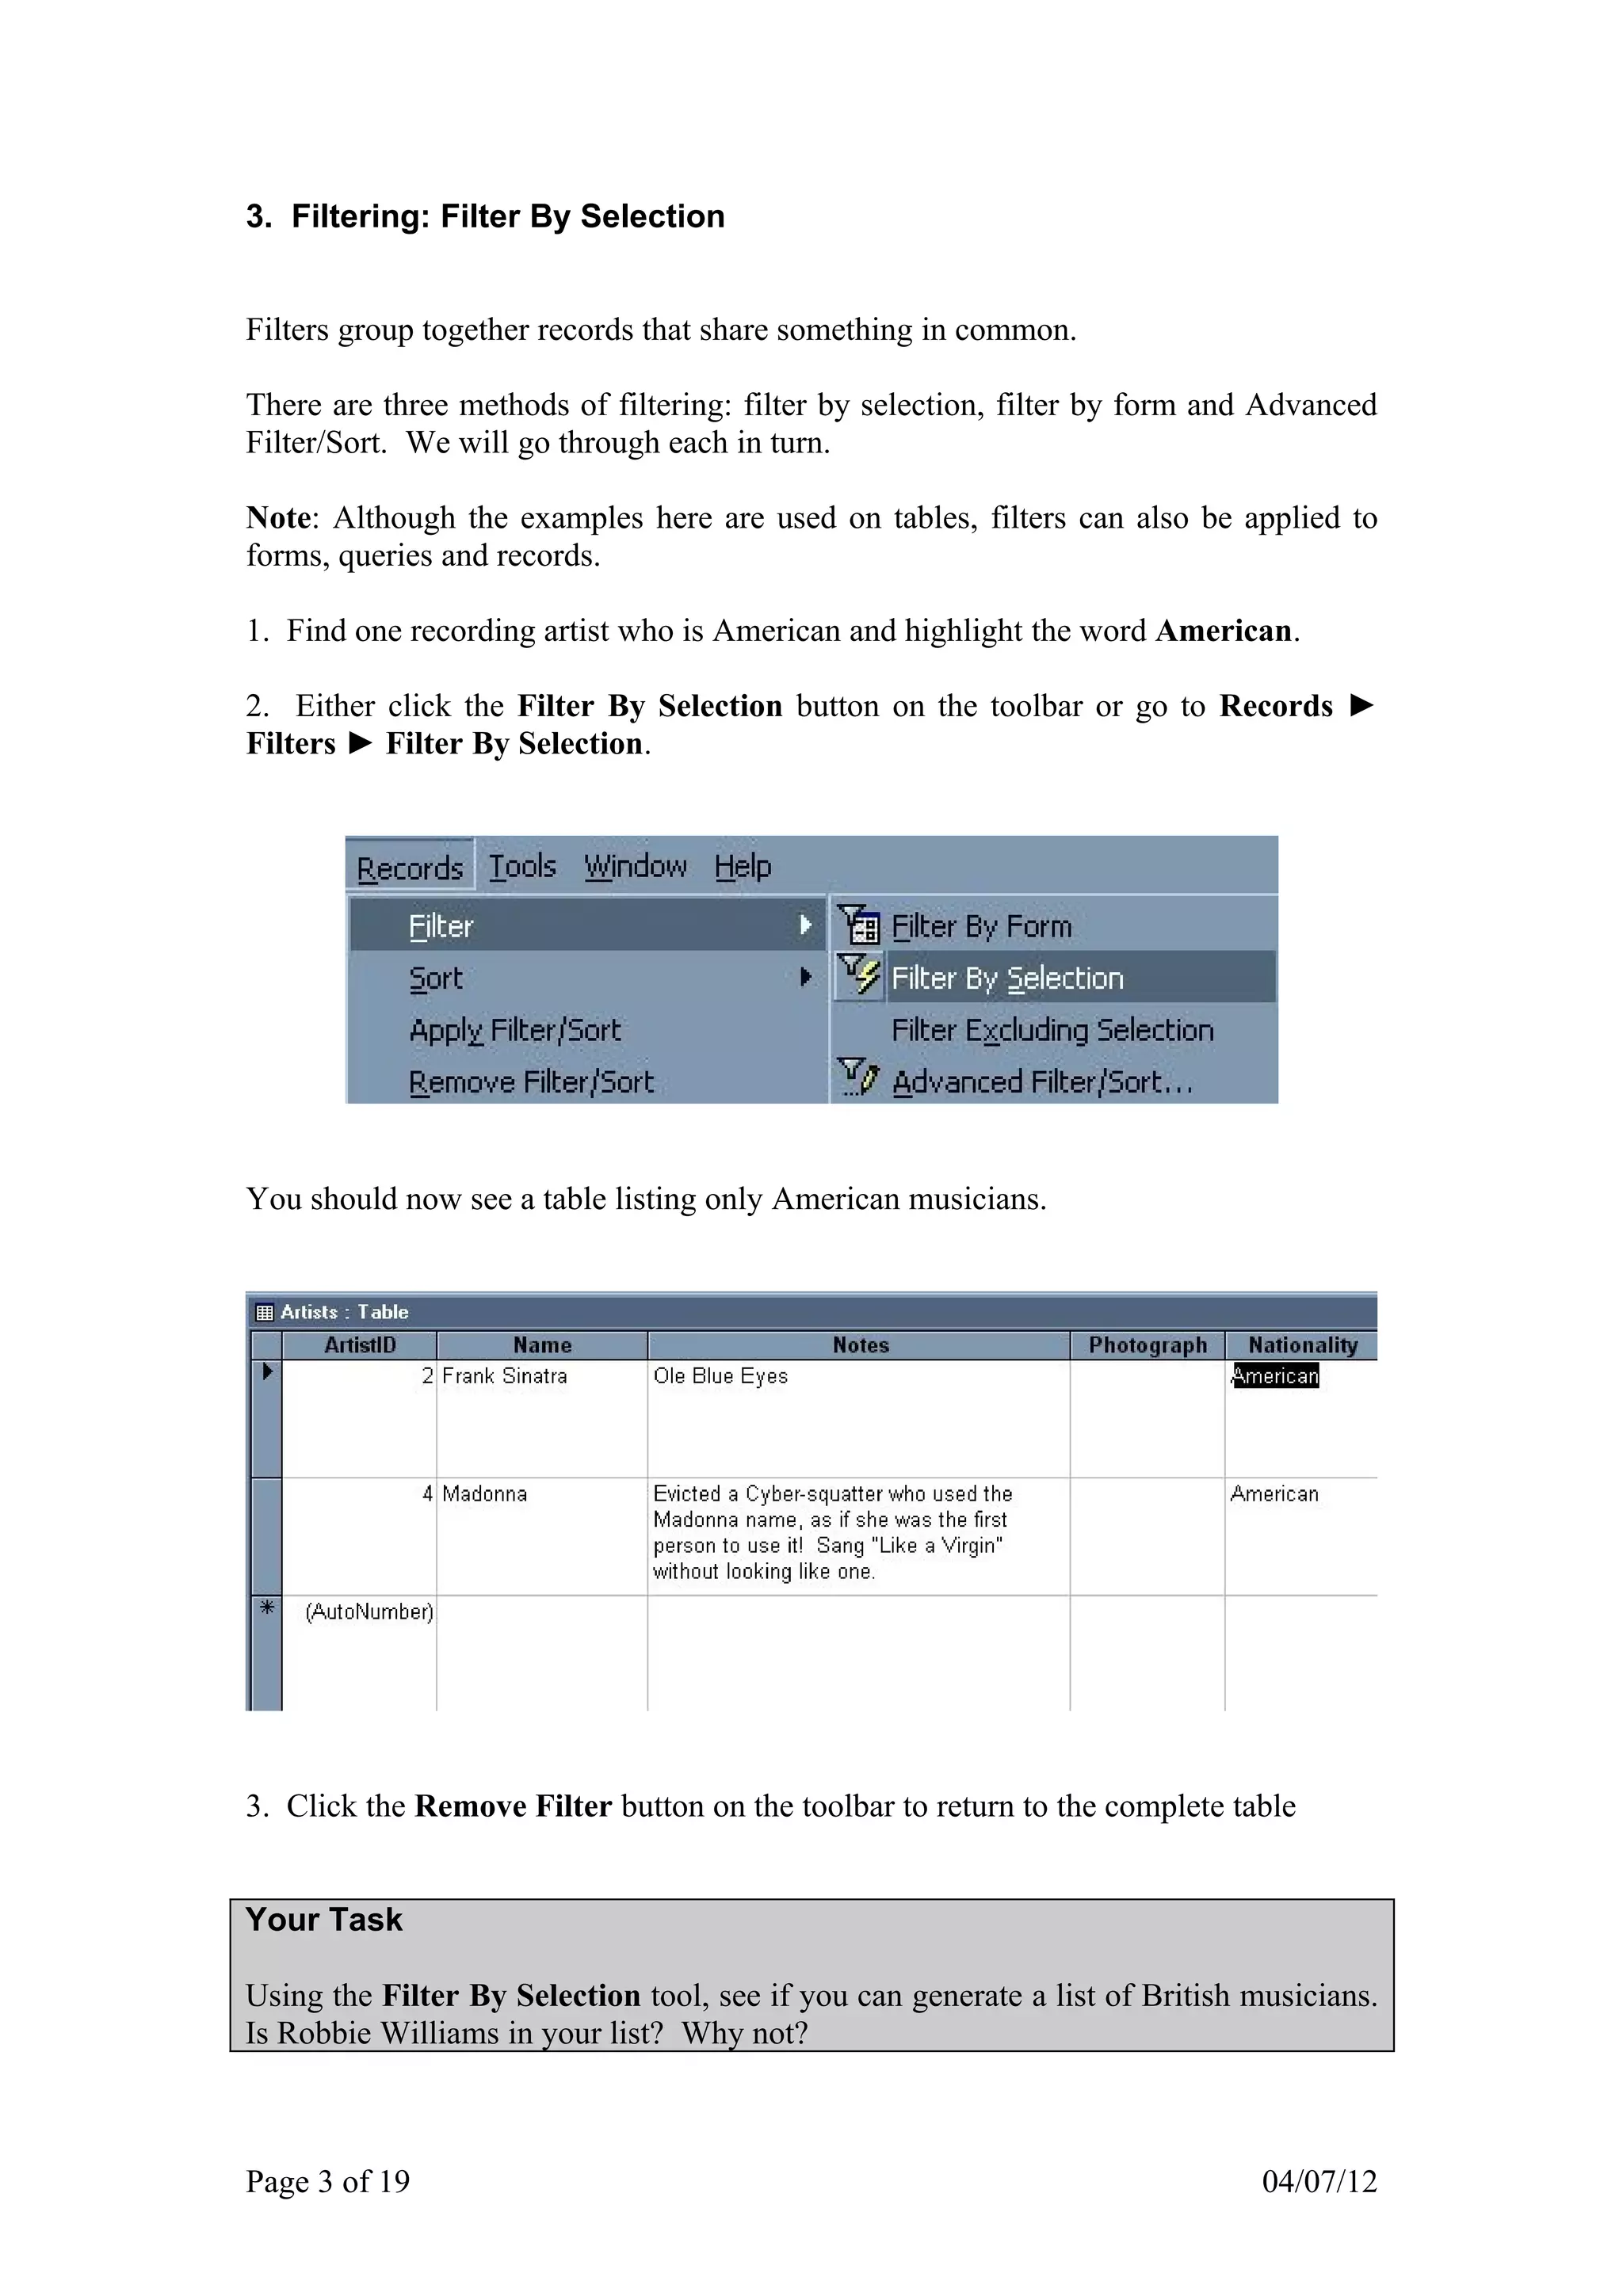
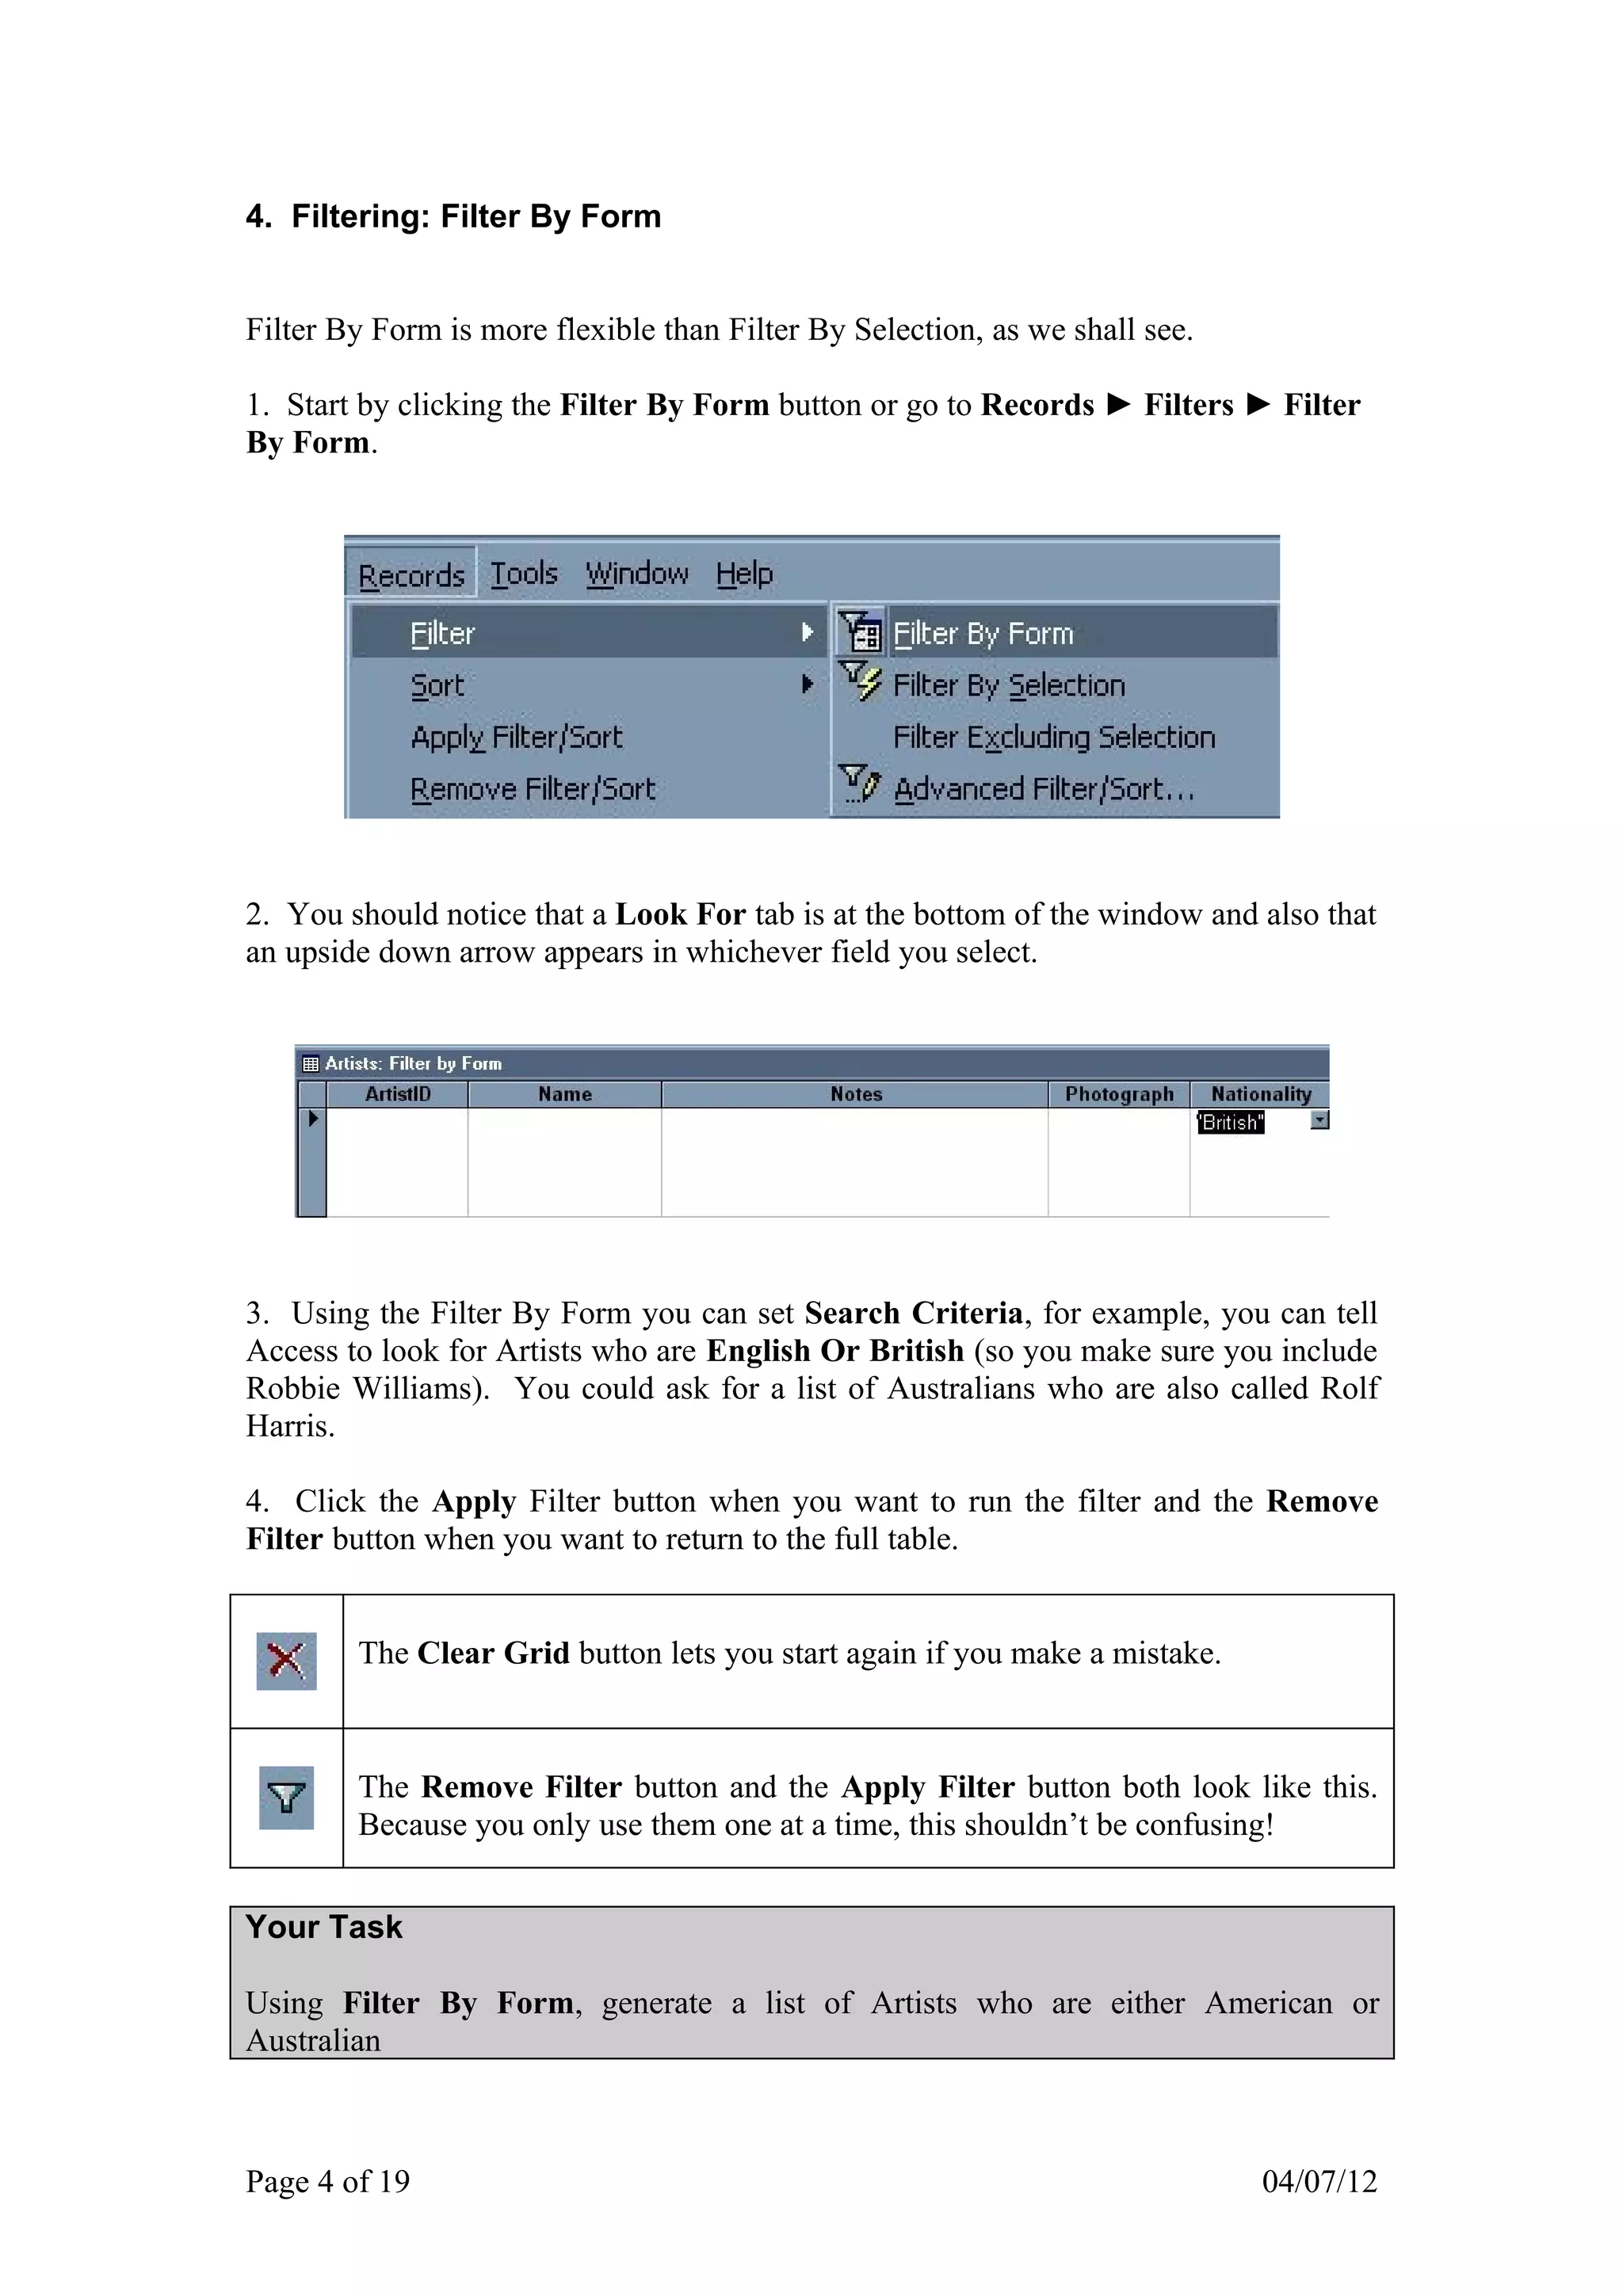
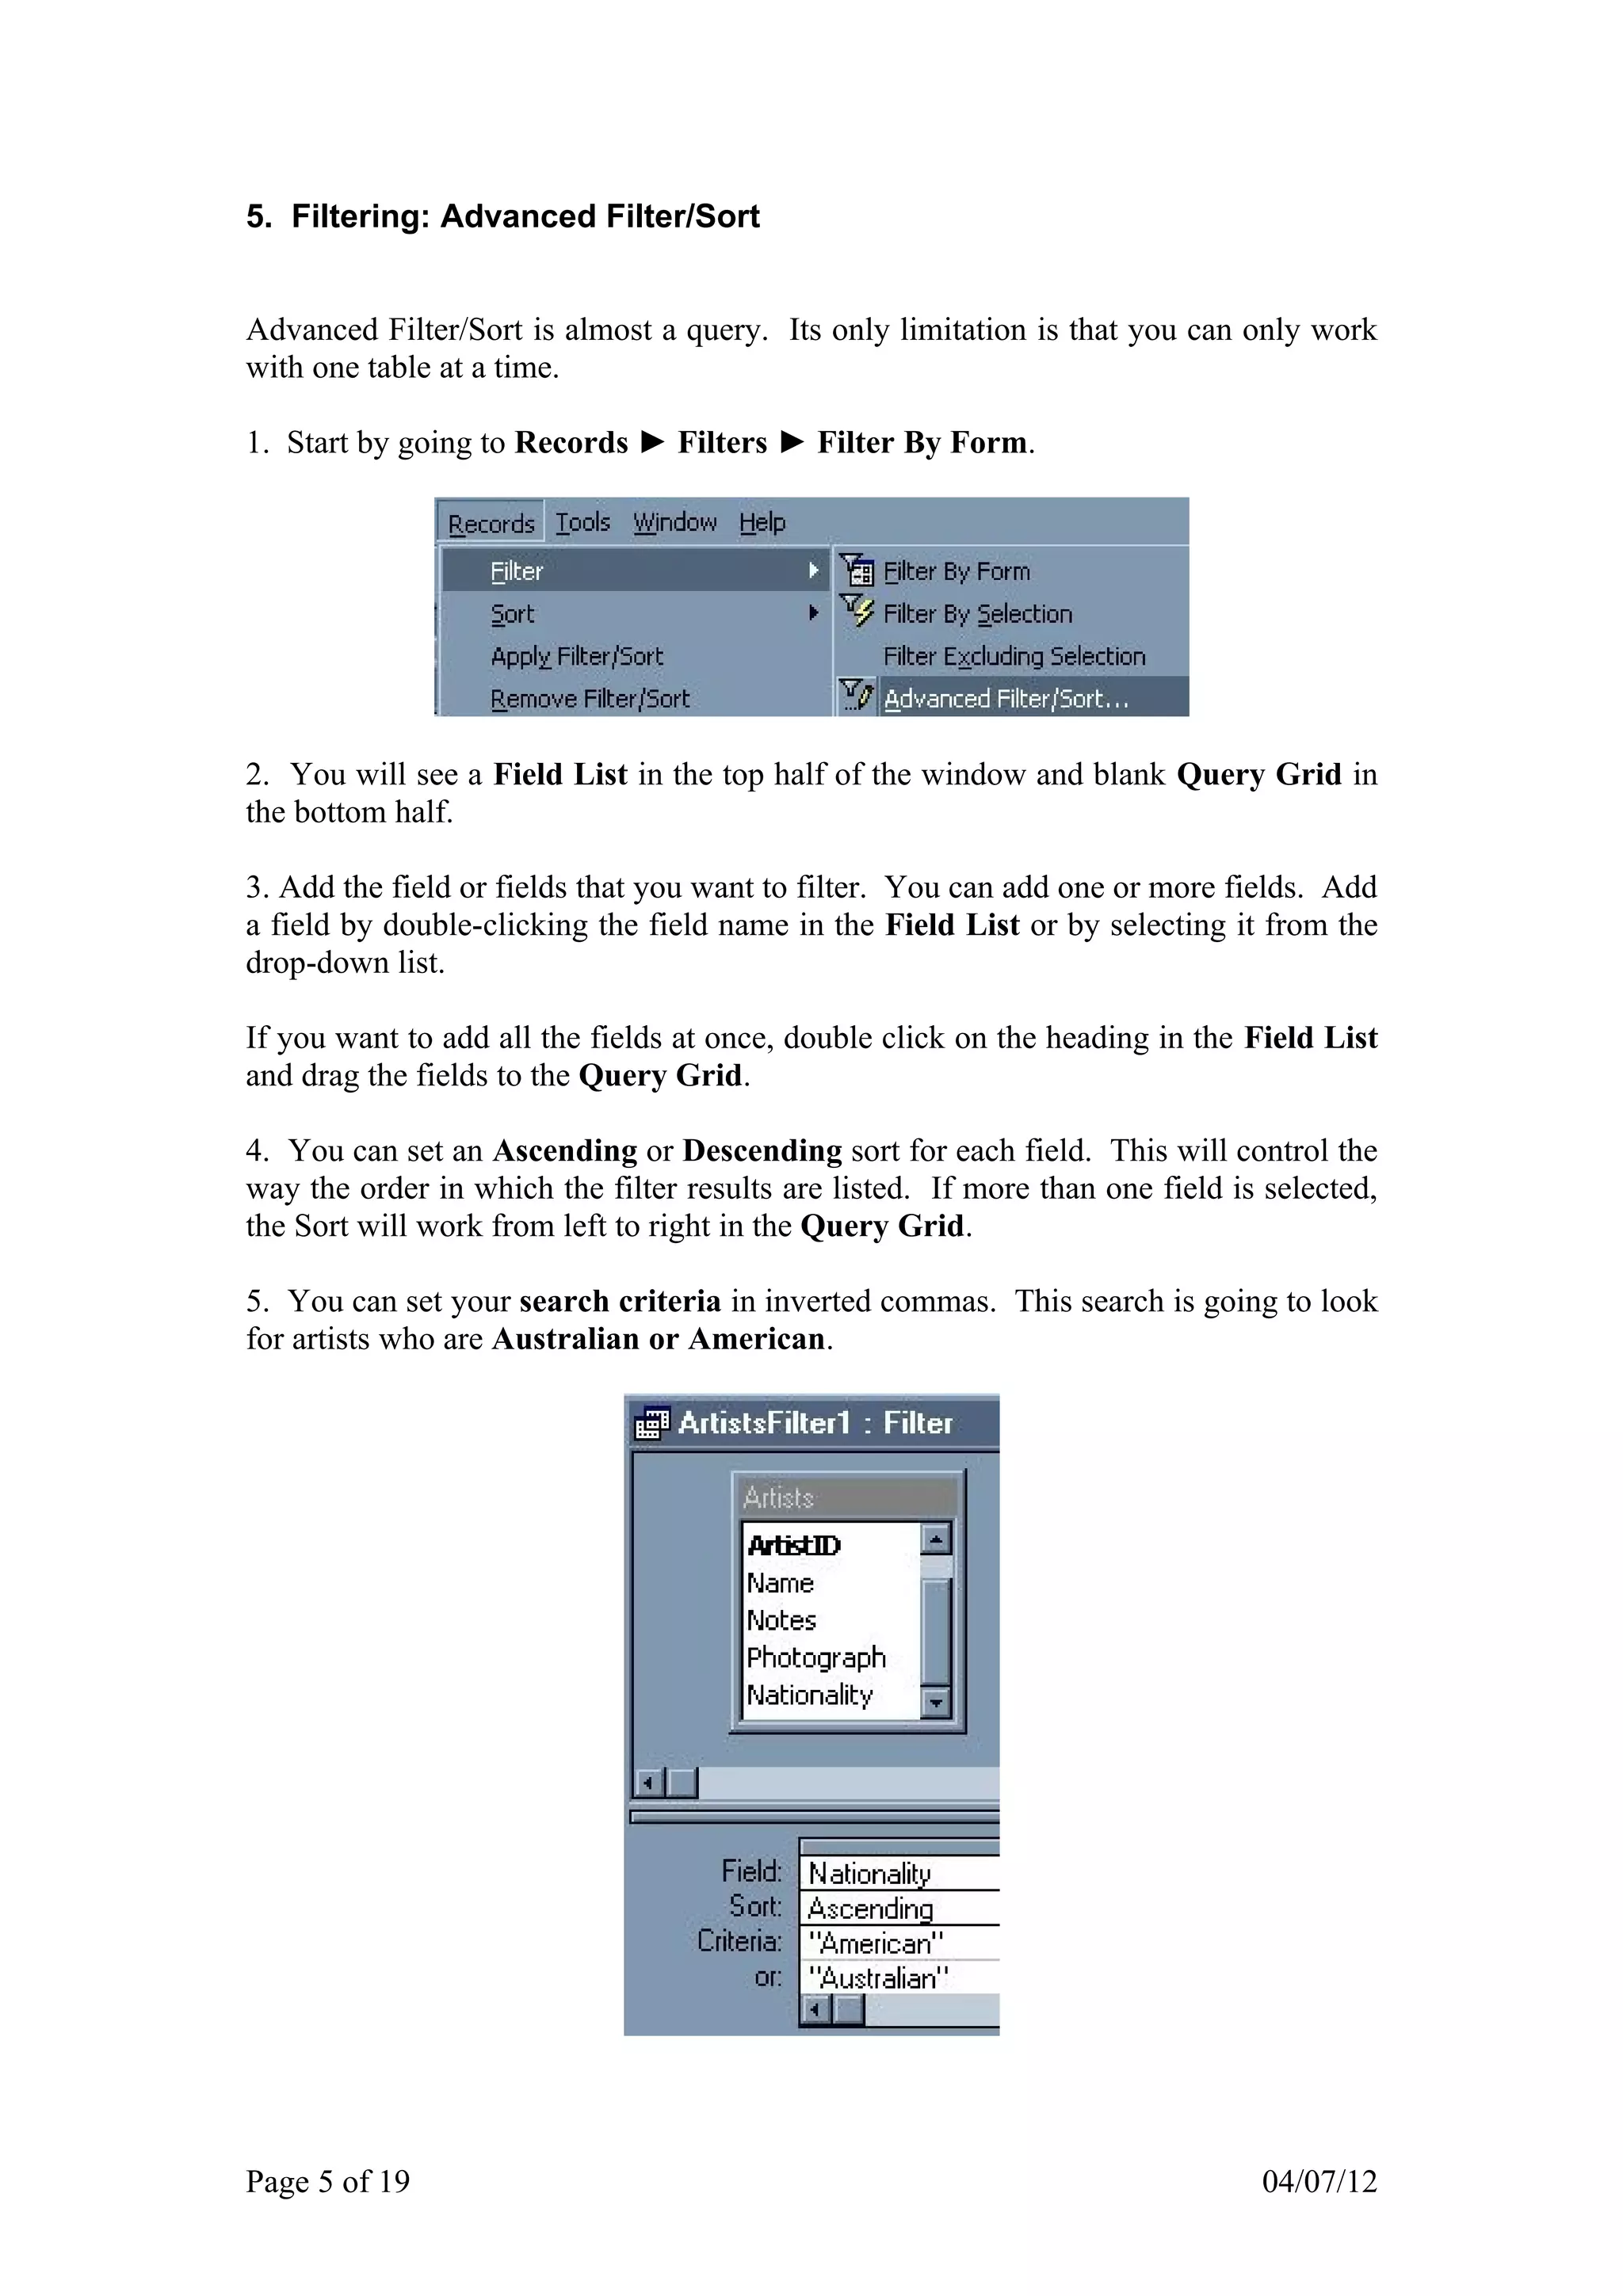
3. Filtering records by selection, using a filter form, or an advanced filter to group records by common fields.
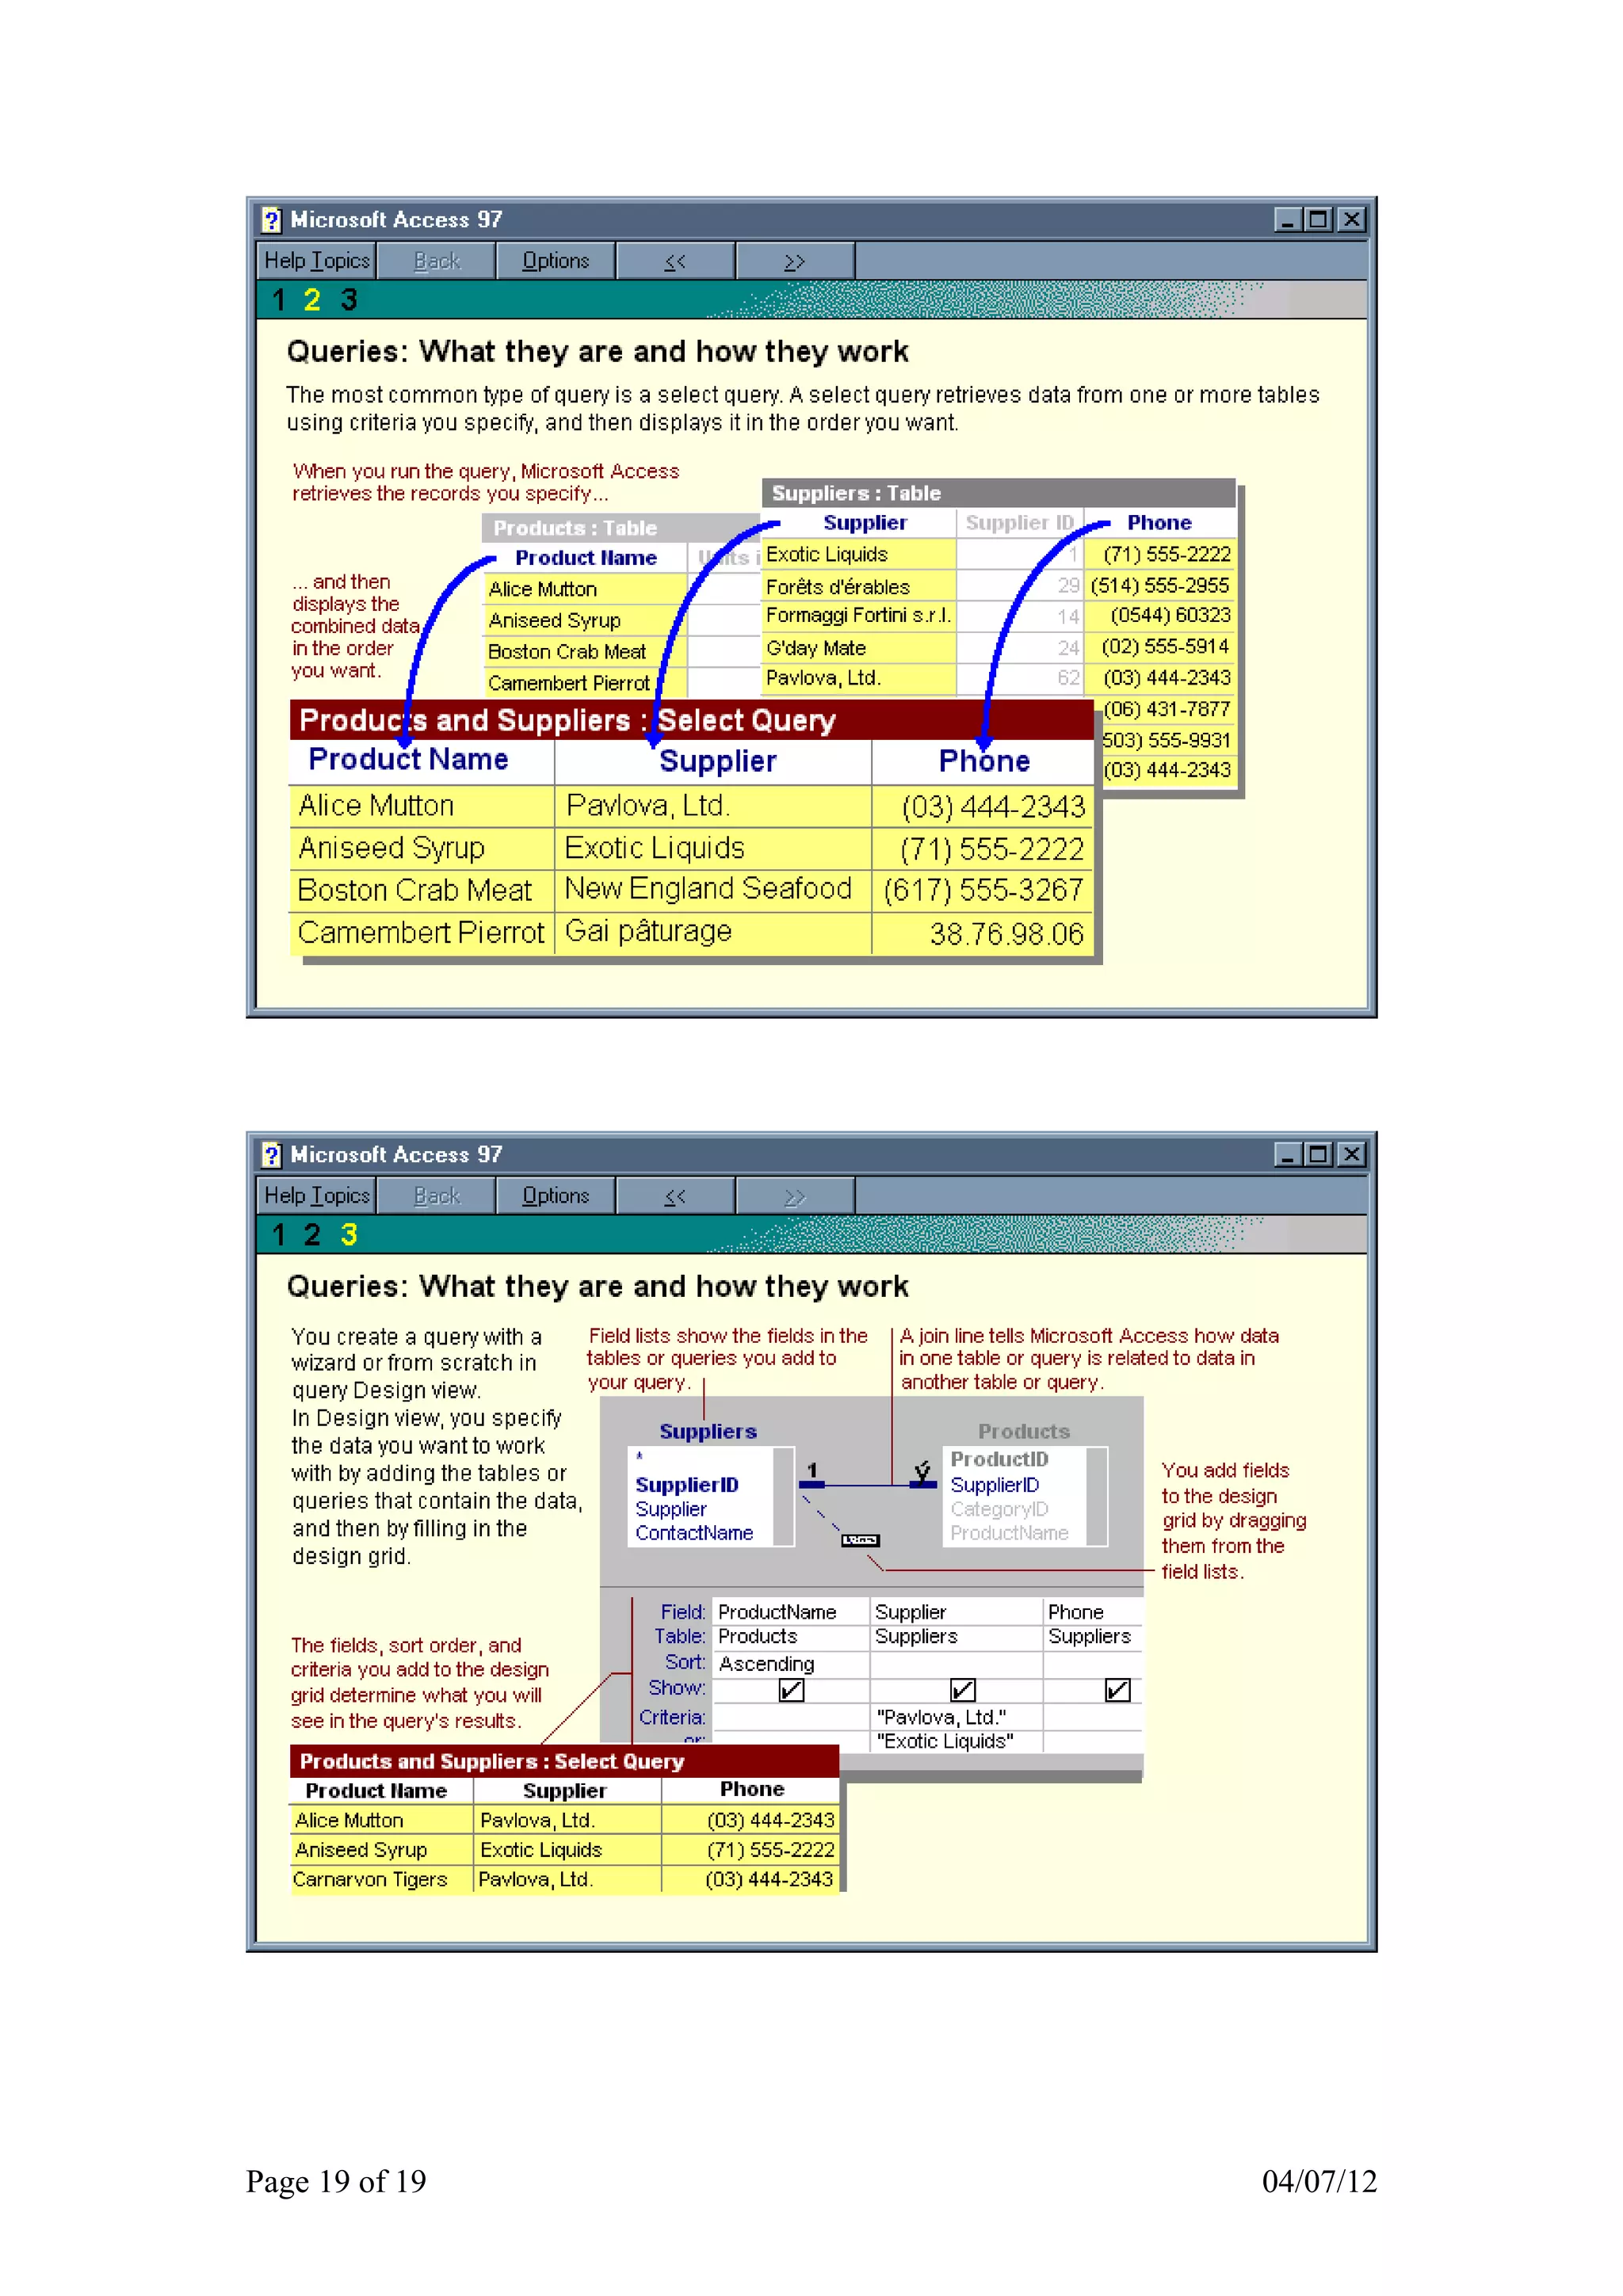
4. Creating simple queries using the query wizard or design view to combine data from multiple tables.

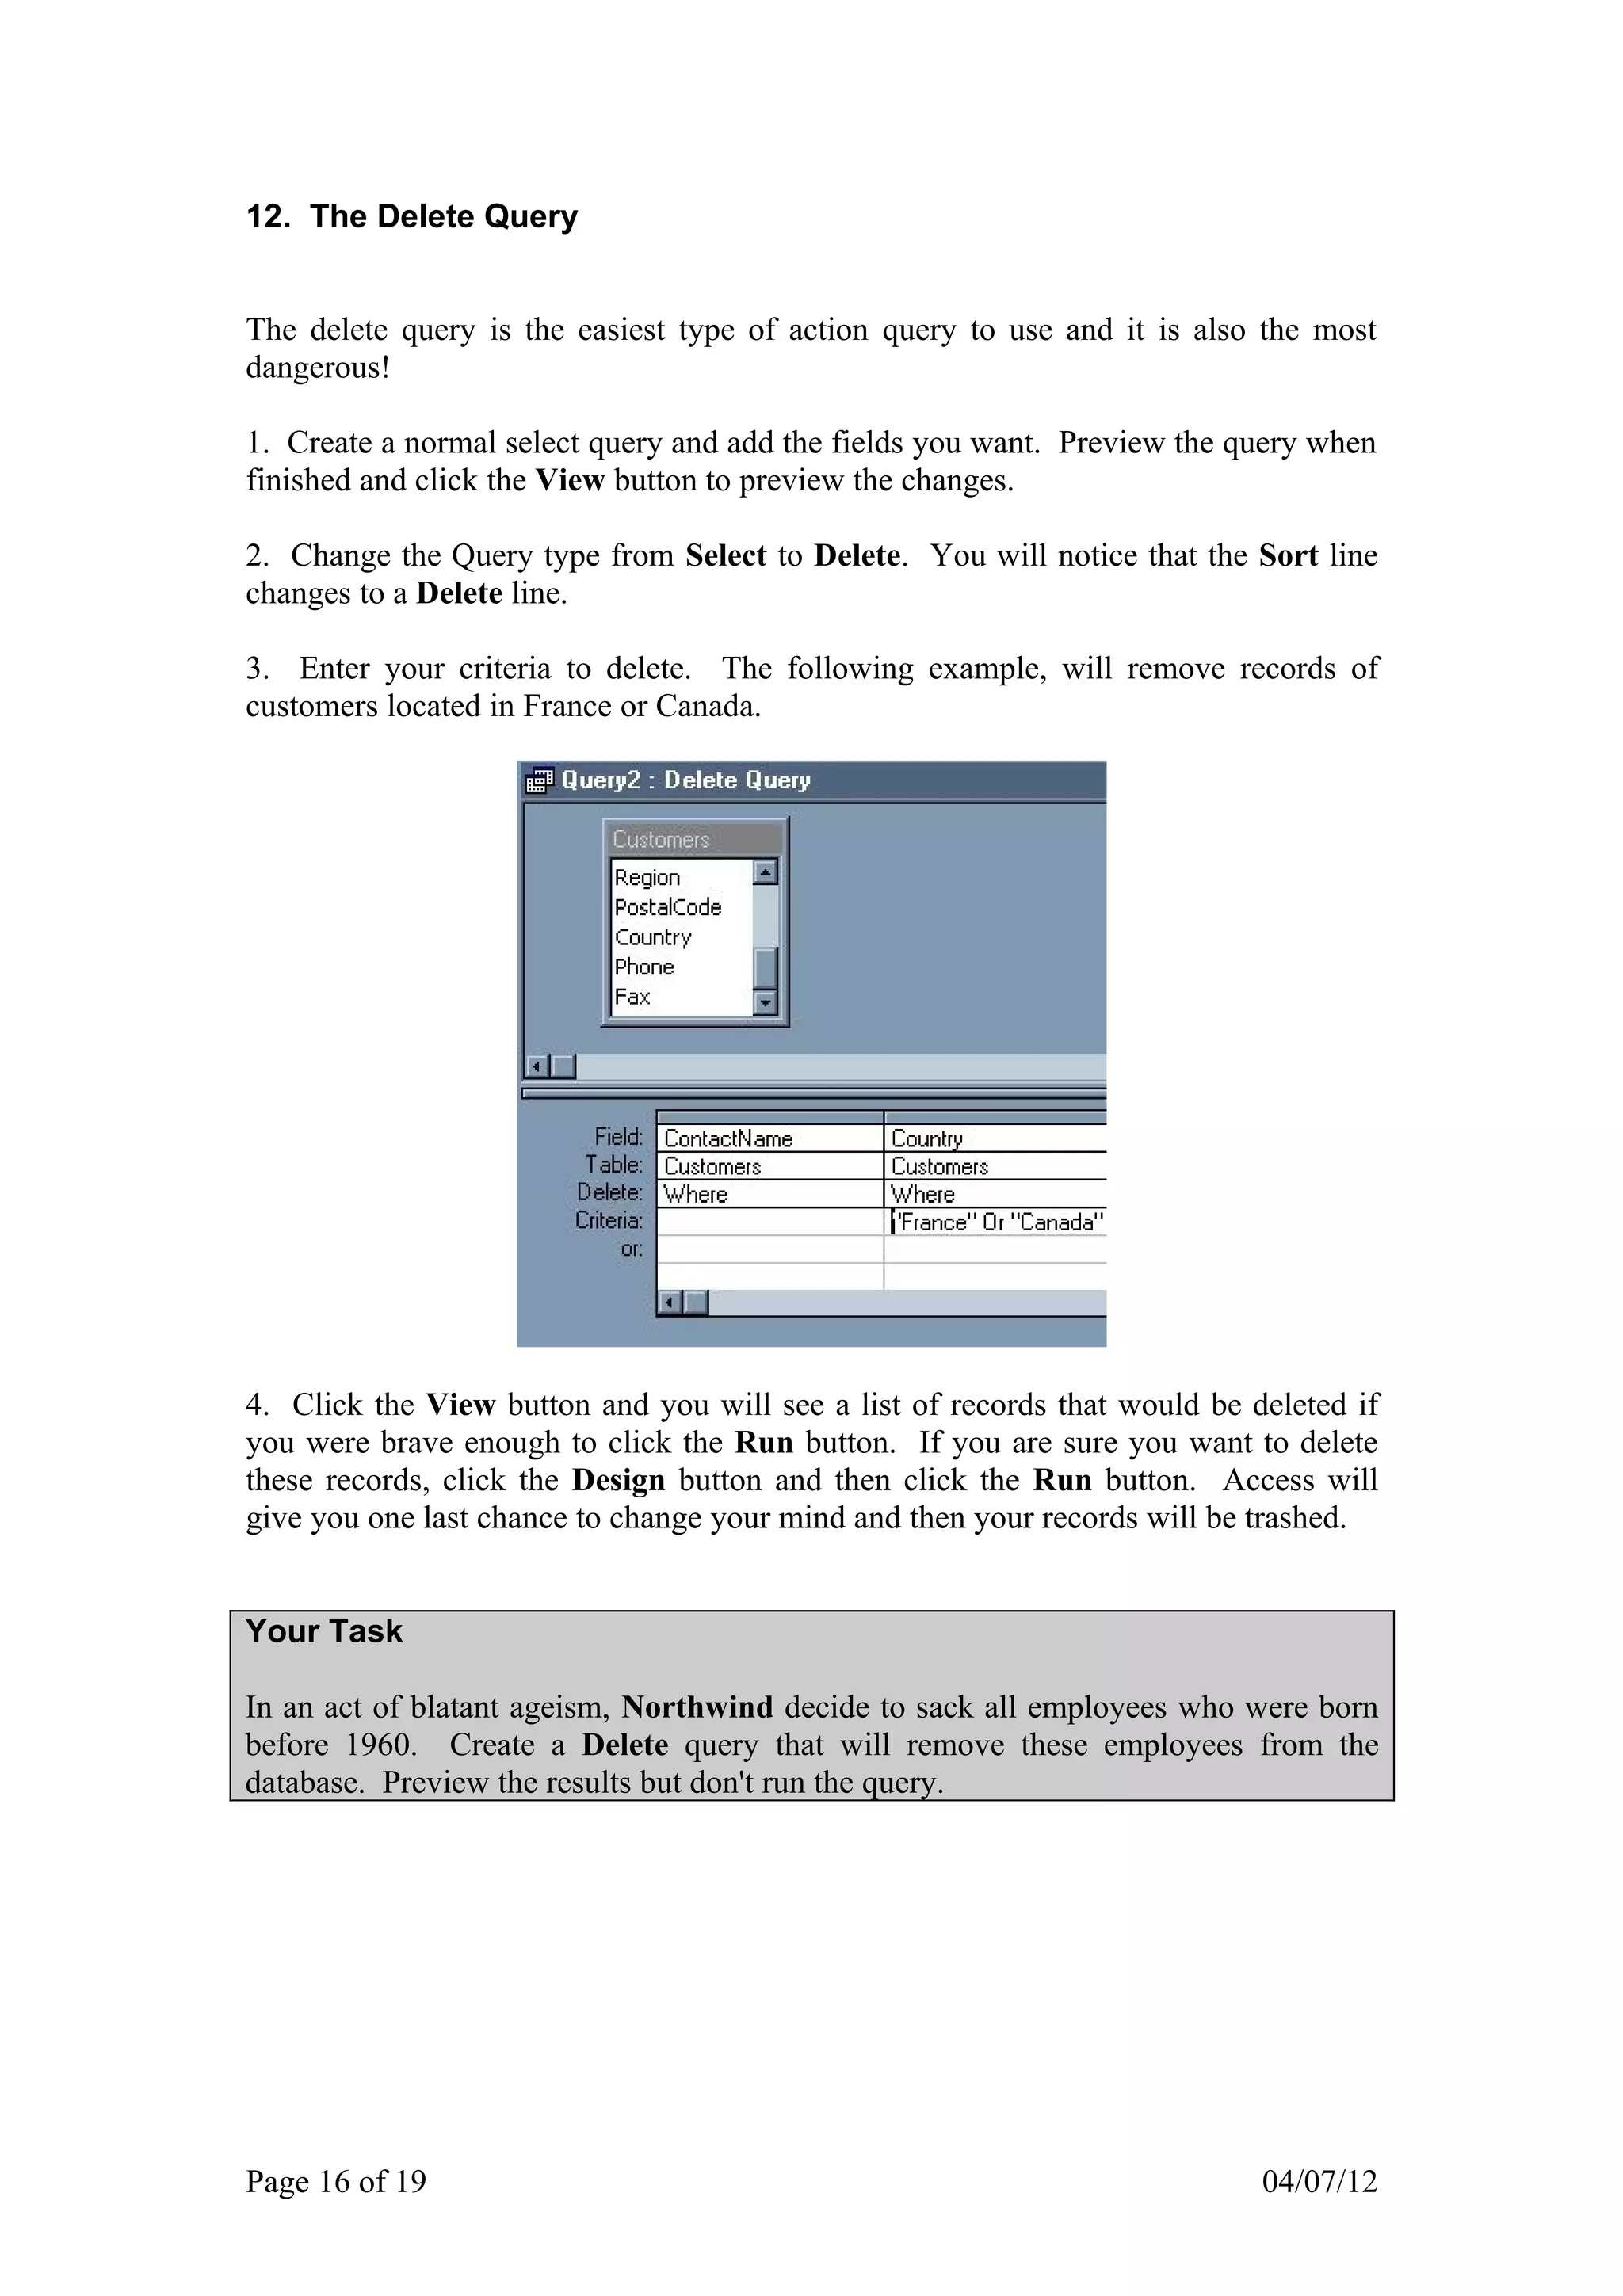
![10. Calculated Fields
A calculated field takes numbers from other fields in the query and performs a
calculation on them.
You can add a calculated field to a query, as long as you include in the query all the
data that the calculated field needs to perform its calculation.
A calculated field can take data from more than one field.
Calculated fields are ideal for performing “What if?” queries. For example, “what
would our prices be if we increased all prices by 5%?”
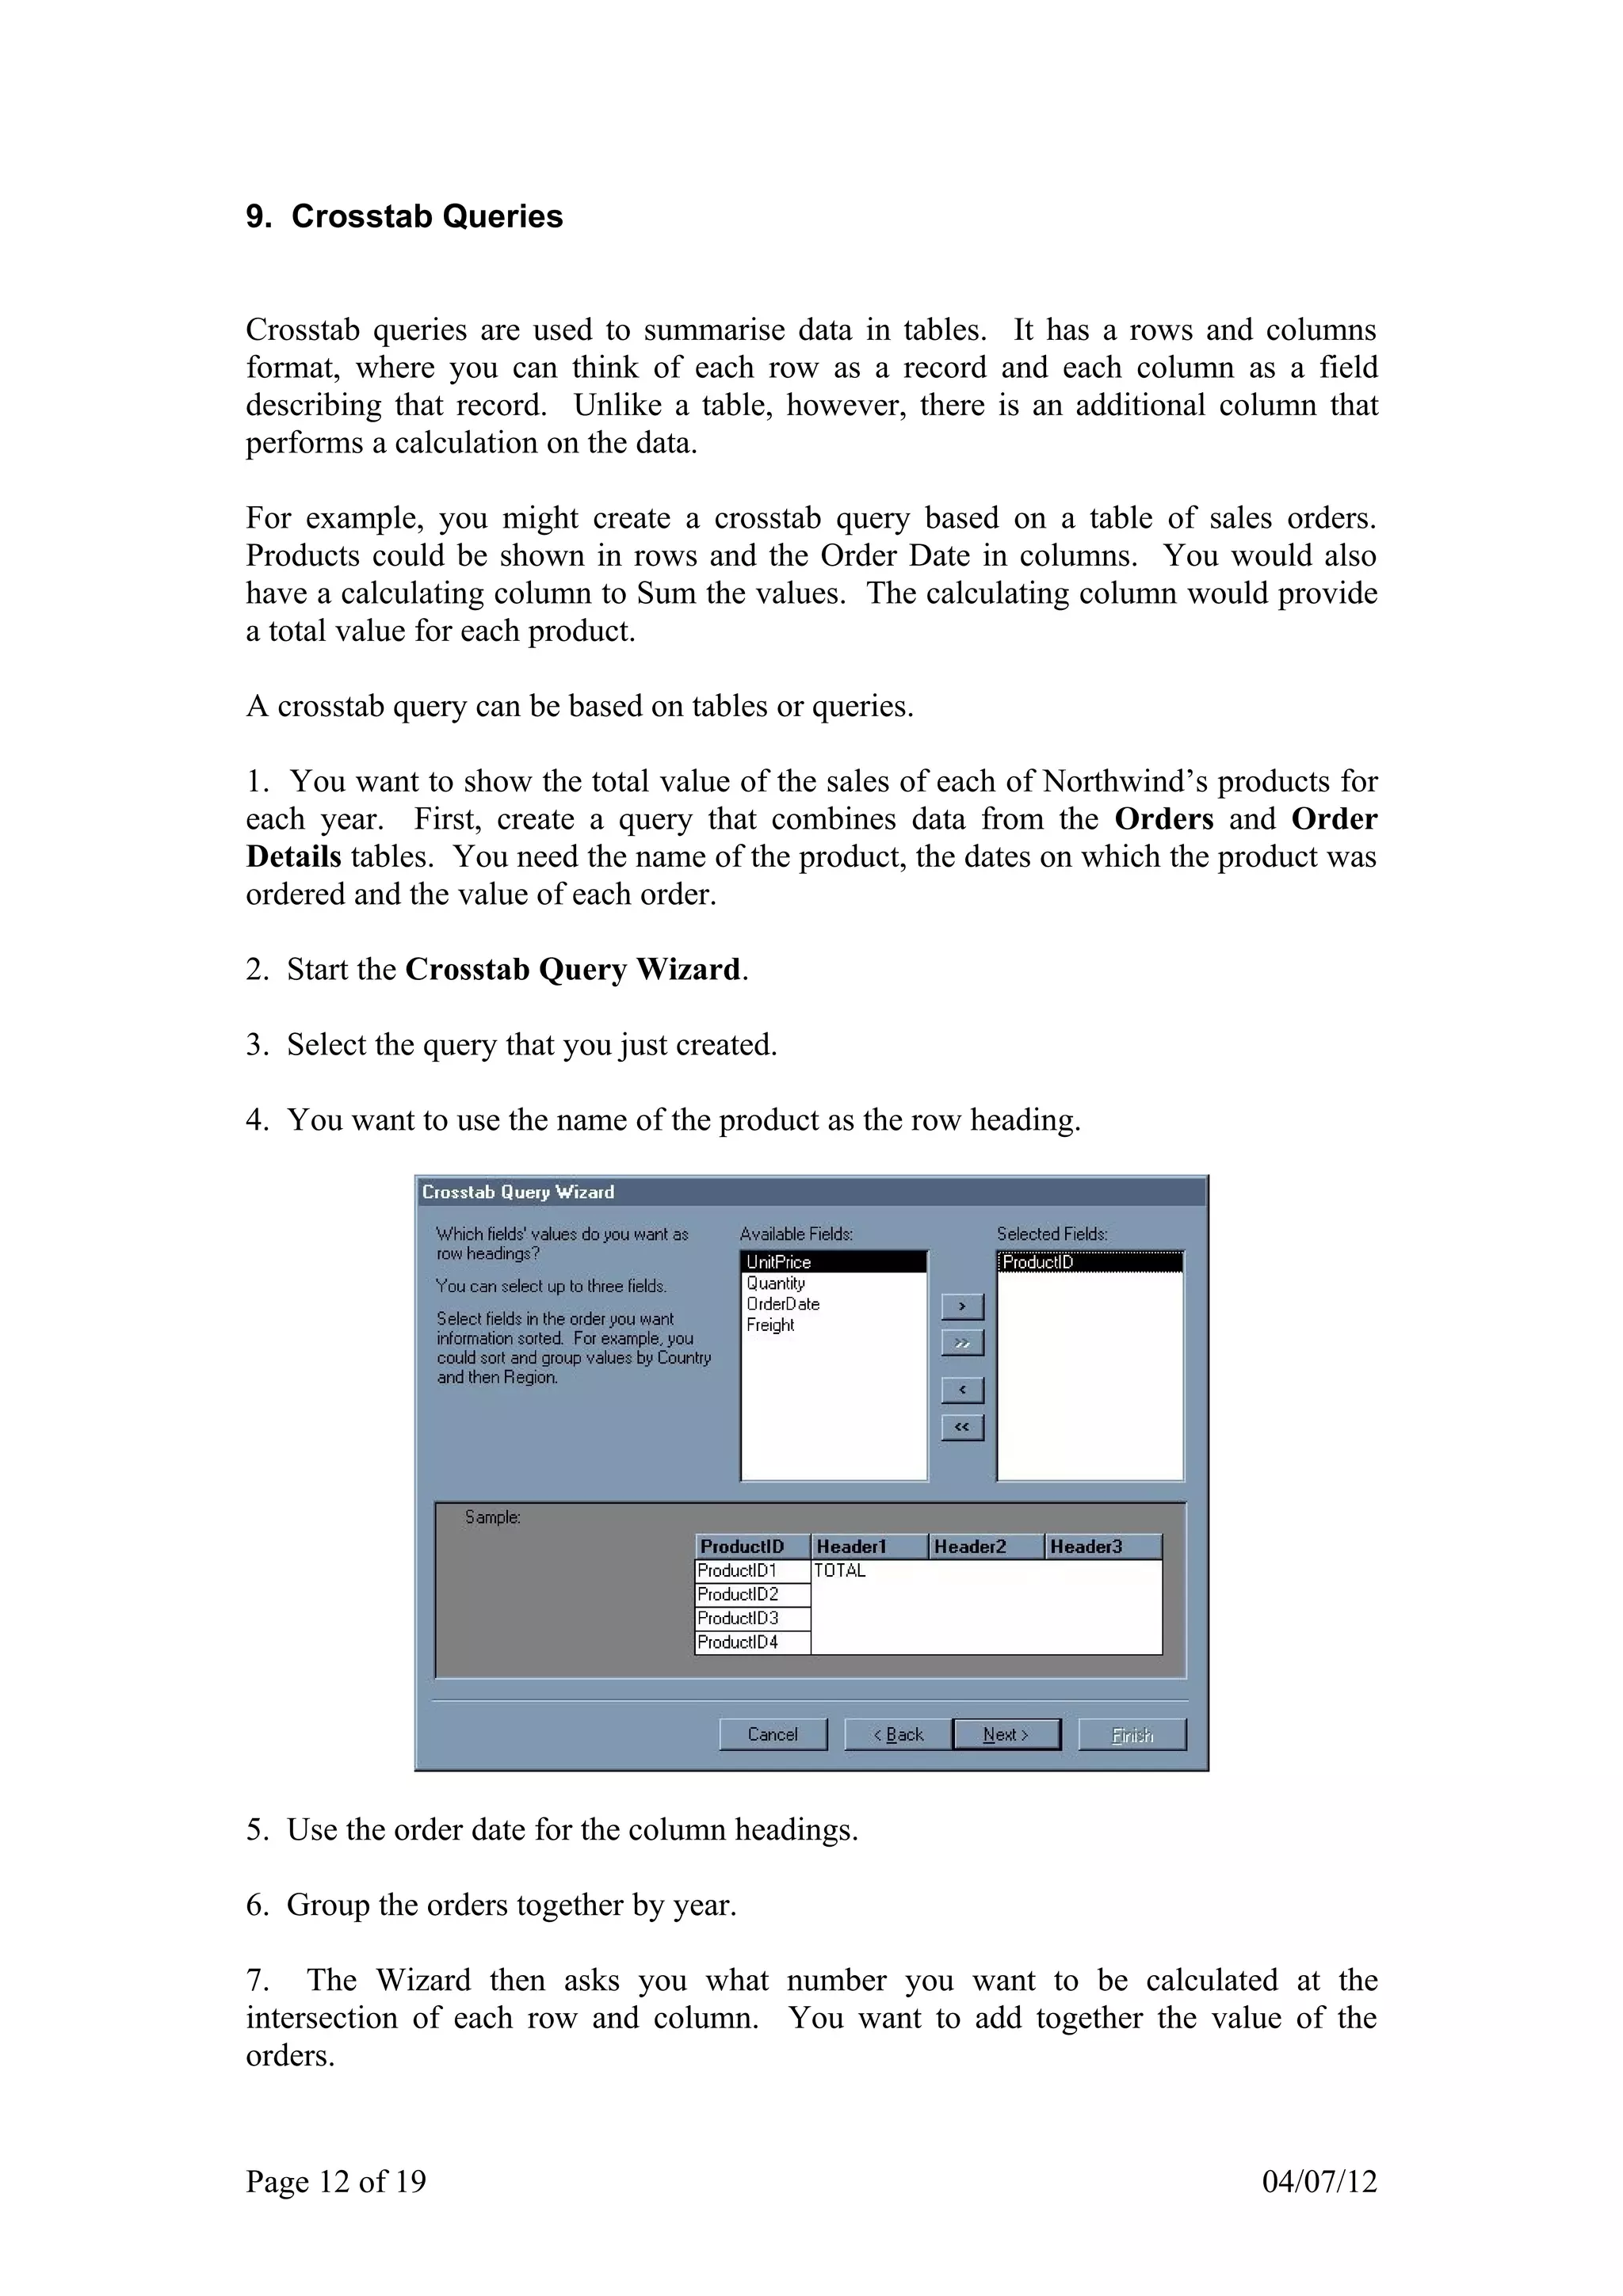
1. To answer this question, use the Northwind database and create a new query using
the Products Table.
2. You need the name of the product and the price of the product in the query.
3. Type [UnitPrice]*1.05 as the field name in a new field:
4. Run the query by clicking the Run Button. You will notice that your field name
has been given the name Expr1, which isn’t very descriptive and the numbers in the
column are not formatted as currency. Click the Design View button to remedy this.
5. Double click Expr1 to select it and change the name to New Price.
6. Click the Properties Button
Change the Format of the field to
Currency.
In the Description Box type: Shows
prices raised by 5%. Close the
Properties.
Page 13 of 19 04/07/12](https://image.slidesharecdn.com/access2-120704045932-phpapp02/75/Access2-13-2048.jpg)
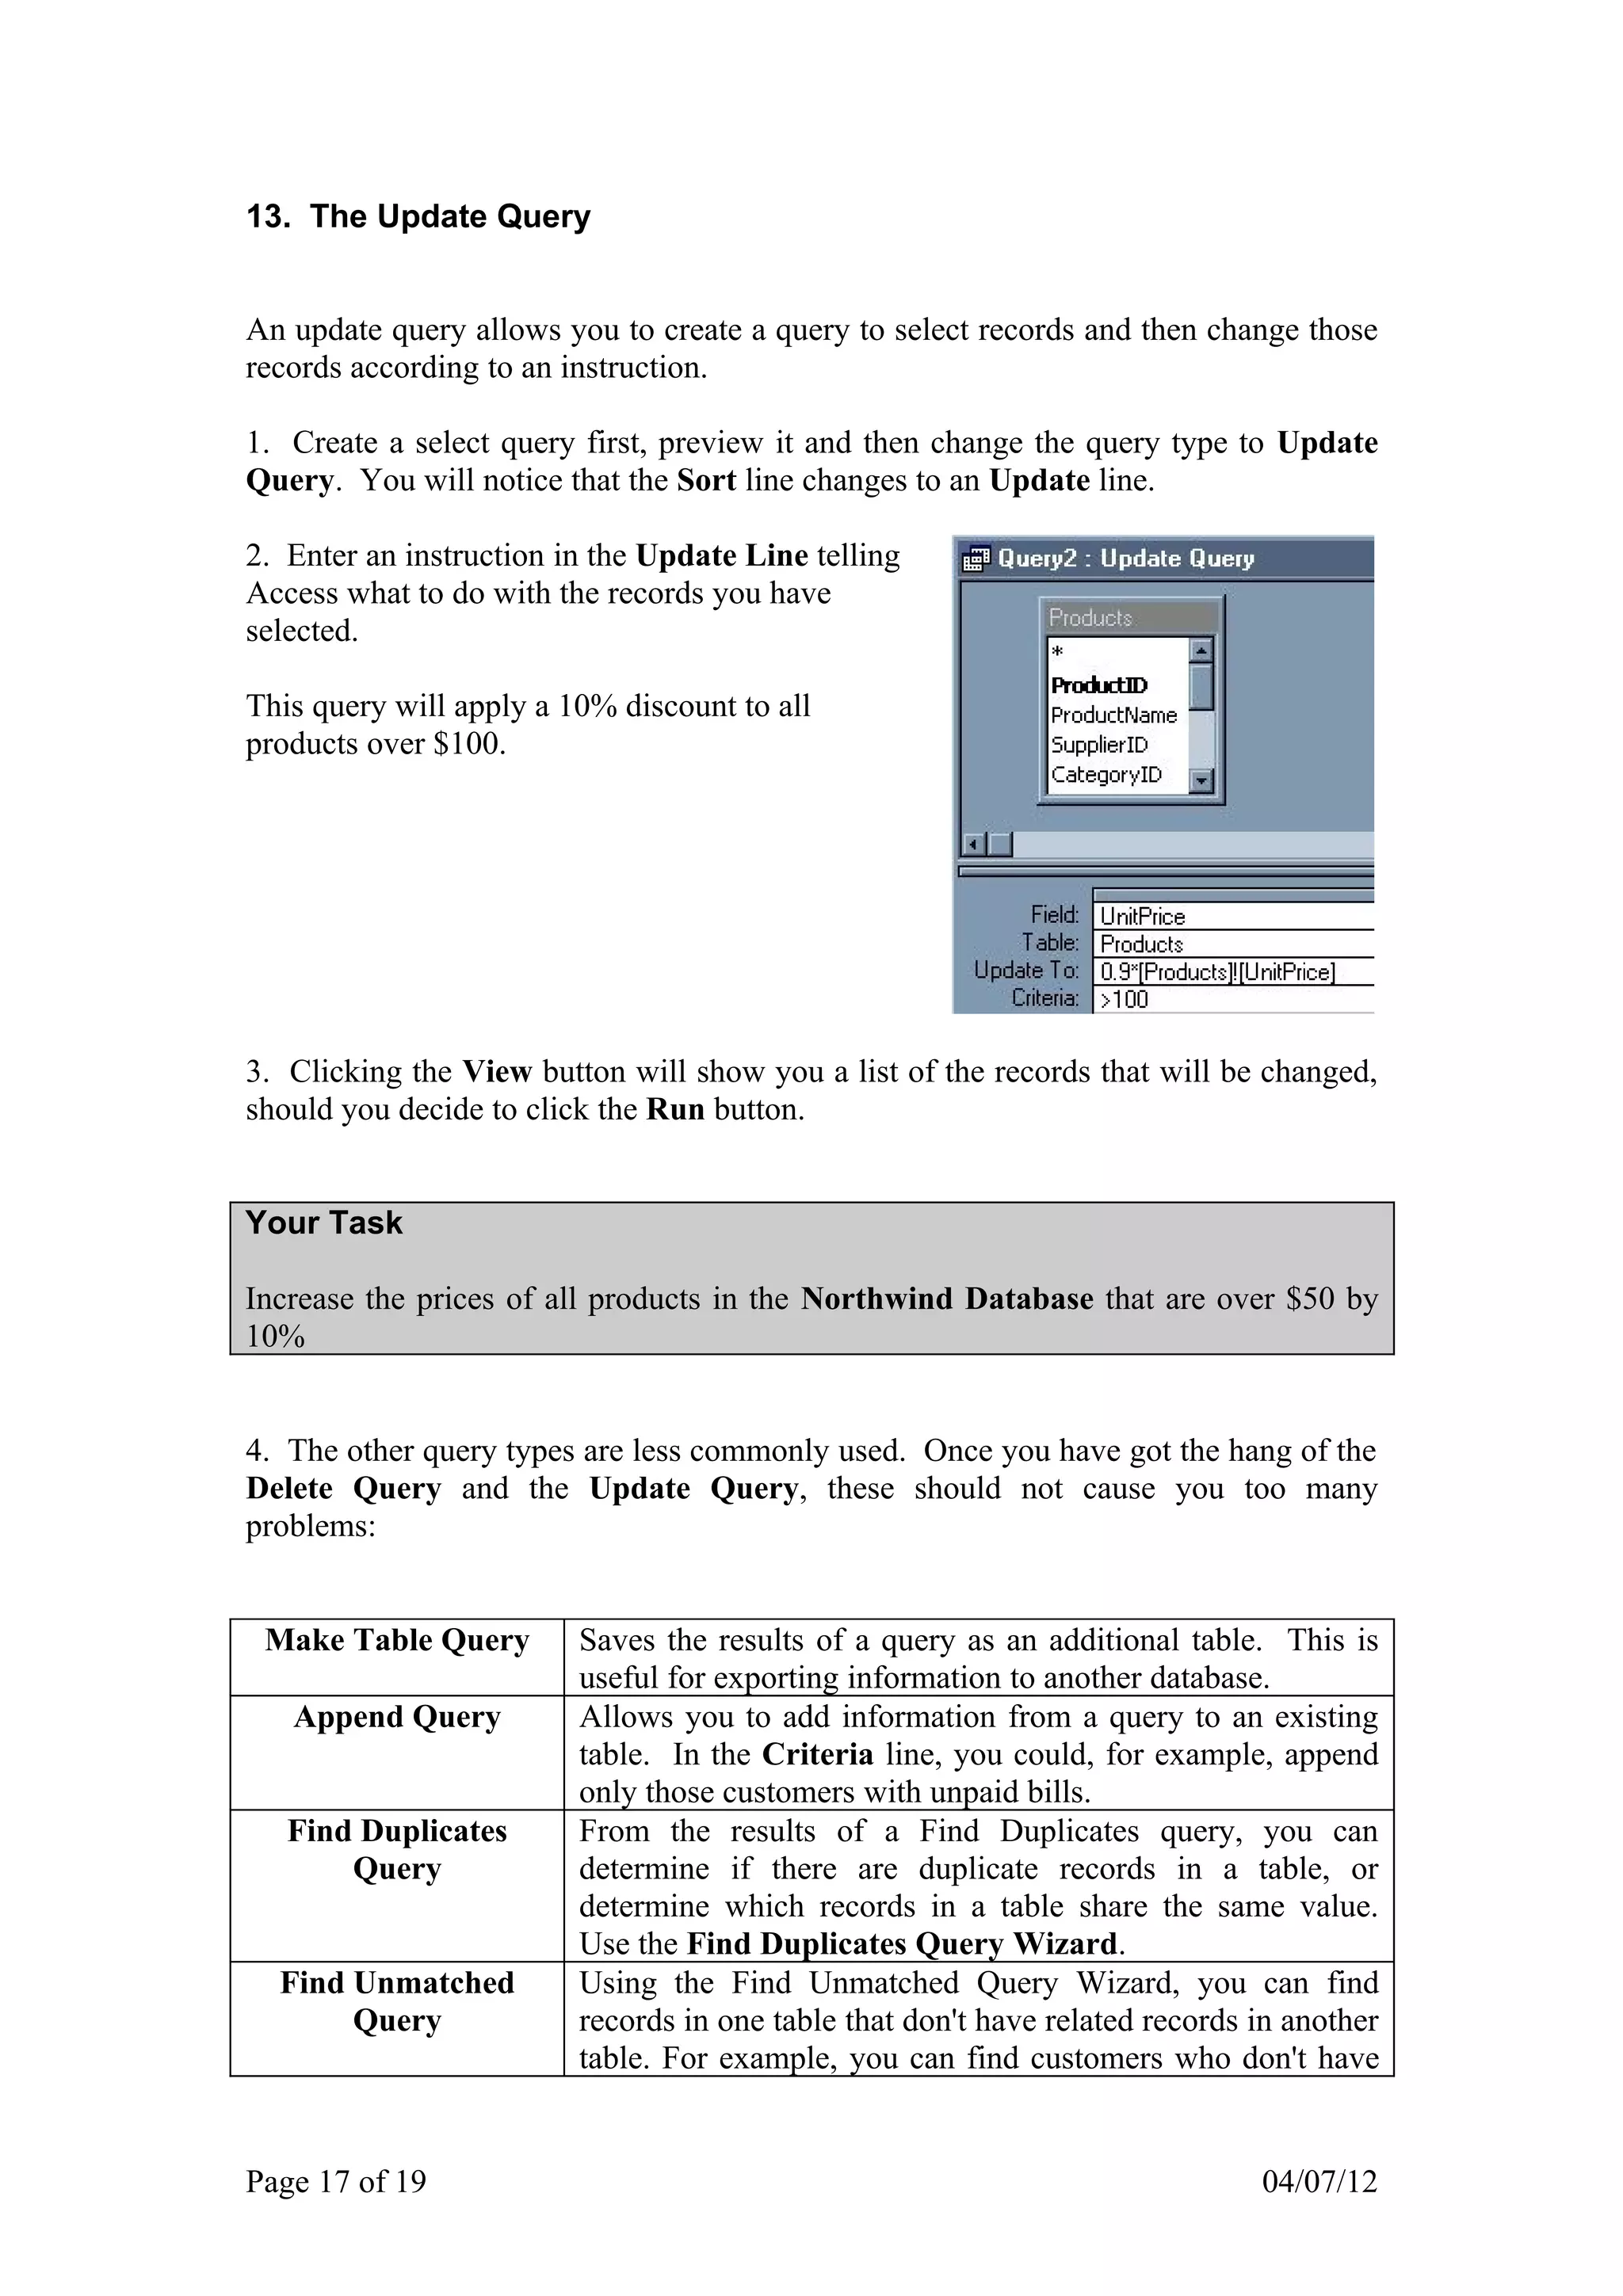
![7. Run the Query again and you will see the effect of your changes. When you click
in the New Price field, you will see the Description Text appear in the Status Bar at
the bottom-left of the Access window.
Your Task
The accounting department at Northwind want to know the value of each product that
is on order. Produce a query with a calculated field that will show this.
8. Of course, the company could be awkward and reduce the prices by 4.5%, and then
they might change their minds again. This needn’t be a worry to you if you make
Access ask for a percentage value before running the calculation.
To achieve this, simply make up the name of a field, for example “PercentIncrease”
and include that in the expression in place of the figure. For example:
New Price: [UnitPrice]*[Percent Increase]
Now, when the query runs, it asks for a percentage increase and calculates the results
accordingly.
Your Task
Northwind are considering reducing their prices for a month. Produce a query with a
calculated field that will allow the accounting department to see the effect of a
percentage decrease in the value of orders.
9. You can calculate with text fields as well as with numbers. A common use for this
is when you want to combine the FirstName and LastName fields. You would
simply enter:
[FirstName]+" "+[LastName]
N.B. the space between the quotation marks tells Access to leave a space between first
name and last name.
Your Task
Create a list of customers with their titles in brackets. For example:
Maria Anders (Sales Representative)
Hint: Click the Build button on the toolbar to use the Expression Builder.
Page 14 of 19 04/07/12](https://image.slidesharecdn.com/access2-120704045932-phpapp02/75/Access2-14-2048.jpg)