Downloaded 89 times


![To save a query:
1. Click the Save button on the Quick Access toolbar
. Access saves the query unless you are saving for the first time. If you are saving for the first
time, the Save As dialog box appears.
2. Type the name you want to give your query.
3. Click OK. Access saves the query. You can now access the query by using the Navigation pane.
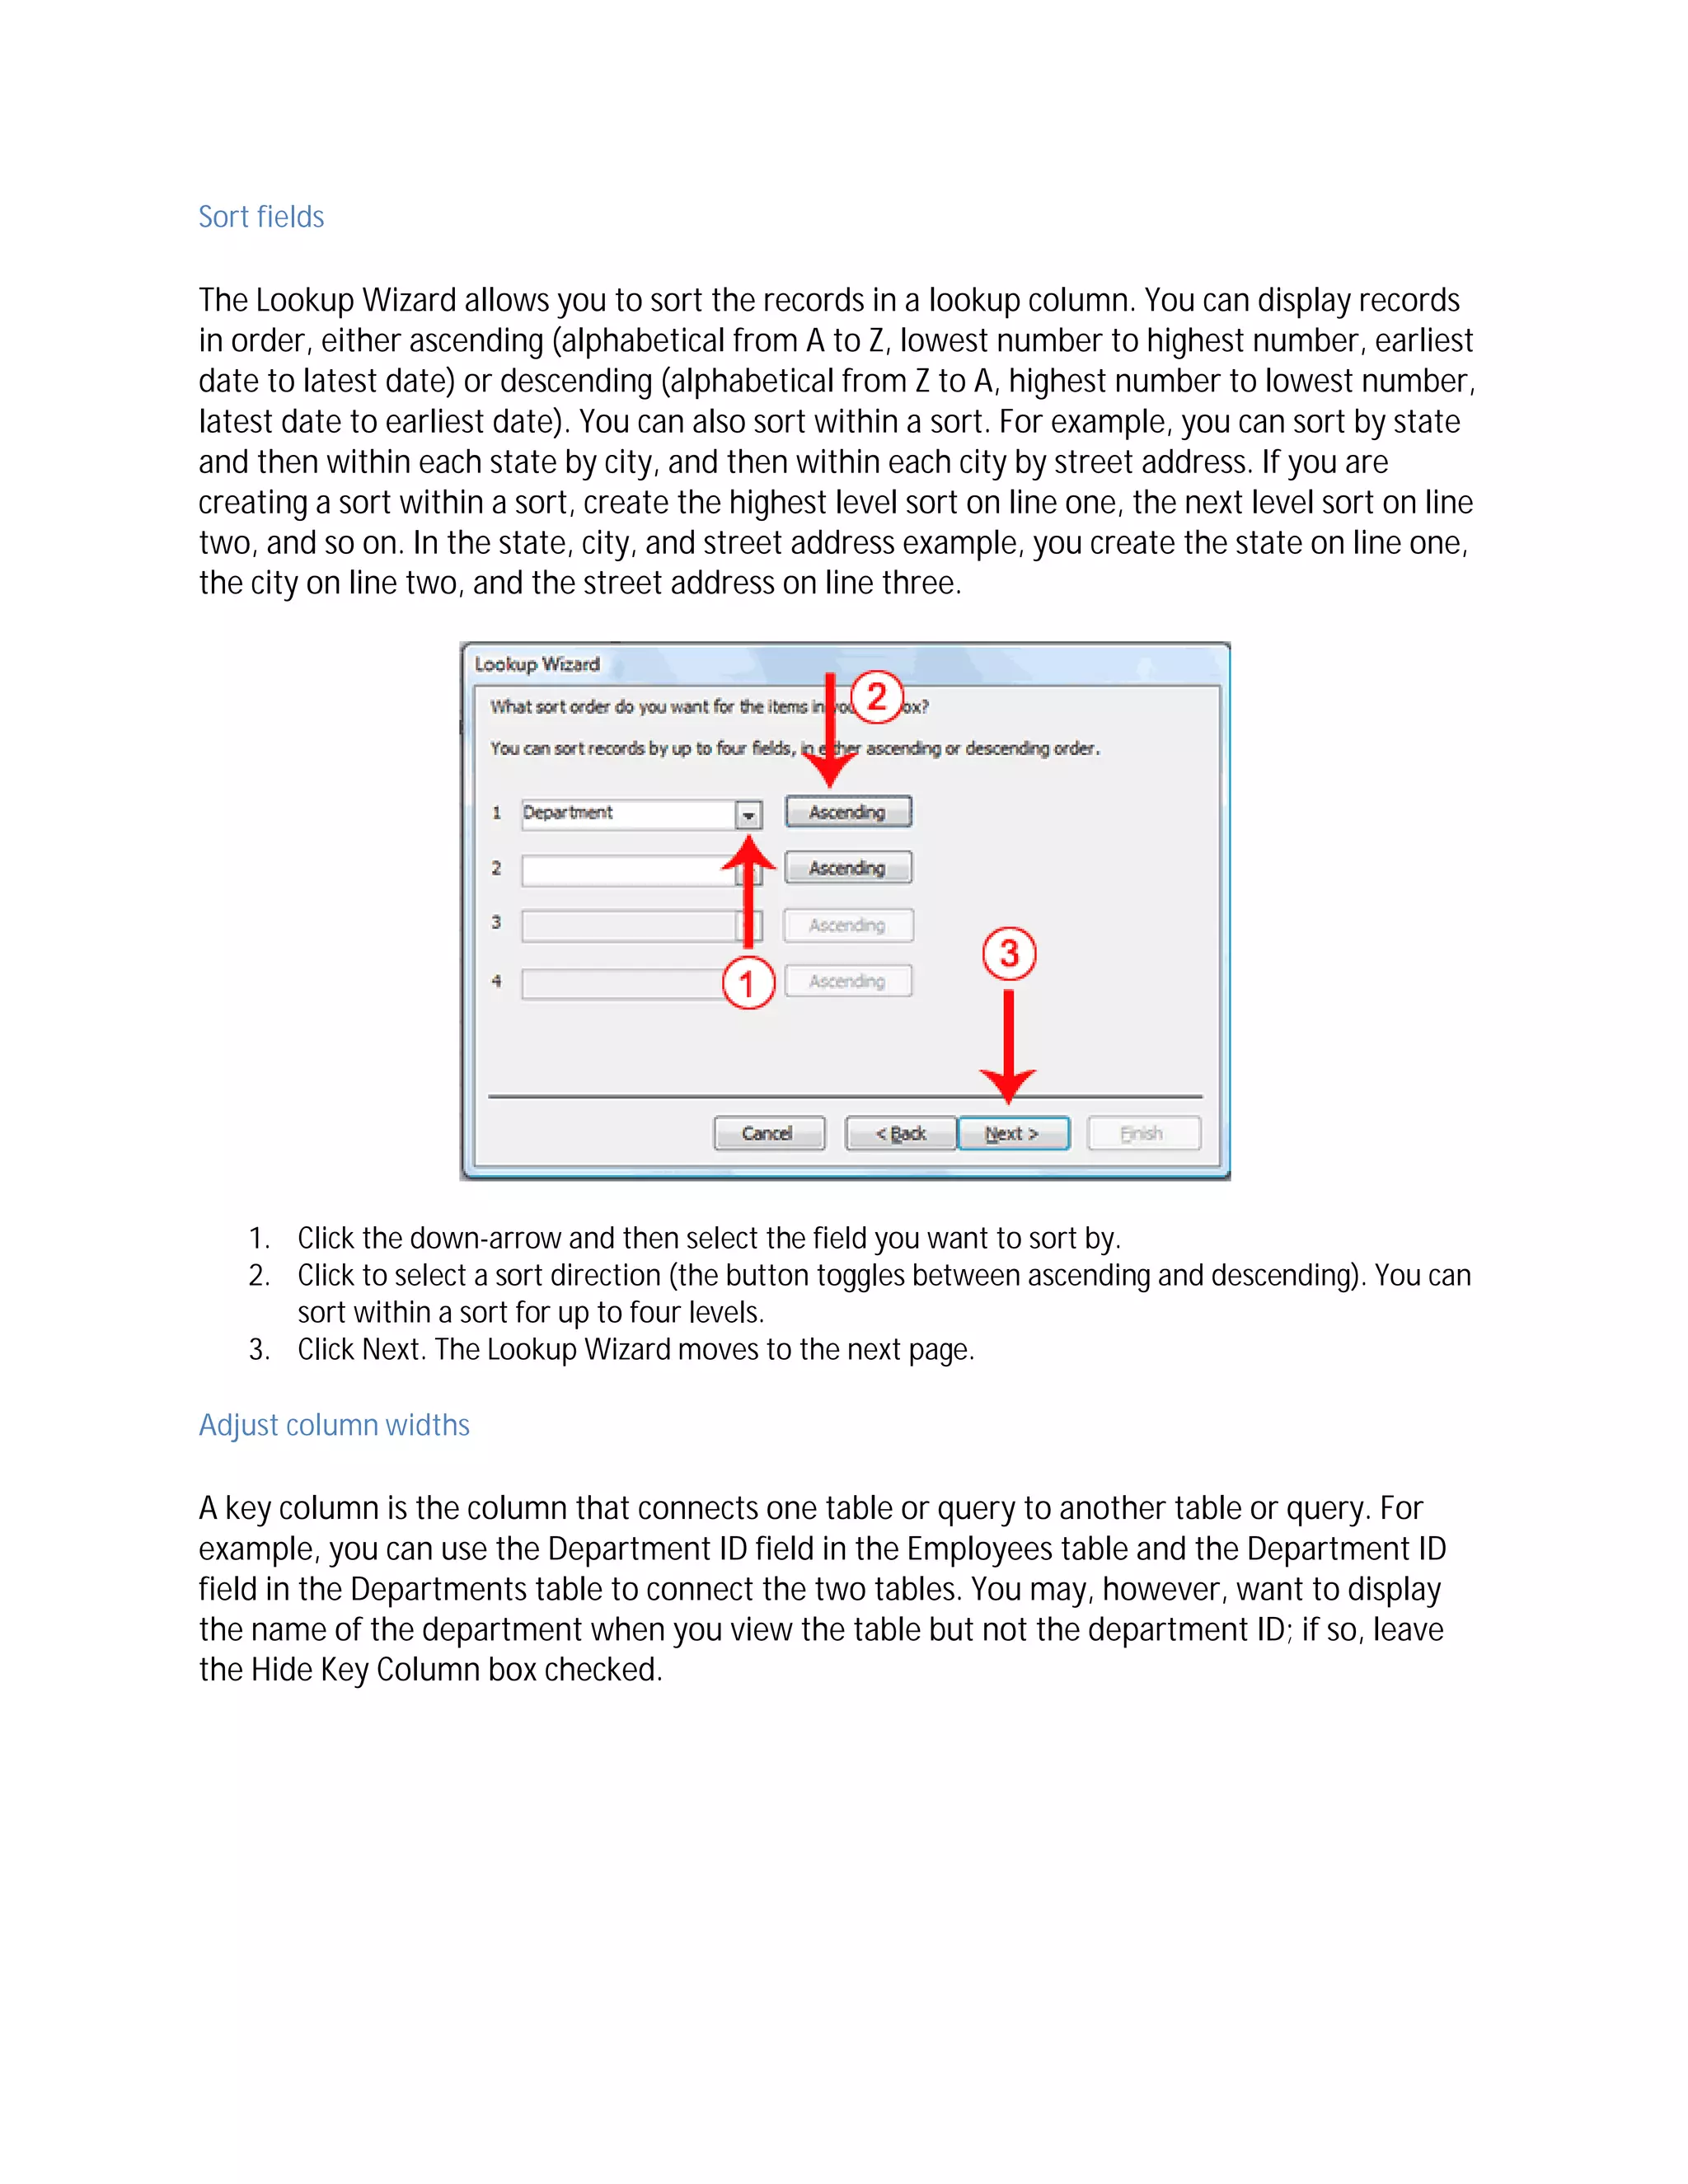
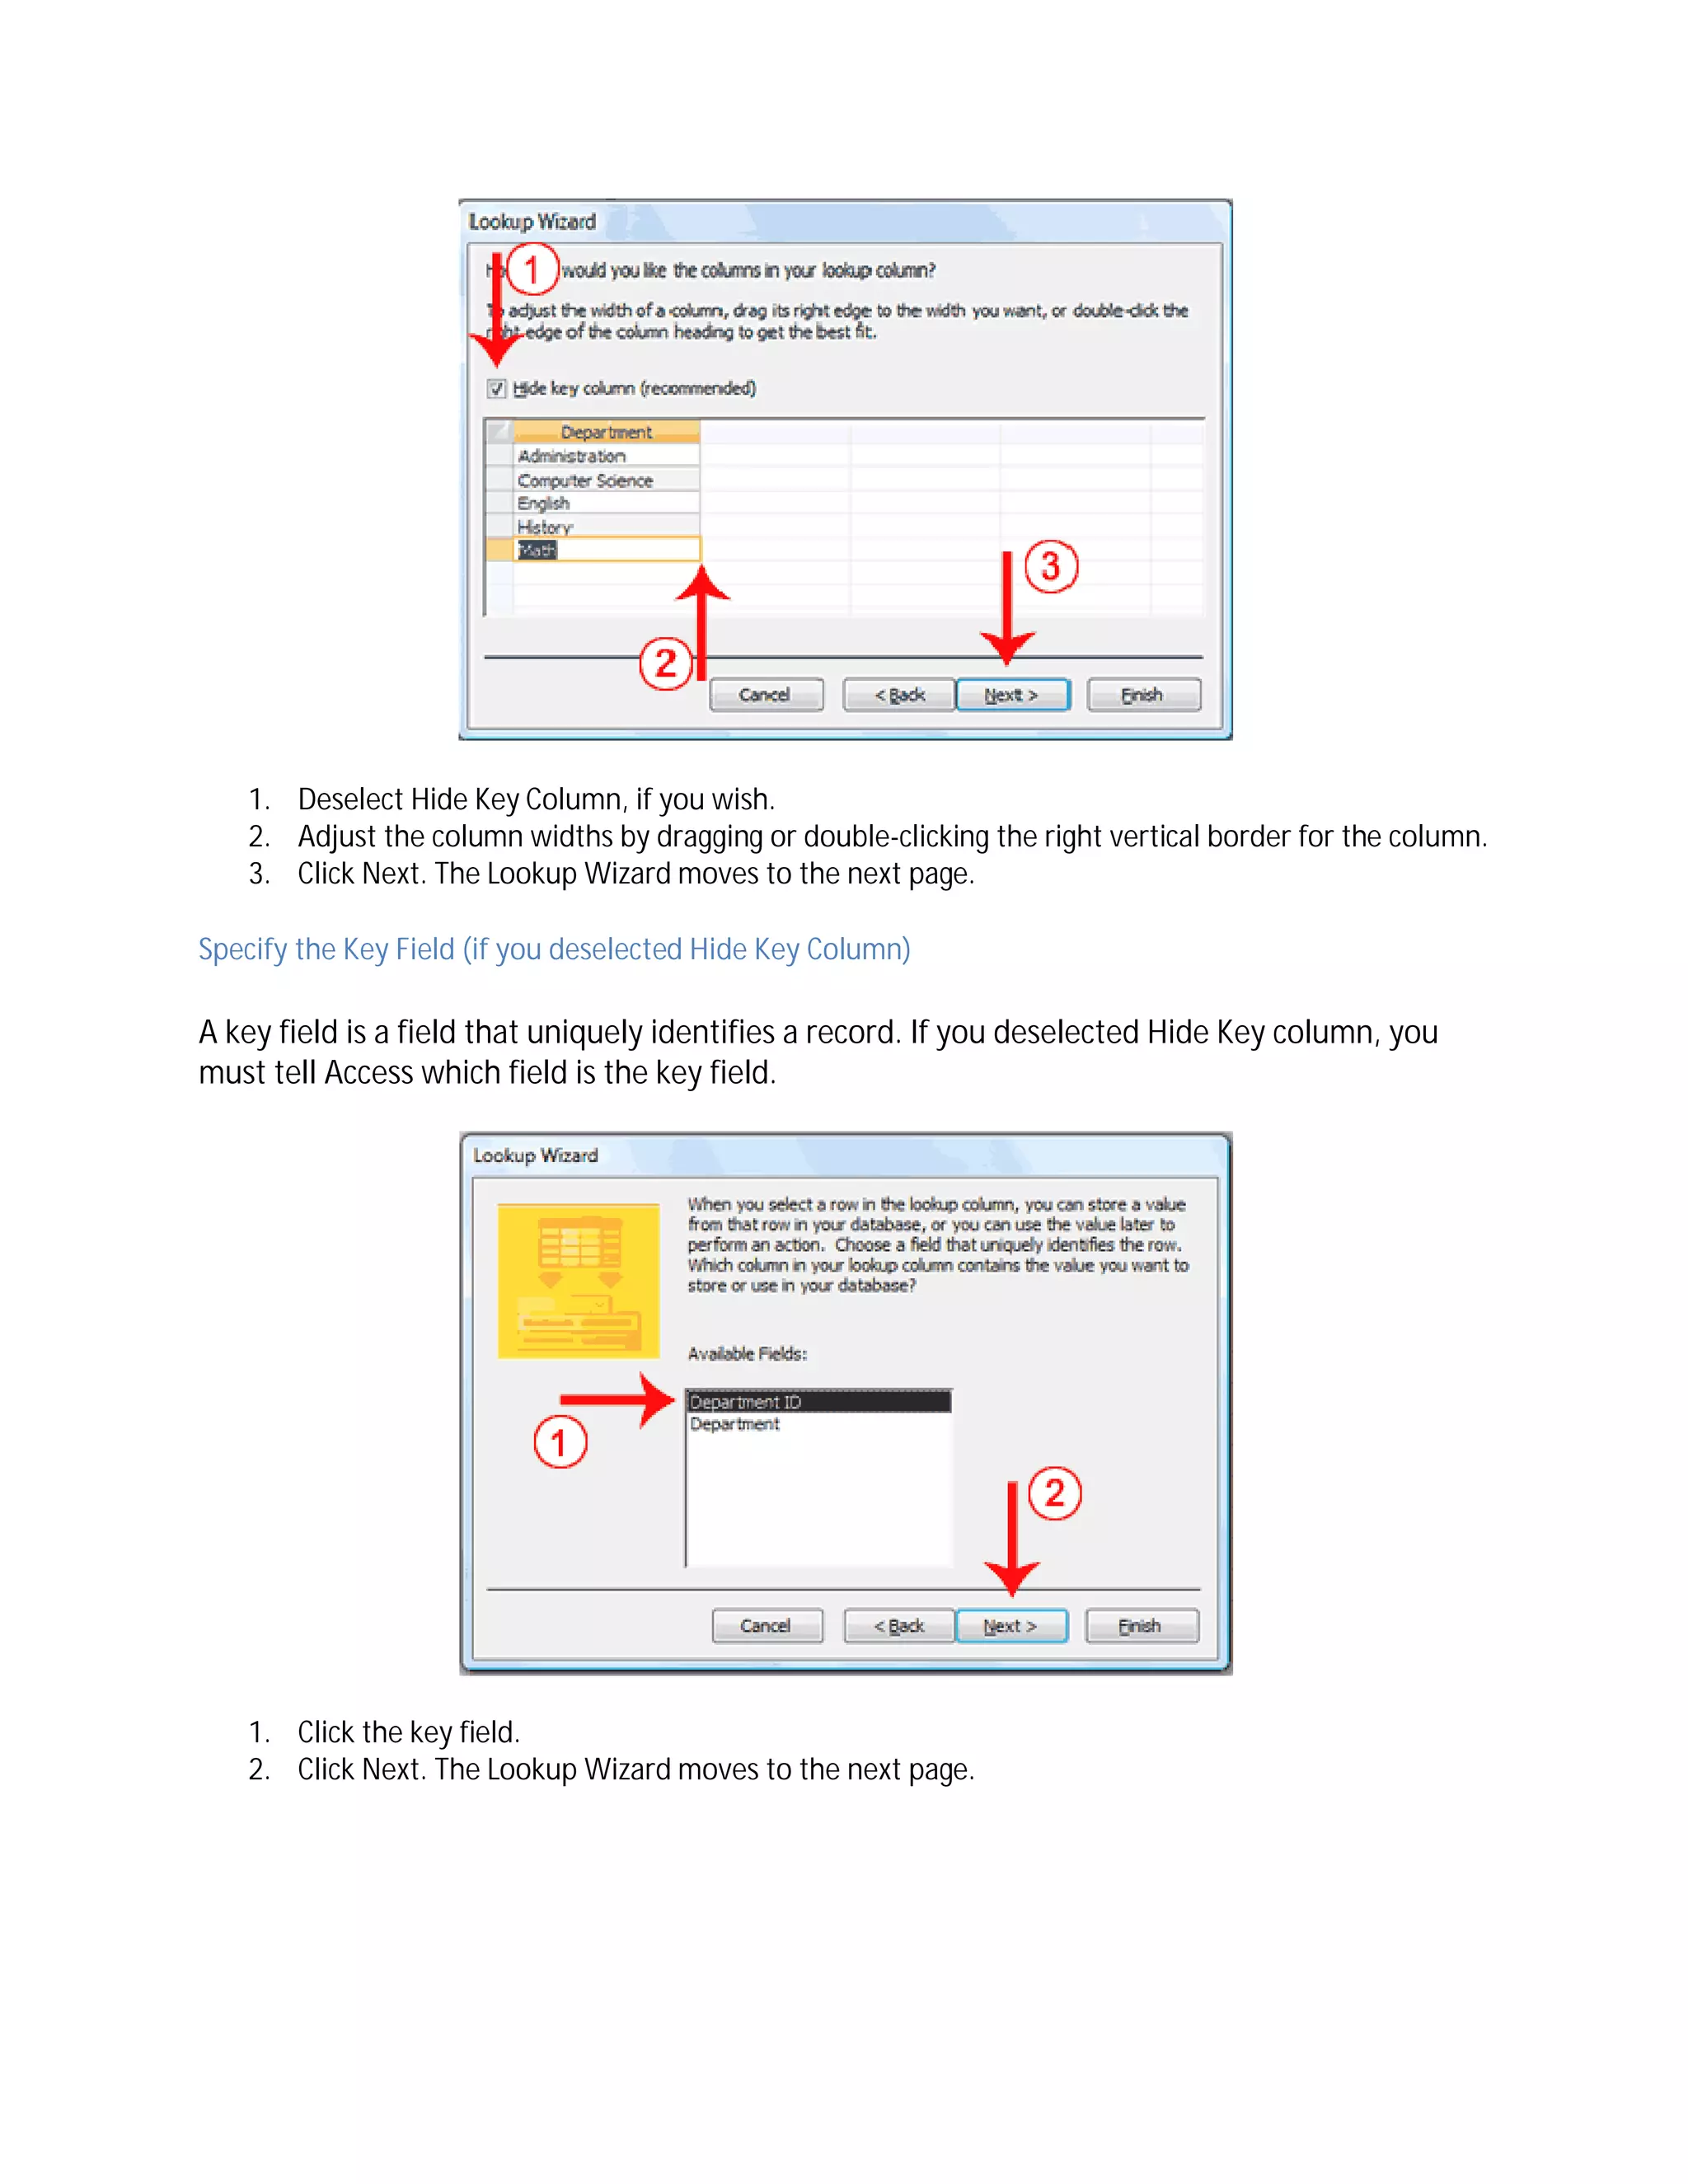
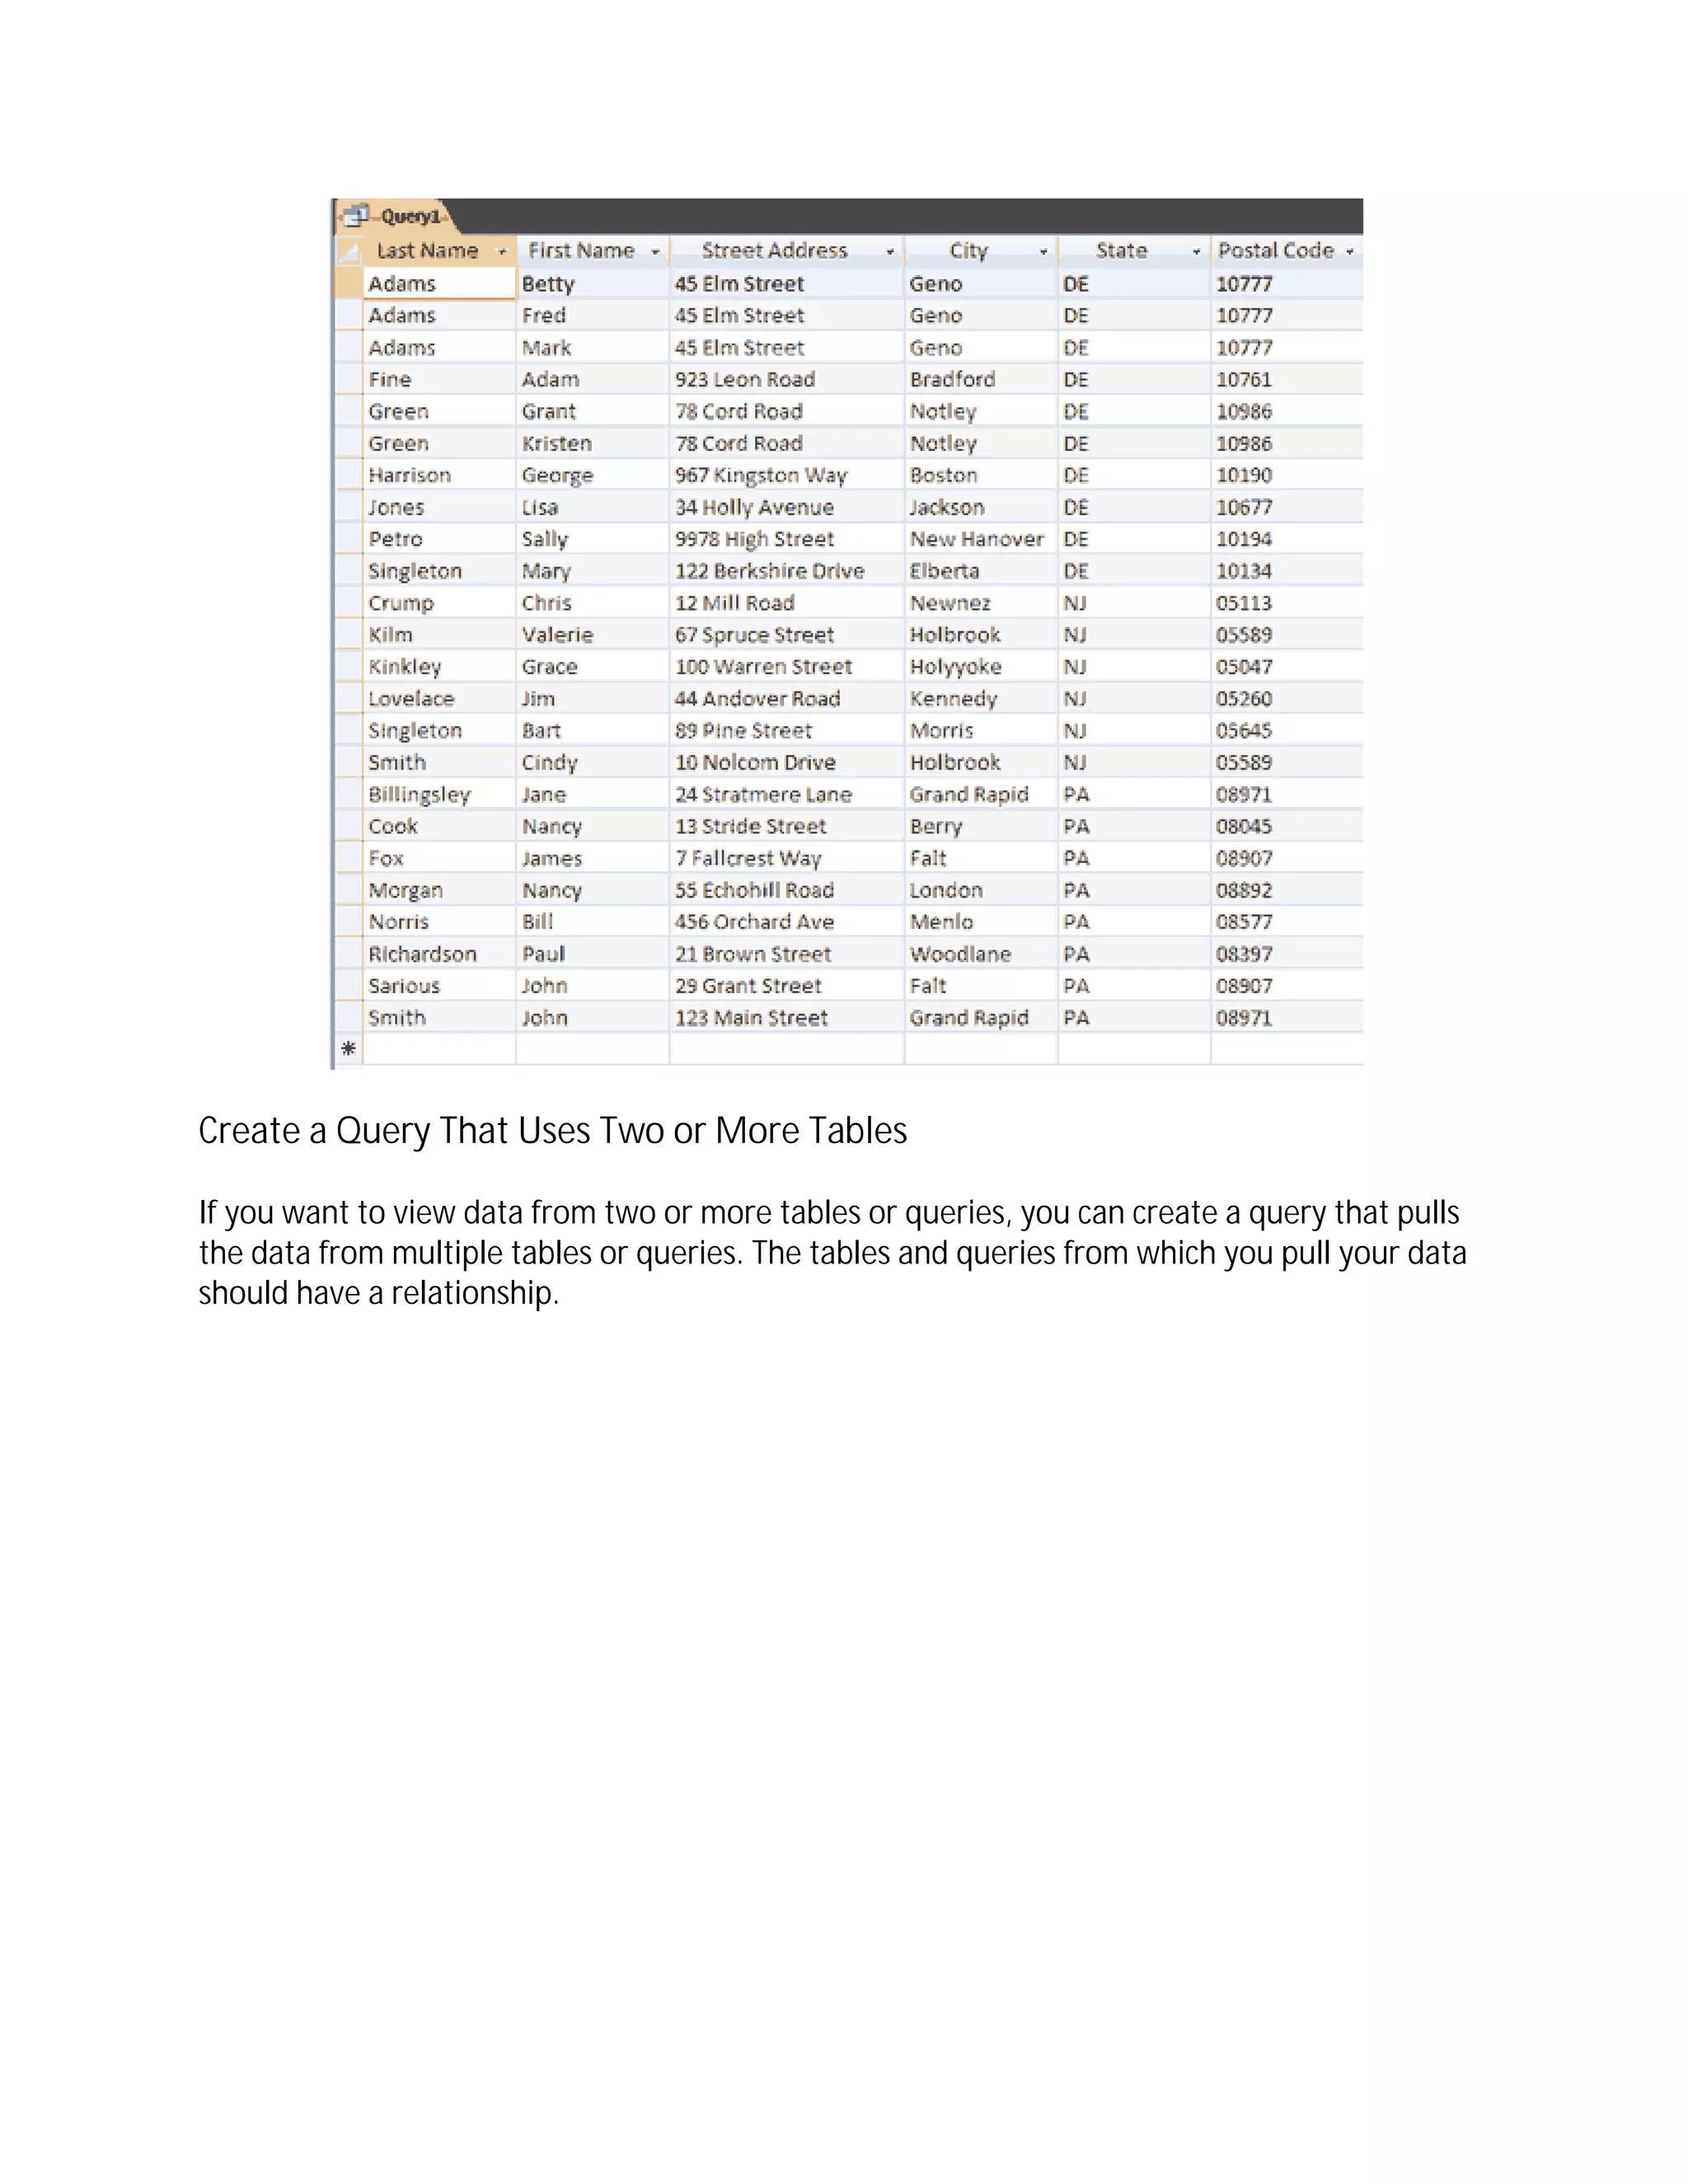
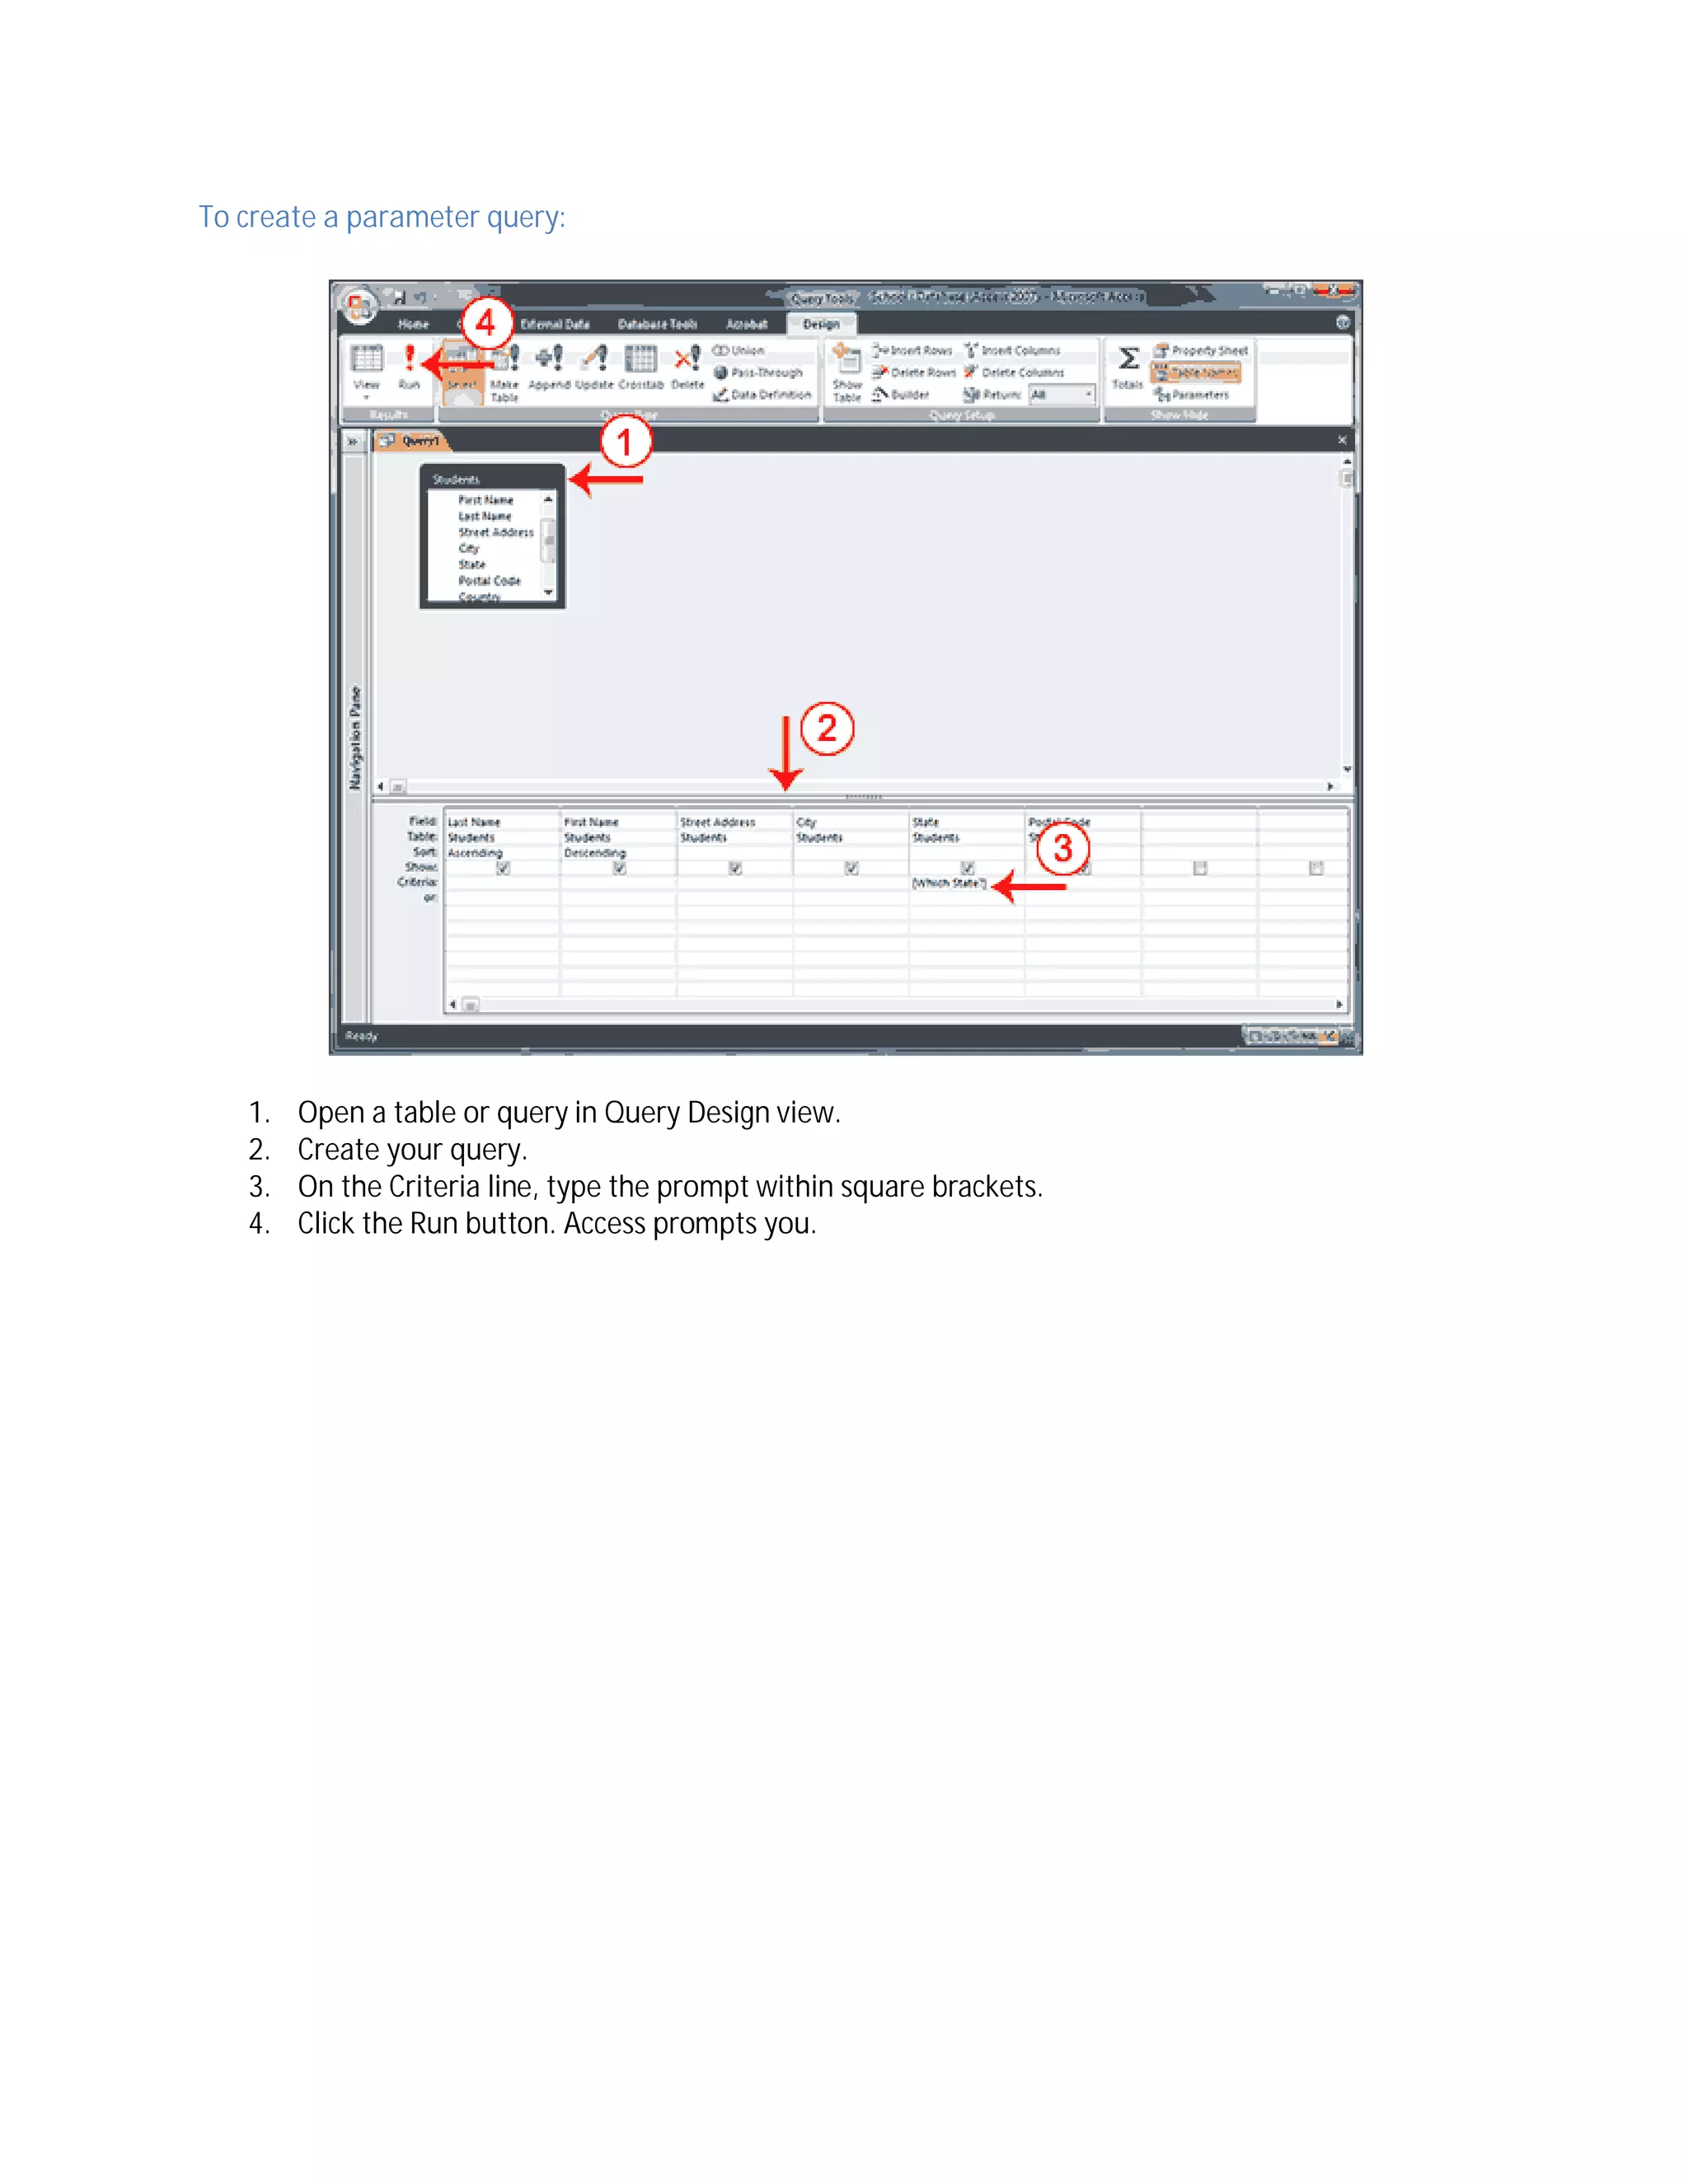
Create a Parameter Query
If instead of entering predetermined criteria, you want to prompt users when a query runs, you
can create a parameter query. You create a parameter query by enclosing a question in square
brackets ([]). For example, if you want to create a parameter query that asks users which State
they want to use from the Student’s table, you would type [Which State?] on the Criteria line
under the State column. When the query runs, Access will prompt the user for the answer to
your question.](https://image.slidesharecdn.com/access2007lecturenotesstudents-151107190802-lva1-app6892/75/Access-2007-lecture-notes-students-38-2048.jpg)


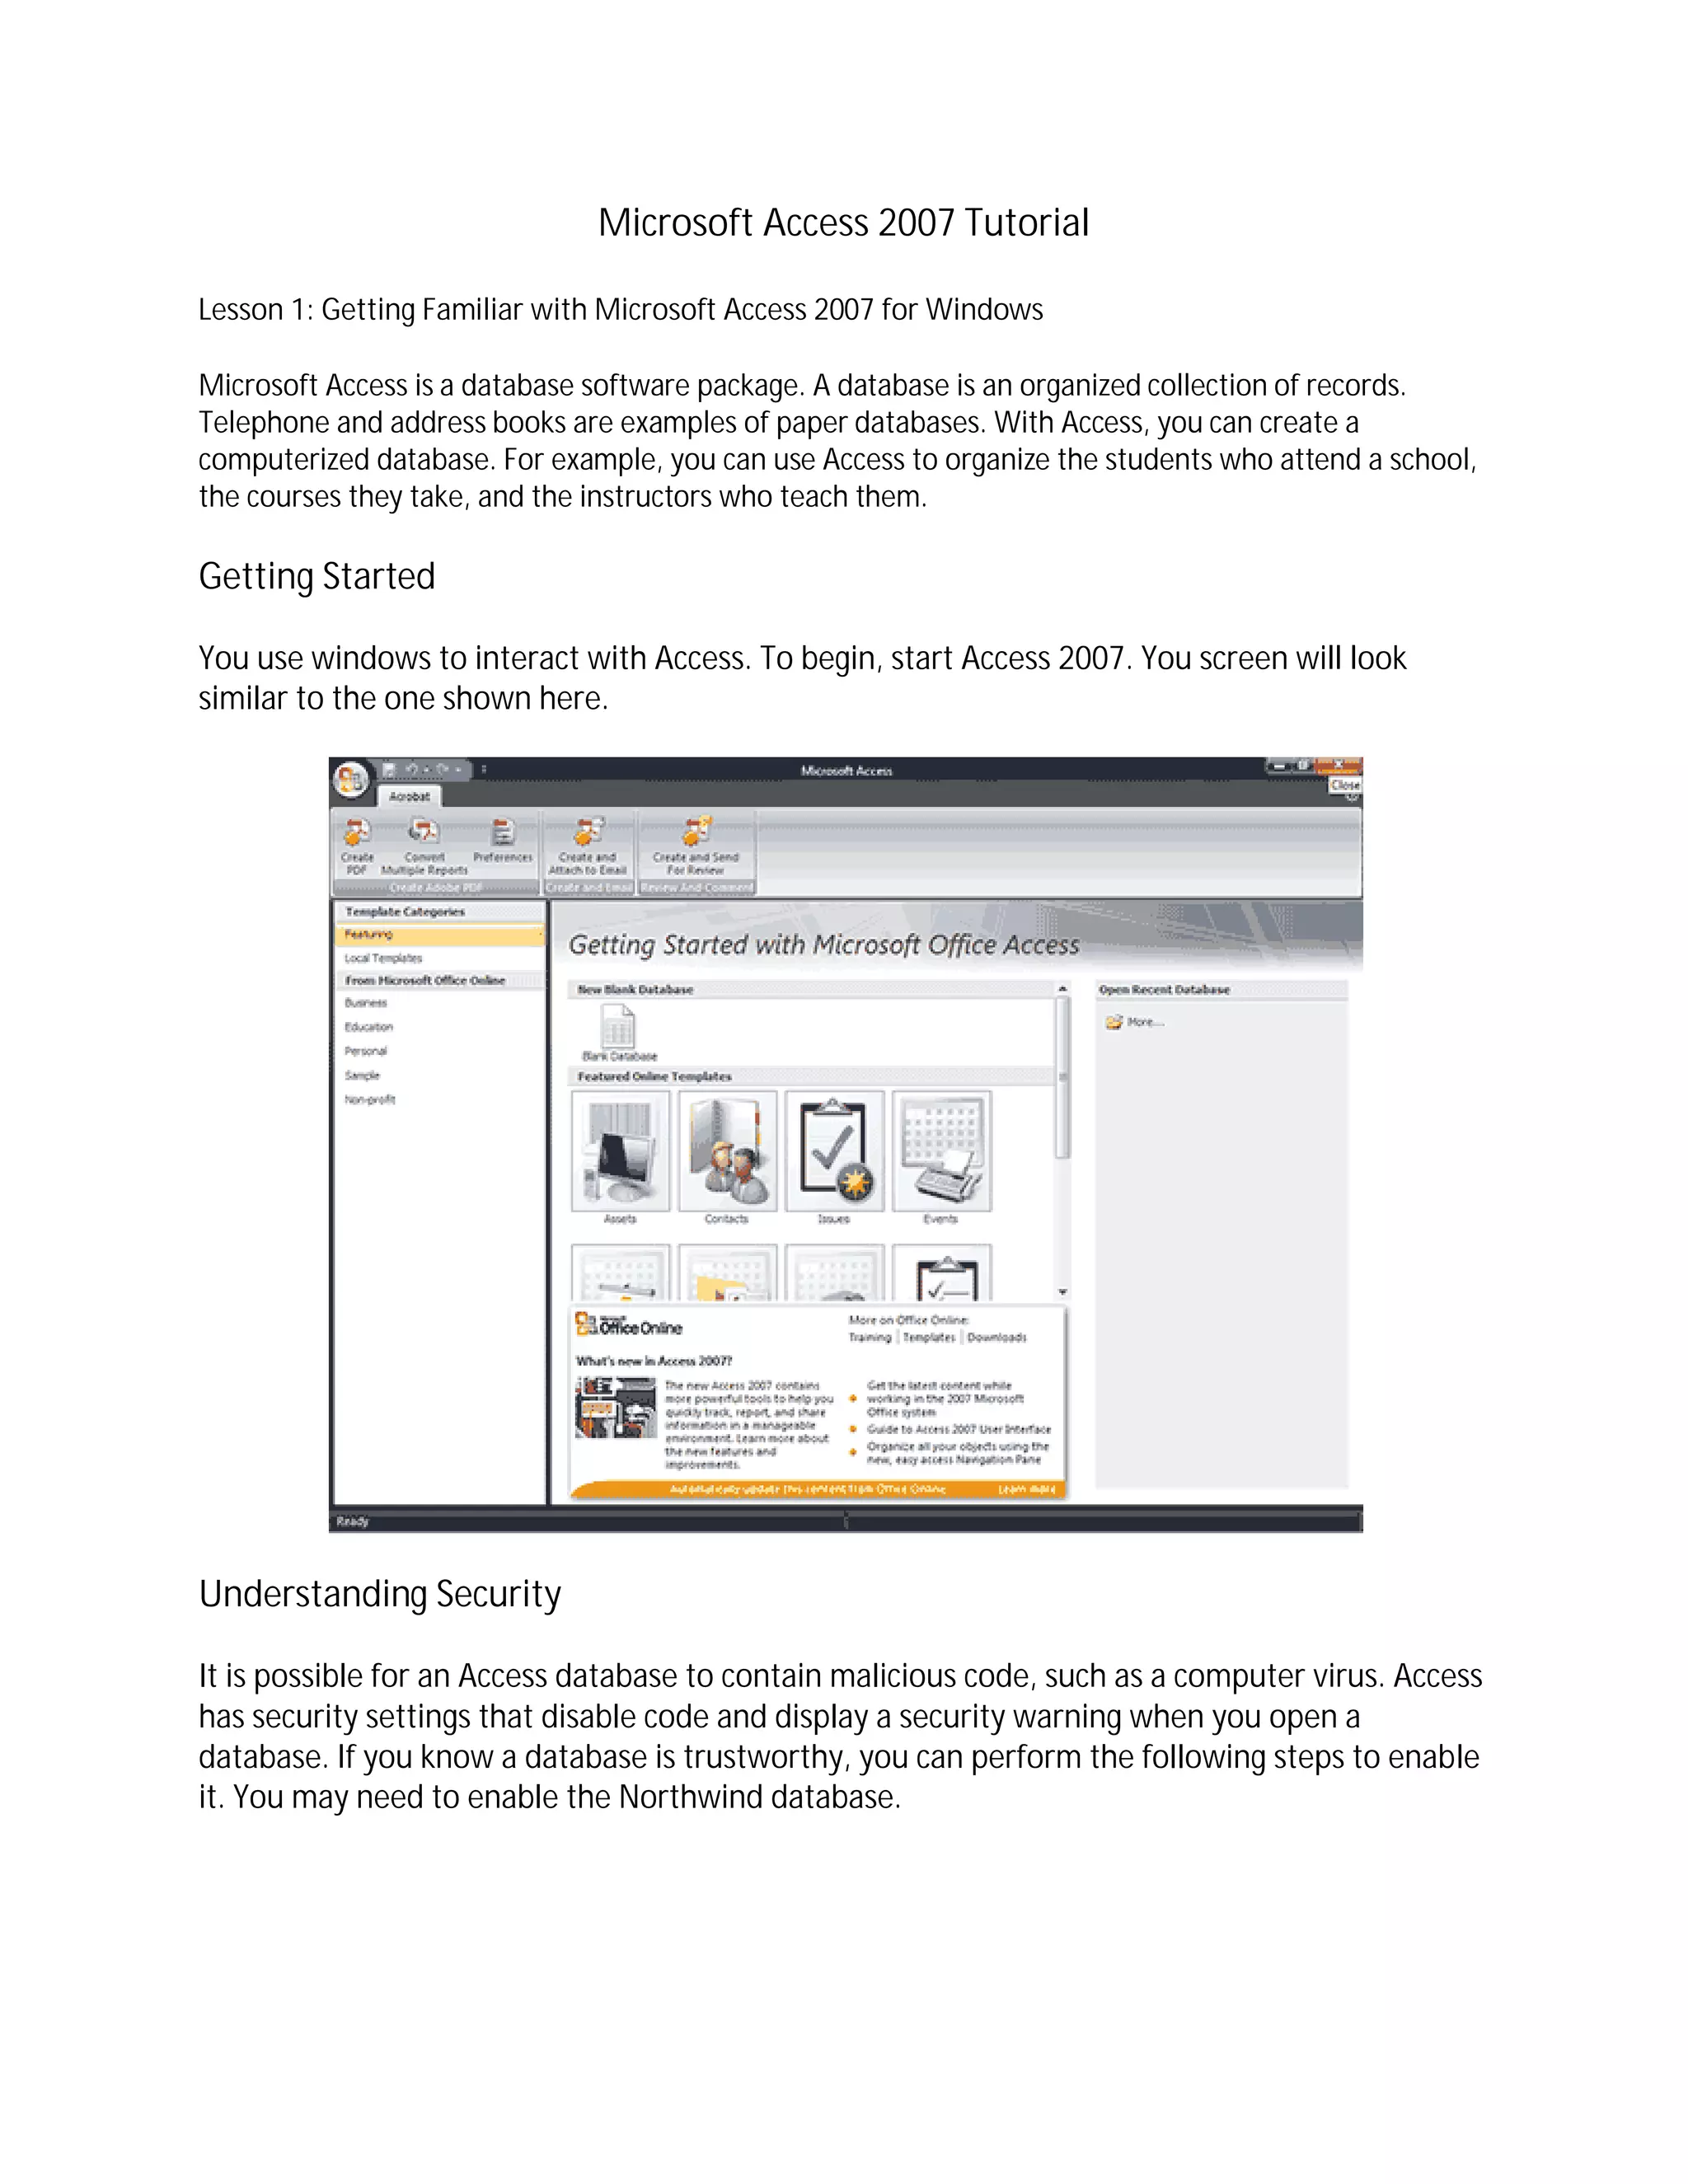
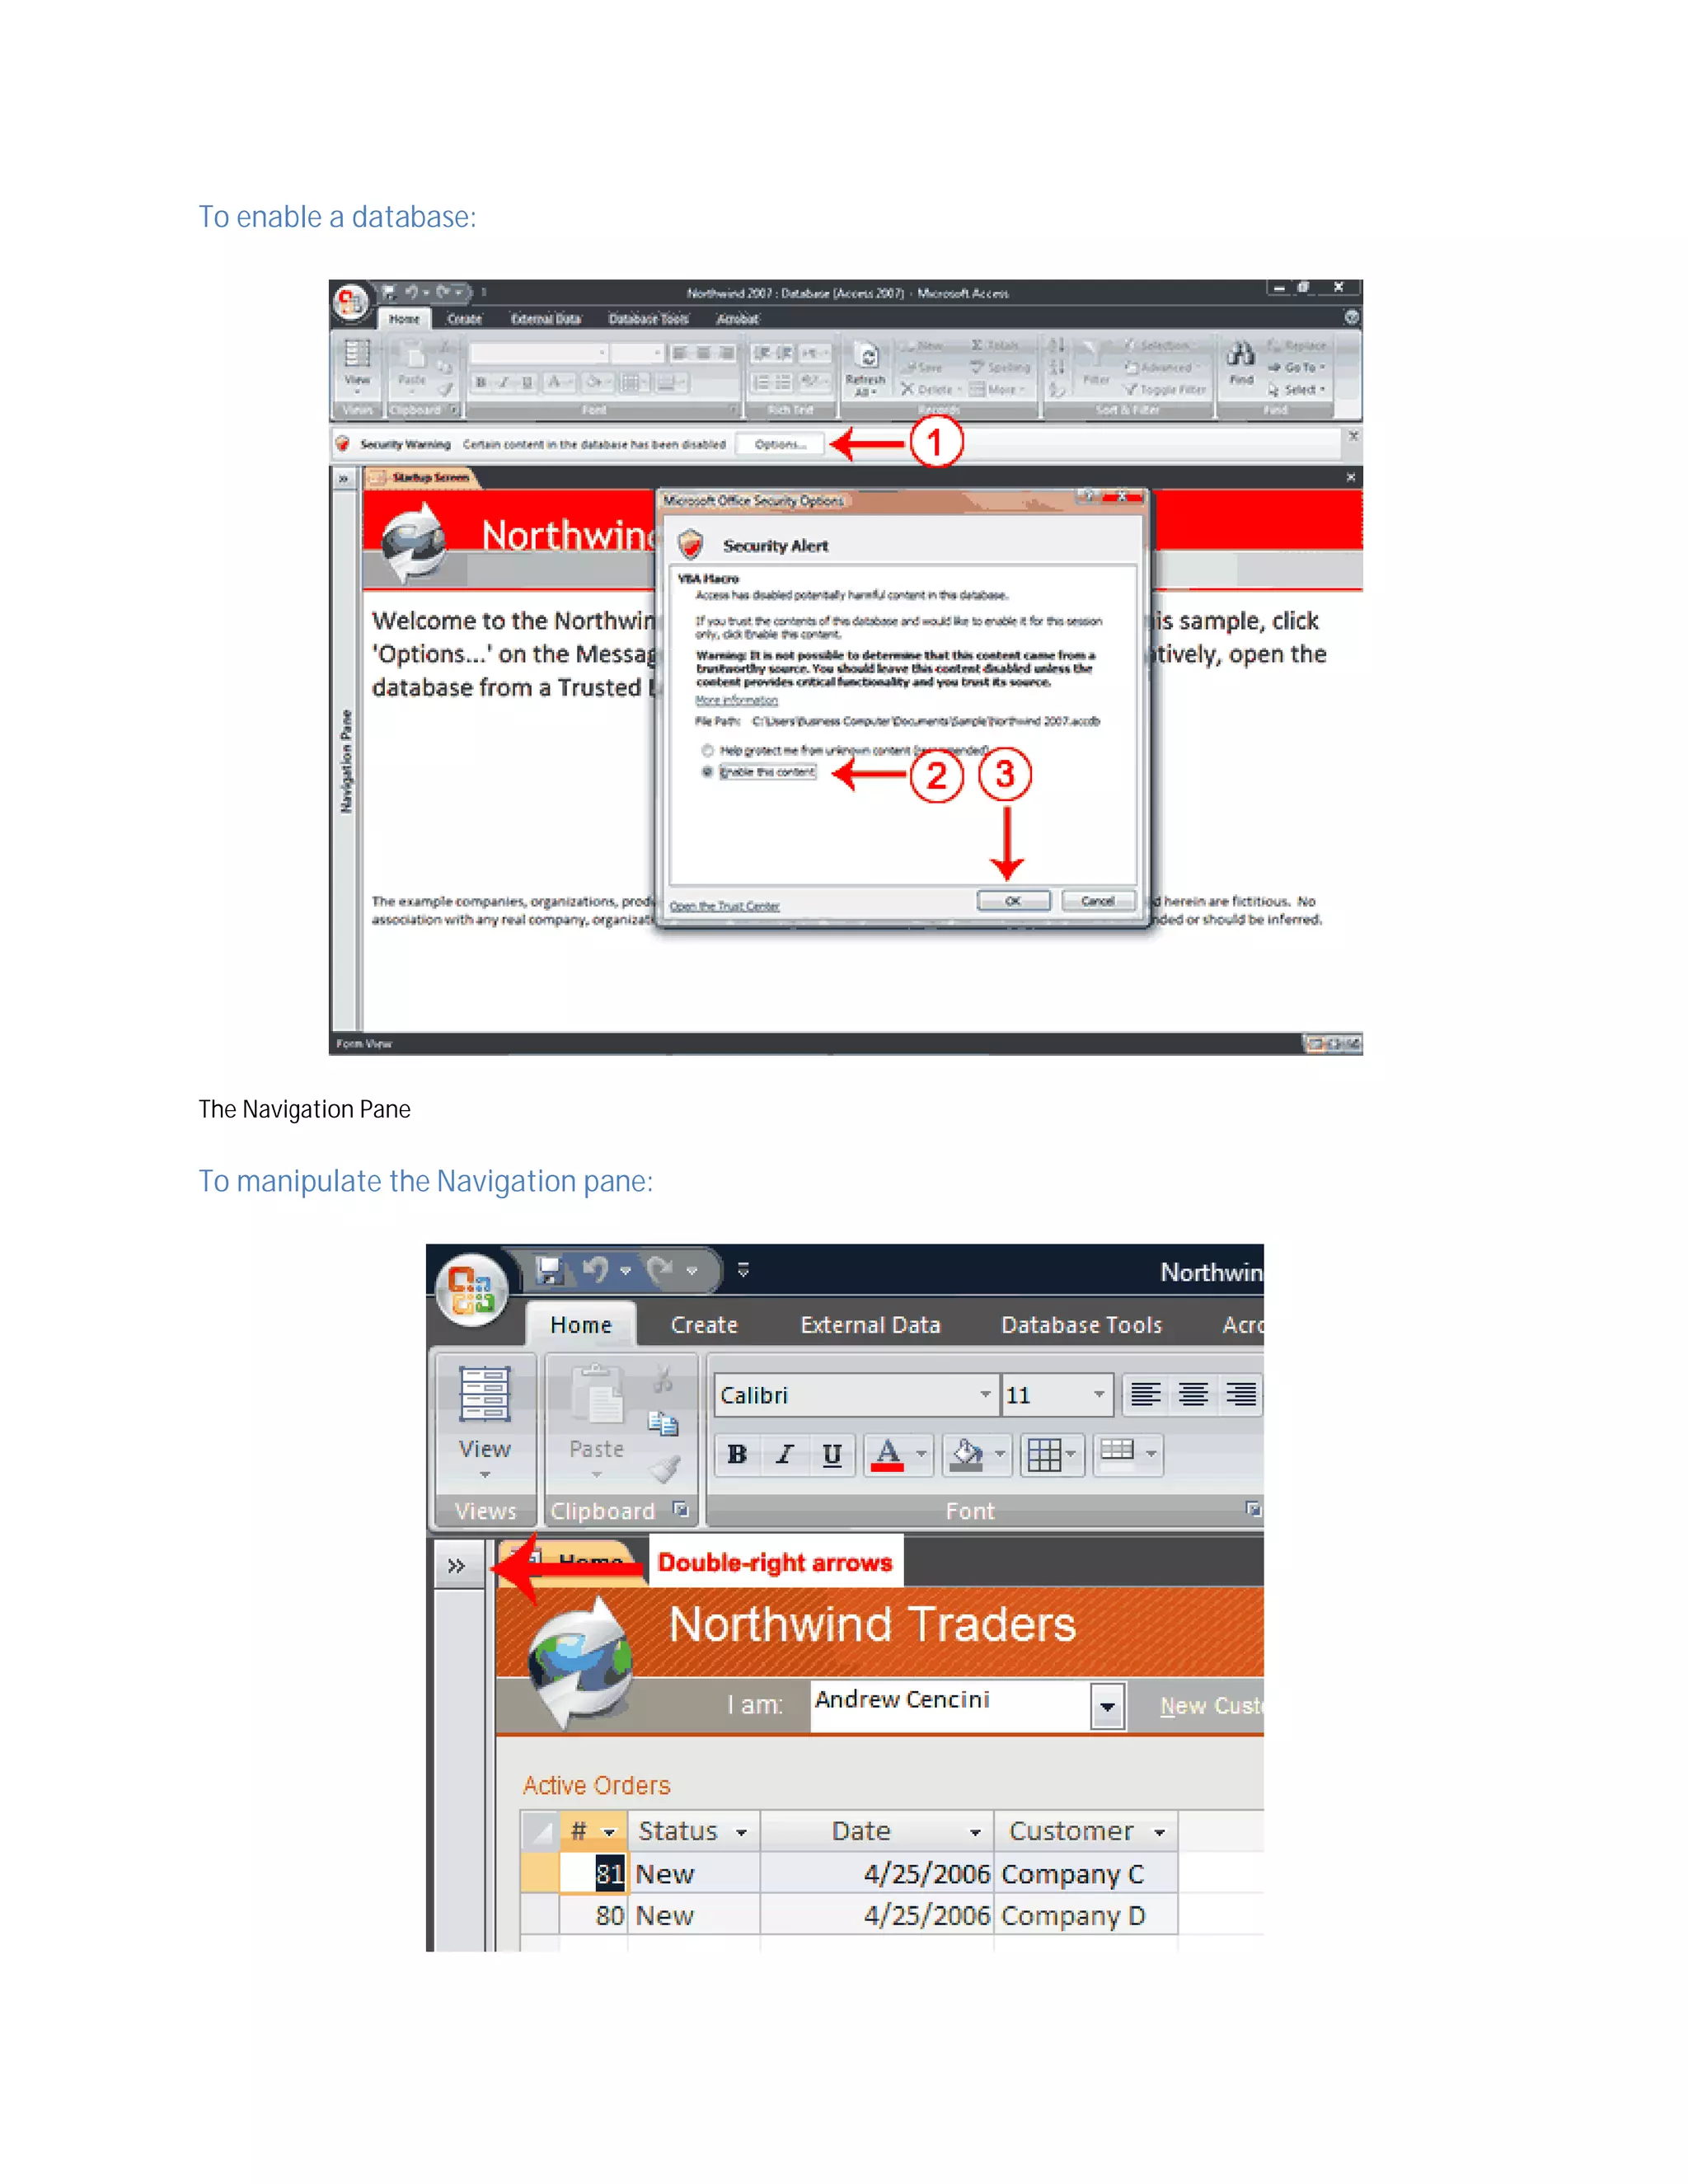
This document provides an overview and introduction to Microsoft Access 2007. It discusses what a database is and how Access allows users to create computerized databases. It describes the basic Access interface elements like the navigation pane, ribbon, and views. It also introduces some common Access objects like tables, queries, forms, reports, macros and modules. The second half of the document focuses on creating and working with tables, including adding fields, assigning data types, setting field properties, and creating lookup columns to relate tables.


![Powering agriculture with renewable energy [compatibility mode]](https://cdn.slidesharecdn.com/ss_thumbnails/poweringagriculturewithrenewableenergycompatibilitymode-160918192550-thumbnail.jpg?width=640&height=640&fit=bounds)