Download as PPS, PPTX

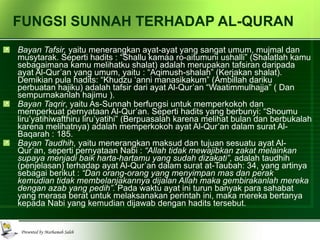
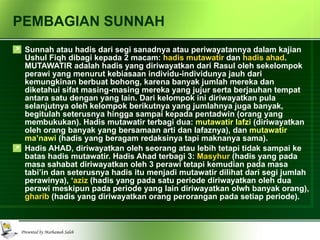
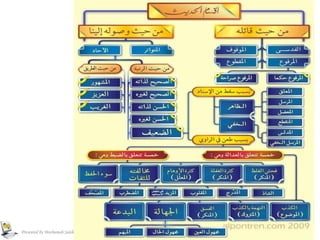

Dokumen ini menjelaskan tentang sunnah, definisi, contoh, dan fungsinya dalam menginterpretasikan Al-Qur'an serta perkembangan hadis dari masa Nabi hingga abad ketiga hijrah. Ditegaskan bahwa sunnah meliputi ucapan, tindakan, dan pengakuan Nabi Muhammad SAW, serta hadis sebagai sumber hukum yang berasal dari beliau. Terdapat juga pembagian hadis menjadi mutawatir dan ahad, serta fungsinya dalam menjelaskan dan memperkuat pernyataan Al-Qur'an.


