1. Design Technology Process Journal
Date: February, 18st, 2011
Name: Jee Yeon Park
Title: Sanding the base, petals, stem and the light
support
What did I do?
Today, I continued to create my project. I took out all
of the parts from the box and began to sand the
rough surface. At first, I got the sand paper and
sand block to sand out the sharp points of the petals. It took me a while to finish sanding those parts.
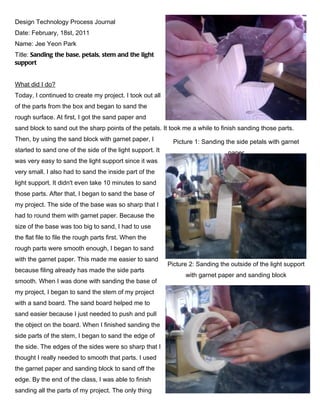
Then, by using the sand block with garnet paper, I Picture 1: Sanding the side petals with garnet
started to sand one of the side of the light support. It paper
was very easy to sand the light support since it was
very small. I also had to sand the inside part of the
light support. It didn't even take 10 minutes to sand
those parts. After that, I began to sand the base of
my project. The side of the base was so sharp that I
had to round them with garnet paper. Because the
size of the base was too big to sand, I had to use
the flat file to file the rough parts first. When the
rough parts were smooth enough, I began to sand
with the garnet paper. This made me easier to sand
Picture 2: Sanding the outside of the light support
because filing already has made the side parts
with garnet paper and sanding block
smooth. When I was done with sanding the base of
my project, I began to sand the stem of my project
with a sand board. The sand board helped me to
sand easier because I just needed to push and pull
the object on the board. When I finished sanding the
side parts of the stem, I began to sand the edge of
the side. The edges of the sides were so sharp that I
thought I really needed to smooth that parts. I used
the garnet paper and sanding block to sand off the
edge. By the end of the class, I was able to finish
sanding all the parts of my project. The only thing
2. that I need to sand more is the petals. Since the petals were so hard to sand with the sanding block and
flat file, I thought it would take more time than I have thought of.
Changes in the plan <gantt chart>
There were some drastic changes in my gantt chart. At first, I was very slow in creating the parts of my
project, but as I caught up the plan of my project, I was able to finish sanding stage than I have planned
to. I just needed to put those parts together and
paint the other parts. Picture 3: Sanding the inside of the light support
with garnet paper
Emotions
During the lesson, I felt very proud of my self that I
was able to complete all of the sanding stage of the
parts of my project. Although I didn't finish sanding
the side petals, I was able to finish a lot of amount of
the work by today.
IB Learner Profile & AOI
3. From today’s lesson, I was able to finish sanding most of the parts of my project. I think I was organized
because I could use the time wisely to complete my task on sanding the parts of the project. I think the
lesson was related with the human ingenuity because I was finish creating the parts for my project
Picture 4: Filing the edge of the base with flat file
Picture 5: Sanding the edge of the base with Picture 6: Sanding the side part of the stem with
garnet paper and sanding block sanding board
Picture 7: Sanding the edge of the stem with
garnet paper and sanding block