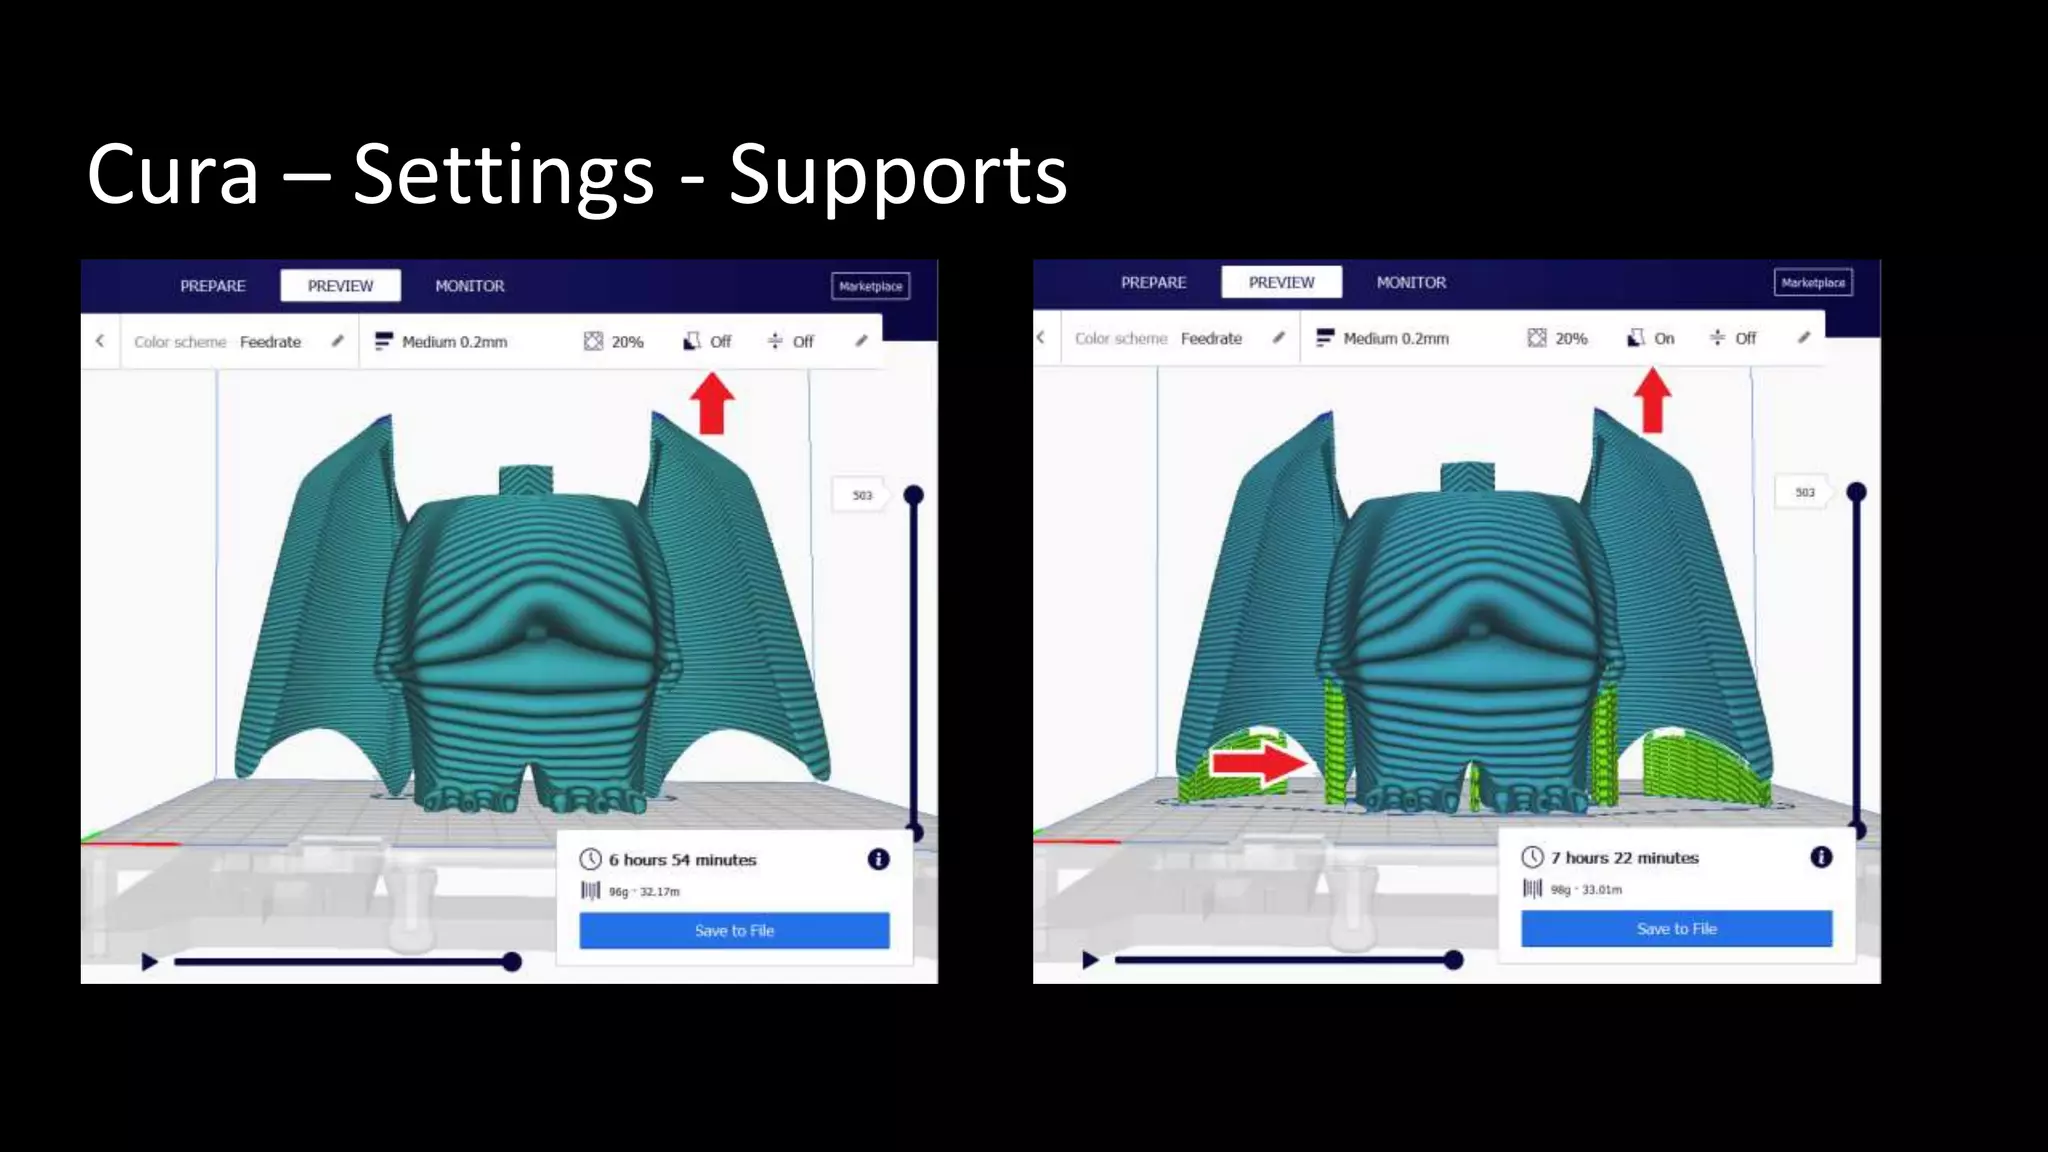
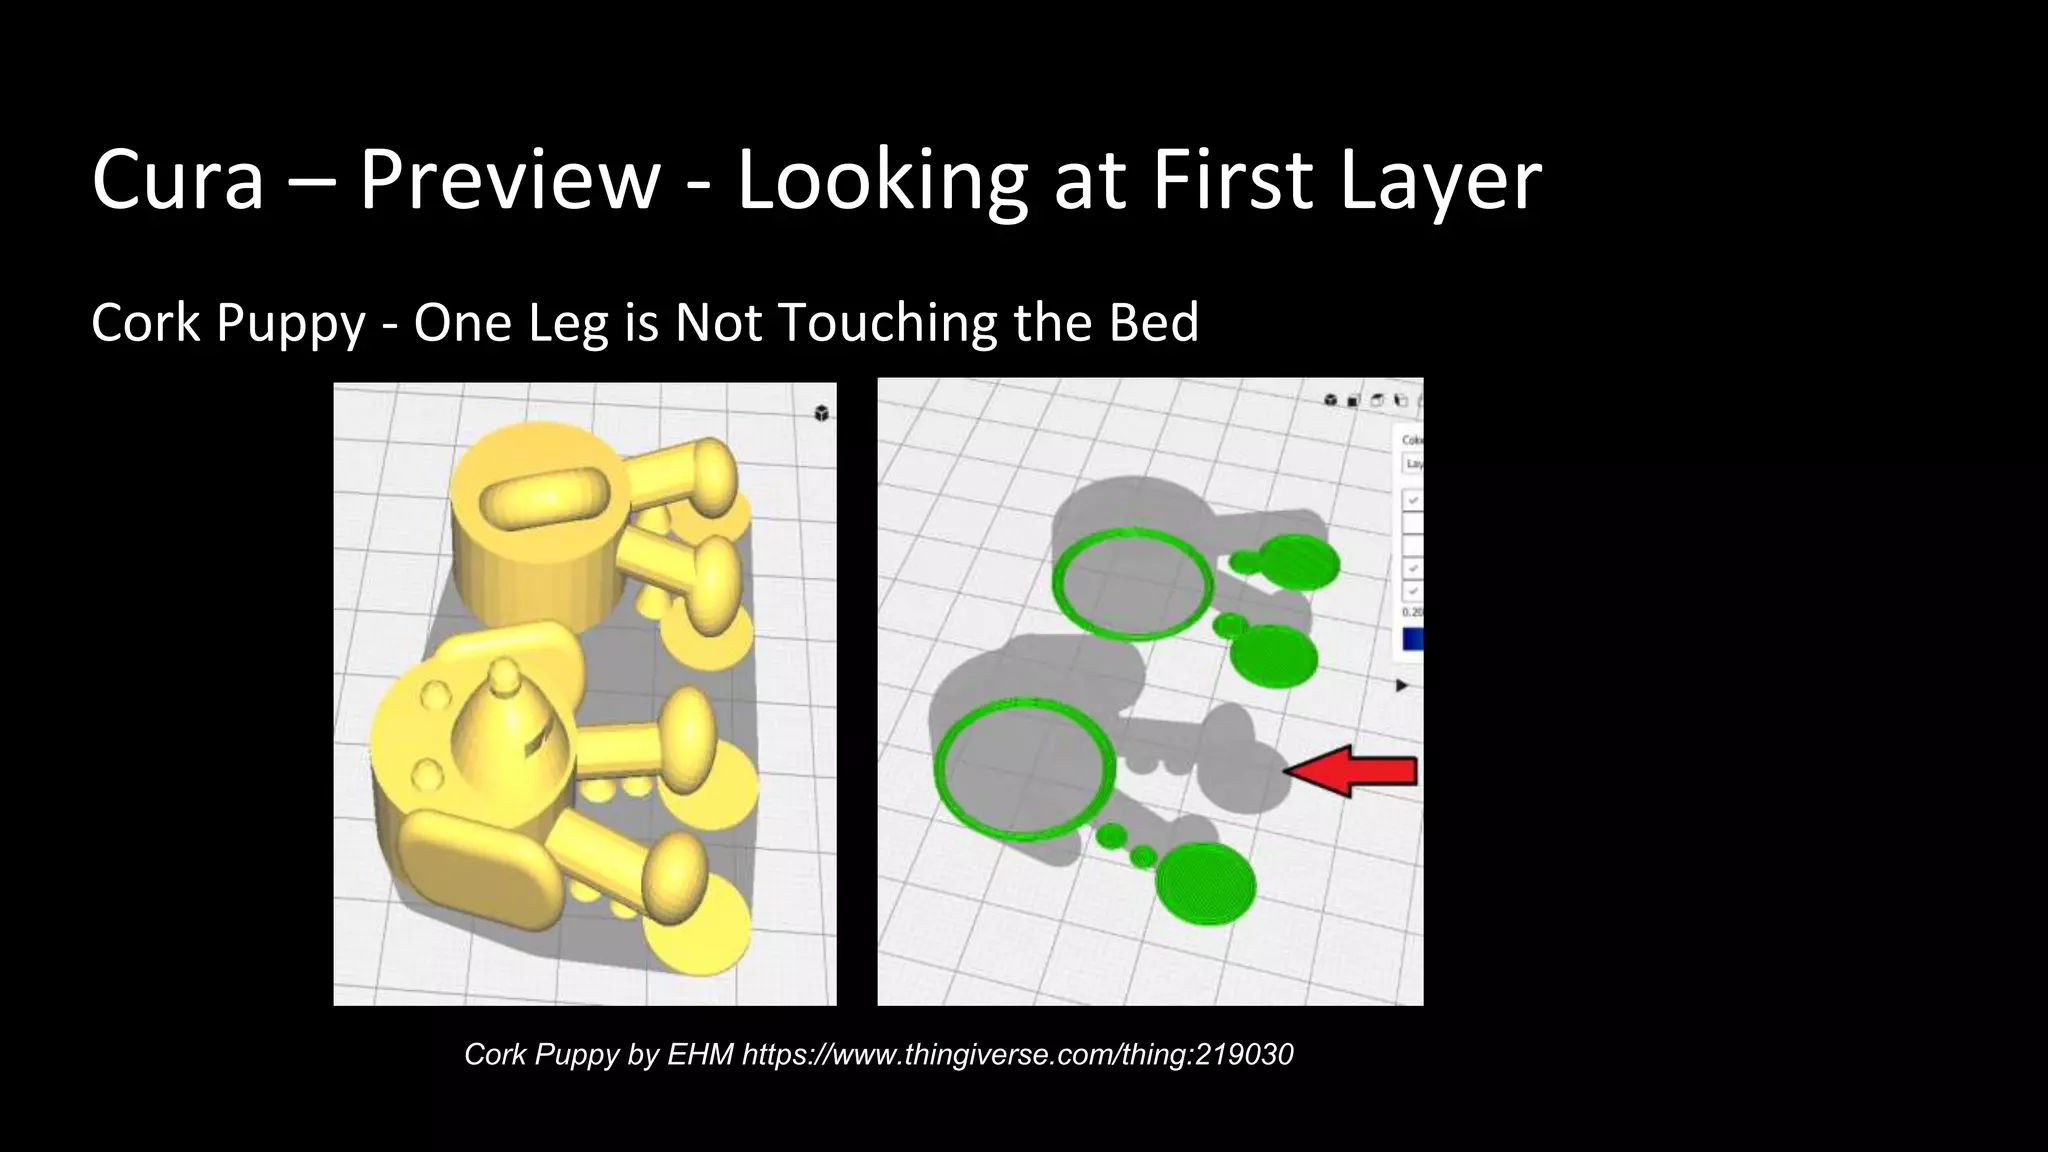
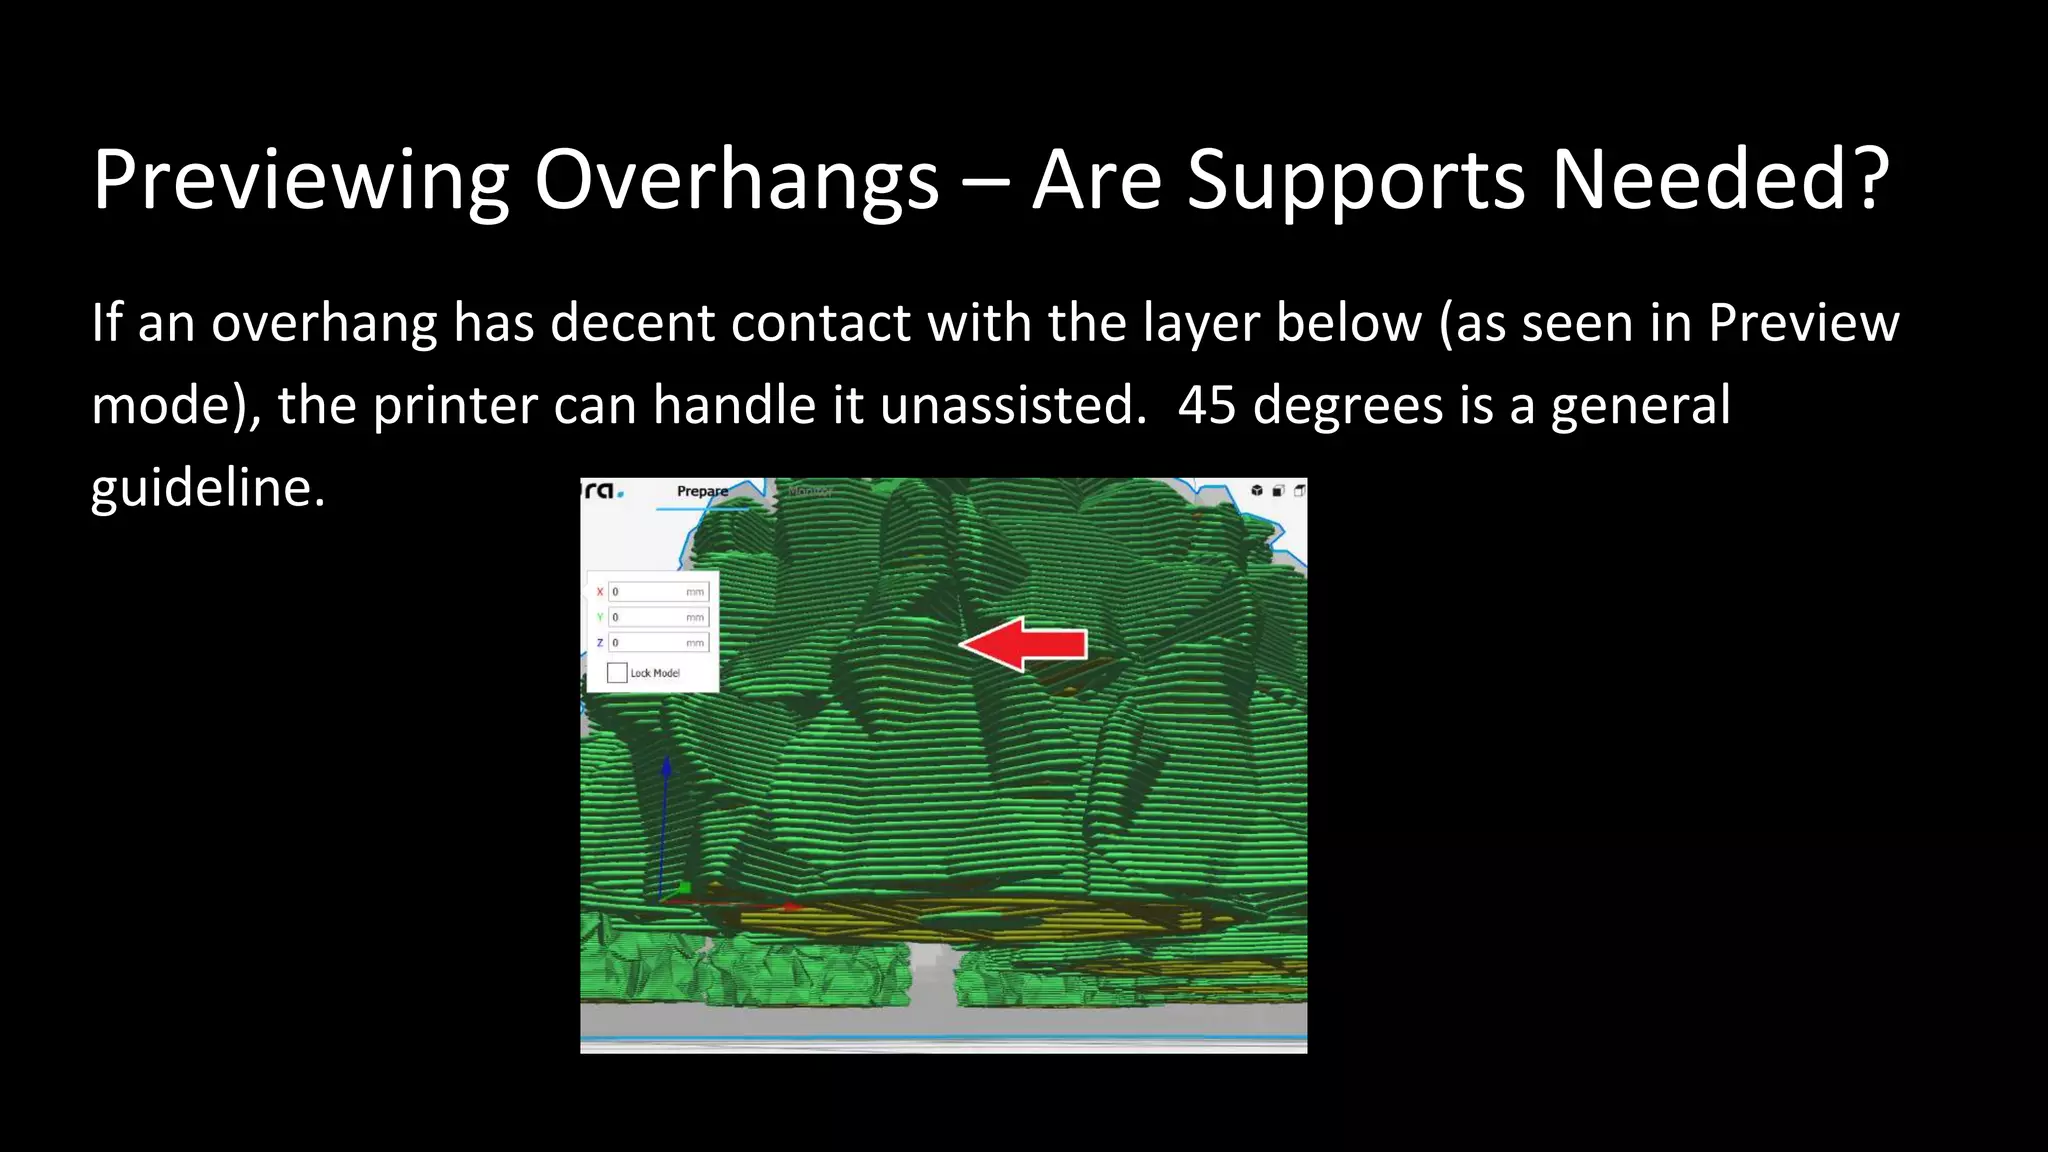
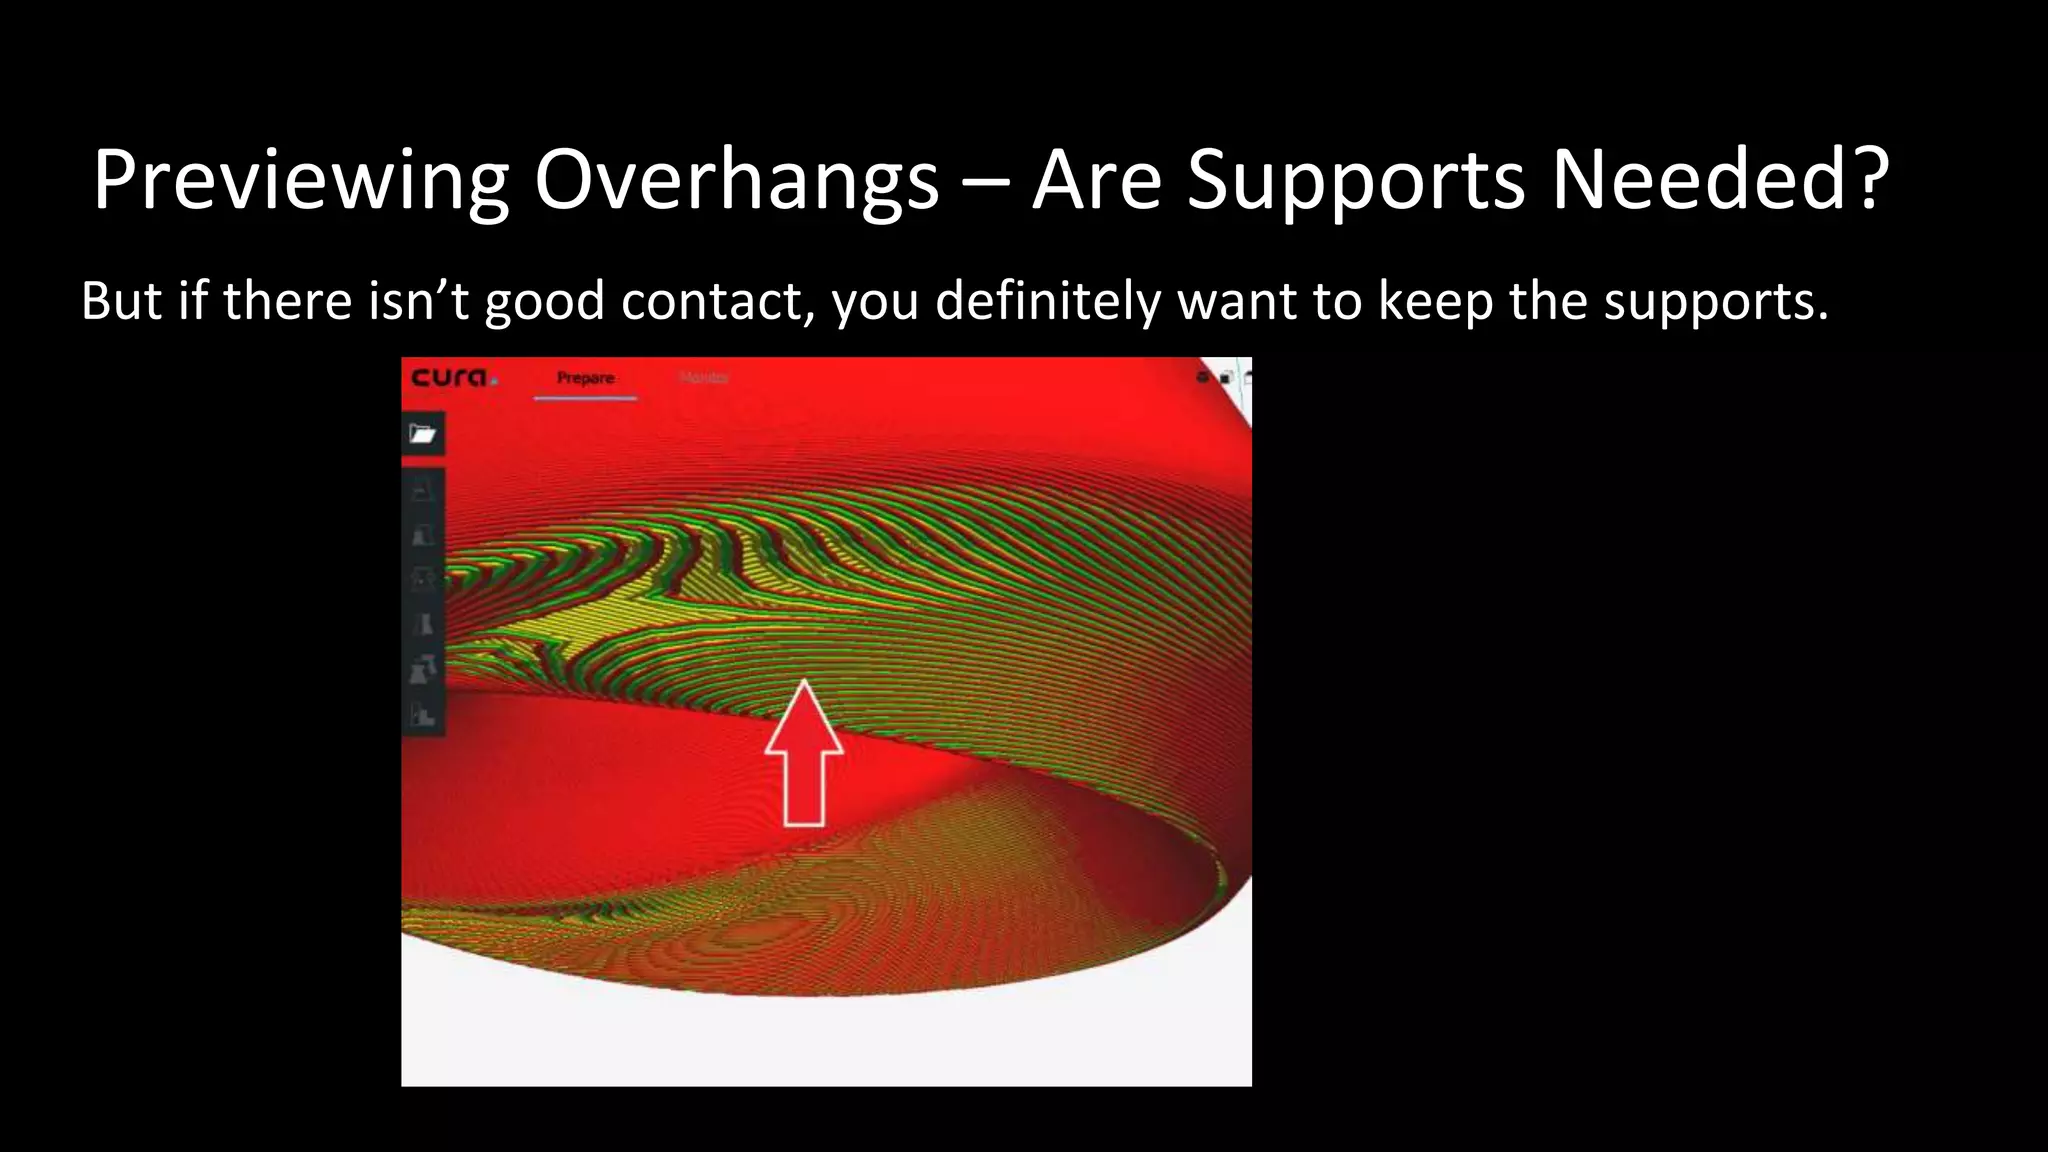
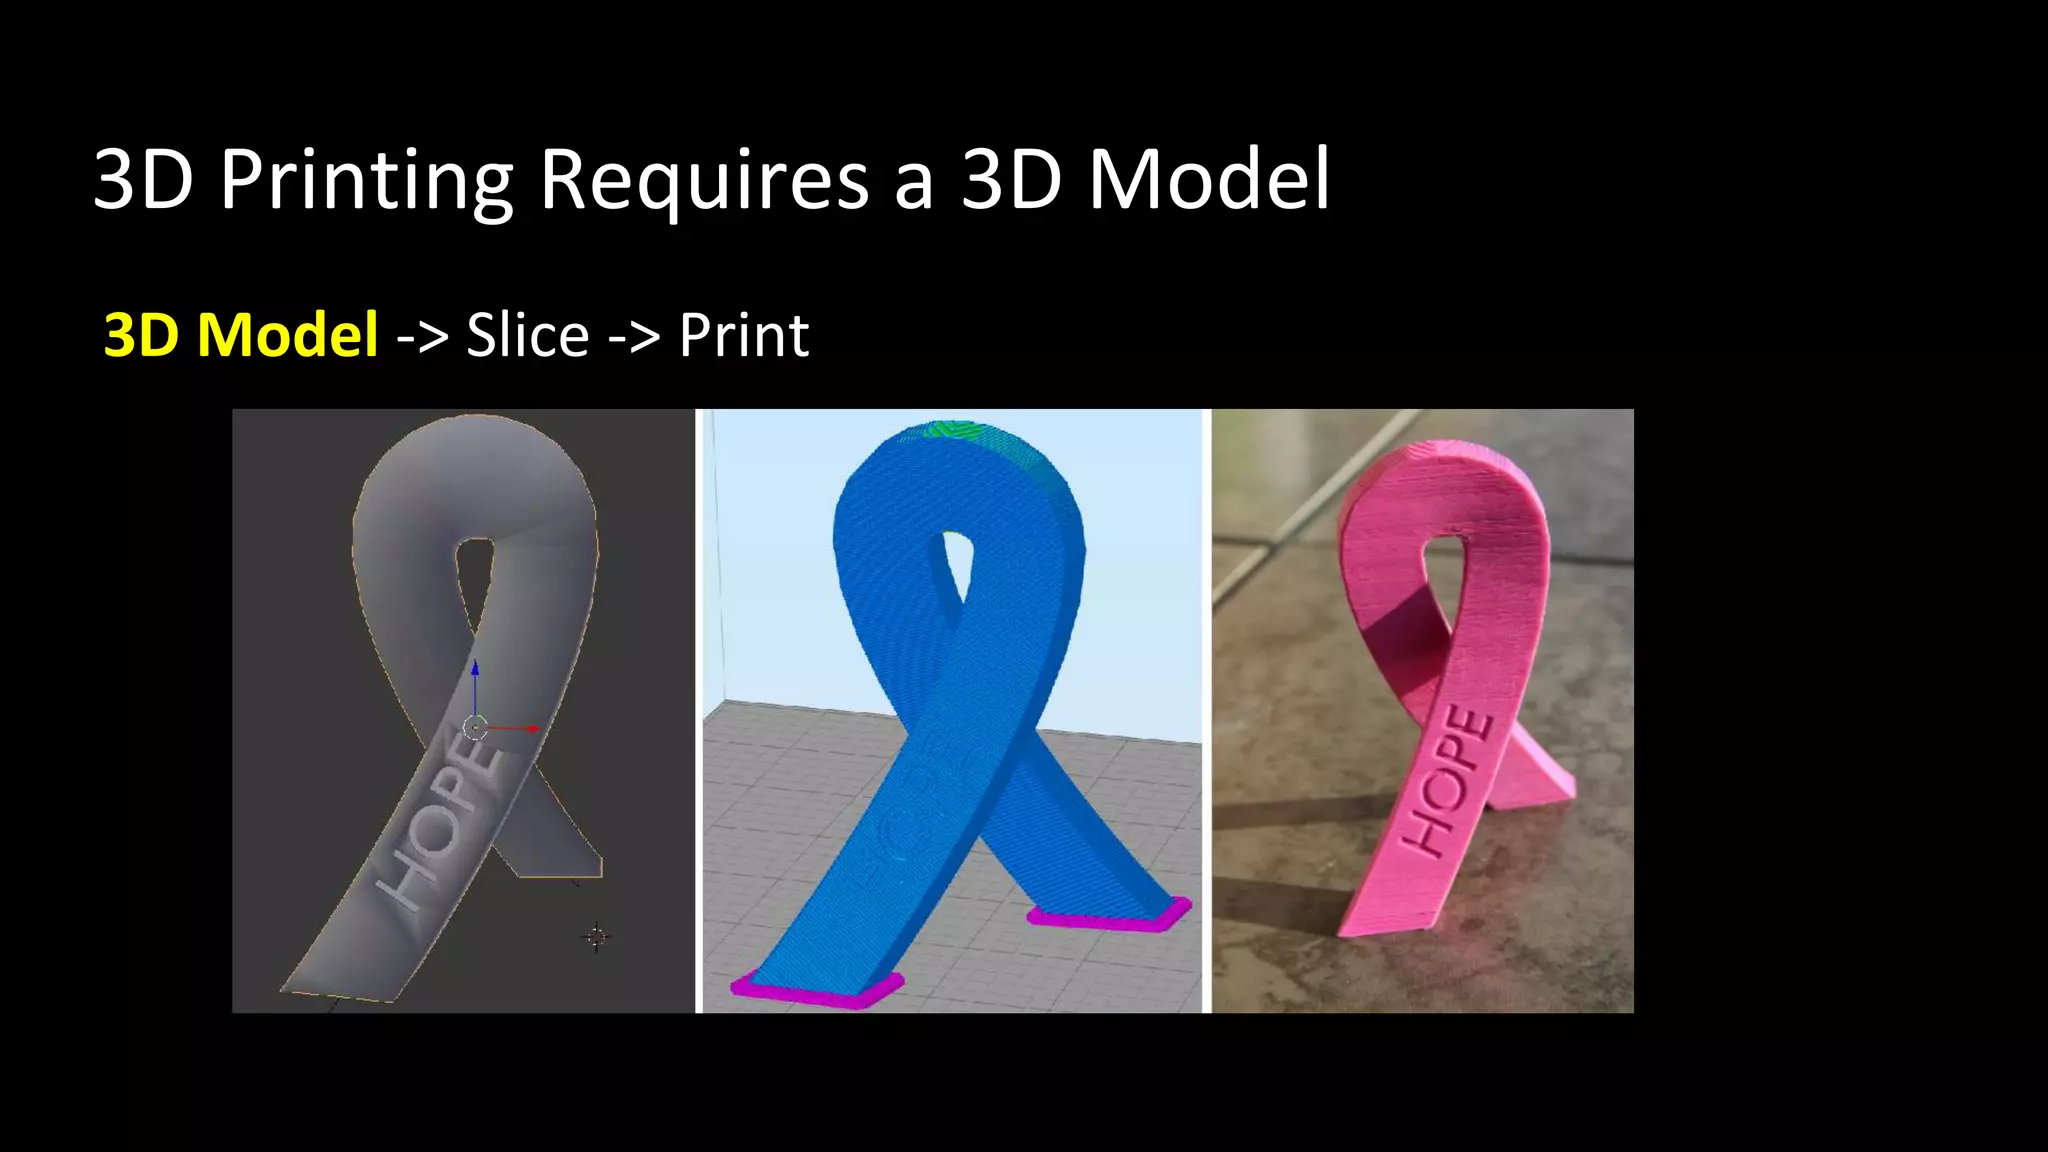
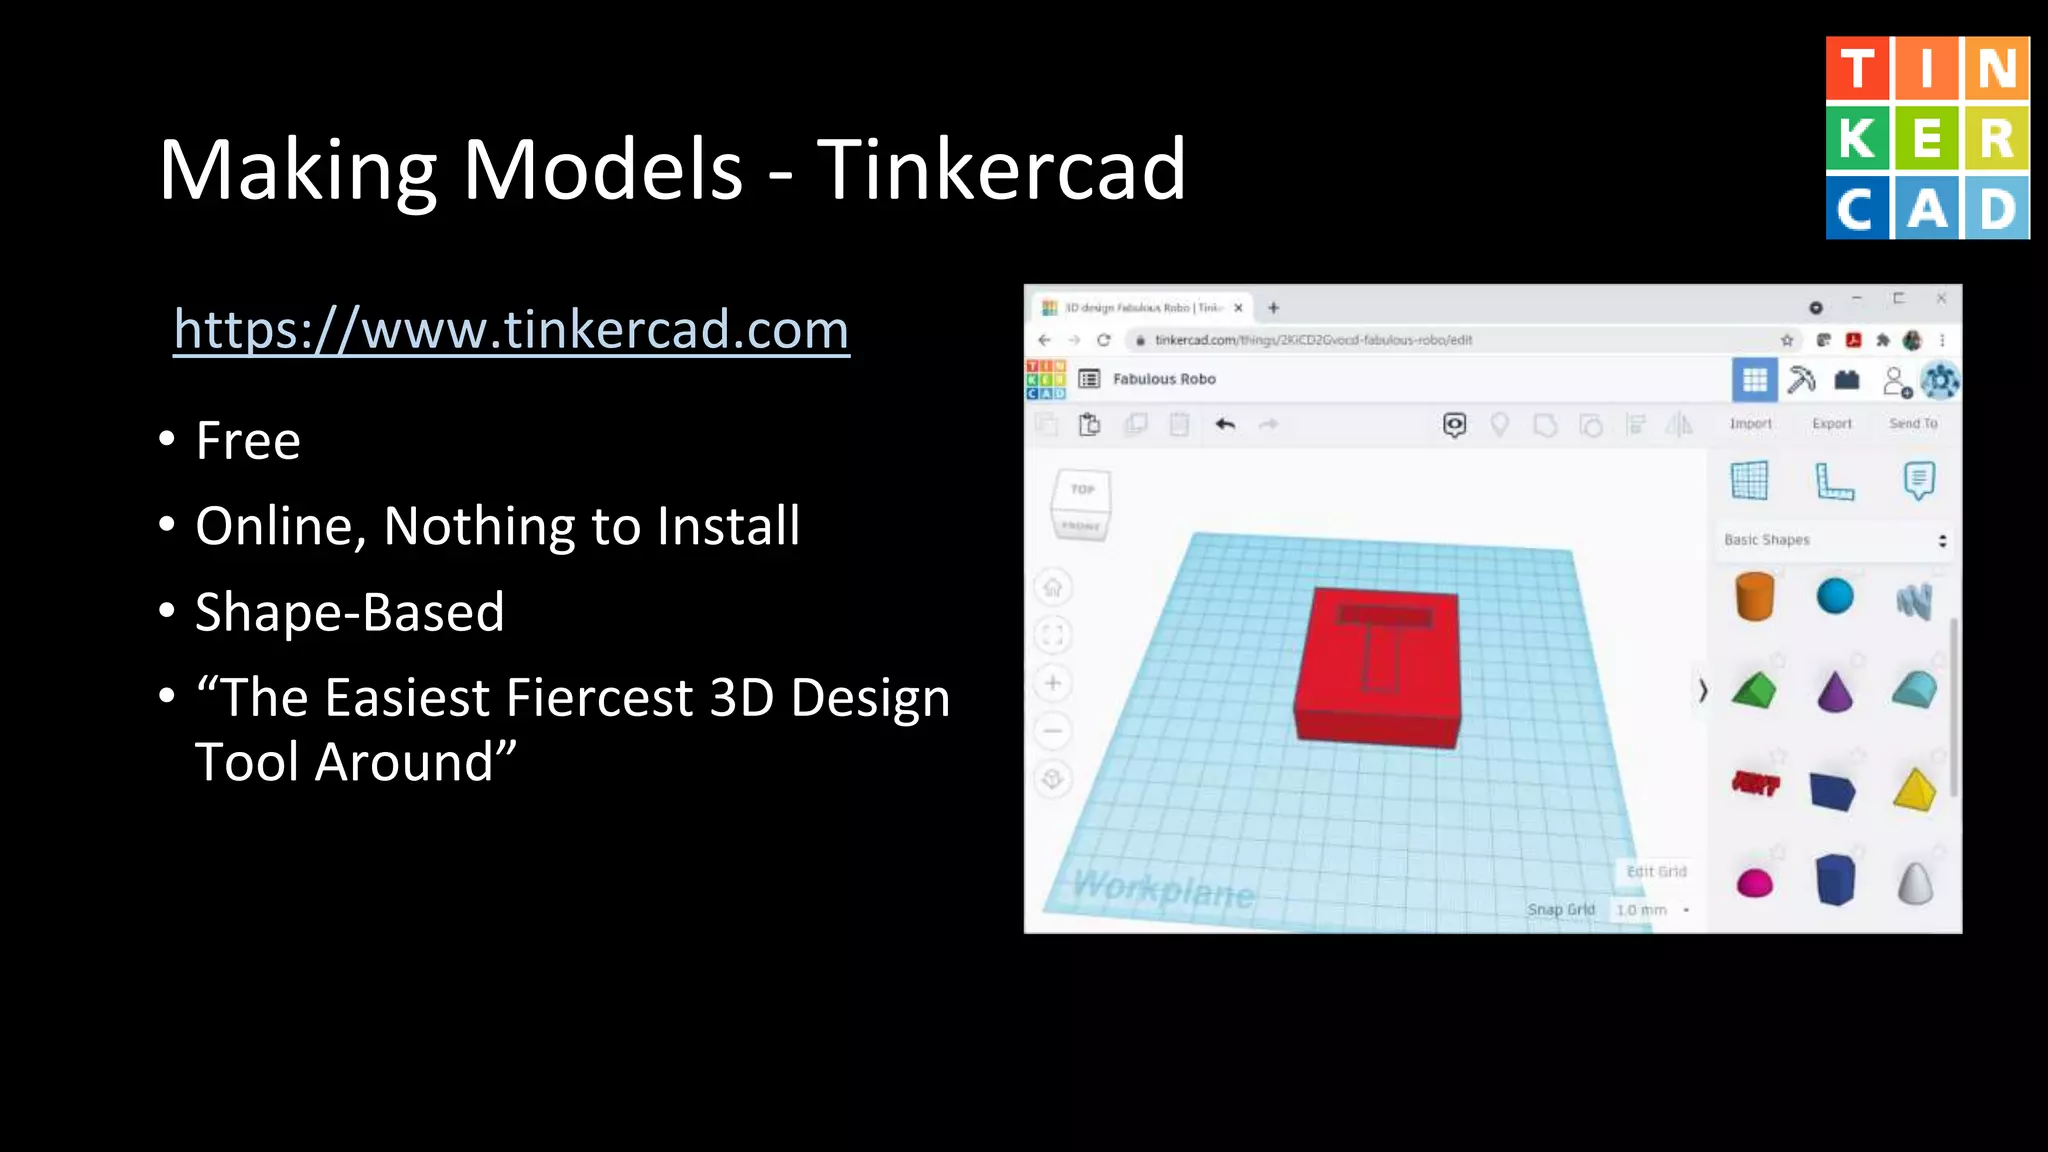
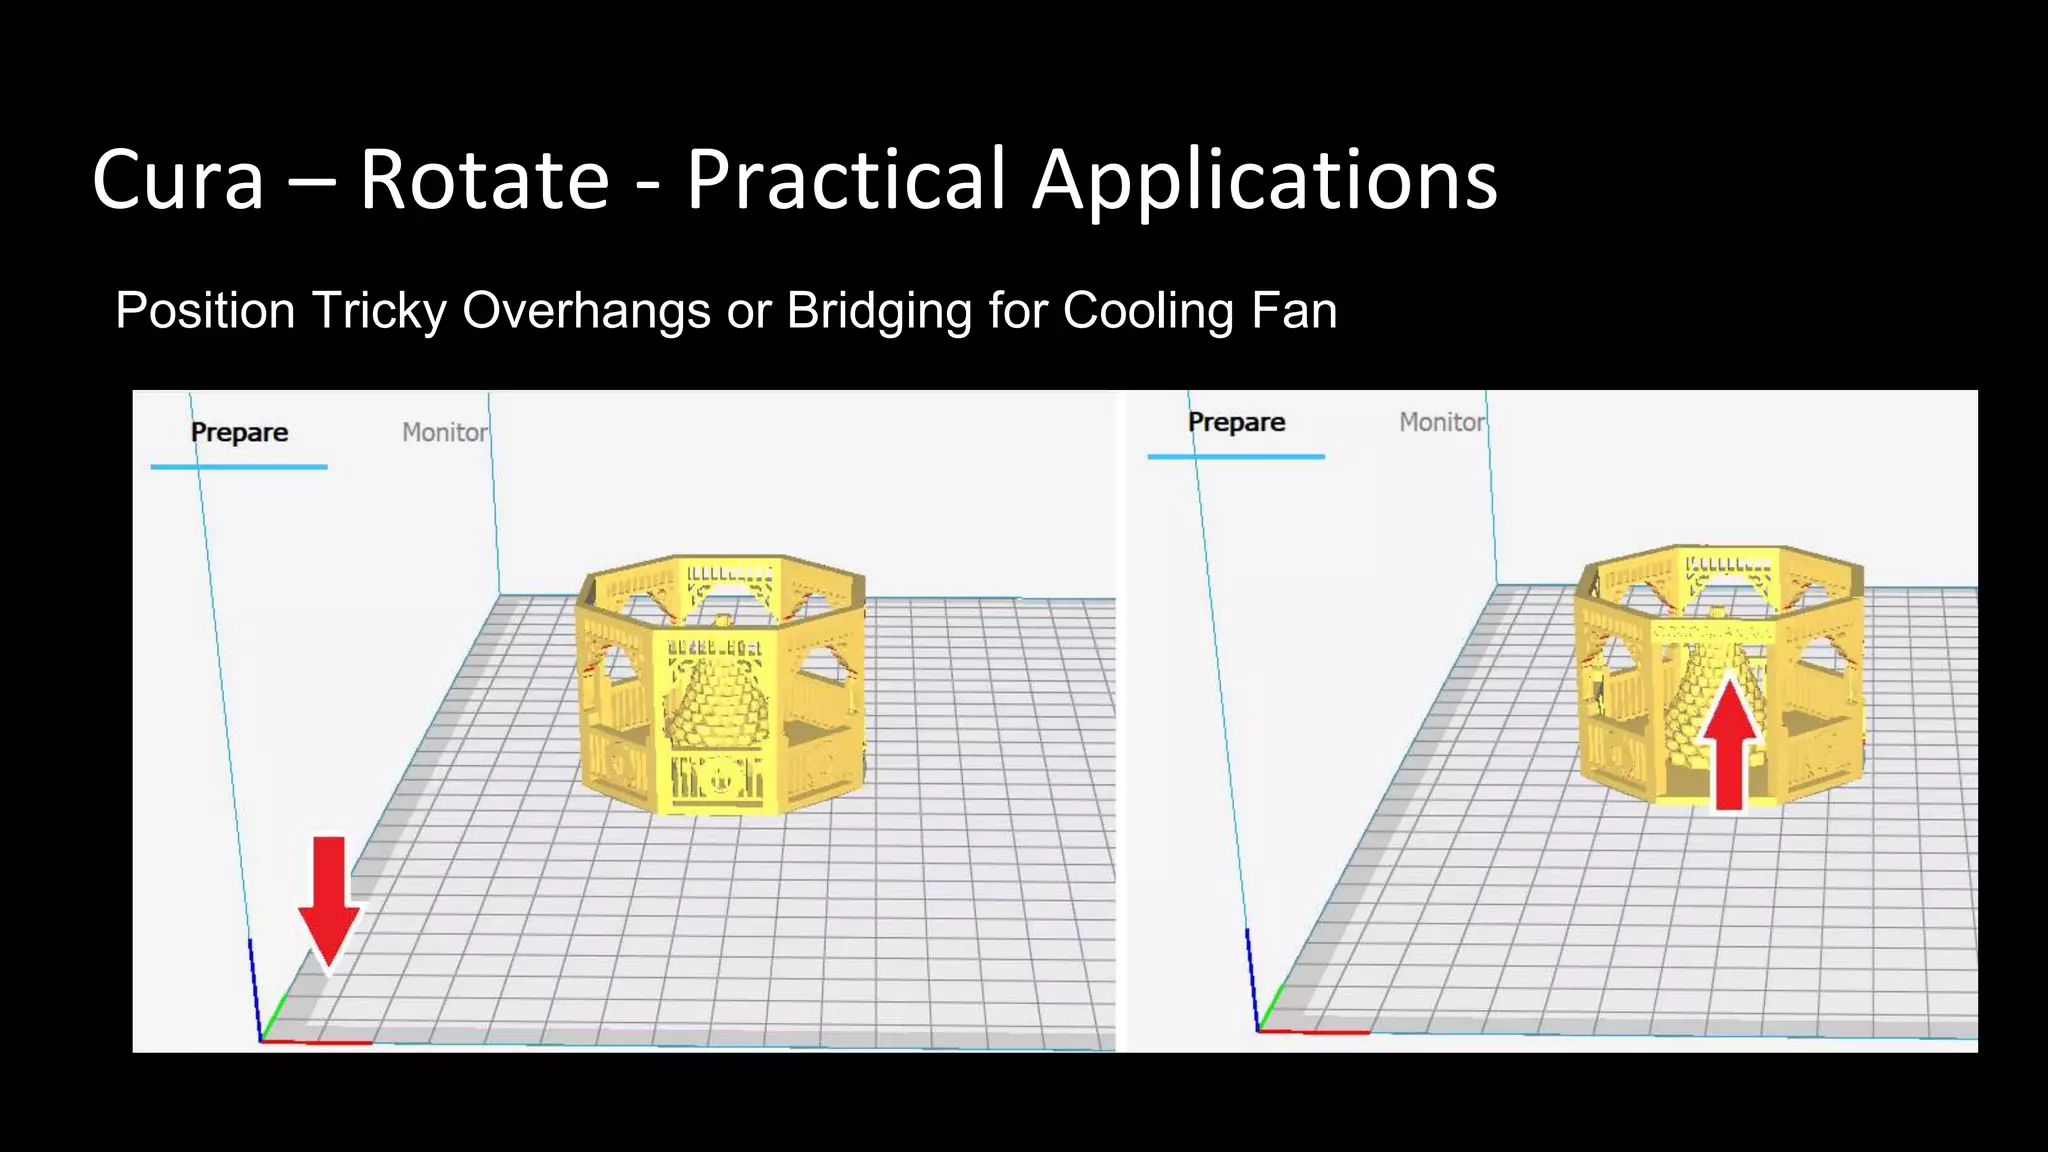
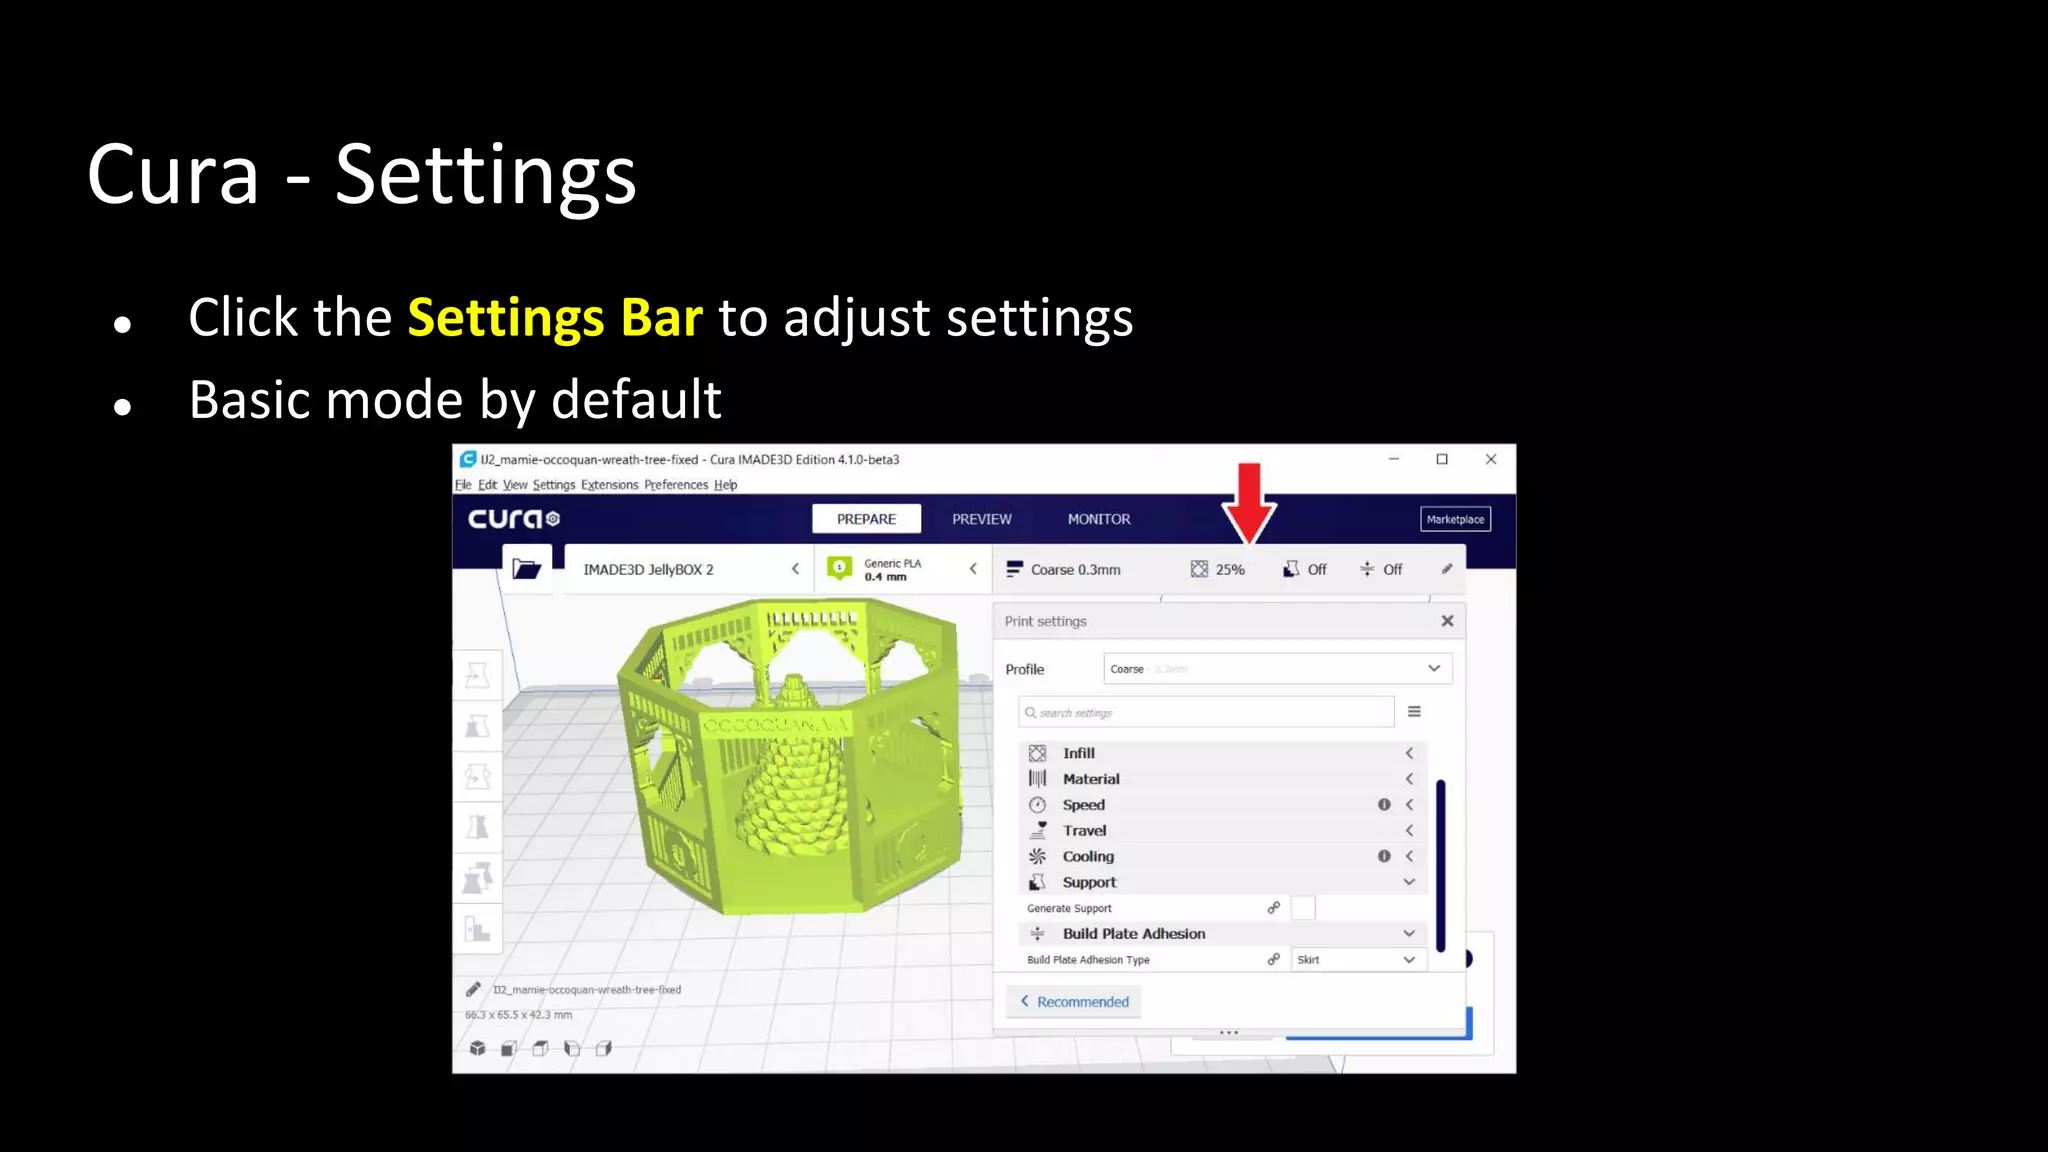
This document provides an overview of the 3D printing process from modeling to printing. It discusses using Tinkercad to model basic 3D objects from shapes and then import them into Cura for slicing. In Cura, the model can be scaled, rotated, and positioned on the print bed. The document highlights practical applications of these tools like fitting multiple objects on the print bed or orienting parts to minimize supports.


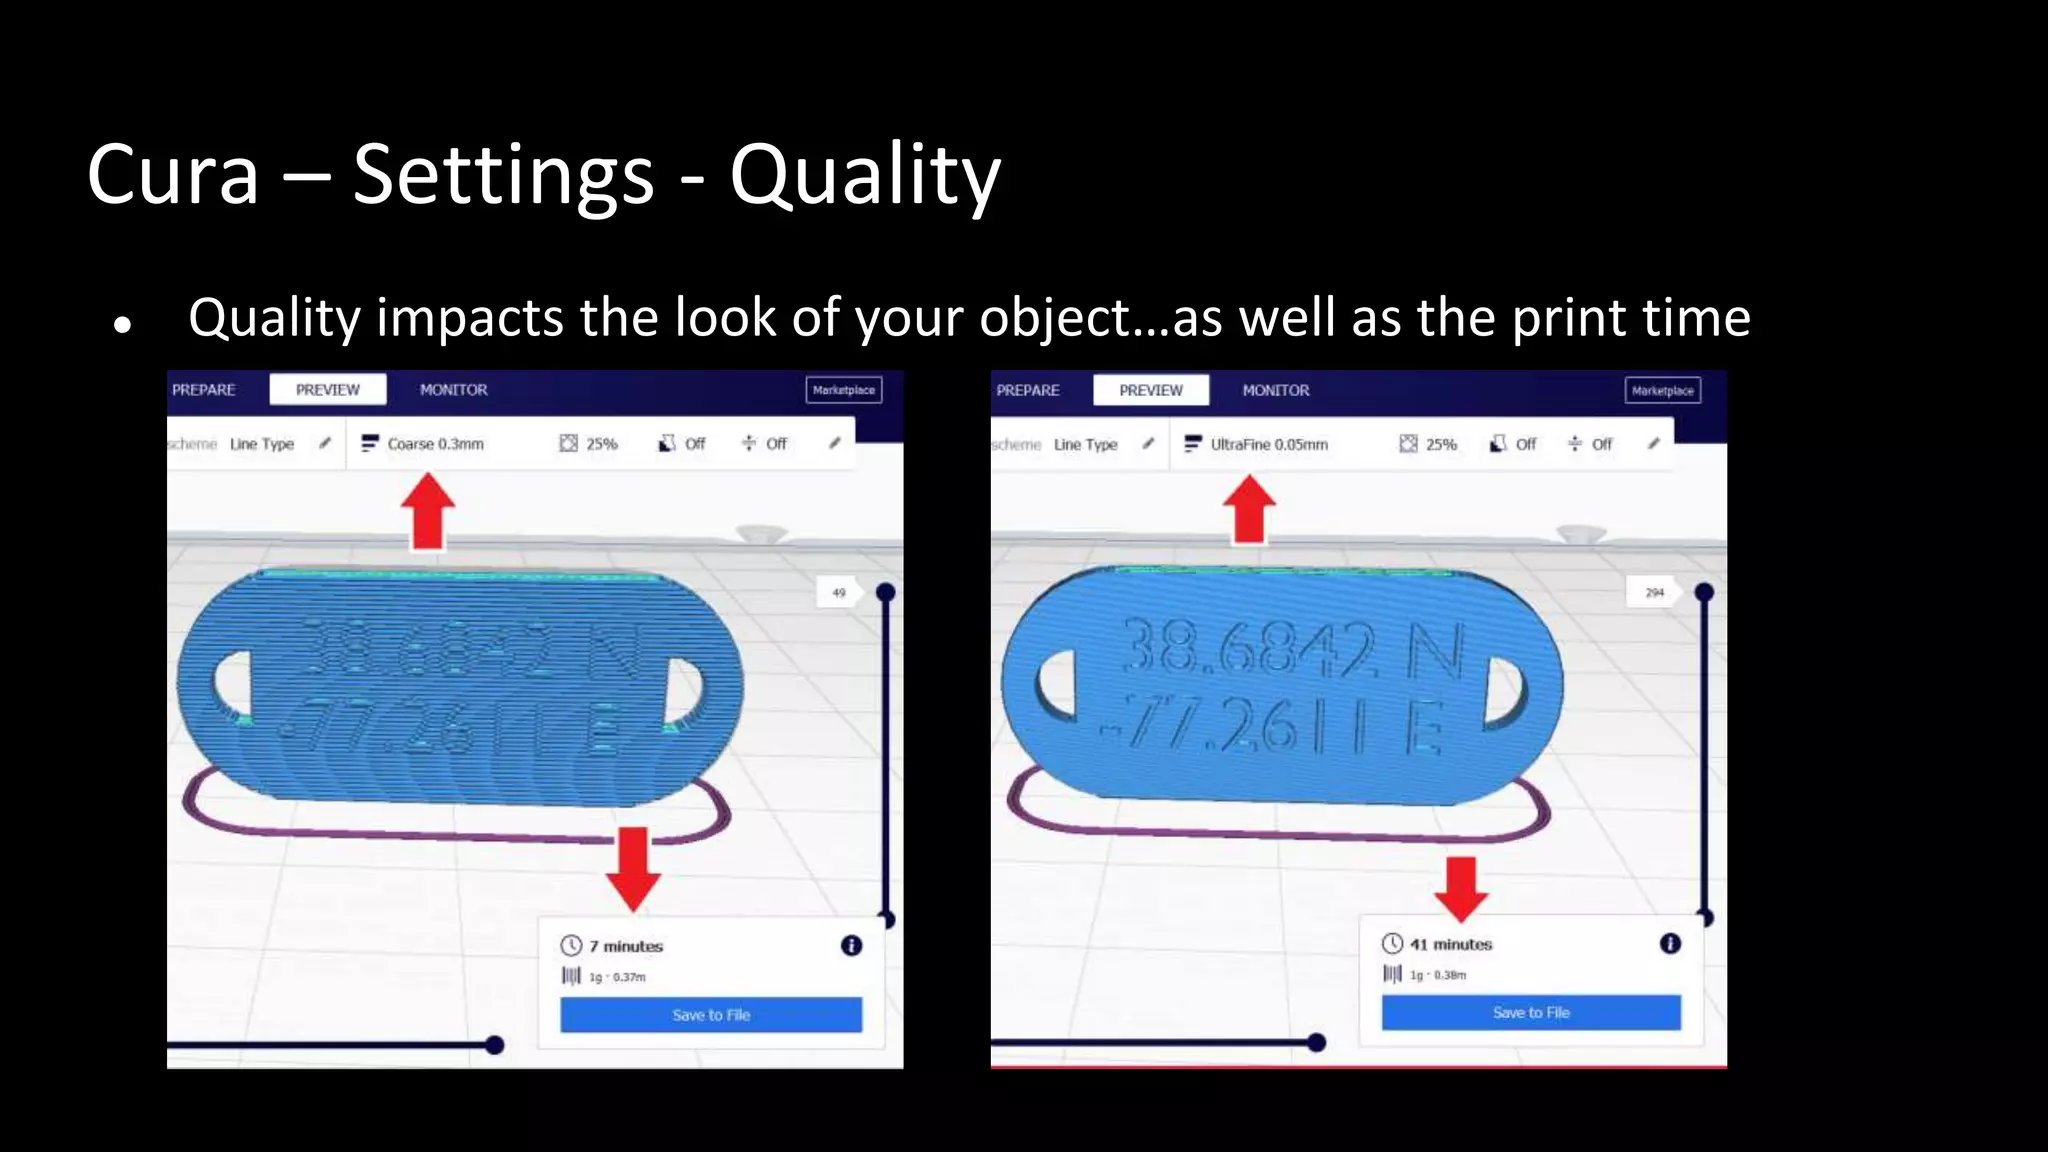
![Cura – Settings - Infill
● The inside of the prints aren’t [usually] solid
● The patterns inside are called infill](https://image.slidesharecdn.com/fcpl2021-210927152240/75/3D-Printing-Tinkercad-Cura-71-2048.jpg)