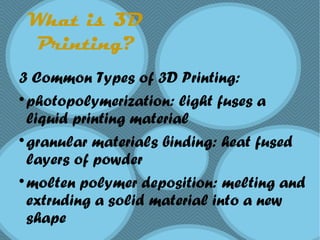
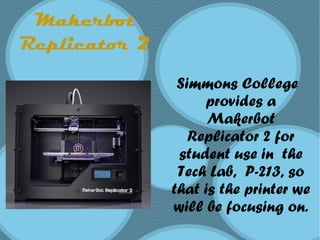
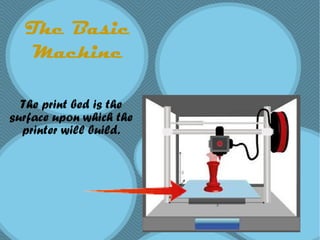
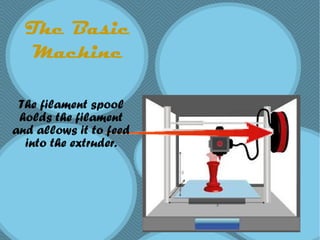
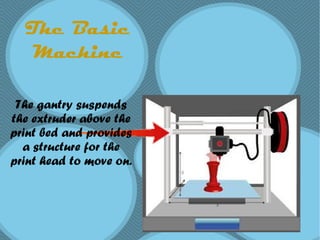
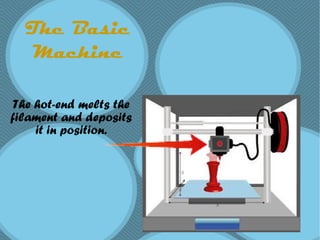
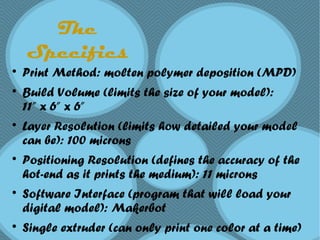
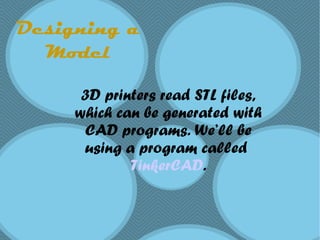
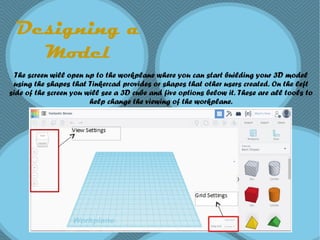
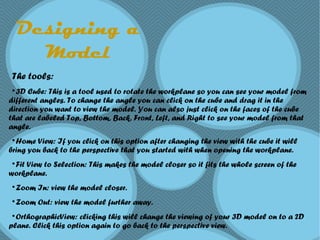
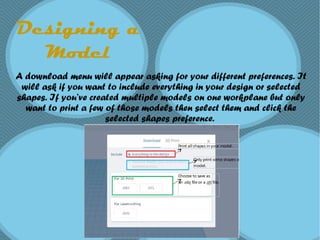
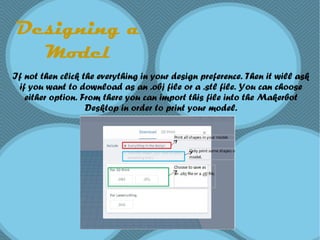
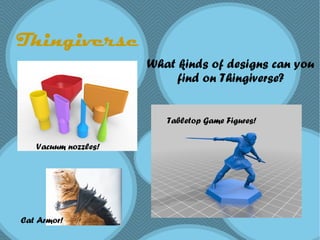
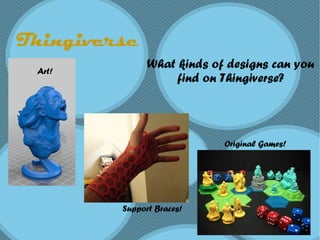
2. What is 3D
Printing?
3D printing is a process of
additive manufacturing or
making parts by fusing
material together.
3. What is 3D
Printing?
The printer lays down the
printing medium in thin layers,
fusing them until it achieves
the desired solid form.
4. What is 3D
Printing?
3 Common Types of 3D Printing:
photopolymerization: light fuses a
liquid printing material
granular materials binding: heat fused
layers of powder
molten polymer deposition: melting and
extruding a solid material into a new
shape
5. What is 3D
Printing?
The printing medium is usually
a type of plastic, but can be one
of many materials as diverse
as metal and chocolate!
6. Why 3D
Printing?
3D printing provides a reasonably
inexpensive and quick way to
manufacture projects. Inventors can
easily make prototypes and distribute
designs with 3D printing technology
and students can get tangible results
while learning computer aided design
(CAD).
15. The
Specifics
Print Method: molten polymer deposition (MPD)
Build Volume (limits the size of your model):
11” x 6” x 6”
Layer Resolution (limits how detailed your model
can be): 100 microns
Positioning Resolution (defines the accuracy of the
hot-end as it prints the medium): 11 microns
Software Interface (program that will load your
digital model): Makerbot
Single extruder (can only print one color at a time)
16. Designing a
Model
3D printers read STL files,
which can be generated with
CAD programs. We’ll be
using a program called
TinkerCAD.
17. Designing a
Model
3D printers read STL files, which can be
generated with CAD programs. We’ll be
using a program called TinkerCAD.
Hit the “start tinkering now” button and
create an account so you can save your
future designs. Once you create your account
you can now create a new design.
18. Designing a
Model
The screen will open up to the workplane where you can start building your 3D model
using the shapes that Tinkercad provides or shapes that other users created. On the left
side of the screen you will see a 3D cube and five options below it. These are all tools to
help change the viewing of the workplane.
19. Designing a
Model
The tools:
3D Cube: This is a tool used to rotate the workplane so you can see your model from
different angles. To change the angle you can click on the cube and drag it in the
direction you want to view the model. You can also just click on the faces of the cube
that are labeled Top, Bottom, Back, Front, Left, and Right to see your model from that
angle.
Home View: If you click on this option after changing the view with the cube it will
bring you back to the perspective that you started with when opening the workplane.
Fit View to Selection: This makes the model closer so it fits the whole screen of the
workplane.
Zoom In: view the model closer.
Zoom Out: view the model further away.
OrthographicView: clicking this will change the viewing of your 3D model on to a 2D
plane. Click this option again to go back to the perspective view.
21. Designing a
Model
At the bottom of the screen there is another setting that allows you to edit
the grid of the workplane. You can change the dimensions to make the size
compatible with the type of 3D printer you are using by clicking the name
of that printer and the dimensions will change to fit that printer.
22. Designing a
Model
On the right of the screen is where you will find all of the shapes that you
can use to create a model. Click the drop down menu to search through
the different types of shapes that Tinkercad provides. You can also find
shapes created by other users by clicking on “Featured Shape Generators”
or “Community Shape Generators”.
23. Designing a
Model
When you find the shape that you want to use all you have to do is drag
that shape into the workplane and it will appear. From there you can
change the look of the shape either by using editing menu or by dragging
the corners of the shape to change the height, length, or width.
24. Designing a
Model
Using the arrows that appear when the shape is selected will tilt the
shape by however many degrees you change it to. If you want to lift the
shape off the workplane in order to stack it on top of another part of your
model then you click on the cone at the top of the shape and drag it up or
down. If you want to move the shape across the workplane then you click
on the shape and drag it where you want it to go.
25. Designing a
Model
In order for the hole to be created you need to group the two shapes
together. To do this select the shape of the model then hold the shift key
and select the shape of the hole. Then at the top menu of the screen find
the group option (or press Ctrl + G). Once the two are grouped together the
hole should appear in the model.
26. Designing a
Model
You also need to group shapes together when attaching multiple shapes
to create one model. For example, if you were creating a 3D model of a
stack of blocks you would take 3 cube shapes and stack them on top of
one another, then you would group those shapes together so they would
be attached when you printed the model.
27. Designing a
Model
When you have finished creating your model then it is time to save in a
way that is compatible for printing in a 3D Printer. First change the name
of your model. Tinkercad automatically gives your model a name at the
top of the screen so click this and change it to a name that you want.
After that click the Export button at the top right of the screen.
28. Designing a
Model
A download menu will appear asking for your different preferences. It
will ask if you want to include everything in your design or selected
shapes. If you’ve created multiple models on one workplane but only
want to print a few of those models then select them and click the
selected shapes preference.
29. Designing a
Model
If not then click the everything in your design preference. Then it will ask
if you want to download as an .obj file or a .stl file. You can choose
either option. From there you can import this file into the Makerbot
Desktop in order to print your model.
30. Thingiverse
Thingiverse is an awesome option of you
don’t want to design your own digital
model. It houses countless designs, most of
which are free to download, or even modify,
under Creative Commons licensing. You can
also upload your own designs.
31. Thingiverse
What kinds of designs can you
find on Thingiverse?
Vacuum nozzles!
Tabletop Game Figures!
Cat Armor!
33. Thingiverse
What kinds of designs can you
find on Thingiverse?
Click here for info on Team UnLimbited,
an awesome group that 3D prints
prosthetic limbs for kids!
Prostheses!
34. Costs
3D printers come in an array of different costs
depending on the type of model. The smallest 3D
printer created by Makerbot is called the Replicator
Mini+ and it costs $1299. While the desktop 3D
printer called the Replicator + costs $2499 and the
large printer called Replicator z18 costs $6499. There
are also other components of 3D printers that need to
be considered when thinking of the cost. The colored
filament used to create 3D models can cost $18 each
for one small spool of one color or $48 for a large
spool. You can also get packs of colors at $160 for
small spools and $430 for large spools.
35. 3D Printing
in Libraries
3D printers are relevant to libraries because they have
become one of the common technologies provided in
makerspaces. The goal of a library is to provide the
public with educational and informational resources
in order to learn and create. 3D printers are one of
these educational resources. Therefore it is important
for information professionals to learn to use this
kind of technology in order to help patrons with their
educational needs.
36. 3D Printing
at Simmons
The MakerBot in P-213 is available on a first-come-
first-serve basis during the Tech Lab’s open hours
Users must stay in the lab while printing
There is no cost and materials are included
20 filament colors are available, including 2 glow-
in-the-dark colors