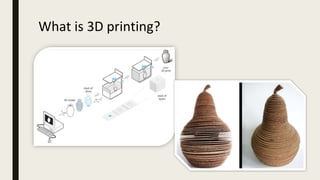
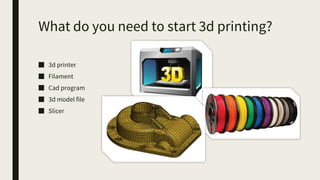
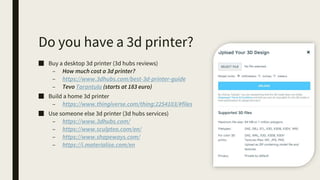
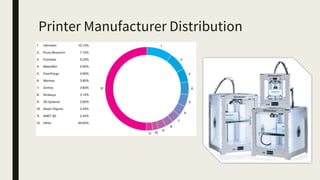
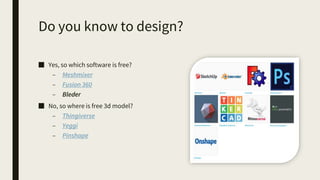
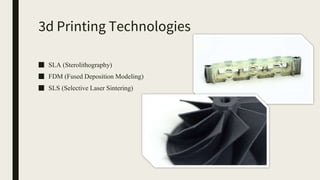
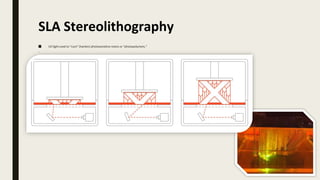
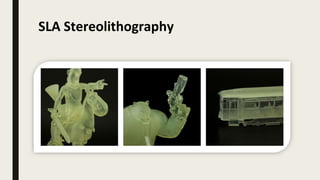
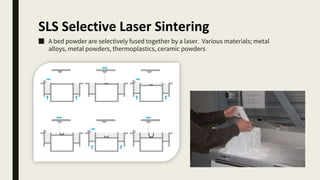
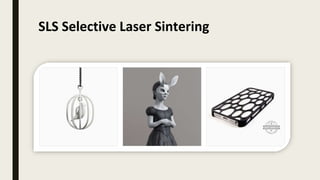
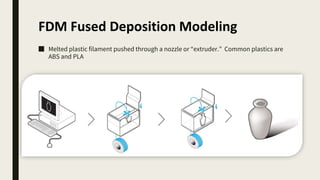
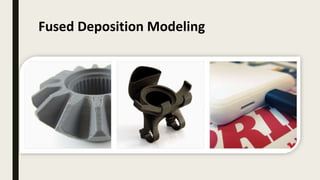
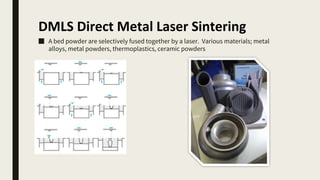
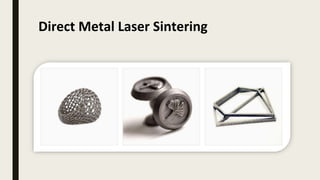
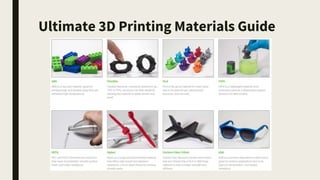
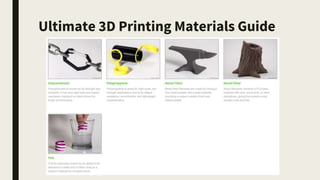
3D printing involves using computer-controlled layering to create 3D objects from digital files. The most common technologies are Fused Deposition Modeling (FDM), Stereolithography (SLA), and Selective Laser Sintering (SLS). To get started with 3D printing, you need a 3D printer, filament or resin, a CAD program, 3D model files, and a slicer program to prepare files for printing. Popular desktop 3D printers start around $183, or you can access printers through services like 3D Hubs. Common materials include PLA, ABS, and resins for SLA printers.
2. What is 3d printing?
■ Is the process used to create a three-dimensional object from digital file.
■ Every layer of material is formed under computer control, to create an object.
Objects can be of any shape or geometry
■ Also known as additive manufacturing (AM)
5. What do you need to start 3d printing?
■ 3d printer
■ Filament
■ Cad program
■ 3d model file
■ Slicer
6. Do you have a 3d printer?
■ Buy a desktop 3d printer (3d hubs reviews)
– How much cost a 3d printer?
– https://www.3dhubs.com/best-3d-printer-guide
– Tevo Tarantula (starts at 183 euro)
■ Build a home 3d printer
– https://www.thingiverse.com/thing:2254103/#files
■ Use someone else 3d printer (3d hubs services)
– https://www.3dhubs.com/
– https://www.sculpteo.com/en/
– https://www.shapeways.com/
– https://i.materialise.com/en
9. Do you know to design?
■ Yes, so which software is free?
– Meshmixer
– Fusion 360
– Bleder
■ No, so where is free 3d model?
– Thingiverse
– Yeggi
– Pinshape
11. Most Used Technologies
The most popular technology continues to be FDM with 68% market share, it’s still the most
affordable way to get the first prototype in your hands
16. SLS Selective Laser Sintering
■ A bed powder are selectively fused together by a laser. Various materials; metal
alloys, metal powders, thermoplastics, ceramic powders
20. DMLS Direct Metal Laser Sintering
■ A bed powder are selectively fused together by a laser. Various materials; metal
alloys, metal powders, thermoplastics, ceramic powders
22. Let’s see deeper a FDM 3d printer
■ Frame
■ Extruder
■ Linear bearings &
guides
■ Belts
■ Heated bead
■ Corners, screws, nuts
■ Control Board
■ Screen
■ Hot end
■ Power supply
■ End stops
■ Cooling fun
■ Stepper motors
■ Cables
23. Typologies of FDM 3d printers
■ Cartesian
– Prusa i3
– Corexy
■ Delta
■ Polar
■ Robotic Arms
24. Extruder types
■ Direct
– is an extruder where the hot and cold end are attached directly to one another
– 3D print head is large and heavy
– Better responsiveness
■ Bowden
– The extruder simply moves the cold end mounted directly to the frame
– More precise positioning (less moment of inertia)
– Can’t print flex materials
– Faster movement
41. Configuration
■ Auto-Configure for Material:
– Adjusts temperature
– Extrusion
– Cooling
– settings based on the material
■ Auto-Configure for Print Quality:
– Adjusts layer height
– infill density
42. Extruder tub
■ Extrusion Multiplier: The
extrusion multiplier will multiply
the amount of filament extruded
for your entire print. The default
values in the software are .90 for
PLA and 1.0 for ABS
■ Retraction Distance: How much
filament will be retracted when
the software does a retract. For
standard Direct Drive, usually .5
to 2.5 mm will work well. For
Bowden extruders, 5 to 8.5 mm
seems to work well
43. Layers tab
■ Primary Layer Height: How thick you want
each layer to be on the Z-axis
■ Top Solid Layers: The number of 100%
infill layers that will be placed at the top of
your part.
■ Bottom Solid Layers: The number of
100% infill layers that will be placed at the
bottom of your part.
■ Outline/Perimeter Shells: Outline shells
will trace the outline of your part, and
extrude at your extrusion thickness.
44. Additions tab
■ Skirts are really useful for
priming your extruder prior to
printing. Generally print with a
skirt offset of 4 mm and 2
outlines.
■ Changing the offset to 0 mm,
offers the ability to create a
"brim" that will connect to your
part and help create surface
adhesion.
45. Infill tab
■ Infill Percentage: Adjusts the
interior solidity of your 3D print.
0% is completely
hollow and 100% is completely
solid. A value in the range of 20-
50% is frequently used.
46. Support tub
■ Support structures
are used when your model has steep
overhangs or unsupported areas.
Typically, overhangs greater than 45º
48. Temperature tab
■ Per-Layer Temperature
Controls: You can edit the
temperature on a per layer
basis.
■ For ABS
■ For PLA
- Layer 1 | Fan off
- Layer 2 | Fan On 60%
49. Cooling tab
■ Per-Layer Fan Controls: You
can edit the fan speed on a per
layer basis. This is very similar
to how the temperature tab
works.
51. Others tab
■ Default Printing Speed: This is
the speed at which the Infill of
your part will be printed.
■ Outline Underspeed: For your
perimeters, you print at a
(80)% of your Default Printing
Speed.
53. Prepare to Print
■ After you have finalized your Process settings, click Prepare to Print! This will initiate two
important functions: Simplify3D will “slice” your model and transition to the review Mode.
■ “Slicing” is the term used to describe the process of converting a digital model into line-by-
line printer instructions called G-Code. The lightening-fast slicer in Simplify3D quickly
prepares G-Code based on the variables you selected in the FFF Settings window
■ The animated Preview Mode allows you to inspect all aspects of
your print operation prior to execution. The software reads the G-Code and displays line-by-
line
or layer-by-layer how your model will be constructed
58. Print Quality Troubleshooting Guide
■ And the answers is below
■ https://www.simplify3d.com/support/print-quality-troubleshooting/
59. Print Quality Troubleshooting Guide
■ Print Not Sticking to the Bed
– Build platform is not level
– Nozzle starts too far away from the bed
– First layer is printing too fast
– Temperature or cooling settings
– The build platform surface (tape, glues, and materials)
– When all else fails: Brims and Rafts
60. Print Quality Troubleshooting Guide
■ Holes and Gaps in the Top Layers
– Not enough top solid layers
– Infill percentage is too low
– Under-Extrusion
■ Layer Separation and Splitting
– Layer height is too large
– Print temperature is too low
61. Print Quality Troubleshooting Guide
■ Stringing or Oozing
– Retraction distance
– Retraction speed
– Temperature is too high
– Long movements over open spaces
– Movement Speed