SlideShare a Scribd company logo
1 of 31
DR.C.THANAVATHI 1
V.O.C. COLLEGE OF EDUCATION, THOOTHUKUDI-8.
Computer Course on
DIGITAL CLASSROOM TOOLS (DCT)
Academic Year 2021 - 2022
Unit 1
MS WORD (5 hours)
Page setup-Menu bars-Opening a new document-Opening an already existing
document-Saving the document-Formatting documents-Printing-Views-Preview-Undo-
Repeat-Formatting fonts (size, style and color)-Paragraph alignments (left, right, center,
justify)-Spacing-Borders and shading-Bullets and Numbering-Headers and Footers- Cut,
Copy, paste options-tabs-Clipboard-Find, replace-Thesaurus-Indents and special indents- Mail
Merge- Change case-Text effects- Clipart-Creating tables-Word art-Hyperlinks.
Microsoft Word 2007 Basics
Microsoft Word 2007 has a completely redesigned user interface. The standard menus along
the top have been removed and replaced with a series of toolbars Microsoft calls “The Ribbon.”
These tool bars are changed using tabs at the top and try to automatically adjust themselves to
the content we are working with. If we select an image it will automatically switch to the
picture tools. The new layout seems to offer easier access to most of the features of Word
allowing for more complex documents to be created quicker.
The Office Logo
The first thing most people will need to relearn is where to go to open
a document, create a new one, save our document and print. Clicking
the Office logo at the top left of the screen will provide most of the
items formerly found under the file menu including those listed above.
Beside the logo we also will find a disk icon to save our document as
well as the undo and redo buttons. More buttons can be added to this
“Quick Access Toolbar” through the word options mentioned in the
next section.
DR.C.THANAVATHI 2
As we can see here the Office logo opens up
listing our options for new, open etc. and also
contains a list of our recent documents for
quick opening. Any of the items listed with
an arrow beside them will replace the recent
documents on the right with the options
associated with the menu item. We should
also see at the bottom right of this menu a
button for exiting Word and changing
Word’s options.
Save as
The save as option will provide we with the
most common file formats to save our
document in. The common ones are Word
Document, Word Template, and Word 97-
2003 document. The last one is the option
most people should be using currently, especially if they wish to share documents with others
who do not have the new version of Office.
Print
Here we can choose from Print, Quick Print and Print Preview. Print brings up the standard
print dialog box, quick print will print one copy without any dialog box coming up and print
preview will bring up the print preview screen.
Prepare
The prepare menu’s most common options are Properties, Inspect Document, Mark as Final
and Run Compatibility Checker. The properties option allows we to setup metadata for the
document like Author, Title, keywords, comments and others. Inspect Document will scan the
document for any hidden data like comments and annotations, and any hidden collaboration
data. This is very useful when making a previously private document public. It will help we
find any comments or changes made previously that should not be made public. Mark as Final
will mark the document as a final copy and make it read only so changes cannot be made. The
last common item, Run Compatibility Checker will scan the document for new features that
were used and show we these. This is recommended if we where creating a document in the
new file format but now need to convert it back to the Office 2003 format to share with someone
who does not have Office 2007.
DR.C.THANAVATHI 3
The Home Tab
The home tab the basic formatting tools found in Word 2007. We will find five sections,
Clipboard, Font, Paragraph, Styles and Editing. Clicking the down arrow beside any of the
icons here will drop down more options for that tool. Each section also contains an arrow in
the bottom right corner which will open a window containing the options found in that section.
Clipboard
The Clipboard allows we to cut, copy, paste and copy formatting from one
place to another.
Font
The font section of the ribbon provides a section to
handle the basic text formatting. Items such as bold,
underline, strikethrough, highlight and font type can
be changed here. Some items from this section and
some items from the paragraph section are also
available by highlighting text and moving our cursor
slightly above the highlighted text. This saves
having to move our cursor all the way to the top of
the screen for some common formatting items.
Paragraph
The paragraph section provides icons for bullets, lists,
justify, line spacing, indents and borders.
Styles
The styles section allows we to quickly
change the formatting of a section of
text by choosing one of the predefined
styles. We can also create a new style based on the formatting of our selected text for use later
in other sections of our document.
DR.C.THANAVATHI 4
Editing
The Editing section of the toolbar allows we to find, replace and select items.
The select option gives we the ability to select all, select objects or select text
with similar formatting. This last option gives we the ability to quickly change
everything in our document with one style to another style without having to
manually find all of that text and change each area separately.
Insert Tab
The insert tab has seven sections for inserting most types of objects. The sections are pages,
tables, illustrations, links, header and footer, text and symbols.
Pages
The pages’ section is where we can go to insert a cover page, blank page or
page break. The cover page drops down offers a selection of predefined
cover pages for our document that have sections for title, date and author.
We can also select text in our document and choose to save the selected text
to the cover page gallery for use in future documents.
Table
The table section only has a drop down menu which offers a grid to create a new
table, insert table, draw table, convert text to table for selected text, Excel
spreadsheet, and some predefined “Quick Tables” that have formatting already
setup for we. When working on a table we will have two additional tabs along the
top of the ribbon, the design and layout tabs. There are screenshots of both directly below.
Table Design
Table Layout
DR.C.THANAVATHI 5
Illustrations
The Illustrations section allows we to insert pictures, clipart,
shapes, SmartArt and charts. After inserting or selecting a
picture we are provided with a new toolbar along the top shown here. This toolbar gives we
the ability to change the brightness, contrast, shape, position, text wrapping and other options
for the picture. Clicking off the picture or on one of the other tabs will take we back to the
standard toolbars. The Shapes option of the Illustrations section allows we to insert lines,
arrows, boxes, basic flowchart shapes and a number of others. The SmartArt option provides
features like org charts, flow charts, illustrated lists and processes. The Chart option is similar
to Word 2003 but it offers more options for our charts.
Links
The links section provides options for inserting hyperlinks, bookmarks and
cross-references. Cross-references can link to figures, tables, equations,
endnotes, footnotes, headers and numbered items.
Header & Footer
The header & footer section allows we to edit the header, footer and
page numbering for our document. Once we select this option it will
change the toolbar along the top to include a larger number of options
for the header and footer. The header bar is shown here. In order to stop editing the header
and footer we need to click the “Close Header and Footer” button on the right of the bar.
Text
Options in the text section include text box, drop cap,
WordArt and a number of predefined text blocks like a
signature line the date and time, and document properties like
DR.C.THANAVATHI 6
abstract, author, and title. There are a lot of option in here to setup on our own or we can use
Words predefined options.
Symbols
The last option in the insert toolbar is symbols. Here we can insert a large
number of special characters and symbols. Choosing the “more symbols” option
from the drop down will also allow we to setup shortcut keys for commonly used
symbols. One of the improved features of Word 2007 is the equation editor. We can now
insert more complicated mathematical and statistical equations. Here there are some standard
equations to choose from or we can create our own. Standards like (𝑥 + 𝑎)𝑛
=
∑ (𝑛
𝑘
)𝑥𝑘
𝑎𝑛−𝑘
𝑛
𝑘=0
,the binomial theorem are available or, by choosing “Insert new equation”
we will get the equation toolbar. Which gives we a large number of options to choose from
while creating our own equation. ∫ 4 + log 𝑦 ∗
Δ𝑦
Δ𝑥
tan 𝑥
+ 𝑥𝑦2
𝑥
𝑦
The equations can be edited in
the new Word 2007 file format however, once they are converted to a Word 2003 format they
will become images which cannot be edited.
Page Layout Tab
The page layout tab has five sections, Themes, Page Setup, Page Background, Paragraph, and
Arrange.
Themes
The themes section provides a quick way to format our document. By choosing
a theme we will have a set colour scheme, font combinations, and effects. We
can choose one of the provided themes, modify a provided them or create our
own. We can also go online in this section and browse Microsoft.com for
additional themes. Be aware that changing our theme after creating a document may require
we to reformat some items as themes also include some layout options.
DR.C.THANAVATHI 7
Page Setup
Page setup provides we with the tools to change
margins, size, orientation, columns, breaks, line
numbers and hyphenation in the document.
Page Background
The page background section allows we to change the background colour of
the document, watermark and draft or confidential document or add borders
to our document.
Paragraph
The paragraph section in the page layout tab allows changes
to a paragraphs spacing and indentation.
Arrange
The arrange section is also found in the image toolbar when
an image is selected. Here we can change an images position,
how text moves around the image, the alignment, grouping
and rotation or the image.
References Tab
The references tab contains six sections, Table of Contents, Footnotes, Citations &
Bibliography, Captions, Indexes and Table of Authorities.
Table of Contents
The table of contents section allows we to insert and modify the table
of contents. We can insert automatic or manual table of contents and
change what styles will be included in the table of contents, if any. We
can also add text to the table and update the table of contents after adding or removing items
from our document.
DR.C.THANAVATHI 8
Footnotes
This section allows we to insert footnotes and endnotes and move
through our existing footnotes quickly.
Citations & Bibliography
This section provides tools to insert citations, manage sources,
citation style and bibliography.
Captions
Insert captions, table of figures, or cross-references in this
section. Once we have created a table of figures we can also
update the table at the click of a button.
Index
This section allows we to create an index, update the index and mark and
item for inclusion in the index.
Table of Authority
This section allows we to create a table of authorities, update the table and
mark and citations for inclusion in the table of authorities.
Mailings Tab
The mailings tab contains five sections, create, start mail merge, write & insert fields, preview
results and finish.
DR.C.THANAVATHI 9
Create
The create section provides a window to create envelopes or labels. This is
mostly for creating single envelopes, labels or a sheet of the same label.
Start Mail Merge
The main features of this section are start mail merge, select
recipients and edit recipient list. The method most people will likely
use to create a mail merge in Word 2007 is the step by step mail
merge wizard found in the start mail merge drop down list. This option will bring up a wizard
along the right side of the screen that will walk we through the process. Recipients can come
from Outlook contact or a large number of files including Access, Paradox, Excel, Word, CSV
and even HTML.
Write & Insert Fields
This section provides the tools necessary to
make a document into one that will work with a
mail merge. We can Highlight merge fields,
work with address block or greeting line, insert new merge fields, setup rules, match fields and
update our labels.
Preview Results
This section allows we to preview our merge before completing it.
Make sure all our recipients fit onto one page, the formatting
remained the same after merging, look for specific recipients and
even have Word auto check for common errors.
Finish
The final section in the mailings tab completes our mail merge.
Review Tab
DR.C.THANAVATHI
1
0
The review tab offers six sections which include proofing, comments, tracking, changes,
compare and protect.
Proofing
The proofing section provides the standard spelling and grammar
check, a thesaurus, word count, research tools that include MSN
search and Microsoft Encarta encyclopaedia. We will also find
translation tools to help with single words or the whole document. The translation of the entire
document is done by an online service called Wordlingo.
Comments
The comments section allows we to add comments to a document for easier
collaboration. We can cycle through the comments to find out what notes
we left for ourself or others and we can delete a comment that was made
when it is no longer relevant.
Tracking
The tracking section can be very helpful with a document that
changes a lot while composing it. We can track the changes
made, who made them and show the changes in balloons off to the side. Be aware that we must
turn this on before it will start to work. Tracking changes does not occur on every document
automatically. We should also be aware that unless we clear the changes once the document
is final they may be visible to others who receive the document even though older changes
were not intended for others to view. We can find all the revisions by turning on the balloons
for revisions and checking each on and accepting or rejecting it by right clicking on the balloon
and choosing the correct option. We can also clear them with the options in the next section
of the review tab.
Changes
The changes section allows we to cycle through and accept or reject changes
made to the document and tracked using the track changes feature. This should
be done before the document is considered final so any changes can be cleared
and no longer visible if the document is distributed to anyone who should not have access to
the revisions and comments.
DR.C.THANAVATHI
1
1
Compare
This section can be used to compare two versions or a document or help we
combine two versions of a document. This can be very helpful when we
find we have accidentally been working on one version on our local drive
and another on the network. We can take the two documents and step through them combining
them instead of redoing work that was already done.
Protect
The protect section gives we options to add a password and protect the document.
We can restrict changes to formatting and editing or the whole document. If we
use Windows Live, we can also manage permissions for specific users who also
have Windows Live.
View Tab
The view tab offers five sections which include document views, show/hide, zoom, window
and macros.
Document Views
The document views section switches we between print
layout, full screen reading, web layout, outline and draft
views. Print layout is the default view. Full screen view
removes all but a couple of tools from the top of the screen and the rest of the screen is our
document. Web layout will take away the empty space on either side of the document if there
is any and fill the window as if it were a web page. Outline view changes the look of our
document into an almost point form style which may help with reviewing main points. Draft
view takes away most of our formatting and images and just shows the text. It also fills the
window with our text similar to web layout.
Show/Hide
The show/hide section will toggle certain tools on or off the screen
including rulers, gridlines, message bar, document map and
thumbnails. The rulers will show along the top and left side of the
screen. Gridlines will cover our entire document inside the margins. They will be visible on
screen but don’t print. The message bar can only be displayed when there is a message to be
displayed. One common reason for the message bar to display is when macros have been
enabled or disabled. The document map and thumbnails will show along the left hand side of
the screen.
DR.C.THANAVATHI
1
2
Zoom
The zoom section provides tools to zoom into or out of the document.
We can choose our own zoom factor or use one of the predefined zoom
factors of 100%, one page, two pages (side by side), or page width
which causes the document to zoom in or out so it fills our window.
Window
The new window button will open our
current document in a new window. The
arrange all button will take our currently
open windows and stack them one on top of the other. The split button will take our current
document and show it in two frames within the window one on top of the other. This will allow
we to look at something we wrote on page one while working on page twenty. View side by
side allows we to view two windows side by side, once in side by side view we can turn on
synchronous scrolling so both side scroll at the same time. Also while in side by side mode if
we resized either window we can click the reset window position button to have them share the
screen equally again. The switch window drops down will allow we to switch between open
windows.
Macros
The macros section provides the tools required to work with and create basic macros.
We can view existing macros or record our own. Choose record macro from the drop
down and then perform the functions we do often, like change the page layout, and
style of the document. Once we have done those tasks then stop recording. We will be able to
use that macro over again to shorten the steps we need to take every time we need to perform
that set of tasks.
DR.C.THANAVATHI
1
3
PARTS OF THE MICROSOFT WORD 2007 SCREEN AND THEIR
FUNCTIONS
1. Office Button – Click the Office Button to find a drop down menu containing options, such
as: open, save, and
print. Also shows previously opened files, which we may choose to “pin” them to make them
“permanent”
choices.
2. Ribbon – The Ribbon is the strip of buttons and icons located above the work area in Word
2007. The Ribbon
replaces the menus and toolbars found in earlier versions of Word. Each ribbon contains groups
of command
buttons with common purpose. Each ribbon contains 7 tabs.
3. Tab Selector button – We can easily set tab stops by clicking on the desired position on the
ruler. This button
allows we to determine which type of tab will be set left aligned, right aligned, center aligned
or
decimal tab. Clicking on this button will allow we to change the tab style.
4. Rulers – Gives we an idea of where we are on the page
5. Document – This is what we are typing/what will print out
DR.C.THANAVATHI
1
4
6. Status Bar – This row can be customized by right-clicking and selecting desired options.
Desired options may
include page number/number of total page, word count, insert/overtype mode, caps lock, and
zoom slide.
7. Task Bar – Shows open programs.
8. View Shortcuts – These four buttons allow we to change the way we view our document
on the screen. From
left to right they are: print layout, full screen reading, web layout and draft. These can be
added/removed by right
clicking anywhere on the status bar and checking/unchecking View shortcuts.
9. Zoom Slide – Allows we to increase/decrease the amount of the document we see on the
screen.
10. View Ruler Button – Allows we to view/hide the rulers.
11. Screen Split Button – At the top of the vertical scroll bar is a new button. Just below the
double arrow is a tiny
button that looks like a minus sign that lets we split our screen in two when double-clicked.
Double-clicking it a
second time will unsplit our screen.
12. Scroll Bars – Allows we to view entire workbook by moving it up, down (vertical scroll
bar), left or right (horizontal
scroll bar).
13. Right Indent – Slide this triangle to the left of the margin to limit the right side of a
paragraph to that point. Move
the triangle to the right of the margin to allow the right side of the paragraph to extend beyond
the margin. The
triangle at the margin will keep the right side of the paragraph with the margin.
14. Group – Command buttons with a common purpose are clustered together. Each ribbon
contains several groups.
Some groups, but not all, contain a quick launch bar (dialogue box launcher) in the bottom
right hand corner.
15. Quick Launch Bar/Dialogue Box Launcher – It is the arrow in the bottom right hand
corner of some
groups. When clicked, it will bring up a dialog box where additional options/changes can be
entered.
16. Title Bar – Shows name of program and open document. Also contains minimize,
maximize and close buttons.
17. Quick Access Toolbar – This customizable toolbar allows we to add frequently used
commands. Click on the
down arrow at the end of the toolbar to add/remove command buttons – or - right-click on any
command button
and choose Add to Quick Access Toolbar.
18. Tab – The ribbon is broken down into 7 tabs. Each tab has a common purpose and consists
of several groups. To
DR.C.THANAVATHI
1
5
select a tab, simply click on it and the appropriate groups will be displayed.
19. First Line Indent – This triangle controls where the first line of a paragraph begins. Moved
to the left of the
margin, will allow the first paragraph to be in the left margin. Can be moved to the right of the
margin to indent
our paragraph. THIS IS NOT SETTING TABS!
20. Hanging Indent – The opposite of a first line indent. It is often moved to the right of the
first line indent, which
allows the remaining lines of a paragraph to be indented according to placement of the triangle.
DR.C.THANAVATHI
1
6
Title Bar: Displays the file name of the document that is being edited and the name of the
software we are using. It also includes the standard Minimize, Restore, and Close buttons.
Quick Access Toolbar: Commands that are frequently used, such as Save, Undo, and Redo are
located here. At the end of the Quick Access Toolbar is a pull-down menu where we can add
other commonly used or commonly needed commands.
File Tab: Click this button to find commands that act on the document itself rather than the
content of the document, such as New, Open, Save as, Print, and Close.
Ribbon: Commands needed for our work are located here. The appearance of the Ribbon will
change depending on the size of our monitor. Word will compress the ribbon by changing the
arrangement of the controls to accommodate smaller monitors.
Edit Window: Shows the contents of the document we are editing.
Scroll Bar: Lets we change the display position of the document we are editing.
Status Bar: Displays information about the document we are editing.
View Buttons: Lets we change the display mode of the document we are editing to fit our needs.
Zoom: Lets we change the zoom settings of the document we are editing.
DR.C.THANAVATHI
1
7
UNIT 2:
MS POWERPOINT (5 hours)
Views and Slides- Editing text- Inserting pictures, Sounds, Files, Charts and Movies-
Backgrounds- Animation-Graphics-Slide design- Slide layout- Slide Transitions-Headers and
Footers- Slide masters- Customizing Slide show- Printing slides- Making use of PowerPoint in
the classroom
MS Power Point
With Microsoft PowerPoint, we can create exciting slide show presentations.
PowerPoint is a presentation software package. With PowerPoint, we can easily create
slide shows. We create our PowerPoint presentation on slides. We use layouts to organize
the content on each slide. PowerPoint has several slide layouts from which to choose.
Themes are sets of colors, fonts, and special effects. Backgrounds add a colored
background to our slides. We can add themes and backgrounds to our slides. After we
complete our slides, we can run our presentation.
Create a Title Slide
When we start PowerPoint, PowerPoint displays the title slide in the Slide pane. We
can type the title of our presentation and a subtitle on this slide. To enter text:
 Click and type the title of our presentation in the "Click to add title" area.
 Click and type a subtitle in the "Click to add subtitle" area.
Create a Title Slide
1. Open PowerPoint. We are presented with a title slide.
2. Enter the information shown here. Type College Scholarships and Financial Aid in the
Click to Add Title text box. Type Paying for College in the Click to Add Subtitle text box
Create New Slides
After completing our title slide, we can create additional slides. To create a new slide:
1. Choose the Home tab.
2. Click the New Slide button in the Slides group. The Office Theme dialog box appears and
displays several layout templates.
3. Click the layout we want. The layout appears in the Slide pane of the PowerPoint window.
4. To add text, click inside the placeholder and type.
5. To add an additional slide to our presentation, do one of the following
 Right-click the slide layout.
 A menu appears. Click Layout and then click the layout we want.
 Choose the Home tab,
DR.C.THANAVATHI
1
8
 click the New Slide button
 and then choose the slide layout we want
Create an Outline
If we need to present the information in our slide in outline form, we can easily create an outline
by using the Increase List Level button to create a hierarchy.
1. Choose the Home tab.
2. Click the New Slide button in the Slides group. The Office Theme dialog box appears.
3. Click the Title and Content layout.
4. Enter the information shown here. Click the Increase List Level button in the Paragraph group
to indent the bullets for Stafford Loans and PLUS Loans. If we ever need to decrease an indent,
use the Decrease List Level button in the Paragraph group.
Use Two-Column Text
We can also place text in two separate columns.
1. Choose the Home tab.
2. Click the New Slide button in the Slides group. The Office Theme dialog box appears.
3. Click the Two Content layout.
4. Enter the information shown here.
Make Changes to Our Slides
After creating a slide, if we want to add text:
1. Place the mouse pointer at the point at which we would like to add text.
2. Type the information we want to add.
If we would like to change text:
1. Select the text we want to change.
2. Type the new text.
We can use the Backspace key to delete text. We can also delete text by highlighting the text
and pressing the Delete key.
Apply a Theme
A theme is a set of colors, fonts, and special effects. Themes provide attractive backgrounds
for our PowerPoint slides.
To apply a theme to all of the slides in our presentation:
1. Choose the Design tab.
2. Click the More button in the Themes group.
DR.C.THANAVATHI
1
9
3. Click the design we want.
To apply a theme to selected slides:
1. Click the Slides tab, located on the left side of the window.
2. Hold down the Ctrl key and then click to select the slides to which we want to apply a theme.
3. Choose the Design tab.
4. Click the More button in the Themes group.
5. Right-click the theme we want to apply. A menu appears.
6. Click Apply to Selected Slides. Excel applies the theme to the slides we selected.
We can add a dramatic effect to our theme by applying a background.
1. Choose the Design tab.
2. Click the Background Styles button.
3. Click the background we want.
Add a Background
1. Choose the Design tab.
2. Click the Background Styles button.
3. Click the background we want. PowerPoint applies the background to our slides.
Run Our PowerPoint Slide Show
After we create our slides, we can run our slide show:
1. Do any one of the following:
o Press F5.
o Choose the Slide Show tab. Click the From Beginning button in the Start Slide Show group.
o Click the Slide Show icon in the bottom-right corner of our screen.
Our slide show appears on our screen.
Most Popular Search Engines
 Google.
 Bing.
 Yahoo.
 Ask.com.
 AOL.com.
 Baidu.
DR.C.THANAVATHI
2
0
 Wolframalpha.
 DuckDuckGo ect.,
kinds of viruses
 Resident Viruses.
 Direct Action Viruses.
 Overwrite Viruses. ...
 Boot Virus. ...
 Macro Virus. ...
 Directory Virus. ...
 Polymorphic Virus. ...
 File Infectors etc.,
kinds of antiviruses
 AVG.
 McAfee
 Norton
 Kaspersky
 Ad Aware.
DR.C.THANAVATHI
2
1
UNIT 3:
MS EXCEL (5 hours)
Creating a spreadsheet-Collecting data for project- Entering data- Editing cell contents-
Preview and printing-Headers and footers-Formatting data-Formulas-Cut, copy and paste-Max
and Min-Inserting function into formula-Insert and delete columns-If function-Multiple sheets-
Charts and Graphs.
Microsoft Excel 2007 Basics
Microsoft Excel 2007 has a completely redesigned user interface. The standard menus along
the top have been removed and replaced with a series of toolbars Microsoft calls “The Ribbon.”
These tool bars are changed using tabs at the top and try to automatically adjust themselves to
the content we are working with. If we select an image it will automatically switch to the
picture tools. The new layout seems to offer easier access to most of the features of Excel
allowing for more complex documents to be created quicker.
The Office Logo
The first thing most people will need to relearn is where to go to open
a document, create a new one, save our document and print. Clicking
the Office logo at the top left of the screen will provide most of the
items formerly found under the file menu including those listed above.
Beside the logo we also will find a disk icon to save our document as
well as the undo and redo buttons. More buttons can be added to this
“Quick Access Toolbar” through the Excel options mentioned in the
next section.
DR.C.THANAVATHI
2
2
As we can see here the Office logo
opens up listing our options for new,
open etc. and also contains a list of
our recent documents for quick
opening. Any of the items listed with
an arrow beside them will replace the
recent documents on the right with
the options associated with the menu
item. We should also see at the
bottom right of this menu a button for
exiting Excel and changing Excel’s
options.
Save as
The save as option will provide we
with the most common file formats to
save our document in. The common
ones are Excel Workbook, Excel
Macro-Enabled Workbook, Excel
Binary Workbook, and Excel 97-
2003 Workbook. The last one is the option most people should be using currently, especially
if they wish to share documents with others who do not have the new version of Office.
Print
Here we can choose from Print, Quick Print and Print Preview. Print brings up the standard
print dialog box, quick print will print one copy without any dialog box coming up and print
preview will bring up the print preview screen.
Prepare
The prepare menu’s most common options are Properties, Inspect Document, Mark as Final
and Run Compatibility Checker. The properties option allows we to setup metadata for the
document like Author, Title, keywords, comments and others. Inspect Document will scan the
document for any hidden data like comments and annotations, and any hidden collaboration
data. This is very useful when making a previously private document public. It will help we
find any comments or changes made previously that should not be made public. Mark as Final
will mark the document as a final copy and make it read only so changes cannot be made. The
last common item, Run Compatibility Checker will scan the document for new features that
were used and show we these. This is recommended if we were creating a document in the
new file format but now need to convert it back to the Office 2003 format to share with someone
who does not have Office 2007.
The Home Tab
DR.C.THANAVATHI
2
3
The home tab the basic formatting tools found in Excel 2007. We will find seven sections,
Clipboard, Font, Alignment, Number, Styles, Cells and Editing. Clicking the down arrow
beside any of the icons here will drop down more options for that tool. Each section also
contains an arrow in the bottom right corner which will open a window containing the options
found in that section.
Clipboard
The Clipboard allows we to cut, copy, paste and copy formatting from one
place to another.
Font
The font section of the ribbon
provides a section to handle
the basic text formatting.
Items such as bold, underline,
strikethrough, highlight and
font type can be changed here. Some items from this section and
some items from the number section are also available by right
clicking a cell. This saves having to move our cursor all the way
to the top of the screen for some common formatting items.
Alignment
The alignment section provides icons to justify, Vertical alignment,
indents, text wrap, merge cells and centre text and text orientation.
Number
The number section provides the options for formatting numbers. We can
choose the type of number, like date, currency, percentage, fraction or general.
We can also increase or decrease the number of decimal places shown.
Styles
The styles section allows we to quickly change the formatting of a
section of cells by choosing one of the predefined styles. We can
DR.C.THANAVATHI
2
4
choose different types of conditional formatting, table formatting or cell styles. These are used
to change the visual appearance of a section to quickly show what is being displayed in an area.
Cells
This section allows we to insert of delete cells, rows, columns, or sheets. We
can also format the height or width of columns and rows, hide or unhide
elements, organize or protect cells and sheets. There are a lot of features in this
section under the format option.
Editing
The editing section gives we options for inserting functions,
filling formulas across cells, clearing formatting and
formulas, sorting and finding. Again, there is a large number of options in
this area. These options are also included in the image to left.
Insert Tab
The insert tab has five sections for inserting most types of objects. The sections are tables,
illustrations, charts, links, text and symbols.
Tables
The tables section has an option for pivot tables and charts and tables. We
can select an area and turn it into a formatted table or pivot table with these
options. Once we have created our table there is another tab which becomes
available to work with the table design. This tab is shown below.
Table Design
DR.C.THANAVATHI
2
5
Illustrations
The Illustrations section allows we to insert pictures, clipart, shapes, and SmartArt. After
inserting or selecting a picture we are provided with a new toolbar along the top shown here.
This toolbar gives we the ability to change the brightness, contrast, shape, position, text
wrapping and other options for the picture. Clicking off the picture or on one of the other tabs
will take we back to the standard toolbars. The Shapes option of the Illustrations section allows
we to insert lines, arrows, boxes, basic flowchart shapes and a number of others. The SmartArt
option provides features like org charts, flow charts, illustrated lists and processes. The Chart
option is similar to Excel 2003 but it offers more options for our charts.
Charts
The charts section provides drop down menus to insert
different types of column, line, pie, bar, area, scatter and
other types of charts. Once we create a chart we will
get three additional tabs to work with our chart. They are shown below.
Chart Design Tab
Chart Layout Tab
DR.C.THANAVATHI
2
6
Chart Format Tab
Links
The links section provides options for inserting hyperlinks to our spreadsheet.
Text
Options in the text section include text box, header and
footer, WordArt and a number of predefined text blocks like
a signature line and symbols. There are a lot of option in
here to setup on our own or we can use Excel’s predefined options.
Page Layout Tab
The page layout tab has five sections, Themes, Page Setup, Scale to Fit, Sheet Options, and
Arrange.
Themes
The themes section provides a quick way to format our document. By
choosing a theme we will have a set colour scheme, font combinations, and
effects. We can choose one of the provided themes, modify any provided
theme or create our own. We can also go online in this section and browse Microsoft.com for
additional themes. Be aware that changing our theme after creating a document may require
we to reformat some items as themes also include some layout options.
Page Setup
Page setup provides we with the tools to
change margins, size, orientation, columns,
breaks, backgrounds and add print titles to
the document.
DR.C.THANAVATHI
2
7
Scale To Fit
This section allows we to scale to fit our document onto a certain number
of pages or to scale it to a certain percentage of its current size.
Sheet Options
This section gives we checkboxes to view or print headings and gridlines.
Arrange
The arrange section is also found in the image toolbar when an image is
selected. Here we can change an images position, the alignment,
grouping and rotation or the image.
Formulas Tab
The formulas tab contains four sections, function library, defined names, formula auditing and
calculation.
Function Library
This section gives we access to the large number of
predefined Excel functions. There are Auto Sum
functions, financial, logical, text, date and time, lookup and reference, math and trig, and
additional functions. It also provides a section for recently used functions so we can get back
to the ones that we use the most quickly.
Defined Names
The defined names section allows we to create names or variables
to be referenced in other areas. This would be like assigning
“taxrate” to cell b2 so in a formula we can easily see what we were
referencing when we look at a formula month after creating it. The formula =A10*taxrate
means more later than =a10*b2
DR.C.THANAVATHI
2
8
Formula Auditing
This section provides tools to manage formulas to ensure that
they are correct. We can use the tools here to find out what cells
our formula depends on, what cells depend on the current cell,
and show the formula in a cell instead of the resulting value. There is also a tool for error
checking which will look for common errors in formulas.
Calculation
Here we can turn on or off automatic calculation from formulas. If we turn
off automatic calculations, we can use this area to calculate the current cell or
the whole sheet.
Data Tab
The data tab contains five sections, get external data, connections, sort and filter, data tools,
and outline.
Get External Data
This is a single drop down item which allows we to refresh data from an external
source. We can pull in data from Access, the Internet, text files or from other
external sources.
Connections
Here is where we manage any connections to outside sources. The setup
done here is what allows we to pull data from the external sources listed
above.
Sort & Filter
Here we can sort or filter our data based on criteria we specify.
We can use simple alphabetical sorting or create more complex
filters to manipulate our data.
DR.C.THANAVATHI
2
9
Data Tools
With the data tools section, we can take text and turn it into
columns, remove duplicates, check our data to make sure it
is valid based on different criteria. Are they all whole
numbers? Are they all properly formatted dates? We can also consolidate data or do “What
if” analysis where we can check we data against different scenarios.
Outline
The final section in the data tab provides tools to group or ungroup rows or
columns and obtain subtotals for grouped items.
Review Tab
The review tab offers three sections which include proofing, comments, and changes.
Proofing
The proofing section provides the standard spelling and grammar
check, a thesaurus, and research tools that include MSN search and
Microsoft Encarta encyclopedia. We will also find translation tools
to help with single words or the whole document. The translation of the entire document is
done by an online service called Wordlingo.
Comments
The comments section allows we to add comments
to a document for easier collaboration. We can
cycle through the comments to find out what notes
we left for ourself or others and we can delete a comment that was made when it is no longer
relevant.
Changes
The changes section allows we to protect a sheet or
the entire workbook, we can also share a workbook.
Some of the sharing features are only available to
users on a Windows domain. This authenticates the users against the domain for access so this
will not work for many people.
DR.C.THANAVATHI
3
0
View Tab
The view tab offers five sections which include workbook views, show/hide, zoom, window
and macros.
Workbook Views
The workbook views section switches our display between
normal view, page layout, full screen and page break preview.
The page layout will show we what will be on each page and
provide a way to add headers and footers to each page. The page break preview will show we
a scaled version of our spreadsheet with dotted lines showing where the page breaks will be.
There is also a way to work with custom views here.
Show/Hide
The show/hide section will toggle certain tools on or off the screen
including rulers, gridlines, message bar, formula bar and headings.
The rulers will show along the top and left side of the screen.
Gridlines will show the grids around each cell. They will be visible on screen but don’t print.
Zoom
The zoom section provides tools to zoom into or out of the document. We
can choose our own zoom factor or use the predefined zoom factor of 100%
or we can select a section and zoom so it fills our screen.
Window
The window section allows we to create a new window,
arrange our windows one on top of the other or split our
window so the same document is viewed in two screens
one on top of the other. We can also hide and unhide a window. Once we have arranged our
windows the way we like them we can save the workspace so we can open to this setup when
we need to work on these items again. This is very handy for setups where we need to work
on multiple documents at once and we have to do this a lot. We can also choose which window
to work on through the switch windows drop down menu.
Macros
The macros section provides the tools required to work with and create basic macros.
We can view existing macros or record our own. Choose record macro from the drop
down and then perform the functions we do often, like change the page layout, and
DR.C.THANAVATHI
3
1
style of the document. Once we have done those tasks then stop recording. We will be able to
use that macro over again to shorten the steps we need to take every time we need to perform
that set of tasks.

More Related Content

What's hot

Language teaching approaches and methods
Language teaching approaches and methodsLanguage teaching approaches and methods
Language teaching approaches and methodsKhif Muamar Miranda
 
Interactive studentnotebooks. ppt
Interactive studentnotebooks. pptInteractive studentnotebooks. ppt
Interactive studentnotebooks. ppttirp9999
 
Learning styles in language teaching
Learning styles in language teachingLearning styles in language teaching
Learning styles in language teachingluiscarl1981
 
Microsoft Office Word Basics Training
Microsoft Office Word Basics TrainingMicrosoft Office Word Basics Training
Microsoft Office Word Basics TrainingMohd Iznan Shamsuddin
 
The aims of morphology
The aims of morphology The aims of morphology
The aims of morphology AbdulSaborSafa
 
CLASSROOM ACTIVITIES IN COMMUNICATIVE LANGUAGE TEACHING
CLASSROOM ACTIVITIES IN COMMUNICATIVE LANGUAGE TEACHINGCLASSROOM ACTIVITIES IN COMMUNICATIVE LANGUAGE TEACHING
CLASSROOM ACTIVITIES IN COMMUNICATIVE LANGUAGE TEACHINGDavid Barona
 
Affective factors in SLA
Affective factors in SLAAffective factors in SLA
Affective factors in SLAnona hr
 
Acculturation Theory
Acculturation TheoryAcculturation Theory
Acculturation TheoryAbibAfzal
 
Syllabuses and coursebooks
Syllabuses and coursebooksSyllabuses and coursebooks
Syllabuses and coursebooksffffunes
 
Powerpoint 2013 tutorial
Powerpoint 2013 tutorial Powerpoint 2013 tutorial
Powerpoint 2013 tutorial 18goodm
 
teaching writing in L2
teaching writing in L2teaching writing in L2
teaching writing in L2Arash Akbari
 
Content based instruction
Content based instructionContent based instruction
Content based instructionEmine Özkurt
 
Language learning strategies
Language learning strategiesLanguage learning strategies
Language learning strategiesAdnanBaloch15
 

What's hot (20)

Language teaching approaches and methods
Language teaching approaches and methodsLanguage teaching approaches and methods
Language teaching approaches and methods
 
Code switching
Code switchingCode switching
Code switching
 
Interactive studentnotebooks. ppt
Interactive studentnotebooks. pptInteractive studentnotebooks. ppt
Interactive studentnotebooks. ppt
 
MS-OFFICE
MS-OFFICEMS-OFFICE
MS-OFFICE
 
Learning styles in language teaching
Learning styles in language teachingLearning styles in language teaching
Learning styles in language teaching
 
Fundamentals of CLIL
Fundamentals of CLILFundamentals of CLIL
Fundamentals of CLIL
 
Microsoft Office Word Basics Training
Microsoft Office Word Basics TrainingMicrosoft Office Word Basics Training
Microsoft Office Word Basics Training
 
The aims of morphology
The aims of morphology The aims of morphology
The aims of morphology
 
CLASSROOM ACTIVITIES IN COMMUNICATIVE LANGUAGE TEACHING
CLASSROOM ACTIVITIES IN COMMUNICATIVE LANGUAGE TEACHINGCLASSROOM ACTIVITIES IN COMMUNICATIVE LANGUAGE TEACHING
CLASSROOM ACTIVITIES IN COMMUNICATIVE LANGUAGE TEACHING
 
Affective factors in SLA
Affective factors in SLAAffective factors in SLA
Affective factors in SLA
 
Acculturation Theory
Acculturation TheoryAcculturation Theory
Acculturation Theory
 
pedagogical grammar
pedagogical grammarpedagogical grammar
pedagogical grammar
 
Syllabuses and coursebooks
Syllabuses and coursebooksSyllabuses and coursebooks
Syllabuses and coursebooks
 
Presentation on Activity Theory
Presentation on Activity Theory Presentation on Activity Theory
Presentation on Activity Theory
 
Grammar Structure.ppt
Grammar Structure.pptGrammar Structure.ppt
Grammar Structure.ppt
 
Powerpoint 2013 tutorial
Powerpoint 2013 tutorial Powerpoint 2013 tutorial
Powerpoint 2013 tutorial
 
Methods
MethodsMethods
Methods
 
teaching writing in L2
teaching writing in L2teaching writing in L2
teaching writing in L2
 
Content based instruction
Content based instructionContent based instruction
Content based instruction
 
Language learning strategies
Language learning strategiesLanguage learning strategies
Language learning strategies
 

Similar to Computer Course Digital Classroom Tools Notes Unit 1, 2, & 3/Dr.C.Thanavathi

Microsoft Office Specialization.pptx
Microsoft Office Specialization.pptxMicrosoft Office Specialization.pptx
Microsoft Office Specialization.pptxDarylCornelos
 
Lesson 5 ms office word 2007
Lesson 5   ms office word 2007Lesson 5   ms office word 2007
Lesson 5 ms office word 2007Ahaly
 
Benefit of MS word in an organisation
Benefit of MS word in an organisation Benefit of MS word in an organisation
Benefit of MS word in an organisation Shubham Agrawal
 
etech-chap2-basic-word.pptx
etech-chap2-basic-word.pptxetech-chap2-basic-word.pptx
etech-chap2-basic-word.pptxJahredBetita
 
Microsoft word
Microsoft wordMicrosoft word
Microsoft wordAmit Singh
 
Advanced Microsoft word seminar
Advanced Microsoft word seminarAdvanced Microsoft word seminar
Advanced Microsoft word seminarM'mama Sawaneh
 
Information Technology
Information Technology Information Technology
Information Technology JassyGill2
 
MS Office 2013.pdf
MS Office 2013.pdfMS Office 2013.pdf
MS Office 2013.pdfpremarhea
 
Microsoft word 2007 part 1
Microsoft word 2007 part 1Microsoft word 2007 part 1
Microsoft word 2007 part 1kenjaneredz
 
Ms Word (Insert Option)
Ms Word (Insert Option)Ms Word (Insert Option)
Ms Word (Insert Option)Saransh Arora
 
Microsoft office word 2003
Microsoft office word 2003Microsoft office word 2003
Microsoft office word 2003sasika fernando
 
Ms Word 2010 Training In Ambala ! Batra Computer Centre
Ms Word 2010 Training In Ambala ! Batra Computer CentreMs Word 2010 Training In Ambala ! Batra Computer Centre
Ms Word 2010 Training In Ambala ! Batra Computer Centrejatin batra
 

Similar to Computer Course Digital Classroom Tools Notes Unit 1, 2, & 3/Dr.C.Thanavathi (20)

Microsoft Office Specialization.pptx
Microsoft Office Specialization.pptxMicrosoft Office Specialization.pptx
Microsoft Office Specialization.pptx
 
Lesson 5 ms office word 2007
Lesson 5   ms office word 2007Lesson 5   ms office word 2007
Lesson 5 ms office word 2007
 
Ms word
Ms wordMs word
Ms word
 
Benefit of MS word in an organisation
Benefit of MS word in an organisation Benefit of MS word in an organisation
Benefit of MS word in an organisation
 
Microsoft word
Microsoft wordMicrosoft word
Microsoft word
 
etech-chap2-basic-word.pptx
etech-chap2-basic-word.pptxetech-chap2-basic-word.pptx
etech-chap2-basic-word.pptx
 
Microsoft word
Microsoft wordMicrosoft word
Microsoft word
 
Advanced Microsoft word seminar
Advanced Microsoft word seminarAdvanced Microsoft word seminar
Advanced Microsoft word seminar
 
icf ppt.pptx
icf ppt.pptxicf ppt.pptx
icf ppt.pptx
 
Ms word module 1
Ms word module 1Ms word module 1
Ms word module 1
 
Information Technology
Information Technology Information Technology
Information Technology
 
MS Office 2013.pdf
MS Office 2013.pdfMS Office 2013.pdf
MS Office 2013.pdf
 
Microsoft word 2007 part 1
Microsoft word 2007 part 1Microsoft word 2007 part 1
Microsoft word 2007 part 1
 
Office04
Office04Office04
Office04
 
word.pptx
word.pptxword.pptx
word.pptx
 
Ms Word (Insert Option)
Ms Word (Insert Option)Ms Word (Insert Option)
Ms Word (Insert Option)
 
Task 2ppt.
Task 2ppt.Task 2ppt.
Task 2ppt.
 
Microsoft office word 2003
Microsoft office word 2003Microsoft office word 2003
Microsoft office word 2003
 
MS WORD.pptx
MS WORD.pptxMS WORD.pptx
MS WORD.pptx
 
Ms Word 2010 Training In Ambala ! Batra Computer Centre
Ms Word 2010 Training In Ambala ! Batra Computer CentreMs Word 2010 Training In Ambala ! Batra Computer Centre
Ms Word 2010 Training In Ambala ! Batra Computer Centre
 

More from Thanavathi C

Data Analysis with SPSS PPT.pdf
Data Analysis with SPSS PPT.pdfData Analysis with SPSS PPT.pdf
Data Analysis with SPSS PPT.pdfThanavathi C
 
Active Learning Methods in Teaching.pdf
Active Learning Methods in Teaching.pdfActive Learning Methods in Teaching.pdf
Active Learning Methods in Teaching.pdfThanavathi C
 
Bibliotherapy.pptx
Bibliotherapy.pptxBibliotherapy.pptx
Bibliotherapy.pptxThanavathi C
 
Student's portfolio's creation
Student's portfolio's creationStudent's portfolio's creation
Student's portfolio's creationThanavathi C
 
Models of Teaching - Unit IV - Dr.C.Thanavathi
Models of Teaching - Unit IV - Dr.C.ThanavathiModels of Teaching - Unit IV - Dr.C.Thanavathi
Models of Teaching - Unit IV - Dr.C.ThanavathiThanavathi C
 
Contemporary India and Education book
Contemporary India and Education bookContemporary India and Education book
Contemporary India and Education bookThanavathi C
 
Education for collective living and peaceful living
Education for collective living and peaceful livingEducation for collective living and peaceful living
Education for collective living and peaceful livingThanavathi C
 
Challenges in achieving universalization of education
Challenges in achieving universalization of educationChallenges in achieving universalization of education
Challenges in achieving universalization of educationThanavathi C
 
Inclusive education
Inclusive educationInclusive education
Inclusive educationThanavathi C
 
Integrated education
Integrated educationIntegrated education
Integrated educationThanavathi C
 
Rashtriya Ucchatar Shiksha Abhiyan (Rusa) dr.c.thanavathi
Rashtriya Ucchatar Shiksha Abhiyan (Rusa) dr.c.thanavathiRashtriya Ucchatar Shiksha Abhiyan (Rusa) dr.c.thanavathi
Rashtriya Ucchatar Shiksha Abhiyan (Rusa) dr.c.thanavathiThanavathi C
 
How to handle online classes in google meet/Dr.C.Thanavathi
How to handle online classes in google meet/Dr.C.ThanavathiHow to handle online classes in google meet/Dr.C.Thanavathi
How to handle online classes in google meet/Dr.C.ThanavathiThanavathi C
 
Rashtriya Madhyamik Shiksha Abhiyan (RMSA)
Rashtriya Madhyamik Shiksha Abhiyan (RMSA)Rashtriya Madhyamik Shiksha Abhiyan (RMSA)
Rashtriya Madhyamik Shiksha Abhiyan (RMSA)Thanavathi C
 
How to write a research proposal
How to write a research proposalHow to write a research proposal
How to write a research proposalThanavathi C
 
Sarva shiksha abhiyaan (ssa)
Sarva shiksha abhiyaan (ssa)Sarva shiksha abhiyaan (ssa)
Sarva shiksha abhiyaan (ssa)Thanavathi C
 
How to enroll and access swayam course
How to enroll and access swayam courseHow to enroll and access swayam course
How to enroll and access swayam courseThanavathi C
 
Digital initiatives dr.c.thanavathi
Digital initiatives dr.c.thanavathi Digital initiatives dr.c.thanavathi
Digital initiatives dr.c.thanavathi Thanavathi C
 
Digital initiatives in higher education
Digital initiatives in higher educationDigital initiatives in higher education
Digital initiatives in higher educationThanavathi C
 

More from Thanavathi C (20)

SPSS FINAL.pdf
SPSS FINAL.pdfSPSS FINAL.pdf
SPSS FINAL.pdf
 
Data Analysis with SPSS PPT.pdf
Data Analysis with SPSS PPT.pdfData Analysis with SPSS PPT.pdf
Data Analysis with SPSS PPT.pdf
 
Active Learning Methods in Teaching.pdf
Active Learning Methods in Teaching.pdfActive Learning Methods in Teaching.pdf
Active Learning Methods in Teaching.pdf
 
Bibliotherapy.pptx
Bibliotherapy.pptxBibliotherapy.pptx
Bibliotherapy.pptx
 
Student's portfolio's creation
Student's portfolio's creationStudent's portfolio's creation
Student's portfolio's creation
 
Models of Teaching - Unit IV - Dr.C.Thanavathi
Models of Teaching - Unit IV - Dr.C.ThanavathiModels of Teaching - Unit IV - Dr.C.Thanavathi
Models of Teaching - Unit IV - Dr.C.Thanavathi
 
Contemporary India and Education book
Contemporary India and Education bookContemporary India and Education book
Contemporary India and Education book
 
Education for collective living and peaceful living
Education for collective living and peaceful livingEducation for collective living and peaceful living
Education for collective living and peaceful living
 
Challenges in achieving universalization of education
Challenges in achieving universalization of educationChallenges in achieving universalization of education
Challenges in achieving universalization of education
 
Nep 2020
Nep 2020 Nep 2020
Nep 2020
 
Inclusive education
Inclusive educationInclusive education
Inclusive education
 
Integrated education
Integrated educationIntegrated education
Integrated education
 
Rashtriya Ucchatar Shiksha Abhiyan (Rusa) dr.c.thanavathi
Rashtriya Ucchatar Shiksha Abhiyan (Rusa) dr.c.thanavathiRashtriya Ucchatar Shiksha Abhiyan (Rusa) dr.c.thanavathi
Rashtriya Ucchatar Shiksha Abhiyan (Rusa) dr.c.thanavathi
 
How to handle online classes in google meet/Dr.C.Thanavathi
How to handle online classes in google meet/Dr.C.ThanavathiHow to handle online classes in google meet/Dr.C.Thanavathi
How to handle online classes in google meet/Dr.C.Thanavathi
 
Rashtriya Madhyamik Shiksha Abhiyan (RMSA)
Rashtriya Madhyamik Shiksha Abhiyan (RMSA)Rashtriya Madhyamik Shiksha Abhiyan (RMSA)
Rashtriya Madhyamik Shiksha Abhiyan (RMSA)
 
How to write a research proposal
How to write a research proposalHow to write a research proposal
How to write a research proposal
 
Sarva shiksha abhiyaan (ssa)
Sarva shiksha abhiyaan (ssa)Sarva shiksha abhiyaan (ssa)
Sarva shiksha abhiyaan (ssa)
 
How to enroll and access swayam course
How to enroll and access swayam courseHow to enroll and access swayam course
How to enroll and access swayam course
 
Digital initiatives dr.c.thanavathi
Digital initiatives dr.c.thanavathi Digital initiatives dr.c.thanavathi
Digital initiatives dr.c.thanavathi
 
Digital initiatives in higher education
Digital initiatives in higher educationDigital initiatives in higher education
Digital initiatives in higher education
 

Recently uploaded

“Oh GOSH! Reflecting on Hackteria's Collaborative Practices in a Global Do-It...
“Oh GOSH! Reflecting on Hackteria's Collaborative Practices in a Global Do-It...“Oh GOSH! Reflecting on Hackteria's Collaborative Practices in a Global Do-It...
“Oh GOSH! Reflecting on Hackteria's Collaborative Practices in a Global Do-It...Marc Dusseiller Dusjagr
 
Blooming Together_ Growing a Community Garden Worksheet.docx
Blooming Together_ Growing a Community Garden Worksheet.docxBlooming Together_ Growing a Community Garden Worksheet.docx
Blooming Together_ Growing a Community Garden Worksheet.docxUnboundStockton
 
Introduction to AI in Higher Education_draft.pptx
Introduction to AI in Higher Education_draft.pptxIntroduction to AI in Higher Education_draft.pptx
Introduction to AI in Higher Education_draft.pptxpboyjonauth
 
ECONOMIC CONTEXT - PAPER 1 Q3: NEWSPAPERS.pptx
ECONOMIC CONTEXT - PAPER 1 Q3: NEWSPAPERS.pptxECONOMIC CONTEXT - PAPER 1 Q3: NEWSPAPERS.pptx
ECONOMIC CONTEXT - PAPER 1 Q3: NEWSPAPERS.pptxiammrhaywood
 
Hierarchy of management that covers different levels of management
Hierarchy of management that covers different levels of managementHierarchy of management that covers different levels of management
Hierarchy of management that covers different levels of managementmkooblal
 
call girls in Kamla Market (DELHI) 🔝 >༒9953330565🔝 genuine Escort Service 🔝✔️✔️
call girls in Kamla Market (DELHI) 🔝 >༒9953330565🔝 genuine Escort Service 🔝✔️✔️call girls in Kamla Market (DELHI) 🔝 >༒9953330565🔝 genuine Escort Service 🔝✔️✔️
call girls in Kamla Market (DELHI) 🔝 >༒9953330565🔝 genuine Escort Service 🔝✔️✔️9953056974 Low Rate Call Girls In Saket, Delhi NCR
 
Roles & Responsibilities in Pharmacovigilance
Roles & Responsibilities in PharmacovigilanceRoles & Responsibilities in Pharmacovigilance
Roles & Responsibilities in PharmacovigilanceSamikshaHamane
 
MARGINALIZATION (Different learners in Marginalized Group
MARGINALIZATION (Different learners in Marginalized GroupMARGINALIZATION (Different learners in Marginalized Group
MARGINALIZATION (Different learners in Marginalized GroupJonathanParaisoCruz
 
Computed Fields and api Depends in the Odoo 17
Computed Fields and api Depends in the Odoo 17Computed Fields and api Depends in the Odoo 17
Computed Fields and api Depends in the Odoo 17Celine George
 
Crayon Activity Handout For the Crayon A
Crayon Activity Handout For the Crayon ACrayon Activity Handout For the Crayon A
Crayon Activity Handout For the Crayon AUnboundStockton
 
Meghan Sutherland In Media Res Media Component
Meghan Sutherland In Media Res Media ComponentMeghan Sutherland In Media Res Media Component
Meghan Sutherland In Media Res Media ComponentInMediaRes1
 
EPANDING THE CONTENT OF AN OUTLINE using notes.pptx
EPANDING THE CONTENT OF AN OUTLINE using notes.pptxEPANDING THE CONTENT OF AN OUTLINE using notes.pptx
EPANDING THE CONTENT OF AN OUTLINE using notes.pptxRaymartEstabillo3
 
Full Stack Web Development Course for Beginners
Full Stack Web Development Course  for BeginnersFull Stack Web Development Course  for Beginners
Full Stack Web Development Course for BeginnersSabitha Banu
 
DATA STRUCTURE AND ALGORITHM for beginners
DATA STRUCTURE AND ALGORITHM for beginnersDATA STRUCTURE AND ALGORITHM for beginners
DATA STRUCTURE AND ALGORITHM for beginnersSabitha Banu
 
Historical philosophical, theoretical, and legal foundations of special and i...
Historical philosophical, theoretical, and legal foundations of special and i...Historical philosophical, theoretical, and legal foundations of special and i...
Historical philosophical, theoretical, and legal foundations of special and i...jaredbarbolino94
 
Capitol Tech U Doctoral Presentation - April 2024.pptx
Capitol Tech U Doctoral Presentation - April 2024.pptxCapitol Tech U Doctoral Presentation - April 2024.pptx
Capitol Tech U Doctoral Presentation - April 2024.pptxCapitolTechU
 
Presiding Officer Training module 2024 lok sabha elections
Presiding Officer Training module 2024 lok sabha electionsPresiding Officer Training module 2024 lok sabha elections
Presiding Officer Training module 2024 lok sabha electionsanshu789521
 

Recently uploaded (20)

“Oh GOSH! Reflecting on Hackteria's Collaborative Practices in a Global Do-It...
“Oh GOSH! Reflecting on Hackteria's Collaborative Practices in a Global Do-It...“Oh GOSH! Reflecting on Hackteria's Collaborative Practices in a Global Do-It...
“Oh GOSH! Reflecting on Hackteria's Collaborative Practices in a Global Do-It...
 
OS-operating systems- ch04 (Threads) ...
OS-operating systems- ch04 (Threads) ...OS-operating systems- ch04 (Threads) ...
OS-operating systems- ch04 (Threads) ...
 
Blooming Together_ Growing a Community Garden Worksheet.docx
Blooming Together_ Growing a Community Garden Worksheet.docxBlooming Together_ Growing a Community Garden Worksheet.docx
Blooming Together_ Growing a Community Garden Worksheet.docx
 
Introduction to AI in Higher Education_draft.pptx
Introduction to AI in Higher Education_draft.pptxIntroduction to AI in Higher Education_draft.pptx
Introduction to AI in Higher Education_draft.pptx
 
ECONOMIC CONTEXT - PAPER 1 Q3: NEWSPAPERS.pptx
ECONOMIC CONTEXT - PAPER 1 Q3: NEWSPAPERS.pptxECONOMIC CONTEXT - PAPER 1 Q3: NEWSPAPERS.pptx
ECONOMIC CONTEXT - PAPER 1 Q3: NEWSPAPERS.pptx
 
Hierarchy of management that covers different levels of management
Hierarchy of management that covers different levels of managementHierarchy of management that covers different levels of management
Hierarchy of management that covers different levels of management
 
call girls in Kamla Market (DELHI) 🔝 >༒9953330565🔝 genuine Escort Service 🔝✔️✔️
call girls in Kamla Market (DELHI) 🔝 >༒9953330565🔝 genuine Escort Service 🔝✔️✔️call girls in Kamla Market (DELHI) 🔝 >༒9953330565🔝 genuine Escort Service 🔝✔️✔️
call girls in Kamla Market (DELHI) 🔝 >༒9953330565🔝 genuine Escort Service 🔝✔️✔️
 
Roles & Responsibilities in Pharmacovigilance
Roles & Responsibilities in PharmacovigilanceRoles & Responsibilities in Pharmacovigilance
Roles & Responsibilities in Pharmacovigilance
 
ESSENTIAL of (CS/IT/IS) class 06 (database)
ESSENTIAL of (CS/IT/IS) class 06 (database)ESSENTIAL of (CS/IT/IS) class 06 (database)
ESSENTIAL of (CS/IT/IS) class 06 (database)
 
MARGINALIZATION (Different learners in Marginalized Group
MARGINALIZATION (Different learners in Marginalized GroupMARGINALIZATION (Different learners in Marginalized Group
MARGINALIZATION (Different learners in Marginalized Group
 
TataKelola dan KamSiber Kecerdasan Buatan v022.pdf
TataKelola dan KamSiber Kecerdasan Buatan v022.pdfTataKelola dan KamSiber Kecerdasan Buatan v022.pdf
TataKelola dan KamSiber Kecerdasan Buatan v022.pdf
 
Computed Fields and api Depends in the Odoo 17
Computed Fields and api Depends in the Odoo 17Computed Fields and api Depends in the Odoo 17
Computed Fields and api Depends in the Odoo 17
 
Crayon Activity Handout For the Crayon A
Crayon Activity Handout For the Crayon ACrayon Activity Handout For the Crayon A
Crayon Activity Handout For the Crayon A
 
Meghan Sutherland In Media Res Media Component
Meghan Sutherland In Media Res Media ComponentMeghan Sutherland In Media Res Media Component
Meghan Sutherland In Media Res Media Component
 
EPANDING THE CONTENT OF AN OUTLINE using notes.pptx
EPANDING THE CONTENT OF AN OUTLINE using notes.pptxEPANDING THE CONTENT OF AN OUTLINE using notes.pptx
EPANDING THE CONTENT OF AN OUTLINE using notes.pptx
 
Full Stack Web Development Course for Beginners
Full Stack Web Development Course  for BeginnersFull Stack Web Development Course  for Beginners
Full Stack Web Development Course for Beginners
 
DATA STRUCTURE AND ALGORITHM for beginners
DATA STRUCTURE AND ALGORITHM for beginnersDATA STRUCTURE AND ALGORITHM for beginners
DATA STRUCTURE AND ALGORITHM for beginners
 
Historical philosophical, theoretical, and legal foundations of special and i...
Historical philosophical, theoretical, and legal foundations of special and i...Historical philosophical, theoretical, and legal foundations of special and i...
Historical philosophical, theoretical, and legal foundations of special and i...
 
Capitol Tech U Doctoral Presentation - April 2024.pptx
Capitol Tech U Doctoral Presentation - April 2024.pptxCapitol Tech U Doctoral Presentation - April 2024.pptx
Capitol Tech U Doctoral Presentation - April 2024.pptx
 
Presiding Officer Training module 2024 lok sabha elections
Presiding Officer Training module 2024 lok sabha electionsPresiding Officer Training module 2024 lok sabha elections
Presiding Officer Training module 2024 lok sabha elections
 

Computer Course Digital Classroom Tools Notes Unit 1, 2, & 3/Dr.C.Thanavathi

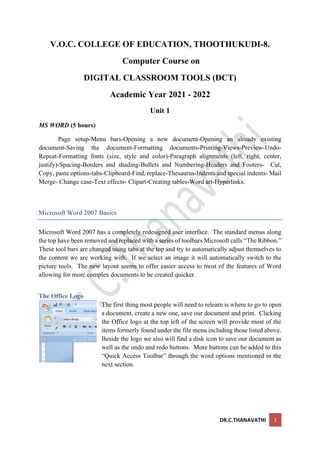
  • 1. DR.C.THANAVATHI 1 V.O.C. COLLEGE OF EDUCATION, THOOTHUKUDI-8. Computer Course on DIGITAL CLASSROOM TOOLS (DCT) Academic Year 2021 - 2022 Unit 1 MS WORD (5 hours) Page setup-Menu bars-Opening a new document-Opening an already existing document-Saving the document-Formatting documents-Printing-Views-Preview-Undo- Repeat-Formatting fonts (size, style and color)-Paragraph alignments (left, right, center, justify)-Spacing-Borders and shading-Bullets and Numbering-Headers and Footers- Cut, Copy, paste options-tabs-Clipboard-Find, replace-Thesaurus-Indents and special indents- Mail Merge- Change case-Text effects- Clipart-Creating tables-Word art-Hyperlinks. Microsoft Word 2007 Basics Microsoft Word 2007 has a completely redesigned user interface. The standard menus along the top have been removed and replaced with a series of toolbars Microsoft calls “The Ribbon.” These tool bars are changed using tabs at the top and try to automatically adjust themselves to the content we are working with. If we select an image it will automatically switch to the picture tools. The new layout seems to offer easier access to most of the features of Word allowing for more complex documents to be created quicker. The Office Logo The first thing most people will need to relearn is where to go to open a document, create a new one, save our document and print. Clicking the Office logo at the top left of the screen will provide most of the items formerly found under the file menu including those listed above. Beside the logo we also will find a disk icon to save our document as well as the undo and redo buttons. More buttons can be added to this “Quick Access Toolbar” through the word options mentioned in the next section.
  • 2. DR.C.THANAVATHI 2 As we can see here the Office logo opens up listing our options for new, open etc. and also contains a list of our recent documents for quick opening. Any of the items listed with an arrow beside them will replace the recent documents on the right with the options associated with the menu item. We should also see at the bottom right of this menu a button for exiting Word and changing Word’s options. Save as The save as option will provide we with the most common file formats to save our document in. The common ones are Word Document, Word Template, and Word 97- 2003 document. The last one is the option most people should be using currently, especially if they wish to share documents with others who do not have the new version of Office. Print Here we can choose from Print, Quick Print and Print Preview. Print brings up the standard print dialog box, quick print will print one copy without any dialog box coming up and print preview will bring up the print preview screen. Prepare The prepare menu’s most common options are Properties, Inspect Document, Mark as Final and Run Compatibility Checker. The properties option allows we to setup metadata for the document like Author, Title, keywords, comments and others. Inspect Document will scan the document for any hidden data like comments and annotations, and any hidden collaboration data. This is very useful when making a previously private document public. It will help we find any comments or changes made previously that should not be made public. Mark as Final will mark the document as a final copy and make it read only so changes cannot be made. The last common item, Run Compatibility Checker will scan the document for new features that were used and show we these. This is recommended if we where creating a document in the new file format but now need to convert it back to the Office 2003 format to share with someone who does not have Office 2007.
  • 3. DR.C.THANAVATHI 3 The Home Tab The home tab the basic formatting tools found in Word 2007. We will find five sections, Clipboard, Font, Paragraph, Styles and Editing. Clicking the down arrow beside any of the icons here will drop down more options for that tool. Each section also contains an arrow in the bottom right corner which will open a window containing the options found in that section. Clipboard The Clipboard allows we to cut, copy, paste and copy formatting from one place to another. Font The font section of the ribbon provides a section to handle the basic text formatting. Items such as bold, underline, strikethrough, highlight and font type can be changed here. Some items from this section and some items from the paragraph section are also available by highlighting text and moving our cursor slightly above the highlighted text. This saves having to move our cursor all the way to the top of the screen for some common formatting items. Paragraph The paragraph section provides icons for bullets, lists, justify, line spacing, indents and borders. Styles The styles section allows we to quickly change the formatting of a section of text by choosing one of the predefined styles. We can also create a new style based on the formatting of our selected text for use later in other sections of our document.
  • 4. DR.C.THANAVATHI 4 Editing The Editing section of the toolbar allows we to find, replace and select items. The select option gives we the ability to select all, select objects or select text with similar formatting. This last option gives we the ability to quickly change everything in our document with one style to another style without having to manually find all of that text and change each area separately. Insert Tab The insert tab has seven sections for inserting most types of objects. The sections are pages, tables, illustrations, links, header and footer, text and symbols. Pages The pages’ section is where we can go to insert a cover page, blank page or page break. The cover page drops down offers a selection of predefined cover pages for our document that have sections for title, date and author. We can also select text in our document and choose to save the selected text to the cover page gallery for use in future documents. Table The table section only has a drop down menu which offers a grid to create a new table, insert table, draw table, convert text to table for selected text, Excel spreadsheet, and some predefined “Quick Tables” that have formatting already setup for we. When working on a table we will have two additional tabs along the top of the ribbon, the design and layout tabs. There are screenshots of both directly below. Table Design Table Layout
  • 5. DR.C.THANAVATHI 5 Illustrations The Illustrations section allows we to insert pictures, clipart, shapes, SmartArt and charts. After inserting or selecting a picture we are provided with a new toolbar along the top shown here. This toolbar gives we the ability to change the brightness, contrast, shape, position, text wrapping and other options for the picture. Clicking off the picture or on one of the other tabs will take we back to the standard toolbars. The Shapes option of the Illustrations section allows we to insert lines, arrows, boxes, basic flowchart shapes and a number of others. The SmartArt option provides features like org charts, flow charts, illustrated lists and processes. The Chart option is similar to Word 2003 but it offers more options for our charts. Links The links section provides options for inserting hyperlinks, bookmarks and cross-references. Cross-references can link to figures, tables, equations, endnotes, footnotes, headers and numbered items. Header & Footer The header & footer section allows we to edit the header, footer and page numbering for our document. Once we select this option it will change the toolbar along the top to include a larger number of options for the header and footer. The header bar is shown here. In order to stop editing the header and footer we need to click the “Close Header and Footer” button on the right of the bar. Text Options in the text section include text box, drop cap, WordArt and a number of predefined text blocks like a signature line the date and time, and document properties like
  • 6. DR.C.THANAVATHI 6 abstract, author, and title. There are a lot of option in here to setup on our own or we can use Words predefined options. Symbols The last option in the insert toolbar is symbols. Here we can insert a large number of special characters and symbols. Choosing the “more symbols” option from the drop down will also allow we to setup shortcut keys for commonly used symbols. One of the improved features of Word 2007 is the equation editor. We can now insert more complicated mathematical and statistical equations. Here there are some standard equations to choose from or we can create our own. Standards like (𝑥 + 𝑎)𝑛 = ∑ (𝑛 𝑘 )𝑥𝑘 𝑎𝑛−𝑘 𝑛 𝑘=0 ,the binomial theorem are available or, by choosing “Insert new equation” we will get the equation toolbar. Which gives we a large number of options to choose from while creating our own equation. ∫ 4 + log 𝑦 ∗ Δ𝑦 Δ𝑥 tan 𝑥 + 𝑥𝑦2 𝑥 𝑦 The equations can be edited in the new Word 2007 file format however, once they are converted to a Word 2003 format they will become images which cannot be edited. Page Layout Tab The page layout tab has five sections, Themes, Page Setup, Page Background, Paragraph, and Arrange. Themes The themes section provides a quick way to format our document. By choosing a theme we will have a set colour scheme, font combinations, and effects. We can choose one of the provided themes, modify a provided them or create our own. We can also go online in this section and browse Microsoft.com for additional themes. Be aware that changing our theme after creating a document may require we to reformat some items as themes also include some layout options.
  • 7. DR.C.THANAVATHI 7 Page Setup Page setup provides we with the tools to change margins, size, orientation, columns, breaks, line numbers and hyphenation in the document. Page Background The page background section allows we to change the background colour of the document, watermark and draft or confidential document or add borders to our document. Paragraph The paragraph section in the page layout tab allows changes to a paragraphs spacing and indentation. Arrange The arrange section is also found in the image toolbar when an image is selected. Here we can change an images position, how text moves around the image, the alignment, grouping and rotation or the image. References Tab The references tab contains six sections, Table of Contents, Footnotes, Citations & Bibliography, Captions, Indexes and Table of Authorities. Table of Contents The table of contents section allows we to insert and modify the table of contents. We can insert automatic or manual table of contents and change what styles will be included in the table of contents, if any. We can also add text to the table and update the table of contents after adding or removing items from our document.
  • 8. DR.C.THANAVATHI 8 Footnotes This section allows we to insert footnotes and endnotes and move through our existing footnotes quickly. Citations & Bibliography This section provides tools to insert citations, manage sources, citation style and bibliography. Captions Insert captions, table of figures, or cross-references in this section. Once we have created a table of figures we can also update the table at the click of a button. Index This section allows we to create an index, update the index and mark and item for inclusion in the index. Table of Authority This section allows we to create a table of authorities, update the table and mark and citations for inclusion in the table of authorities. Mailings Tab The mailings tab contains five sections, create, start mail merge, write & insert fields, preview results and finish.
  • 9. DR.C.THANAVATHI 9 Create The create section provides a window to create envelopes or labels. This is mostly for creating single envelopes, labels or a sheet of the same label. Start Mail Merge The main features of this section are start mail merge, select recipients and edit recipient list. The method most people will likely use to create a mail merge in Word 2007 is the step by step mail merge wizard found in the start mail merge drop down list. This option will bring up a wizard along the right side of the screen that will walk we through the process. Recipients can come from Outlook contact or a large number of files including Access, Paradox, Excel, Word, CSV and even HTML. Write & Insert Fields This section provides the tools necessary to make a document into one that will work with a mail merge. We can Highlight merge fields, work with address block or greeting line, insert new merge fields, setup rules, match fields and update our labels. Preview Results This section allows we to preview our merge before completing it. Make sure all our recipients fit onto one page, the formatting remained the same after merging, look for specific recipients and even have Word auto check for common errors. Finish The final section in the mailings tab completes our mail merge. Review Tab
  • 10. DR.C.THANAVATHI 1 0 The review tab offers six sections which include proofing, comments, tracking, changes, compare and protect. Proofing The proofing section provides the standard spelling and grammar check, a thesaurus, word count, research tools that include MSN search and Microsoft Encarta encyclopaedia. We will also find translation tools to help with single words or the whole document. The translation of the entire document is done by an online service called Wordlingo. Comments The comments section allows we to add comments to a document for easier collaboration. We can cycle through the comments to find out what notes we left for ourself or others and we can delete a comment that was made when it is no longer relevant. Tracking The tracking section can be very helpful with a document that changes a lot while composing it. We can track the changes made, who made them and show the changes in balloons off to the side. Be aware that we must turn this on before it will start to work. Tracking changes does not occur on every document automatically. We should also be aware that unless we clear the changes once the document is final they may be visible to others who receive the document even though older changes were not intended for others to view. We can find all the revisions by turning on the balloons for revisions and checking each on and accepting or rejecting it by right clicking on the balloon and choosing the correct option. We can also clear them with the options in the next section of the review tab. Changes The changes section allows we to cycle through and accept or reject changes made to the document and tracked using the track changes feature. This should be done before the document is considered final so any changes can be cleared and no longer visible if the document is distributed to anyone who should not have access to the revisions and comments.
  • 11. DR.C.THANAVATHI 1 1 Compare This section can be used to compare two versions or a document or help we combine two versions of a document. This can be very helpful when we find we have accidentally been working on one version on our local drive and another on the network. We can take the two documents and step through them combining them instead of redoing work that was already done. Protect The protect section gives we options to add a password and protect the document. We can restrict changes to formatting and editing or the whole document. If we use Windows Live, we can also manage permissions for specific users who also have Windows Live. View Tab The view tab offers five sections which include document views, show/hide, zoom, window and macros. Document Views The document views section switches we between print layout, full screen reading, web layout, outline and draft views. Print layout is the default view. Full screen view removes all but a couple of tools from the top of the screen and the rest of the screen is our document. Web layout will take away the empty space on either side of the document if there is any and fill the window as if it were a web page. Outline view changes the look of our document into an almost point form style which may help with reviewing main points. Draft view takes away most of our formatting and images and just shows the text. It also fills the window with our text similar to web layout. Show/Hide The show/hide section will toggle certain tools on or off the screen including rulers, gridlines, message bar, document map and thumbnails. The rulers will show along the top and left side of the screen. Gridlines will cover our entire document inside the margins. They will be visible on screen but don’t print. The message bar can only be displayed when there is a message to be displayed. One common reason for the message bar to display is when macros have been enabled or disabled. The document map and thumbnails will show along the left hand side of the screen.
  • 12. DR.C.THANAVATHI 1 2 Zoom The zoom section provides tools to zoom into or out of the document. We can choose our own zoom factor or use one of the predefined zoom factors of 100%, one page, two pages (side by side), or page width which causes the document to zoom in or out so it fills our window. Window The new window button will open our current document in a new window. The arrange all button will take our currently open windows and stack them one on top of the other. The split button will take our current document and show it in two frames within the window one on top of the other. This will allow we to look at something we wrote on page one while working on page twenty. View side by side allows we to view two windows side by side, once in side by side view we can turn on synchronous scrolling so both side scroll at the same time. Also while in side by side mode if we resized either window we can click the reset window position button to have them share the screen equally again. The switch window drops down will allow we to switch between open windows. Macros The macros section provides the tools required to work with and create basic macros. We can view existing macros or record our own. Choose record macro from the drop down and then perform the functions we do often, like change the page layout, and style of the document. Once we have done those tasks then stop recording. We will be able to use that macro over again to shorten the steps we need to take every time we need to perform that set of tasks.
  • 13. DR.C.THANAVATHI 1 3 PARTS OF THE MICROSOFT WORD 2007 SCREEN AND THEIR FUNCTIONS 1. Office Button – Click the Office Button to find a drop down menu containing options, such as: open, save, and print. Also shows previously opened files, which we may choose to “pin” them to make them “permanent” choices. 2. Ribbon – The Ribbon is the strip of buttons and icons located above the work area in Word 2007. The Ribbon replaces the menus and toolbars found in earlier versions of Word. Each ribbon contains groups of command buttons with common purpose. Each ribbon contains 7 tabs. 3. Tab Selector button – We can easily set tab stops by clicking on the desired position on the ruler. This button allows we to determine which type of tab will be set left aligned, right aligned, center aligned or decimal tab. Clicking on this button will allow we to change the tab style. 4. Rulers – Gives we an idea of where we are on the page 5. Document – This is what we are typing/what will print out
  • 14. DR.C.THANAVATHI 1 4 6. Status Bar – This row can be customized by right-clicking and selecting desired options. Desired options may include page number/number of total page, word count, insert/overtype mode, caps lock, and zoom slide. 7. Task Bar – Shows open programs. 8. View Shortcuts – These four buttons allow we to change the way we view our document on the screen. From left to right they are: print layout, full screen reading, web layout and draft. These can be added/removed by right clicking anywhere on the status bar and checking/unchecking View shortcuts. 9. Zoom Slide – Allows we to increase/decrease the amount of the document we see on the screen. 10. View Ruler Button – Allows we to view/hide the rulers. 11. Screen Split Button – At the top of the vertical scroll bar is a new button. Just below the double arrow is a tiny button that looks like a minus sign that lets we split our screen in two when double-clicked. Double-clicking it a second time will unsplit our screen. 12. Scroll Bars – Allows we to view entire workbook by moving it up, down (vertical scroll bar), left or right (horizontal scroll bar). 13. Right Indent – Slide this triangle to the left of the margin to limit the right side of a paragraph to that point. Move the triangle to the right of the margin to allow the right side of the paragraph to extend beyond the margin. The triangle at the margin will keep the right side of the paragraph with the margin. 14. Group – Command buttons with a common purpose are clustered together. Each ribbon contains several groups. Some groups, but not all, contain a quick launch bar (dialogue box launcher) in the bottom right hand corner. 15. Quick Launch Bar/Dialogue Box Launcher – It is the arrow in the bottom right hand corner of some groups. When clicked, it will bring up a dialog box where additional options/changes can be entered. 16. Title Bar – Shows name of program and open document. Also contains minimize, maximize and close buttons. 17. Quick Access Toolbar – This customizable toolbar allows we to add frequently used commands. Click on the down arrow at the end of the toolbar to add/remove command buttons – or - right-click on any command button and choose Add to Quick Access Toolbar. 18. Tab – The ribbon is broken down into 7 tabs. Each tab has a common purpose and consists of several groups. To
  • 15. DR.C.THANAVATHI 1 5 select a tab, simply click on it and the appropriate groups will be displayed. 19. First Line Indent – This triangle controls where the first line of a paragraph begins. Moved to the left of the margin, will allow the first paragraph to be in the left margin. Can be moved to the right of the margin to indent our paragraph. THIS IS NOT SETTING TABS! 20. Hanging Indent – The opposite of a first line indent. It is often moved to the right of the first line indent, which allows the remaining lines of a paragraph to be indented according to placement of the triangle.
  • 16. DR.C.THANAVATHI 1 6 Title Bar: Displays the file name of the document that is being edited and the name of the software we are using. It also includes the standard Minimize, Restore, and Close buttons. Quick Access Toolbar: Commands that are frequently used, such as Save, Undo, and Redo are located here. At the end of the Quick Access Toolbar is a pull-down menu where we can add other commonly used or commonly needed commands. File Tab: Click this button to find commands that act on the document itself rather than the content of the document, such as New, Open, Save as, Print, and Close. Ribbon: Commands needed for our work are located here. The appearance of the Ribbon will change depending on the size of our monitor. Word will compress the ribbon by changing the arrangement of the controls to accommodate smaller monitors. Edit Window: Shows the contents of the document we are editing. Scroll Bar: Lets we change the display position of the document we are editing. Status Bar: Displays information about the document we are editing. View Buttons: Lets we change the display mode of the document we are editing to fit our needs. Zoom: Lets we change the zoom settings of the document we are editing.
  • 17. DR.C.THANAVATHI 1 7 UNIT 2: MS POWERPOINT (5 hours) Views and Slides- Editing text- Inserting pictures, Sounds, Files, Charts and Movies- Backgrounds- Animation-Graphics-Slide design- Slide layout- Slide Transitions-Headers and Footers- Slide masters- Customizing Slide show- Printing slides- Making use of PowerPoint in the classroom MS Power Point With Microsoft PowerPoint, we can create exciting slide show presentations. PowerPoint is a presentation software package. With PowerPoint, we can easily create slide shows. We create our PowerPoint presentation on slides. We use layouts to organize the content on each slide. PowerPoint has several slide layouts from which to choose. Themes are sets of colors, fonts, and special effects. Backgrounds add a colored background to our slides. We can add themes and backgrounds to our slides. After we complete our slides, we can run our presentation. Create a Title Slide When we start PowerPoint, PowerPoint displays the title slide in the Slide pane. We can type the title of our presentation and a subtitle on this slide. To enter text:  Click and type the title of our presentation in the "Click to add title" area.  Click and type a subtitle in the "Click to add subtitle" area. Create a Title Slide 1. Open PowerPoint. We are presented with a title slide. 2. Enter the information shown here. Type College Scholarships and Financial Aid in the Click to Add Title text box. Type Paying for College in the Click to Add Subtitle text box Create New Slides After completing our title slide, we can create additional slides. To create a new slide: 1. Choose the Home tab. 2. Click the New Slide button in the Slides group. The Office Theme dialog box appears and displays several layout templates. 3. Click the layout we want. The layout appears in the Slide pane of the PowerPoint window. 4. To add text, click inside the placeholder and type. 5. To add an additional slide to our presentation, do one of the following  Right-click the slide layout.  A menu appears. Click Layout and then click the layout we want.  Choose the Home tab,
  • 18. DR.C.THANAVATHI 1 8  click the New Slide button  and then choose the slide layout we want Create an Outline If we need to present the information in our slide in outline form, we can easily create an outline by using the Increase List Level button to create a hierarchy. 1. Choose the Home tab. 2. Click the New Slide button in the Slides group. The Office Theme dialog box appears. 3. Click the Title and Content layout. 4. Enter the information shown here. Click the Increase List Level button in the Paragraph group to indent the bullets for Stafford Loans and PLUS Loans. If we ever need to decrease an indent, use the Decrease List Level button in the Paragraph group. Use Two-Column Text We can also place text in two separate columns. 1. Choose the Home tab. 2. Click the New Slide button in the Slides group. The Office Theme dialog box appears. 3. Click the Two Content layout. 4. Enter the information shown here. Make Changes to Our Slides After creating a slide, if we want to add text: 1. Place the mouse pointer at the point at which we would like to add text. 2. Type the information we want to add. If we would like to change text: 1. Select the text we want to change. 2. Type the new text. We can use the Backspace key to delete text. We can also delete text by highlighting the text and pressing the Delete key. Apply a Theme A theme is a set of colors, fonts, and special effects. Themes provide attractive backgrounds for our PowerPoint slides. To apply a theme to all of the slides in our presentation: 1. Choose the Design tab. 2. Click the More button in the Themes group.
  • 19. DR.C.THANAVATHI 1 9 3. Click the design we want. To apply a theme to selected slides: 1. Click the Slides tab, located on the left side of the window. 2. Hold down the Ctrl key and then click to select the slides to which we want to apply a theme. 3. Choose the Design tab. 4. Click the More button in the Themes group. 5. Right-click the theme we want to apply. A menu appears. 6. Click Apply to Selected Slides. Excel applies the theme to the slides we selected. We can add a dramatic effect to our theme by applying a background. 1. Choose the Design tab. 2. Click the Background Styles button. 3. Click the background we want. Add a Background 1. Choose the Design tab. 2. Click the Background Styles button. 3. Click the background we want. PowerPoint applies the background to our slides. Run Our PowerPoint Slide Show After we create our slides, we can run our slide show: 1. Do any one of the following: o Press F5. o Choose the Slide Show tab. Click the From Beginning button in the Start Slide Show group. o Click the Slide Show icon in the bottom-right corner of our screen. Our slide show appears on our screen. Most Popular Search Engines  Google.  Bing.  Yahoo.  Ask.com.  AOL.com.  Baidu.
  • 20. DR.C.THANAVATHI 2 0  Wolframalpha.  DuckDuckGo ect., kinds of viruses  Resident Viruses.  Direct Action Viruses.  Overwrite Viruses. ...  Boot Virus. ...  Macro Virus. ...  Directory Virus. ...  Polymorphic Virus. ...  File Infectors etc., kinds of antiviruses  AVG.  McAfee  Norton  Kaspersky  Ad Aware.
  • 21. DR.C.THANAVATHI 2 1 UNIT 3: MS EXCEL (5 hours) Creating a spreadsheet-Collecting data for project- Entering data- Editing cell contents- Preview and printing-Headers and footers-Formatting data-Formulas-Cut, copy and paste-Max and Min-Inserting function into formula-Insert and delete columns-If function-Multiple sheets- Charts and Graphs. Microsoft Excel 2007 Basics Microsoft Excel 2007 has a completely redesigned user interface. The standard menus along the top have been removed and replaced with a series of toolbars Microsoft calls “The Ribbon.” These tool bars are changed using tabs at the top and try to automatically adjust themselves to the content we are working with. If we select an image it will automatically switch to the picture tools. The new layout seems to offer easier access to most of the features of Excel allowing for more complex documents to be created quicker. The Office Logo The first thing most people will need to relearn is where to go to open a document, create a new one, save our document and print. Clicking the Office logo at the top left of the screen will provide most of the items formerly found under the file menu including those listed above. Beside the logo we also will find a disk icon to save our document as well as the undo and redo buttons. More buttons can be added to this “Quick Access Toolbar” through the Excel options mentioned in the next section.
  • 22. DR.C.THANAVATHI 2 2 As we can see here the Office logo opens up listing our options for new, open etc. and also contains a list of our recent documents for quick opening. Any of the items listed with an arrow beside them will replace the recent documents on the right with the options associated with the menu item. We should also see at the bottom right of this menu a button for exiting Excel and changing Excel’s options. Save as The save as option will provide we with the most common file formats to save our document in. The common ones are Excel Workbook, Excel Macro-Enabled Workbook, Excel Binary Workbook, and Excel 97- 2003 Workbook. The last one is the option most people should be using currently, especially if they wish to share documents with others who do not have the new version of Office. Print Here we can choose from Print, Quick Print and Print Preview. Print brings up the standard print dialog box, quick print will print one copy without any dialog box coming up and print preview will bring up the print preview screen. Prepare The prepare menu’s most common options are Properties, Inspect Document, Mark as Final and Run Compatibility Checker. The properties option allows we to setup metadata for the document like Author, Title, keywords, comments and others. Inspect Document will scan the document for any hidden data like comments and annotations, and any hidden collaboration data. This is very useful when making a previously private document public. It will help we find any comments or changes made previously that should not be made public. Mark as Final will mark the document as a final copy and make it read only so changes cannot be made. The last common item, Run Compatibility Checker will scan the document for new features that were used and show we these. This is recommended if we were creating a document in the new file format but now need to convert it back to the Office 2003 format to share with someone who does not have Office 2007. The Home Tab
  • 23. DR.C.THANAVATHI 2 3 The home tab the basic formatting tools found in Excel 2007. We will find seven sections, Clipboard, Font, Alignment, Number, Styles, Cells and Editing. Clicking the down arrow beside any of the icons here will drop down more options for that tool. Each section also contains an arrow in the bottom right corner which will open a window containing the options found in that section. Clipboard The Clipboard allows we to cut, copy, paste and copy formatting from one place to another. Font The font section of the ribbon provides a section to handle the basic text formatting. Items such as bold, underline, strikethrough, highlight and font type can be changed here. Some items from this section and some items from the number section are also available by right clicking a cell. This saves having to move our cursor all the way to the top of the screen for some common formatting items. Alignment The alignment section provides icons to justify, Vertical alignment, indents, text wrap, merge cells and centre text and text orientation. Number The number section provides the options for formatting numbers. We can choose the type of number, like date, currency, percentage, fraction or general. We can also increase or decrease the number of decimal places shown. Styles The styles section allows we to quickly change the formatting of a section of cells by choosing one of the predefined styles. We can
  • 24. DR.C.THANAVATHI 2 4 choose different types of conditional formatting, table formatting or cell styles. These are used to change the visual appearance of a section to quickly show what is being displayed in an area. Cells This section allows we to insert of delete cells, rows, columns, or sheets. We can also format the height or width of columns and rows, hide or unhide elements, organize or protect cells and sheets. There are a lot of features in this section under the format option. Editing The editing section gives we options for inserting functions, filling formulas across cells, clearing formatting and formulas, sorting and finding. Again, there is a large number of options in this area. These options are also included in the image to left. Insert Tab The insert tab has five sections for inserting most types of objects. The sections are tables, illustrations, charts, links, text and symbols. Tables The tables section has an option for pivot tables and charts and tables. We can select an area and turn it into a formatted table or pivot table with these options. Once we have created our table there is another tab which becomes available to work with the table design. This tab is shown below. Table Design
  • 25. DR.C.THANAVATHI 2 5 Illustrations The Illustrations section allows we to insert pictures, clipart, shapes, and SmartArt. After inserting or selecting a picture we are provided with a new toolbar along the top shown here. This toolbar gives we the ability to change the brightness, contrast, shape, position, text wrapping and other options for the picture. Clicking off the picture or on one of the other tabs will take we back to the standard toolbars. The Shapes option of the Illustrations section allows we to insert lines, arrows, boxes, basic flowchart shapes and a number of others. The SmartArt option provides features like org charts, flow charts, illustrated lists and processes. The Chart option is similar to Excel 2003 but it offers more options for our charts. Charts The charts section provides drop down menus to insert different types of column, line, pie, bar, area, scatter and other types of charts. Once we create a chart we will get three additional tabs to work with our chart. They are shown below. Chart Design Tab Chart Layout Tab
  • 26. DR.C.THANAVATHI 2 6 Chart Format Tab Links The links section provides options for inserting hyperlinks to our spreadsheet. Text Options in the text section include text box, header and footer, WordArt and a number of predefined text blocks like a signature line and symbols. There are a lot of option in here to setup on our own or we can use Excel’s predefined options. Page Layout Tab The page layout tab has five sections, Themes, Page Setup, Scale to Fit, Sheet Options, and Arrange. Themes The themes section provides a quick way to format our document. By choosing a theme we will have a set colour scheme, font combinations, and effects. We can choose one of the provided themes, modify any provided theme or create our own. We can also go online in this section and browse Microsoft.com for additional themes. Be aware that changing our theme after creating a document may require we to reformat some items as themes also include some layout options. Page Setup Page setup provides we with the tools to change margins, size, orientation, columns, breaks, backgrounds and add print titles to the document.
  • 27. DR.C.THANAVATHI 2 7 Scale To Fit This section allows we to scale to fit our document onto a certain number of pages or to scale it to a certain percentage of its current size. Sheet Options This section gives we checkboxes to view or print headings and gridlines. Arrange The arrange section is also found in the image toolbar when an image is selected. Here we can change an images position, the alignment, grouping and rotation or the image. Formulas Tab The formulas tab contains four sections, function library, defined names, formula auditing and calculation. Function Library This section gives we access to the large number of predefined Excel functions. There are Auto Sum functions, financial, logical, text, date and time, lookup and reference, math and trig, and additional functions. It also provides a section for recently used functions so we can get back to the ones that we use the most quickly. Defined Names The defined names section allows we to create names or variables to be referenced in other areas. This would be like assigning “taxrate” to cell b2 so in a formula we can easily see what we were referencing when we look at a formula month after creating it. The formula =A10*taxrate means more later than =a10*b2
  • 28. DR.C.THANAVATHI 2 8 Formula Auditing This section provides tools to manage formulas to ensure that they are correct. We can use the tools here to find out what cells our formula depends on, what cells depend on the current cell, and show the formula in a cell instead of the resulting value. There is also a tool for error checking which will look for common errors in formulas. Calculation Here we can turn on or off automatic calculation from formulas. If we turn off automatic calculations, we can use this area to calculate the current cell or the whole sheet. Data Tab The data tab contains five sections, get external data, connections, sort and filter, data tools, and outline. Get External Data This is a single drop down item which allows we to refresh data from an external source. We can pull in data from Access, the Internet, text files or from other external sources. Connections Here is where we manage any connections to outside sources. The setup done here is what allows we to pull data from the external sources listed above. Sort & Filter Here we can sort or filter our data based on criteria we specify. We can use simple alphabetical sorting or create more complex filters to manipulate our data.
  • 29. DR.C.THANAVATHI 2 9 Data Tools With the data tools section, we can take text and turn it into columns, remove duplicates, check our data to make sure it is valid based on different criteria. Are they all whole numbers? Are they all properly formatted dates? We can also consolidate data or do “What if” analysis where we can check we data against different scenarios. Outline The final section in the data tab provides tools to group or ungroup rows or columns and obtain subtotals for grouped items. Review Tab The review tab offers three sections which include proofing, comments, and changes. Proofing The proofing section provides the standard spelling and grammar check, a thesaurus, and research tools that include MSN search and Microsoft Encarta encyclopedia. We will also find translation tools to help with single words or the whole document. The translation of the entire document is done by an online service called Wordlingo. Comments The comments section allows we to add comments to a document for easier collaboration. We can cycle through the comments to find out what notes we left for ourself or others and we can delete a comment that was made when it is no longer relevant. Changes The changes section allows we to protect a sheet or the entire workbook, we can also share a workbook. Some of the sharing features are only available to users on a Windows domain. This authenticates the users against the domain for access so this will not work for many people.
  • 30. DR.C.THANAVATHI 3 0 View Tab The view tab offers five sections which include workbook views, show/hide, zoom, window and macros. Workbook Views The workbook views section switches our display between normal view, page layout, full screen and page break preview. The page layout will show we what will be on each page and provide a way to add headers and footers to each page. The page break preview will show we a scaled version of our spreadsheet with dotted lines showing where the page breaks will be. There is also a way to work with custom views here. Show/Hide The show/hide section will toggle certain tools on or off the screen including rulers, gridlines, message bar, formula bar and headings. The rulers will show along the top and left side of the screen. Gridlines will show the grids around each cell. They will be visible on screen but don’t print. Zoom The zoom section provides tools to zoom into or out of the document. We can choose our own zoom factor or use the predefined zoom factor of 100% or we can select a section and zoom so it fills our screen. Window The window section allows we to create a new window, arrange our windows one on top of the other or split our window so the same document is viewed in two screens one on top of the other. We can also hide and unhide a window. Once we have arranged our windows the way we like them we can save the workspace so we can open to this setup when we need to work on these items again. This is very handy for setups where we need to work on multiple documents at once and we have to do this a lot. We can also choose which window to work on through the switch windows drop down menu. Macros The macros section provides the tools required to work with and create basic macros. We can view existing macros or record our own. Choose record macro from the drop down and then perform the functions we do often, like change the page layout, and
  • 31. DR.C.THANAVATHI 3 1 style of the document. Once we have done those tasks then stop recording. We will be able to use that macro over again to shorten the steps we need to take every time we need to perform that set of tasks.