
More Related Content
What's hot
What's hot (20)
Viewers also liked
Viewers also liked (12)
Similar to Xpression CG Handbook
Similar to Xpression CG Handbook (20)
Recently uploaded
Recently uploaded (20)
Xpression CG Handbook
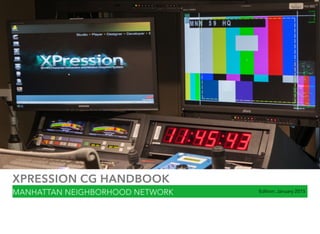
- 1. XPRESSION CG HANDBOOK MANHATTAN NEIGHBORHOOD NETWORK Edition: January 2015
- 2. Table of Contents Principles of Graphics 2 Types of Graphics 4 Introduction to Xpression CG 6 Media Management | Setting up a Project…………………………7 Xpression Interface……………………………………………………………………………9 Understanding Objects………………………………………………………………….11 Understanding Materials……………………………………………………………….12 Understanding Text Objects……………………………………………………….13 Scene Fonts…………………………………………..……………………………………………..14 Creating Templates….…………………………………………………………..…………..16 How to Create a Lower Third…………………………………………16 How to Create a Full-Page Graphic………………………..…19 How to Create Credits…………………………………………………….…21 Templates in Sequencer Mode……………………………………….………..22
- 3. PRINCIPLES OF GRAPHICS When working with images and graphics, there are three key elements to be aware of: • Image Size & Aspect Ratio • Title Safe Area • Readability In this section, we will explore graphic principles and the types of video graphics. 2
- 4. IMAGE SIZE & ASPECT RATIO When gathering images to use for broadcast, it is important you understand the importance of image sizes. The aspect ratio for broadcasting in MNN’s HD studios is 16x9. Media from different sources, such as cell phones and digital cameras, come in all shapes and sizes. The advantage of recording in MNN’s studios is that most media will fit in the HDTV 16x9 aspect ratio regardless of the source. TITLE SAFE AREA This is the area in which all essential information should remain. This ensures that all titles and graphics will be visible regardless of the viewers screening device. The area within the gray bars is the title safe area for 4x3 SD monitors. If you use the title safe area within the 4x3 frame, graphics will be clearly visible on 16x9 screens. READABILITY There are a few elements that aid in building the best graphics for your viewers and they all depend on their ability to be read. • Color: Be aware of your set, talent’s clothes and any other items that may compete with the graphic colors. It is best to mix high energy or loud colors (reds, yellows, blues) with low energy colors (gray, pink, light blue). Mixing multiple high energy, bright, loud colors, can be distracting to the viewer’s eye. • Amount: Keep it simple. Don’t try to fit too much information on the screen. • Safe Area: Be aware of the placement of graphics. As we mentioned previously, if information is outside of the safe areas, it risk not being visible. • Fonts: Use large, bold fonts. San serif or fonts that don’t have the feet on them are best for the screen. All caps, condensed and narrow font types are key font elements when it comes to readability. Using thin or script font types is not recommended. 3 4x3 Title Safe Area 16x9 Title Safe
- 5. TYPES OF GRAPHICS Video graphics give shows an identity and personality. Many mediamakers create a “graphics package” for their video projects. A graphics package usually consists of backgrounds, lower thirds, idents/bumps and credits. Your project could include some or all of these elements and it is recommended they all have a similar style and theme. You can create a consistent graphics package by making sure you use consistent fonts, colors and images. In this section, we will discuss four primary types of graphics. BACKGROUNDS These are full-screen animations or images that leave a blank area designated for text. The blank area is for important information that may need to appear on-screen during a show. For example, this could be event information, a calendar of events or images pertaining to the show’s topic. IDENTS This graphic type, also referred to as a bump, is usually featured between show segments. This graphic features the show’s brand or identity by including the logo, colors and font styles. LOWER THIRDS A lower third graphic is generally placed in the lower third portion of the screen. This graphic provides information to the audience regarding individuals featured on the show. This information could be the host/guest name and their roles. You could also use lower thirds for additional text information such as telephone numbers for call-in shows, questions by callers, websites or social networking information. These graphics differ from backgrounds because they do not cover the entire screen. CREDITS These graphics are a list of names of the cast and crew involved in the production. They usually appear on-screen as rolling text but can also appear as a series of individual titles fading from one to the next. 4
- 6. INTRO TO XPRESSION CG Xpression CG is character generator software that gives you the ability to create dynamic graphics for your studio production. This PC computer-based application gives producers the ability to create titles, lower thirds, credits and add pre-created video opens, roll-ins and PSAs to your production. There are two primary areas to the Xpression interface: Layout and Sequence. The Layout portion of the interface is where you create your graphics. You are essentially creating templates that you will use for your project. This is where you design and build elements such as the lower thirds, opening graphics, logos and credits. The Sequencer portion of the interface is where you can modify and implement the graphics to appear during your studio production. Before we discuss in detail the capabilities of the layout and sequencer, lets explore media management and how to set up a project. 5
- 7. MEDIA MANAGEMENT Before you begin creating graphics in Xpression, it is important to ensure any existing media will work inside of Xpression. If you plan to add any images, logos or videos, it is important to know what is acceptable. IMAGES Xpression will accept most flattened image file types: JPEG, PNG, TIFF. When working with photos, it is best to use photos with high resolutions, preferably the same as the video resolution, 1920x1080. If your image or images are too large (larger than 1920x1080), you can resize them using the application PAINT on the PC or PREVIEW on a Mac. Avoid using images smaller than 700x700. VIDEOS & AUDIO If you want to add short-form videos such as a video open, pre- recorded video segment (recommend these range from 3-5 minutes) or a PSA to your Xpression project, it must be converted to a specific file type. Audio files in Xpression must be in the WAV format. Audio can be in the form of sound effects or music. If you need assistance with converting an existing audio file to a WAV file, visit the Production & Facilitation department or email education@mnn.org. Video & Audio in Xpression is an advanced technique that is not covered in this handbook. SETTING UP A PROJECT Before you open Xpression, first create a project folder. You can create this folder on your personal, portable hard drive or on the Xpression computer’s :C drive. • Navigate to the START menu (Windows logo). • Select COMPUTER. • Find your hard drive or the :C drive and double-click to open. Double-click the folder titled “Xpression Projects.” • At the top of the tool bar, in the blue area, select “new folder.” • Title your new folder. 6
- 8. Now you are ready to open the CG application and create a new project. Double-click the icon on the desktop titled “Xpression Designer.” Once the application is open, you can begin the process of creating a project. • Go to the top toolbar and select FILE > NEW. You will get a prompt asking you to “Save Changes to project Untitled?” Select NO. • Now you want to select your Project Settings. On the left side of the window, select the preset under HD-SDI labeled “1080i 29.97.” • Select the location to save your project. Select the “browse” button and find the folder you created. • In the space under the location, name the project the same title as your folder or something similar. • IMPORTANT: Make sure “Create Project Structure” is checked. This will create a series of subfolders inside of the folder you created. This is where you should place all of your project’s assets. Keeping your assets together makes it easy for you to move your project from computer to computer and to make future changes. • Select the OK button. You will get a warning stating “Project location already exists, use this folder anyway?” Select YES. • Now your project is ready to go. To see the subfolders created by Xpression, select the EXPLORE button and you will see folders like audio, images, videos, etc. Place all assets (images) in these folders only. Stay organized! 7
- 9. XPRESSION INTERFACE: LAYOUT MODE As we discussed in the beginning of this section, this is the area where you create and edit your graphics. Explore this window and become familiar with what each section of the layout interface. 8 1) Main Viewport: This is where you will design and edit each template, also referred to as a scene. This is the main window where you can see your graphic while designing it. 2) Scene Manager: This is where all of the scenes (or templates) that you create will be listed. You can also create scene groups. At the top of this section, you press the green plus sign to create a new scene or scene group. 3) Object Manager: Graphics are comprised of objects. As you add elements (or objects) to your scenes, you will be able to see a list of those objects in this area. You can turn the visibility of objects on and off by pressing the large eye symbol. 4) Object Inspector: This is where you can change various attributes of an object; for instance, the size, position, font for text objects, etc. 5) Object Library: This is where all of the available objects are listed. You can drag an object from this window to the Viewport window to begin creating graphics. The most common objects are text, backgrounds and quads. 6) Material Manager: On the far right of the interface is a button labeled Material Manager. If you hover your mouse over this tab, a window will popout. This is where you can add materials to change qualities of an object. For instance, you can add color, images or videos as a material on an object. 12 3 4 5 6
- 10. XPRESSION INTERFACE: SEQUENCE MODE When in sequence mode, you can customize elements of the templates created in layout mode. This is also where you create playlists and control playback graphics that will appear during your studio production. 9 1) Scene Manager: This is where all of your templates are listed. You cannot make design changes to templates on the Sequence side. Return to Layout mode to make modifications. 2) Sequencer Playlist: Drag a template scene from the Scene Manager to this window to sort, edit and activate your graphics for the studio production. You can drag as many templates as many times as you like. When you delete a scene from the playlist, it does not delete the original template. Just drag another template from the scene manger. We will discuss how to create template links and publish object so they are editable in Sequencer mode. 3) Take Inspector: This is where you can name groups or take items, add transitions to take items or modify text or materials to take items. 4) Sequencer Playlist: This gives you a thumbnail preview of the take items in the Sequencer Playlist. 5) Preview: This is a preview of the take item prepared to go on air. 1 2 3 4 5
- 11. Before you can begin making graphic templates in layout mode, it is important to understand objects, materials and how to create and format text. UNDERSTANDING OBJECTS To begin creating graphics, you want to start with an object. Let’s discuss two primary object groups you will use to create graphics: Base Objects: These are the most common objects and most graphics include one or both of these base objects. Primitives: These are shape objects used to create bars for lower thirds, bugs with logos and various other elements to design graphics. The most common primitive is a Quad and this is what we will use to create a background bar for our lower thirds. Once an object has been added to a scene, you can change elements or attributes of the object using the Object Manager and Object Inspector. When you have multiple objects in the Object Manager, you have to select which object you want to make changes to and make those changes in the Object Inspector. You can single-click with your mouse any object in the Object Manager to change the name. There are multiple tabs in the Object Inspector: 10 Object Type (Quad): This is where you can change the size of the object. If you want the aspect ratio of the material added to the object to stay the same, check the box “maintain aspect ratio of texture.” Transform: This tab is where you can rotate, scale make position changes to your object. This can also be done using the transform tools on the toolbar. Materials: This tab will show you a thumbnail view of material options or let you select materials in your subfolders so you may apply them to objects.
- 12. UNDERSTANDING MATERIALS Materials are added to objects to define their look and style. You can add a standard material to give a quad or text object color. You can also add an image or video material to an object. Materials are contained in the Materials Manager located on the far right of the Xpression Interface. Once you hover your mouse over the Materials Manager tab, you can see all of the materials you have created or imported into Xpression When importing images to use as materials, make sure they are in the pre-created Xpression folders. To import or create a material, do the following: Images and Videos are added to the list of All Materials. • To create a new “Material,” right-click and select NEW > MATERIAL. • To import a image or video material, right-click and select NEW > IMAGE OR VIDEO. • This will open a Material Editor window, where you can select the color of the material. The DIFFUSE channel must be selected to adjust the color. Then drag the mouse inside of the color picker to select a color. To change the color shade, drag the position of the color wheel up or down to change the base color options. Once a material is created or imported into the All Materials list, it is NOT automatically added to the object. To add a material to an object: • Select the object in the Object Manager window. When selected, it should be highlighted. To add a material to multiple objects, press SHIFT then select multiple objects. • Navigate to the Materials Manager and double-click the material you want to apply to your object or objects. 11
- 13. UNDERSTANDING TEXT OBJECTS The process of formatting text begins with selecting a TEXT object from the Object Library. Once a text object has been created, you can see it in the Object Manager. Once a text object is created, you can start typing your text into that object. You can rename the text to reflect what that text is by single-clicking the default name in the Object Manager. The Object Inspector for text consists of a variety of tabs. Let’s discuss the basic text object tabs: 12 Scene Fonts: This is where you change the font type, face, border, size, slant, etc. You can create and save fonts and apply them to various scenes with text. Transform: This is where you can change the position of objects. You can also rotate and scale objects under this tab. Tabs & Options: This is where you change the justification of your text. You can make it left, right or centered- justified. You can also add auto-squeeze and word wrap to have greater control over your text. Materials: If you want to add video, images or a color material to your text, you can choose a material in this tab. Template Links: If you want to be able to change text or materials of the template once in sequencer mode, enable template links. This will allow you to change titles for info graphics or lower thirds or images for over-the-shoulder graphics.
- 14. SCENE FONTS When you create your first text object, you can change the size, font face and various other elements. When making scene templates, you will use a variety of font types and styles in a single scene. For instance, when creating credits, you may want the crew position title to be larger or smaller than the name of the person performing the role. In that case, you will have two USED scene fonts for your template. When you select a text object you have created, you will see what fonts are USED in that scene. You will also see STOCK fonts that you have previously created. CREATING A NEW FONT: • Create a text object. Type the necessary text. • Highlight the text in the Main Viewport. • Press the NEW button. • Change the face, size, style, etc. (Note: You may not be able to see the changes until the next step). • Press APPLY. Continue to make changes to text. That newly created font will be added to the USED row. When the font is not in use in that specific scene, it will be added to the STOCK row. The text must be selected in the Object Manager to see the USED fonts. SCENES WITH MULTIPLE FONTS If you have a scene with multiple fonts, you can highlight the font to see which font is being used. As you can see in the picture (right), when “Director/TD” is highlighted, the font being used is also highlighted. FONTS IN MULTIPLE SCENES When you create scene fonts, you can apply them to multiple scenes. Be careful because if you place a scene font into multiple scenes and make a change to the font in one scene, it will change all scenes with that font. If you get the popup warning (pictured below), make sure you do want all fonts to change. If you do not want all of the scene fonts to be affected, then create a new font using the steps previously mentioned. 13
- 15. NAMING FONTS As you begin to build up fonts in your project, it is best to keep them organized so you know what your originally created them for. If you look under the thumbnail image (highlighted green) of the USED and STOCK fonts, you will see some numbers and words. The first number is the order in which the font was created (1,2,3,4). So as you create more and more fonts, that number will keep going up. The next is the title. By default, it will name it Font. You will want to name your fonts things such has “header, title, subtitle, etc.” You can rename this to something that makes more sense by right-clicking with your mouse and selecting RENAME. The last numbers represent the size of the font. This is good since you may have quite a few fonts of varying sizes. APPLYING STOCK FONTS TO EXISTING TEXT If you already have text in a scene template and want to change the font to an older font you previously created, do the following: • Highlight the text you want to change in the Main Viewport. • Select from your list of STOCK fonts. • Press the APPLY button. 14
- 16. CREATING TEMPLATES In this section, we will walk through how to create a basic lower third, full-page and credits. We will also discuss how to add template links so elements of these templates can be changed once in the Sequencer. HOW TO CREATE A LOWER THIRD STEP 1: Create a Quad. Navigate to the Object Library and select QUAD. With the Quad selected, adjust the Width and Height of the Quad in the Object Inspector. STEP 2: Create a Material. Give the Quad a background color by adding a material. Navigate to the Material Manager. Right-click with your mouse in the Material Manager window and select NEW > MATERIAL. STEP 3: Once the material has been created, you can select the color of your choice. Make sure the DIFFUSE channel is selected and choose your color. Press OK. STEP 4: Add Material to the Quad. With the Quad selected in the Object Manager, double-click the material you just created. The material is in the Material Manager. 15
- 17. STEP 5: Move the Material. The material should be placed in the lower third of the screen. Select the Quad object, then press the CTRL key, then click and drag the Quad object to the new position. STEP 6: Add Primary Text Object. Select a TEXT object from the Object Library. Type your text that identifies your main person. Click the SCENE FONTS tab and select your size and font type. To change the color of the font, select EDIT MATERIAL under the FACE area (see highlighted area below). STEP 7: Add Secondary Text Object. Create another TEXT object. This text object is to identify the role of the person who will appear on screen. STEP 8: Move the text to the lower third area of the screen above the quad you created. Make sure the text is within the title-safe line (inner gray box). If it appears that your text is BEHIND the quad object, go to the tab labeled “transform.” With your text object highlighted, change the Z POSITION to 2. This will bring your text in front of the quad object. 16
- 18. ENABLING AUTO SQUEEZE Keep in mind that the lower thirds we are creating are simply “templates” that we will be modifying. So there will be times when your guest(s) name and/or title is longer than what you expect. In this case, you want to enable “auto squeeze.” What this does is ensure that your text will not go beyond the title-safe line regardless of its length. To enable auto squeeze: • Select the tab labeled “Tabs & Options.” • Select the text in the Object Manager. Move the cursor to the end of your text and press the space bar until the red box reaches the title-safe line. • Under AUTO SQUEEZE, select “Set to Current.” • Check the box labeled “Enabled.” ** Repeat the process with the secondary/subtitle text. CREATING A TEMPLATE LINK When you create a lower third, you are essentially creating a template. You will want to modify the placeholder text of your lower third and various elements to reflect the specific guests featured on your show. To do this, create a template link. To create the template link: • Select the text in the Object Manager. • Choose the tab labeled “Template Links.” • Check the box under “Published” next to Text. If you wanted to make other attributes modifiable in the Sequencer, you could check those options as well. • Check the box next to “Publish Object.” • Repeat these steps for any and all text you want to publish. • You may also publish other attributes such as the size, position and visibility, if you want those to be changed in Sequencer mode. CHANGING TEXT JUSTIFICATION 17 If you want to change your text justification to left, right or cen- tered, select the tab labeled “Tabs & Options.” Under the section labeled Tabs, go to the column where is says “alignment” and click where it says left, right or alignment under the “Nr 1” row. Once it is highlighted blue, you will see a drop-down arrow to the right and you can change the justification.
- 19. HOW TO CREATE A FULL-PAGE GRAPHIC Next, you will learn how to create a full-page graphic. This graphic will cover the entire screen unlike the lower third. These graphics are generally created to provide additional information such as bullet points about a topic, event information and details, or you may just want to add a flyer or photo to display during your show. To create a full page text graphic: STEP 1: Create a new Scene. STEP 2: In the Object Library, select a BACKGROUND object. Make the background object black by adding a Material from the Material Manager or the Materials tab in the Object Inspector. STEP 3: If you do not have a black material, create one. Right-click in the Material Manager window and select NEW > MATERIAL. Change the color to black and name the material BLACK. STEP 4: Create a TEXT object. Type in the necessary information that should appear on-screen. This could be event information, a question from a caller, etc. STEP 5: You can add logos or images using a Quad object. Feel free to be creative. If you do not want a black background, change the material. 18
- 20. ENABLING WORD WRAP Word wrapping is similar to auto squeeze but for paragraphs. If you have text that will run on multiple lines, it is best to enable word wrap to ensure it stays within the title-safe lines. • Select the text in the Object Manager. • Select the tab labeled “Tabs & Options.” • Under WORD WRAP, adjust the value of the Fixed Width making sure the red lines do not expand past the title-safe area. • Check the box labeled “Enabled.” To create a template link, follow the same steps for creating template links for lower thirds. To create a full-page image graphic: STEP 1: Add a background Object. Select BACKGROUND from the Object Library. Add a black material to the background. STEP 2: Import the Image. Make sure you place all images in the pre-created images folder. Navigate to the Material Manager and right-click in the window, select ADD NEW > IMAGE. It will automatically take you to your images folder where you can select the image you want to import. STEP 3: Add a Quad for the Image. Create a Quad. In the Object Inspector, make sure the box “Maintain Aspect Ratio of Texture” is checked. Navigate to the Materials Manager and double-click on the imported image. Your image should now replace the Quad and you can move it, add more Quads/Images or add text objects. 19
- 21. HOW TO CREATE CREDITS If you want to have credits at the end of your show, you can create a credit roll. To create credits: STEP 1: Create a Scene Group. First, you must create a scene group. Navigate to the Scene Manager window on the left side of the interface and press the button to create a Scene Group. This group by default has a transparent background which means your text will roll over your active camera shot. If you want it to have a background, select Background from the Object Library and add a material to the background. STEP 2: Create a Scene. Select the New Scene button (to the left of the Create Scene Group button). This is where you will add your credit information. Drag this scene on top of the Scene Group you just created. If dragged properly, a yellow anchor connecting the scene to the group should have appeared. You will see the word ROLL above the Group thumbnail. By default, this will make any scenes you place in this group roll on the screen. STEP 3: Create a Text Object. Make sure the scene, not the scene group is selected. Add a Text Object from the Object Library. Format and add your credit information. After you have formatted your text, duplicate the scene by right-clicking the scene and selecting DUPLICATE. It will automatically place that scene below the previous one. You can edit the text and repeat this process if necessary. STEP 4: Format the Credit Roll. Lastly, you want to format the settings for the scene group by selecting the group in the Scene Manager. Then change the settings in the Object Inspector. Change the Duration option to SECONDS and select the length. You can also change the option to become a crawl, meaning the words will go from right to left and the direction from which they roll/crawl. 20
- 22. TEMPLATES IN SEQUENCER MODE Once you are done creating your template, you can begin customizing the template in Sequencer Mode. The Scene Manager in sequence mode is identical to that in Layout Mode. The only difference is you can’t make changes to the template. If you enabled template links, once you drag a template into the take area, you can edit those links. As you can see from this example, the sequence templates have been placed into the appropriately named groups. It is generally recommend to keep your templates organized, specifically in the order in which they will appear. You can perform a variety of functions when you right-click in the list area. To create groups, right- click and select NEW GROUP. You can also do the following: • Duplicate a Scene • Delete a Scene • Take a Scene Offline (remove from air) Once you drag a template from the Scene Manager (on the left) to the List (middle right), you can begin making the modifications you enabled using template links. 21
- 23. Now let’s discuss how to begin creating the list of templates and how to modify the template link text. MODIFYING TEMPLATES IN SEQUENCER MODE STEP 1: Drag the file from the Scene Manager to the List area. Note: You can drag multiple templates and modify each individually. STEP 2: Editing Text Templates. Select the item from the list area. Press the tab labeled TEMPLATE DATA. You will see a text box where you can change the text. If you have two lines of text, select the template text on the left side and the box for that text will appear. STEP 3: Editing Image Templates. If you enabled a template link for an image, drag that template to the List area. Select the item from the list. Under TEMPLATE DATA, highlight the words “MaterialFace.” By default, you will see a thumbnails of the images located in your dedicated subfolders. You will see options for Materials, Image Files and Video Files. *Remember to keep all project assets in your Xpression-created folders. STEP 4: Add a transition. You have the ability to add a transition to your graphics. Select the tab titled “transition” and choose DISSOLVE for the IN transition. If you look at the transition column in the List for that scene, the item will have changed to say DISSOLVE. Be sure to select the tab on the bottom to set an OUT transition. 22 List Area
- 24. TAKING ITEMS TO AIR FROM SEQUENCER Once you have completed preparing your graphics for air, there are two primary ways to bring them online to air. • Option 1: Using Mouse. You can double-click the List Item you want to bring on Air. To take it offline, right-click on the Take Item and select TAKE OFFLINE. • Option 2: Using Keyboard Numberpad. Using the up/down arrow keys, highlight the Take Item and press the enter key on the numberpad to Take Online. If you want to take an item online and preview the next item, use the + key. If you have FAST RECALL (highlighted) enabled, you can type the Take ID number into the keypad and press enter to jump to the Take Item. TO INITIATE GRAPHICS USING SWITCHER Once the graphics are online, they still need to be activated using the switcher. Step 1: Select CG on the Key Bus row, Auto Select and KEY 3 SEL. Step 2: Press Key 3 above the transition keys. Step 3: On the far right of the switcher, select Key 2 Auto to dissolve the graphic in or KEY 2 CUT to cut the graphic. 23 1 2 3
- 25. 24 For a more help with Xpression CG, go to the top toolbar and select HELP > CONTENTS. A digital copy of the Xpression User Guide is available on the Xpression computers. You can also email education@mnn.org for additional questions regarding Xpression CG.