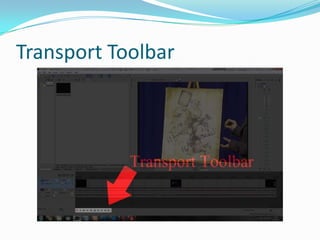
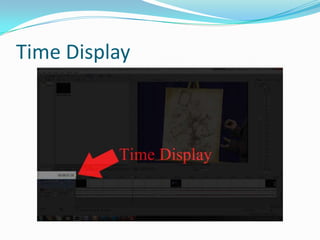
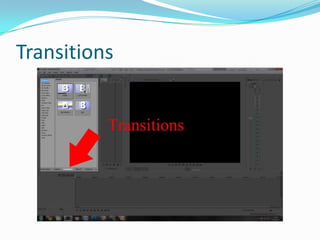
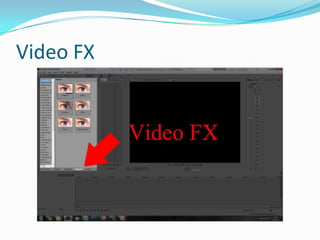
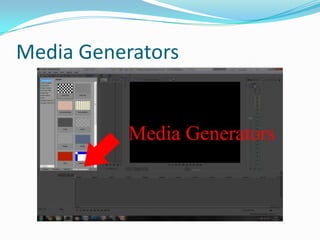
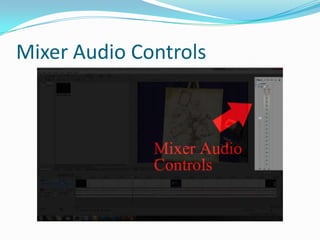
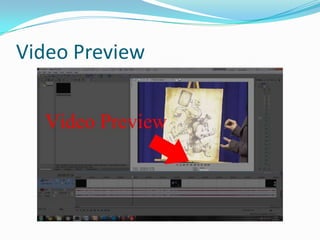
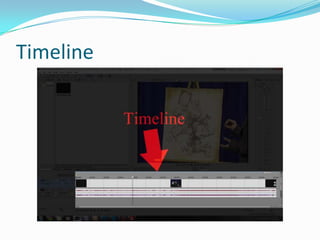
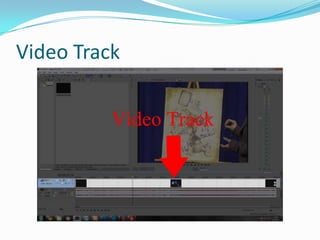
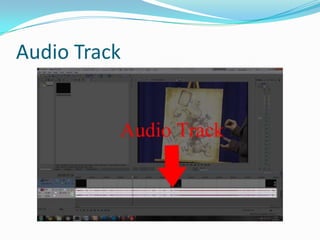
At the PEG Studio
Track Header
Track Header
 Located left of the timeline
 Displays the name of each track
 Controls for each track: adjust audio volume or
 panning, video compositing level, apply
 effects, temporarily mute or solo an audio or video
 track, apply track motion, change the recording
 mode, or change the track height.
Timeline
Timeline
 This is your main work area
 Horizontally, the timeline represents time
 Timeline is like a movie filmstrip or unraveled audio
  tape where you can read your tracks from left to right
 Vertically, the timeline shows tracks. A track is a strip
  where you can put your audio / video files
 Event: when an audio, video, or still image file is
  placed on the timeline, it is referred to as an event.
 The timeline lets you precisely control the length and
  placement of the events in your movie
Transport Toolbar
Transport Toolbar
 You can control playback like a tape deck or a CD
 player
Time Display
Time Display
 Shows the current cursor position of the timeline in
 HH:MM:SS;FF format
Status Area
Status Area (for timeline)
 Selection
    starting time
    ending time
    selection length
Project Media Window
 This windows shows all of your media that are used in
 your project.
   Audio
   Video
   Still images
   Text
   Backdrops
Transitions
Transitions
 Categories are listed on the left
 Common presets for these categories are listed to the
  right
 To view: hover your mouse over a preset on the right
 To add a transition: drag to an overlap of two events
Video FX
Video FX
 All of the effect categories are on the left
 To view, hover mouse over preset on right
 To add, drag preset onto a video event
Media Generators
Media Generators
 Variety of different text and backdrops categories are
 listed on the left and common presets are displayed on
 the right
   To add, drag presets to timeline
Explorer Window
Explorer Window
 Browse your computer for audio, video, or still image.
    You can drag a file from the explorer to the timeline to
     use it in your project
Trimmer
 A portion of a media file can be selected (or trimmed)
 and inserted into your project
Mixer Audio Controls
 Adjust the overall project volume
 Project properties and preview your audio and video
 file
Video Preview
Video Preview
 Displays your video, along with any text or
 backdrops, text effects, and transitions in your project
In Sony Vegas 10.0
Timeline
Timeline
 This is your main work area
 Horizontally, the timeline represents time
 Timeline is like a movie filmstrip or unraveled audio
  tape where you can read your tracks from left to right
 Vertically, the timeline shows tracks. A track is a strip
  where you can put your audio / video files
 Event: when an audio, video, or still image file is
  placed on the timeline, it is referred to as an event.
 The timeline lets you precisely control the length and
  placement of the events in your movie
Video Track
Video Track
 Video, Still Images, Text, Backdrops
 Video events on video tracks show graphical images
  inside of them which should give you an idea of what
  the video looks like – very much like frames in a
  filmstrip.
 The video tracks are layered in order from top to
  bottom.
Audio Track
Audio Track
 Voice, Music, Sound Effects
 Audio events are represented in waveforms, or
  graphical representations of the audio showing the
  larger parts having the louder audio peaks.
 By using multiple audio tracks, you can have more
  than one sound playing at once. For instance, you can
  have someone speaking over background music. The
  events must be on different tracks but playing at the
  same time on the timeline.
Zooming In and Out
Zooming In and Out
 When you zoom in, you will see more detail of your
 project. When you zoom out, you will see less detail.
 In either case, you are not changing anything about
 your project, just how much of it you can see on the
 timeline.
Scrolling
Scrolling
 The horizontal scroll bar controls the visible area of
  your project left or right.
 The scroll box will become smaller as you zoom in to
  indicate that the project extends beyond the visible
  area of the timeline.
Project’s Time Ruler
 It should give you a general idea of where you are on
 the timeline.
The Cursor
The Cursor
 Inside the timeline, you will see a vertical flashing line.
  This is the play cursor.
   It indicates the current time in your project.
Transport Toolbar
Transport Toolbar
 You can control playback like a tape deck or a CD
 player
Selection
 If you drag your mouse on an empty section of the
  timeline, you can create a selection.
 Although a selection can be used for editing
  purposes, it also lets you playback certain portions of
  your movie.

Introduction to sony vegas 10

  • 1.
    At the PEGStudio
  • 2.
  • 3.
    Track Header  Locatedleft of the timeline  Displays the name of each track  Controls for each track: adjust audio volume or panning, video compositing level, apply effects, temporarily mute or solo an audio or video track, apply track motion, change the recording mode, or change the track height.
  • 4.
  • 5.
    Timeline  This isyour main work area  Horizontally, the timeline represents time  Timeline is like a movie filmstrip or unraveled audio tape where you can read your tracks from left to right  Vertically, the timeline shows tracks. A track is a strip where you can put your audio / video files  Event: when an audio, video, or still image file is placed on the timeline, it is referred to as an event.  The timeline lets you precisely control the length and placement of the events in your movie
  • 6.
  • 7.
    Transport Toolbar  Youcan control playback like a tape deck or a CD player
  • 8.
  • 9.
    Time Display  Showsthe current cursor position of the timeline in HH:MM:SS;FF format
  • 10.
  • 11.
    Status Area (fortimeline)  Selection  starting time  ending time  selection length
  • 12.
  • 13.
    Project Media Window This windows shows all of your media that are used in your project.  Audio  Video  Still images  Text  Backdrops
  • 14.
  • 15.
    Transitions  Categories arelisted on the left  Common presets for these categories are listed to the right  To view: hover your mouse over a preset on the right  To add a transition: drag to an overlap of two events
  • 16.
  • 17.
    Video FX  Allof the effect categories are on the left  To view, hover mouse over preset on right  To add, drag preset onto a video event
  • 18.
  • 19.
    Media Generators  Varietyof different text and backdrops categories are listed on the left and common presets are displayed on the right  To add, drag presets to timeline
  • 20.
  • 21.
    Explorer Window  Browseyour computer for audio, video, or still image.  You can drag a file from the explorer to the timeline to use it in your project
  • 22.
    Trimmer  A portionof a media file can be selected (or trimmed) and inserted into your project
  • 23.
  • 24.
    Mixer Audio Controls Adjust the overall project volume  Project properties and preview your audio and video file
  • 25.
  • 26.
    Video Preview  Displaysyour video, along with any text or backdrops, text effects, and transitions in your project
  • 27.
  • 28.
  • 29.
    Timeline  This isyour main work area  Horizontally, the timeline represents time  Timeline is like a movie filmstrip or unraveled audio tape where you can read your tracks from left to right  Vertically, the timeline shows tracks. A track is a strip where you can put your audio / video files  Event: when an audio, video, or still image file is placed on the timeline, it is referred to as an event.  The timeline lets you precisely control the length and placement of the events in your movie
  • 30.
  • 31.
    Video Track  Video,Still Images, Text, Backdrops  Video events on video tracks show graphical images inside of them which should give you an idea of what the video looks like – very much like frames in a filmstrip.  The video tracks are layered in order from top to bottom.
  • 32.
  • 33.
    Audio Track  Voice,Music, Sound Effects  Audio events are represented in waveforms, or graphical representations of the audio showing the larger parts having the louder audio peaks.  By using multiple audio tracks, you can have more than one sound playing at once. For instance, you can have someone speaking over background music. The events must be on different tracks but playing at the same time on the timeline.
  • 34.
  • 35.
    Zooming In andOut  When you zoom in, you will see more detail of your project. When you zoom out, you will see less detail. In either case, you are not changing anything about your project, just how much of it you can see on the timeline.
  • 36.
  • 37.
    Scrolling  The horizontalscroll bar controls the visible area of your project left or right.  The scroll box will become smaller as you zoom in to indicate that the project extends beyond the visible area of the timeline.
  • 38.
    Project’s Time Ruler It should give you a general idea of where you are on the timeline.
  • 39.
  • 40.
    The Cursor  Insidethe timeline, you will see a vertical flashing line. This is the play cursor.  It indicates the current time in your project.
  • 41.
  • 42.
    Transport Toolbar  Youcan control playback like a tape deck or a CD player
  • 43.
    Selection  If youdrag your mouse on an empty section of the timeline, you can create a selection.  Although a selection can be used for editing purposes, it also lets you playback certain portions of your movie.