Download as PDF, PPTX
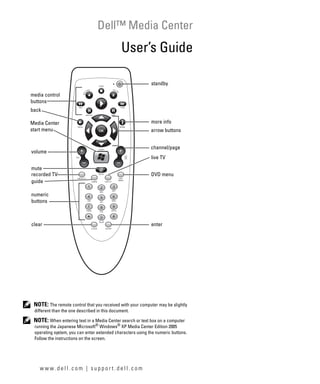
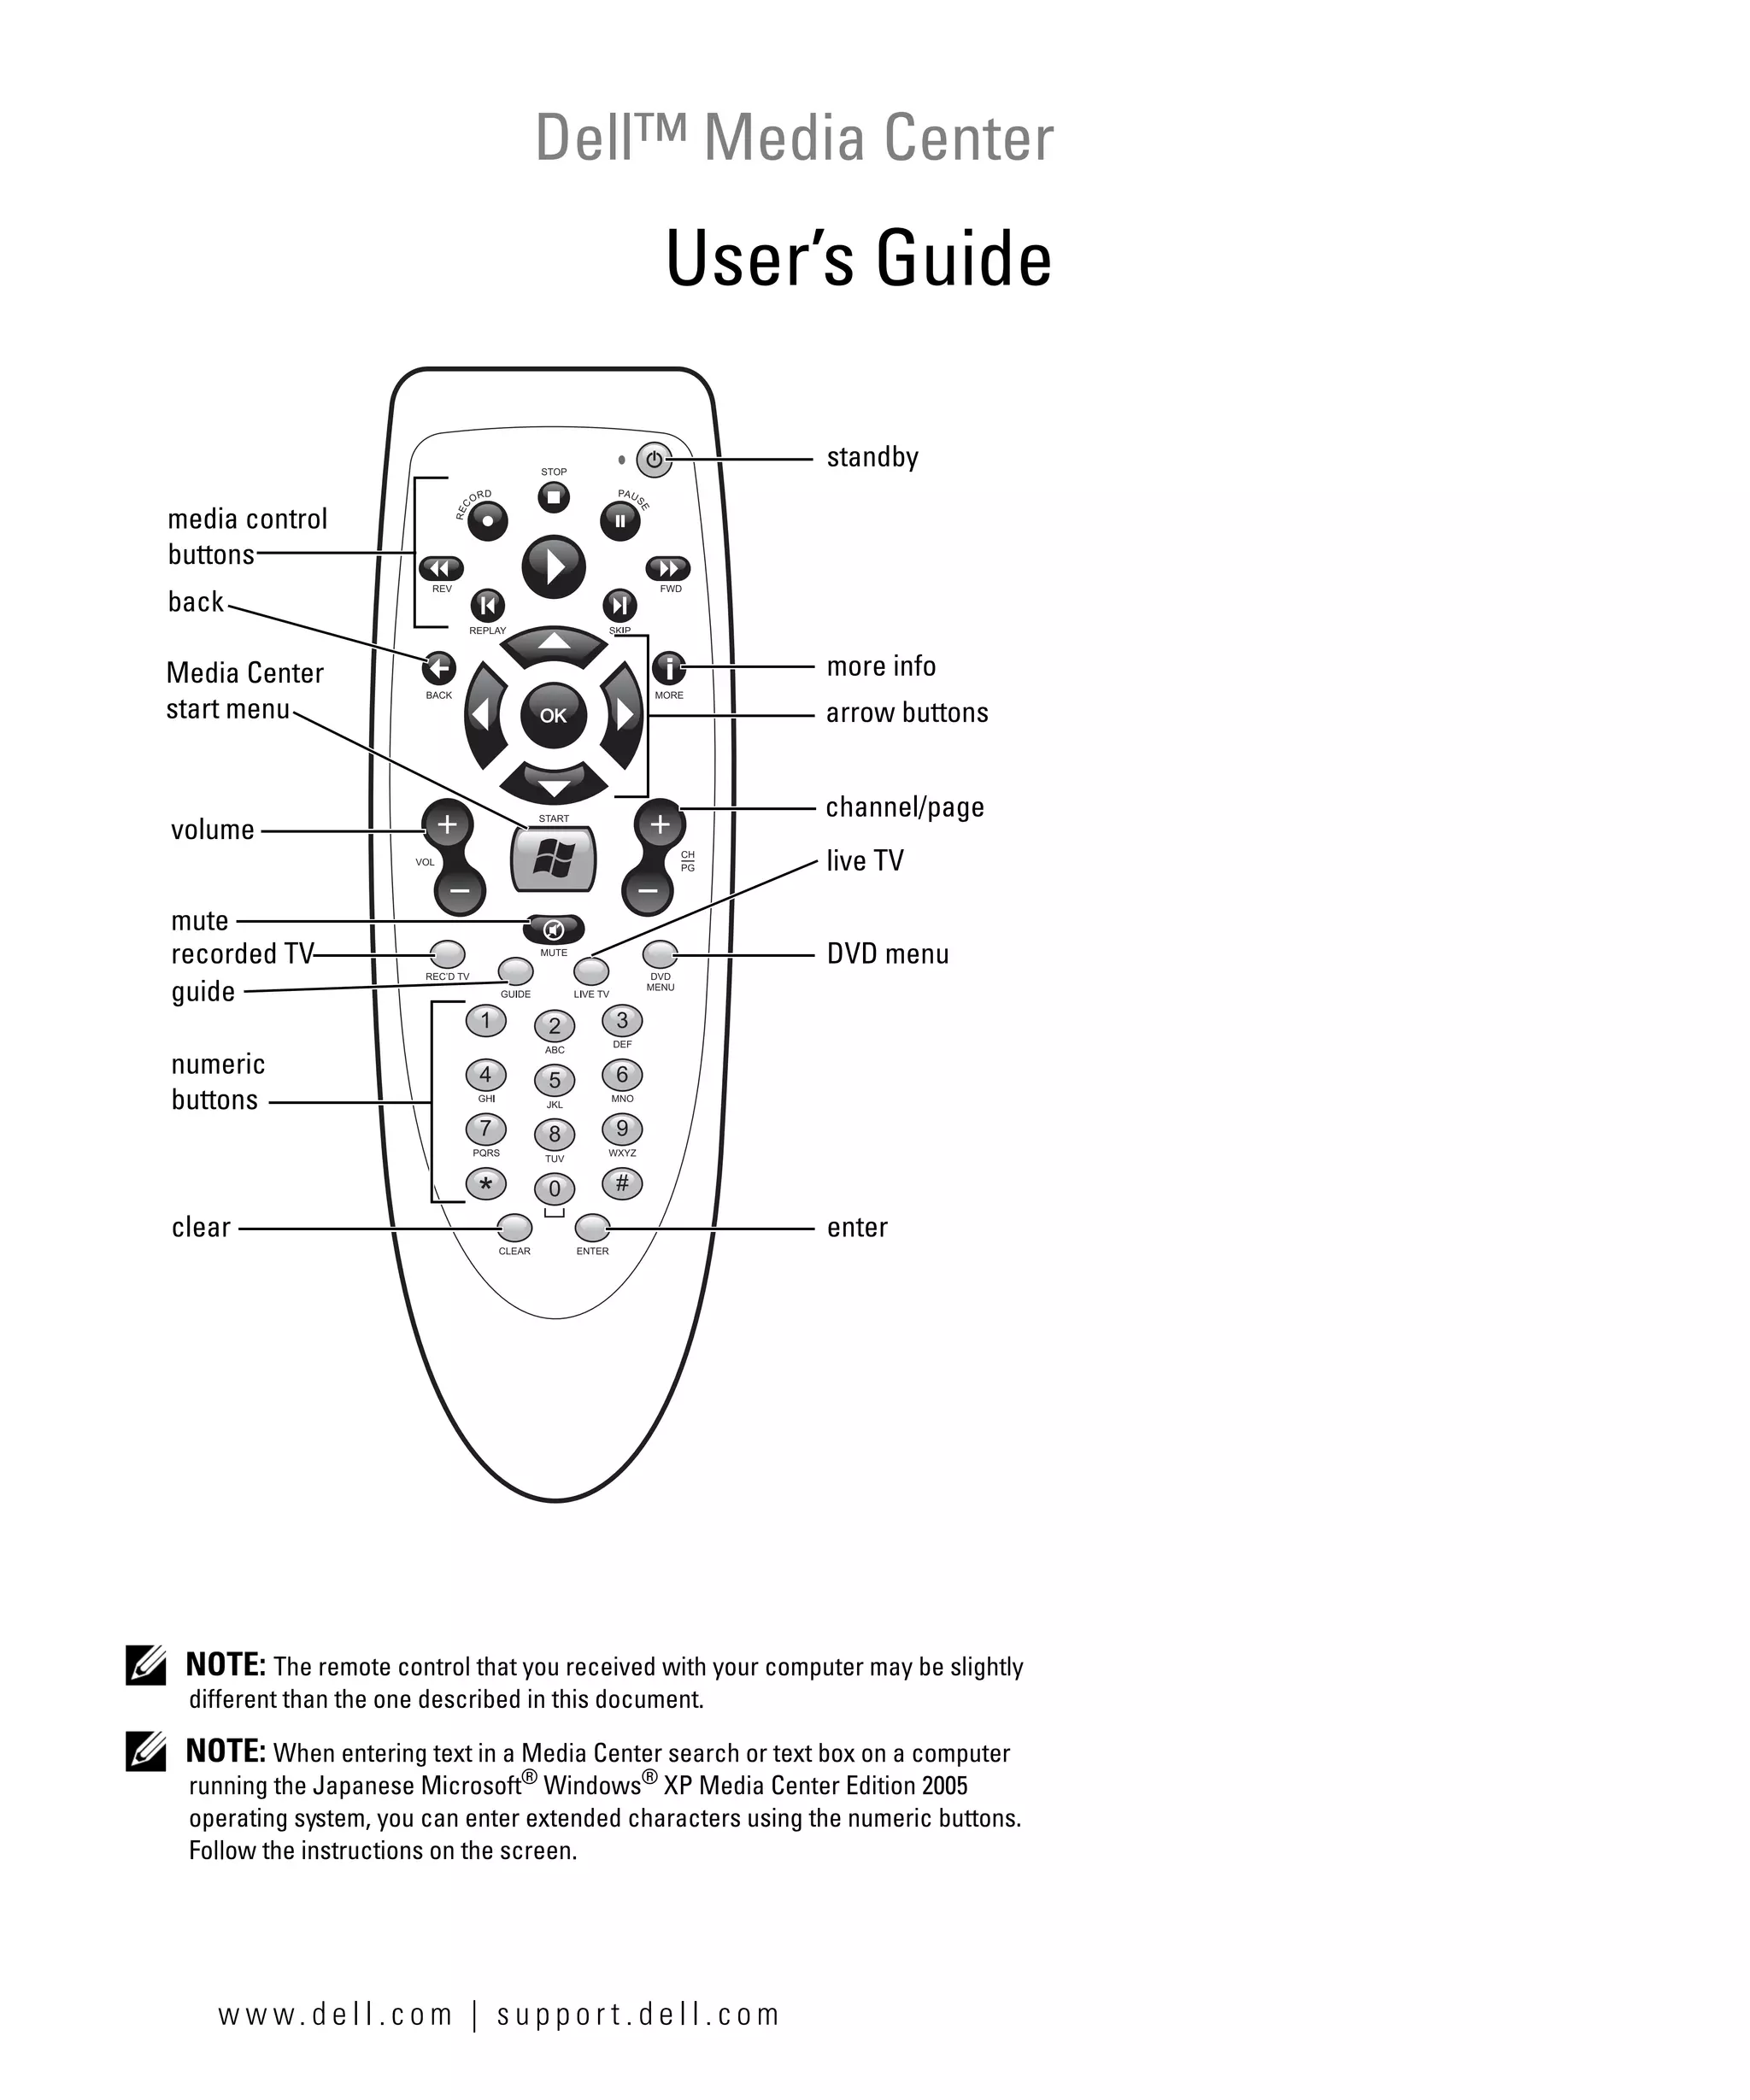

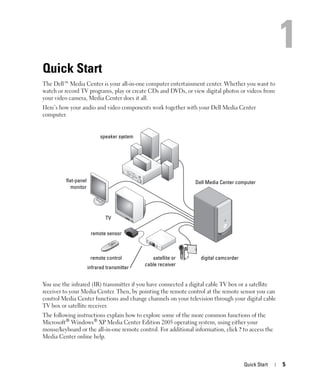
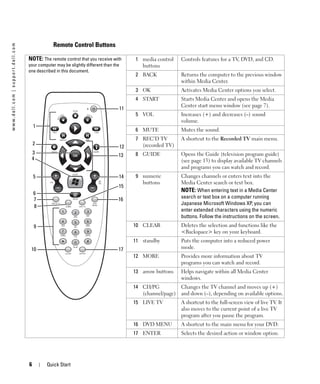


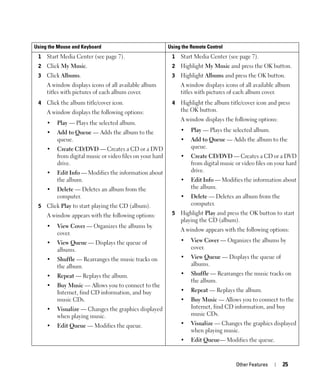

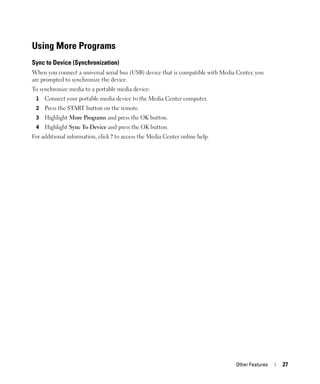

This document provides instructions for using the basic functions of a Dell Media Center computer, including playing DVDs, viewing digital photos, watching and recording TV (if the computer has a TV tuner), and listening to music. It describes the buttons on the included remote control and how to navigate the Media Center interface using either the remote or mouse/keyboard. Notes are provided about input options and playback features for different media types.


