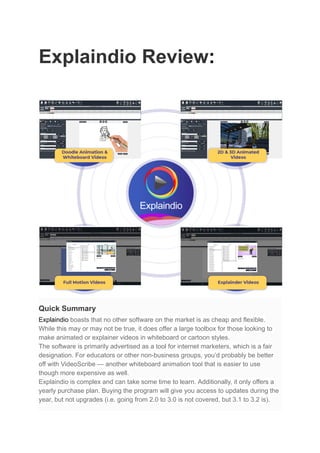
Explaindio is a versatile tool for creating animated videos

Explaindio boasts that no other software on the market is as cheap and flexible. While this may or may not be true, it does offer a large toolbox for those looking to make animated or explainer videos in whiteboard or cartoon styles. The software is primarily advertised as a tool for internet marketers, which is a fair designation. For educators or other non-business groups, you’d probably be better off with VideoScribe — another whiteboard animation tool that is easier to use though more expensive as well. Explaindio is complex and can take some time to learn. Additionally, it only offers a yearly purchase plan. Buying the program will give you access to updates during the year, but not upgrades (i.e. going from 2.0 to 3.0 is not covered, but 3.1 to 3.2 is).

Recommended
Recommended
More Related Content
What's hot
What's hot (20)
Similar to Explaindio is a versatile tool for creating animated videos
Similar to Explaindio is a versatile tool for creating animated videos (20)
Recently uploaded
Recently uploaded (20)
Explaindio is a versatile tool for creating animated videos
- 1. Explaindio Review: Quick Summary Explaindio boasts that no other software on the market is as cheap and flexible. While this may or may not be true, it does offer a large toolbox for those looking to make animated or explainer videos in whiteboard or cartoon styles. The software is primarily advertised as a tool for internet marketers, which is a fair designation. For educators or other non-business groups, you’d probably be better off with VideoScribe — another whiteboard animation tool that is easier to use though more expensive as well. Explaindio is complex and can take some time to learn. Additionally, it only offers a yearly purchase plan. Buying the program will give you access to updates during the year, but not upgrades (i.e. going from 2.0 to 3.0 is not covered, but 3.1 to 3.2 is).
- 2. GET EXPLAINDIO WHAT I LIKE ● Library of pre-made animated scenes ● Timeline is flexible and offers precision control of elements ● Import your own files, from fonts to 3D creations WHAT I DON'T LIKE ● Unintuitive interface is hard to use ● Limited free media library ● Poor audio functionality Explaindio OVERALL RATING: 3.5 out of 5 Windows/macOS, $59+ per year BUY NOW
- 3. Quick Navigation // Explaindio FAQs // A Detailed Review of Explaindio // Reasons Behind My Review and Ratings // Alternatives to Explaindio // Conclusion Explaindio FAQs What is Explaindio? It is a versatile tool for creating animated videos. It will allow you to implement elements in several styles, such as a whiteboard, 3D figures and images, or other preset. The interface is drag-and-drop based. Primary features include: ● Create explainer or marketing videos ● Use several styles or file types in a single project ● Draw from their library or use your own media ● Export the final project in several different formats Is It Free? No, Explaindio is not free and does NOT offer a free trial. They offer two subscription options, a personal and a commercial license. The only difference between the two is an extra $10 a year, and the ability to resell videos you produce with the software as your own. Purchasing the program gives you access for one year. After twelve months, you’ll be charged again for another year of access. Compared to similar tools, this is very cheap, but Explaindio does not offer a month-by-month subscription or a one-time purchase. Even if you only want the program for a few months, you’ll need to pay for the whole year. How Do I Download It? Explaindio does not have a download available until you purchase the program. Upon purchase, you will be emailed login details and need to
- 4. access the member portal https://account.explaindio.com/. This link is not on their site, making it almost impossible for non-users to find. Once you log in, you’ll be greeted with an account details page where you can download the program. Under the “Active Resources” section, choose Explaindio 3 and scroll through the ads until you find the download button. Some ZIP files while immediately begin to download. After unzipping, you’ll need to open the PKG file and go through the installation. This is different from the more modern DMG installation you may be familiar with and requires you to click through six steps. When the installation finishes, the program will be in your application folder. Note: This process is for Mac and will be different if you are using a Windows computer. From the applications folder, you can open Explaindio for the first time. I expected a login screen right away. Instead, I was told I needed to install an update. This was very confusing, considering any program you download should come in the most recent version. The program finished updating within 30 seconds, and I reopened it to get a login screen, where I had to copy the license key from the account confirmation email.
- 5. After that, the program opened to the main editing screen and I was ready to start testing and experimenting. Is It Safe? Yes, Explaindio is safe software. They’ve been around since about 2014 and have a wide customer base. The website passes scans from Norton Safe Web, and the installed program is not dangerous to your computer. It is uncomplicated to get from the ZIP folder to your applications, and its primary interaction with your computer is to export or import files you choose. How Does It Compare to VideoScribe? I have made my own chart to compare VideoScribe and Explaindio. The software you pick comes down to what you want to use it for, not its individual features. Sure, Explaindio has 3D support, which VideoScribe does not. But neither software can claim the other is “inflexible”.
- 6. While Explaindio may be a better fit for an internet marketer in a long term position with a client that wants extremely complex animations, VideoScribe would be a better choice for an educator who needs a single video specifically in the whiteboard style and has very little spare time to learn a complex program. So, Explaindio may be more versatile at face value, users should not discount the beauty of a program built for a more specific purpose. Consider each program within the frame of the project you are trying to complete. A Detailed Review of Explaindio I learned how to use the program over the course of a few days through tutorials and experimentation. Everything below is compiled from what I learned. However, some details or screenshots may appear slightly different if you are using a PC rather than a Mac computer. Interface, Timeline, & Scenes When you first open Explaindio, the interface is overwhelming. The menu bar along the top contains around 20 different buttons. The timeline is positioned just underneath this, where you can add scenes or modify media. Lastly, the canvas and editing panel is at the bottom of the screen. Note that this area will change depending on what you are working on.
- 7. You will not be able to do anything until you click “Create Project” in the top left. This will prompt you to name your project before returning to the interface shown above. Your first step should be to add a scene by clicking the icon that appears to be a film strip with a plus in the middle. You’ll be asked to create a new slide or add a scene from your personal library. Choose the first one, as the second one is only usable if you’ve previously saved in a specific format. The bottom half of the editor will change to reflect the fact that you are now editing a scene. You can use the buttons along the bottom of the editor to add media from various formats. Choose “close canvas” to return to the main editor and exit the drag-and-drop media adding interface.
- 8. In this section, you’ll have options depending on what kind of media has been added to the scene. If you look on the left side, you can see a tab for “image” that will allow you to adjust some animation features. To edit other scene elements, you’ll need to select them in the timeline to see the options in the editor. You can also edit aspects on the entire scene here such as the scene background and voiceover. The timeline is extremely versatile for such an inexpensive program. It features the ability to rearrange media within scenes, supports overlapping animations, and allows you to create gaps as necessary. Each item in a scene takes up one row on the timeline. The gray bar is how long the media is animated for and can be dragged along the timeline to change when it appears on the screen. The order each media item appears in vertically is the order in which appears to be stacked (i.e. topmost items are the most forward and visible), but the arrangement of the gray bars determines which elements animate and appear first. Every scene has its own media stacking, and media from one scene cannot be moved so that it animates in another. Using Media In Explaindio, media comes in several formats and for various uses. From background music to voice-overs, text, and visualizations, media is what
- 9. will create your video. Here’s an introduction to how it is used within the program, and what sort of features or limitations you might face. Visuals Visual media is available in several formats. The first is the most basic: SVG sketch files for creating whiteboard style animated characters and icons. Explaindio has a decent free library of these: Clicking one will add it to your canvas including its pre-made animations. Alternatively, you could choose a bitmap or non-vector image to add to your project. Bitmap images are PNGs and JPEGs. You can insert it from your computer or Pixabay, which Explaindio integrates with. I tried this feature with a picture of a world map and had great results. Unlike many other whiteboard programs, Explaindio actually created a path for the image and drew it very similarly to an SVG.
- 10. When I was importing, I was confused because the whole image didn’t appear on the upload screen (shown above), but I was pleasantly surprised with the results. As you can see, the bitmap JPEG was converted into a whiteboard style, drawn animation. I also tried importing a GIF but had less success. Although it animated like an SVG or JPEG in the program and appeared drawn, the actual moving parts of the GIF did not animate and the image remained still. Next, I tried adding a video in MP4 format. At first, I thought it had failed when I saw the following white screen:
- 11. However, I soon found out that the program simply used the first frame of my video (blank whiteness) as the preview. In the actual animation, the video appeared in the timeline and played inside the Explaindio project I had created. After that, I attempted to the “Animation/Slide” media. I was given the option to import either an Explaindio slide or a flash animation. Since I do not have any flash animations and had little idea of where to find one, I went with the Explaindio slide and was redirected to a library of presets.
- 12. Most of the pre-made options were actually pretty nice. However, I could not figure out how to edit them and replace the filler text with my own. I contacted support regarding this confusion (button in the top right of the program). Once I created a ticket, I was sent an automated email asking me to create an account with the support team to check my ticket status, as well as a note: “A support representative will be reviewing your request and will send you a personal response. (Usually within 24 – 72 hours). The response may be further delayed during product launch and weekends.” I submitted my ticket on a Saturday at about 2:00 PM. I did not have a response within 24 hours, but chalked it up to the weekend. I didn’t get a response until the following Wednesday, and even then it was pretty unhelpful. They redirected me to the FAQ I had already checked, and linked a few user made tutorials from youtube.
- 13. Not exactly stellar support. They also closed the ticket after responding. Overall, the experience was unsatisfying. Lastly, I experimented with the 3D file feature. When I went to import a file, I was greeted with a default library of six files with an extension I had never seen before and with no preview option.
- 14. I added each one to a different slide and shortened the play length to a couple of seconds for each animation. As you can see from the clip, each animation seemed stranger than the last. When would I ever need a 3D animation of a hinge connecting two planks of wood? Their uses seemed oddly specific and I still have no idea why Explaindio would ever promote this feature as much as they do on their site. For such a paltry set of pre-made clips, I would expect that it would be easy to find third party files as a replacement, but even as someone who has worked with various CAD programs, I have no idea what a “.zf3d” file is. This isn’t a file you’ll find amongst a database of free stock. I imagine the game here is that they want you to purchase another program that integrates with Explaindio in order to make full use of the 3D function. Audio Sound will bring your video to life. It’s an important form of media within any video you create. Explaindio actually does a great job explaining how their sound functions work in this video from the member tutorials. I’d like to make a few additional points. First, if you record your audio within the program, there are no do-overs. You have to get it all right on the first try or start over from the beginning if you misspeak. To rectify this, you’ll want to use a third party program like Quicktime or Audacity to create an MP3 for the voice-over.
- 15. Second, I can’t say I’m happy with the default background songs either. With only 15 tracks to choose from, you would at least hope for some variety. Instead, you’re handed fifteen tracks so dramatic they could never be used in a marketing video. Titles like “Battle Hymn” and “Epic Theme” should be a blatant red flag that Explaindio wants you to choose “Get More Tracks” and purchase from their marketplace. Here’s a song from Youtube in the style of the free tracks Explaindio provides. When it comes to audio with the program, you’re on your own. You’ll either need to pay to buy tracks from their marketplace, use another program to record your own voice-over and audio, or search up some royalty free tracks from the internet. Text While text may not be the highlight of your video, you will need it for charts, signs, captions, statistics, descriptions, and much more. Explaindio’s text feature is fairly versatile. You can change the color, the animation/FX, font, and more. For each of these options, there are different degrees of customization. For example, with color, you may feel limited to the provided palette. However, these colors are being displayed as HEX codes, which means you can use a tool like Google’s HEX Color Picker to choose a custom color and copy the code instead. If you can’t find the font you want, you can import your own as a TTF file. You can animate the text to move from one place to another, or use one of the dozens upon dozens of entry and exit animations if you’re not happy with the sketched by hand style.
- 16. The only shortcoming I found with text is the missing alignment tools. All text is centered no matter how long, short, or the number of lines. This is unfortunate, but not completely unworkable. For more on using text, this explanatory tutorial video does a pretty good job in only two minutes. Export and Share Once you’ve completed your video and edited your scenes, you’ll want to export your video. From what I can see, there are only two ways to export. You can either export the whole movie or a single scene. To export a whole movie, you’ll want to pick “create video” from the menu bar. This will bring up an export options dialog box. As you can see, we have a few options. First, ignore the ‘Export Path and Filename” section, which you cannot edit yet and will update automatically when you do. The video size options go up to full HD at 1080p, and the quality options range from “perfect” to “good”. Export speed is highly dependent on your computer, but you can choose from a range of options that sacrifice speed or quality to achieve the other. You can also add a watermark by using a PNG file with your logo. This would be useful for demo videos or protecting creative work. The option
- 17. just above this, “export project for online presenter” is a bit more mysterious. I couldn’t find any material on what it does, and checking the box didn’t seem to do anything when I exported a video. Once you’ve picked your settings, choose “Start Export.” This will prompt a second dialog box. You can change the name of your project here. The most important thing is picking the right “where”. The default folder is some obscure program directory, so you’ll want to click it and choose your normal saving location instead. Once you press save, your video will start exporting and you’ll see a gray progress bar. Exporting a scene is almost exactly the same. In the editor area, choose “create video from this scene” to be given a dialog box almost identical to the project exporter.
- 18. The only difference is that it says “Export Scene” instead of “Export Project.” You’ll need to complete the same steps as for exporting a project. After that, the file will be located where you designated it to be. Reasons Behind My Review and Ratings Effectiveness: 3.5/5 Explaindio advertises several main features: the ability to create animated videos, multiple animation styles (explainer, whiteboard, cartoon, etc), 2D and 3D graphics integration, a library of free media, and the tools you need to put it all together. In my opinion, it doesn’t live up to everything it advertises. While you can create animated videos and there’re plenty of tools to get you there, the program fails to provide a fair amount of free material, especially when it comes to 3D and audio. The user is forced to look elsewhere or buy additional resources in order to effectively use the program. Price: 4/5 Compared to other tools, Explaindio is extremely cheap. It’s only $69 for a year of the best plan they have available, whereas tools such as VideoScribe or Adobe Animate cost upwards of $200 to have them year round. On the other hand, the program does not offer the same price flexibility as other programs. If you purchase the software, you can’t just pay for a few months. Additionally, you can’t test the software without paying first and requesting your money back within 30 days. Ease of Use: 3/5 This program was no cakewalk to work with. Its interface is crowded and layered, with important tools hidden behind others. With Explaindio, I felt as if every almost every feature needed its own tutorial. Good UI is dependent on natural movements and logical sequences, which made Explaindio frustrating to work with. It’s the sort of program you could learn to work and be effective with eventually, but you’ll need a lot of practice. Support: 3.5/5 Stars Like many programs, Explaindio has some tutorials and FAQ resources for users. However, these resources are only available to those who have purchased the program–and once you’ve gained access to them, they’re very poorly organized. The 28 tutorial videos are all listed in a single
- 19. page that scrolls seemingly forever with no index. Ads for other programs crowd the already lengthy page. All of the tutorials are unlisted and therefore unsearchable on Youtube. Their email support advertises a response within “24 – 72 hours”, but to expect delays on the weekends. When I contacted support on a Saturday, I did not receive a response until Monday on my simple ticket and until Wednesday on my feature-related question. Considering these two were sent only 30 minutes apart, I find this fairly unreasonable, especially with the poor quality response I received. Alternatives to Explaindio VideoScribe (Mac & Windows) If you specifically want to make whiteboard videos, VideoScribe is the software to go with. It’s fairly priced at $12/mo, with plenty of tools for making a professional looking video. You can read our VideoScribe review here for more details on the program. Adobe Animate CC (Mac & Windows) The Adobe brand carries a certain authority in the creative industry. Animate will let you create videos with precision control, but you’ll sacrifice some of the simplicity of other programs. You’ll also be paying about $20 a month. For more on what Animate CC is capable of, check out our Adobe Animate review. RawShorts (Web Based) For whiteboard and cartoon versatility without downloading anything, Rawshorts is a great web-based alternative. The program is drag-and-drop, and includes a large library of media. Each unbranded video you export will cost $20, but the program is otherwise free to use. Doodly (Mac & Windows) For a tool with great third party image integration and high-quality whiteboard animations, you may want to consider Doodly. While much more expensive than Explaindio, it has a wide variety of free resources and the tools to make a great explainer video. You may want to read this Doodly review on the program for more information. You can also read this whiteboard animation review we recently put together for more info.
- 20. Conclusion If you need to create animated videos for marketing, Explaindio is a tool with plenty of options that will get you to the finish line. While it has a few shortcomings in the audio and 3D departments, the program is fairly well-made in terms of the timeline, canvas, and editing features. It may take some time to learn, but you’ll have a high-quality video for a cheap price by the end. GET EXPLAINDIO