Downloaded 68 times


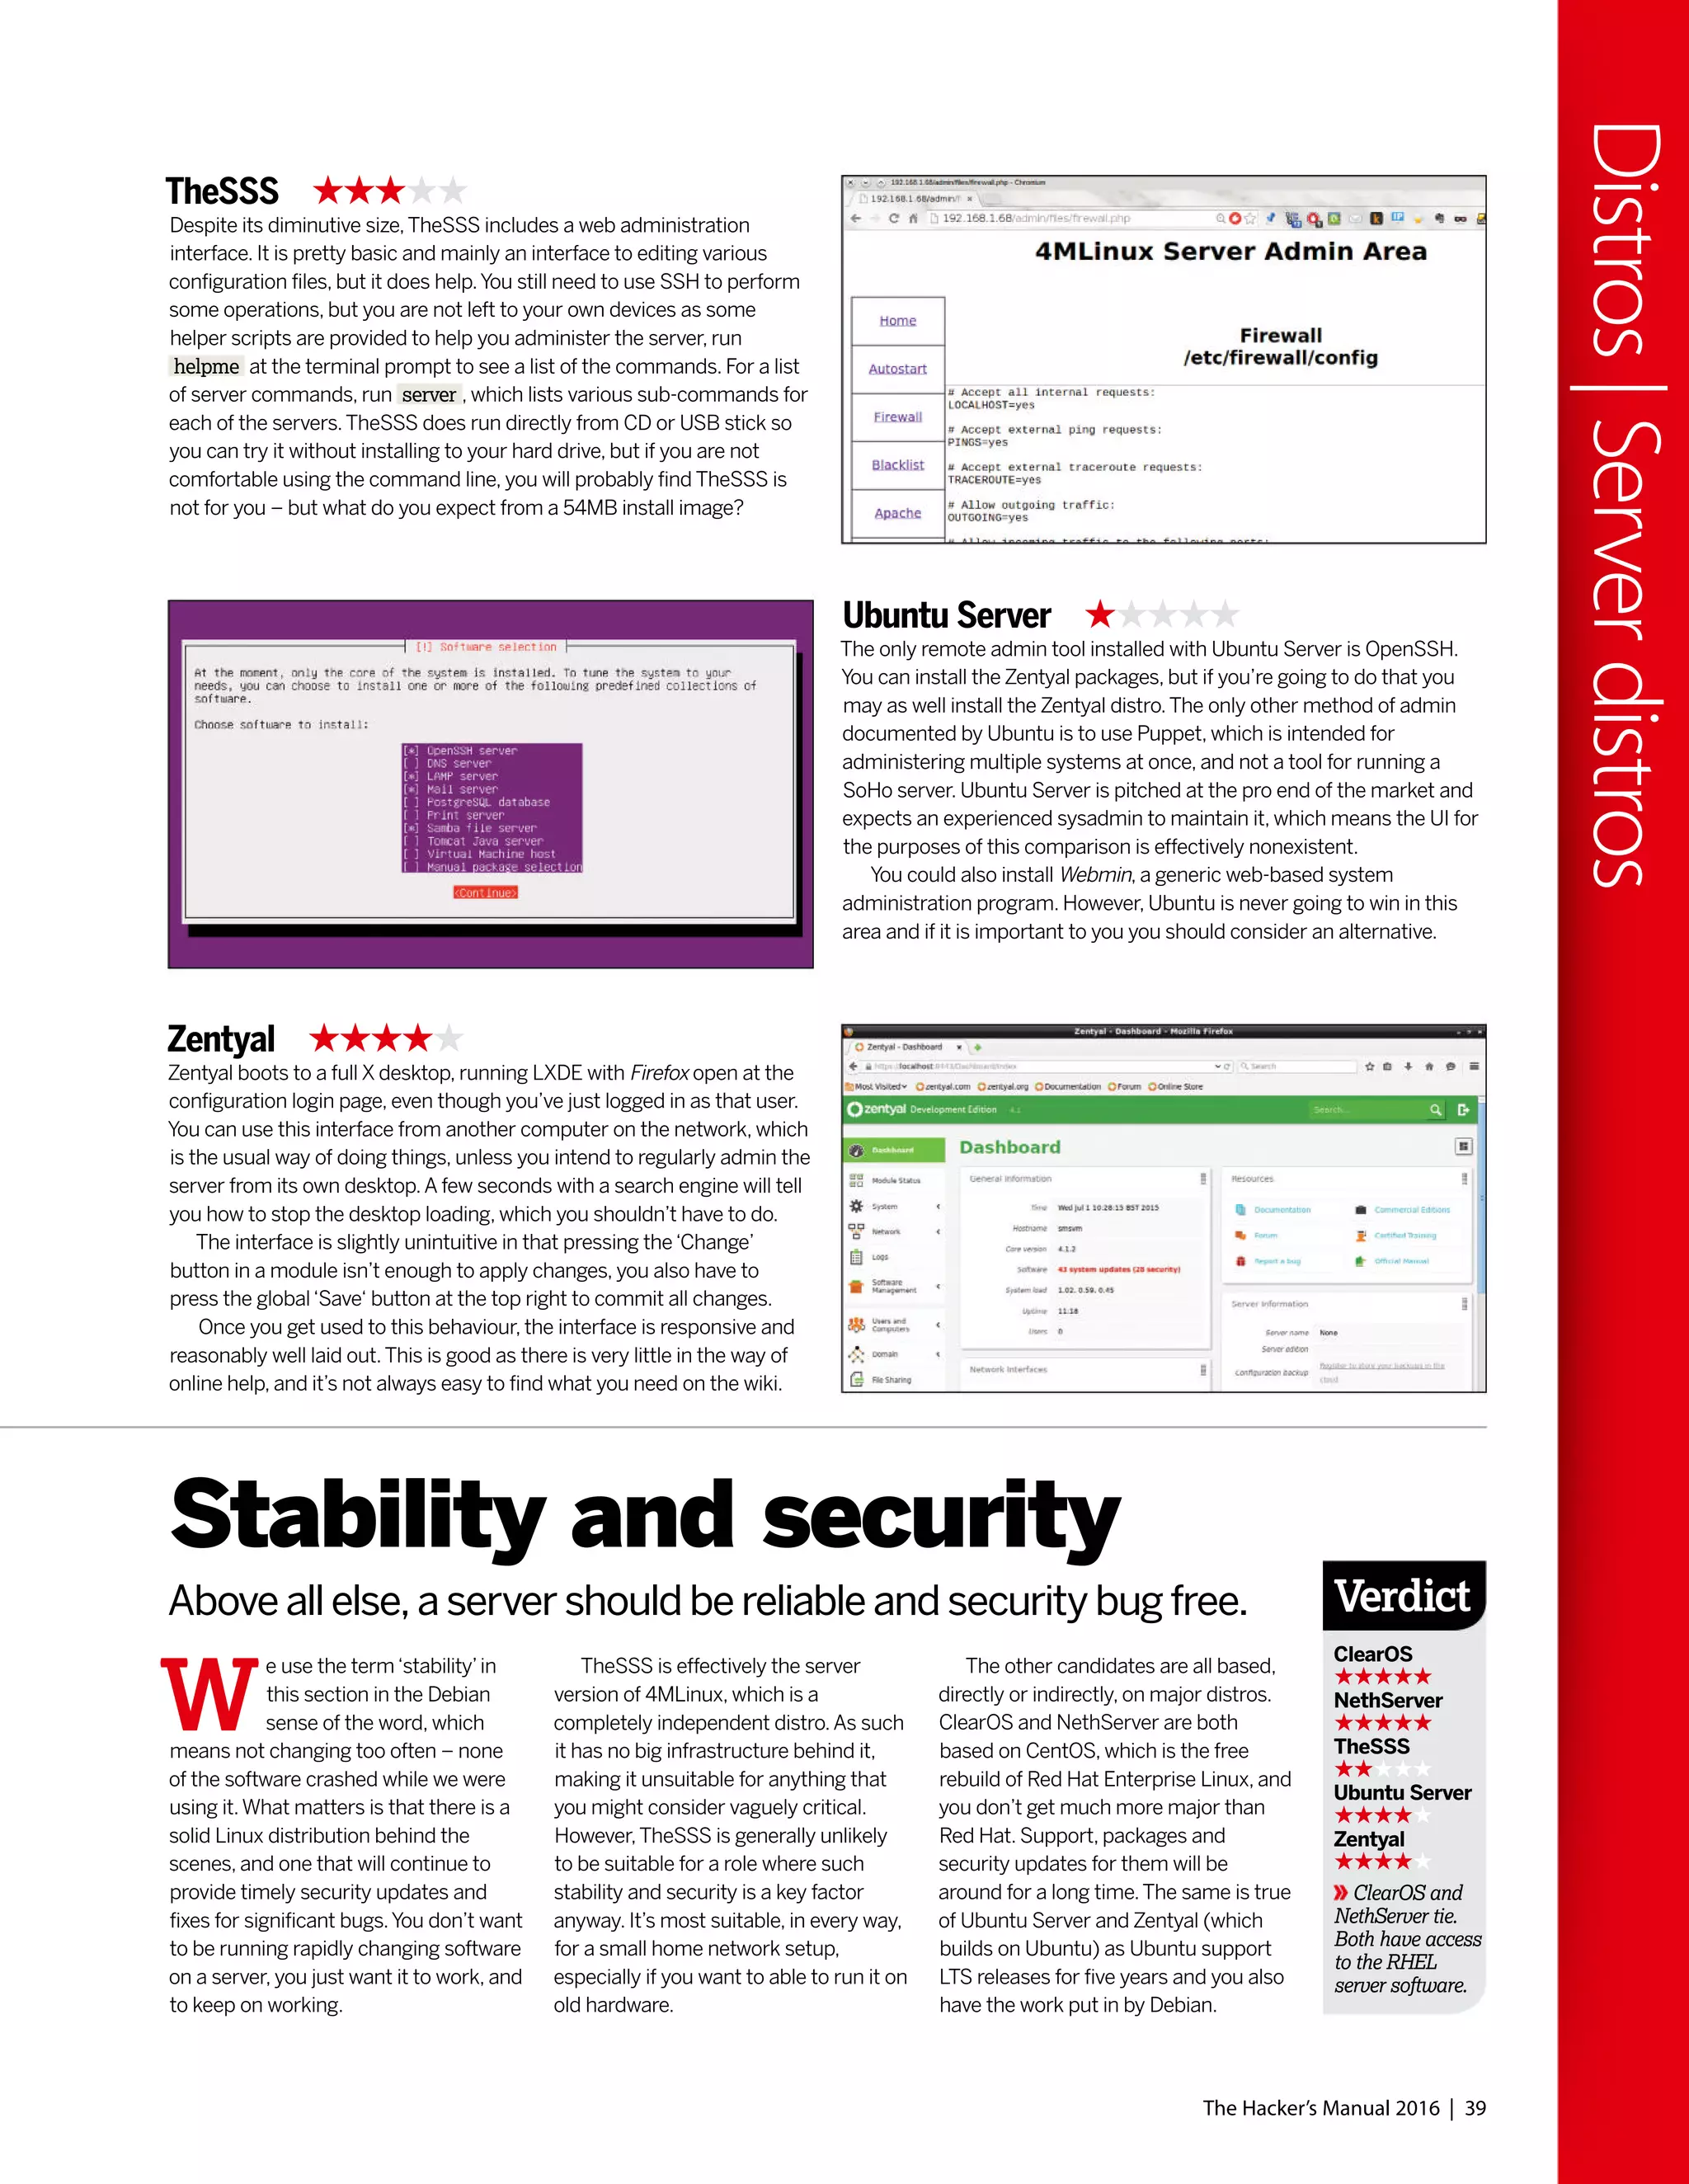
![T
he latest iteration of Windows
is here, impressing, confounding
and upsetting early adopters.
As has become traditional, we
pit the Microsoft OS mano-a-mano with
Linux to determine the
ultimate operating system.
Of course, in reality this is
comparing apples and
oranges (and scoring them
with bananas): One is a free
codebase which can run on
most any hardware imaginable, the
other is a proprietary product with an
undecouple-able GUI that, until recently,
has run only on x86 PCs. Our approach
will be to consider features from the
Windows 10 build available at press time,
together with Microsoft’s own PR
announcements and compare them
with like-for-like equivalents from
various Linux distributions.
Much of the pre-release hype spoke
to Windows 10 heralding a paradigm shift
across the Windows landscape. Certainly
there are a lot of changes and perhaps
most notable is that Windows 10 will be
the operating system’s last incarnation.
That doesn’t mean the end of Windows,
but rather the beginning of“Windows
as a Service”. Updates will be pushed to
consumers once Microsoft deems them
ready, while businesses will be offered
a choice of two release channels, dubbed
Current and Long Term which
offer more rigid release cycles.
Individuals who purchase
(or are entitled to a free)
copy of Windows will see it
supported“for the lifetime
of that device.”Another
intriguing development is that users
of the pre-release Technical Preview who
enroll in the Windows Insider Program
can continue to use that and will have the
privilege [pain, surely? – ED] of testing new
features – and won’t have to pay.
26 | The Hacker’s Manual 2016
Distros|LinuxvsWindows
Take cover: Microsoft’s fired its latest salvo and
it’s time to square it up against the Linux batallion.
“We pit the Microsoft OS
mano-a-mano with Linux to
determine the ultimate OS”
LINUX
WINDOWS
VS](https://image.slidesharecdn.com/thehackersmanual2016-160522105830/75/The-hackers-manual-2016-26-2048.jpg)


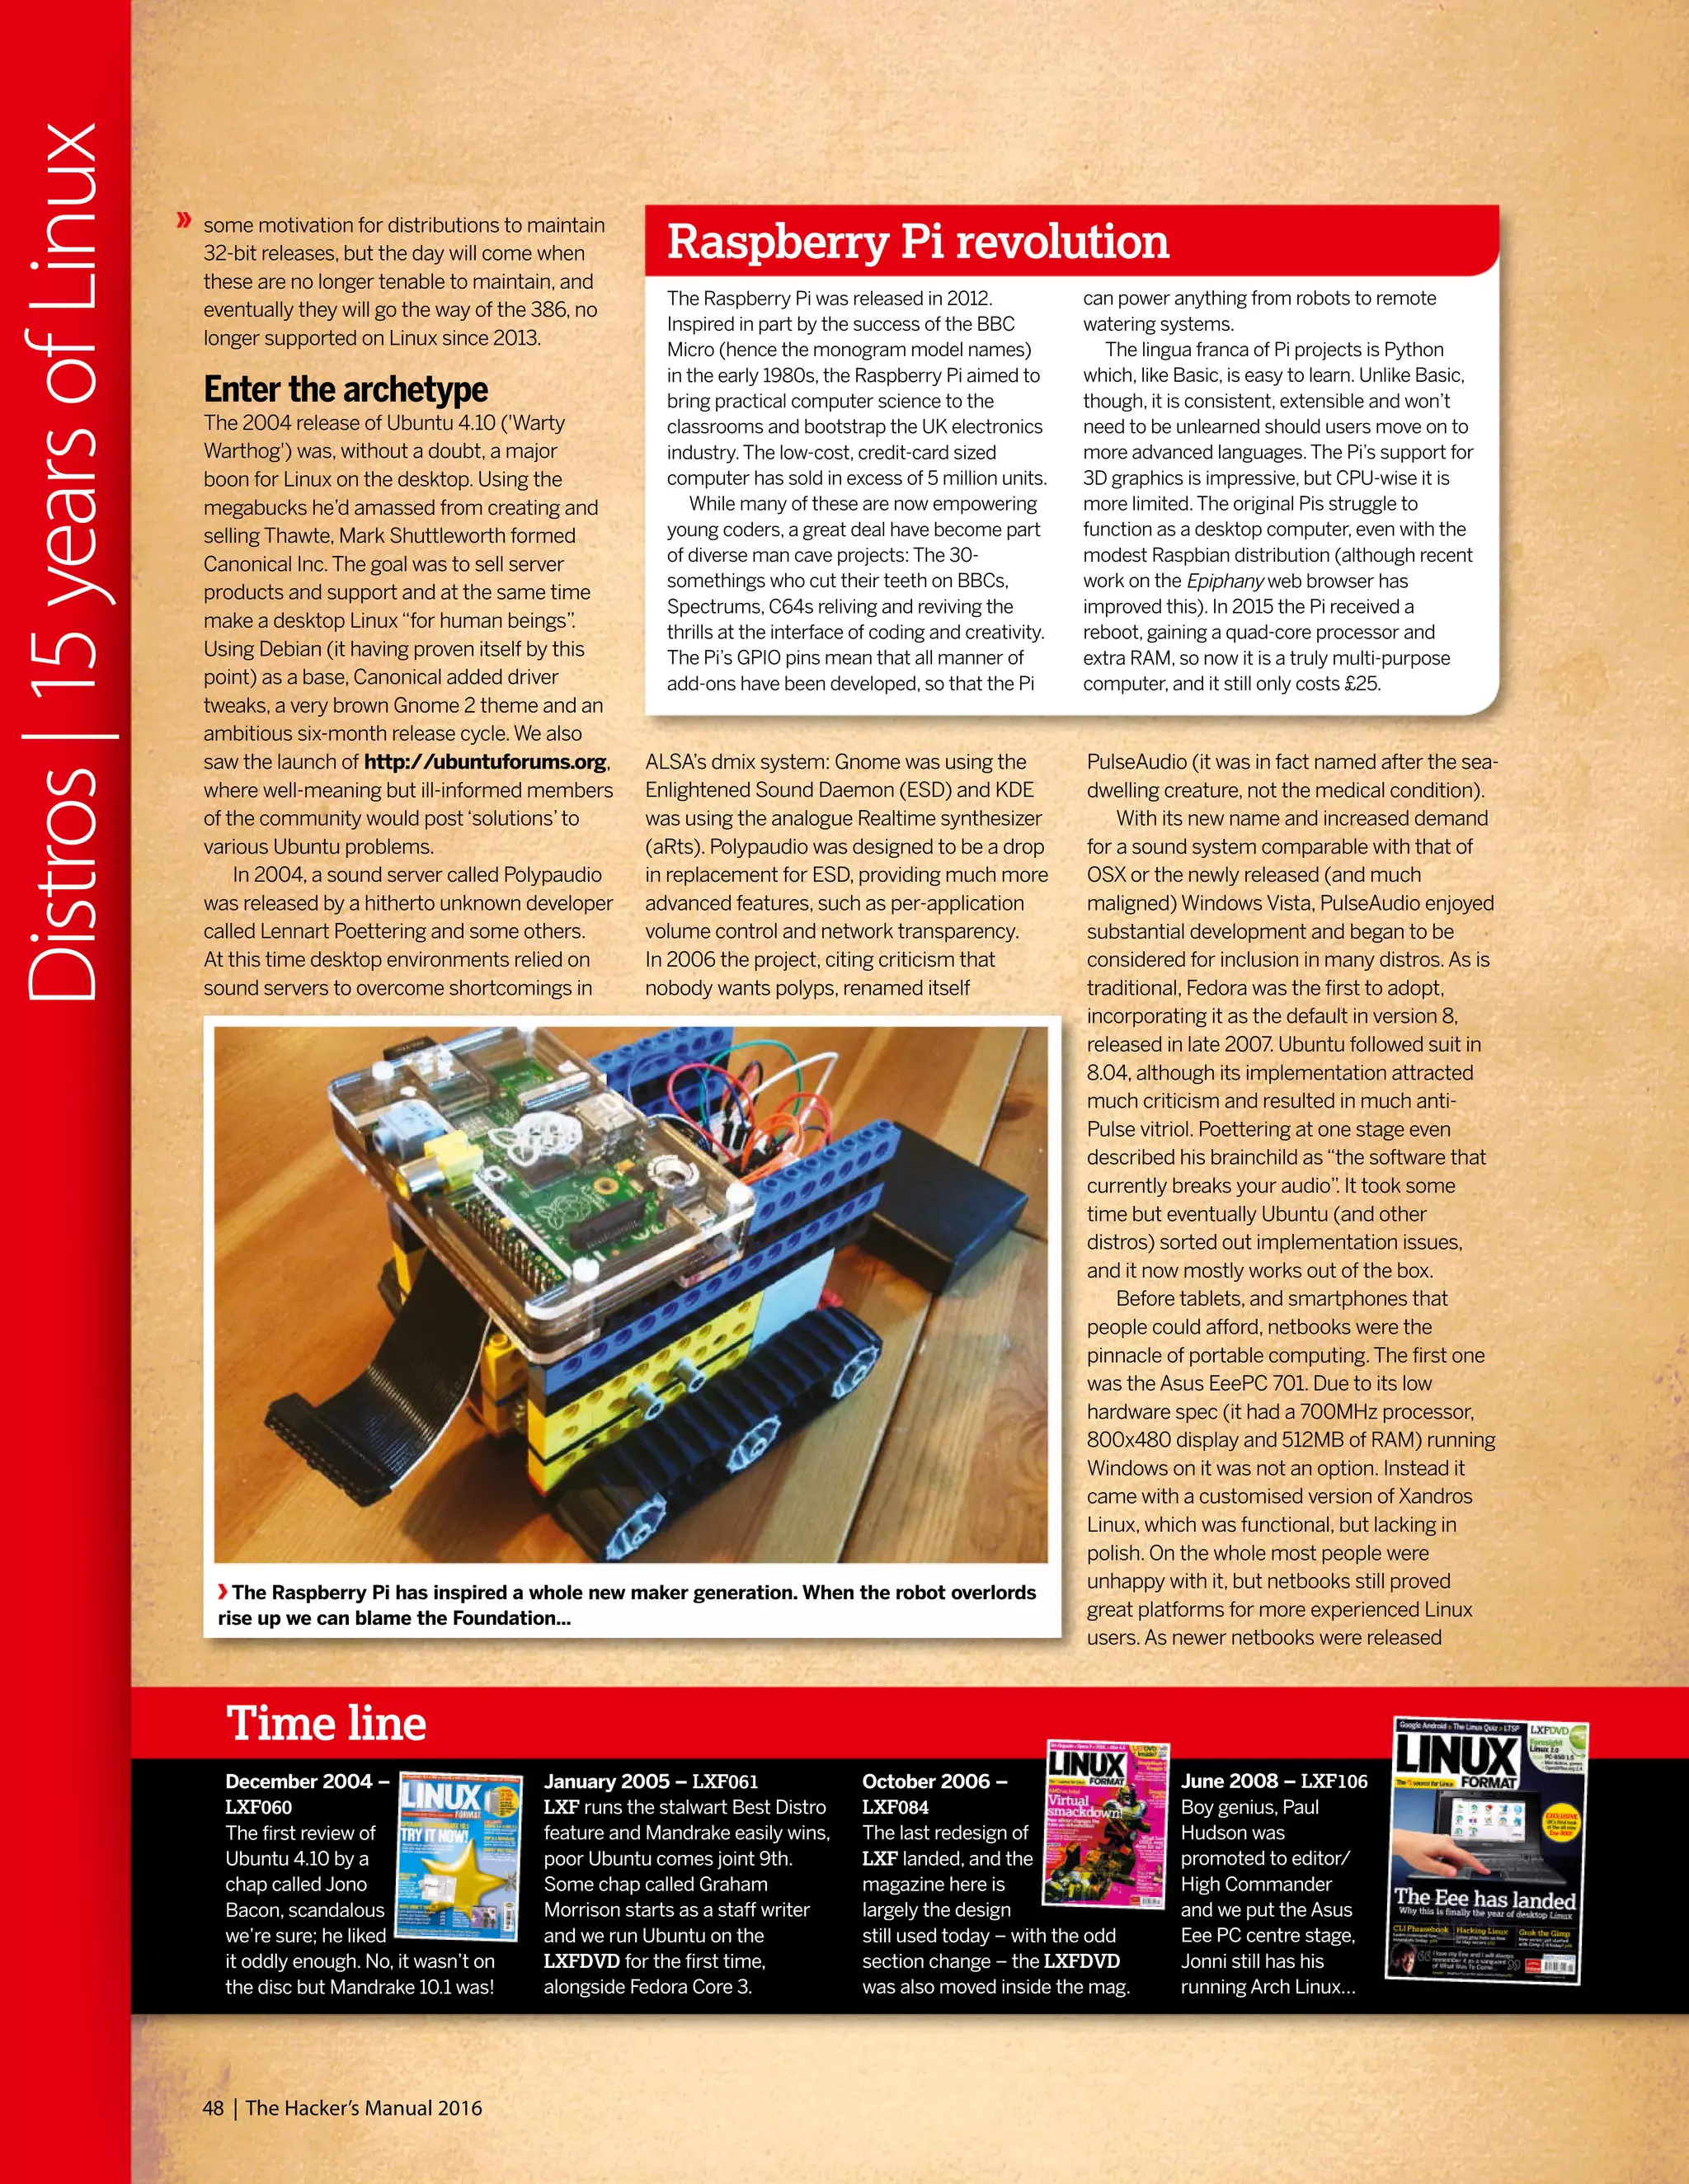
![42 | The Hacker’s Manual 2016
Distros|15yearsofLinux
t was a cold grey morning in May 2000.
Winter should have departed but that
doesn’t happen in Britian. So Reader
Zero, seeking respite from the icy rain
and miserable population,
stumbled into their local
newsagent.Zero was hoping for
some stimulating and edifying
reading material, but was
mostly resigned to the notion
that the shelves would be
populated with the usual feuilletons, corrupt
gaming magazines and various‘zines
pandering to interests Zero did not possess.
And then he saw it, fluorescent orange, a light
in the darkness:“Join the revolution!”the
coverline told our enraptured reader.Amazed
that frustrated tinkerings at the terminal,
considered by their peers an affectation rather
than a hobby, could be part of something so
exciting and dynamic as a‘revolution’,Zero was
powerless to resist.There was a free disc too,
a whole Linux distribution (Definite Linux) was
on there! That would take about a month to
download over dial up.And there would be
another one in four weeks, and
eventually there would be not
just a CD but a DVD.Zero’s life
was changed, and while Definite
Linux definitely didn’t last long,
and the magazine would
change hands many times over
the next 15 years, it remained a bastion of
quality publishing [until Jonni joined – Ed] that
would inform, entertain and delight.
“A light in the darkness: ‘Join
the revolution!’ the coverline
told our enraptured reader.”
Take a walk down memory lane as we examine how Linux
has changed over the Linux Format magazine’s lifespan.](https://image.slidesharecdn.com/thehackersmanual2016-160522105830/75/The-hackers-manual-2016-42-2048.jpg)

![The Human theme was an attempt to make Ubuntu Linux more friendly, because as
everyone knows brown is beautiful, especially if you’re a warthog.
ack when Zero was having their
cathartic moment in the newsagents,
Linux was already about nine-years
old. Some distributions (distros) had already
established themselves, and one of the
earliest was Softlanding Linux System (SLS),
which appeared in May 1992. Unlike its
contemporaries, SLS provided more than just
the kernel and some GNU tools for preparing
filesystems, instead it shipped with a
networking stack and the X display server.
This was considered ambitious and buggy,
and efforts to fix this culminated in
Slackware’s release in 1993.Also that year,
and again in response to frustration with SLS,
Debian came into being. Red Hat Commercial
Linux appeared the following year, which
would engender many popular distros of the
late 90s, including Mandrake,Yellow Dog and
Definite Linux. KDE was released in 1998, with
Gnome following in 1999. Gnome was in part
created due to KDE’s reliance on the then non-
freely licensed Qt toolkit. By May 2000, the
most popular distributions were Debian 2.1,
Red Hat 6.1, Linux-Mandrake 7.0 (this was how
it addressed itself back then), Slackware 7.0
and SUSE Linux 6.3. Some of these even
featured in the very first LXF Roundup.
What’s user experience?
If you’re a recent Linux convert who’s had to
engage in combat with rogue configuration
files, misbehaving drivers or other baffling
failures, then spare a thought for
those early converts whose bug
reports and invective utterances
blazed the trail for contemporary
desktop Linux. Up until
comparatively recently, it was
entirely possible to destroy your
monitor by feeding X invalid timing
information. Ever had problems with Grub?
Try fighting it out with an early version of Lilo.
In the early days, even getting a mouse to
work was non-trivial, requiring the user to do
all kinds of manual calibration. Red Hat
released a tool called Xconfigurator which
provided a text-mode, menu-driven interface
for setting up the X server. It was considered a
godsend, even though all it did was generate
an XF86Config file which otherwise you’d
have to write yourself. So while Windows users
whined about Windows ME being slow and
disabling real mode DOS, your average Linux
user would jump for joy if their installation
process completed. Even if you got to that
stage, it would be foolishly optimistic to
suppose the OS would boot successfully.
Hardware detection was virtually non-existent,
and of the few drivers that had been written
for Linux, most weren’t production quality.Yet
somehow, the pioneers persisted – many
were of the mindset that preferred the DOS
way of working, which began to be sidelined
as the millennium approached.Windows
users were having their files abstracted away
–‘My Computer’epitomises this movement.
In January 2001 Kernel 2.4 was released
and with it came support for USB and exciting
new Pentium IV processors, among other
things. It was of particular importance to
desktop users thanks to its unified treatment
of PCI, ISA, PC Card and PnP devices as well
as ACPI support.The dot-
com bubble was
just about to burst, but all
the excitement
and speculation around
it meant that many
computer enthusiasts
had a broadband
connection in their home, some even enjoyed
the luxury of owning more
than one computer.This solved some major
entry barriers to Linux: people could now
download it much more easily; up-to-date
documentation was easily accessible;
and when Linux saw fit to disappear one’s
internet connection (or render the system
unbootable), the other machine could be used
to seek guidance. But the user experience
Pre-history – Linux Answers
In late 1999 Future plc published
a one-off magazine, this was
borne off the back of the success
of, the now closed, PC Answers
and PC Plus [the flashbacks! –
Ed].All we’ll say is that this was
successful enough to launch a
monthly magazine…
May 2000 – Linux Format #1
Renaming the title in line with
Future’s most successful print
magazines: Amiga Format and
PC Format, Linux Format was
released with editor Nick Veitch of
Amiga Format fame and writing
talent from PC Plus mag. It came
with a CD and was an instant hit.
Timeline
44 | The Hacker’s Manual 2016
Distros|15yearsofLinux
“Even getting a mouse to work
was non-trivial, requiring all
kinds of manual calibration.”](https://image.slidesharecdn.com/thehackersmanual2016-160522105830/75/The-hackers-manual-2016-44-2048.jpg)

![was still, on the whole, woefully inhospitable.
While some installers had evolved graphical
capabilities, these more often than not were
more trouble than they were worth. Users
were expected to understand the ins and outs
of disk partitioning, and be able to discern
which packages they required from often
terse descriptions.
Windows XP was released around October
2001, and while this was seen as a vast
improvement over its predecessor, many
users found that their machines weren’t up to
running it.After all, it required 64MB RAM and
a whopping 1.5GB of disk space. Remember
that BIOSes had only recently gained the
ability to address large drives (there were
various limits, depending on the BIOS, 2.1, 4.2
and 8.4GB were common barriers). So many
people couldn’t install it on their hardware, and
many that met the minimum specs found the
performance rapidly degraded once the usual
pantheon of office suites and runtime libraries
were installed.This provided the motivation for
another minor exodus to Linux, and the retro-
hardware contingent continue to make up an
important part of the Linux userbase (and
berate us for not including 32-bit distros).
Before 2006 all Macs had PowerPC
processors, and many of these (as well as
early Intel Macs), long-bereft of software
updates from Apple, now run Linux too.
The Gnome 2 desktop environment was
released in 2002 and this would become a
desktop so influential that some still seek
(whether out of nostalgia, atavism or
curmudgeonly dislike of modern alternatives)
to reproduce it. It aimed to be as simple,
tweakable and intuitive, and it’s hard to argue
against its achieving all of these adjectives.
Oh, we’re so pretty
One of the major enablers was its strict
adherence to the Gnome Human Interface
Guidelines which set out some
key principles for application
designers.This meant the
desktop was consistent not
just internally, but in respect to
all the GTK apps that people
would go on to write for it.
Also released was KDE 3, which vaguely
resembled Windows – in that it was
cosmetically similar and slightly more
resource-demanding than Gnome. People and
distributions sided with one or the other.
SUSE Linux (predecessor of openSUSE)
always aimed to be desktop agnostic, but
most of its users preferred KDE. Heeding this,
though not until 2009, it changed position and
today is the leading KDE-based distro.
In late 2002,‘DVD’Jon Johansen was
charged over the 1999 release of the DeCSS
software for circumventing the Content
Scrambling System (CSS) used on
commercial DVDs.This software enabled
Linux users to play DVDs, a feat they had been
hitherto unable to do since DVD software
required a licence key from the DVD Copy
Control Agency, one of the plaintiffs in the suit.
It later emerged that CSS could be broken
much more trivially and Johansen was
eventually acquitted. By this time iPods and
piracy meant that MP3 files were
commonplace.These were, and still are,
dogged by patent issues with a number of
bodies asserting ownership of various parts of
the underlying algorithm.As a result, many
distros shipped without patent-encumbered
multimedia codecs.The law is murky though,
and rights holders have shown restraint in
filing suit against FOSS implementations of
these codecs. Most distros are prudent and
leave it up to the user to install these, although
Ubuntu offers users the licensed (but
proprietary) Fluendo codecs on install.
Fortunately, many of the MP3 patents have
expired and many more will have done so by
2017, it doesn’t really matter – we have plenty
of open formats and codecs now (OGG, FLAC,
VPx and x264). It’s still technically a DMCA
violation to use libdvdcss (a modern and
much more efficient way of cracking CSS,
used by the majority of media players on
Linux) to watch a DVD, but that only applies in
some [backwards – Ed] countries and to date,
no one has challenged its use.
The city of Munich announced in 2003 that
it was to migrate all of its infrastructure from
Windows NT to Linux.As well as saving costs,
the Bavarians claimed the main impetus for
the move was freeing them from vendor lock
in. Steve Ballmer visited the mayor personally,
Timeline
November 2000 – LXF007
Corel Linux, the
Debian-based
distro, was on the
CD.The OS may
have failed but it
was a super-easy introduction
to Linux and pointed the way
forward for distro developers.
April 2001 – LXF013
The beginning of a
new century called for
new media, so the
DVD age finally hit
Linux Format! On the
first LXFDVD you
could find SuSE Linux
7.1 and Red Hat 7.0.
The LiMux project branded Tux with Munich’s emblem, the Münchner Kindl. Apparently
it didn’t a hurt a bit. The project is estimated to have saved around ¤11 million.
May 2001 – LXF014
First a DVD and next an all-new
look for LXF! The first redesign
of the magazine cemented
favourites such as HotPicks,
Roundup and Answers.The
International Space Station
was in the Linux news and
AMD64 was on the cards.
46 | The Hacker’s Manual 2016
Distros|15yearsofLinux
“Gnome 2: A desktop so
influential that some still
seek to reproduce it.”](https://image.slidesharecdn.com/thehackersmanual2016-160522105830/75/The-hackers-manual-2016-46-2048.jpg)

![(many based around the more suitable Intel
Atom chips) they started to ship with
Windows XP (some seven years after its initial
release) and then the crippled Windows 7
Starter Edition.Asus later backpeddled on its
Linux enthusiasm: Teaming up with Microsoft
it even launched an‘It’s better with Windows’
campaign, designed to deter people from
purchasing Linux-based laptops.This smear
campaign used phrases like‘major
compatibility issues’and‘unfamiliar
environment’to scare people away.
The cost of progress
The year 2010 may be remembered by some
as the one Ubuntu started to lose the plot. Up
until now, the distro had been going from
strength to strength, gaining more users, more
stability. It was the poster child for the (dead
or irrelevant depending on who you ask)
dream of Linux on the desktop. But things
started to go awry in the 10.10 release. Its
Ubuntu Software Center now included paid-
for apps (the first one was Fluendo’s licensed
DVD player) and the Netbook remix used a
new desktop environment called Unity. In the
11.04 release though, this became the new
shell for the main release too. Ubuntu had
long taken issue with the new Gnome 3
desktop, which at the time of the Ubuntu
feature-freeze was not considered stable
enough to include in
the release anyway,
and Gnome 2 was
already a relic. So in a
sense Ubuntu had no
choice, but no one likes
change, and users
were quick to bemoan
the new desktops. Ubuntu has persisted with
Unity and it’s much improved today, but a low
point came with the 12.10 release when users
noticed‘suggestions’from Amazon as they
typed queries into the search lens.
Gnome 3 is not without controversy too –
the criticisms it attracted were threefold: First,
many preferred the old Gnome 2 way of doing
things and this clearly was not that. Second,
all the fancy desktop effects required a
reasonable graphics card (and also working
drivers).There was a fallback mode, but it
severely crippled desktop usability. Finally, this
appeared to be something designed for use
on mobiles or tablets, yet even today mobile
Linux (not counting Android) has never taken
off, so why should users be forced into this
mode of thinking? Many found though, that
once some old habits are unlearned and some
sneaky keyboard shortcuts are learned (and
Gnome Tweak Tool is installed), that the
Gnome 3 way of working could be just as
efficient, if not more so, than its predecessor.
KDE users looked on smugly, having already
gone through all the rigmarole of desktop
modernisation (albeit less drastic than
Gnome’s) when KDE 4 was released in 2008.
Around this point we ought to mention
Systemd as well, but there’s not much to say
that hasn’t been said elsewhere: the old init
system was creaking at the seams, a new and
better one came along, it wasn’t everyone’s
cup of tea, but we use it anyway, the internet
slanders Lennart Poettering.
There has always been a niche interest in
gaming on Linux, but this was mostly done
through Wine, which has been around since
the mid 90s.Things changed when Valve
released its Steam for Linux client in 2013.
Today there are over 1,000 games available for
Linux, with more being ported all the time.
Granted, many of the high profile ports
incorporate either a Wine layer or a wrapper
such as eOn, but we are also seeing a good
proportion of indie releases running natively.
Valve even made an OpenGL version of
zombie splatterfest Left 4 Dead 2, which
outperformed the DirectX/Windows release.
Linux users make up about 1% of the Steam
userbase at present, but this may change if
Valve’s plan to conquer the living room
[why not the desktop!? – Ed] through Steam
boxes, running the Debian-based Steam OS,
comes to fruition.
The last couple of years have been full of
Linux developments and dramas too, including
the Heartbleed bug, a partial resolution to the
long-running SCO-IBM lawsuit and a much
less adversarial stance from Microsoft. But
there just isn’t enough space, alas.
Thanks to Steam on Linux, Tux gamers finally have thousands of games to play, and
LXF writers can peruse the Summer Sale offerings and still claim to be doing work.
July 2009 –
LXF120
We celebrate
Ubuntu 10.04
by putting it on
the cover and
interviewing Mark Shuttleworth,
again.The man just won’t leave
us alone!
August 2010 –
LXF134
What’s this Android
thing and how can
it even possibly
have a chance of
taking on the iPhone?
We explained why, plus Mint 9 and
Fedora 13 on the LXFDVD.
April 2012 –
LXF156
We reported on
this thing called
the Raspberry Pi
back in LXF147,
but finally the
world could buy this tiny PC
marvel and the world loved it.
January 2014 – LXF179…
A new editorial team lands at
Linux Format Towers as the
old team departs for pastures
new. LXF179 is the top-selling
issue of the year and LXF181
is the best seller for almost
two years! Thank you for helping
us keep LXF the UK’s best seller!
The Hacker’s Manual 2016 | 49
Distros|15yearsofLinux
“The last couple of years
have been full of Linux
developments and dramas.”](https://image.slidesharecdn.com/thehackersmanual2016-160522105830/75/The-hackers-manual-2016-49-2048.jpg)

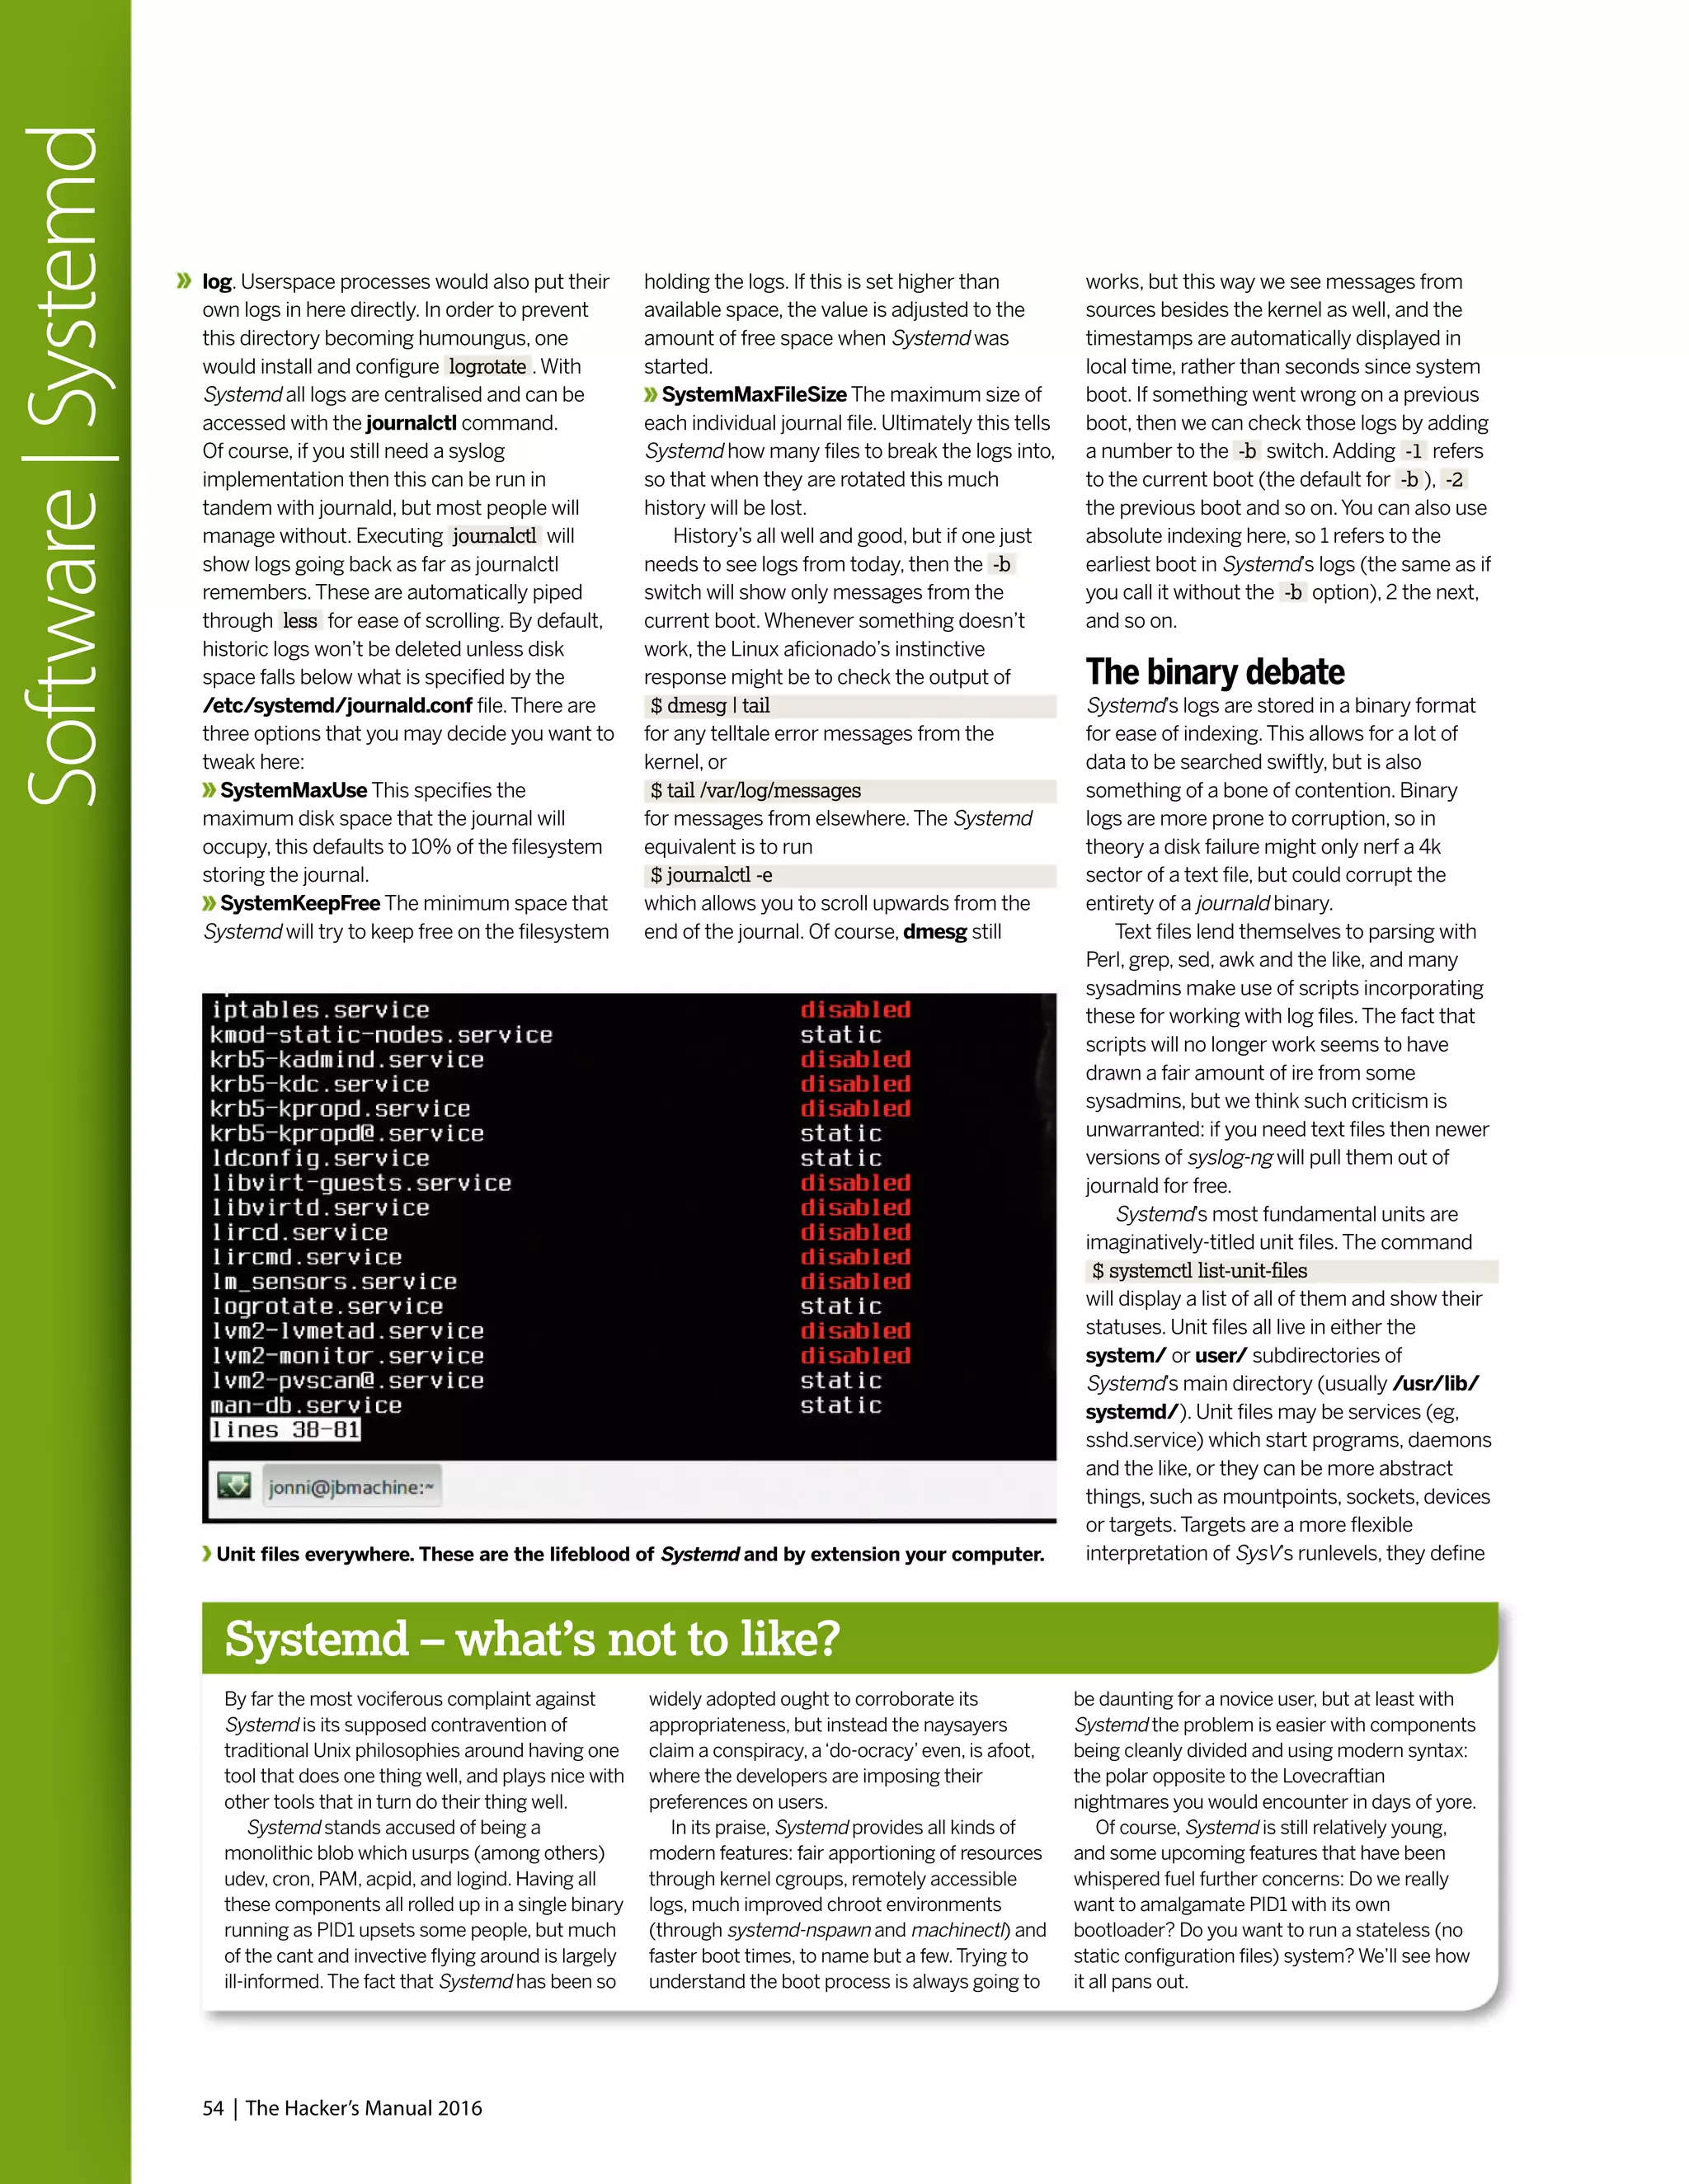
![52 | The Hacker’s Manual 2016
Software|Systemd
S
ince being made the default init
system by Fedora 15 in 2011,
Systemd has, despite the
controversy, seen steady
adoption by other
distributions. Having made it
into both the latest Debian
and Ubuntu versions, only
Gentoo and Slackware
remain as major stalwarts of
ye olde SysVinit.
There are, of course, a number of smaller
and niche distros that do likewise, but the lack
of any major exodus of users to any of these
distros provides anecdotal evidence that they
are at least satisfied with Systemd’s
performance and are unswayed by the
ideological concerns surrounding it. Indeed,
desktop users will typically have witnessed
much improved start up times thanks to its
parellelisation of startup services and the way
it unifies what is a disparate collection of
scripts and daemons makes it much more
appealing for junior sysadmins, and Linux
Format magazine has covered Systemd fairly
extensively [Tutorials, p68,
LXF191, Tutorials, p70,
LXF188]. But new features are
being added all the time and
many users are unaware of
those that have been there for
some time.We’ll probe
Systemd’s innards and see what it’s up to,
what it can do, and how to stop it doing what
we don’t want it to. But first some background.
“Unifies a disparate collection
of scripts and daemons makes
it much more appealing.”
SystemdWait! Don’t leave. Systemd really isn’t going to eat
your computer, and in fact it isn’t all that bad...](https://image.slidesharecdn.com/thehackersmanual2016-160522105830/75/The-hackers-manual-2016-52-2048.jpg)


![In cases where companies are prohibited from
doing so, we asked the companies to promise
to provide notice after an emergency has
ended or a gag was lifted. Because we knew it
would take significant engineering and
workflow changes for some of the larger
companies to implement these practices, we
gave them more than a year’s notice that this
criterion would be included in the 2015 report.
Two companies, Google and Twitter, who
had previously earned credit in our report
for telling users about government data
requests did not receive credit this year
because they didn’t have policies in place that
tell users after a gag has been lifted or an
emergency ended.
Out of the 24 companies, 15 companies we
evaluated did meet this stronger criterion, and
we’re pleased to see the industry is evolving
in this way.We were particularly impressed by
the strong policy adopted by Dropbox, which
states the following:
“Dropbox’s policy is to provide notice to
users about law enforcement requests for
their information prior to complying with
the request, unless prohibited by law.We
might delay notice in cases involving the
threat of death or bodily injury, or the
exploitation of children.”
Data retention policies
For the first time this year, we extended our
evaluated companies to cover whether they
were transparent about what deleted data
they continued to store. Often, users may not
realise that data they delete from an email
service provider or off a social network is still
stored and available to law enforcement
agencies upon request.
Transparency is the first step to educating
users about what happens to their deleted
data, so we are evaluating companies on their
transparency practices in this category.
Note that we aren’t making specific
requirements about a company deleting data
after a certain time. Indeed, some companies
publicly state that they maintain deleted data
and server logs indefinitely – a practice we
think is terrible for users. However, for this
report, we’re just asking companies to be
clear about retention periods for data
collected that may not be easily viewable to
the user (including IP addresses and DHCP
data) as well as content that users deleted.
Again, we saw 15 companies out of the 24
that we evaluated receive credit in this
category.We were particularly impressed by
the clarity and detail of Comcast’s disclosures.
The company maintains historical call detail
records for Xfinity Voice telephone service for
two years.This includes local, local toll, and
long distance records. In limited instances,
older records may be available, but will require
additional time and resources to retrieve. For
more details about its data retention policy
see the Comcast Law Enforcement Handbook
at http://bit.ly/LXFitsthelaw.
Opposing backdoors
One of the big trends we’re seeing across the
technology industry is a emphatic rejection of
government-mandated security weaknesses.
In fact, 21 out of the 24 companies we
evaluated took a public position opposing the
use of backdoors.This is a powerful statement
from the technology community that
Congress and the White House should heed.
Many of the companies have signed onto
a letter organised by the Open Technology
Institute that opposed mandates to
intentionally weaken security, which stated
the following:
“We urge you to reject any proposal that
US companies deliberately weaken the
security of our products … Whether you call
them‘front doors’or‘back doors’, introducing
intentional vulnerabilities into secure
products for the government’s use will make
those products less secure against other
attackers. Every computer security expert
that has spoken publicly on this issue agrees
on this point, including the government’s
own experts.”
The EFF’s conclusions
We are pleased to see major technology
companies competing on privacy and user
rights. Practices that encourage transparency
with users about government data requests
are becoming the default for companies
across the web.While we’re only able to judge
a small selection of the tech industry, we
believe this is emblematic of a broader shift.
Perhaps invigorated by the ongoing debates
around government surveillance and in
response to growing public attention around
these issues, more and more companies are
voluntarily speaking out about government
data requests and giving users the tools to
fight back.
We think that this type of transparency
can help prompt broader discussion and
systematic change about how and when
governments access user data and eventually
prompt Congress to clarify and improve the
privacy laws for digital data.We also recognise
that tech companies are in a position to know
about and resist overbroad government
requests, so we need to do everything within
our power to encourage them to speak out
and fight back. In handing our data to these
companies, we’ve handed them a huge
responsibility to do what they can to stand
up for privacy.We’re pleased that many of
the companies we evaluated are stepping up
to the task.
Running your own cloud services, using OwnCloud, is one way
to secure your own privacy.
The Hacker’s Manual 2016 | 87
Security|EFFprivacyreport
Linux escapees
The EFF report is very US centric,
but as a good portion of the world
uses so many of these US-based
services, it’s a report that affects
the majority of us.As open source
aficionados, the average Linux
Format reader is far more aware of
the privacy implications and far
better set to do something about
the situation.The mag has
previously looked at OwnCloud
[see Tutorials, LXF190] to see
just how easy it is to create your
own cloud-based document
collaboration and sharing system.
This means it’s possible to put
into place your own means of
escaping corporate rules,
regulations and privacy issues.
The reality is that not everyone
is in such a position and it’s
in everyone’s interest that
companies offering online services
do so in ways that protect us all
without kowtowing to government
demands. Or at least make people
aware of how their data is store
and when – if ever – access is
given to government bodies.
Cloud services are only going
grow in number, and the amount
of data we’ll store on them will do
the same. LXF will be looking at
new open source cloud options in
the future as more services, such
as www.onlyoffice.com appear.](https://image.slidesharecdn.com/thehackersmanual2016-160522105830/75/The-hackers-manual-2016-87-2048.jpg)

![But the compromised web servers doing
the malware-foisting are, more often than not,
Linux boxes.And our man in the pub told us
these are secure. In fact, there are any number
of ways by which a Linux box could end up
‘owned’by a villain.And if it’s hosting a
popular website or sensitive database then all
the more motivation for someone to attempt
to do so.We often get questions from readers
asking how to set up a secure LAMP stack or
suchlike, and unfortunately there isn’t really an
easy answer.There are a few things you
should (and plenty of things you shouldn’t) do,
but there’s no accounting for a talented
adversary, or some obscure 0-day bug in one
of the many components upon which a
modern LAMP server relies.That said, let’s
focus on what we can mitigate against.
It’s a config thing
While a compromise could be the result of
some new vulnerability with a catchy name
and stylish logo, by far the most common
cause is good old-fashioned server
misconfiguration.A server that is overly
permissive about what it lets an outsider
access or modify is a server that’s asking for
trouble. Common mistakes include allowing
the web server to write to sensitive files, or
having an SQL server accessible to the public
(when it need only listen locally or for
connections from selected IPs).Alternatively
attackers might get lucky through
bruteforcing SSH (or other) logins.This
shouldn’t really be possible – password logins
should be disabled (at least for sensitive
accounts) in favour of public key auth, and
multiple failed login attempts (which are time
consuming anyway) should result in a
temporary ban.
Thus, check your permissions, have
servers only listen on the localhost address
where possible (and connect via an SSH
tunnel if you need to access them), and have
some effective firewall rules in place. In the
latter case, it’s prudent to lock down outgoing
traffic as well as incoming.This might just
stop a malevolently installed program from
phoning home (they often communicate over
How to update when you can’t update
There are, regrettably, a surfeit of servers
running distributions (distros) long past their
support window.Admins of these boxes really
should get their act together, but if upgrading
the OS is out of the question then you should
attempt to backport important security fixes.
Sometimes people will generously provide
packages for your ageing distro, which is
convenient but raises a question of trust. In
general, you’ll have to roll your own packages,
incorporating any new security fixes. Source
packages for old distros are easy to find (for old
Ubuntu versions look on https://launchpad.
net and http://archive.debian.org for Debian).
It’s a very good idea to set up a virtual
machine that’s as close a copy of your aged
server as you can manage.You’ll also need a
working gcc toolchain, the set up of which may
involve some dependency hell, and you’ll also
require all the package’s build dependencies.
You won’t want to do any major version
upgrades of vulnerable software since this will
likely bork your system, instead patches will
need to be adjusted to fit the old version, which
will involve some trial and error. If you’re using a
Debian-based distro then add the patch to the
debian/patches/all directory, inside the
package source’s directory, and add the patch
name to the file debian/patches/series.Then
run debuild to make the package.
IRC) and wreaking havoc. Root logins should
be disabled, and authorised users should use
sudo or su to do administrative tasks, since it
leaves an audit trail by way of the system log.
Assuming then that our front door, as it were,
is secure, how else might ne’er-do-wells
access our box? Well, that depends on how
secure the rest of it is.
PHP scripts provide a common attack
surface against web servers, though ultimately
any server side language could fall prey to
similar attacks.Wherever your web application
accepts user input, beware. Since you have no
control of exactly what users might input, it’s
important to sanitise it. Otherwise a malicious
user can inject code which, depending on the
context, could prove harmful. For example a
simple PHP search form might look like:
<form method=’get’ action=’search.php’>
<input name=”search” value=”<?php echo $_
GET[‘search’];?>” />
<input type=submit name=’dosearch’
value=’Search’ /></form>
Input is passed unchecked to the search.
php script, which means a user could inject
some JavaScript, for example searching for
the string:
“><script>alert(0)</script>
Results in an alert box.The initial double-
quote terminates the HTML attribute value,
then the right bracket escapes from the input
element.To guard against these shenanigans,
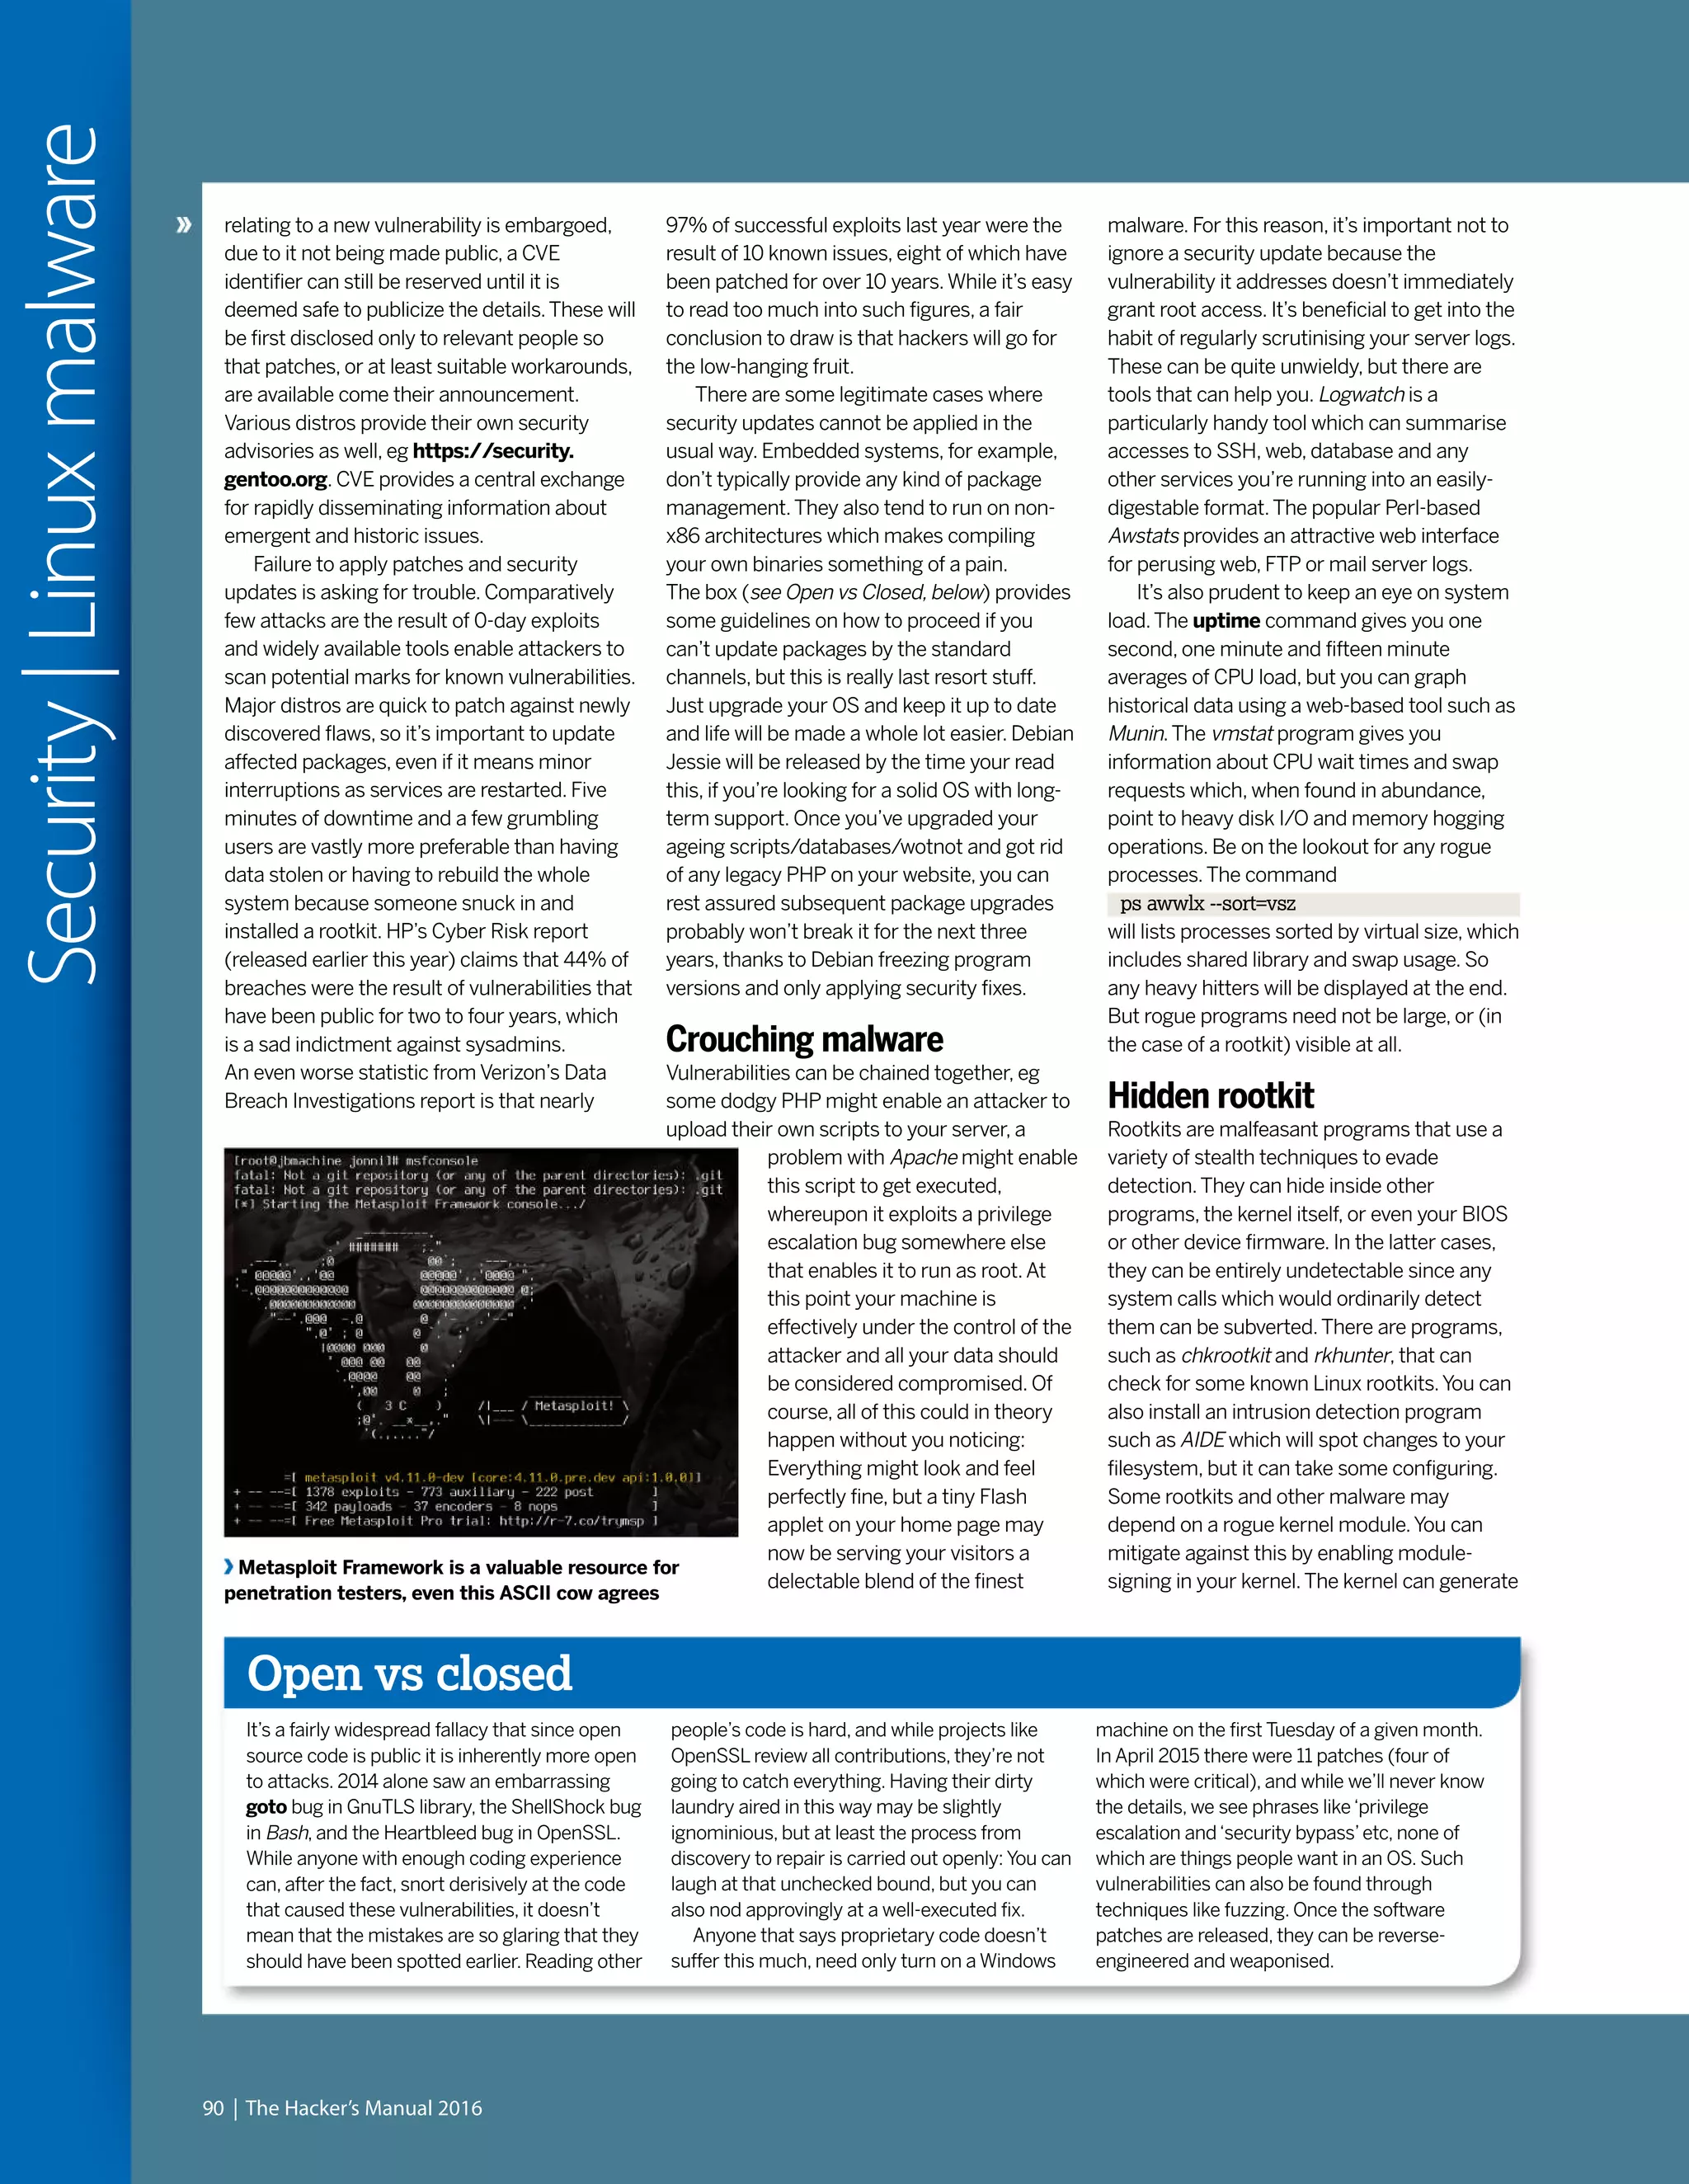
Munin comes
from the Norse for
‘memory’. Once
you’ve gathered
some stats, sudden
increases in
resource demand
become much easier
to spot.
be sure to use the available functions to filter
the input.The following code will escape any
special characters so they won’t cause harm:
<?php
$input = “pointy brackets <and> &
ampersands?”;
var_dump(filter_var($url,FILTER_SANITIZE_
SPECIAL_CHARS));
?>
While the output in the browser will look
the same, if you look at the HTML source
generated by the script, you will see that it in
fact outputted the string:
“pointy brackets <and> &
ampersands?”
The escaped characters are much less use
to an attacker.You can also use FILTER_
SANITIZE_STRING here, which removes
(rather than escapes) tags.You could equally
well have injected PHP here or, where the
input is passed to a database, SQL
commands.When using PHP to interface with
databases, it’s worth using the PDO (PHP
Data Objects) API as opposed to MySQLi.
This will ensure that data will never be
mistaken for instructions.
Once discovered and confirmed,
vulnerabilities are referenced through the
Common Vulnerabilities and Exposures (CVE)
system, although individual products and
companies may have their own internal
systems too. In the case where information
The Hacker’s Manual 2016 | 89
Security|Linuxmalware](https://image.slidesharecdn.com/thehackersmanual2016-160522105830/75/The-hackers-manual-2016-89-2048.jpg)


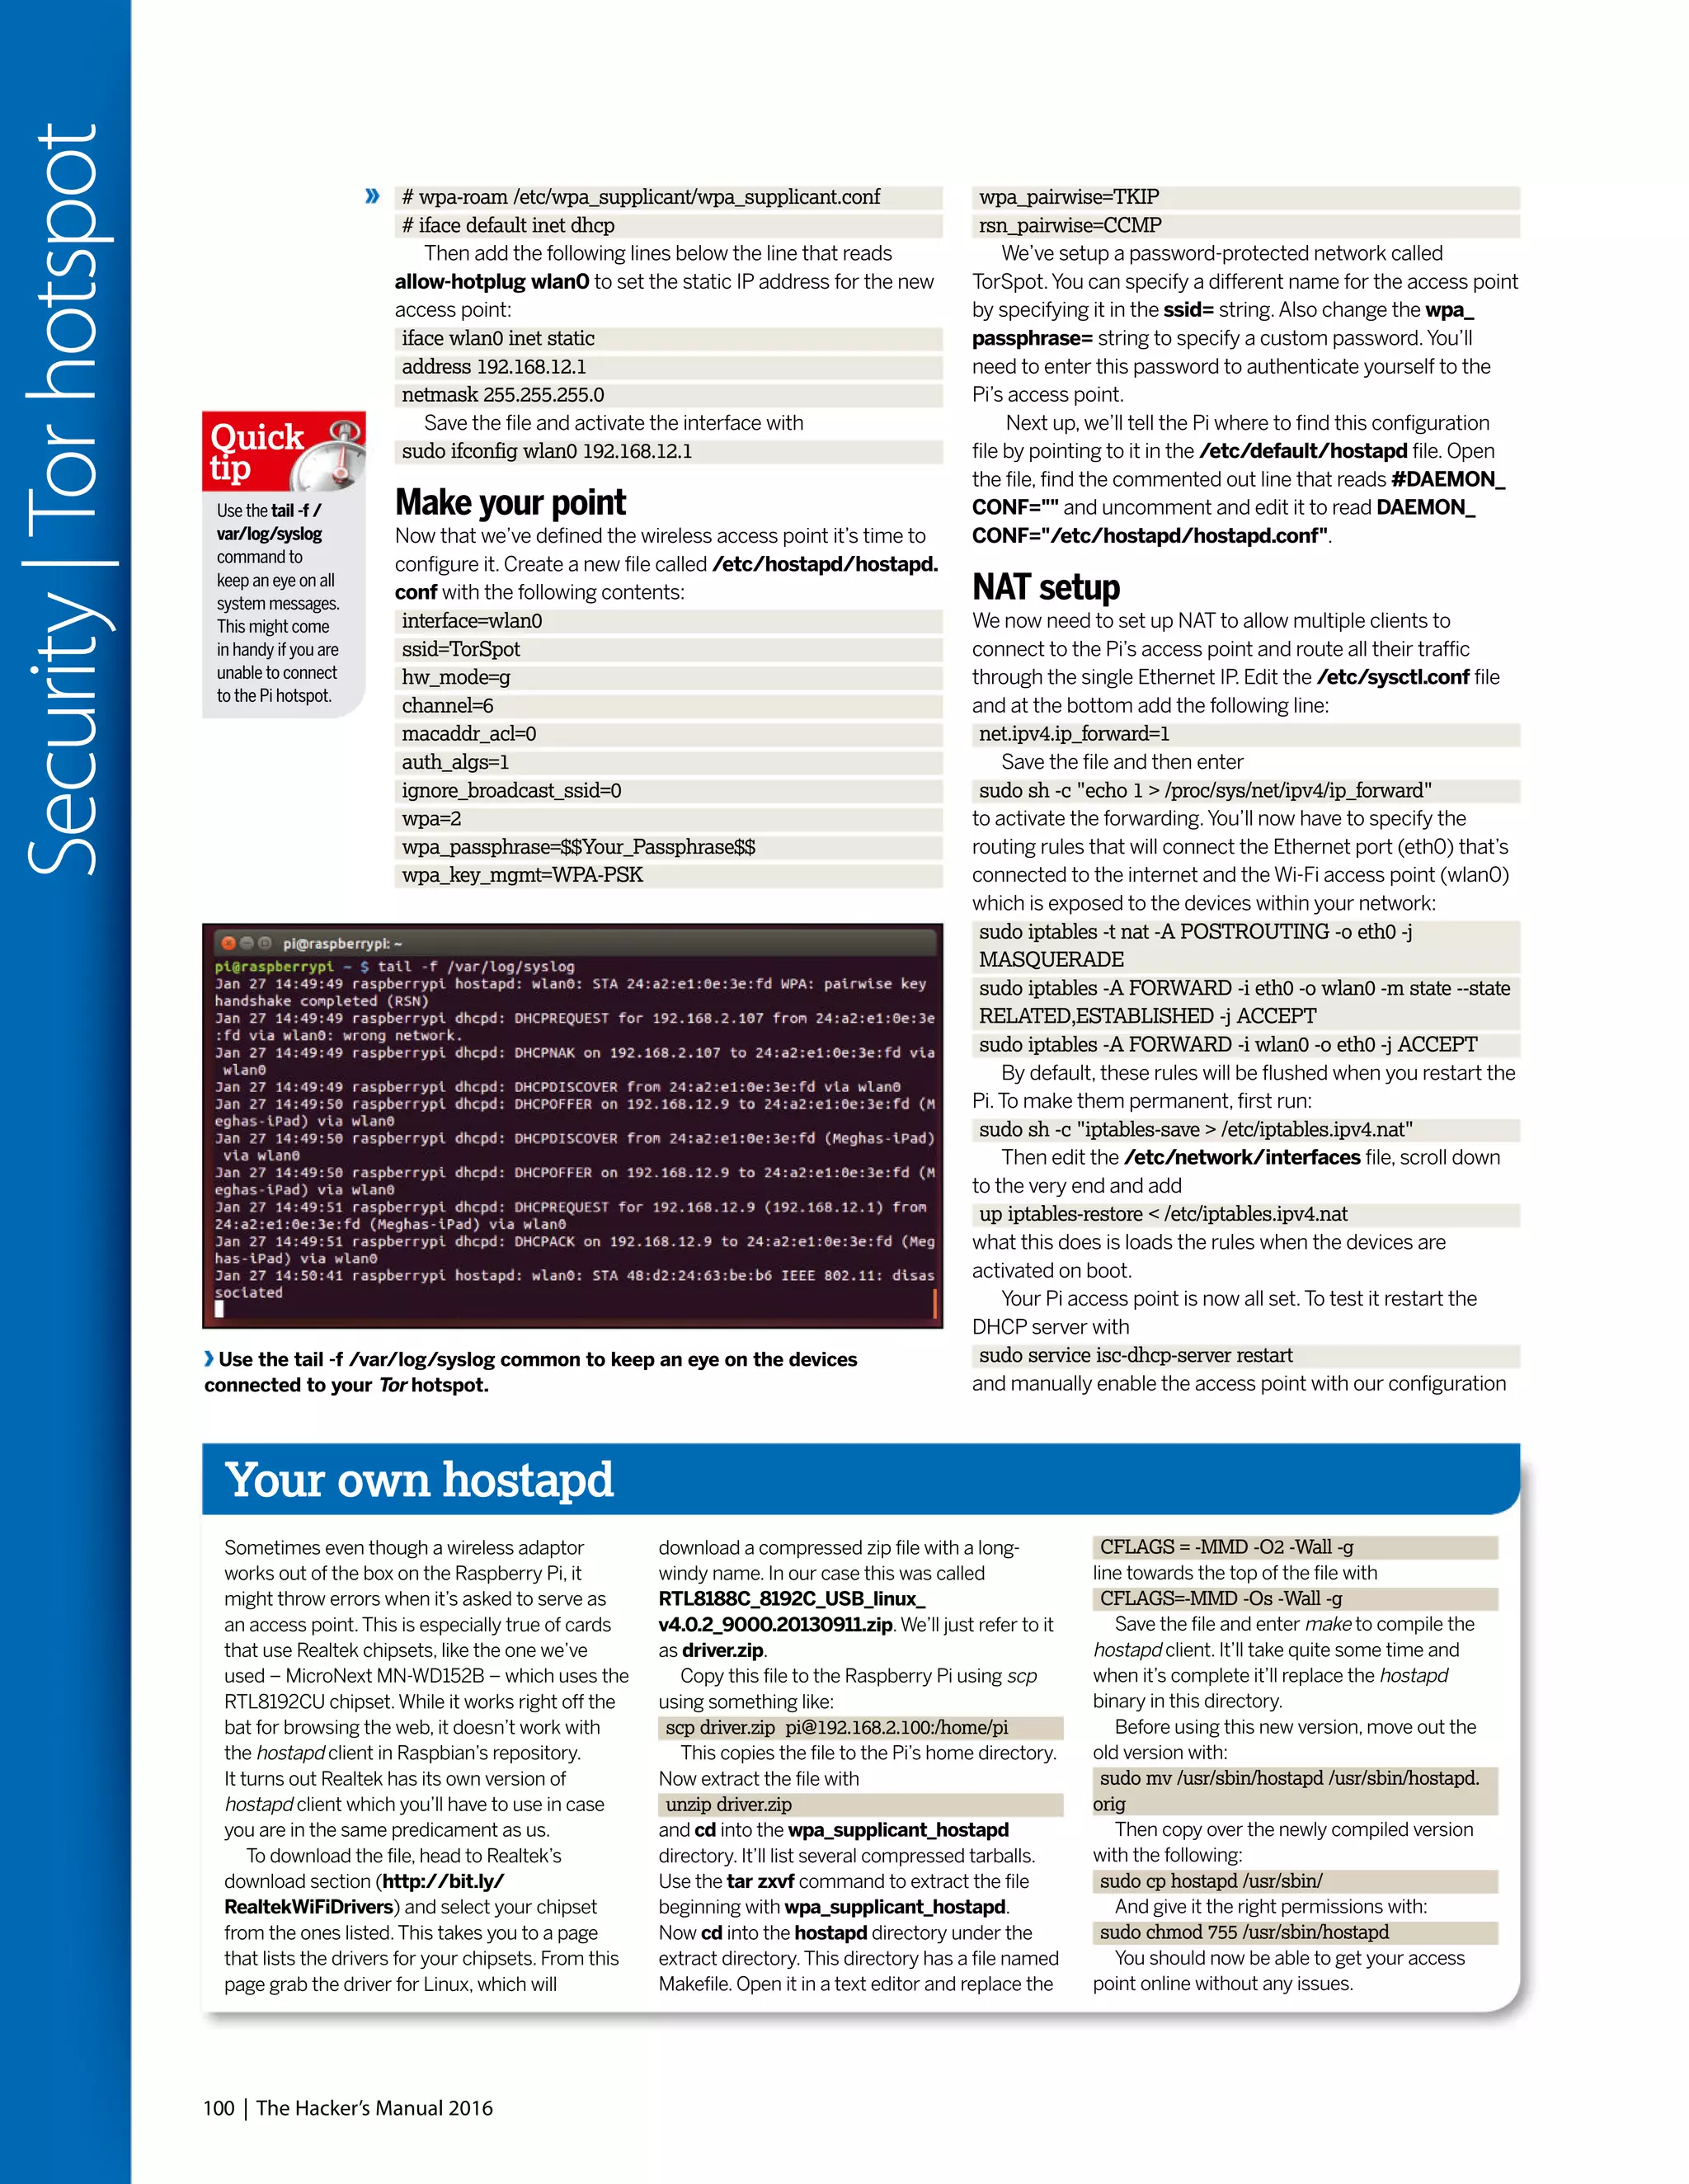
![The Hacker’s Manual 2016 | 101
Security|Torhotspot
We’veusedGoogle’s
DNS service in this
tutorial,but you can
use another service
like OpenDNS or
your ISPs DNS
servers by pointing
to them in the
/etc/dhcp/dhcpd.
conf file.
Quick
tip
Verify the traffic redirection rules with the sudo iptables -t nat -L command.
with the following command [Read the ‘Your Own Hostapd’
box, p72, if you get an unknown driver error]:
sudo /usr/sbin/hostapd /etc/hostapd/hostapd.conf
If everything goes well, the wireless access point (TorSpot)
is listed in the list of available Wi-Fi hotspots.You can connect
to it from another computer or a smartphone and
authenticate using the password you specified in the
hostapd.conf file.When connected, you should be able to
browse the Internet normally.
Once you have tested the new access point, let’s cement
the settings so that they are activated as soon as the Pi boots
up. Start the hostapd and DHCP services with the
sudo service hostapd start
and
sudo service isc-dhcp-server start
commands and then update the init scripts with
sudo update-rc.d hostapd enable
and
sudo update-rc.d isc-dhcp-server enable
Now restart the Pi with
sudo shutdown -r now
When the Pi is back up again, you’ll be able to connect to
the new access point and browse normally.
Torify access
Your Raspberry Pi is now fully functional as a wireless
hotspot. However, the data is still not anonymised. So let’s
add Tor to the mix. SSH back into the Pi and install Tor with
sudo apt-get install tor
When it’s installed, edit Tor’s config file /etc/tor/torrc
and add the following at the top:
Log notice file /var/log/tor/notices.log
VirtualAddrNetwork 10.192.0.0/10
AutomapHostsSuffixes .onion,.exit
AutomapHostsOnResolve 1
TransPort 9040
TransListenAddress 192.168.12.1
DNSPort 53
DNSListenAddress 192.168.12.1
These settings inform Tor about the IP address of our
access point and asks that it anonymises any traffic that
flows over it. Next up, we’ll change the routing tables so that
connections via the Wi-Fi adaptor (wlan0) are routed through
Tor. First, flush the existing redirection and NAT rules with the
sudo iptables -F
command go on to
sudo iptables -t nat -F
command. Since, we’ll still want to be able to SSH into the Pi,
we’ll add an exception for SSH’s Port 22 with:
sudo iptables -t nat -A PREROUTING -i wlan0 -p tcp --dport
22 -j REDIRECT --to-ports 22
We’ll now add two rules.The first is a passthrough rule for
DNS lookups and the second directs all TCP traffic to Tor’s
port 9040:
sudo iptables -t nat -A PREROUTING -i wlan0 -p udp --dport
53 -j REDIRECT --to-ports 53
sudo iptables -t nat -A PREROUTING -i wlan0 -p tcp --syn -j
REDIRECT --to-ports 9040
Like before, these rules won’t be carried on to the next
session.To load them on reboot, all you have to do is save
them to the NAT save file like before with
sudo sh -c "iptables-save > /etc/iptables.ipv4.nat"
In the previous section, we’ve already configured the /
etc/network/interfaces file to load the contents of this file
when the interfaces are activated.
You can now enable the Tor service with
sudo service tor start
and update the relevant boot scripts with
sudo update-rc.d tor enable.
That’s it. Now restart the Pi.When it’s back up again, you’ll
be able to connect to the Pi hotspot,TorSpot, as before.
However, unlike as before all your traffic will now be routed
through the Tor network.
You can verify that this is happening by heading to check
https://torproject.org from any device that’s connected to
TorSpot.The page will also list your IP address which will not
be that of your ISP.Visit this page from another device
connected to TorSpot and it’ll show a different address.
Congratulations, you can now anonymously browse the web
on all your devices!
Tor-in-a-box options
If you find this tutorial too cumbersome, or want
to set up something for a non-technical friend or
relative, there are several ready-made hardware
solutions that can anonymise all their web traffic
in a similar fashion.
There’s the OnionPi Pack from AdaFruit
(http://bit.ly/AdaOnionPi) which includes a
Raspberry Pi B+ and a compatible USB Wi-Fi
adaptor along with a case for the Pi, cables, SD
card and everything else you need to setup your
Torrified Wi-Fi hitspot.The bundle costs $80.
However, you’ll still have to follow the instructions
and set it all up yourself.
If you’d rather have something more plug and
play, there’s the SafePlug from the guys who
bought us PogoPlug. It’s a $49 device that plugs
into your wireless router and once activated
routes all traffic over the Tor network.A neater
and smaller alternative is the Anonabox
(www.anonabox.com). It initially launched on
Kickstarter but after its funding was suspended it
relaunched on Indiegogo. Here it was listed at
$51 and surpassed its funding target in early
January 2015 and will begin shipping in February
2015.Anonabox is a router that you can directly
connect to via Wi-Fi or Ethernet.
Another router-based option is Portal which
stands for Personal Onion Router To Assure
Liberty.The project produces a pre-built software
image for several TP-Link routers.You can simply
flash the Portal firmware image onto these router
following the instructions on the project’s
website (https://github.com/grugq/portal).](https://image.slidesharecdn.com/thehackersmanual2016-160522105830/75/The-hackers-manual-2016-101-2048.jpg)
![106 | The Hacker’s Manual 2016
Security|Protectyournetwork
packet, they prevent the statistical analysis that caused WEP
to fail. Nevertheless, they are vulnerable to some attack
techniques.WPA and WPA2 are frequently deployed with a
pre-shared key (PSK) to secure communications between
the access point and the wireless clients.The PSK should be
a random passphrase of at least 13 characters in length; if
not, it is possible to determine the PSK using a brute-force
attack by comparing the PSK to a known dictionary.This is
the most common attack.
The best way to check whether your wireless network is
impervious to attacks or not is to break into it. However, be
advised – breaking into a wireless network that isn’t under
your charge is illegal and shouldn’t be attempted.
We’ll use the airmon-ng set of tools to crack open the
faults in our network.To start, we need to be able to intercept
or monitor wireless transmissions; therefore, we need to set
the Kali communication interface with wireless capabilities
to monitor mode with
airmon-ng start wlan0
If the command tells you that there might be some processes
that could cause trouble, use
airmon-ng check kill
to kill those processes before reissuing the
airmon-ng start wlan0
command.The command creates a monitoring interface
such as wlan0mon.
When the monitoring interface is up, use
airodump-ng wlan0mon
to view the local wireless environment.This command lists all
networks that it can find within range of the wireless adaptor
at that particular point of time.The output includes several
key details including the BSSID of each network along with its
MAC address, bandwidth information including the channel
used, information on the encryption used, and the ESSID
which provides the name of the wireless network.
Now locate your network from the list, and make a note of
its BSSID and the channel it’s on.Then use the information
you get to fire up airodump, for example:
airodump-ng -c 11 --bssid 28:03:7C:51:10:31 -w /root/
Documents/my-network wlan0mon .
The command will create a bunch of files under the /root/
Documents directory.
We’ll now force one of the devices to reconnect with the
router and capture the handshake between them. Make a
note of the BSSID of any station and launch a new terminal
while leaving Airodump running. In the new terminal window
we’ll launch what’s known as a deauthentication attack where
a device is forced to reauthenticate to the access point and
re-exchange the secure encrypted WPA2 keys. In the new
Beef up security
with Kali LinuxPlug the holes in your network defenses with this pentesting distro.
K
ali Linux is the swiss army knife for ethical hackers.
The distro is loaded with tools for penetration testing
that you can use to compromise your own network in
order to identify the weak points of entry that can be exploited
by crackers.The Debian-based distro has more than 300
tools and utilities that are arranged neatly in a categorised
and structured menu. Kali Linux is available in multiple
flavours and can be used as a Live distro or inside a virtual
environment. In this tutorial we’ll use some of the common
tools in Kali Linux to expose the weak points in our network.
First let’s find out what devices are logged on to the
network using netdiscover, which can be used for
reconnaissance on those WiFi networks that aren’t using
DHCP. Fire up a terminal inside Kali and type
netdiscover -i wlan0
which sends out ARP requests over the network and then
displays the results on the screen.The process is live, and as
soon as new machines come on the network they’ll pop up on
the screen. Once you have a list of hosts, press [Ctrl] + [C] to
stop the scan.With a list of hosts and their MAC addresses
you can begin the process of exploiting them.
You will probably need to see what ports are open on
these hosts, and the OS they are running. One of the best
apps for the job is nmap, which can be easily used via its
graphical interface,Zenmap, which lets you run various types
of scans on any host within your network.Zenmap ships with
10 common scanning profiles and you can define your own
using its extensive options.
Break into WiFi
WiFi Protected Access (WPA) and WiFi Protected Access 2
(WPA2) are wireless security protocols that were intended to
address the security shortcomings of WEP. Because the
WPA protocols dynamically generate a new key for each
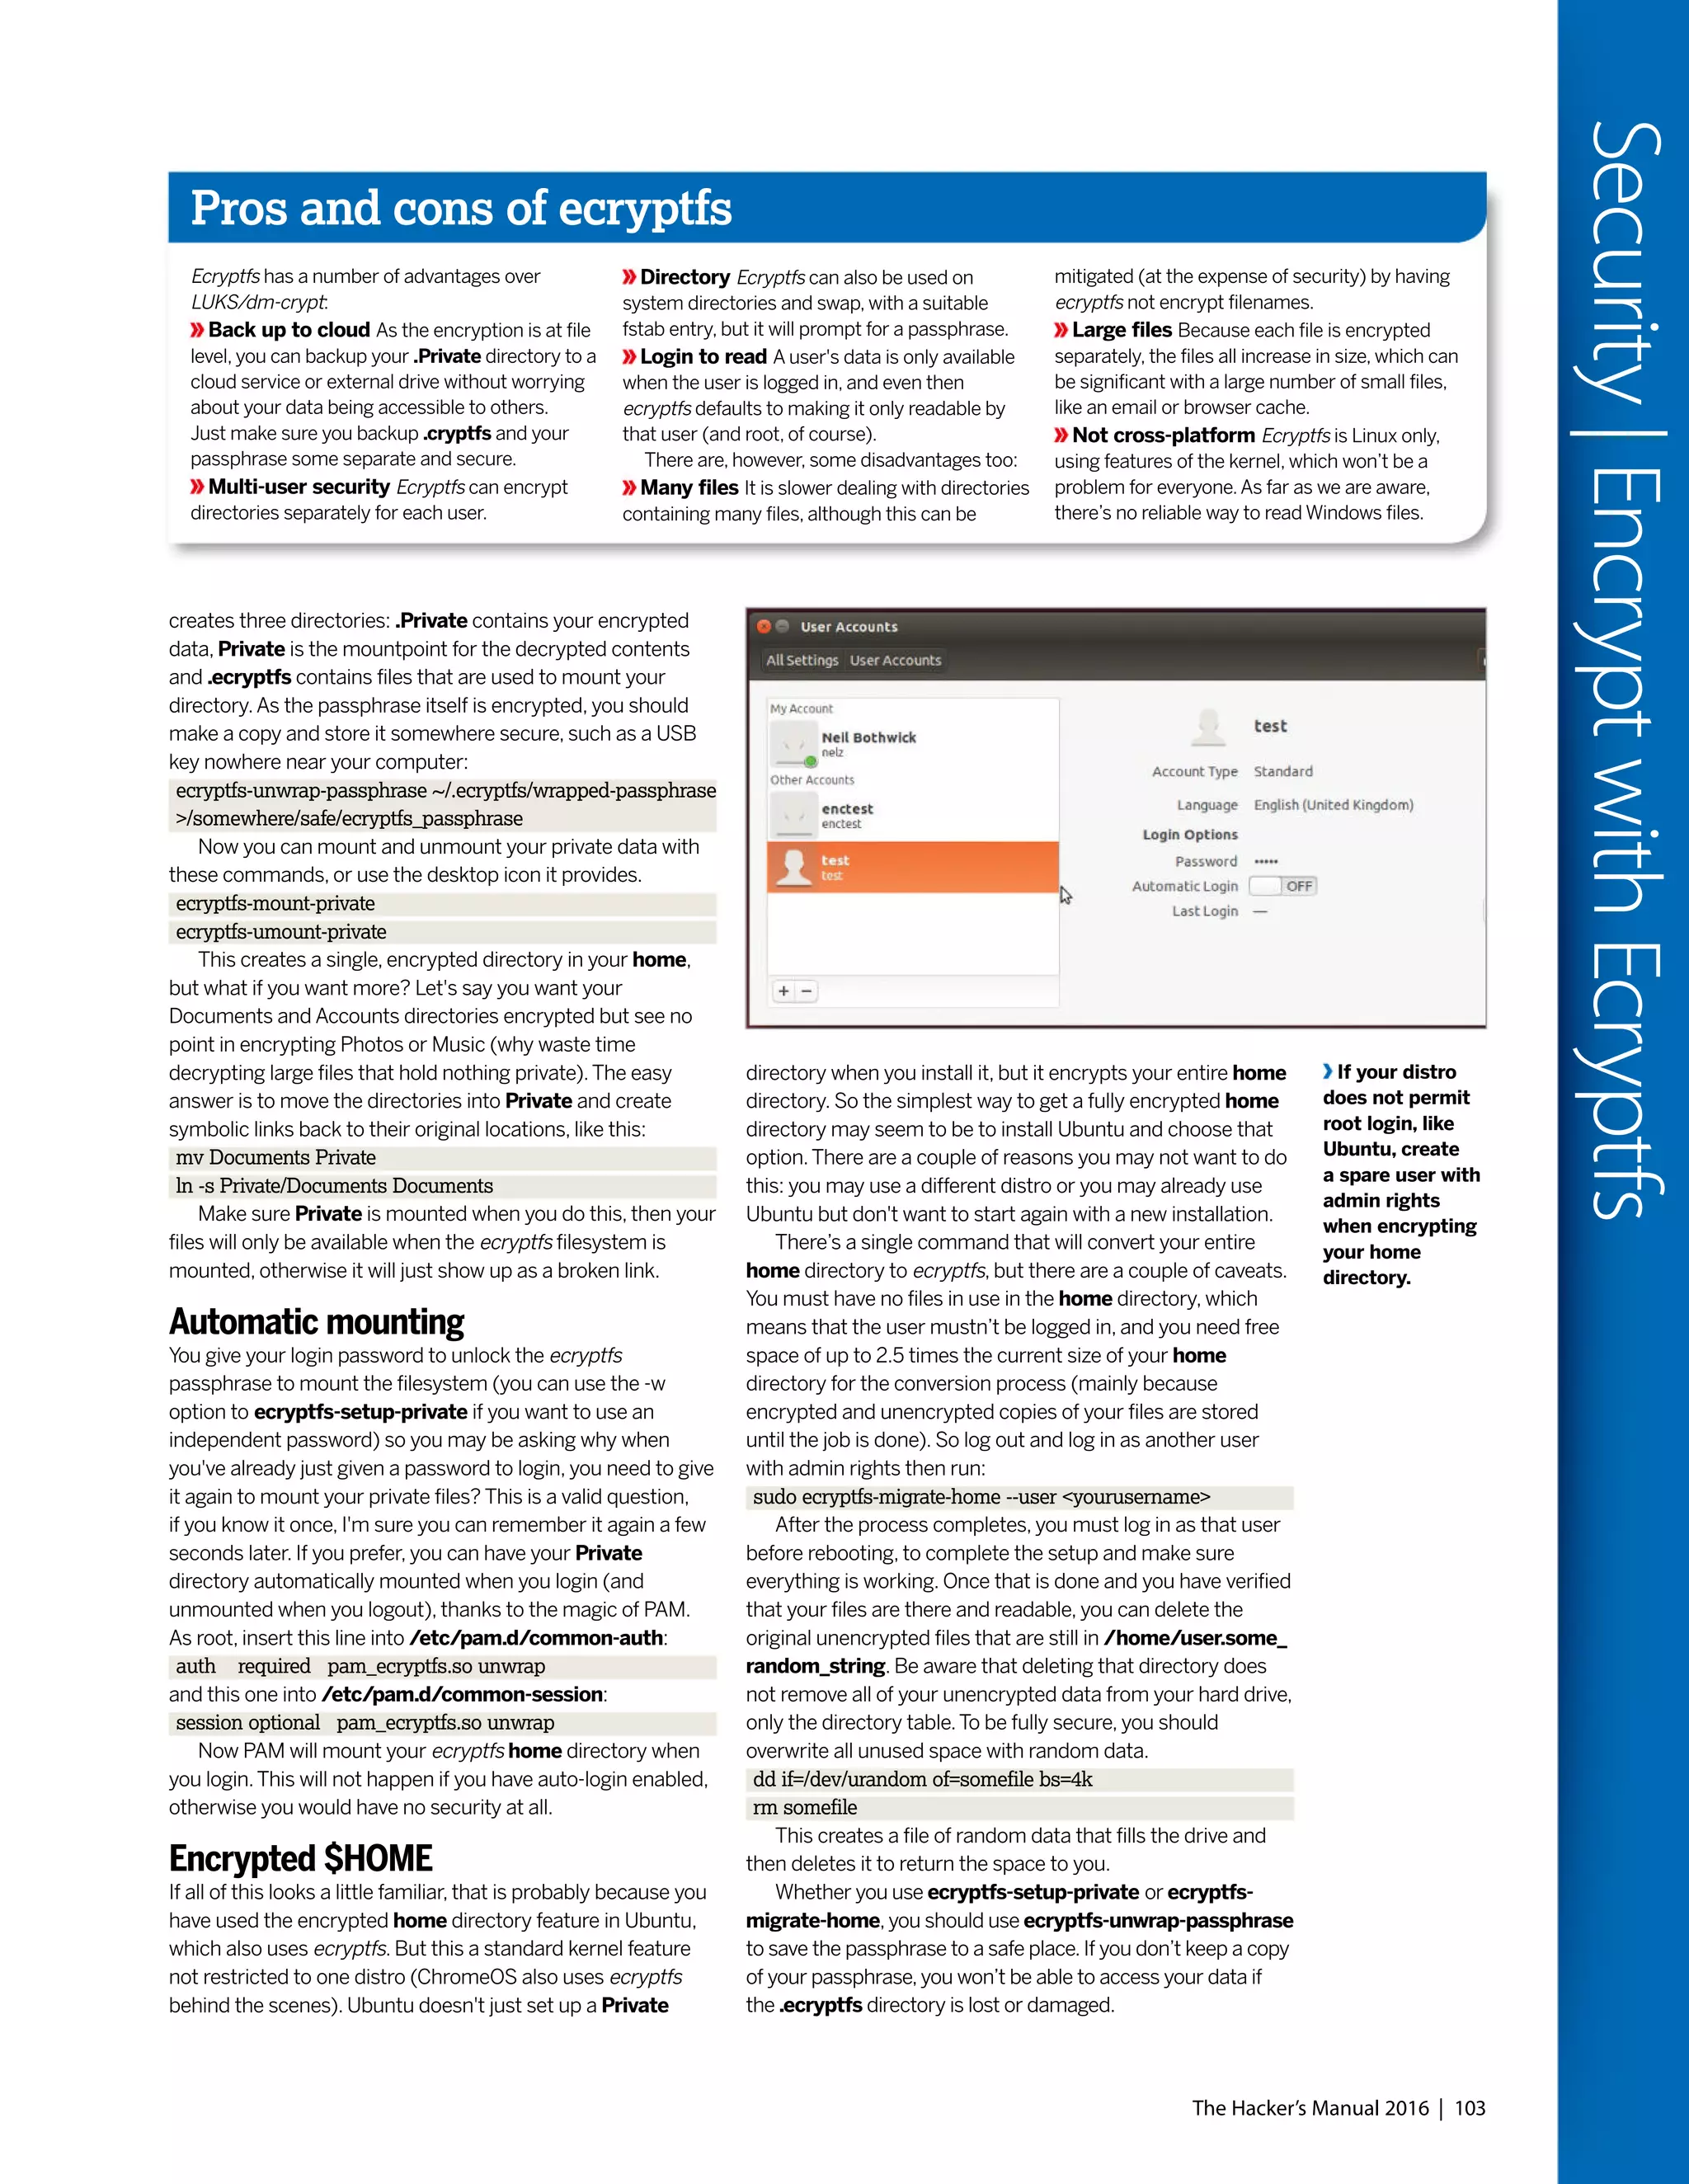
The Kali Linux
menu is arranged
in the order in
which a network
is usually
infiltrated. It
begins with tools
for infiltration
testing and
moves on to
vulnerability
analysis, wireless
attacks and
exploitation.](https://image.slidesharecdn.com/thehackersmanual2016-160522105830/75/The-hackers-manual-2016-106-2048.jpg)


![Tips for RPM/Yum/Fedora
89
Install RPMs with Yum
To resolve and fetch dependencies
install RPM packages with yum install
<package.rpm> .
90
Update a particular package
Use yum check-update <package> to
check for updates for the package which you
can install with yum update <package> .
91
Search for packages
Use yum whatprovides <name> to
fetch the name of the package that provides
the mentioned file.
92
Install package groups
List all available groups with yum
grouplist and install any with yum
groupinstall <group-name> .
93
Rollback updates
Get a list of actions along with their
update IDs with yum history and undo one
with yum history undo [update-id] .
94
Speed up Yum
Install the fastestmirror plugin with yum
install yum-plugin-fastestmirror and always
use the closest mirror to install a package.
Tips for Apt/DPKG/
Ubuntu/Mint
95
Backup package list
To install the same packages on another
machine, create a list of installed packages
with dpkg --get-selections > pkgs.list .
96
Replicate on another system
On a fresh installation, first import the
list of packages with dpkg --set-selections <
pkgs.list and then install them with apt-get
dselect-upgrade .
97
Uninstall apps
To completely uninstall
apps along with their
configuration files, use apt-
get remove --purge <app> .
98
Downgrade packages
installed from PPAs
Install the PPA purge tool with
apt-get install ppa-purge and
revert upgraded packages
with ppa-purge <ppa-repo>.
99
Install dev libraries
To compile a newer
version of an app fetch the
dev libs of the version in your
repos with apt-get build-dep <app-name> .
100
Remove archives
Use apt-get autoclean to remove
downloaded archives of packages that have
since been upgraded to newer versions.You
can also get rid of them all with apt-get clean .
101
Remove unnecessary packages
The apt-get autoremove command
zaps all dependencies no longer in use.
102
Fix broken dependencies
Use apt-get -f install if you get an
error while trying to install a Deb package
without installing its dependencies first.
103
Use fastest mirror
In Ubuntu’s Software & Updates,
select‘Other’from the Download from the
menu and click the‘Select best server’button.
Tips for URPMI/Mageia
104
Fetch a list of dependencies
The command urpmq -d <pkg-name>
will get a list of required package dependencies.
105
Update all media
Use urpmi --auto-update to update
the list of available packages.
106
Saves the RPMs
Append the --noclean option to
prevent urpmi from automatically deleting the
downloaded rpms after installing an app.
107
Install from a local directory
Drop RPMs inside a directory and then
add it as an installation medium with urpmi.
addmedia backup <directory> .
Better manage software
108
Install from a URL
Instead of first downloading packages
you can install them directly from the web
with urpmi <URL-to-the-rpm> .
Tips for ZYpp/OpenSUSE
109
List installed packages
The rpmqpack command displays a
list of all installed packages.
110
Update a package
Use zypper in <app-name> to update
a package.The command will also install the
package if it isn’t yet installed.
111
Faster zypper
Use zypper sh to enter the Zypper
shell which installs packages faster as it keeps
all relevant data in memory.
112
Simulate an upgrade
Before you upgrade your installation
do a dry run with zypper -v dup -D .
113
Backup repos
Save all the configured repos with
zypper lr --export ~/backup-repos.repo .
114
Restore repos
Use zypper ar ~/backup-repos.repo to
restore repos from the backed up file.
115
View required patches
Fetch a list of required update patches
with zypper lp .
116
Install patches
Upgrade apps by applying all available
patches with zypper patch .
Use Ubuntu’s Additional Drivers tool to
install proprietary drivers for your graphics
card and other hardware.
Linux Mint has great custom software management tools
for easy management of mirrors and PPAs.
134 | The Hacker’s Manual 2016
Domore|200tips
Use the command line to get more from your distro’s package manager.](https://image.slidesharecdn.com/thehackersmanual2016-160522105830/75/The-hackers-manual-2016-134-2048.jpg)

![148
Find memory leaks
To figure out which processes are
hogging up the RAM, use ps --sort mem
which arranges processes in ascending order
of memory consumption with the heavy
consumers at the bottom.
149
Memory of a particular process
View a detailed memory consumption
report of a particular process with pmap -x
<PID> which displays the amount of resident,
non-shared anonymous, and locked memory
for each mapping.
150
Trace the execution of a binary
If you have an unknown binary, trace
its execution with stace <binary> to view all
the system calls and signals it makes.
151
Track logged in users
Use the w command to get a list of
logged in users and their processes.Add the
-f option to include the hostname of remote
users in the output.
152
Kill a graphical app
Type xkill in the terminal or the run
dialog box which changes the pointer into a
cross-hair cursor. Now click on any non-
responsive window to kill it. Right-click to
dismiss xkill without killing a process.
153
Decrease use of swap
If you’ve got ample RAM, optimise
swap usage by editing the /etc/sysctl.conf
file and changing the value of the vm.
swappiness parameter to 10.
Backup
154
Backup the boot sector
A boot sector backup comes in handy
when you accidentally wipe out your MBR.
Make a backup of a healthy boot sector with
dd if=/dev/sda of=disk.mbr count=1 bs=512
and restore it with dd if=disk.mbr of=/dev/sda .
155
Backup partition table
You should also keep a backup of your
partition table in the event when a mishap or
other zaps this crucial bit of information. Use
sfdisk -d /dev/sda > disk.sf to backup the
table and sfdisk /dev/sda < disk.sf to restore
the partition table.
156
Monitor the progress of dd
Install the Pipe Viewer (pv) tool from
your distro’s repos and use it to monitor dd .
For example, pv -tpreb some-distro.iso | sudo
dd of=/dev/sdb bs=4096 .
157
Speed up backups on
slower machines
If bandwidth isn’t a problem, use rsync -W
to transfer whole files and save time spent
computing the changed blocks and bytes.
158
Track rsync progress
Append the --progress option to the
rysnc command to keep an eye on the
data transfer.
159
View changes between source and
destination
Use the -i option to view the list of items
modified by an rsync operation, such as
rsync -avzi [source] [destination] .
160
Use rsync over ssh
To transfer rsync data over SSH use
the -e ssh option, such as rsync -avhze ssh
[source] [destination] .
161
Exclude files
Rsync also lets you skip over certain
files that you can specify with the --exclude
option, like rsync -avhz --exclude ‘*.tmp*’ will
ignore files with the .tmp extension.
162
Test rsync
First time users should append a
--dry-run option to all rsync operations and
scan the output for any unexpected outcomes
before running it for real.
163
Limit bandwidth
To make sure the rsync operation
doesn’t hog all the bandwidth restrict its
usage with the --bwlimit option, such as rsync
-avhz --bwlimit=50 .
164
Don’t backup files on
external filesystems
Tar is a popular choice for creating an archive
of the disk. Use the --one-file-system option
with tar to make sure it doesn’t backup any
mounted partitions (/media) or virtual
partitions (/proc, /sys).
Security & Firewall
165
Find which port a program is
running on
Use netstat -ap | grep [app-name] to see a list
of ports that a particular application is
communicating from.
166
Disable ping reply
Pings can be used to flood the network
and cause network congestion. Disable it
temporarily with echo “1” > /proc/sys/net/
ipv4/icmp_echo_ignore_all or permanently by
editing the /etc/sysctl.conf file to add net.
ipv4.icmp_echo_ignore_all = 1 .
167
Backup iptables
If you’ve spent customising the
kernel’s iptables firewall, make sure you back
it up with iptables-save > ~/iptables.backup
168
Block a particular domain
First, you need to figure out the
domain’s IP address with host -t a www.
example.com .Then use the IP address to get
its CIDR with whois [IP Address] | grep CIDR .
Then use the CIDR to block access to the
domain, such as iptables -A OUTPUT -p tcp
-d [CIDR] -j DROP .
169
Change password for any user
If you’ve forgotten a password for a
user, you can set a new one with sudo passwd
[username] without being prompted for the
current password.
Mageia also includes a Parental Controls
for time-based and app-based restrictions.
Use Nethogs to get a real-time view of the bandwidth being consumed by an application.
136 | The Hacker’s Manual 2016
Domore|200tips](https://image.slidesharecdn.com/thehackersmanual2016-160522105830/75/The-hackers-manual-2016-136-2048.jpg)
![170
Replicate permissions
Use the --reference option to copy the permissions
of one file to another, such as chmod --reference=[copy-
permission-from-this-file] [apply-on-this-file] .
171
Securely delete files
Install and use the shred utility to delete files so that
they cannot be recovered. For example, shred [file] will
overwrite the file’s block with random data several times.
172
Enable built-in Firewall
Some distros such as Ubuntu ship with a simpler
front-end to iptables firewall, called UFW. It’s disabled by
default but you can enable it with ufw enable .
173
Allow incoming connection
UFW denies all incoming connections by default.
To tweak this policy and allow connections for common
servers do ufw allow ssh, sudo ufw allow www, ftp .
Network & Internet
174
Run commands remotely
You can also use SSH to execute commands on a
remote machine, such as ssh [hostname] [command] .
175
Copy SSH keys to another machine
Use ssh-copy-id [remote-host] to securely copy the
public key of your default identity to the remote host.
176
Keep connection open
If you frequently get disconnected from remote SSH
sessions due to lack of activity, you can enable the KeepAlive
option by adding the ServerAliveInterval 60 line in the /etc/
ssh/ssh-config file.
177
Browse via SSH tunnel
First create an SSH tunnel to a remote host with
ssh -f -N -D 1080 user@remotehost .Then change your web
browser’s Proxy settings and set the SOCKS host to
127.0.0.1 and the port to 1080.
178
Play music over SSH
The command ssh user@remotehost cat ~/Music/
audio.ogg | mplayer will redirect the output of the remote
media file to mplayer on the local machine.
179
Mount partitions over SSH
Use sshfs to mount remote partitions such as sshfs
user@remotehost:/home/bodhi /media/remotefs to mount
the remote home directory under the local filesystem.
180
Better monitor network traffic
Ntop is available in the official repos of most distros
and gives you detailed analysis of the network traffic via its
web-based interface running on port 3000.
181
View network statistics
Use netstat -s to view statistics for all protocols or
netstat -st for only the TCP protocol.
182
Save a webpage
Use wget to properly download a webpage. eg,
wget -r -np -k http://www.tuxradar.com/content/dear-
edward-snowden will download all images and change the
links in the HTMl and CSS files to point to local files.
183
Save multiple files
If you have saved links to multiple downloads in a file,
use cat isos.txt | xargs wget -c to download them all.
184
Limit data transfer rate
Prevent wget from hogging all the bandwidth by
imposing limitations, such as wget --limit-rate=2m will limit
the transfer rate to two megabytes per second.
185
Download files based on modification date
Use curl with the -z option to only download files
that have been modified after a particular time. For example,
curl -z 29-May-2015 [download-location] .
186
Upload files
You can use curl to connect to a FTP server and
upload files, such as curl -u [user:pass] -T upload.txt ftp://
ftp.example.com .
187
Get definitions
Curl can fetch the definition of a word from a
directory server. List them all with curl dict://dict.org/
show:db and then query one with curl dict://dict.
org/d:shell:foldoc which fetches the definition of the word
‘shell’from the Foldoc dictionary.
188
Simple web filtering
To prevent your computer from accessing a website
enter its URL in /etc/hosts, such as 127.0.0.1 www.
addictivewebsite.com.
189
Mirror entire websites
Use the graphical WebHTTrack tool available in the
official repos of most distros to mirror entire websites and
automatically modify links.
190
Regulate bandwidth
You can use Trickle, lightweight userspace bandwidth
shaper, to control both upload and download speeds. It can
also regulate speeds for package managers such as trickle
-d200 apt-get install .
191
Monitor bandwidth
To monitor bandwidth used by individual network
applications use the nethogs, a small net top tool that’s
available in the repos of most distros. Instead of breaking
traffic down by protocol it groups bandwith by process.
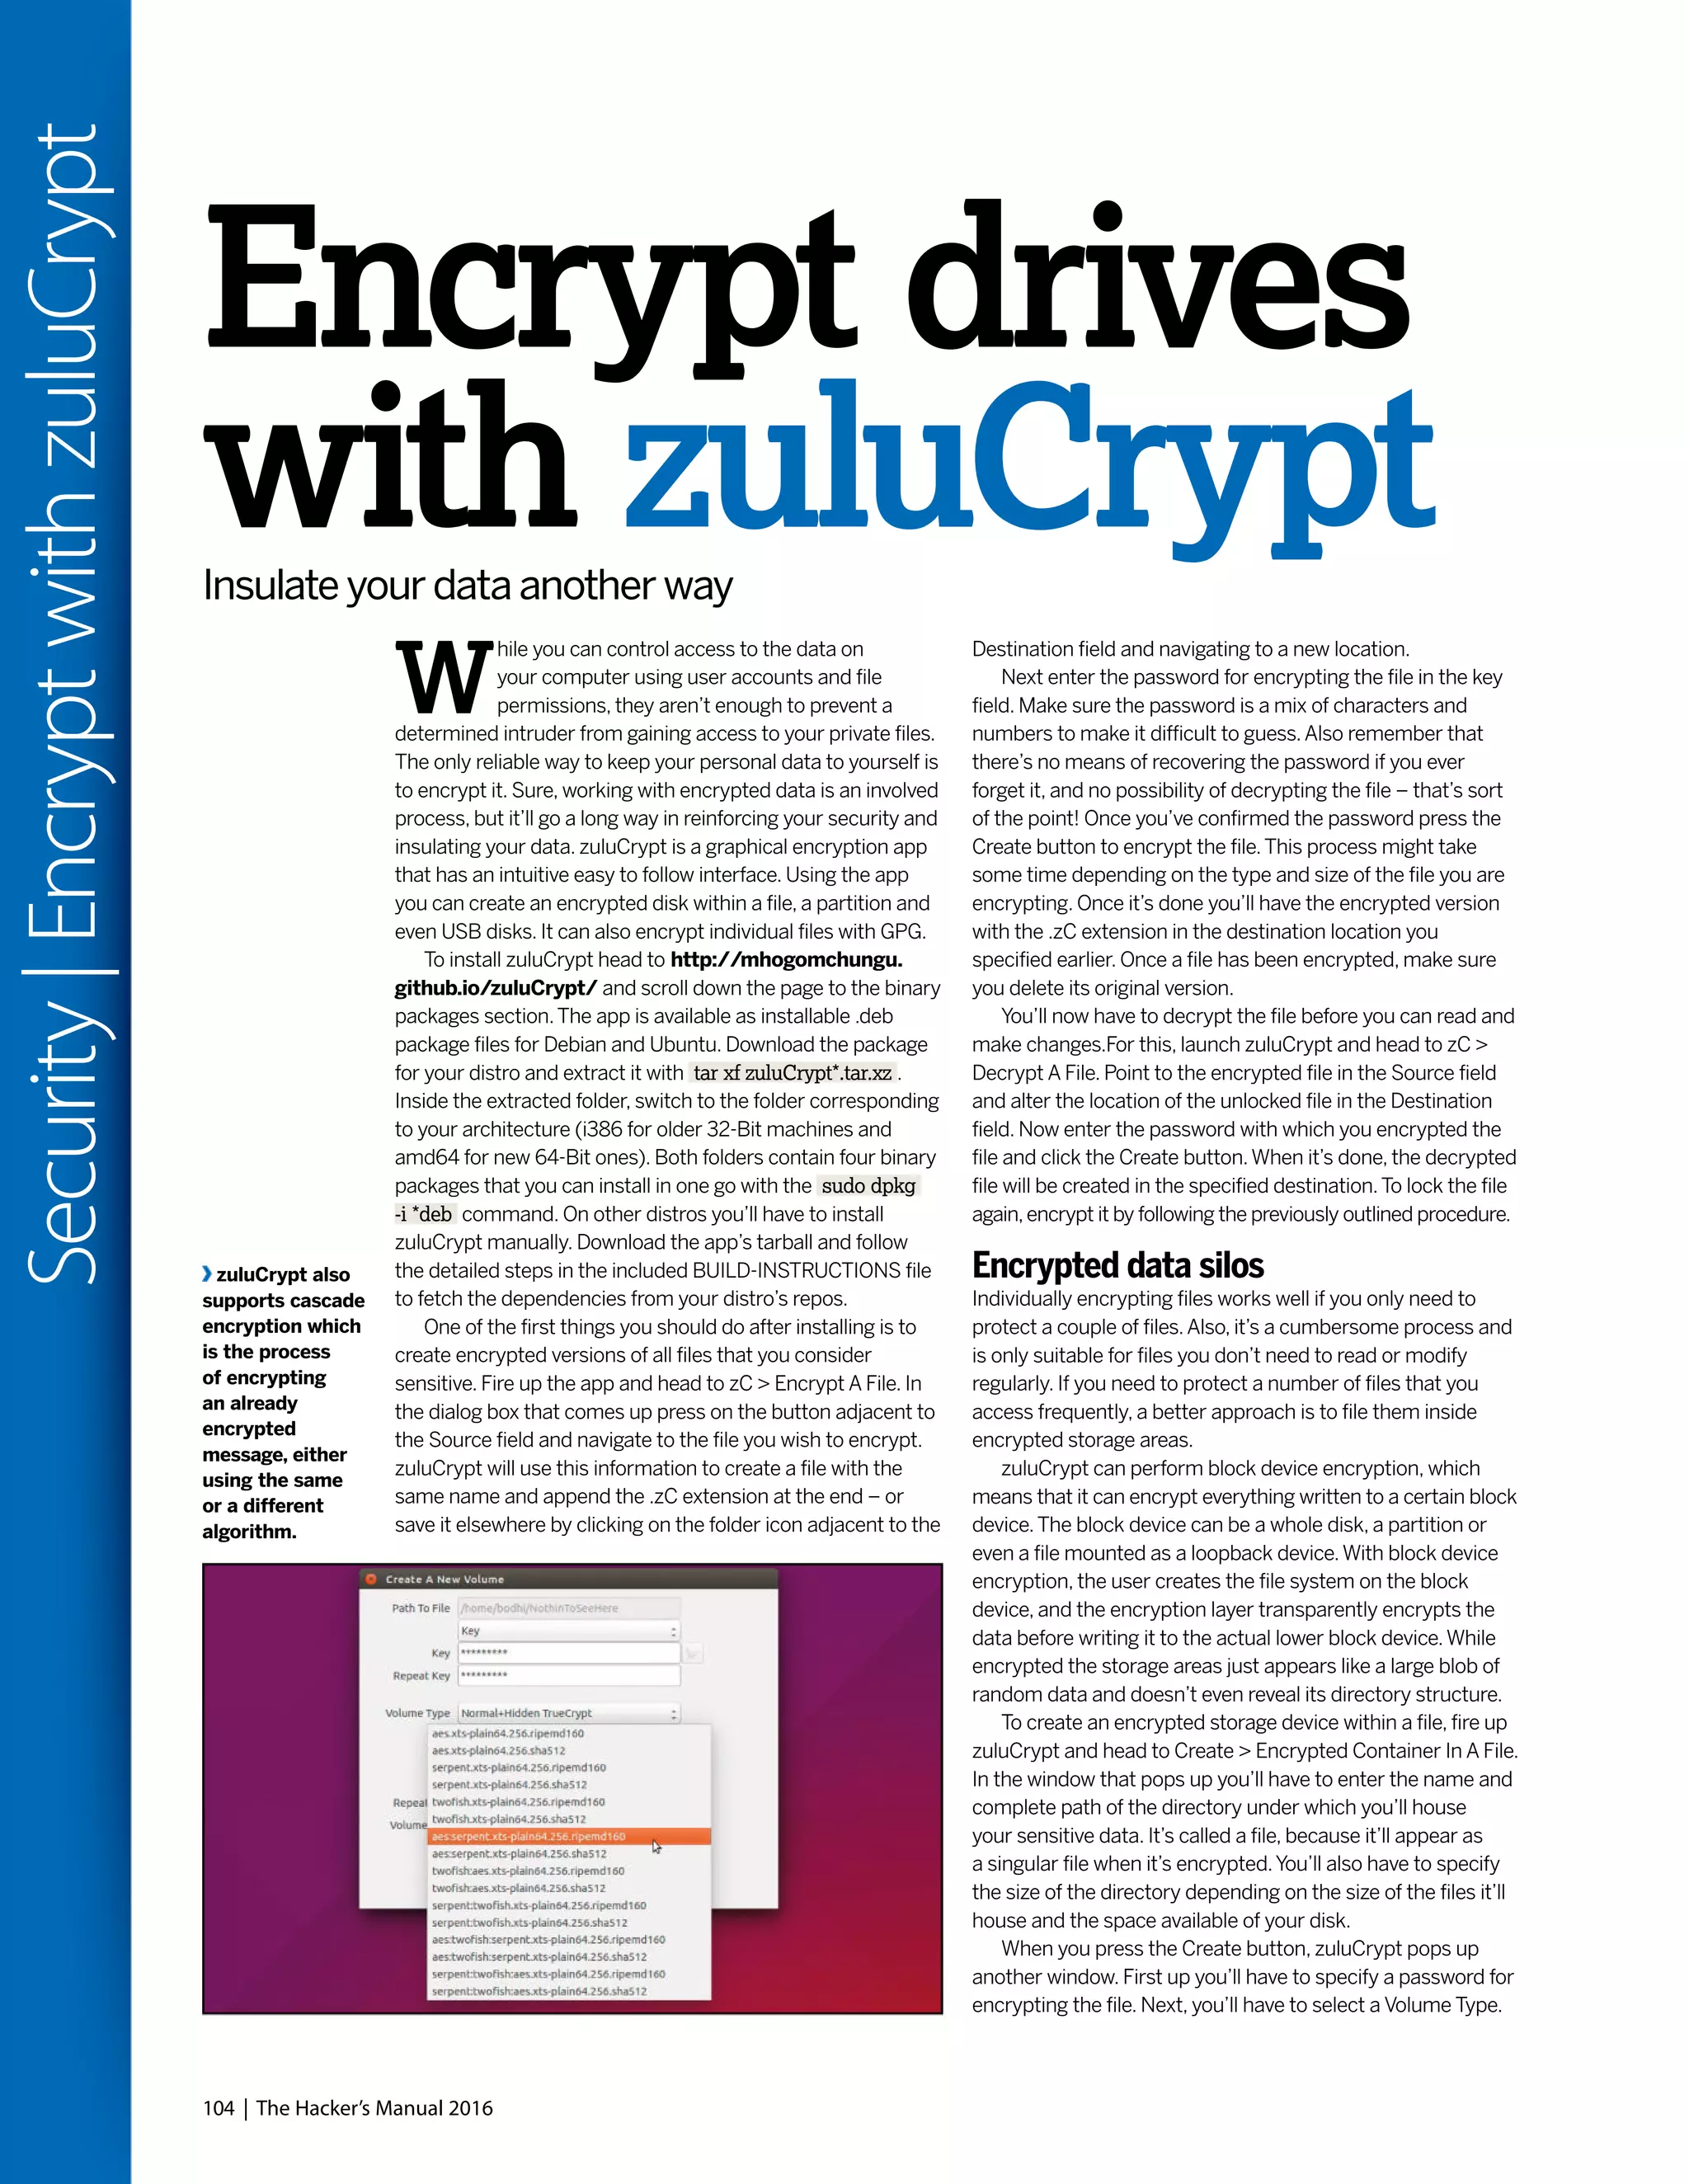
Ntop is a versatile tool that can be extended with plugins.
The Hacker’s Manual 2016 | 137
Domore|200tips
Top
command
shortcuts
192
Shift+m
Sort by
RAM utilisation.
193
k
Kill a task
from within top.
194
1
Track all
cores individually
within top.
195
Shift+w
Save
the modified
configuration
permanently.
less
command
shortcuts
196
/
Search
forward for a pattern.
197
n
Next match.
198
Shift+f
Displays
new content as it’s
appended to the file.
199
v
Edit the file
with your system’s
configured editor.
200
h
View the
complete list of
shortcuts.](https://image.slidesharecdn.com/thehackersmanual2016-160522105830/75/The-hackers-manual-2016-137-2048.jpg)
![138 | The Hacker’s Manual 2016
Domore|Zeroshell
Zeroshell server with the router via an Ethernet cable.
We can defer the task of doling out IP addresses to the
router, which saves us the effort of configuring the routing
and DHCP features of Zeroshell and instead allows us to
focus on more interesting tasks.
To get started, boot Zeroshell either from the CD or the
USB image.The distro boots up to a customised text-based
interface. Before going any further, press [P] to change the
default password (zeroshell) for the admin user.
Next up we need to make sure Zeroshell is on the same
subnet as the rest of the network. By default Zeroshell
assigns itself to the 192.168.0.x subnet. If your existing router
is on the same subnet you’re in luck. Press [I] and note the
IP address shown at the top of the page.That’s the address
of Zeroshell’s web-based interface.
Break the shell
If however you are on a different subnet – let’s say your router
is located at 192.168.3.1 – then you’ll need to change
Zeroshell’s default address and bring it on the same subnet
as the rest of the network.
For this, press [I] to bring up the IP Manager menu.Then
bring down the ethernet interface by pressing [S] and
following the wizard. Now press [D] and delete the default IP
address before pressing [G] to set the default gateway
address to your existing router’s IP address. In our case, this
is 192.168.3.1, and many routers like to sit at x.x.x.1, but yours
may be different. Now press [A] to enter a new static IP
address for the Zeroshell server, say 192.168.3.151.To bring
the changes into effect press [S] to change the status of the
ethernet to up.The interface will now change to reflect the
new IP addresses. Press [Q] to return to the main menu.
You can now access Zeroshell using a web browser on
any computer within the network by pointing that browser at
the IP address that you’ve just set.When it prompts you for
login credentials, use the admin username along with the
password you defined at the start.
Although the web interface can handle the bulk of its
configuration, you’ll occasionally need to access Zeroshell’s
console interface as well. Instead of hopping over to the
Zeroshell server, you can remotely access it via SSH.To
enable SSH, head to the web interface and click on the SSH
tab under the Setup section. In the popup window, toggle the
Enabled checkbox.Then enter the subnet of your network
(such as 192.168.3.0/24) in the IP address text box and press
the + button. Bring the changes into effect with the Save
button.You can now ssh into the Zeroshell server from any
computer on the subnet with, for example,
sudo ssh admin@192.168.3.151
Turbocharge
your networkConvert an old PC into a state-of-the-art router with Zeroshell.
I
f you are responsible for a bunch of networked
computers on a small LAN, you can use the Zeroshell
distro to rollout various useful network-related services.
The Zeroshell distro will transform any computer into a multi-
purpose server that offers a lot more services and flexibility
than you can wring out of most off-the-shelf routers.
Zeroshell is a small Linux distro that provides various
essential network services from DHCP and firewall to VPN
and load-balancing.The distro includes a RADIUS server
for WPA2 authentication, a Captive Portal instance to create
public hotspots and can also be used to shape network traffic
and QoS.
The distro has modest hardware requirements and chugs
along quite nicely even on an antiquated Celeron box with
1GB of RAM.You can download Zeroshell as an ISO image
that you can transfer onto to a CD and install onto the
machine’s hard disk. Or, you can grab a USB image which will
save its configuration locally.
Once you’ve figured out the hardware you’ll use to run
Zeroshell, you’ll need to decide whether you wish to use
Zeroshell to replace your existing router or to supplement
it. In case of the former, you’ll need to equip the Zeroshell
machine with two network cards – one that’ll plug into the
Internet modem, and the other into a network switch that
connects to the other computers on the network. If the
Zeroshell server only needs to serve a small number of
computers, you can replace the switch with a wireless
adapter and turn the Zeroshell machine into a wireless
access point.
This is how we’ll configure Zeroshell in his tutorial.
We’ll also keep the router in the equation and connect our
You can
extend Zeroshell
with several
interesting
add-ons by
supporting the
project with
your wallets or
by promoting it
and sending a
link to its sole
developer.](https://image.slidesharecdn.com/thehackersmanual2016-160522105830/75/The-hackers-manual-2016-138-2048.jpg)
![The Hacker’s Manual 2016 | 139
Domore|Zeroshell
Take charge
Next up, let’s configure the wireless adapter on the Zeroshell
server to act as a wireless access point. For this you’ll first
need to head to the console-based menu – remember that
you can now access this via SSH. In the menu press [W] to
bring up the WiFi Manager menu. Once inside press [N] which
will kick off a wizard that helps define the settings for the new
access point.Zeroshell will prompt you for the SSID of the
new access point as well as the encryption mechanism you’d
like it to use.While the default options will work in most cases,
review each carefully – especially the encryption mechanism.
Once you’re through with the wizard your wireless access
point should be visible to the devices in the vicinity. However,
to hand out IP address to these devices and allow them to
browse the Internet, you’ll need to create a bridge interface
between the wireless adapter and the router that’s connected
to the Ethernet card.
For this, log in into the web-based interface and head
to the Network tab under the Setup section.Then click the
button labelled Gateway to make sure the default gateway is
set to your router’s IP address – 192.168.3.1 in our case.
Close the window and click on the New BRIDGE button.
This pops open a window which lists both the ethernet (eth0)
and wireless adapter (wlan0) interfaces under the Available
Interfaces list. Select each and click the button with the three
right arrows to move the selected interface into the Bridged
Components list. Do this for both the interfaces, then click
Save to activate the new bridged interface.That’s it.You can
now connect devices to the new wireless access point which
will hand out an IP address the same way it takes them to the
Internet – via the router.
Furthermore, you can also shield the devices connected
to Zeroshell’s access point from nasties on the Internet by
enabling the Transparent Antivirus Proxy feature. Scroll down
to the Security section in the left-hand column and click the
HTTP Proxy link. Here, toggle the Enabled checkbox and
click the Save button to bring the proxy online.This can take
several minutes, since Zeroshell will fetch the latest antivirus
definition from ClamAV’s website.The Update Log button
will help you keep track of the progress.
Once the proxy is active, click on the + icon in the HTTP
Capturing Rules section and add two separate Capture
Request rules for all traffic passing through the wireless
and ethernet adapters. Unless your users are known to
frequent the darkest corners of the Internet, you can go easy
on ClamAV’s server and tune down the number of times
Zeroshell checks it for new definitions and updates from
the default 12 to, if you’re confident, 2.Also make sure you
change the default mirror to one that’s closer home.
Widespread access
The final feature we’re going to enable is VPN access.
Configuring an OpenVPN server is quite an involved process
which includes pulling in and configuring various pieces of
software and generating the appropriate secure certificates.
However,Zeroshell ships with OpenVPN, which means all
you need to do to use it is to enable it and export the
certificates for your clients.
Zeroshell supports different mechanisms for VPN
authentication.You can use simple usernames and
passwords,X.509 secure certificates, or both – which is
what we’ll be using.To grab the certificates, click on the Users
links under the User section on the left. By default this will list
only the admin user.You can use the Add link in the top bar to
add more users and repeat the process for each.
For now, select the admin user and click on the tab
labelled X509 in the top-bar. From here you can review,
revoke and generate a new certificate for the selected user.
For the moment though, we’ll just save the certificate. Use the
pull-down menu to select PEM certificate format and then
press the Export button and save the admin.pem file to your
local machine.
We’ll now grab the certificate for the Trusted Certificate
Authority, which in our case is the Zeroshell server itself.
Scroll down to the Security section in the left-hand column
and click the X.509 CA link. Now switch to the Trusted CAs
tab from the top bar, which pops open a window with a list
of trusted CAs. Select the only listed entry for our local
Zeroshell server and click on the Export button to save the
TrustedCA.pem file.
Finally, click the VPN link under the Network section in the
left-hand column and toggle the Enabled checkbox. Click on
the Save button to bring the server online.That’s all there’s to
it. Now follow the detailed instructions on Zeroshell’s website
(http://www.zeroshell.org/openvpn-client/) to configure
your Linux,Windows and Mac OS X clients to connect to your
Zeroshell OpenVPN server.
There’s a lot more you can do with Zeroshell.Just like
OpenVPN, the server ships with a Captive Portal and a
RADIUS server installation.All you need to do is enable it
and tweak it as per your network.
Along with the
antivirus, you
can also blacklist
URLs from under
the transparent
HTTPS proxy
section.
Zeroshell lets you save and load different configurations
inside profiles which is really handy for experimenting with
and testing new features.](https://image.slidesharecdn.com/thehackersmanual2016-160522105830/75/The-hackers-manual-2016-139-2048.jpg)
![140 | The Hacker’s Manual 2016
Domore|Websitecloning
targets for hackers. Finally, web developers will love this as it’s
a great tool for making quick copies of your favourite website
work, which can easily end up as components in other
projects and websites.
At this point, the developer will probably want to hand
code, or re-theme the website with a template from a source
like Themeforest.The new update from the clone with a more
contemporary theme will also likely load much faster than the
previous website installation and be easier to maintain, if the
changes are only minor.
Although this tutorial is geared to using HTTrack for
cloning websites, much of the content covered will explain
what to do with your clone. Cloning is actually quite easy to
do and can you can perform the whole operation within
minutes.The more tedious part is knowing how to make
changes to the clone. But by the end of the tutorial, you'll
have the secrets to creating your cloned template and how to
change it to suit your needs. Even if you decide one day to
buy a commercial template and build your own website with
Linux free of cost, these tips will guide you to getting an
excellent finished result. No previous coding knowledge is
required for this too, but you will see how to make basic text
changes and some basic markup.
Below are a list of commands to install and use httrack
with a Debian-based Linux operating systems, such as
Raspbian and Ubuntu.These installations are required on a
clean Linux install. If you already have the installed packages,
such as apache and php, just skip these steps:
sudo apt-get update
sudo apt-get install apache2
sudo apt-get install php5 libapache2-mod-php5 php5-mcrypt
/etc/init.d/apache2 restart
sudo apt-get install httrack
Do you want to continue[Y/n]
Type Y and hit Enter on the keyboard.
Cloning options
Using the command line, the command below will get the files
and links of the main directory. Note: This won't clone the
subfolders that could contain data like other HTML or PHP
files, shopping cart scripts and more:
sudo httrack http://example.com/ -O "/websites/example.
com" -%v -%e0
The command below, however, clones a subfolder
sudo httrack http://example.com/store/ -O "/websites/
example.com/store" -%v -%e0
and while we're covering cloning of a website or subfolders,
HTTrack:
Website cloningNeed a challenge? Why not quickly get into web development by
cloning websites and altering the HTML without prior coding knowledge.
T
he tool HTTrack makes cloning websites quick and
easy. But why would you want to clone a website?
Well, there are many reasons: for instance, if you've
ever had any inclination to build stylish websites, cloning
makes it easy to start with a copy of a website you like which
you can then modify to suit your needs.
Essentially, almost anything on the web can be captured
to provide you a template along with all of the required files
(with exceptions of websites created on platforms like Wix
and several others). However, you will need to use discretion
when making a clone of a website since you likely don't want
to violate any copyright laws.
In addition to being a great learning tool, it can benefit
website owners as it can be a valuable way to acquire a copy
of your website, especially if the web developer is reluctant to
hand over the all of the files for some reason or other.
On another level, you can clone from a bloated or
outdated CMS platform and end up with lean, fast loading
static HTML files. For example, you can clone an outdated
Joomla or Wordpress website to make static HTML files with
all images and JavaScript.This is one way around security or
compatibility issues of an outdated CMS which are often
To make the most
of HTTrack,you’ll
need to get your
HTML,CSS and
Javascript skills up
to scratch as you’ll
need them to tweak
you clone once it’s
been copied.
Quick
tip](https://image.slidesharecdn.com/thehackersmanual2016-160522105830/75/The-hackers-manual-2016-140-2048.jpg)
![The Hacker’s Manual 2016 | 141
Domore|Websitecloning
for those that want to explore other uses for HTTrack you can
find a lot more information at http://bit.ly/HTTrackGuide.
You should now be able to see the files within the specified
directory. In the case above, browse to the /websites/
example.com folder.
cd /websites/example.com
cd example.com
Alternatively, you could run HTTrack from a browser.You’ll
need to allow the Apache user www-data to become a super
user and allow it to use the httrack package without a
password. So, open up that /etc/sudoers file and give
Apache permission to use the desired service(s).Type nano
/etc/sudoers to open the file:
www-data ALL=NOPASSWD: /usr/bin/httrack
In order to submit a URL and clone the website, you'll need
a basic script that can do this.The code below can do exactly
that.The code shown can be copied and pasted into a file
stored within the /var/www folder. For simplicity, let's call it
cloner.php.This code will store the clone in the /home/pi
folder, but you can change the directory to wherever you want
the clone to reside:
<?php
if (count($_POST) > 0) {
$url = htmlspecialchars($_POST['url'], ENT_QUOTES,
"utf-8");
//CREATE CLONE
shell_exec('sudo httrack http://' . $url . '/ -O "/home/pi/'
. $url . '" -%v -%e0 2>&1;');
}
?>
<form name="myform" action="<?php echo
htmlspecialchars($_SERVER["PHP_SELF"], ENT_QUOTES,
"utf-8"); ?>"
method="post">
<input class="index-second" type="text" name="url"/>
<input class="index-fourth" type="submit"
name="mysubmit"
value="Clone It"/>
</form>
Just open the URL in a browser, add the URL and submit.
The site is stored in the /home/pi folder. Depending on the
size of the site and files, the clone can take a little while to
complete. Often, a website can be cloned in less than a
minute. Essentially, using this basic script is a time saver and
making the clone can be done by anyone. Let's go on to
explain how the script works.
The code contains a simple text box and Submit button,
and once the button is clicked, the input is sanitised.After it's
sanitised with the htmlspecialchars() function, the new
variable called $url is dumped into the shell_exec() function.
The shell_exec() function is one way to run Linux shell
commands within PHP files and by default it's generally
enabled, and that is very likely the case with your system.
Therefore, if you plan to clone with your Ubuntu, Linux Mint or
Rapbian machine at home, you are automatically set up.
However, you may find that the shell_exec() function is
disabled if you plan to use the script on a web hosting
account.The reason that it's often disabled is down to
security measures.
Nevertheless, if you have shell access on a web hosting
account, you can enable it to use a specified folder or remove
it from a blacklist by editing the loaded php.ini file.With
shared hosting, you can ask if they will enable it for you.
Fixing up the clone
To do a quick check, open the main files called index.html in
a browser.At this point you should be able to see the web
page exactly as you'd expect it to look like.That's a good
starting point, but you may want to clean up the code a little
since HTTrack can leave extra pages and extra code.
For example, your index.html file may just be a file that
redirects to another page like index-2.html. It makes sense to
make the redirected page the index.html file. It will still work
by having two duplicate pages, but, from a web developer's
perspective this is messy navigation and having redundant
pages is bad practice.
If you happen to know some web design and development
and have an editor that can search all files for words or
regular expressions, making the change from index-2.html to
index.html is quick and easy. For command liners, you can
use the find command to find the files and use sed to change
the text:
sudo find /websites/example.com/example.com -type f -exec
sed -i 's/index-2.html/index.html/g' {} ;
Once you are done with the operation, you will want to
change the folder permissions which is currently root, unless
your user is in the sudoers file.
chown -R username:username /websites
Now, if you have saved index-1.html to index.html,
all links and navigation should work correctly. If you want to
clean up the code between the <head> tags, you can still do
that too. It may include a comment that HTTrack was used to
make a website copy.You can remove the entire line that
starts with <!-- and end with --> and any other comments
that could exist in the header.
Firebug is an extension you can add on to Firefox or
Chromium. However, you'll get many more features using
Firefox and it’s much more efficient to use with this browser.
With Firebug, you can drag your mouse over any web page
to work with any desired element on the page.You will have a
panel on the bottom and a sidebar on the right.With these,
Installing the Firebug addon for Firefox or Chromium makes analysing and
changing web page content for display a painless process.
You can add
custom PHP/
MySQLfor dynamic
web pages by
moving your clone
into folder /var/
www or /var/
html/www,and
renaming the
files with a .php
extension and
changing the menu
names to match.
Quick
tip](https://image.slidesharecdn.com/thehackersmanual2016-160522105830/75/The-hackers-manual-2016-141-2048.jpg)

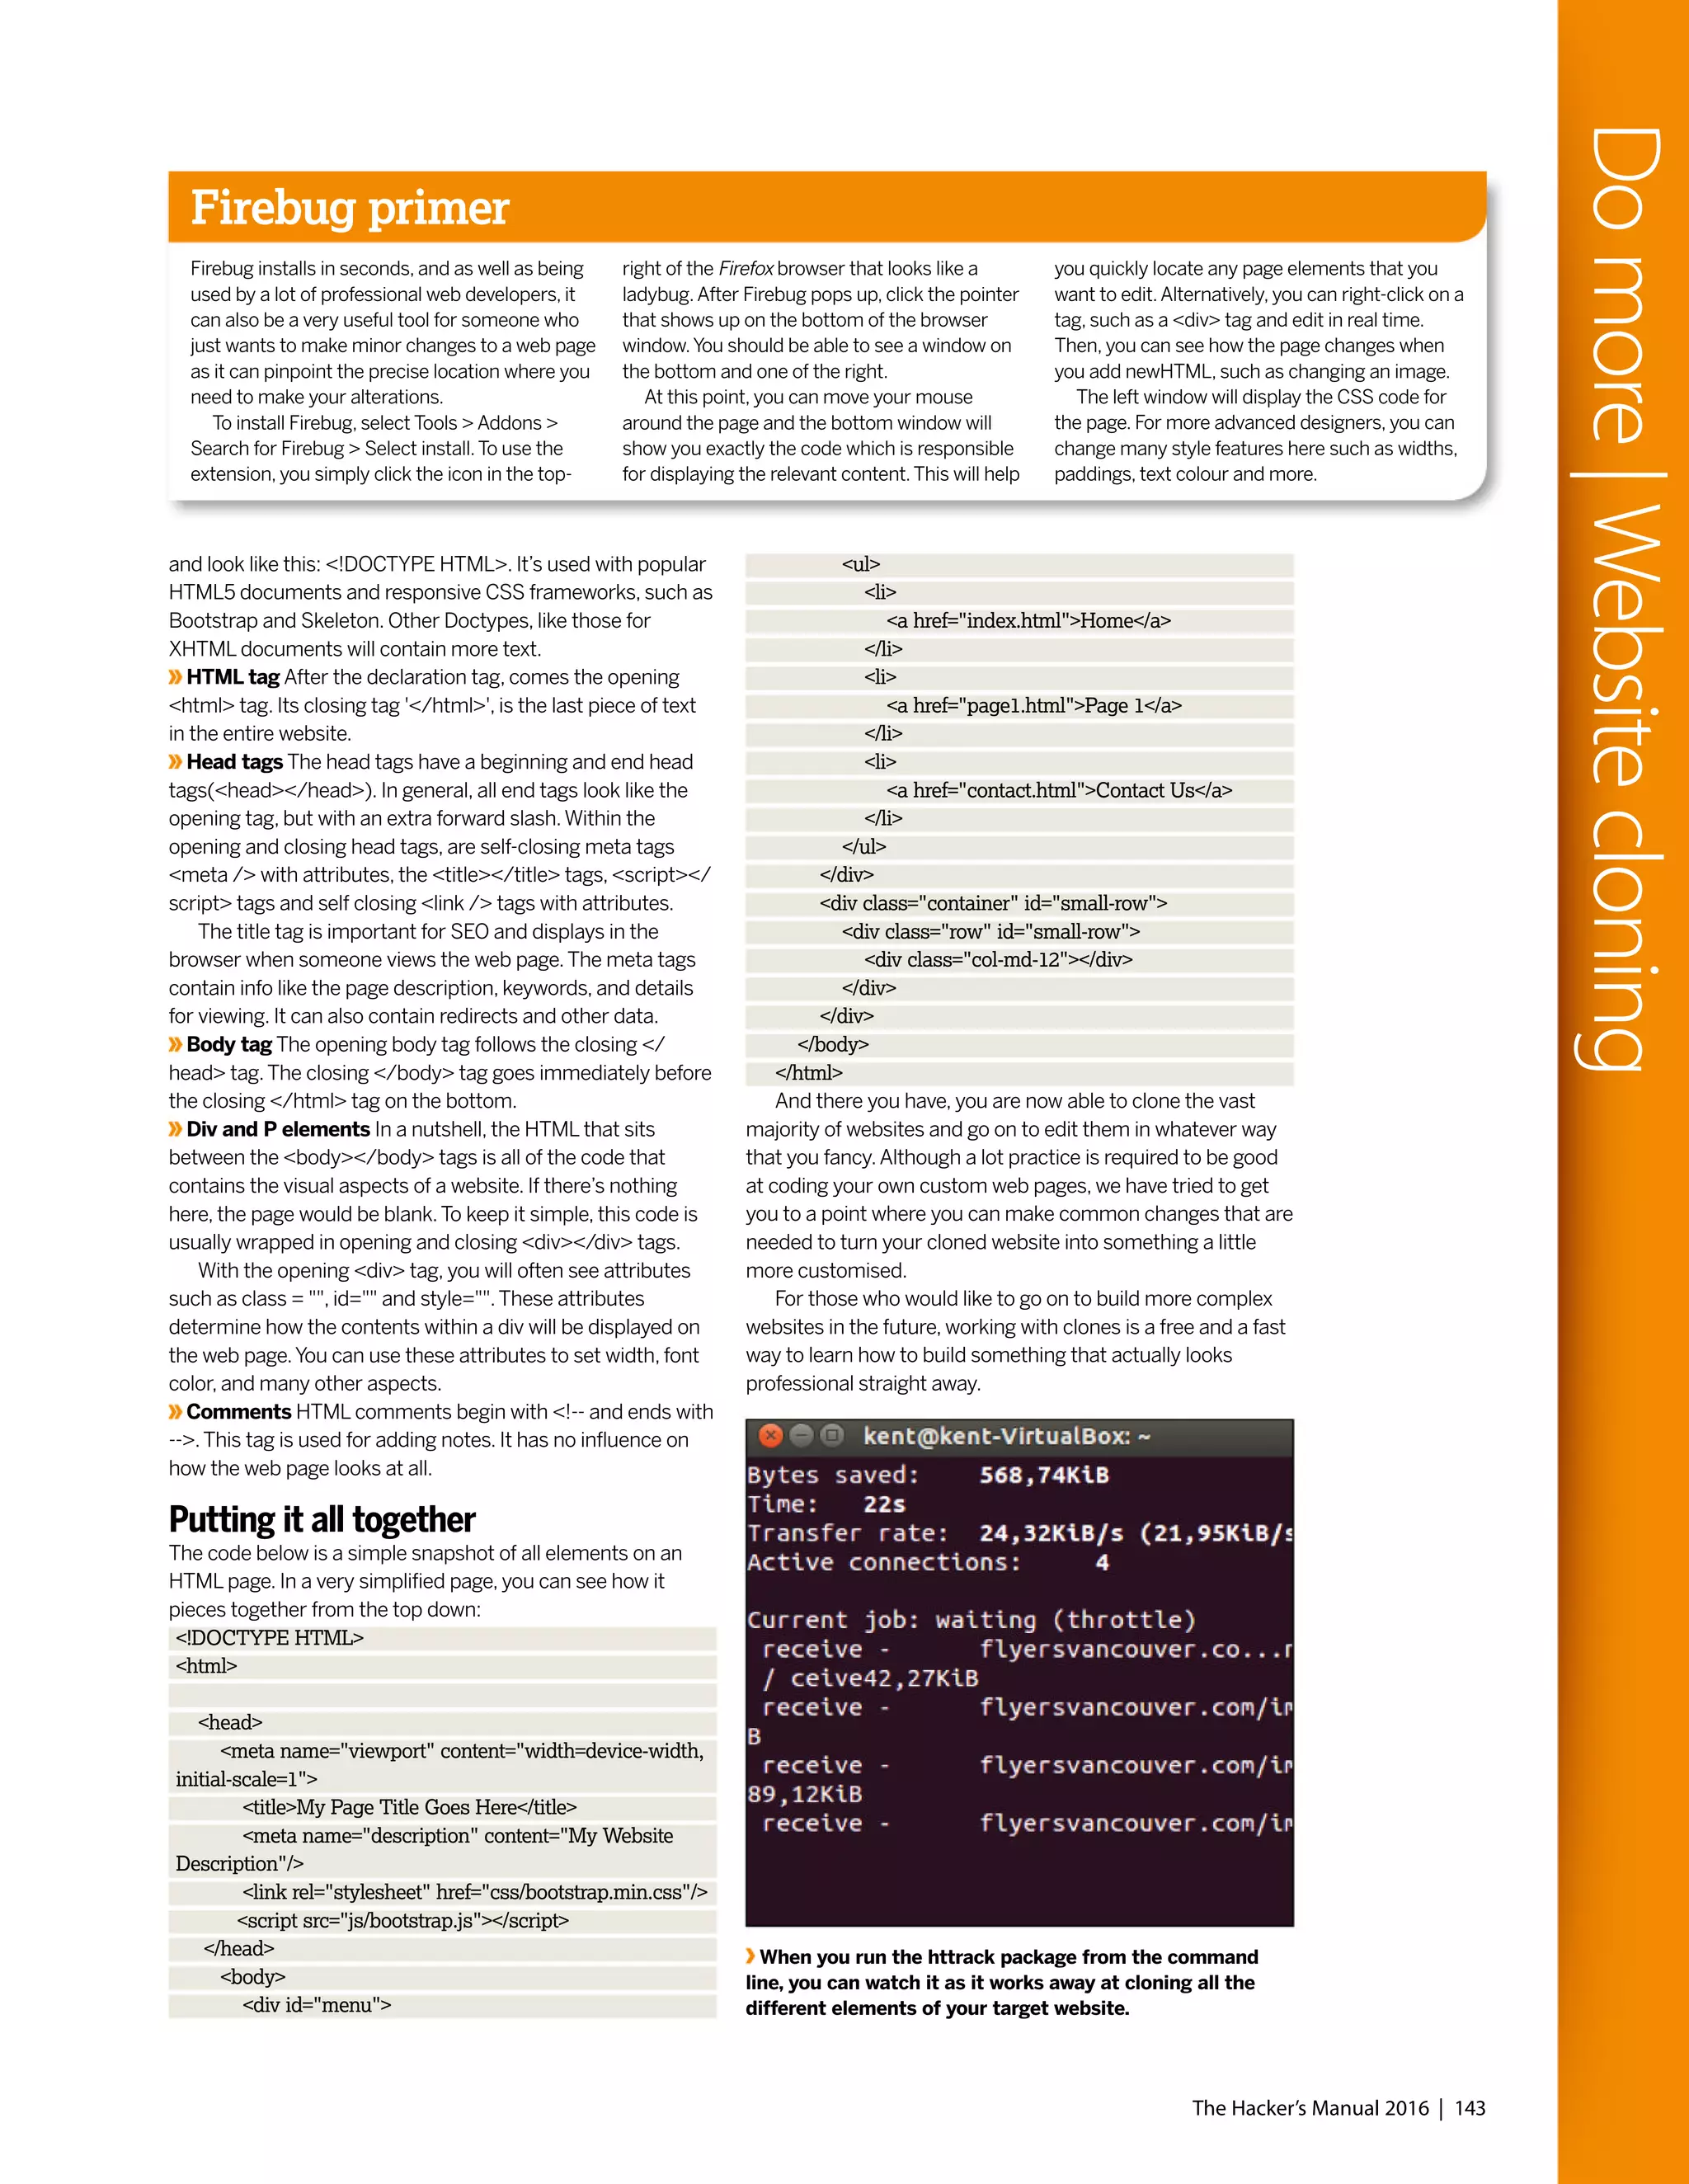


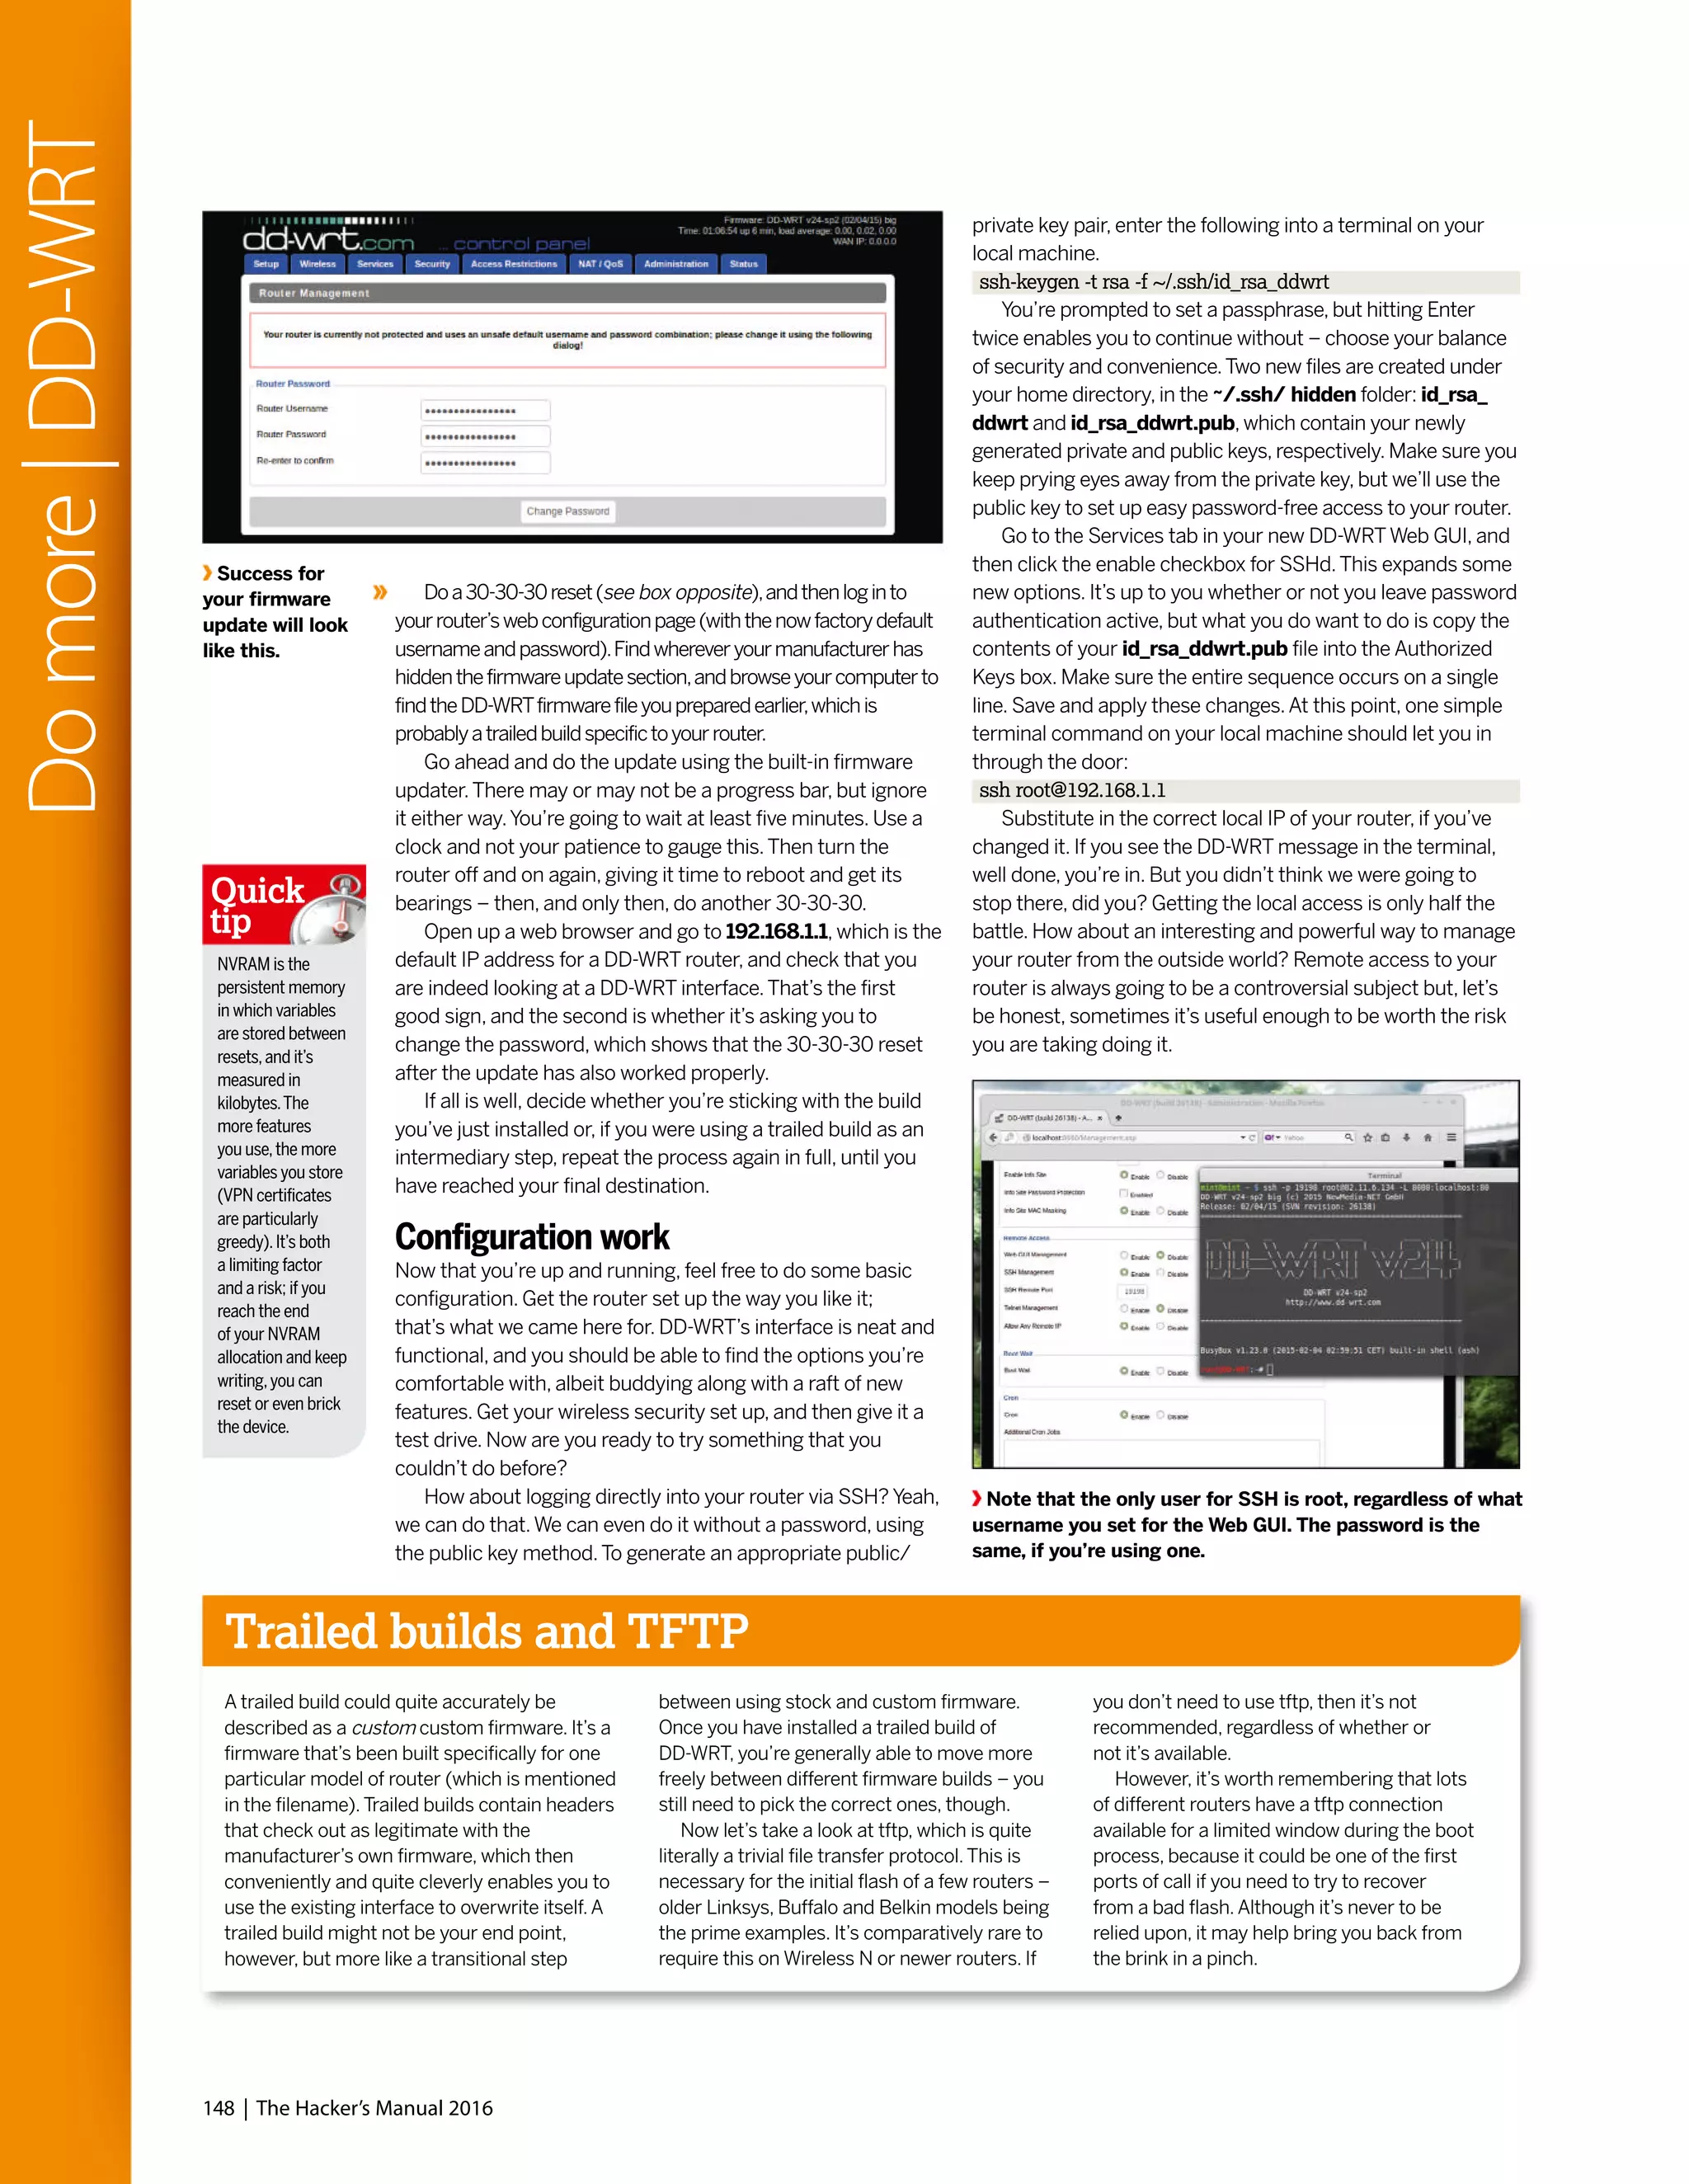


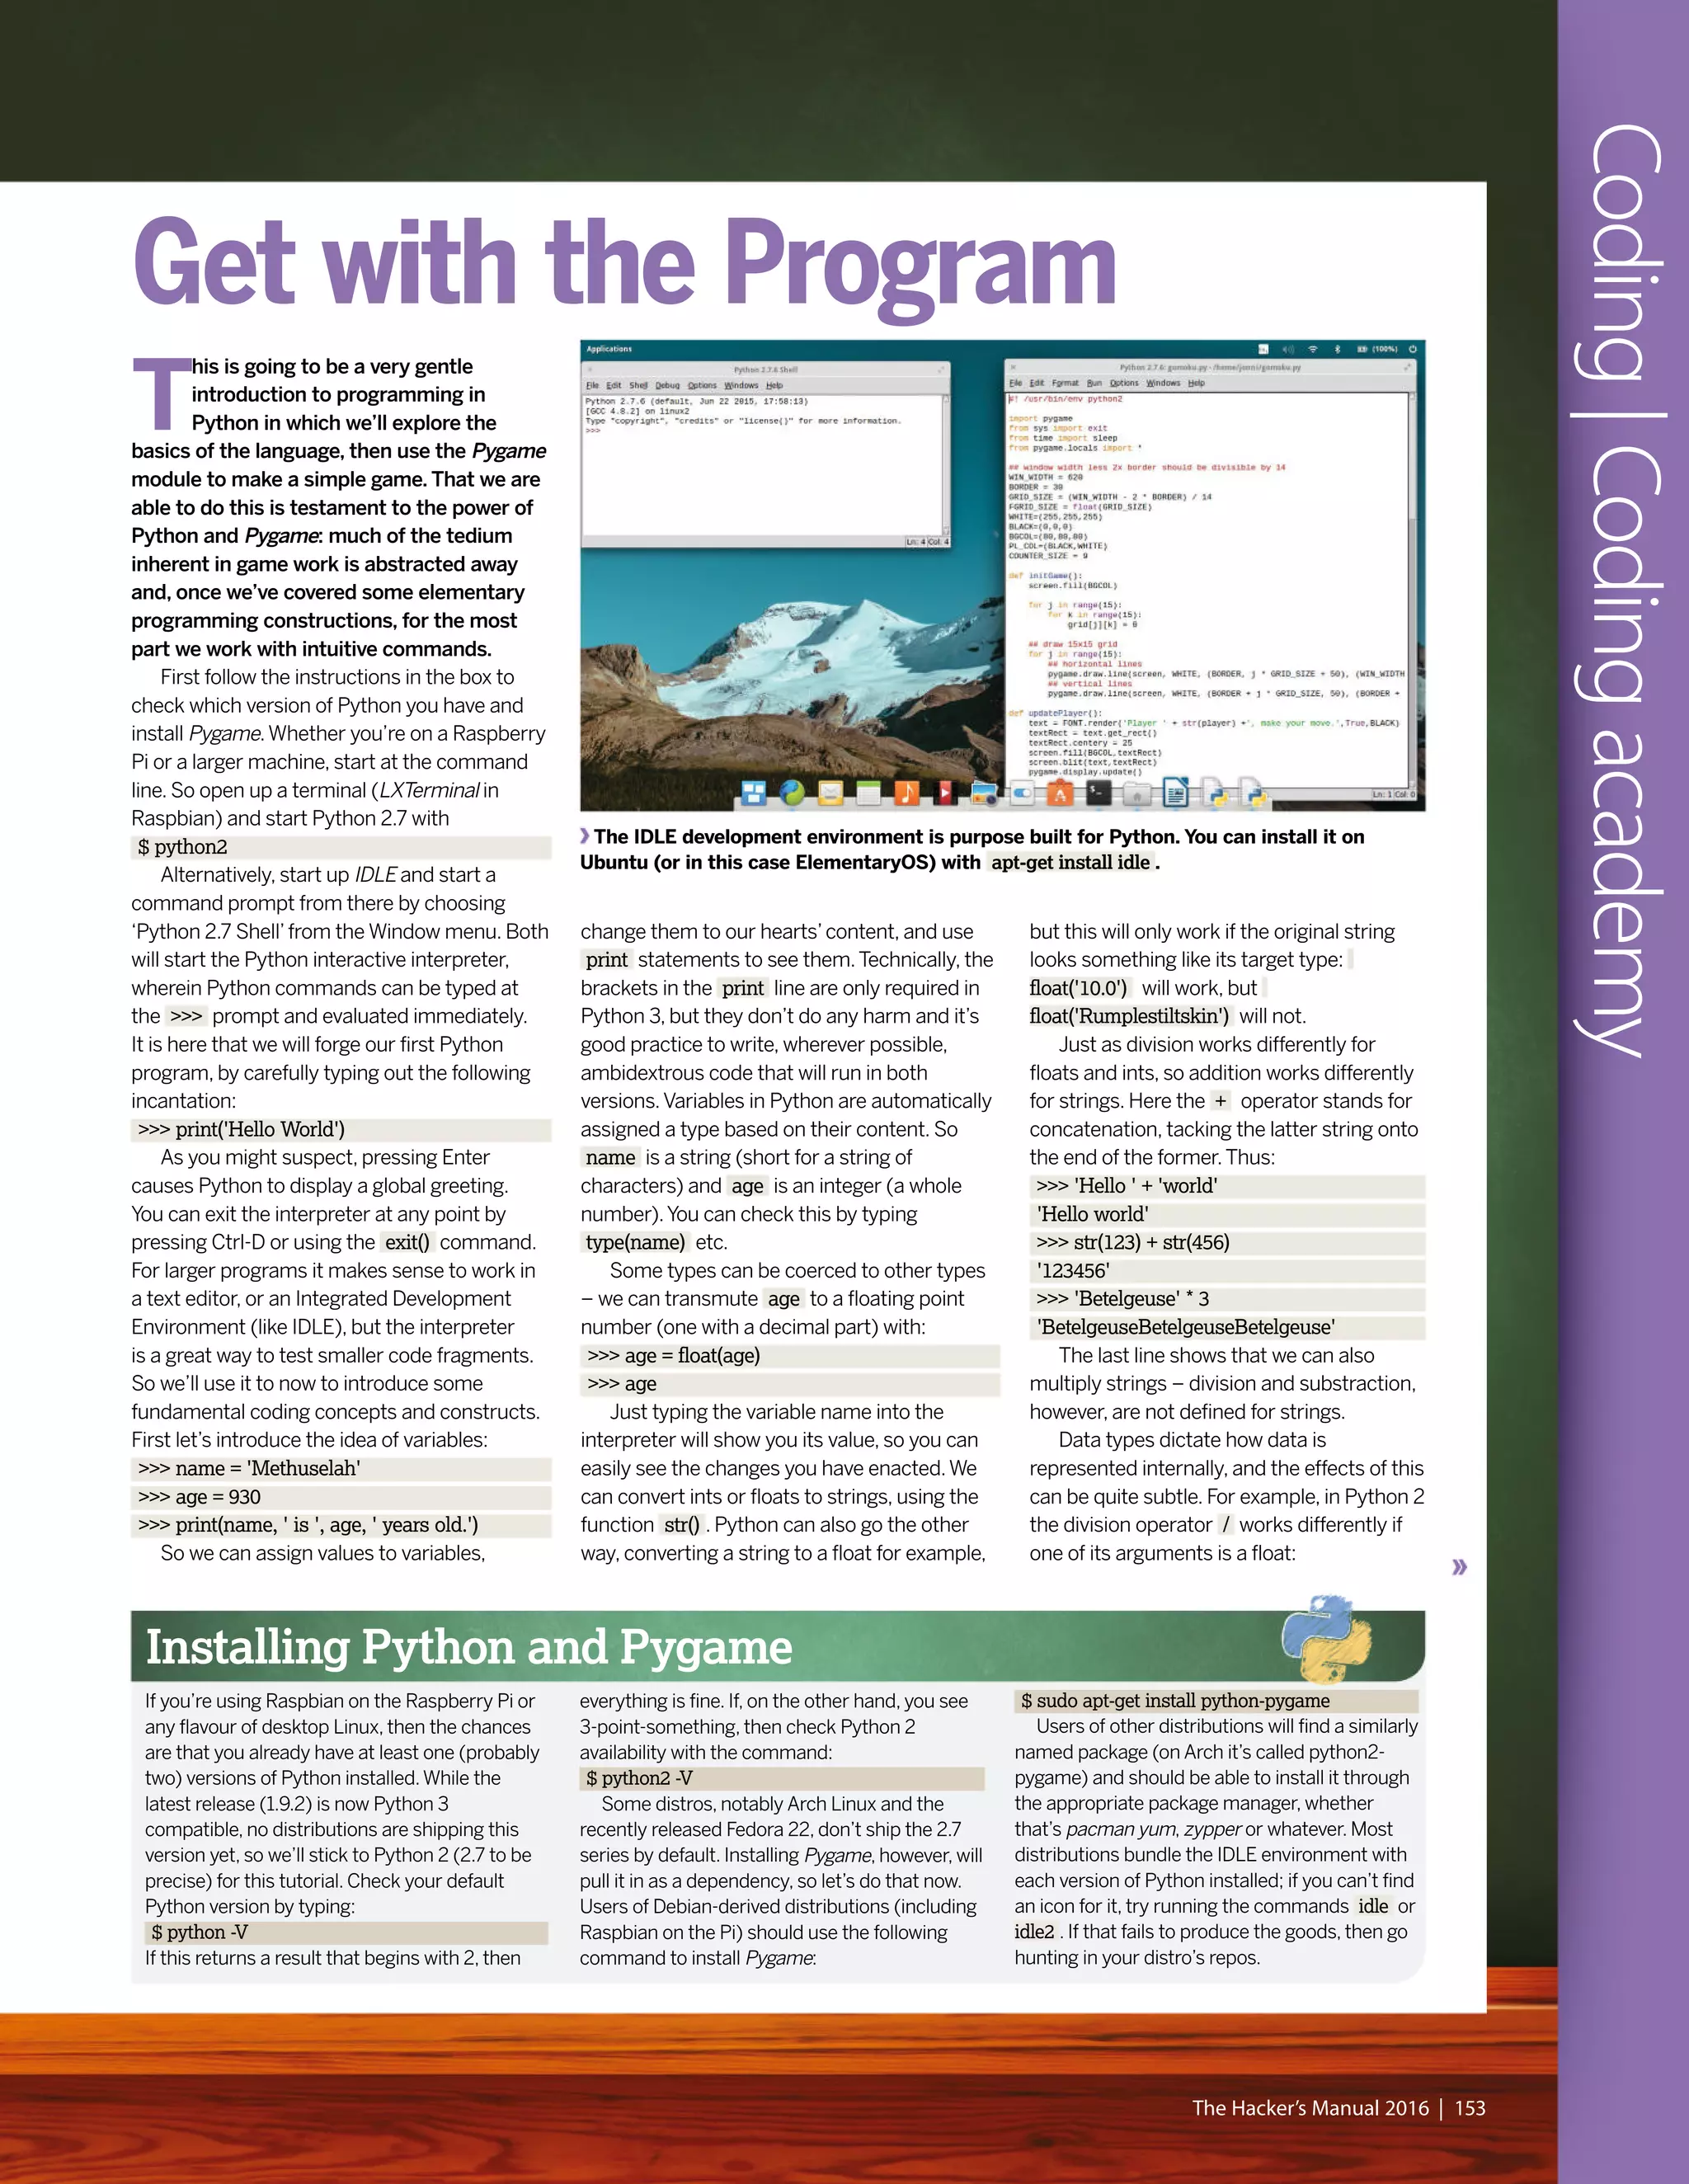
![>>> 3/2
>>> 1
>>> 3/2.
>>> 1.5
Funny the difference a dot can make.
Note that we have been lazy here in typing
simply 2. when we mean 2.0. Python is
all about brevity. (Besides, why make life
hard for yourself?) Sooner or later you’ll
run into rounding errors if you do enough
calculations with floats. Check out the
following doozy:
>>> 0.2 * 3
0.6000000000000001
Such quirks arise when fractions have a
non-terminating binary decimal expansion.
Sometimes these are of no consequence,
but it’s worth being aware of them.They can
be worked around either by coercing floating
point variables to ints, or using the round()
function, which will give you only the number
of decimal places you require.We’ll see this
in practice when we program our Gomoku
game later.
Going loopy
Very often programmers desire to do almost
the same thing many times over. It could be
appending entries to a list, adding up totals
for each row in a table, or even subtracting
energy from all enemies just smitten by a
laser strike. Iterating over each list item,
table row or enemy manually would be
repetitive and make for lengthy, hard-to-read
code. For this reason we have loops, like the
humble for loop below.When you hit Enter
after the first line, the prompt will change to
… .This is because the interpreter knows
that a discrete codeblock is coming and the
line(s) following the for construct‘belong’to
it. Such codeblocks need to be indented,
usually using four spaces, though you can
use as many as you like so long as you’re
consistent. If you don’t indent the second
line, Python will shout at you. Entering a
blank line after the print statement will end
the codeblock and cause our loop to run.
>>> for count in range(5):
… print('iteration #', count)
There’s a few things going on here.We have
introduced a new variable, an integer by the
name of count . Giving sensible names to your
variables is a good idea; in this case it implies
(even in the absence of any other coding
knowledge) that some counting is about to
happen.The range() function, when used in
isolation, returns a list consisting of a range of
integers.We’ll cover lists in just a moment, but
for now we just need to know that range(5)
looks like [0, 1, 2, 3, 4], which you can verify in
the interpreter. So our variable count is going
to iterate over each of these values, with the
print() line being issued five times – once for
each value in the range.
Another type of loop is the while loop.
Coding|Codingacademy
154 | The Hacker’s Manual 2016
How to play Gomoku
Gomoku is short for gomokunarabe, which is
roughly Japanese for‘five pieces lined up’.The
game in fact originated in China some 4,000
years ago. Players take turns to each place a
counter on the intersections of a square grid
with the goal of forming unbroken lines
(horizontal, vertical or diagonal) of length 5.
Traditionally the board has 19x19 intersections,
but we’ve gone for the smaller 15x15 board
used in some variations.We haven’t included
an AI (that would be somewhat too complicated
for a beginner tutorial) so you’ll need to find a
friend/other personality with which to play.
Alternatively there are plenty of online versions
you can play, and KDE users get the similar
Bovu game with their desktop.
It’s easy to figure out some basic strategies,
such as always blocking one side of your
opponent’s‘open three’line or obstructing a
‘broken four’.Yet to become a master takes
years of practice.The basic rule set as we’ve
implemented it heavily favours the starting
player (traditionally black). In fact, work by L.
Victor Allis has shown that a good player
(actually a perfect player) can force a win if they
start.To mitigate against this, big tournaments
use a starting strategy called swap2.The first
player places two black counters and one white
one on the board, and the second player then
either chooses a colour or places another black
and another white counter on the board and
allows player 1 to choose colours.You are free
to modify the code to force use of swap2, but
it’s entirely possible to obey this rule without
any code modification: just disobey the first few
‘Player x, make your move’prompts.
There are all kinds of Pygame-powered games. This one, You Only Get One Match, features
lots of fireworks but limited means of ignition. Check it out at http://bit.ly/LXF202-onematch](https://image.slidesharecdn.com/thehackersmanual2016-160522105830/75/The-hackers-manual-2016-154-2048.jpg)
![Coding|Codingacademy
The Hacker’s Manual 2016 | 155
One of many tense counter-based battles
which Jonni ultimately won. [That’s cos you
were playing both sides – Ed]
Rather than iterating over a list, our wiley while
loop will keep going over its code block until
some condition ceases to hold. In the following
example, that condition is that the user claims
to have been born after 1900 and before 2016.
>>> year = 0
>>> while year < 1900 or year >= 2015:
… year = input("Enter your year of birth: ")
… year = int(year)
Again the loop itself is indented, and again
you’ll need to input a blank line to set it
running.We’ve used the less than ( < ) and
greater than or equal to ( >= ) operators to
compare values. Conditions can be combined
with the logical operators and, or and not. So
long as year has an unsuitable value, we keep
asking. It is initialised to 0, which is certainly
less than 1900, so we are guaranteed to enter
the loop.We’ve used the input() function, which
returns whatever string the user provides.This
we store in the variable year, which we convert
to an integer so that the comparisons in the
while line do not fail. It always pays to be as
prudent as possible as far as user input is
concerned: a malicious user could craft some
weird input that causes breakage, which while
not a big deal in this example, is bad news if it’s
done, say, on a web application that talks to a
sensitive database.You could change 1900 if
you feel anyone older than 115 might use your
program. Likewise, change 2015 if you want to
keep out (honest) youngsters.
The opposite of listless
We mentioned lists earlier and in the exciting
project that follows we’ll use them extensively,
so it would be remiss not to say what they are.
Lists in Python are flexible constructions that
store a series of indexed items.There are no
restrictions on said items: they can be strings,
ints, other lists, or any combination of these.
Lists are defined by enclosing a comma-
separated list of the desired entries in square
brackets. For example:
>>> myList = ['Apple', 'Banana', 'Chinese
Gooseberry']
The only gotcha here is that lists are zero-
indexed, so we’d access the first item of our
list with myList[0] . If you think too much like a
human, then 1-indexed lists would make more
sense. Python doesn’t respect this, not even a
little, so if you too think like a meatbag, then be
prepared for some classic off-by-one errors.
We can modify the last item in the list thusly:
>>> myList[2] = 'Cthulhu'
Lists can be declared less literally – for
example, if we wanted to initialise a list with
100 zeroes, we could do:
>>> zeroList = [0 for j in range(100)]
This is what is known as a list comprehension.
Another example is
>>> countList = [j for j in range(100)]
which results in a list containing the integers
0 up to and including 99, which could equally
well be achieved with range(100) in Python 2.
However, the concept is more powerful – for
example we can get a list of squares using the
exponentiation (to the power of) operator ** :
>>> squareList = [j ** 2 for j in range(100)]
And after that crash course we’re ready to
program our own game.You’ll find all the code
on the disc (in Tutorials, in the file gomoku.py)
or at http://pastebin.com/FRe7748B, so it
would be silly to reproduce that here. Instead
we’ll focus on the interesting parts, in some
cases providing an easier-to-digest fragment
which you can play with and hopefully see how
it evolves into the version in the program.
To dive in and see the game in action, copy
gomoku.py to your home and run it with:
$ python2 gomoku.py
On the other hand, if you want to see some
code, open up that file in IDLE or your favourite
text editor. Starting at the first line is a
reasonable idea… It looks like:
#!/usr/bin/env python2
This line is actually ignored by Python (as
are all lines that begin with #) but it is used by
the shell to determine how the file should be
executed. In this case we use the env utility,
which should be present on all platforms, to
find and arm the Python 2 executable. For this
nifty trick to work, you’ll need to make the
gomoku.py file executable, which is achieved
from the command prompt (assuming you’ve
copied the file to your home directory, or
anywhere you have write permission) with:
$ chmod +x gomoku.py
You’ll find you can now start the game with
a more succinct:
$ ./gomoku.py
Next we have three import statements, two
of which (pygame and sys) are straightforward.
The pygame module makes easy work of
doing game-related things – we’re really only
scratching the surface with some basic
graphics and font rendering.We need a
single function, exit() , from the sys module
so that we can cleanly shut down the game
when we’re done. Rather than importing the
whole sys module we import only this
function.The final import line is just for
convenience – we have already imported
pygame, which gives us access to pygame.
locals, a bunch of constants and variables.
We use only those relating to mouse,
keyboard and quitting events. Having this
line here means we can access, say, any
mouse button events with
MOUSEBUTTONDOWN without prefixing it
with pygame.locals.
It’s all in the (Py)game
Throughout the program you’ll notice that
some variables are uppercase and some are
not.Those in uppercase are either from
pygame.locals or should be considered
constants, things that do not change value
over the course of the game. Most of these
are declared after the import statements
and govern things like the size of the game
window and counters. If you want to change
the counter colours, to red and blue for
example, you could replace the values of
WHITE and BLACK with (255,0,0) and
(0,0,255) respectively.These variables are
tuples (a similar structure to a list, only it
cannot be changed) which dictate the red,
green and blue components of colours.
Next you’ll see a series of blocks
beginning with def: – these are function
definitions and, as is the case with other
codeblocks in Python, they are demarcated
by indentation.The initGame() function
initialises the play area. Here’s a simple
version that shows what this function does:
WIN_WIDTH = 620
GRID_SIZE = (WIN_WIDTH) / 14
WHITE=(255,255,255)
BLACK=(0,0,0)
BGCOL=(80,80,80)
def initGame():
screen.fill(BGCOL)
for j in range(15):
pygame.draw.line(screen, WHITE, (0, j
* GRID_SIZE), (WIN_WIDTH, j * GRID_
SIZE))
pygame.draw.line(screen, WHITE, (j *
GRID_SIZE, 0), (j * GRID_SIZE, WIN_
WIDTH))
pygame.init()
pygame.display.set_caption(‘LXF Gomoku’)
screen = pygame.display.set_mode((WIN_
WIDTH,WIN_WIDTH))
initGame()
pygame.display.update()
If you add the three import lines to the
beginning of this, then this is actually a](https://image.slidesharecdn.com/thehackersmanual2016-160522105830/75/The-hackers-manual-2016-155-2048.jpg)
![Coding|Codingacademy
156 | The Hacker’s Manual 2016
perfectly valid Python program.The
initGame() function doesn’t do anything
until it is called at the last line, by which time
we’ve already initialised Pygame, set our
window title and set the window size to 620
pixels.All variables set up outside of function
definitions, hence the five all-caps constants
at the beginning and screen are accessible
inside function definitions; they are known
as global variables.Variables defined inside
function definitions are called‘local’– they
cease to exist when the function exits, even
if they have the same name as a global
variable – again, something to be aware of in
your future coding endeavours.The variable
screen refers to the‘canvas’on which our
game will be drawn, so it will be used
extensively later on.The initGame()
function’s first act is to paint this canvas a
delightful shade of grey (which you’re very
welcome to change).Then we use a loop
to draw horizontal and then vertical lines,
making our 15x15 grid. None of this artwork
will appear until we tell Pygame to update
the display, hence the last line.
Astute readers will notice that the grid
overruns ever so slightly at the edges.This
is because drawing 15 equispaced parallel lines
divides the board into 14, but 620 (our window
size) is not divisible by 14. However, when we
add in some window borders, since we want
to place counters on the edge lines as well,
620 turns out to be a very good number, and
we were too lazy to change it.Though rough
around the edges, it’s still testament to
Pygame’s power and Python’s simplicity that
we can do all this in just a few lines of code.
Still, let’s not get ahead of ourselves, our game
still doesn’t do anything.
Finer points
From here onward, we’ll refer to the actual
code, so any snippets we quote won’t work in
isolation – they’re just there to highlight things.
You’ll notice that the FONT variable isn’t
defined with the other constants: this is
because we can’t use Pygame’s font support
until after the Pygame’s init() method has
been called. Let’s look at the main game loop
right at the end of the code.The introductory
clause while True: suggests that this loop will
go on forever.This is largely correct – we want
to keep checking for events, namely mouse
clicks or the user clicking the exit button, until
the game is done. Obviously we exit the loop
when the application quits – clicking the
button triggers a QUIT event which we react to
with the exit() function from the sys package.
Inside the main loop, the first thing we do is call
the updatePlayer() function, which you’ll find on
line 32.This updates the text at the top of the
screen that says whose go it is, drawing
(‘blitting’) first a solid rectangle so any
previous text is erased. Next we loop over the
events in the events queue; when the player
tries to make a move, the tryCounterPlace()
function is called, with the mouse co-ordinates
passed along.
To keep track of the game, we use a two-
dimensional square array (a list of lists) in the
variable grid.This is initialised as all 0s, and
when a player makes a move a 1 or a 2 is
entered accordingly.The first job of the
tryCounterPlace() function is to reconcile the
mouse coordinates where the user clicked with
a pair of coordinates with which to index the
grid variable. Of course, the user may not click
exactly on an intersection, so we need to do
some cheeky rounding here. If the player clicks
outside of the grid (e.g. if they click too far
above the grid, so the y coordinate will be
negative) then the function returns to the main
loop. Otherwise we check that the grid position
is unoccupied and if so draw a circle there, and
update our state array grid .A successful
move causes our function to return a True
value, so looking at line 111 in the code we see
this causes the next player’s turn. But before
that is enacted, by the updatePlayer() call at
the top of the loop, we call the checkLines()
function to see if the latest move completed a
winning line.You’ll find details of how this check
is carried out in the box.
When a winning counter is detected by
our state-of-the-art detection algorithm, the
winner() function is invoked.This replaces the
text at the top of the screen with a message
announcing the victor, and the gameover loop
is triggered.This waits for a player to push R to
restart or rage quit. If a restart is ordered, then
the player order is preserved and, since this is
updated immediately before checkLines() is
called, the result is that the loser gets to start
the next round.
This is a small project (only about 120 lines,
not really a match for the 487 byte Bootchess
you can read about at www.bbc.co.uk/news/
technology-31028787), but could be extended
in many ways. Graphics could be added,
likewise a network play mode and, perhaps
most ambitiously, some rudimentary AI could
be employed to make a single player mode.
This latter has in fact already been done…
Joel Murielle’s graphical Gomoku is
available from the Pygame website.
Pygame takes all the pain out of working
with sprites, notorious troublemakers.
Reading between the lines
Part of Key Stage 2 involves learning to
understand and program simple algorithms.
We’ve already covered our basic gameflow
algorithm – wait for a mouseclick (or for the
user to quit), check if that’s a valid move, check
if there’s a line of five, etc.At the heart of that
last stage, lies a naïve, but nonetheless relevant,
algorithm for detecting whether a move is a
winning one.
Consider the simpler case where we’re
interested only in horizontal lines.Then we
would loop over first the rows and then the
columns of our grid array. For each element
we would check to see that it is non-zero (i.e.
there is a counter there) and if the four
elements to its right have the same value. In
Python it would look like this:
for j in range(15):
for k in range(10):
pl = grid[j][k]
if pl > 0:
idx = k
while grid[j][idx] == pl and idx < 14:
idx += 1
if idx - k >= 5:
# game winning stuff goes here
Note that the inner loop variable k reaches a
maximum value of only 9.We do not need to
check row positions further right than this
since our algorithm will reach out to those
positions if a potential line exists there. Our
variable idx effectively measures the length of
any line; it is incremented using the += operator,
short for idx = idx + 1.
The algorithm is easily adapted to cover
vertical and diagonal lines. Rather than having
four separate functions, though, we’ve been
clever and made a general function lineCheck(),
which we call four times with the parameters
necessary for each type of line checking. Said
parameters just change the limits of the for
loops and how to increment or decrement grid
positions for each line direction.](https://image.slidesharecdn.com/thehackersmanual2016-160522105830/75/The-hackers-manual-2016-156-2048.jpg)


![Coding|Codingacademy
160 | The Hacker’s Manual 2016
P
HP used to stand for Personal
Home Page, but these days it’s
a recursive acronym for PHP:
Hypertext Processor. Many of the world’s
leading web applications, such as
WordPress and OwnCloud, are written in
PHP. It’s used extensively by some of the
biggest websites in the world, some of
which are so big (Facebook) that they had
to write their own engine (HHVM) for it.
Rather than using PHP in a traditional
setting (running as a module through a
webserver), let’s install PHP-CLI, the
command line edition. This saves us the
trouble of setting up Apache or some such
(although that’s pretty easy nowadays, so
you may want to do the tutorial this way
and that is fine).
On Debian-based distributions and their
derivatives, you’ll want to run:
$ sudo apt-get install php5-cli
Other distros will name their packages
differently – on Arch it’s called just php.
Ultimately, if you find your package manager
starts trying to install a
webserver and all sorts of
other gubbins, then you
chose the wrong package.
We’ll work in the text
editor of your choice – you
could use nano and do the
whole thing from the terminal, or you can
use something graphical like IDLE or Geany.
Whatever you choose, your first program is
going to be short – this short:
<?php
echo 'Hello World!';
?>
Save this as hello.php and then run it
with the following command:
$ php hello.php
You probably knew what was going to
happen. Similar to how JavaScript is
enclosed in HTML pages via <script> tags,
PHP code has to be surrounded by the tags
on the first and last lines of the snippet there.
Codeblocks – which include but are not
limited to variable assignments, loops and
if...else..endif clauses – must be terminated
with a semicolon (that most roguish of
punctuation marks). If you were to embed
the code above in an HTML document on a
PHP-enabled webserver, then it would
perform its worldly greeting on that
webpage.Viewing the page’s source through
the browser would not show the PHP code,
only its output... Spooky.
Let’s try a more complicated example.
This time we’re going to define a function
called fib which takes an integer $n as an
argument and returns the $nth Fibonacci
number.Variables in PHP are prefixed with
dollar signs, functions are wrapped in curly
brackets and if conditions in regular brackets:
<?php
function fib($n) {
if ($n == 0) {
return 0;
}
if ($n == 1) {
return 1;
}
return fib($n - 1) + fib ($n - 2);
}
echo fib(12);
?>
Even without any coding experience or
exposure to the Fibonacci sequence you’ll
probably figure out that the‘zeroth’Fibonacci
number is 0, and the next one is 1. Subsequent
Fibonacci numbers are defined as the sum of
their two predecessors, hence the rest of the
sequence goes 1,1,2,3,5,8.Amazingly, coding
this requires next to no effort – it is perfectly
legal to call the function from within itself, and
it won’t even break.This technique is known
as recursion and is vaguely illustrated by the
cornflakes packet on which you’ll find a smaller
picture of the cornflakes packet, which has on
it... Maybe not quite like that – thanks to our
two base cases the recursion depth is limited,
so we won’t end up in some infinite depth trap.
Be that as it may, this is not the most efficient
way to compute Fibonacci numbers. Look at
the figure to see the call structure for fib(5) –
more than half the calls are superfluous.As n
grows, so too does this duplication of effort:
see what happens when you change the
function call in the second last line to calculate
the 40th Fibonacci number (it’s about 100
million, and takes us about 45s to compute).
Check out the box opposite for a fix.
Note that if the user doesn’t supply an
argument to fib2.php (from said box), then
PHP will complain since the array $argv does
not have an entry at index 1.The value of
$argv[0] is always the name of the program
itself, in this case fib2.php.Where an argument
is provided, we convert it from a string to an
int.This converts unusable input to the int 0,
which triggers our unhelpful error message.
Unfortunately this means our program doesn’t
work for the zeroth Fibonacci number, but that
one’s easy to remember.Anything bigger than
zero can be found remarkably quickly using
our new algorithm.Well, not quite anything –
the 93rd Fibonacci number is greater than
2^64, so cannot be stored as a 64-bit integer.
PHP rounds this to a floating point number
(displayed using exponent-mantissa notation)
with limited precision, but eventually (1,477 on
our setup) the numbers become too big even
for that.
Perhaps it’s worth noting that there’s an
inherent overhead in every layer of recursion
and function call you add to your program. So
if one really wanted to be Teutonically efficient
about it, an iterative solution would be the best
one.There’s no perceivable speed gains in this
case (fib2 1476 displays an answer almost
immediately), so we leave this as an exercise.
You’ll need to know about for loops in PHP,
which is good because they
feature in the next section.
Caesar cipher
To finish off today’s lesson,
we’re going to use some classic
cryptography. Be sure to revisit
our glorious treatise on this subject from
LXF189, but it will suffice to know that Julius
Caesar used to encrypt messages by shifting
each letter three places down the alphabet,
wrapping X,Y and Z to A, B and C respectively.
This is slightly tricky to achieve on a computer.
One way is to look at the ASCII values of each
character of plaintext: uppercase letters A-Z
have values 65-90, and lowercase a-z occupy
the range 97-122. For simplicity we’re going to
leave all other characters (e.g. spaces and
punctuation) untouched in the ciphertext. So
we will loop over $plaintext character by
character, add the value shift to the ASCII value
of each alphabetic character, perform any
appropriate wraparounds, get the character
represented by this new value and finally
append this to our ciphertext.
Once you get that finding the ASCII value is
done with the function $ord and the character
with $chr :
<?php
function ccipher($plaintext, $shift) {
$ciphertext = '';
for ($j = 0; $j < strlen($plaintext);
$j++) {
$asciicode = ord($plaintext[$j]);
PHP: Code and calculate
“Many of the world’s leading
web apps, like WordPress and
OwnCloud, are written in PHP.”](https://image.slidesharecdn.com/thehackersmanual2016-160522105830/75/The-hackers-manual-2016-160-2048.jpg)
![fib (3)
fib (2)
fib (1) fib (0)
fib (1) fib (1) fib (1)fib (0) fib (0)
fib (2) fib (1)
fib (3)
fib (5)
fib (4)
fib (2)
Change the value
of $shift to make
other equally
useless ciphers –
a value of 13 will
give you the ROT13
code popular for
hiding punchlines
and spoilers on
many forums.
Quick
tip
Coding|Codingacademy
The Hacker’s Manual 2016 | 161
The red text shows wasted effort due
to the two function calls in our first
Fibonacci function. The code reads
nicely, but is criminally inefficient.
if ($asciicode >= 65 &&
$asciicode <= 90) {
$ciphertext .=
chr(($asciicode + $shift + 13) % 26 + 65);
}
else if ($asciicode >= 97
&& $asciicode <= 122) {
$ciphertext .=
chr(($asciicode + $shift + 7) % 26 + 97);
}
else {
$ciphertext .=
chr($asciicode);
}
}
return $ciphertext;
}
$plaintext = 'Veni vidi vinci';
$shift = 3;
echo ccipher($plaintext, $shift);
?>
For loops are initiated C-style, giving a list
of conditions in brackets. Our iterator variable
$j starts at 0 and goes all the way to the
length of our string.The and operator is
abbreviated to && and we use the .= operator
to concatenate strings.
All pretty straightforward, except for the
wraparound part. Here we use the modulus
operator %, which gives you the remainder
on division, in our case by 26. In the first
case we want this to be 0 if our shifted value
is 65, so we add on 13, since 65 + 13 = 78,
which is divisible by 26. Dually we add on 7 in
the second block.There isn’t any room left
to write the corresponding cdecipher()
function, but it’s just a question of changing
two plus signs to minus signs. See if you can
recover the original plaintext this way.
Faster Fibonacci function
Programmers are very keen on writing efficient
code.This is not just because they like elegance
(though as a rule they do); as we’ve mentioned,
inefficient code might be fine to begin with but
can start running as slow as treacle when asked
to deal with heavier loads. Here we can use a
smarter Fibonacci function which passes the
two previous numbers in the sequence, so that
no effort is wasted. But we still want to be able
to call our function with a single argument, so
we’ll make these extra arguments optional,
setting their defaults to 1 and 0:
<?php
function fib2($n, $oldfib = 1, $olderfib = 0) {
if ($n > 1) {
return fib2($n - 1, $oldfib + $olderfib,
$oldfib);
}
else {
return $oldfib;
}
}
if (!$argv[1]) {
echo 'no';
}
else{
echo fib2((int) $argv[1]);
}
?>
Besides defining our new improved function
fib2() we also use the special variable $argv to
allow the user to provide input on the command
line. If one saved this file as fib2.php, then the
54th Fibonacci number could be found thusly:
$ php fib2.php 54
86267571272](https://image.slidesharecdn.com/thehackersmanual2016-160522105830/75/The-hackers-manual-2016-161-2048.jpg)
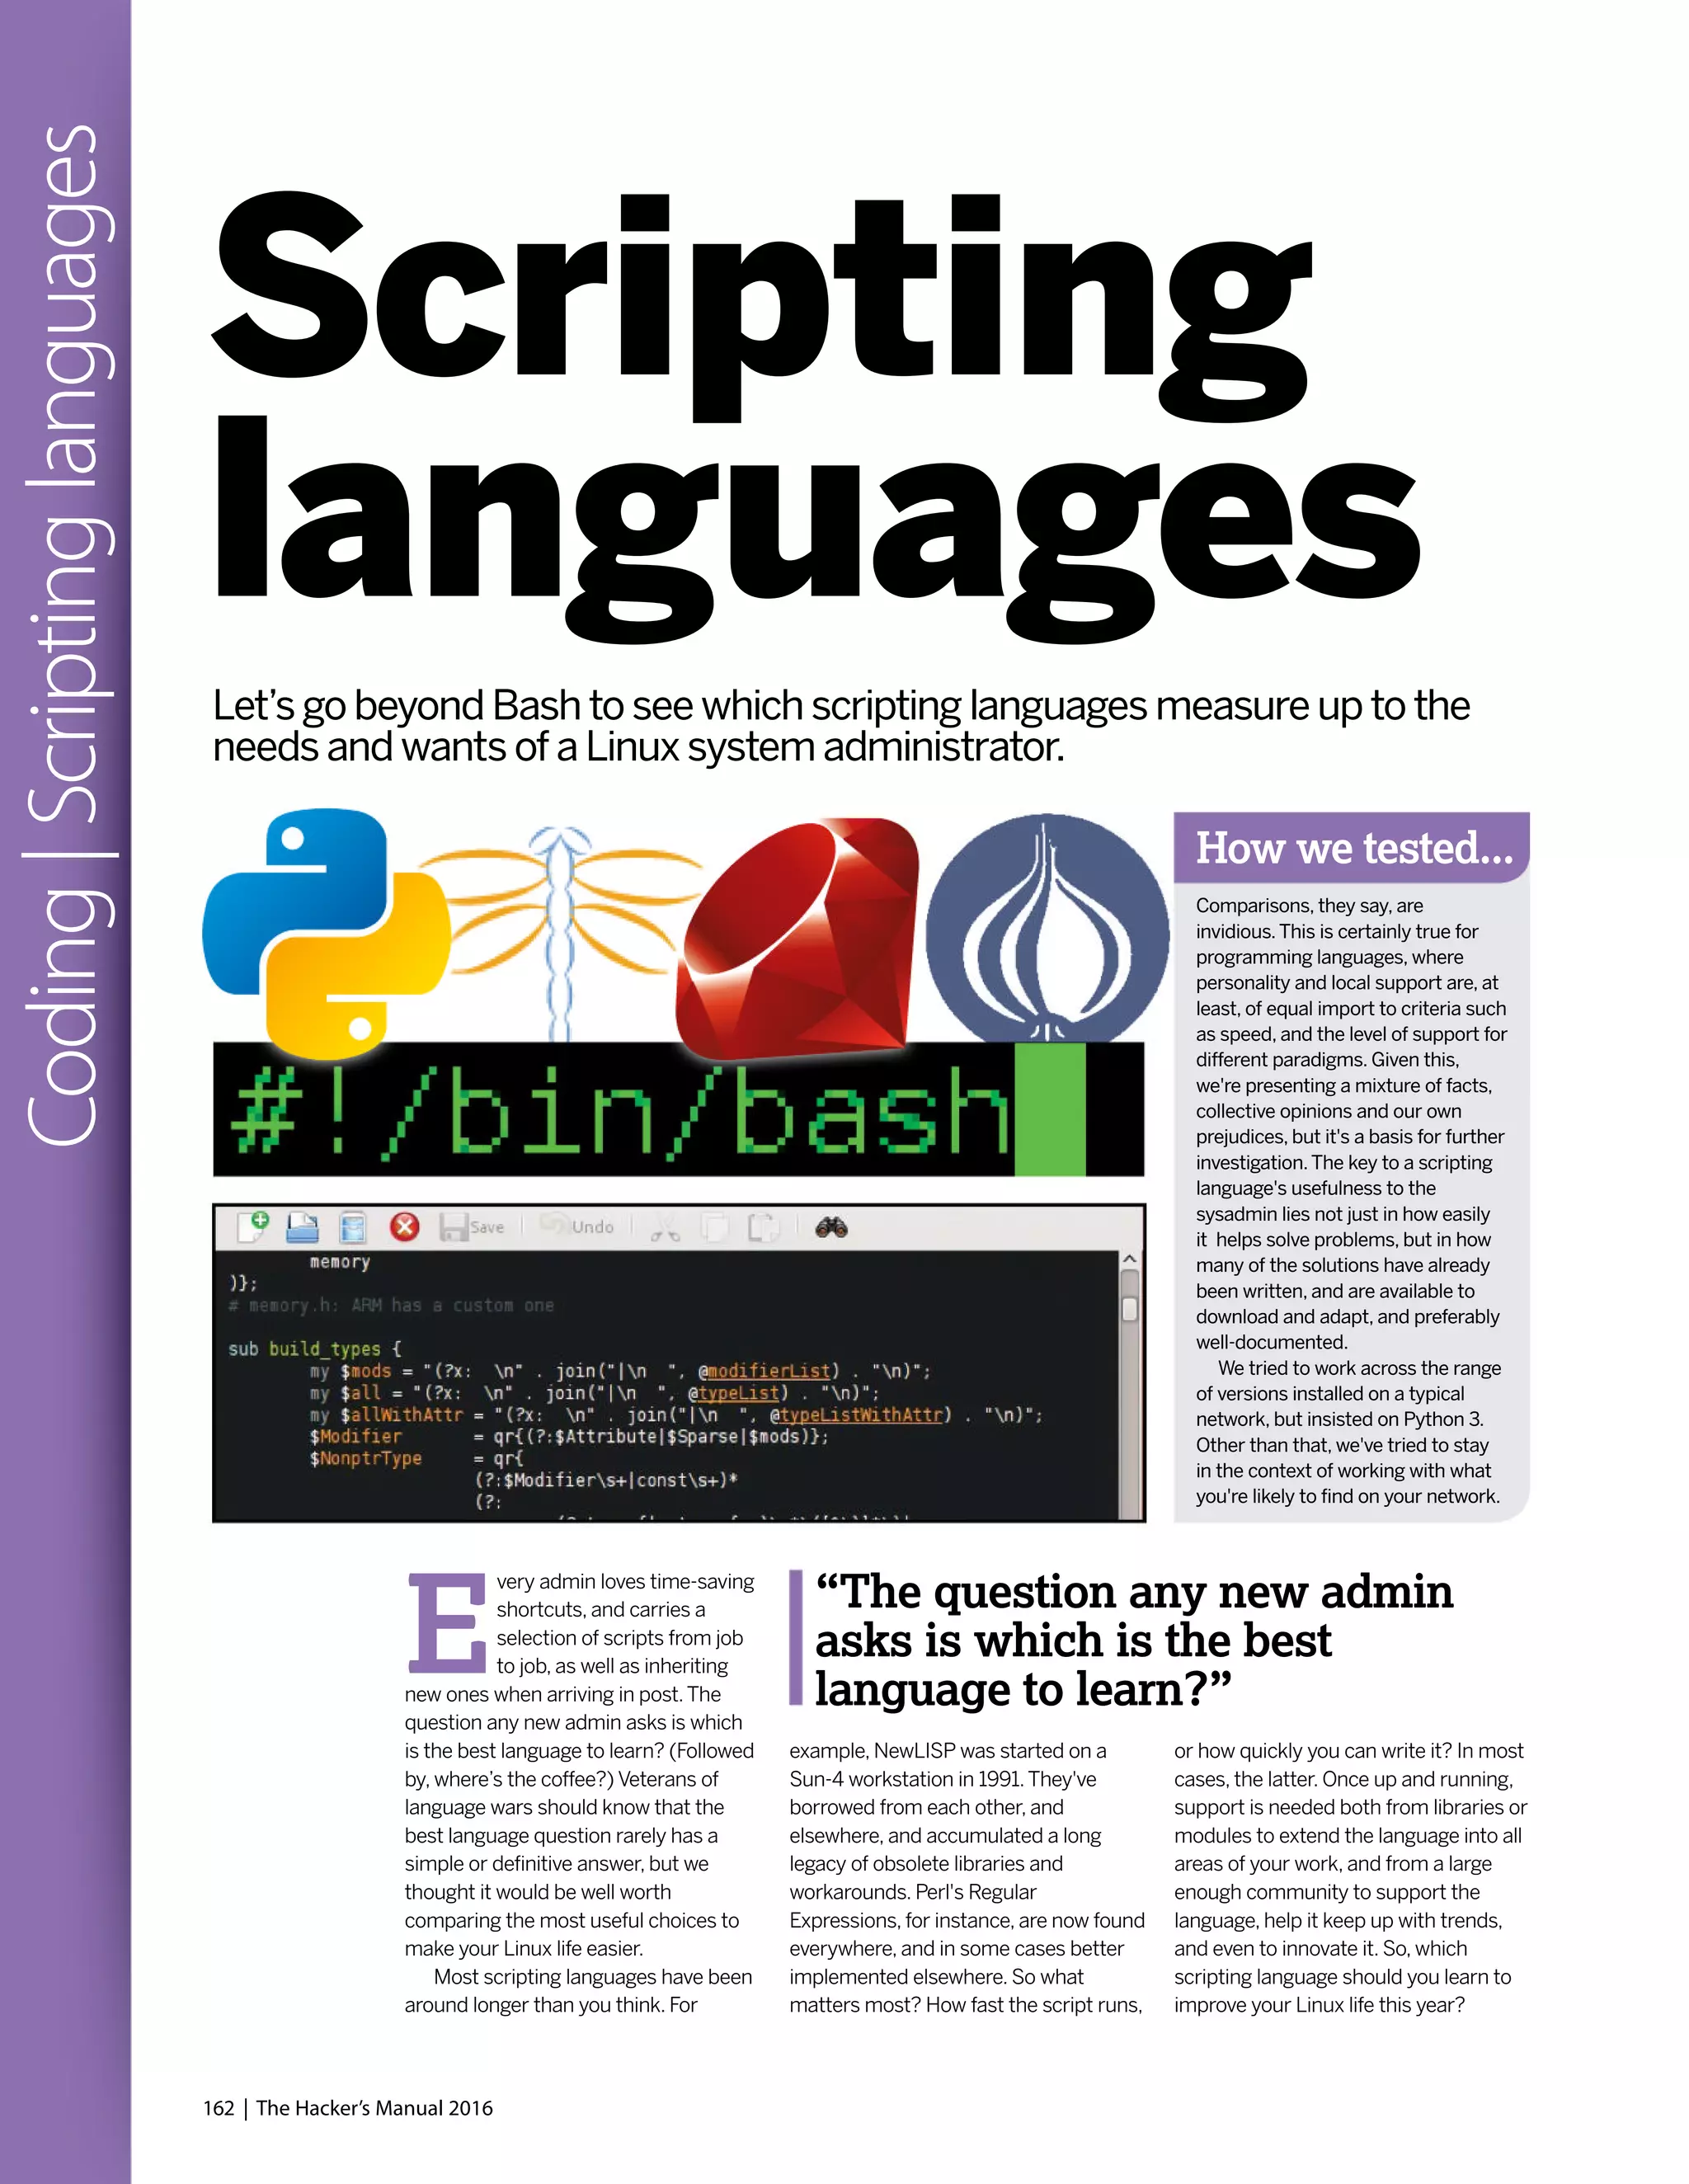
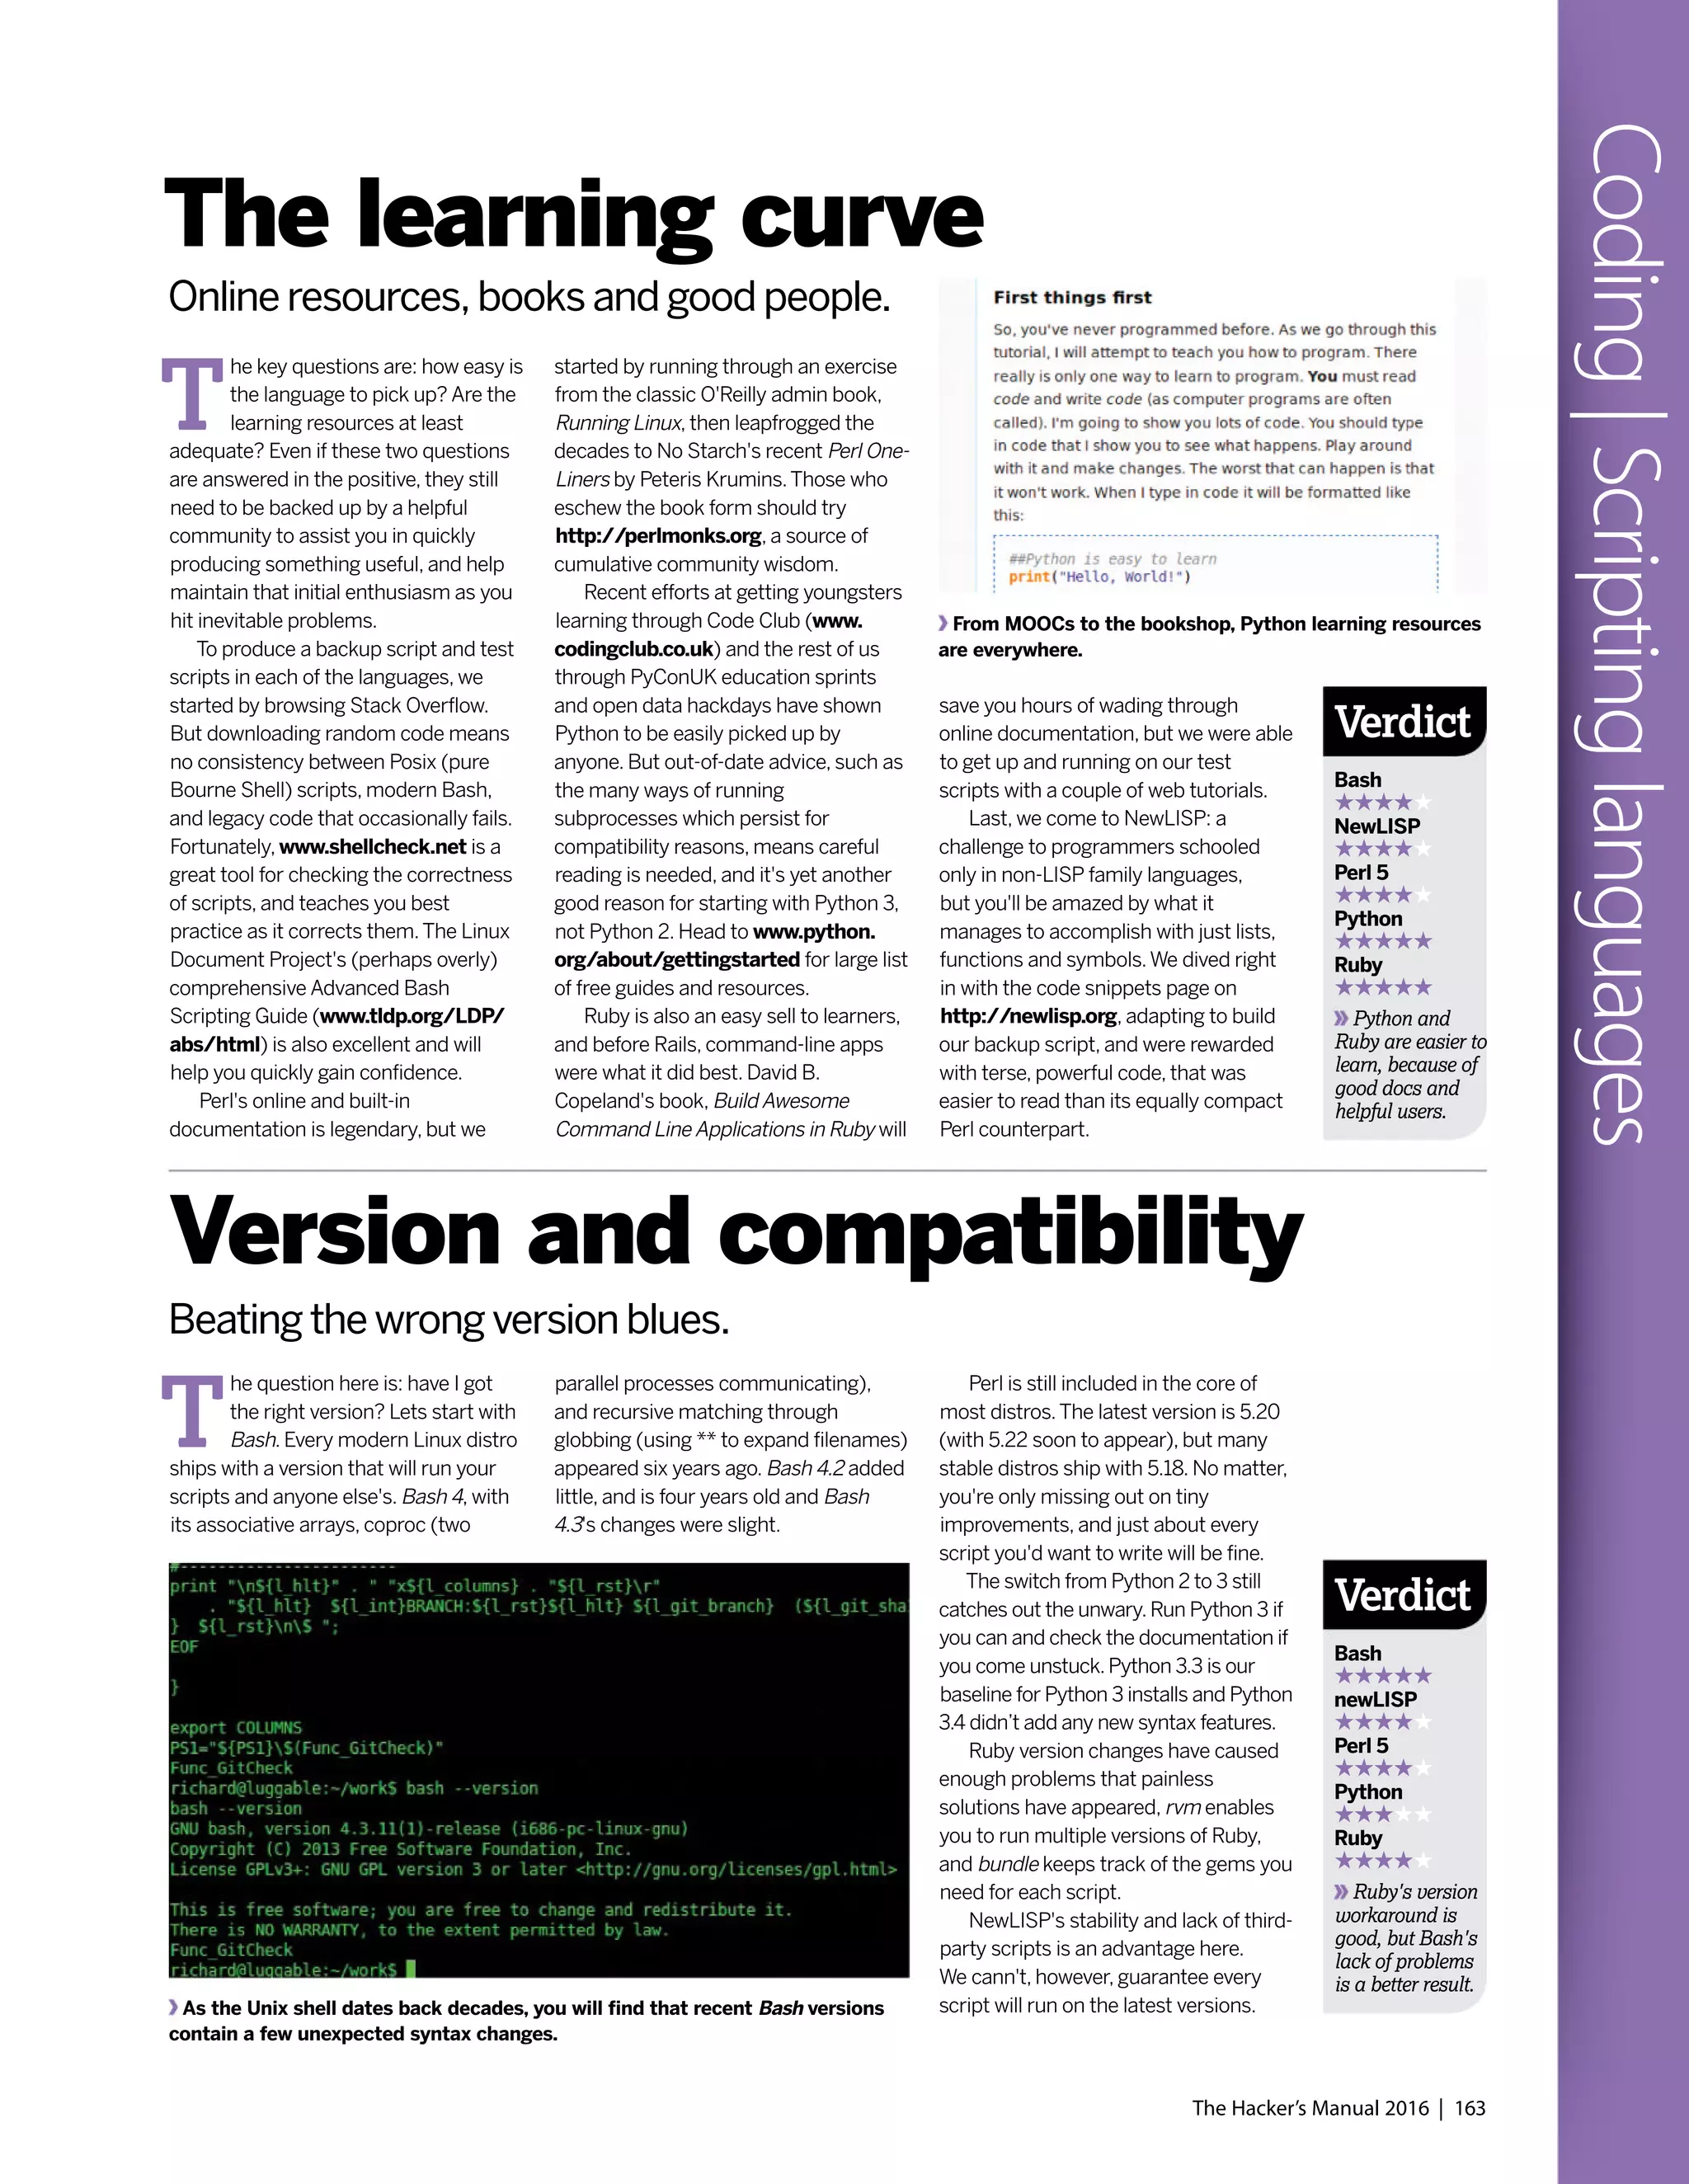
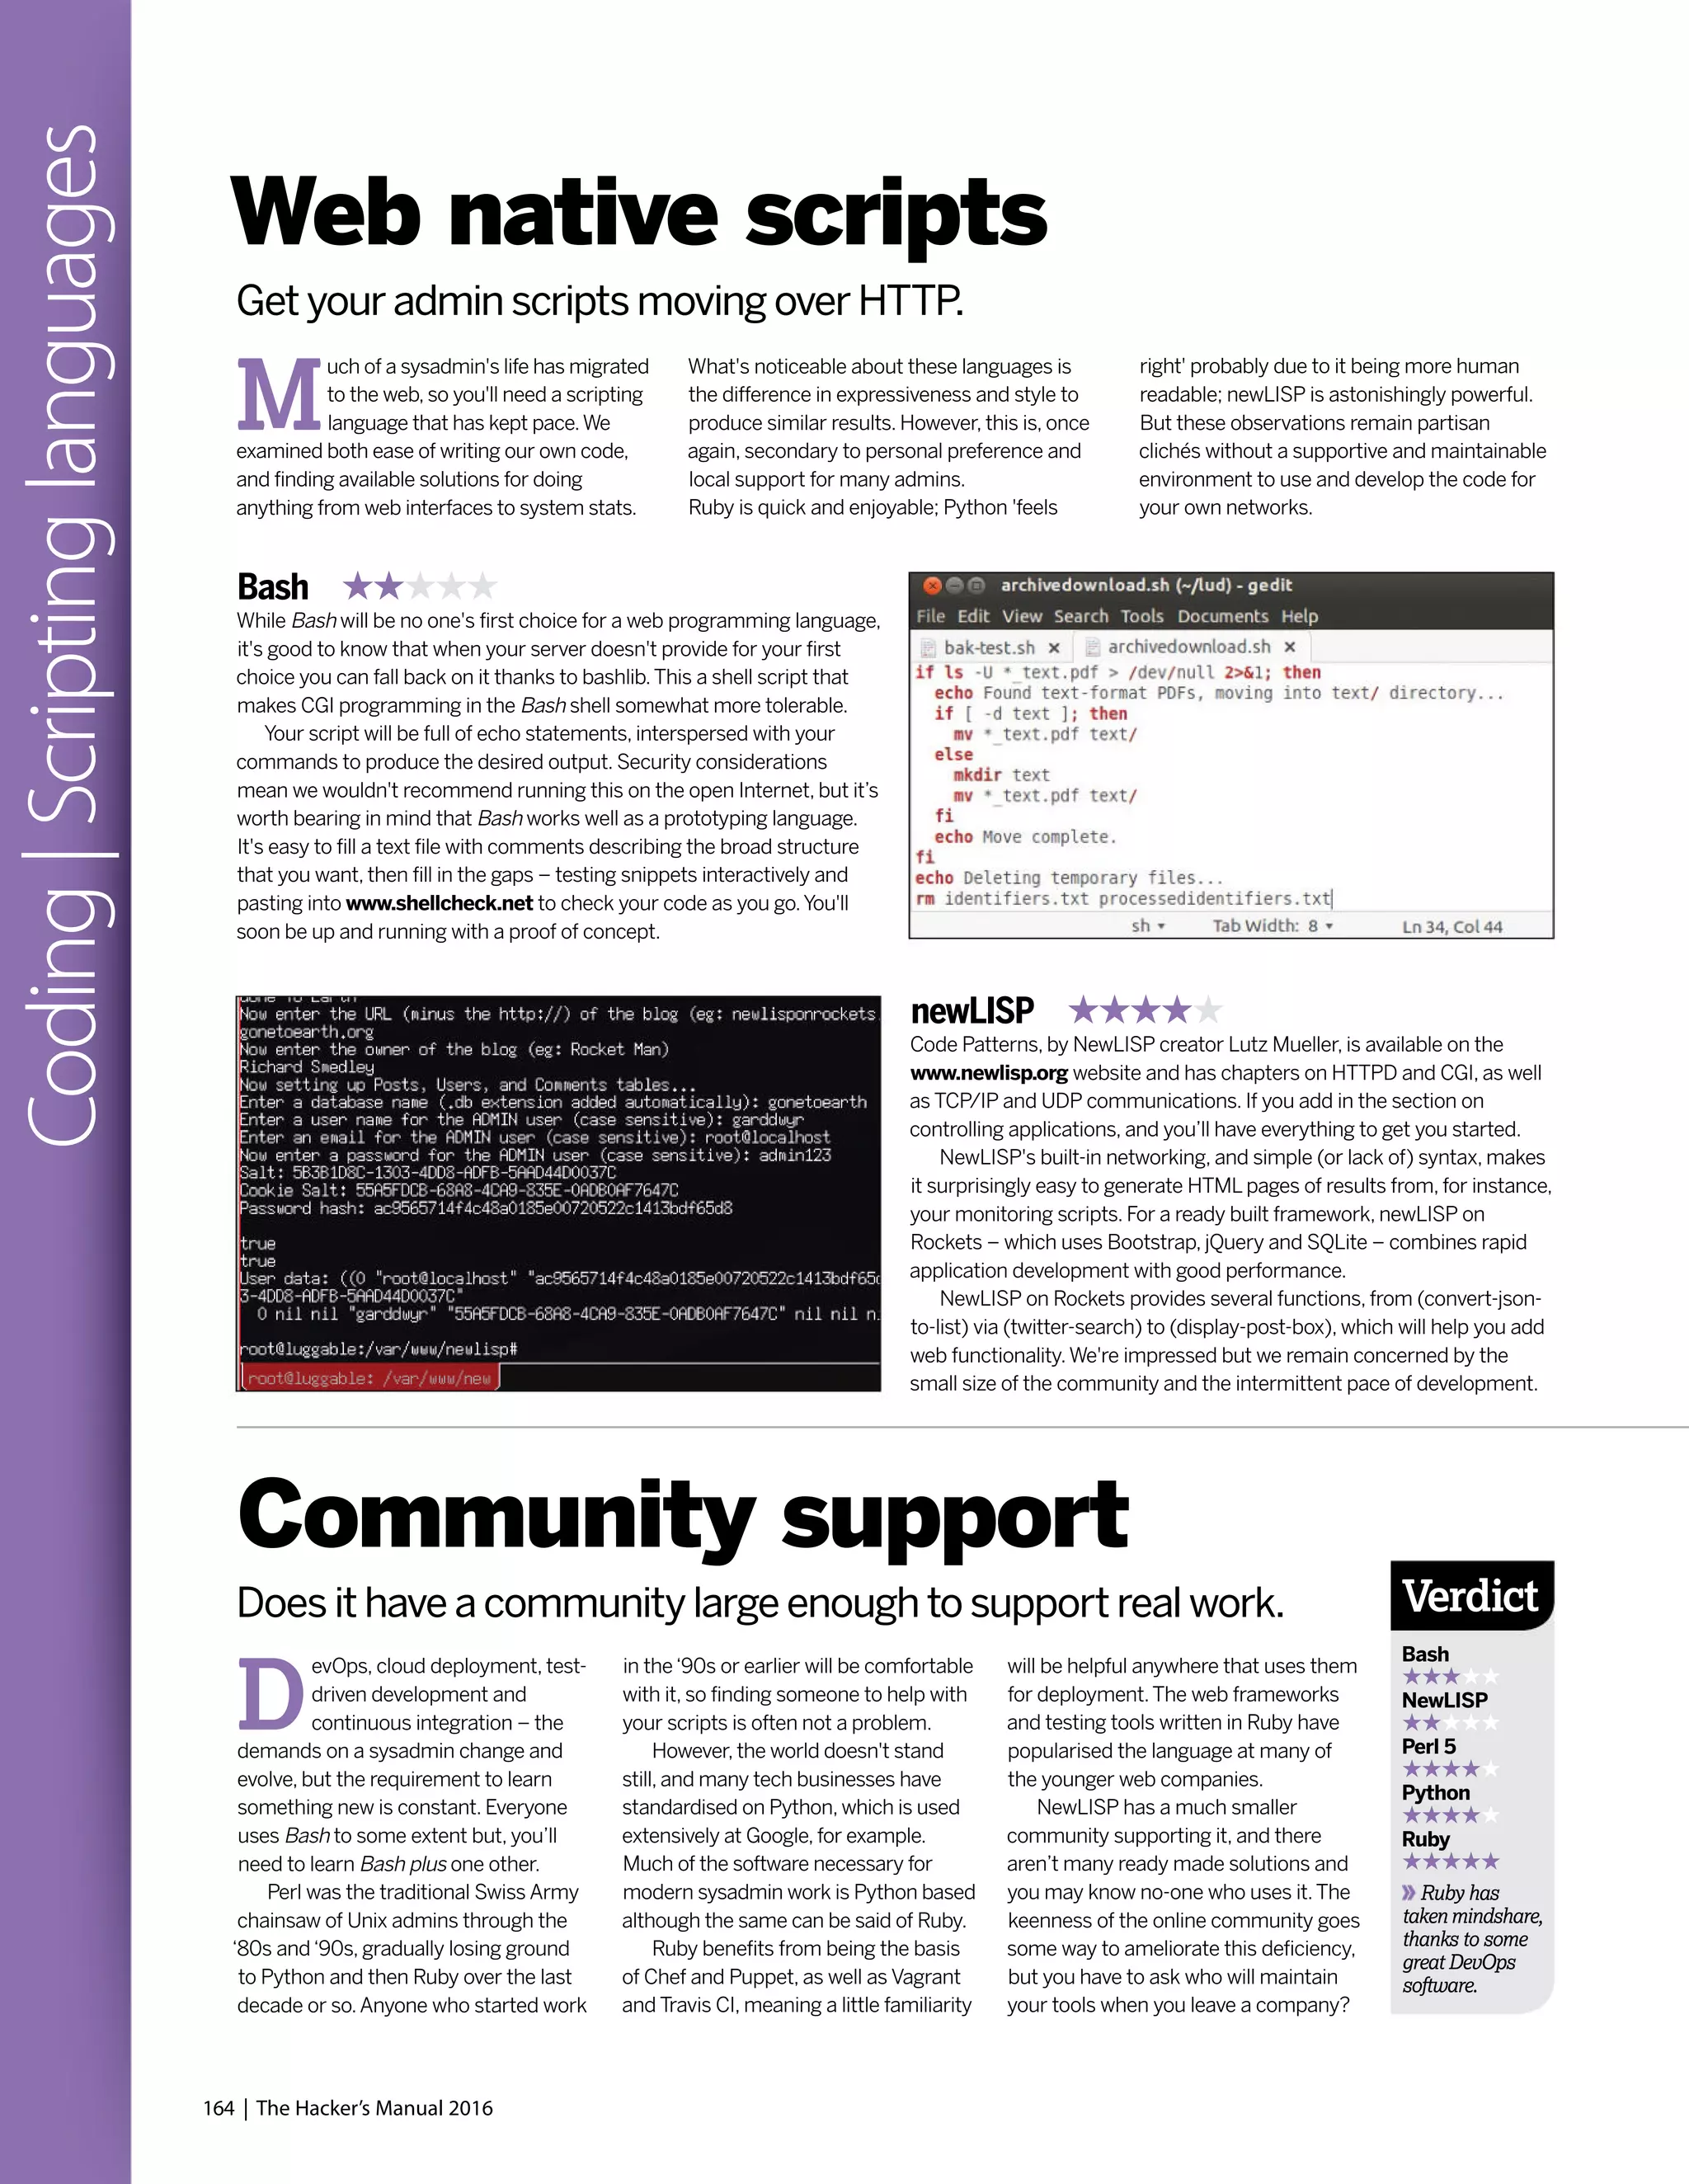
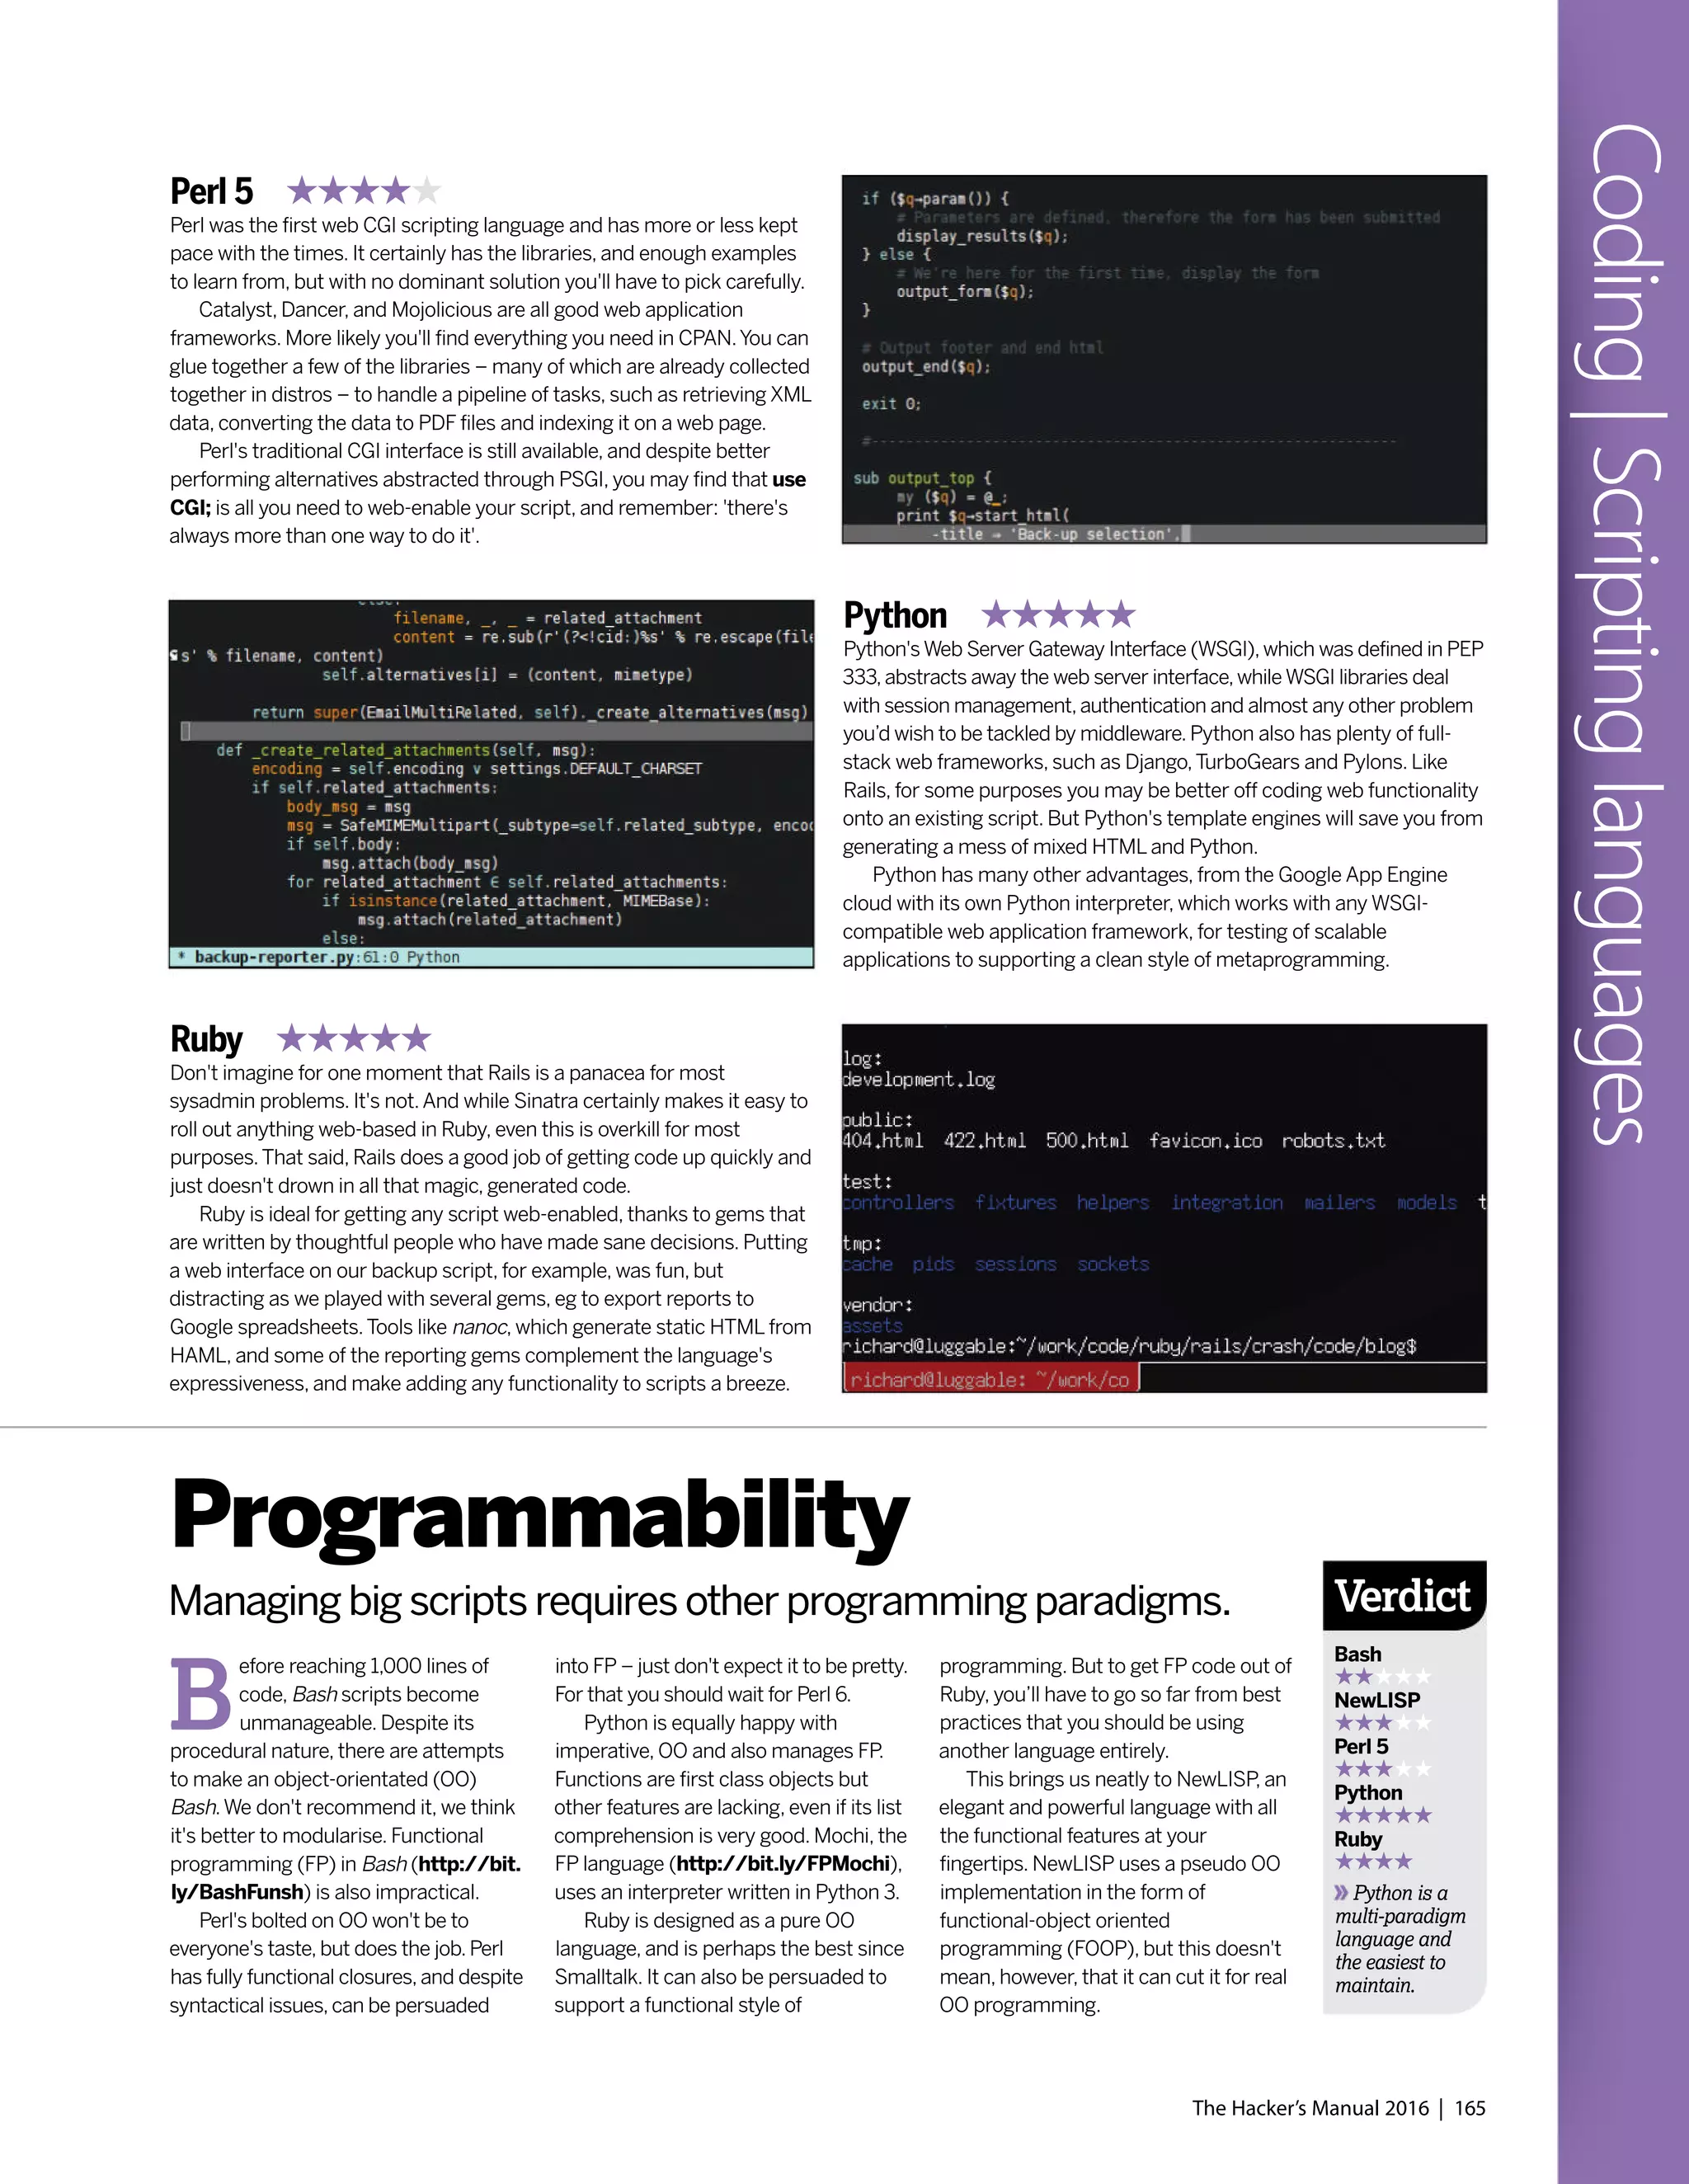
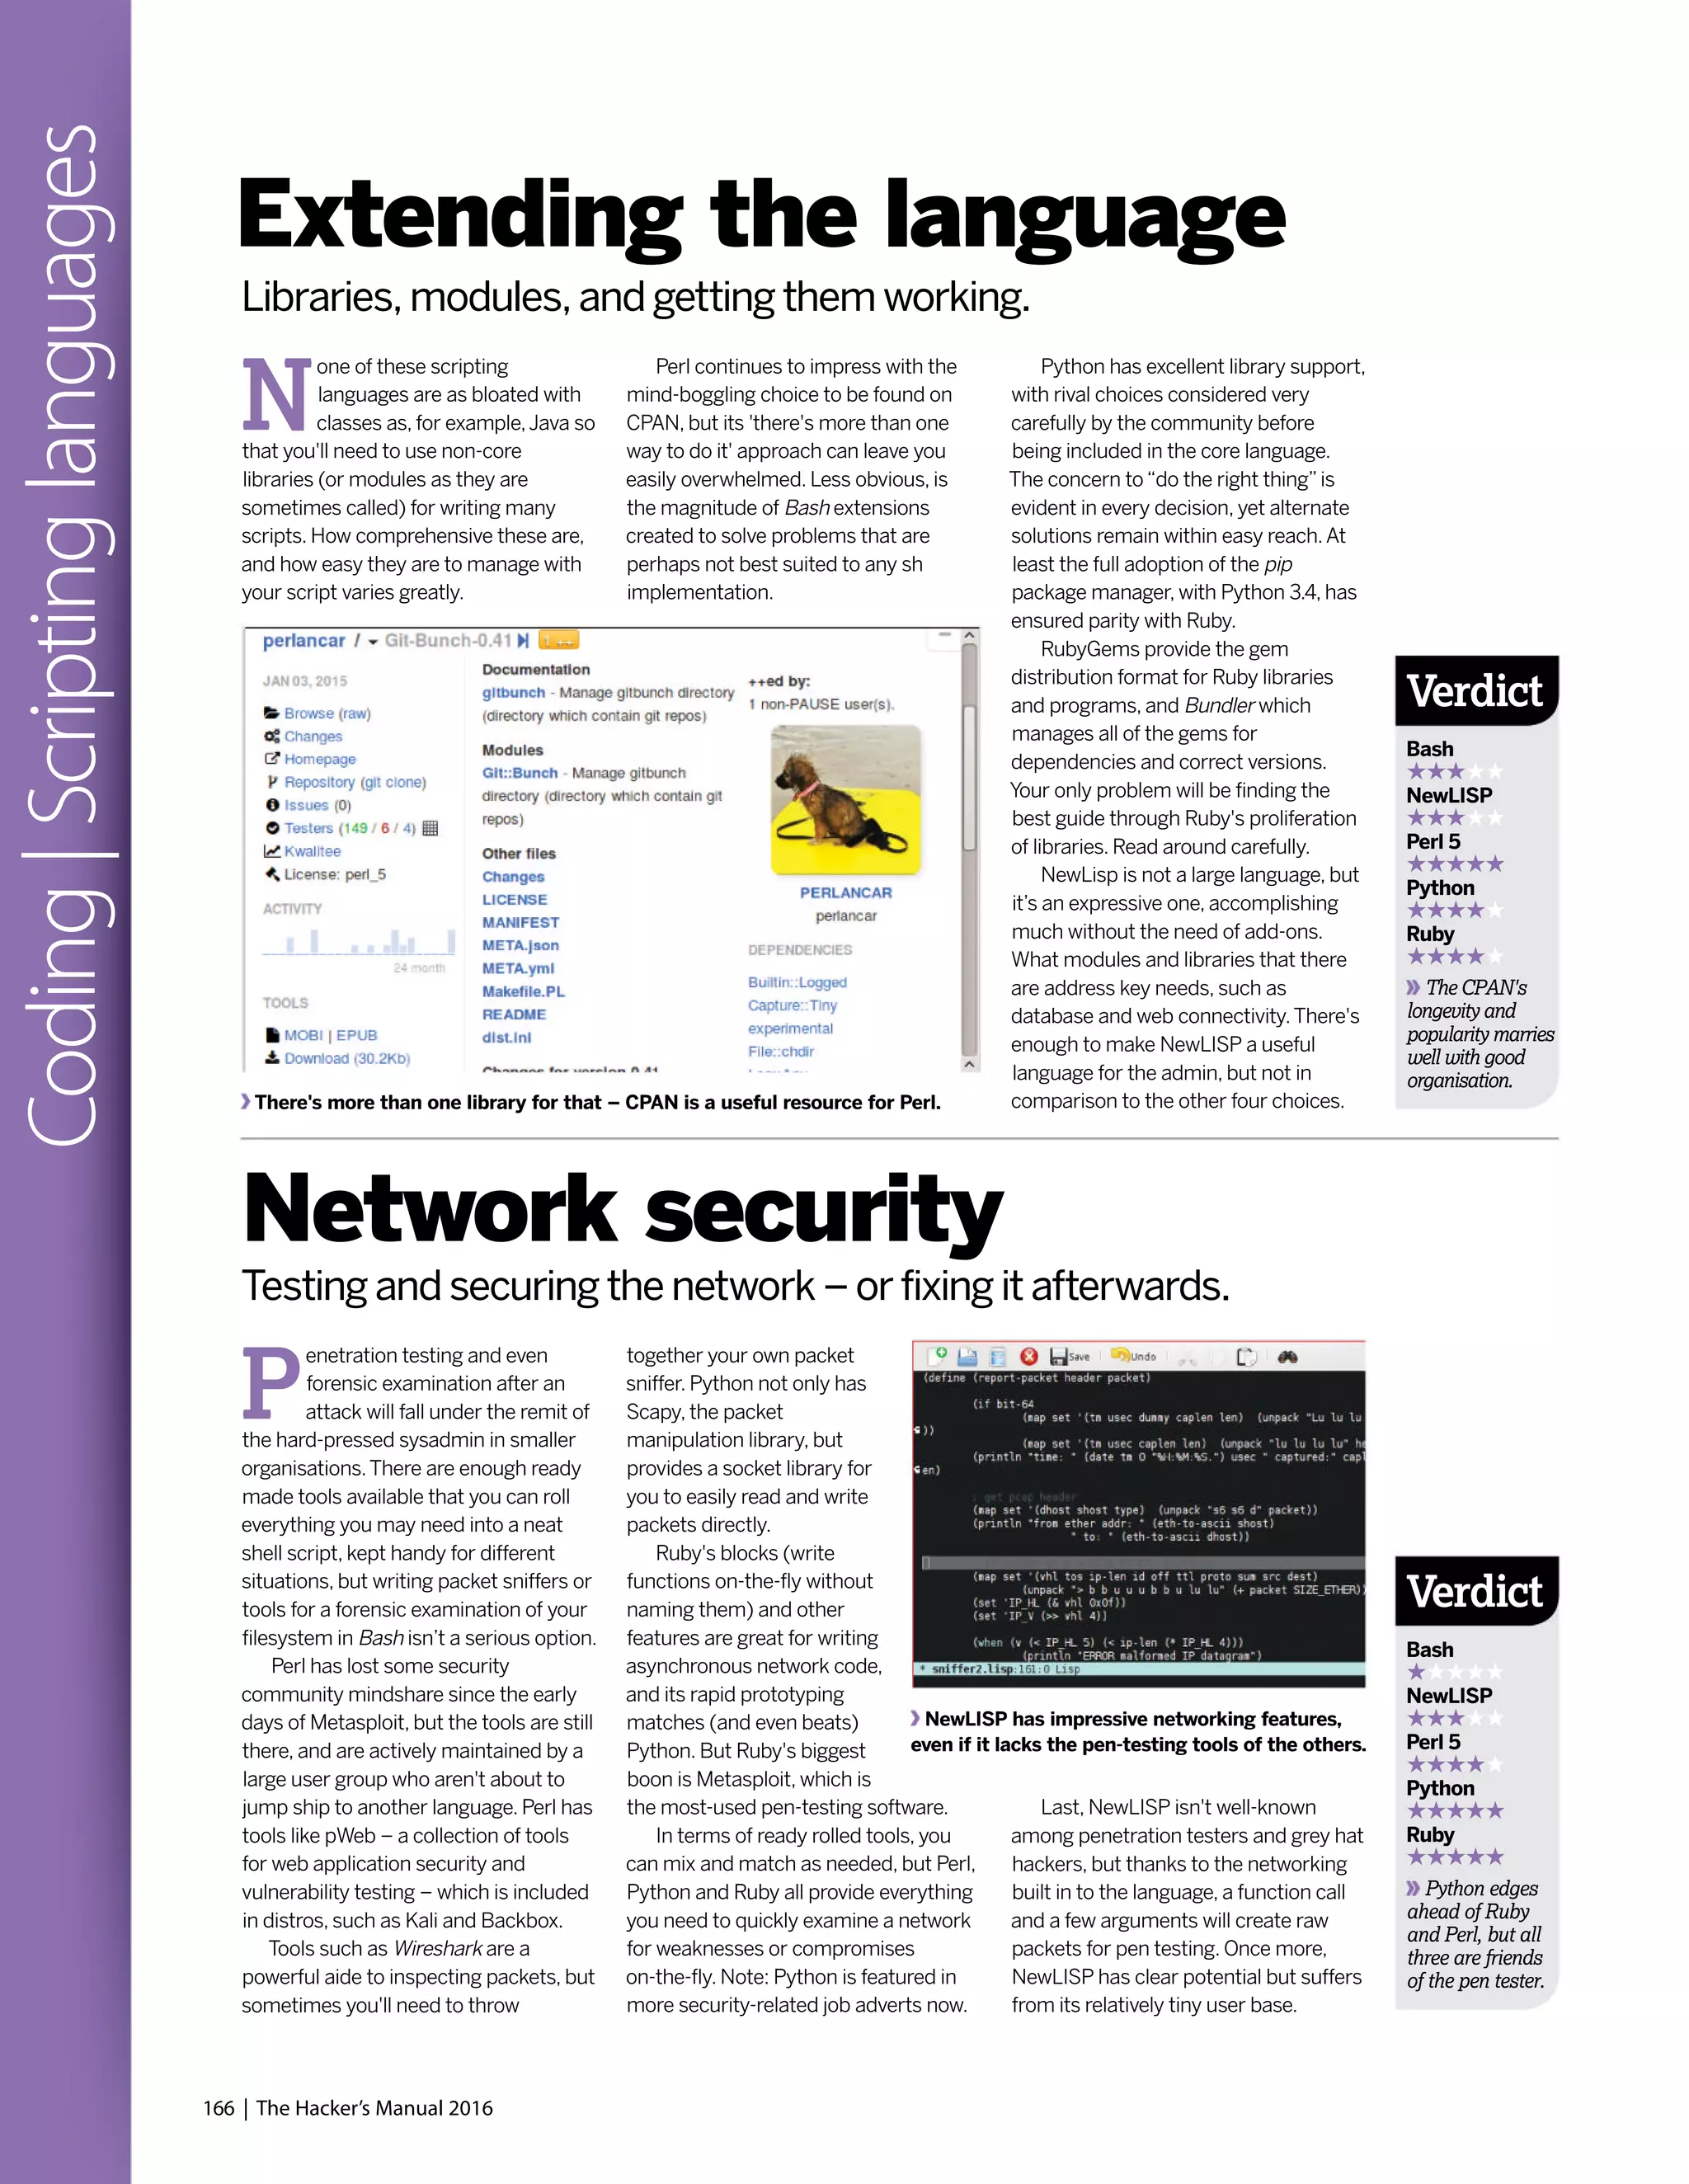

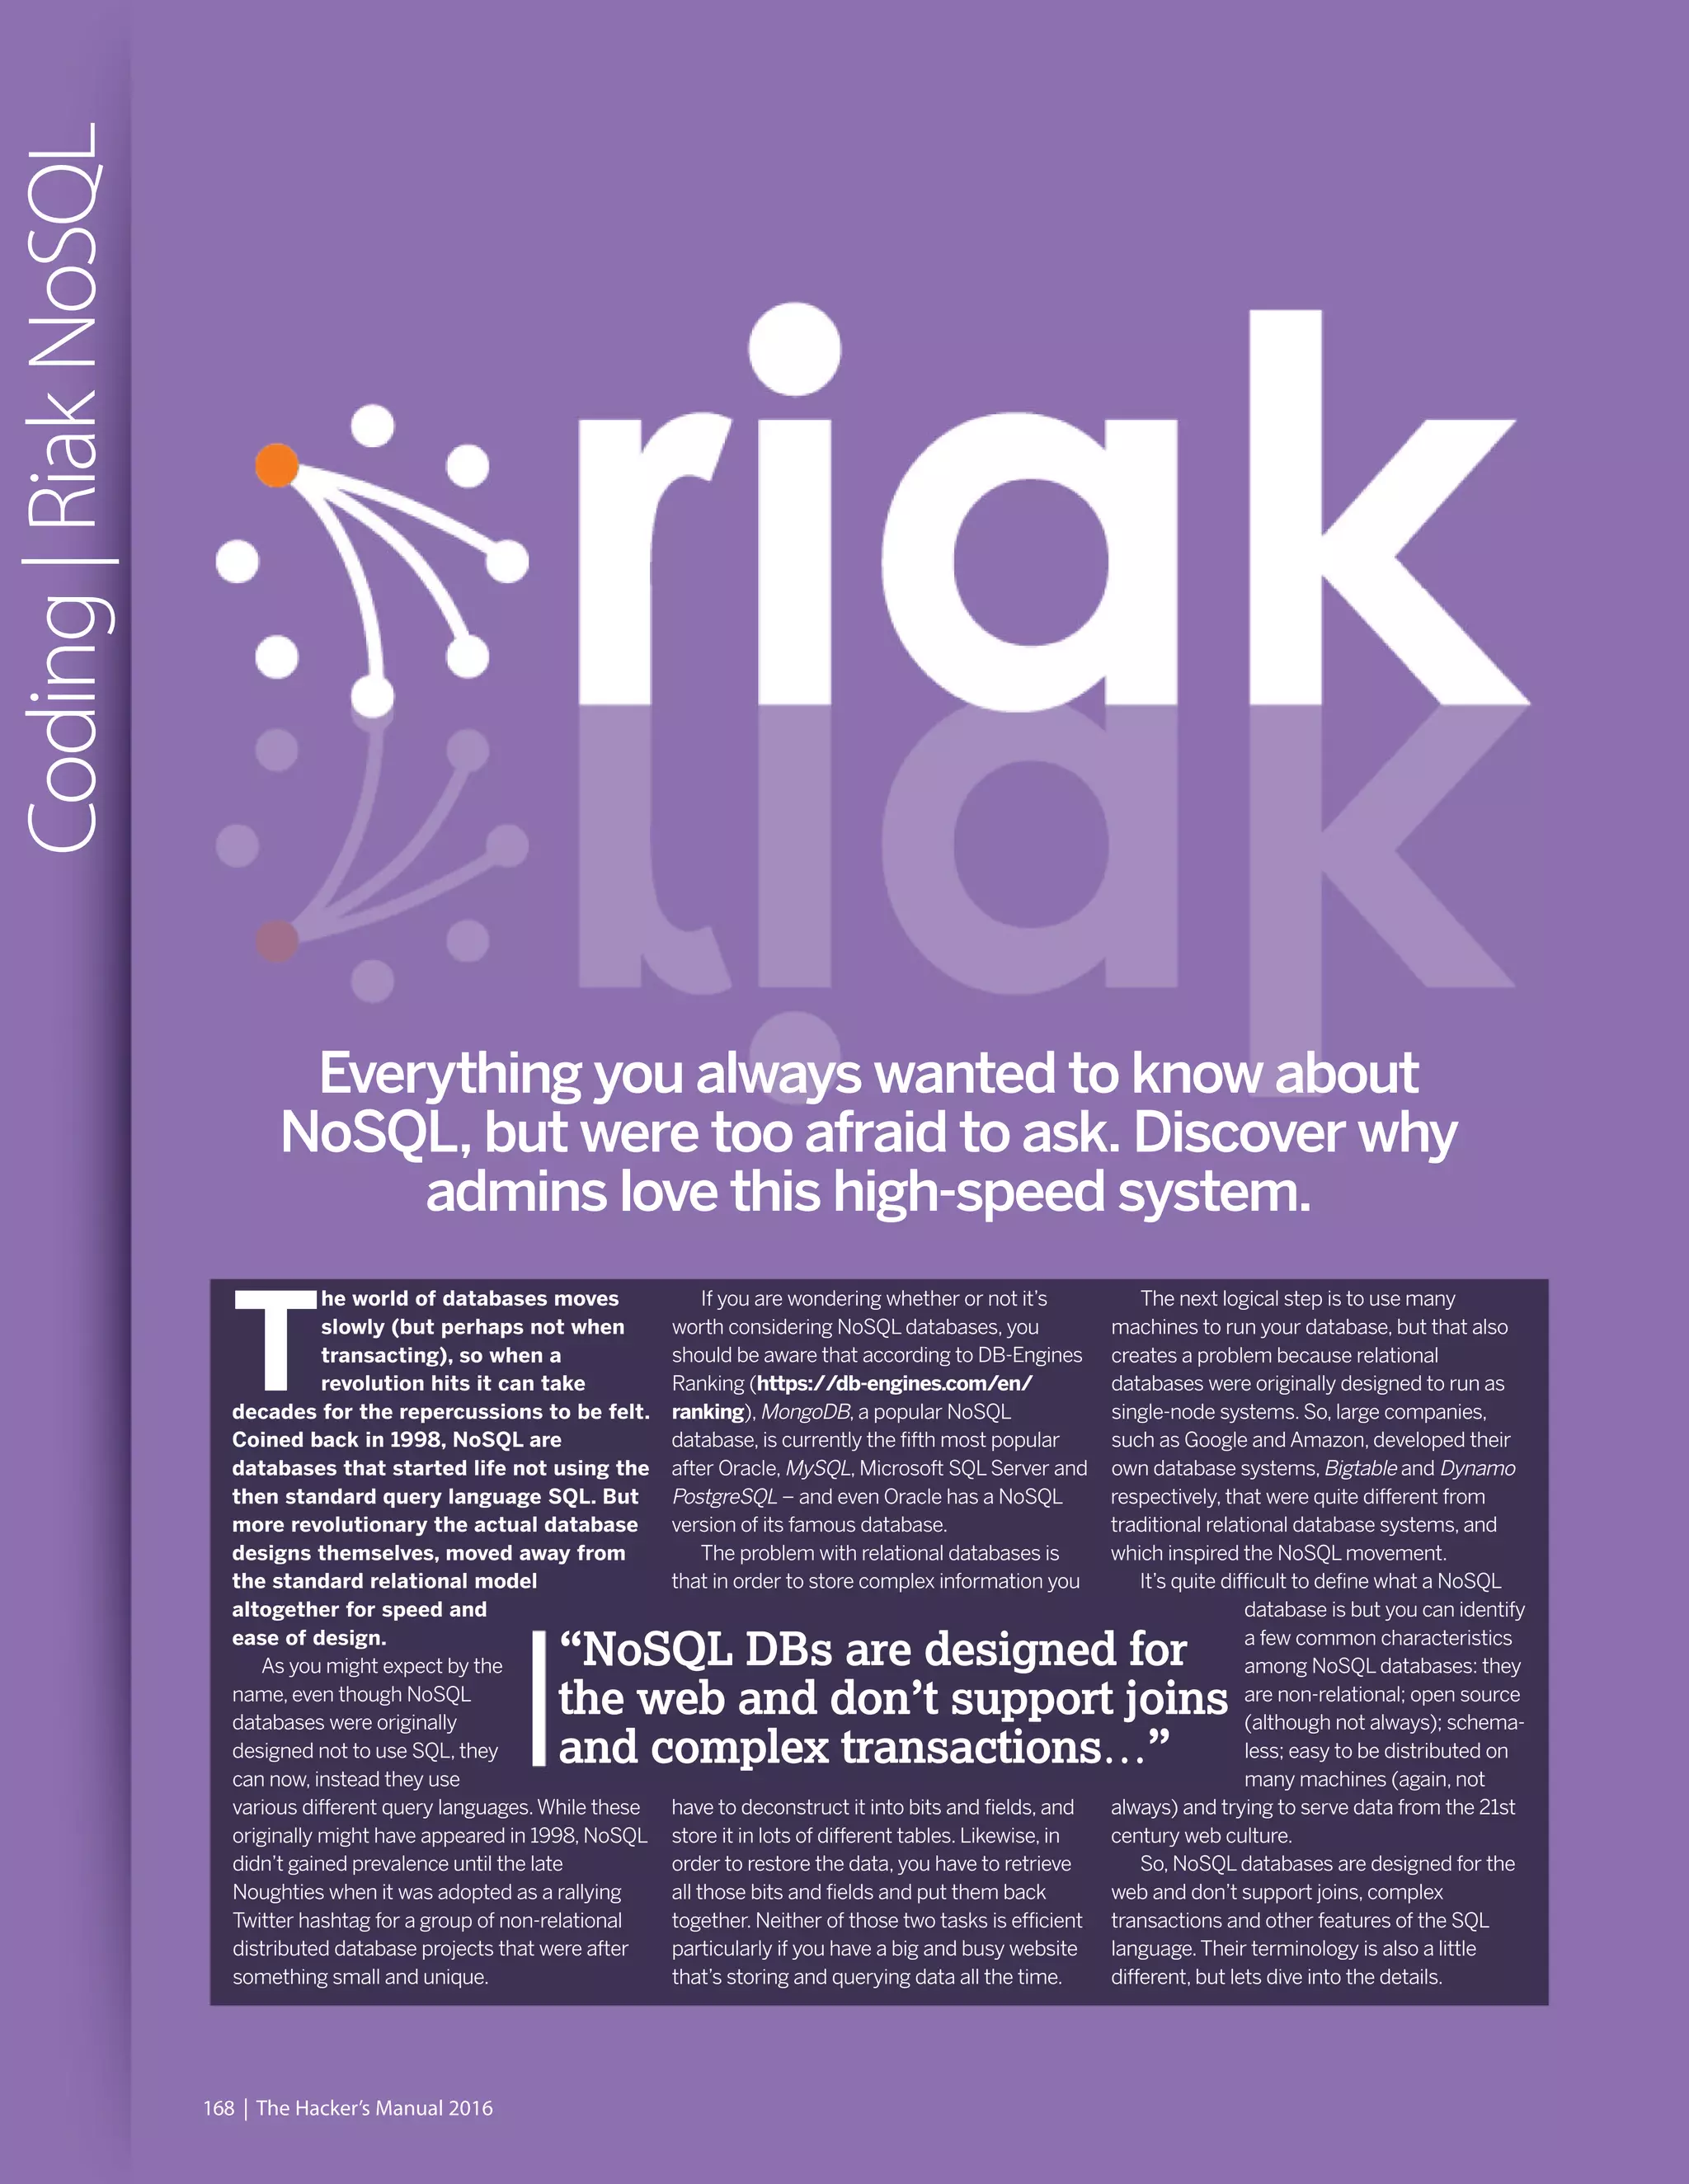

![170 | The Hacker’s Manual 2016
Coding|RiakNoSQL
reason to get the Riak source code and
compile it for yourself.
Before we continue with the rest of the
article, we need to introduce you to some
terms. First, a Riak node is analogous to a
physical server.A Riak cluster is a 160-bit
integer space which is divided into equally-
sized partitions. Partitions are, in turn, the
spaces into which a Riak cluster is divided.
Each vnode in Riak is responsible for a
partition.Vnodes coordinate requests for the
partitions they control.A Riak cluster can have
many nodes that reside on the same or
different physical machines.A ring is a 160-bit
integer space equally divided into partitions,
and a bucket is a namespace for data stored
in Riak. Internally, Riak computes a 160-bit
binary hash of each bucket/key pair and
maps this value to a position on an ordered
ring of all such values.
As you will see later in this article, any
client interface to Riak interacts with objects
in terms of the bucket and key in which a
value is stored, as well as the bucket type that
is used to set the properties of the bucket.
The default mode of operation for Riak is
to work as a cluster consisting of multiple
nodes. Riak nodes are not clones of one
another by default.
You can start three example Riak database
servers – you don’t have to start all eight Riak
servers – by executing the next commands:
$ ./dev/dev1/bin/riak start
$ ./dev/dev2/bin/riak start
$ ./dev/dev3/bin/riak start
$ ./dev/dev1/bin/riak start
Node is already running!
Each Riak server offers a web interface
(see top of p169 for an example of what you
will see after connecting to a Riak server).The
port number and the server IP address are
defined inside the riak.conf file.This is a plain
text file that you can edit.The following
command reveals the IP and the port number
that each Riak server listens to:
$ grep listener.http.internal `find ./dev -name
riak.conf`
./dev/dev2/etc/riak.conf:listener.http.internal =
127.0.0.1:10028
Riak benchmarking
Basho (http://basho.com) offers a
benchmarking tool for Riak written in Erlang.
You can get and install it with:
$ git clone git://github.com/basho/basho_
bench.git
$ cd basho_bench
$ make
You should then run ./basho_bench
myconfig.config to get the tool collecting data,
and either create a myconfig.config yourself or
modify an existing config. Existing files reside in
the examples directory.We used the
examples/basho_bench_ets.config file as a
starting point and added the {riakclient_nodes,
[‘dev1@127.0.0.1,‘dev2@127.0.0.1’]}.” line.
Basho Bench creates one Stats process and
workers based on what’s defined in the
concurrent configuration setting in myconfig.
config file.As soon as these processes are
created and initialised, Basho Bench sends a
run command to all worker processes and this
initiates the testing.The Stats process is notified
every time an operation completes. It also gets
the elapsed time of the completed operation
and stores it in a histogram.
All the results are inside the tests directory.
The latest results can be found using the
./tests/current/ soft link.To generate a graph
against the current results, run make results.
[See the bottom of p171 for a sample output.]
./dev/dev1/etc/riak.conf:listener.http.internal =
127.0.0.1:10018
./dev/dev3/etc/riak.conf:listener.http.internal =
127.0.0.1:10038
And so on… Every node in Riak has a name
associated with it.You can change the name
by changing the nodename variable of the
riak.conf file.The first server (dev1) uses port
number 10018, the second Riak server (dev2)
uses port number 10028 and the third (dev3)
uses port number 10038. Riak versions prior
to 2.0 used a configuration file called app.
config which has been replaced by riak.conf.
The easiest way of finding out if a Riak
node is up or down is via the curl command
and the web interface of the node to ping it:
$ curl http://localhost:10018/ping
OK
$ curl http://localhost:10038/ping
curl: (7) Failed to connect to localhost port
10038: Connection refused
Alternatively, you can use the following:
$ ./dev/dev1/bin/riak ping
pong
$ ./dev/dev6/bin/riak ping
Node ‘dev6@127.0.0.1’ not responding to
pings.
The advantage of the‘curl way’is that you
can run it from a remote machine – provided
that the Riak server also listens to an external
IP address – without having to login to the
A MapReduce example. It may look simplistic but MapReduce is a very powerful technique.
Attempting the same with SQL would be extremely difficult.
machine that runs the Riak node.You can stop
the dev1 Riak server by executing the ./dev/
dev1/bin/riak stop command.
Riak uses epmd – the Erlang Port Mapper
server – which plays a crucial part in the
whole Riak operation.The epmd process
starts automatically by the erl command if the
node is to be distributed and there’s no
running instance present.The epmd process
enables Riak nodes to find each other. It’s an
extremely lightweight and harmless process
that can continue to run even after all Riak
nodes have stopped.You may kill it manually
after you stop all Riak nodes, but this isn’t
compulsory.The following command lists all
names registered with the currently running
epmd process:
$ epmd -names
epmd: up and running on port 4369 with
data:
name dev3 at port 49136
name dev1 at port 55224
name dev2 at port 48829
Storing and retrieving data
You can connect to Riak dev1 server and store
a document using the web interface:
$ curl -v -X PUT http://127.0.0.1:10018/riak/
LXF/test -H “Content-Type: text/html” -d
“<html><body><h1>This is a test.</h1></
body></html>”](https://image.slidesharecdn.com/thehackersmanual2016-160522105830/75/The-hackers-manual-2016-170-2048.jpg)
![The Hacker’s Manual 2016 | 171
Coding|RiakNoSQLRiak offers a benchmarking tool called
Basho Bench. The graph is produced with R.
Data consistency
Data consistency in databases is critical.ACID
(Atomicity, Consistency, Isolation and Durability)
is a set of properties that guarantee that
database transactions perform reliably.
Atomicity means that when you do something
to change a database, the change should work
or fail as a whole. Isolation means that if other
things are taking place at the same time on the
same data, they should not be able to see half-
finished data. Durability refers to the guarantee
that once the user has been notified of the
success of a transaction, the transaction will
persist, and won’t be undone even if the
hardware or the software crashes afterwards.
Graph databases perform ACID transactions
by default, which is a good thing. On the other
hand, not every problem needs‘perfect’ACID
compliance.MongoDB is ACID-compliant at the
single document level, but it doesn’t support
multiple-document updates that can be rolled
back. Sometimes, you may be OK with losing a
transaction or having your DB in an inconsistent
state temporarily in exchange for speed.
You should carefully check the characteristics
of a NoSQL database and decide if it fits your
needs. Nevertheless, if data consistency is
absolutely critical, you can always implement it
in code if it’s not fully supported by your NoSQL
DB. Keep in mind that this might be non-trivial
especially on distributed environments.
myRecord = bucket.get(‘myData’)
# Retrieve the record!
dictRecord = myRecord.data
# Now print it to see if all this actually
worked.
print dictRecord
$ python myRiak.py
{u’Surname’: u’Tsoukalos’, u’Name’:
u’Mihalis’}
The pb_port value of 10017 is defined in
the ./dev/dev1/etc/riak.conf file using the
listener.protobuf.internal parameter.This is
the Protocol Buffers port that is used for
connecting to the Riak Cluster.
Due to the flexibility in the way that a
NoSQL database stores data, inserting,
querying and updating a NoSQL database is
more complex than a database that uses SQL.
Generating a Riak cluster
Creating and manipulating clusters in Riak is
relatively easy with the help of the riak-admin
command. If you try to add a node that’s not
already running to a cluster, you will fail with
the following error message:
$ dev/dev2/bin/riak-admin cluster join
dev1@127.0.0.1
Node is not running!
$ ./dev/dev2/bin/riak start
$ dev/dev2/bin/riak-admin cluster join
dev1@127.0.0.1
Success: staged join request for
‘dev2@127.0.0.1’ to ‘dev1@127.0.0.1’
$ dev/dev2/bin/riak-admin cluster join
dev1@127.0.0.1
Failed: This node is already a member of a
cluster
Similarly, if you try to join a node to itself,
you will get an error message:
$ dev/dev1/bin/riak-admin cluster join
dev1@127.0.0.1
Failed: This node cannot join itself in a
cluster
The following command shows the
members of an existing cluster:
$ dev/dev2/bin/riak-admin status | grep
members
ring_members : [‘dev1@127.0.0.1’,’d
ev2@127.0.0.1’]
$ dev/dev1/bin/riak-admin status | grep
members
ring_members : [‘dev1@127.0.0.1’,’d
ev2@127.0.0.1’]
$ dev/dev3/bin/riak-admin status | grep
members
Node is not running!
Another useful command that shows the
status of the nodes is the following:
$ ./dev/dev1/bin/riak-admin member-status
The joining status is a temporary status
and will become valid when all changes that
are waiting in a queue will be applied and
committed. If you want to force changes,
you should execute the riak-admin cluster
commit command.
If you run the riak-admin member-status
command again you will see the new status of
the dev3 node, and the riak-admin cluster
plan command displays the changes that are
about to be applied.
For a node to actually leave the cluster (see
bottom of p169 to see what an interaction with
a cluster of five nodes looks like), you must
first review the changes using the riak-admin
cluster plan command and then commit
them with riak-admin cluster commit.
So far, you won’t have seen any security
when interacting with a Riak database.
Nevertheless, Riak supports users and
passwords.You can find a lot more
information on how Riak deals with
authentication and authorisation at
http://bit.ly/RiakDocsAuthz.
What is actually stored in the /riak/LXF
test location is what follows the -d option.
When you successfully insert a new value,
Riak will return a 204 HTTP code.As you
already know, Riak is a key-value store,
therefore in order to retrieve a value you need
to provide a key to Riak.You can connect to
Riak dev1 server and ask the previously stored
document by going to the http://127.0.0.1:
10018/riak/LXF/test URL. Every URL follows
the http://SERVER:PORT/riak/BUCKET/
KEY pattern.The following command returns
the list of available buckets:
$ curl -i ‘http://127.0.0.1:10018/
riak?buckets=true’
HTTP/1.1 200 OK
Vary: Accept-Encoding
Server: MochiWeb/1.1 WebMachine/1.10.5
(jokes are better explained)
Date: Fri, 19 Dec 2014 21:13:37 GMT
Content-Type: application/json
Content-Length: 33
{“buckets”:[“LXF”,”linuxformat”]}
The following command returns the list of
keys in a bucket:
$ curl ‘http://127.0.0.1:10018/buckets/LXF/
keys?keys=true’
{“keys”:[“test2”,”test”,”test3”]}
Most of the times, you are going to use a
script written in a programming language to
access a Riak database.The following is a
Python script that connects to a Riak
database, stores and retrieves a document:
import riak
# Connect to the cluster
client = riak.RiakClient(pb_port=10017,
protocol=’pbc’)
# The name of the bucket
bucket = client.bucket(‘python’)
# “myData” is the name of the Key that will
be used
aRecord = bucket.new(‘myData’, data={
‘Name’: “Mihalis”,
‘Surname’: “Tsoukalos”
})
# Save the record
aRecord.store()
# Define the key for the record to retrieve](https://image.slidesharecdn.com/thehackersmanual2016-160522105830/75/The-hackers-manual-2016-171-2048.jpg)

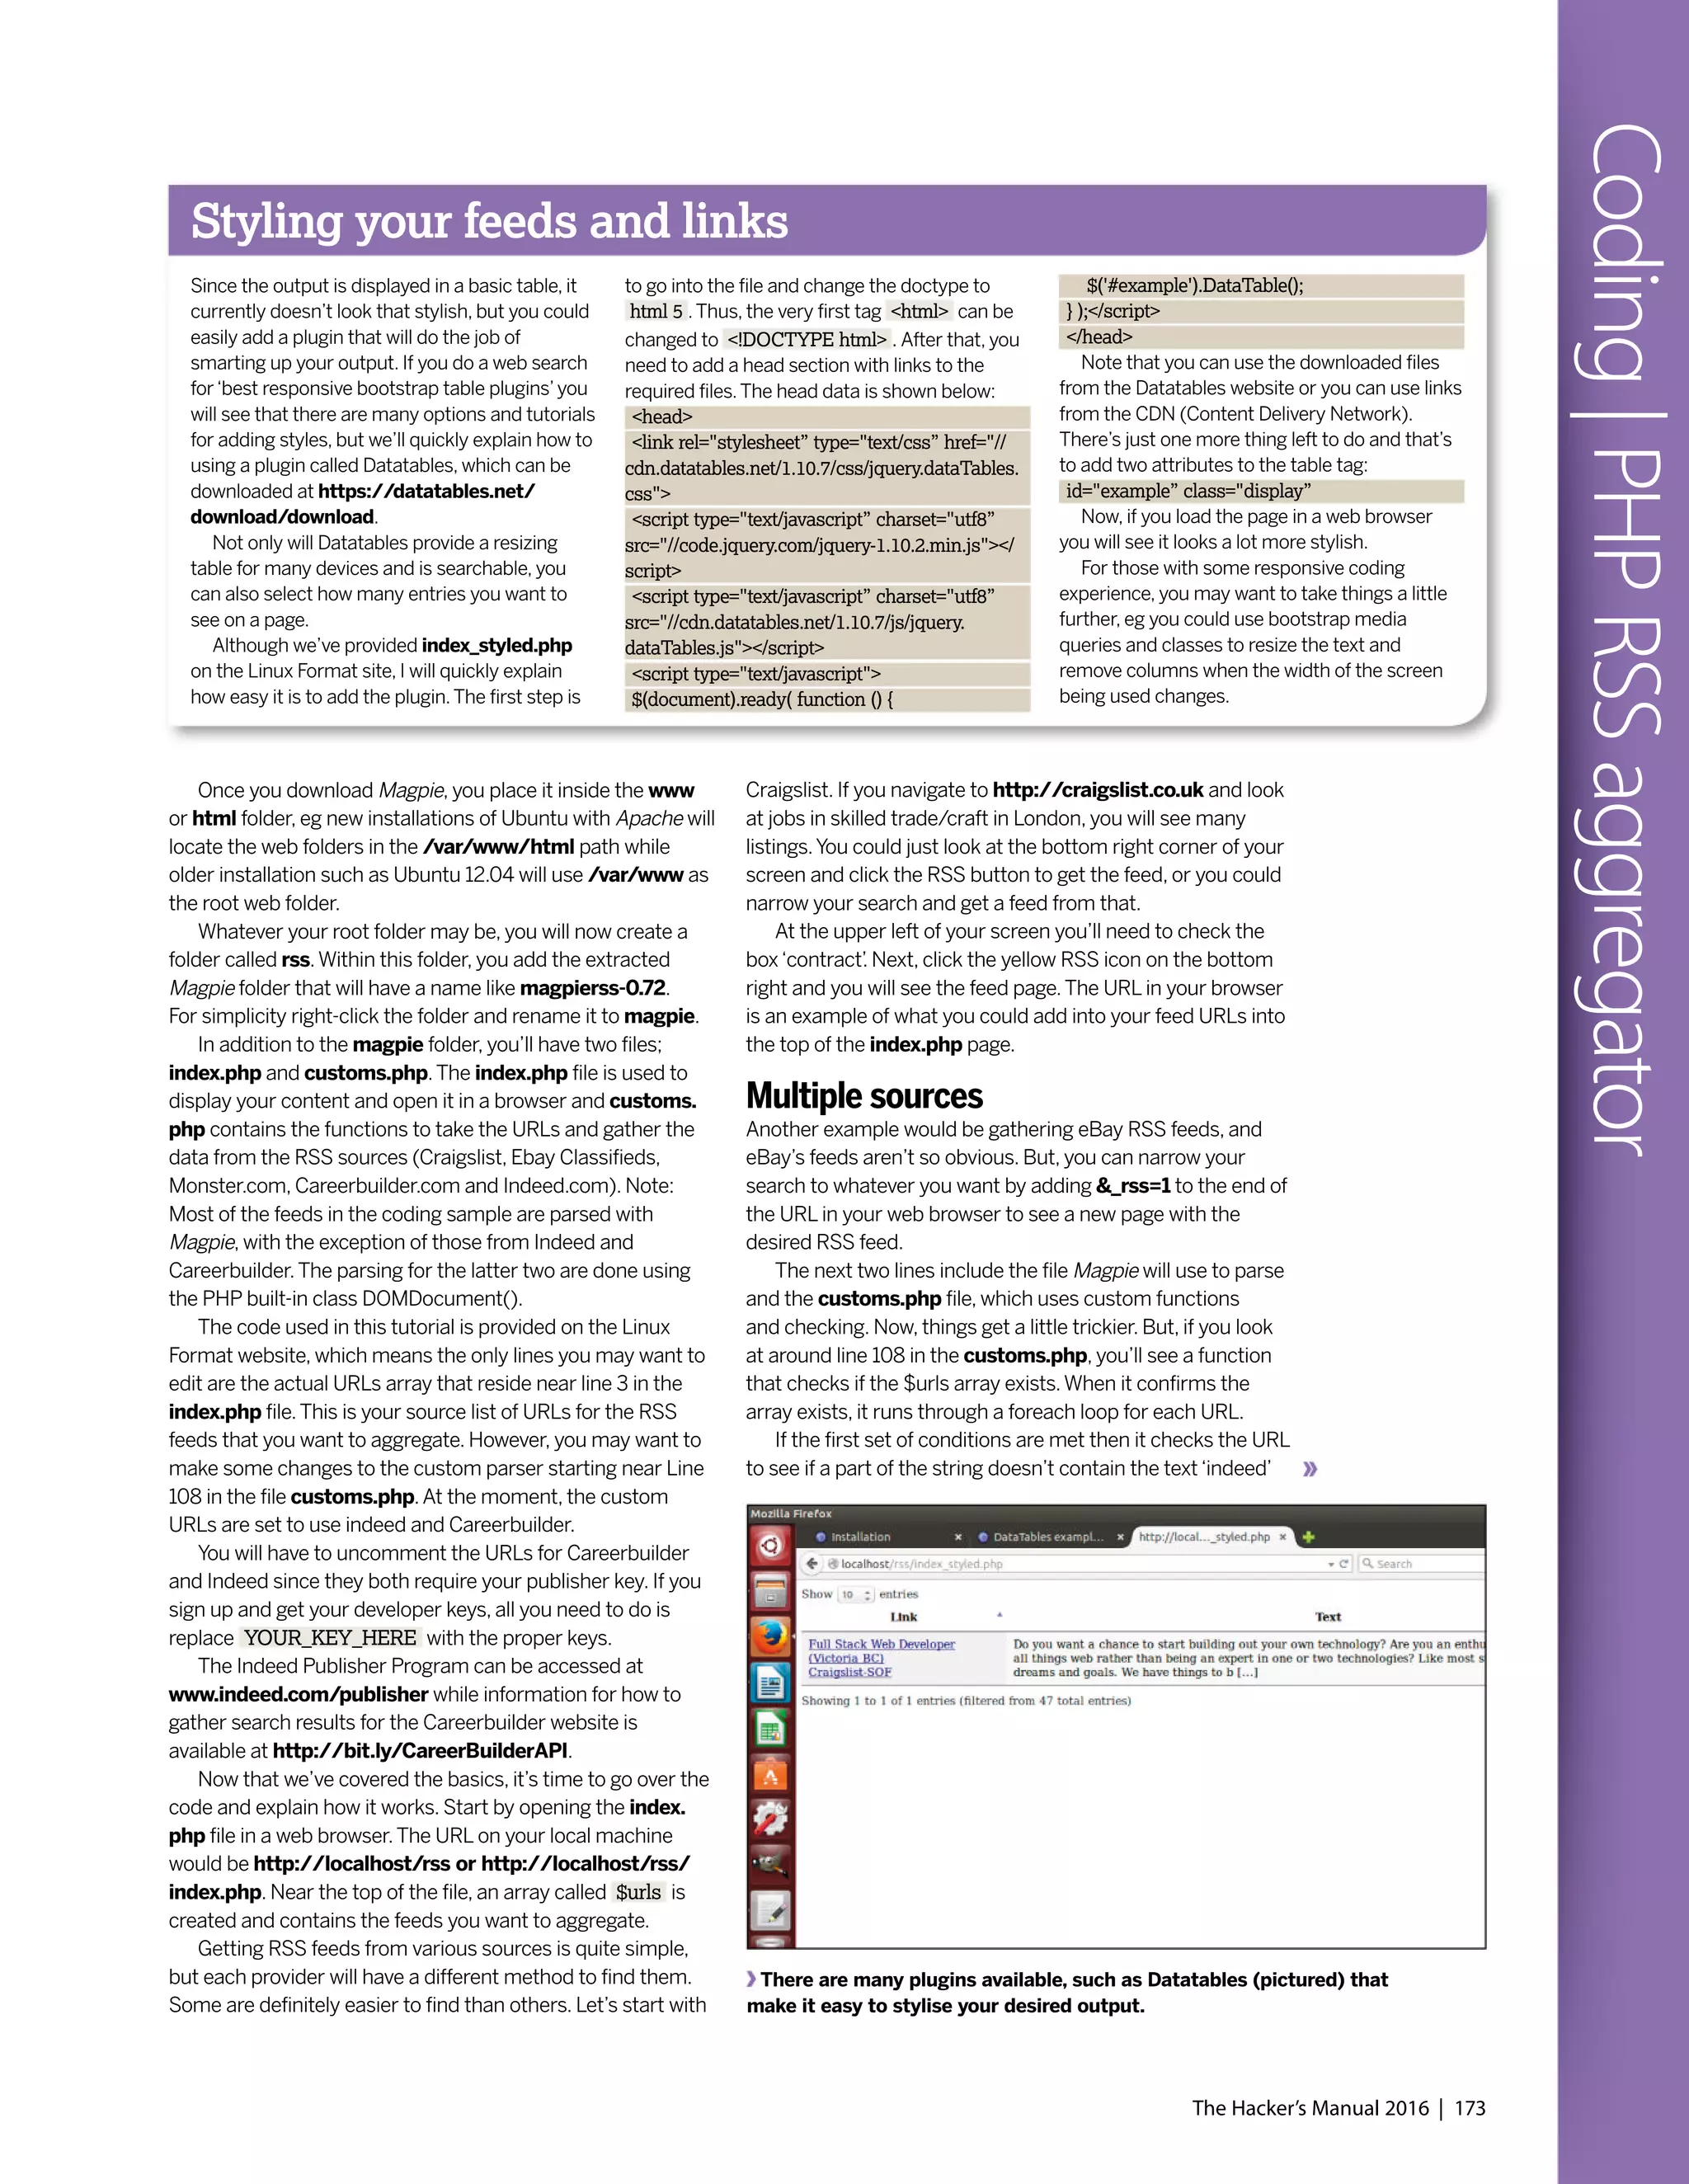
![174 | The Hacker’s Manual 2016
Coding|PHPRSSaggregator
Magpie RSS can be downloaded from Sourceforge.
(Don’t worry, it’s just a TAR and not an installer.)
or‘careerbuilder’.The PHP built-in function strpos() is used to
determine if the word is positioned in the URL. If the URL
doesn’t contain indeed or careerbuilder, the custom_url($url)
function with the URL will be fired.This function is near the
top of customs.php.
After the URL is passed into the custom_url() function, it
will then get tossed into the fetch_rss() function, which is a
Magpie function located in the magpie/rss_fetch.inc file.
In short, Magpie grabs the URL and returns $rss_items.
At this point, the elements in the array which contain the title,
description, link are separated into individual variables with
names like $title, $description and $date.
Note that Craigslist uses $item['dc']['date'] for the date
while other sources tend to use $item['pubDate'].This
sample code makes it easy to check out a feed, but see the
tag and add a condition, if necessary.
Once the variables from the feed have been set, there are
conditions that create an origin variable called $origin, which
are based on the text from the URL. By doing this, you can
see the source in the browser when you run the script.
Finally, at the end of this function, the $tot_array grows as
each URL runs through the function.The $tot_array contains
all the variables, such as the date and title they were created
previously.The array contains strings that contain each piece
of data that is separated by commas.
Functions and conditions
Now looking back a little, do you remember that the custom_
url() function only runs if the URL isn’t from Indeed.com or
Careerbuilder? What about if it is from either Indeed.com or
Careerbuilder? Let’s answer that now. Since both Indeed.com
and Careerbuilder have different XML tags, they each will go
through a set of parsing specific to them. In fact, it’s good to
remember this because you can apply the same techniques
to other XML files that aren’t in this coding example – just
follow the pattern and make the required adjustments.
The code is set to check if the URL is from Indeed.com
first. If it isn’t, the check will be performed for Careerbuilder.
Now, let’s assume it’s your custom API from Indeed.com that
you can get free when you sign up.
First, a new DOMDocument is created that’s encoded
using utf-8.After that, the $dom->load($url) method is called
and the URL is loaded.At this point, you will have a list that
comes out.With an Indeed XML file, each result from it is
listed as‘result’while each listing from Careerbuilder would
be‘JobSearchResult’.
For the rest of this example, only the explanation of
Indeed.com and its tags will be covered.To show what is
being interpreted, you can simply take your API URL from
Indeed.com and load it in a browser. It will be an XML file and
have all the tags and data for each listing.
Moving on, a foreach loop is used to parse each result.
As you can see from the code on the Linux Format website,
the getElementsByTagname() method is used and some
other coding to get the desired values; just like Magpie did
with the other RSS feeds.
You will note that there will be some coding and functions
such as htmlspecialchars_decode() that is used when
creating the value variables such as $jobtitle_value. Basically,
decoding converts character code to the desired symbol.
With Indeed, you will also see that if there’s a $jobkey_value,
a new $myurl_value is created.The reason for this is that it
will provide a link to the actual company listing, not the
Indeed post.
Note that with each foreach loop, the $tot_array gets
larger with each loop and contains all listings when the loop
comes to an end. Essentially, the $tot_array is everything
from both Magpie and the custom XML parsing. Now can go
back to the index.php and carry on where we left off, which
was near line 9.
If we got our listings from all of our sources, we have a
$tot_array. Code-wise, if the array exists, it runs through a
usort() function that calls the cmp() function.This is used to
parse the array so the newest listings show up on top.
Once that function runs its course the HTML code
displays a table for the results.The left side will be the titleThe source code of a feed, which contains entries in an organised manner.](https://image.slidesharecdn.com/thehackersmanual2016-160522105830/75/The-hackers-manual-2016-174-2048.jpg)
![The Hacker’s Manual 2016 | 175
Coding|PHPRSSaggregator
and link to the post, the middle will be the description and the
date will be at the end.
To get a better understanding of how each of the listings is
displayed, look around line 28.As you will see, the array_
unique() function is used to ensure our results are unique and
have no duplicates.Then, near line 33, a foreach loop is used
to parse the $tot_array.
For each listing in the array, new variables are made in
order to create the title, date, URL and description entries.
Since each item in the $tot_array, which is also known as
$tot, comes through as a string with commas separating the
values, the explode() function is used to make another array
called $all.
The array $all contains the actual variables. Since the date
was the first item in the array, you will see it is $all[0]. In
addition, the title was the second element and took its value
from $all[1]. If you have limited array knowledge, keep in mind
that all indexed arrays begin with 0, not 1 as you may expect.
Finishing off your aggregator
Getting back to the latest date variable, you will see it
contains other code.Well, this is because the date function is
used to display the results with year, month and day.
The strtotime() function is also included to gather the date
from the loop located in the $all[0] element and convert it to
a Unix timestamp.
If you look at the source code in the index.php file, you will
see that a table row is displayed for each entry and each value
is shown between the <td></td> tags.At the bottom of the
file you will also see the usual closing </body> tag and
closing </html> tag.With that done, you have a working RSS
aggregator and an explanation covering the details of our
lean-coded script. But, currently it does look a little too old
school and needs some style.As far as usability goes, you
could add and draw the URLs from a database so that you
could have various aggregated sources at your fingertips.
Another feature you could add easily enough is listing
management. Since each listing will have a specific URL, you
could make buttons to insert the data into a database, eg one
button could be used to make it a favourite and another could
be to mark it as a dud that you don’t want to see in the list the
next time you open the page.
So there you have it.You have your own RSS feed
aggregator that will display the source and job description by
date.Whether you’re looking or comparing jobs, trying to find
bargains, or keeping up to date from multiple news sources,
this bit of PHP scripting can be used to find the prize data
that you are after.
Using scraping
Scraping is an alternative method to using if an
RSS feed if one isn’t available.This is a
technique where source code from a web page
is analysed for patterns of data that you might
be interested in.
Some of your sources may not supply RSS
feeds. But, since they likely provide some kind of
listings using HTML web page lists, tables or
ordered <div> tags, you can always look at the
source code, find the relevant pattern and then
scrape the data out.
Often, entries of this kind will have a unique
class or some other set of attributes that can
make it easy to identify a beginning and end to
the useful data.
To scrape a page with PHP, you can use one
of its functions, such as file_get_contents() or
curl() to retrieve the source code of a page that
you fancy. Curl has many more advantages, eg
you can use a proxy such as Tor. However, you
must exercise caution when scraping data.
You may want to contact the copyright holder
and keep the content unpublished from the web
so the content isn’t crawled.
Once the content is gathered into a string,
you use regular expressions and PHP functions,
such as preg_match_all() and preg_match() to
separate the file into entries. In the end, you’ll
have the same data as you would with RSS
feeds.You could combine the scraping method
with RSS feeds if you want to keep all of your
data in one place, with only the addition of a few
lines of code.
Here’s a sample
RSS feed shown
in your web
browser.](https://image.slidesharecdn.com/thehackersmanual2016-160522105830/75/The-hackers-manual-2016-175-2048.jpg)


This document discusses Linux distributions (distros) and evaluates the top distros of 2015. It examines the key differences between distros, how they have evolved over time, and provides recommendations for the best distros depending on intended usage, such as desktop, server, or for beginners. Specific distros highlighted include Ubuntu, Linux Mint, OpenSUSE, and Fedora. The document aims to help readers choose a distro that suits their needs and showcases the capabilities of Linux and open source software.