Ultimate Linux Projects2nd Edition 2023 Unknown
install download
https://ebookmeta.com/product/ultimate-linux-projects-2nd-
edition-2023-unknown/
Download more ebook from https://ebookmeta.com
2.
FROM THE MAKERSOF THE NUMBER ONE LINUX MAGAZINE
Mint 20 Smart home office Retro games Livestreaming
Robotic OS Safeguard data Escape Google Photos
NEW
SUPERCHARGE YOUR MACHINE
132
PAGES OF EXPERT
ADVICE FROM
INSIDE
Digital
Edition
ISSUE
O2
4.
Linux is thegateway to exciting open-source software,
stimulating coding projects and, of course, impressive
Raspberry Pi machinations. In Ultimate Linux Projects, we throw
those doors wide open and explore the opportunities that
Linus Torvalds’ creation can offer us.
Inside, the minds behind Linux Format magazine provide their
expertise to bring you specialist tutorials, guides and advice to
help you get some extra joy from your machine. From coding
masterclasses that will tell you how to tap into weather satellites
and more, to plug-in-and-play Raspberry Pi guides, and
open-source alternatives to popular services like Google Photos
and Plex – we’re sure that if you’re a Linux fan, you’ll find
something to obsess over here.
So, pop that kettle on, boot up your machine and get ready to
explore the possibilities that Linux has to offer.
OPEN-SOURCE GUIDES
Customise Mint20 8
Learn how to make the versatile distro your own
Get a next-gen media server
up and running 16
Install an exciting alternative to Plex
Stress-test your CPU 20
Harness S-TUI to monitor your computer’s stats
Build the ultimate audiobook collection 22
Compile your audio collection into one easy space
Rise of the robots 26
Discover the fundamentals of robotic OS
Build a custom digital signage system 30
Create an electronic display using Xibo
Contents
Decode signals from weather satellites 34
Tap into space broadcasts to decode images of Earth
Sharpen your desktop publishing skills 38
Design newsletters, flyers and more with Scribus
Escape Google Photos 42
We show you some free alternatives for your albums
Create,editandusecustommappingdata 50
Get started with creating your own maps with QGIS
How to easily emulate 486 PCs
and run DOS 54
Relive the PC glory days with this emulation lesson
How to run classic distros with QEMU 58
Feeling nostalgic? Visit some old favourites here
Build a smart home office 62
Be the envy of your co-workers with our expert guide
4 Ultimate Linux Projects
8.
CODING ACADEMY RASPBERRYPI PROJECTS
Coding a Space Invaders clone 74
Create some aliens… then blow them out of the sky
Build a dynamic app security pipeline 78
How to better safeguard your project
Programming a Turing Machine 82
Put the computing father’s concept through its paces
Classic pseudo-3D racing road effects 86
It’s not quite OutRun, but it’s pretty close
How to code diagrams,
graphs and pie charts 90
Use Mermaid to visualise data
Build radio walkie-talkies with Python 94
Create some communicators with micro:bits
Pug & Play Pi projects 100
Discover how versatile this micro-computer really is
Take better photos with your
Raspberry Pi 110
We put the HQ Camera through its paces
Back up and clone your Raspberry Pi 114
Save yourself some heartache and back up
Turn a Pi HATinto a Magic 8-ball project 116
Harness the HAT to see into the future… sort of
Raspberry Pi streaming 118
Become a livestream Pi legend
Create, configure and use gamepads 126
Planning some gaming? You can’t go wrong with this…
Ultimate Linux Projects 5
9.
CUSTOMISE
MINT 2O!
8 UltimateLinux Projects
UltimateLinuxProjects
inux Mint continues to go
from strength to strength, as
you’ll know if you’ve already
had a play with the latest
20.2 release. If not, what are you waiting
for? Head to linuxmint.com and witness
the, er, Mint-ness forthwith. See, now you
want to install it, don’t you? And that is
just the beginning of the adventure. One
of the things that makes Linux Mint so
cool is its potential for configurability.
It’s often said (by the brains behind
Linux Format) that Mint is an ideal
beginner’s distro, and it turns out it’s
also ideal (we say) for beginners to
tinker around with.
The flagship Cinnamon desktop can be
transformed not just with swishy effects
and colourful themes, but with all kinds of
extensions, applets and desklets
(collectively known as ‘spices’ in Cinnamon
parlance). And MATE and Xfce, the
desktops featured in other editions of Mint,
are equally seasonable. But we can do
better than that: why not mix it up and
install a whole new desktop environment?
We’ll show you how to install the
outstanding KDE Plasma, we’ll even show
you how to make it work with the state-of-
the-art Wayland display protocol.
If you like things slimline, we’ll show you
how to go minimal with the featherweight
Sway desktop, again powered by
Wayland. Sway is based on the i3 window
manager, popular with power users and
those who cannot abide desktop bloat.
We’ll have you doing everything in the
terminal and tiling like a pro in no time.
And just so no one gets hurt, we’ll start
with a handy reminder about how you can
use Timeshift to easily undo any
desktop-related mishaps.
L
Linux Mint is fantastic, but it’s also
flexible, malleable and tweakable.
Jonni Bidwell shows you how
to truly make it your own.
10.
Customise Mint 20
UltimateLinux Projects 9
urveyors of historic issues of Linux Format
magazine may be able to correct this, but as
far as our research can tell, the first mention
of Linux Mint in the core magazine came in the
Distrowatch column of LXF094, when Mint 2.2 was
released. Even back then, Mint was notable for its
out-of-the-box experience, bundling codecs, Java and
Flash plug-ins and wireless firmware, saving users
from having to shoehorn those on there using fragile
instructions from a random forum post.
That experience remains central to Mint, and though
wireless hardware is well-supported on most distros
(and no one needs Flash any more), it still shines. Right
from the Welcome screen in fact, which will invite you to
set up backups using Timeshift, switch keyboard layouts,
or send and receive files from another machine using
Warpinator. Oh, and there are minimise buttons on
windows in Cinnamon – a trend that feels like it is
quickly disappearing on other desktops, but one which
makes many a user feel at home.
Other desktops are going full steam ahead with
Client Side Decorations (CSD, which allows applications
to draw their own titlebars). This might allow
programs to make best use of space and provide a
coherent interface. Or it might make them look
inconsistent, clumsy or other pejorative terms – it
depends your own personal preference. At any rate,
Mint’s X-apps are refreshing in their avoidance of the
CSD wave, and Mint’s substantial fanbase suggests that
the distro’s creators are still doing all they can to keep
their users happy.
The joy of tinkering
Sort out rollbacks so you can customise Linux Mint with
impunity and immunity (to problems).
P
Making the menu
transparent and
pasting Sticky
Notes are but
one way of
customising Mint.
Sooner or later, though, you’re going to want to
change things up. It generally starts with changing your
desktop background and Cinnamon theme. These are
important, but also quite easy – easy enough that you
don’t need us to tell you how to do them. What we’ll be
doing is a little more earth-moving. Tectonic stuff like
installing whole new desktop environments, swish
display managers, maybe even switching to the Wayland
display protocol. And while these aren’t without risk,
Mint’s Timeshift program allows you to back up your
system files (much like Apple’s Time Machine or
Windows Restore Points), affording an easy way to undo
any desktop mishaps.
Even if nothing goes wrong, it’s handy to be able to
roll back to a cleaner system rather than unpick
changes manually: see the walkthrough below. If you’ve
already got Timeshift set up, take a manual snapshot
now before pouring in all the packages over the page.
Go on, you know it makes sense!
Start Timeshift
Fire up Timeshift and set it up to
take a couple of daily snapshots to a local
drive with plenty of space (at least 1GB
more than the current filesystem size).
Timeshift will only back-up system files by
default, so files in your home directory
aren’t included. There are better tools for
backing these up.
1
Take a Snapshot
It might spring into action
immediately if the clocks align. But don’t
worry if it doesn’t, just hit the Back Up Now
button to take an on-demand snapshot.
Timeshift backs up incrementally so only
changed files are stored. Once the
snapshot completes, add a helpful
description to help future you keep track.
Restore a snapshot
If something goes wrong, you can
now easily restore a Snapshot by clicking
the button. You might want to examine the
files within first, which you can do by
right-clicking. Even if things go really wrong,
and Mint no longer starts, you can use
Timeshift from a live medium. Just point it
to the /timeshift directory.
EASY ROLLBACKS WITH TIMESHIFT
2 3
11.
UltimateLinuxProjects
10 Ultimate LinuxProjects
f you haven’t had a nosey around
Cinnamon’s many settings, you might be
pleasantly surprised at how configurable it
is. When Mint 20 was released, much ado was made
about the Mint-Y theme now having fifty shades of
colour variations (okay, it was 32), but we haven’t
found our favourite hue yet. Check out the palette by
opening up the main menu and going to Preferences
then Themes.
Dark themes are so common these days, even
Windows has them, but Mint has a corresponding dark
theme for each variation. You can download whole new
themes from the web, too; just don’t expect them to all
be in line with your design preferences. Hidden away in
the Settings section of the Themes dialog are some
oft-overlooked options for scrollbars, including the
option to disable overlays.
To customise the main panel, go to Preferences and
then select Applets. Now you can add all kinds of
shortcuts and widgets. For example, select the Expo
applet and click the + at the bottom to add a shortcut
(via a smooth animation) to an expo-style overview of
your workspaces. For even more efficient workspace
shifting (at the cost of some panel estate) add the
Workspace Switcher applet. If you want to disable Expo,
or any other applet, just click the – button. Like themes,
third-party applets can be downloaded by visiting the
appropriate tab. Downloaded themes come with no
guarantees, so they come with an uninstall option in
case they annoy you.
There are some extremely pleasant new wallpapers
in Mint 20.2, and we recommend to right-click the
desktop and choose Change Background if you haven’t
already perused them. But before you click there, take a
look again at that desktop context menu. In particular,
have a gander at the Add Desklets option. There aren’t
many pre-installed desklets, but if you want a digital
clock or photo frame on your desktop then you’re in
luck. If you delve into the Download tab you’ll find plenty
more, including an analogue clock as well as more
productive tools such as the Google Calendar desklet.
The final flavour in Cinnamon’s Spices cabinet is
extensions. These change the way the whole desktop
behaves. Again, there aren’t many installed by default,
but head to the Download tab and it won’t take long for
‘Wobbly Windows’ to catch your eye. Hopefully, you have
better luck than us with that extension. If you’re of a
certain pedigree, you’ll remember the Desktop Cube
extension too, taking your workspace switching to a
whole new level. There are other extensions which some
may write off as desktop fripperies, such as being able
to tweak window decorations, shadows or transparency,
but there’s no harm trying them out.
By default, desktop effects are enabled in Cinnamon,
unless your install has fallen back to software rendering
– in which case have a look at the Driver Manager for
possible remedies. These effects aren’t the sort of
in-your-face, windows catching fire, stunts of the early
‘aughts, but have been designed to help users navigate
Tweaking Cinnamon
See how easy it is to make your mark on Linux Mint’s
flagship desktop environment and beyond!
I
MUTATING MATE AND EXTENDING XFCE
But what about Mint’s other flavours,
surely they can be customised too?
Indeed they can. You’ll find a similar
arrangement with themes, extensions
and effects in both of these. All three of
the Mint desktops are ultimately based
on GTK3, so the fundamental desktop
elements can be themed with a standard
GTK theme from the likes of https:/
/
www.gnome-look.org/browse?cat=135.
Extract any themes you like into your
~/.themes directory, and they should
pop up in the theming options. If you’re
using Mint MATE or Xfce, but desire to
try Cinnamon, then that’s easy. The
standard desktop is available through
the mint-meta-cinnamon package, or
you can get a minimal edition via
cinnamon-core. Conversely, if you are
using Cinnamon and want to try Xfce or
MATE, hit up the mint-meta-xfce and
mint-meta-mate (rolls off the tongue
nicely that one) packages. Again, there
are minimal packages too if you only
want the core applications. These will all
add a session to your login screen, so
you can choose your desktop from the
menu to the right of your username.
Speaking of the login screen, you can
tweak that too. Just go to Administration
> Login Window from the main menu.
Such cosmetic tweaking can happen
even earlier in the boot process, GRUB
can be themed and so too can the
Plymouth splash screen (https:/
/www.
gnome-look.org/browse?cat=108).
If you want to
experiment with
Xfce it’s easy to
install it and all
its apps from the
Software Manager.
12.
Customise Mint 20
UltimateLinux Projects 11
the desktop. It’s reassuring (sometimes) to see where
applications were called into being from, and where they
disappear to when they minimise. Be that as it may, you
might want to turn these off, and this you can easily do
by from the Effects option in the Preferences menu.
Besides eschewing the Gnome desktop, Mint has
made a couple of other choices that fly in the face of
desktop Ubuntu. One is the absence of the Snap
daemon, which prevents installing packages from
Canonical’s Snapcraft store. Another is that there’s no
Wayland support (at the time of writing) in either
Cinnamon, Xfce or MATE, the three officially supported
Mint desktops. You might not care about next-gen,
cross-distro packaging systems or banishing old X.org
from your machine. Indeed, plenty in the Linux Mint
community seem to share this sentiment. But there’s
good stuff in the Snap store, so let’s look now at how we
might enable that now. Plus, Wayland is pretty
impressive now, so we’ll look at that over the page, once
we have a desktop that supports it.
When Mint 20 was released sans Snap support, an
immediate consequence was that there was no way to
install the Chromium web browser, since Ubuntu (20.04
and later) now only packages it as a Snap. We think
more people should use Firefox, and if our user agent
tracking on linuxformat.com is anything to go by, it
seems they are. But it sets a potentially worrying
precedent; if Chromium was to be abandoned by
Ubuntu’s DEB packagers, then perhaps other popular
applications might go the same way. We don’t think you
should worry, as so far there’s been no sign of that.
Team Mint now packages its own Chromium DEB
package, so if you’re craving a hint of Google in your
browsing then fetch it from the Mint App Store or with a
good ol’ fashioned apt incantation at the command line.
We’ve seen that software is also available as
Flatpaks, and that this is enables a wealth of software to
be installed from outside the Ubuntu (and Mint)
repositories. Flatpak is actually enabled out of the box
on Linux Mint, and if you look carefully you’ll find some
Flatpak applications in the Software Manager. For
example, if you want the latest version of GIMP, the
Flatpak edition is probably the second one in the search
results. You’ll also find Flatpaks of Spotify
and Steam so you can queue up your Rush
playlist and play Space Invaders like it’s the
olde days.
If you do want Snaps, perhaps to get the
latest version of Blender or the PyCharm IDE,
that’s easy to sort out from the Terminal. We first
remove the file that prevents the Snap daemon from
being installed, and then install it with apt:
$ sudo rm /etc/apt/prefs.d/nosnap.pref
$ sudo apt install snapd
Snaps can now be searched and installed from the
command line. You can also browse what’s on offer at
https:/
/snapcraft.io, but for a complete GUI experience
you’ll want to install the Snap Store too. Appropriately,
it’s available as a Snap and it can be yours with:
$ sudo snapd install snap-store
One easy and surefire way to turn heads (or
whatever is the virtual equivalent) is to bling your
terminal with a little transparency. Not only does this
look pleasant, but if you arrange your windows correctly,
and get into the habit of arranging them as such, it can
be pretty useful as well. Endowed with X-ray vision, one
can make out both the terminal itself and the web
browser or whatever substrata lay below this.
To enable the opulent opacity effect in the Terminal,
go to Edit > Preferences then select the current profile
(it will be named Unnamed Profile if you haven’t given
it), untick the setting about system theme transparency,
then tick the box above it. Play with the slider to find the
optimum opacity. Or, if you’d rather more drastic
changes look over the page, in which we install the
high-fidelity KDE Plasma desktop environment.
We have fond
memories of
wobbly windows
confusing our
graphics drivers
so its good to see
this still lives on.
USEFUL DESKTOP EFFECTS
“These effects aren’t the sort of
in-your-face, windows catching fire,
stunts of the early ‘aughts.”
13.
UltimateLinuxProjects
12 Ultimate LinuxProjects
Installing KDE Plasma
Transform your desktop with the smooth, svelte, sumptuous experience
that is KDE Plasma and go complete next-gen with the Wayland too!
here’s no official Linux Mint KDE edition
these days, but that doesn’t mean Mint users
should miss out on the wonderful experience
that is KDE Plasma. It’s modern, but still has a
traditional applications menu. It’s incredibly polished,
but is nowhere near the resource hog it used to be.
Oh, and its Dolphin file manager is a joy to work with,
especially if you’re finding Nemo a little too simplistic.
Be that as it may, installing a new desktop
environment comes with its own consequences, and
it’s good to be aware of these before you blame us for
ruining your system.
Firstly, there’s the disk space hit. The smallest KDE
Plasma metapackage provides a minimal desktop, but
according to the screenshot it pulls in some 850MB of
dependencies in 446 packages. If you go for the full-fat
edition, with all the applications from the KDE
ecosystem, that will cost you close to 3GB. Next is the
duplication of core utilities such as text editors, media
players and screenshot tools. These all start to crowd
your application menus, and if you use, say, KDE’s
Dolphin file manager in Cinnamon, it looks a bit odd.
Finally, it’s sometimes hard for apt to completely
uninstall a desktop. It’s likewise hard to repair a broken
desktop after you attempt to clear out packages
manually. So don’t do that; instead, try things out within
a virtual machine first, or make use of Timeshift to
restore things to a known good state (as we
demonstrated earlier).
Having installed (at least) the Plasma desktop we can
opt to change the display manager from the
Mint-themed LightDM to the Qt-powered SDDM
(Simple Desktop Display Manager). If you
installed from the command line this will be
offered to you, and if you didn’t you can get
to the configuration by running:
$ sudo dpkg-reconfigure lightdm
Both display managers work with all major Linux
desktop environments (and lightweight window
managers), so which you choose is a matter of personal
preference – or whichever you can find the prettiest
themes for. The default SDDM theme is probably not
most people’s idea of pretty, but once you’re logged in
it’s easy to change this from Administration > Login
Screen (SDDM). For some reason, perhaps an attempt
at irony, we found ourselves using a Windows-like login
theme. Never mind that, you’ve probably just found
yourself immersed in the wonderful world of KDE
Plasma. Behold the cool Breeze theme, marvel at the
polish and feel at home with the knowledge that all your
favourite Mint tooling is just a click away.
KDE 4, now largely retired, received occasional
criticism for being too configurable. In part, this was fair.
Every widget (and there were a lot of widgets) could be
configured, a clumsy edit mode gave them a handle
about which they could be rotated or stretched, and one
was sometimes left wondering what the point of all this
was. Worse, successive iterations of KDE 4 got very good
at hiding all kinds of key options just when you thought
you’d got a handle on where they ought to be. That
version of KDE also faced criticism for being something
of a resource hog, and shipping with all kinds of
graphical frippery enabled. Modest machines would
probably have been fine with this, but as the graphics
driver ecosystem of the era was far more fragile back
then, hardware acceleration was not something that
someone could count upon.
You’ll be pleased to hear, then, that KDE 5 (or KDE
Plasma 5 as the desktop prefers to be called) is a much
sleeker animal. In our tests it did use up a tiny bit more
memory than Cinnamon, and slightly more than Xfce
and MATE, but what’s a hundred or so megabytes
between friends? It makes not one iota of difference
T
For some reason we found this SDDM theme much more relaxing than
the austere default.
The lightest suite of KDE applications weighs in at around 850MB, but it is quite outstanding.
14.
Customise Mint 20
UltimateLinux Projects 13
LXQT
LXQt might be just be the lightest desktop environment that still provides all the friendly
GUI crutches we’ve come to rely on.
If you’re enamoured with the Qt toolkit, but crave a
lighter, nimbler desktop, you should look no further
than LXQt. That’s what powers the current LTS edition of
Lubuntu, and it’s what could power your new Livingston-
seagull-like Mint desktop. Over the page, we’ll go pretty
much as far as we can go without abandoning the GUI altogether. But
if you want something a little more user-friendly and less gymnastic
keyboard shortcut-orientated, LXQt may well be for you.
LXQt is the spiritual successor to the GTK2-powered LXDE desktop
that used to power Lubuntu and Raspbian. Rather than move to
GTK3, which at the time was seen as bloated, LXDE teamed up with
the RazorQt effort and the result is LXQt. You can install it with a
simple sudo apt install lxqt openbox . If you haven’t already installed
KDE this will pull in around 400MB of dependencies, but if you’ve
already installed Qt et al, the footprint will be much lighter. Don’t
forget to take a snapshot first, though.
When you start LXQt you’ll be prompted to choose a window
manager. By default it uses openbox, but it can use Cinnamon’s
Mutter, Xfce’s Xfwm4 or, if you really want to make it pretty, Kwin from
Plasma. Openbox is by far the lightest, and for non-scientific
comparison purposes a plain LXQt/Openbox session occupied
around 500MB of our memories.
once you start memory-
slayer Chromium. Plasma is
certainly configurable, but in
a way that is not
overbearing. Take the
default, medium-weight
launcher menu (at the
bottom-left, as it should be).
Right-click it and select
Show Alternatives.You will
see it can be swapped for a
modern, full-screen
launcher (sort of like
Gnome) or a more classic
cascading menu design.
KDE comes with its own
graphical application store
called Discover (one of few
KDE apps not to capitalise
on any opportunity for an
unnecessary letter K).You’ll
find this already pinned to
the favourites menu, and you might also prefer it to
Mint’s native Software Manager. One thing you’ll want to
do is sort out Flatpak support in Discover. Fire up a
terminal (try the Konsole application) and run:
$ sudo apt install plasma-discover-backend-flatpak
You can now, after restarting Discover, browse
FlatHub (or any other Flatpak repos) by adding them via
the Settings option at the bottom right. Just click Show
Contents to the right of the repo name. Flatpak is a
much more decentralised idea than Snaps; anyone can
set up their own Flatpak repository, but the only Snap
outlet in town is Canonical’s Snapcraft. Both forms are
potentially risky though, since there’s little to stop a
scoundrel uploading a rogue Flatpak or Snap. And while
both have some sandboxing capabilities we have no
compunction to endorse the downloading of random
binaries. Popular applications are easy to spot on
FlatHub and common Snap packages have a
reassuring ‘Verified’ badge.
We mentioned that Wayland isn’t explicitly supported
by any of the Mint desktops, but that is changing. In the
latest MATE release, a great deal of the desktop now
works natively with Wayland, so if you switch the Marco
window manager for Compton then you’re well on your
way to display protocol future. Xfce 4.18 plans to
introduce support, though that may be a long way off. So
it’s really desktops, rather than distros, that enable
Wayland – and as luck would have it KDE Plasma has
support built in to its Kwin window manager. There’s just
a couple of packages to pull in to bring it to life:
$ sudo apt install plasma-workspace-wayland
Now if you log out, a new session called Plasma
(Wayland) will be available from the menu. The
Plasma experience on Wayland has come a long way this
year. We’re told it even works with the proprietary
Nvidia driver now.
One thing that might strike you as jarring about
Plasma in general is that your session is
automatically saved. If you prefer to start each time
without all those stray terminals and whatever else
you left open, head over to Settings > Startup and
Shutdown > Desktop Session.
Newly installed apps appear in bold,
and lots of them begin with K.
15.
UltimateLinuxProjects
14 Ultimate LinuxProjects
ne of our new favourite Ubuntu-derivatives is
Regolith Linux. It’s fairly unique in its choice
of the ultra-light i3 tiling window manager.
Tiling window managers take some getting used to,
and also a whole lot of configuration, but Regolith
ships with remarkably sane defaults and
easy-to-learn keyboard shortcuts (i3 is very much
keyboard- driven, but converts say they never looked
back). Also, it still has all of the GNOME
infrastructure and applications for managing
sessions and settings, so all of your system
administration can be carried out with familiar GUI
apps. We’re big fans of Pop!_OS too, and in particular
its COSMIC (Computer Operating System Main
Interface Components) desktop. This features a tiling
mode that, while not having the diminutive resource
footprint of i3, offers users a gentle introduction to
the joy and efficiency of keyboard shortcuts and
mouse gestures in harmony.
There’s no reason we shouldn’t have these sorts of
things in Mint too; the i3 window manager is in the
Ubuntu repositories. But we’re going to try something
else. Sway is a lightweight window manager inspired
heavily by i3, except that it is for Wayland. If you are
Ultralight Mint
Embrace minimality and learn some keyboard
gymnastics with the featherweight Sway desktop.
familiar with i3, you
will quickly get the
hang of Sway; most of
the default keys are the
same, and you can even use
your own i3status scripts. In fact, you should be able to
use your i3config file without modifications. Sway is in
the Ubuntu repos, but it’s an old version from
January 2020. It would take some work of the compiling
variety to get the latest version working, so let’s just
install the repo version to dip our toes in:
$ sudo apt install sway
As before, the login screen should now have a Sway
session. Dive into it and you should see the rather
fetching Sway logo and top bar. Try anything with the
mouse (besides moving the pointer) and you’ll realise
that you’re not in Cinnamon any more – nothing reacts
to being clicked, double-clicked, dragged or any such
thing. Sway is all about keyboard commands: try
pressing Super (the brand-independent name for the
Windows key) and Enter. A terminal should spring into
life, so now you can at least practise your Bash
scripting for a while.
Now try pressing Super+2; the terminal will
disappear, but not really – cast your eye to the top-left
and you’ll see we’ve just moved to a new virtual desktop.
If you try to open another one with Super+3, you’ll see
that this doesn’t happen. We didn’t need a third desktop
because we hadn’t opened anything on our second, so
Sway quietly renamed the previous workspace to 3.
Go back to workspace 1 and hit Super+Enter to open
another terminal. Now you can see what tiling window
managers are all about. The first terminal, that was
occupying the whole desktop, obsequiously squishes
over to the left, making room for a new terminal to the
right. If you like, you can start any program you want
from either of these terminals (notice the focus follows
the mouse so you don’t need to click in either one).
But Sway also has its own application launcher, after
a fashion. Hit Super+D and you’ll see some commands
in lexicographical order (some beginning with numbers,
and several beginning with the letter A, probably). Start
typing the first few characters of firefox and you’ll see
this list get rapidly smaller. Press Enter when firefox is
highlighted in blue to start it.
If you already had a couple of windows open, things
by now will probably be getting a little cramped. You
could close one of them (either with a Ctrl+D or
traditionally with the Close button). But now is also a
good time to introduce window resizing. With at least
two windows open, hit Super+R to enter resize mode.
You’ll see this indicated in the top-left of the status bar.
Now you can use the H and L keys (like Vi) to make the
active window (and remember you can change this by
O
The rxvt-unicode terminal isn’t that pretty in its default state, but we’re sure you can make it so.
WINDOW TILING IS AN ART
“To make the most of window tiling,
much like an Etch A Sketch you’ll want
to use a combination of horizontal
and vertical arrangements.”
16.
Customise Mint 20
UltimateLinux Projects 15
hovering the mouse over a new window) wider or
narrower. That covers one dimension. Press Esc to exit
resize mode and the hit Super+E while focused on the
leftmost window. Bam! Vertical windows. Be careful of
case sensitivity here, because Super+Shift+E (often
abbreviated to Super+E) is the shortcut to exit Sway.
In order to make the most of window tiling, much like
an Etch A Sketch you’ll want to get the hang of using a
combination of horizontal and vertical arrangements.
This seems straightforward at first, but there are a few
subtleties that are best experienced for yourself. Before,
the Super+E shortcut operated on several windows at
once and tiled them uniformly. They were grouped
together along a common dimension. But if you hit
Super+V on one of them, then hit Super+Enter to open
another terminal (or open any other application for that
matter), it will open in the other orientation. In this way
you’ll see that Super+E and Super+V act as orientation
triggers, and you’ll notice that the former highlights the
right edge of window, and the latter highlights the lower
edge, giving a hint as to how the next window will spawn.
Sway’s default configuration file can be found at
/etc/sway/config, but rather than edit this directly,
copy it to ~/.config/sway/config to make personal
changes. For example, the line:
output * bg /usr/share/…
sets the background on all displays. You can change
this, or indeed set a custom background for each
display, by modifying this. The output directive actually
controls all sorts of things fundamentally related to the
display. For example, if you’re running Sway on a virtual
machine, putting the final touches to the overdue cover
feature, you’ll probably need to add a line of the form:
output Virtual_1 resolution 1280x720
in order to make your screen grabs have the correct
aspect ratio. You can get a list of display names and
modes by running:
$ swaymsg -t get_outputs
Sway and i3 are famed for their low memory
footprints. But in order to keep these low, and maintain
You’ll need to use
shutdown from the
login screen with
Sway; a nimble
Super+Shift+E will
get you there.
a minimal desktop aesthetic, one has to use lighter
applications too. This isn’t quite the place to show how
much stuff you can run from the terminal, but you
should check out the nnn file manager, the w3m web
browser, mpv the video player and the ncmpcpp
front-end to the mpd music player. What we will
demonstrate is how to swap the default Gnome
terminal for something a little lighter.
You might have noticed when we installed Sway that
it pulled in a package called Suckless Tools. Suckless
(https:/
/suckless.org) is as much a state of mind as a
software suite, and encompasses a range of ultra
low-resource utilities and daemons. These include the
dwm window manager, the suckless terminal and a few
more. You can read more about them in LXF254 and
they’re actually of limited use for us here because
most of them don’t cater to Wayland.
These get installed
primarily for the sake of
the dmenu program which
(through Xwayland) provides
the handy Super+D
launcher we met earlier.
Have fun tweaking!
KERNEL UPDATES
Being a derivative of the Long Term Support release
of Ubuntu, Mint by default uses the same 5.4 series
kernel featured there. Don’t be put off by the fact
that the current branch of the kernel is numbered
5.13, since Canonical backports all manner of
features and fixes to the Ubuntu kernel. Also the 5.4
kernel is itself a longterm branch (as you’ll see from
kernel.org). It has always been possible, but not
recommended, to use mainline kernels in Ubuntu,
but a better way is to activate the hardware
enablement HWE stack.
This will give you a newer kernel (which recently
bumped from 5.8 to 5.11) which has undergone
some Canonical patching and testing, as well as a
refreshed graphics stack (new versions of X.org and
libdrm and what have you). There is a low-visibility
Edge edition of Mint (nothing to do with the web
browser) but it’s definitely not worth reinstalling just
to get a newer kernel. Likewise, you probably
shouldn’t install the HWE stack unless something is
broken, but it’s a safer bet than being seduced by a
stock kernel with a bigger number.
Desktop Ubuntu now gets the HWE kernels by
default, and so it would seem does Pop!_OS, but not
Mint. That’s okay, because it’s easy to install:
$ sudo apt install --install-recommends linux-
generic-hwe-20.04
If you are using the Nvidia proprietary driver
this is not enough, since you’ll need corresponding
proprietary modules too. These you can get with:
$ sudo apt install --install-recommends linux-
modules-nvidia-NNN-generic-hwe-20.04
where NNN is the version of Nvidia drivers required
by your card. You can find this out by running
ubuntu-drivers list . Be aware that lots of users have
encountered problems with the 5.8 HWE stack
(sound, graphics, virtualisation) and the same is
likely to be true for this one.
17.
UltimateLinuxProjects
16 Ultimate LinuxProjects
JELLYFIN
Credit: https://jellyfin.org
introduced features for watching the same server
content in real-time with far-flung friends and family.
Jellyfin quickly followed suit with SyncPlay, available to
anyone who’s logged into your server.
While it’s true that Jellyfin isn’t quite as slick in terms
of clients as its better-known siblings, it still covers most
bases (see https:/
/jellyfin.org/clients for a full list).
What it lacks in polish is more than made up by its
customisability, and unlike Plex and Emby, it doesn’t
require cloud-based authentication to unlock all its
features, making it perfect for those wanting a server
exclusively for use over their own network. (You can still
open up Jellyfin for remote access though – see the box
for details, below right.)
Getting started
You can install Jellyfin natively or through Docker – visit
https:/
/jellyfin.org/downloads for a complete set of
instructions. We recommend a native install if you plan
to make use of Jellyfin’s hardware-transcoding features.
Click the Stable link to reveal the full commands, or save
time if you’re running Ubuntu LTS (16.04 or later) by
issuing the following commands:
$ sudo apt install apt-transport-https
$ wget -O - https://repo.jellyfin.org/jellyfin_team.gpg.
key | sudo apt-key add -
$ sudo tee /etc/apt/sources.list.d/jellyfin.list
$ sudo apt update | sudo apt install jellyfin
Once installed, Jellyfin will set itself up a service, and
will start running in the background. You can configure it
from your web browser by going to http:/
/127.0.0.1:8096
– if you installed it on a server, you can access it
remotely via http:/
/192.168.x.y:8096 (where 192.168.x.y
is Jellyfin server’s internal IP address).
The first-run wizard will appear. After choosing a
username and strong password you’ll be prompted to
set up your first media library. The process is the same
here as it is when adding further libraries via Jellyfin’s
main Dashboard, so is worth covering.
Set up media libraries
First, choose your content type: Movies, Music, TV
Shows, Books, Photos, Music Videos and the catch-all
Mixed Content are all available. Name your library, then
click + to select a folder containing that library’s
ant the best features of Plex and Emby without
the cost (or closed-source components)? Then
take a look at Jellyfin (https:/
/jellyfin.org),
which has come on leaps and bounds from a simple
fork of the last open-source Emby release (3.5). While
Jellyfin still has a similar feel to Emby, it’s carving out its
own unique niche in the media server marketplace.
It may be free, but that doesn’t mean you’ll miss out
on features. On the contrary, Jellyfin includes features
found only behind Plex and Emby’s respective paywalls:
hardware GPU transcoding for one, full support for live
TV (including DVR facilities) for another.
It’s even keeping up with some of the newer features
added to its rivals. Early in lockdown, Plex and Emby
Get a next-gen media
server up and running
Nick Peers reveals how to install and set up a completely open source – but
brilliant – alternative to Plex, the streaming media platform.
Nick Peers
is shifting his
allegiance from
Plex to Jellyfin,
and not just
because it’s free!
W
OUR
EXPERT
NAVIGATING JELLYFIN’S MEDIA LIBRARIES
1
Slide-out menu
Click here to quickly jump between
libraries – including Jellyfin’s Collections,
which can be manually curated or created
automatically via a plugin.
2
Admin tools
The Dashboard is where you go to
monitor and administer the Jellyfin server.
3
Sharing options
Click here to set up SyncPlay to watch
with friends and family, cast to another device
or search your library.
4
Playback controls
Click here to play the movie, watch the
trailer, plus other tasks – for example, adding it
to a playlist or editing its metadata.
5
Access multiple versions
Rip different versions – say extended
versus theatrical release – of the same film and
choose which one to watch.
6
Choose audio and subtitle tracks
If your movie contains multiple audio
tracks – as well as subtitles – you can select
which ones you want from these menus.
1
4
5
6
3
2
18.
Get a next-genmedia server up and running TUTORIALS
Ultimate Linux Projects 17
Name your media
files correctly and
Jellyfin will ‘scrape’
online databases
to provide you with
all the necessary
metadata.
Jellyfin’s home screen puts all your media within easy reach. Its Next
Up feature tracks your progress through favourite TV series.
SET UP SECURE REMOTE ACCESS
content. While you can add multiple folders to a single
library, it’s best to start with just one. After it’s been fully
scanned, move on to your second folder, and so on.
Beneath the folders are your library settings, which
vary according to the type of content you’ve chosen.
The key choice here is which ‘scrapers’ you want Jellyfin
to use to populate your library with metadata including
artwork – thetvdb.com is no longer available by default,
but you can add it as an option later via the plugins
repository (see the final Quick Tip).
A quick note about filenames: Jellyfin broadly follows
the same naming convention favoured by Plex and
Emby, but there are some quirks with organising movie
extras – see the Server>Media section of the online
Jellyfin documentation (https:/
/jellyfin.org/docs/
general/quick-start.html) for details.
Beneath the scrapers is a section that makes it
possible for you to choose how metadata is stored.
Beware of ticking ‘Nfo’ and ‘Save artwork into media
folders’ – this requires write-access to your media
folders, which isn’t a given. Leaving them unticked
stores the information within a central database.
Flick the ‘Show advanced settings’ switch at the top
to reveal even more options. These include pulling in
artwork and whether you want to ‘download images in
advance’
, which basically means downloading them
when media is imported into your library instead
of when requested by a Jellyfin app.
Once you’ve configured your library, click OK, then
repeat for any other media libraries you’d like to
configure now (you can add these later if you’re
impatient to get going). Click Next when done. Note
that, depending on the size of your media folders,
setting up each library can take some time. You’ll see
content start to appear relatively quickly, but it may take
several hours before each library is fully populated.
Complete your setup
You’ll need to confirm your default metadata language
and country settings, and then click Next. The next step
confirms whether you want to open remote access to
your server (for streaming content over the internet) –
enabled by default – and whether you’d like to attempt
UPNP port mapping. If UPNP is disabled on your router,
you’ll need to manually forward ports to your server’s IP
address. This form of streaming is insecure – for a
better solution, disable the option and follow the guide
in the box (below).
Once configured, click Next followed by Finish and
Jellyfin will start scanning your media folders for content
in the background.
Take the tour
You’ll find yourself at the main Jellyfin screen, which
offers you a way to both manage and consume your
media from your web browser. The main screen is split
into different levels: at the top are shortcuts to your
media libraries, followed by ‘Continue Watching’ (if
you’re halfway through any movies or shows, they’ll
appear here, ready to resume where you left off) and
‘Next Up’
, which is Jellyfin’s equivalent of Plex’s On Deck
view for working your way through series. Beneath this
you’ll see the latest additions to each library.
If you configure Jellyfin with live TV (see the box
overleaf), this will also appear as an option on the main
Configuring Jellyfin to enable friends and
family to stream remotely is more
complicated than in Plex or Emby, but the
upside is there’s no cloud-based
authentication involved. Insecure
connections are easy to set up, but you
should make your connection encrypted
and secure for maximum privacy.
We recommend you set up a
subdomain on an existing domain you
own or sign up for a free dynamic
hostname (free ones are available from
www.noip.com). You’ll need to point this
to your own public IP address, which is
best done using a tool like ddclient
(https:/
/ddclient.net/) or NoIP DUC
(www.noip.com/download?page=linux).
Once these are set up, security is
achieved via a reverse proxy working in
conjunction with an SSL certificate – you
can kill two birds with one stone using
Caddy 2, following Cognicom’s guide
(https:/
/forum.jellyfin.org/t/simpleton-
guide-for-remote-access/2707/2).
After following the guide, open the
Jellyfin Dashboard and select Networking
under Advanced. Tick Enable HTTPS and
change the port number to that which
you chose when following Cognicom’s
guide. Click Save. Now try logging on to
the server through your web browser
using the following syntax, substituting
1337 with your chosen port: https:/
/
subdomain.domain.com:1337.
If all is well, you should see Jellyfin
throw up the login screen. Now, not only
can friends and family log on to their own
user accounts remotely, the SyncPlay
feature should work correctly too.
Quick Connect
speeds up login
from selected
devices. Log
into your
account and go
to Dashboard>
Quick Connect
to enable it.
Then click your
profile photo
and choose
Quick Connect
followed by
Activate. Return
to your client
and tap Use
Quick Connect
to generate the
code you need.
19.
UltimateLinuxProjects
18 Ultimate LinuxProjects
When browsing a library you’ll see three buttons –
use these to change the way content is displayed from a
choice of six, including banner, list and the default
poster view. The A-Z button enables you to sort your
library differently – for example, by IMDb rating or
release date. The final button is for filtering the view,
with options including genres, parental ratings and
whether or not the show has been watched or not.
Select a specific movie, television episode or other
piece of media to go to its own page. The annotation
(see the start of this article) reveals what controls you’ll
find on these pages.
Fix metadata
It’s a good idea to browse your libraries after adding
them, because Jellyfin is more prone than its rivals to
incorrectly identifying shows and movies – particularly
those whose name is shared with other releases. When
you spot an error, roll your mouse over the incorrectly
labelled item, click the vertical ellipsis button that
appears and select Identify.
This will bring up a search tool – you can search by
title and/or year (which should resolve most issues
where an identically titled show or movie from a
different year has been selected), but if this doesn’t
yield a result, go to www.imdb.com or www.thetvdb.com
to manually locate your show and grab its ID. Enter this
into the relevant search field and you’re guaranteed to
get the correct match when you click Search.
Jellyfin takes a little while to update the metadata –
so don’t be surprised if the correct artwork isn’t appear
immediately. If you want to perform more drastic
surgery to your metadata, use Jellyfin’s dedicated
Metadata Manager instead: access this by clicking the
hamburger ( ) button in the top left corner of the
screen and then choosing Metadata under Admin.
The Metadata Manager reveals an Explorer-like view
of your media by folder. Drill down to a movie title, or
parent folder for a TV show, and you’ll see its metadata
appear in the right-hand pane, ready for editing.
Admin dashboard
The Dashboard is where you can both monitor and
administer your media server. From here, you can see
what tweaks you can perform to make things run even
more smoothly. Your options are Server, Devices, LiveTV
and Advanced, with Dashboard at the very top. This
provides a handy overview of recent changes, which
devices are currently connected and what’s streaming
and where.
screen. All of this is customisable by clicking your profile
icon in the top right-hand corner of the screen and
choosing Home from the pop-up menu.
Browsing any of these views is self-explanatory, with
plenty of on-screen navigation aids. At the top are a
range of library views, from ‘Suggestions’ to ‘Genres’
.
Two views are customisable: Favourites will appear as
an option on the home screen for any favourite items
you roll over and click the heart icon to highlight. Jellyfin
also supports Collections, which makes it possible to
manually group related items together, whether it’s all
the James Bond or Star Trek movies, or films featuring a
favourite actor like Tom Hanks.
SET UP LIVE TV
If you have a HDHomeRun network TV tuner device, then adding live
TV and DVR capabilities to Jellyfin – accessible through any client, and
shareable on a per-user basis – is easy. Just click Live TV on the main
dashboard followed by + and your HDHomeRun should appear. If you
have a USB TV tuner you’d like you use, then you’ll need to link Jellyfin
to a compatible backend like TVHeadend via the appropriate plugin.
You’ll then need to assign an appropriate Electronic Programme
Guide: Schedules Direct costs US$25/year, or $6 for two months
after a six-day free trial, but offers a 21-day guide and is non-profit.
XMLTV is free, but fiddly.
Once set up, switch to the DVR section to specify where to save
your recordings – separate folders for TV and Movies, and they’ll be
created as separate libraries in Jellyfin, so don’t place them inside
existing library folders. Streams are recorded uncompressed in
MPEG2 format, but if you’re running ffmpeg, then Bill Thornton’s
post-process.sh script (https:/
/gist.github.com/thornbill) will
convert it into MP4/H.264 automatically for you. Just invoke it via the
‘Recording post processing’ option under DVR settings.
Once configured, Live TV will appear on your home screen, with its
own shortcut and an ‘On Now’ section providing convenient shortcuts
to shows currently on-air. Click a show and you’ll be given the
opportunity to record it as well as watch it.
One area that
Jellyfin is still
lacking in is,
up-to-date
documentation.
If you run into
problems,
use its reddit
channel (www.
reddit.com/r/
jellyfin/) to
search for
answers – or
post your own
question if
needed. Also
check out
https:/
/forum.
jellyfin.org/ -
although now
closed, you may
find additional
help here.
Once set up,
you’ll have access
to a program
guide and can
watch live TV
and schedule
recordings to add
to your library.
You can access your Jellyfin server from a range of clients – Jellyfin
Media Player works on Linux and is similar to Plex’s desktop client.
Jellyfin’s Metadata Manager is a prime example of how it enables you
to fine-tune your media collection to your personal tastes.
20.
Get a next-genmedia server up and running TUTORIALS
Ultimate Linux Projects 19
Select
Dashboard>
Advanced>
Plugins to
extend Jellyfin’s
functionality
using plugins.
These cover
Authentication,
Channels,
General, LiveTV,
Metadata, and
Notifications.
Click one for
a description
and options to
install it.
Create new user
Navigate to the Jellyfin dashboard and choose Users under
Server where you’ll see your own account is already in place. Click
+ to set up your first friend or family member. Give them a suitable
username and assign them a password, which you’ll need to pass
on to them securely. Complete the initial setup by choosing which
libraries they’re allowed to access. Click Save.
Access limits and parental controls
The Access tab is where you can redefine which libraries a
user has access to, plus restrict their access to specific devices
only. If setting up a child account, use Parental Control to set a
maximum rating (from U to R18) for content, block unrated
content (or content you’ve add specific tags to), and set an access
schedule to restrict overall usage.
Configure settings
Work your way through the four tabs to determine what
level of access the user has. The default settings on the Profile tab
are a sensible starting point and largely self-explanatory, but we
recommend setting limits on the Internet streaming bitrate and
maximum number of simultaneous user sessions (five is a sensible
limit to cover multiple devices).
Personalise user
Once the user logs in, they can click their username to
customise their own setup. Profile is where they can set a
quick-access PIN code for easy access over the local network and
add a photo, while Display enables them to change how the Jellyfin
UI appears to them. They can also customise playback options and
subtitles, and set their own home screen.
CONFIGURE JELLYFIN FOR MULTIPLE USERS
1
3
2
4
The Server section enables you to change your
server name and preferred language (General), plus
administer your own and add other users (Users) – see
the walkthrough for a more detailed guide on setting up
Jellyfin for sharing. The options revealed there can also
be applied to your own user account, enabling you to
personalise Jellyfin’s look and feel.
Server also contains tools for adding libraries and
managing existing ones (Libraries) and configuring
playback options (Playback). Playback has three tabs:
Transcoding is where you enable hardware-accelerated
transcoding using a supported GPU. Transcoding occurs
when a client doesn’t support your media, and the best
approach is to avoid – or at least minimise – it. Find out
more in our guide to x264 and x265 video encoding in
LXF272. If you must transcode, hardware-accelerated
transcoding transfers the burden on to the GPU, and
newer chips, such as Intel 600-series or later GPUs,
produce better-quality results than older ones.
If you do go down the transcoding route, you’ll also
find advanced conversion settings for transcoding to
x264/x265 – familiar to Handbrake users – which
enable you to fine-tune the quality of your transcodes.
The Streaming tab is where you can set an
‘Internet streaming bitrate (Mbps)’ limit. You can use
www.speedtest.net to benchmark your home internet
connection, making a note of the upload speed. Unless
you have cable or a gigabit broadband connection, you’ll
need to set a reasonable limit here – 3Mbps or 4Mbps
should enable users to watch 720p high-definition
content without forcing the server to transcode the
stream to reduce its bitrate.
Complete the tour
The other sections of the software are largely
self-explanatory – see the box (opposite) for details of
configuring live TV. Under Advanced you can access
system logs and notifications, tweak the networking
setup and install plug-ins. But there’s no need to spend
lots of time here right now – get your first Jellyfin client
installed, log into your server and account, and start
streaming your media!
21.
UltimateLinuxProjects
20 Ultimate LinuxProjects
installing the tool is fairly straightforward, and the
project’s GitHub page describes various installation
techniques. If your Linux distribution is already
configured to use pip , you can install S-TUI with the
sudo pip install s-tui command.
For other installation methodologies, such as
installing it from Git, you’ll have to ensure all the
dependencies are installed. These include tools such as
urwid and psutil. Although it isn’t a dependency, if you
decide to use S-TUI to also stress-test your CPU, you
should also install stress or stress-ng. Thankfully, these
are offered in the software repositories of almost all
desktop distributions.
ver the past few years in Linux Format
magazine, we’ve introduced a blend of
powerful and robust as well as nifty and nimble
command utilities that help you perform a variety of
tasks. Everything from everyday text editing, connecting
with remote machines, performing backups and other
administration tasks can be done from the terminal.
A key matrix for determining the vitality of a Linux
distro, or the hardware that it runs on, is system
performance. Depending on your purpose, you can
choose from a variety of dedicated tools to monitor the
different components such as CPU frequency,
temperature and memory utilisation. But if you favour
the CLI, like us, you’ll rather enjoy working with S-TUI.
With S-TUI, which is an acronym for Stress-Terminal
UI, you can simultaneously monitor CPU temperature,
frequency, power and utilisation. The utility presents all
the information graphically and can even be used to
export the data into CSV files. Better still, you can
configure S-TUI to automatically launch scripts when
the values of any of the components being monitored
breaches the defined threshold values. When coupled
with stress, another command-line utility, S-TUI can also
be used to stress-test your system.
Don’t stress over installation
Although S-TUI isn’t available in the software
repositories of most popular desktop distributions,
Some sensors, such as Power, are only available when you run S-TUI as
sudo, and not as a regular user.
Stress-test your CPU
While Shashank Sharma isn’t fond of stress-testing the weighing scale,
he’s fine with tools like S-TUI, which help him monitor CPU performance.
Shashank
Sharma
is a trial lawyer in
Delhi and an avid
Arch Linux user.
He’s always on
the hunt
for geeky
memorabilia.
O
S-TUI
MAKING USE OF THRESHOLD SCRIPTS
In addition to the s-tui.conf file, the
~/.config/s-tui directory also contains a
directory called hooks-d. You can place
custom scripts you wish to execute
when a certain threshold, such as CPU
temperature or frequency is exceeded,
within this directory. The name of the
script must be <name>source.sh, where
<name> is the name of the supported
source. While you can use S-TUI to track
various sources, for now it only supports
running scripts based on CPU
temperature threshold setting.
The default threshold value for the
CPU temperature is 80. To change this
value, you must invoke S-TUI with the
s-tui --t_thresh <value> command.
You can then save the new threshold
value into the ~/.config/s-tui/s-tui.conf
file by saving the settings from within
S-TUI itself.
If you make any changes to the
settings from within the S-TUI interface,
and wish to save them for future use,
you’ll need to navigate to the Save
Settings option on the sidebar and then
press Enter. Depending on how you
installed S-TUI, you may have to amend
the file permissions on the s-tui.conf
file for it to be writeable, otherwise the
tool will exit with a curt ‘Permission
Denied’ error.
When you now open the s-tui.conf file
in a text editor, you’ll find a new entry
showing the newly defined temperature
threshold value:
[GraphControll]
refresh = 2.0
utf8 = True
tthresh = 70
While the stress testing feature is of
little use to home Linux users, there’s no
denying the benefit of graphical
representation of the collected data for
administrators and programmers.
OUR
EXPERT
22.
Stress-test your CPUTUTORIALS
Ultimate Linux Projects 21
You must refer to the man page and documentation on the stress utility to understand the
different supported functions.
Unlike many other command-line utilities, S-TUI
requires no configuration and you can begin using it
immediately after installation. Run the s-tui command
to launch the utility.
At the top of the sidebar on the left are the details
about your CPU. Our Lenovo test machine was correctly
identified as running an Intel Core i3-5005U CPU @
2.00GHz processor. This is because S-TUI utilises
various other native tools and utilities to gather the
relevant information. For instance, the same information
and far more details can be ascertained from running
the cat /proc/cpuinfo command.
When you first launch S-TUI, it displays all four
parameters – Frequency, Utilization, Temperature and
Power – and refreshes the data for each every second.
You can change the refresh rate by changing the value
of Refresh[s]:1.0 on the sidebar.
Depending on your terminal application, and the
colour scheme, you may not be able to clearly see the
different elements on the S-TUI interface. Should this
happen, exit S-TUI, then switch to a basic White-on-
Black colour scheme on your terminal emulator, and run
S-TUI again. You should now be able to see all the
different colours used by S-TUI to display all the
collected information, and you can edit your terminal
profile accordingly.
You can use the up and down arrow keys to navigate
the sidebar, but S-TUI also supports the use of H and J
to scroll, much like you would in Vim.
Add some stress
By default, S-TUI is configured to only monitor your
system. This is evident from the (X) next to Monitor on
the sidebar. If you installed the stress utility as well, you
can enable the stress feature by navigating to the Stress
entry on the sidebar and pressing the spacebar. You’ll
notice the empty brackets would be replaced with (X)
now. You can similarly enable or disable monitoring of
the different components. When you disable a
component, the corresponding graph will automatically
disappear from the interface.
Unlike most other command-line utilities, S-TUI can
also be controlled with the mouse. You can left-click on
an entry/option in the sidebar to select it. You must still
hit Escape to return to the main screen and use the
arrow keys to scroll through the sidebar as the
scroll-wheel on your mouse doesn’t work with S-TUI. To
disable the mouse, you must invoke S-TUI with the
s-tui -nm command.
You can also switch to a different temperature sensor
from within S-TUI itself, if you believe the graph is
inaccurate. Navigate to the ‘Temp Sensors >’ entry on
the sidebar, and press Enter. This opens the Available
Temperature Sensors dialog, and you can then select
one from the list. As before, after navigating to an entry
in the list, press Spacebar to select it. Remember to
select Apply for the changes to take effect.
You must hit Escape to return back to the main
screen of the application, such as from the About>
Help or Temp Sensors section.
While the graphical interface for S-TUI also has a
Help section in the sidebar, it provides little more than a
quick introduction. For a complete list of all the
supported command options, you must run the
s-tui –help command.
The collected data is lost as soon as you exit S-TUI,
because the tool doesn’t save it by default. If you want
all the collected information to be automatically saved
to a CSV file when you exit S-TUI, you must invoke the
utility with the s-tui -c command. The collected data
will be stored in the users’ home directory. You can then
view the s-tui_log_<TIME>.csv file in your preferred text
editor. You can also provide a custom name for the CSV
log file with the s-tui -c <path_to_CSV_file> command.
Another useful command option is -j , which can be
used to print on the screen the current status of the
machine in JSON format. The output generated by the
s-tui -j command is a record of the current status of
the machine, and not a running log:
$ s-tui -j
{
“Frequency": {
“Avg": “1282.1”,
“Core 0": “1630.6”,
“Core 1": “1295.6”,
“Core 2": “1175.6”,
“Core 3": “1026.4”
},
“Temp": {
“Acpitz,0": “48.0”,
“PackageId0,0": “49.0”,
“Core0,0": “47.0”,
“Core1,0": “47.0”,
“Pch_Wildcat_Point,0": “40.5”
},
}
S-TUI supports a number of different temperature
sensors and you can choose a different one by
navigating to the Temp Sensors screen. This is only
needed if the default configuration fails to accurately
graph the CPU temperature on your machine.
All the basic settings, such as the refresh rate (in
seconds) and which components to graph, by default
are stored in ~/.config/s-tui/s-tui.conf. Unfortunately,
you must set the Stress options and the temperature
sensors every time you run S-TUI as the tool doesn’t
permit saving these settings in the configuration file.
The stress
utility performs
a loop that
calculates the
square root
of a random
number in order
to stress the
CPU. You can
customise the
stress options
by navigating
to the Stress
Options screen
from the S-TUI
sidebar. The
graphical
interface
enables you to
define all the
major settings
such as the
worker count
for the sqrt(),
sync(), malloc()
functions, as
well as choose
whether to dirty
the memory.
23.
UltimateLinuxProjects
22 Ultimate LinuxProjects
being Audible); and finally, from free websites where
classic books – namely, those now out of copyright –
have been narrated by volunteers can be found.
One of the best sources of free audiobooks is LibriVox
(www.librivox.org). When you find a title you like, choose
the ‘Whole book (zip file)’ option to download the book
as a series of MP3 files, one per chapter. Each file is
tagged with author, title and other key details, and you
can also download cover art from here to illustrate the
book in your library – more on tagging and artwork later.
Where will you store your audiobooks? The simplest
option is to create a dedicated folder – Audiobooks –
which can reside inside your Home folder. Books can
then be stored within the following folder structure:
AudiobooksAuthorTitle – for example, Audiobooks
Herman MelvilleMoby Dick. If your collection threatens
to get out of hand, or you’d like to subdivide your library
(say separating children’s titles from your wife’s
collection of thrillers), add another layer – Genre –
between Audiobooks and Author.
Audiobook file breakdown
Another important consideration is how you intend to
store individual audiobooks. Audible supplies entire
books as a single file, and whatever chapter markers are
embedded in its native file format (AAX) will be lost on
conversion. Conversely, audiobook CDs split each CD
into short tracks – three- to five-minutes long – to aid
navigation through CD players.
Neither option is particularly desirable. Your
audiobook player should be able to pick up from where
you left off, but it’s still handy to be able to jump to a
specific chapter or section of a book quickly. The
e all love a good story – after all, telling stories
around the fire is as old as human language
itself. Audiobooks – and radio dramatisations –
continue that tradition into the modern age, and thanks
to your phone and PC, give you the opportunity to
listen to your favourite books wherever you are.
In this guide, we’ll show you how to bring all of your
audiobooks – whether on CD or in the cloud – into one
central library. You’ll add tags to make them easy to
identify, plus discover how to listen to them from your
PC or phone. Let’s get storytelling…
Set up your Audiobook library
There are three principal places to source audiobooks:
on CD, with unabridged editions spanning dozens of
discs; from an online vendor (the obvious example
Listen to one voice
reading the text in
Librivox in the Solo
audiobook versions.
Build the ultimate
audiobook collection
Nick Peers reveals how to put together your own audiobook
library using CDs, free downloads and Audible purchases.
Nick Peers
has been busy
building a huge
audiobook library
from his massive
CD collection, all
powered by the
lovely Booksonic.
W
COZY
OUR
EXPERT
Credit: https://cozy.geigi.de
Rip audiobooks with fre:ac
1
fre:ac controls
The buttons provide shortcuts to
frequently accessed tools and settings,
including the all-important rip button.
2
Joblist
All tracks requiring processing are listed
here. Use the controls on the left to quickly
select all, deselect all or invert selection.
3
Metadata
Although fre:ac enables you to edit the
currently selected track’s metadata, it’s quicker
and easier to use Kid3.
4
Monitor progress
Progress bars show you how far the
ripping process has got – both for the current
track and the overall selection.
5
Output folder
You’ll need to set this manually for each
audiobook CD you rip owing to issues with
fre:ac’s automated tools.
6
Monitor track length
When dividing audiobooks into roughly
equal ‘parts’, the figure next to ‘X’ helpfully
reveals the combined length of your selection.
1
2
3
4
5 6
24.
Build the ultimateaudiobook collection TUTORIALS
Ultimate Linux Projects 23
OpenAudible converts your Audible purchases into DRM-free audiobooks for your own
consumption on your choice of platform.
Ignore tagging your files when ripping in fre:ac – your focus should be
on naming them in the correct sequential order.
TRACK DOWN COVER ART
approach adopted by LibriVox books is best – one file
per chapter, and this is something that OpenAudible can
do with your Audible library by splitting books into
separate files – one for each chapter – during the
AAX-to-MP3 conversion process.
It’s more complicated with CDs where you need to
combine multiple tracks into a single file, and choose
where to break them: by CD, so each file spans 60-70
minutes; chapter – can be fiddly to locate where each
chapter begins, and not always an option with abridged
audiobooks; or arbitrary break – say splitting each CD
into two 35-minute or three 25-minute ‘parts’
.
Thankfully, our ripping tool of choice – fre:ac – can
handle any of these options with aplomb.
Convert your Audible library
Let’s start with revealing what do with your Audible
collection. You’re probably already listening to them
using an app – either on your phone or via the open-
source Audible for Linux tool (https:/
/github.com/cross-
platform/audible-for-linux). This ties you into Audible’s
DRM system, meaning you won’t be able to combine
your Audible titles with those sourced elsewhere.
Until recently, there was a free solution to this in the
form of OpenAudible – it’s now shareware, but if you’re
desperate to produce non-DRM versions of your Audible
books, then the £12 registration fee isn’t too prohibitive.
By way of compensation, it supports up to three
separate Audible accounts and comes with a year’s
worth of updates.
To get started, head over to https:/
/openaudible.org
to download a DEB package or AppImage – the latter is
the simplest to use: simply place it in your Home folder
and don’t forget to right-click it and choose
Properties>Permissions to tick the all-important ‘Allow
executing file as program’ box before launching it.
Once up and running, press Ctrl+K to open a
browser window that will redirect to Audible.co.uk –
look for the Sign In button in the top-right corner to log
into your Audible account. Once logged in, close the
browser window to return to the main OpenAudible
interface. Next, choose Controls>Quick Library Sync
and after a short pause you should see your Audible
purchases appear.
Next, select a title – you’ll see a summary and
artwork appear. Its State should read ‘Ready to
download’
. Choose Actions>Download and wait for the
audiobook to download in its native AAX format. All of
this can be done for free, but this is the point where
you’ll need that licence. If About>Purchase doesn’t
work, head to https:/
/openaudible.org/purchase to buy
through FastSpring. Once you’ve received your licence
code, choose ‘About > Activate’ to enter it, then press
Ctrl + T to convert the file to MP3 format.
One final step: the file is converted into a single file
by default, so once done you’ll need to choose ‘Actions
> Split Selected Books’ and wait while a progress bar
reveals how many chapters or files will be created, plus
keep you updated with how it’s getting on.
Once all this is complete, a folder window will open to
reveal your converted audiobook inside a sub-folder
with the title as its name. You can now copy or move this
into your Audiobooks library (you’ll need to create an
Author folder if you’ve not done so already to place the
folder in).
For those with large Audible libraries, there’s some
good news: once you’ve purchased a licence, any book
you subsequently download will be automatically
converted to MP3 (see Edit>Preferences where you can
also adjust the encoding quality of the resulting MP3 file
if you wish to change the balance of file size versus
audio quality). Select multiple books at once and
choose Actions>Download to do so – you’ll be
To hunt down artwork, head to https:/
/images.google.co.uk and
search for the title of your book plus the word ‘audiobook’
. You’ll
almost certainly get a match, but wait – is it suitably hi-res? Our
preferred size is 600x600 pixels, although 500x500 is the size of
artwork embedded into your Audible collection by OpenAudible.
To locate higher res artwork more easily, click Tools under the
Google Search button and change Any size to Large, which will filter
out smaller images. Hopefully at least one will remain: click it to view a
preview. Roll your mouse over this to reveal its size – if large enough,
right-click it and choose ‘Save image as’ to save a copy to your hard
drive. Use your image editor to reduce both its physical size to
600x600 if necessary, plus its file size by saving it as a JPEG.
If you’re struggling to find a suitably sized image via a keyword
search, save the largest version of the artwork you can find, then click
the camera icon inside the Google Image Search box and choose
‘Upload an image’ to search the internet using the actual image
itself. If you’re lucky, you’ll see an ‘All sizes’ button appear next to
the image thumbnail: click this and hopefully it’ll reveal a higher
resolution image that you can use.
When it comes
to assigning
genres to your
audiobooks,
avoid the
generic
‘Audiobook’
to come up
with specific
book genres
like Mystery or
Sci-Fi. Search
Goodreads.comto
see how other
readers have
categorised
a book, if
necessary.
25.
UltimateLinuxProjects
24 Ultimate LinuxProjects
error message stating that the freedb.org database has
no record of the CD. This will be true for most – if not all
– audiobook CDs, so choose Database>Automatic
CDDB queries to remove the automatic check.
At this point, you could tag your files using fre:ac’s
Tags>Albums tab section where you can manually input
the author (Artist) and book title (Album), plus add
artwork, a year and genre. While this works perfectly, it’s
very fiddly – you need to add this information manually
each time you insert a new CD, and it’s much quicker to
handle the process later on using Kid3, so for now leave
everything set as ‘untitled’
.
Select tracks to rip
Now, you need to select all the tracks you plan to rip as
your first file. If you’re ripping an entire disc, just make
sure everything’s selected; otherwise you need to locate
the first and last tracks that make up your selection –
either aim for 25 (or 35) minutes for an arbitrary break,
or use the playback controls above the track list to work
out where each chapter begins and ends.
Finally, click Select next to Output folder to open
your Audiobooks folder, then manually create a new
author folder (or select an existing one if applicable)
followed by a folder named after the book title. With this
selected, you can now click the green ‘Start the
encoding process’ button from the main toolbar.
You’ll be prompted to save the file – automatically
named Artist – Album (or Author – Book Title).mp3. Be
sure to insert a track number at the beginning
corresponding to the chapter, part, or disc number – so
01-Author-Book Title.mp3, for example. You might even
prefer to name the file 01-Chapter One.mp3 or whatever
naming convention you like – just make sure the track
number is at the beginning.
Once you click Save, the rip will begin. A progress
indicator will reveal how your rip is progressing and
completed tracks will disappear from the queue. When
finished, a single MP3 file will have been created. Now
repeat the process for the next chapter or part, and
when you’ve finished with a disc, move on to the next.
Tag your media
Once you’ve ripped your audiobook CD, it’s time to tag it
using a tagging tool. We’ve opted for Kid3, which is
regularly updated and has evolved into just the tool for
audiobook tagging. It’s best installed through the
Terminal to ensure you get access to the latest version:
$ sudo add-apt-repository ppa:ufleisch/kid3
$ sudo apt-get update && sudo apt install kid3-qt
Once installed, launch Kid3 and choose
Settings>Configure Kid3. Up the ‘Track number digits’ to
2 (so 01, 02 rather than 1, 2, etc), and tick Album Artist
and Composer under Quick Access Frames before
dragging and dropping them in alphabetical order. Like
Artist, Album Artist will record the author’s name, while
prompted about automatic conversion for the first
book, but thereafter it’ll all proceed in the background.
And once that process completes, choose Actions>Split
Selected Books to complete the process.
Rip audiobook CDs
When it comes to ripping audiobook CDs, you’ll need a
ripping tool that can combine multiple tracks into a
single file – we recommend fre:ac, which you can install
through the Software Centre. To enable this feature in
the program, choose Options>General settings. Verify
the LAME MP3 encoder has been selected, then check
‘Encode to a single file’
. Click Select under Output folder
to select your Audiobooks folder and untick ‘Use input
file folder if possible’
. Ignore the ‘Filename pattern’ field
for automatically naming your output files – it doesn’t
work when ripping multiple tracks to a single file.
Spoken audio recordings take up less space than
regular music due to their relative simplicity, but you can
squeeze them even smaller by switching from stereo to
mono recordings: click Configure encoder next to the
LAME MP3 encoder to do so. Change the Use preset to
Custom settings, then switch to the Misc tab and choose
Mono under Stereo mode before clicking OK.
Next, insert the first disc of your first audiobook and
click the ‘Add audio CD contents to the joblist’ button.
You’ll see all the CD’s tracks appear, accompanied by an
Fancy turning
your audiobook
collection into
a streaming
server
accessible from
anywhere over
the internet?
Dig out your
copy of LXF259
and turn to
page 64 for our
two-page guide
to building and
maintaining
the perfect
audiobook
server using
Booksonic.
ANDROID AUDIOBOOK HEAVEN
Want to listen to audiobooks on your Android phone? If you’ve ever
used Booksonic (covered in LXF259), then the obvious solution is to
install the official Booksonic app (£2.49), which not only streams
books from your server to save space on your phone, but enables
you to mark individual titles for listening to offline. This means that
they’re temporarily downloaded to your phone’s storage, which
makes it possible for you to listen to them anywhere, then easily
removed when you’re done.
If all you want is to listen to audiobooks you’ve transferred to your
phone’s storage – after all, you
can fit a heck of a lot of books on
to a 32GB microSD card – then
try Smart AudioBook Player
instead. When you first launch it,
simply point the app towards
your Audiobooks folder, then
refresh the library to view a
complete list of books, sorted by
author and then title. Tap one to
access its own playback screen
where you’ll find all the controls
you need – and then some,
including Characters (to help you
remember who’s who) and
Bookmarks (for jumping to
favourite passages quickly).
After 30 days, the app reverts
to a basic cut-down version – it
has all the core functionality you
need, but the full version costs
just £1.89. Select Help> Features
to compare versions followed by
Help>Version>Buy to purchase. You can create your own custom genres in Kid3, enabling you to add
another layer of organisation to your audiobooks.
Smart AudioBook Player has all the
playback controls you could ever need
(or want, frankly).
26.
Build the ultimateaudiobook collection TUTORIALS
Ultimate Linux Projects 25
the Composer field is for recording the audiobook’s
narrator. You’d expect things to be the other way round,
but go figure…
Use the Custom Genres section to input custom
audiobook genres – click Add for each one, from Horror
and Crime to Sci-Fi and generic Fiction. When you’re
done, tick ‘Show only custom genres’ if you want to
remove all other auto-suggestions as you fill the Genre
tag. Once you’ve tweaked Kid3’s settings to your
satisfaction, click OK. You’re now ready to tag your files
– the step-by-step guide (below) reveals how to apply
consistent tags across all your audiobook’s files, and
add album art.
How to enjoy your audiobooks
Once your audiobooks have been ripped, organised and
tagged, it’s time to enjoy the fruits of your labours. While
you can listen to an audiobook through any music
player in Linux, it’ll be a messy process trying to
combine music and audiobooks in the same program,
never mind library. Instead, use a dedicated audiobooks
player called Cozy, installed via Flatpak:
$ sudo apt install flatpak
$ flatpak install flathub com.github.geigi.cozy
$ flatpak run com.github.geigi.cozy
The program will launch – going forward, it can be
opened through the Launcher. Step one is to import
your audiobooks – simply select your Audiobooks folder
to proceed and Cozy will import them into its library.
Once complete, choose your view: Author displays titles
by Composer field (meaning the narrator), whole
Reader displays them by Album Artist (so the author).
Hang on – haven’t we just organised everything the
other way around? Yes, because other audiobook
programs and services organise them that way, as do
regular music players. Don’t worry, though, because
Cozy can be configured to swap them round to avoid
confusion: click its menu button and choose
Preferences>Behaviour tab, then flick the ‘Swap author
and reader’ switch to instantly correct the view.
Now return to your chosen view, where you’ll be
greeted by a two-pane window. On the left is a list of
authors or narrators (depending on the view that you’re
using), while the right-hand pane displays a list of titles,
again in alphabetical order, complete with artwork. Use
the left-hand pane to filter the view by author/narrator if
necessary, then roll your mouse over its image cover to
reveal a play button to click; alternatively, click
elsewhere on the artwork to view the title up close.
Cozy’s user interface is nice and straightforward to
navigate – you’ll see a series of buttons across the top,
including a handy 30-second rewind button next to the
play/pause button, plus a progress bar to
navigate quickly through the current track. You’ll
also find playback speed, sleep timer, and search
buttons to the right.
Click the menu button for more options – you can
manually refresh the library after ripping new
audiobooks, tick the box to hide unavailable books
(such as those stored on currently disconnected
external or network storage), plus revisit the
Preferences section, where you can add additional
folders to Cozy’s library if you wish via the Storage tab.
And what about consuming your audiobook
collection on other devices? The box (opposite) reveals
all you need to know about listening to your audiobook
collection on your Android phone.
Dedicated audiobook player Cozy works beautifully with your audiobook library – no need to play
them in a music utility.
Set common tags
Choose File>Open to select all your
audiobook’s files and click Open – they
should appear highlighted in blue. Tick all
the tags that will apply to all tracks: Album
Artist, Artist, Album, Date, Genre and
Composer, and fill in each field. Add your
artwork by dragging the file to where it
says ‘Drag album artwork here’. Click Save
to save your changes.
Add track number
Next, you need to tag each file with
its specific track number. To do this, verify
all files are still highlighted, then choose
Tools>Number Tracks. Make sure the
Destination is set to Tag 2, click Save
Settings to make this default going
forward, and click OK. Select each file
in turn to verify the correct track number
has been assigned. Click Save again.
Add title information
Again, with all the tracks highlighted,
choose File>Import from Tags. Click Add,
name it Generate Audiobook Titles, and
type the following string into the Source
box: Part %{track.1} – replace Part with
Chapter or Disc as required. Type %{title}
(.+) into the Extraction box, and select Tag
2 under Destination. Click Save Settings>
Apply, then click Save for the last time.
1 2 3
TAG YOUR MEDIA WITH KID3
We’ve chosen
MP3 as the
file format for
our audiobook
library because
spoken word
recordings
don’t require
audiophile
levels of quality.
When you
factor in the
length of most
audiobooks –
many hours
per title – the
smaller your
files the better.
27.
26 Ultimate LinuxProjects
ssembling your own robot
and getting it to walk around
will entertain kids of all ages
for a good few minutes.
However, for robotics to be long-term
fun it needs to be a challenge.
A common misconception about
robotics is that you need a degree to make
anything of your own. Having said that, a
robot does require many subsystems to
operate. There are legs to move, arms to
stretch, things to see and react to.
Basically, everything we do as humans –
except you must design the entire system
that can handle all those tasks.
This isn’t something you whip up in
your coding cave on a rainy afternoon.
Being free and open source enthusiasts,
we know better than to believe we have to
cover every detail ourselves. There have
been many projects to make robotics an
area you can thrive in and help expand, the
most successful organisation to date is the
Open Source Robotics Foundation
(www.openrobotics.org). Out of this has
developed the Robotics Operating System
(ROS). It’s not an operating system as
such, but rather a collection of tools that
help you create your version of what a
robot should be and do.
The ROS is better described as a
robotics framework, but what do you want
from the ROS and what do you need to do
to get a robot up and running? We’ve
already mentioned that many subsystems
control different parts of the robot. Your
robot will need to navigate, move and
interact with its environment. That may
include interacting with you and other
humans, but that’s for another time. The
simplest robot will run around the house
exploring – a more advanced version will
go to the kitchen and bring you a new
beverage. For all this you need sensors,
micro controllers and a lot of mechanics…
A
Mats Tage Axelsson presents the
basics of a robotics operating
system and reveals what
components can be used…
RISE OF THE
ROBOTS
UltimateLinuxProjects
28.
Ultimate Linux Projects27
Rise of the robots IN-DEPTH
shows many useful examples of a service, client,
publisher and others. Everything else uses the client
libraries, so make sure you understand them.
While you run ROS on your machine, you can find all
the different message formats through using the various
commands. The other parts of the ROS system are
specific to different functions. The turtlesim executable
demo displays some of the available functions. It shows
how to move the robot around.
As well as snaps, you can also use virtual machines
for your ROS installations. The snap route to a ROS
installation is an easy way to see the first examples
before you start creating your own code:
$ sudo snap install ros-beginner-tutorials
With these snaps, you can run all the demos on the
ros.org website. The commands are even named
according to the activities in the documentation. A ROS
installation contains a massive amount of software. All
packages are small, but dependencies can be
troublesome on your regular machine that you use for
It’s important to bear in mind that all these parts
must communicate with each other. This is where things
can become complex and you need an overall control
system. Using ROS, you can declare and define all the
nodes (the distinct parts of the system) and how they
communicate. Other things included in the ROS
framework are simulators and visualising software to
help you spot problems and solve them.
Knowing what the different pieces of software do
requires a fundamental understanding of the
architecture. Yet defining a robot as the sum of its
components will quickly become complex, so there
needs to be a standard method of communication –
either within the robot or from outside. This is, in
essence, what ROS is for: it establishes the standard
communications protocols. Within this standard are
certain components that define the overall system:
nodes, services and topics.
A node is one collection of functions that
communicate with other nodes using the ROS client
library. This makes it possible to choose between many
different solutions for each task, so long as they use
ROS to communicate with the other nodes. Nodes will
use the other parts of the architecture – topics and
services – in different ways, depending on what the
information is used for.
Topics are places that contain data, which many
nodes will need to access. One node will send data to
the topic and other nodes can subscribe to the topic. In
short, this is a broadcast-type message – information
that many nodes may need and one can create. In
contrast, services are created so that one node can
request information from another node. The first node is
the client that requests information from the server.
Component core
To run ROS, you need a number of packages. In the
core version, you’re provided with everything you need
to run the actual robot. These packages implement the
ROS interfaces, the middleware interface and some
specifications for the messages that you need to use
for development.
The two that you’ll come in contact with the most are
the rclcpp and rclpy libraries. They both implement the
client libraries; as you may guess, one is for C++ and the
other for Python programmers. The client libraries cover
the messaging we mentioned earlier. This is where you
decide whether your client needs to broadcast to topics
or set up a service for other nodes. This is also where
you find the message formats so you can add your
information for your applications. The documentation
YARP: A SIMILAR FRAMEWORK
YARP is the framework for communications within robotics. It can
replace the ROS master as a name server. You can also do this the
other way around using the YARP as a name server. The name server
will support the nodes and protocols across your system. You can also
use both in a single system.
One reason why you may want to use this is if you have a single unit
that requires a separate underlying protocol. Another reason might be
because your project is in transition between the two frameworks.
These protocols can be used in other fields. For example, if you have a
number of Kubernets nodes you can have them share information
using either YARP or ROS.
The project is open source and available on https:/
/github.com/
robotology/yarp/releases/latest. The project provides ways to install
using Debian packages, or they have their own repository at
www.icub.org/ubuntu. Naturally, you can always compile from source
using their git repository. It requires CMake, cmake-curses-gui and git.
This framework also has its own visualisation system and plotting
functions. The focus with YARP is to use as much of the standard
GNU tools as possible. There is browser port access, so you can use a
browser on one machine to check the stat, along with many other
aspects. Discover more about the project at: www.yarp.it/git-master/
index.html. YARP has been tested and have language-specific
packages for Python, Java, Lua, MathLab and others.
Controlling a turtle across the screen is ideal for learning the
fundamentals of robot design.
You can create an entire environment in Gazebo. This includes walls, stairs and windows.
29.
UltimateLinuxProjects
28 Ultimate LinuxProjects
other tasks. You may also want to use many nodes,
possible across different types of hardware. For these
reasons we would advise setting up a separate
environment for ROS whenever possible, rather than
use your main system.
You might as well start running it in different
machines, even if they are virtual. The communication
will be between machines; this makes simulation more
accurate. You can find a Linux container solution on the
ROS website. The basic idea is that you install Ubuntu
and add ROS to the image when it’s running.
When you use a container you won’t experience
problems with dependencies on other parts of your
system. See the NixOS boxout (below) for more on this.
Building blocks
The full install includes many planning tools and the
emulators/simulators for testing without hardware. As
we mentioned earlier, the main function of ROS is to
establish the communication protocols between nodes.
You also need nodes to handle things like the wheels,
moving arms and drivers for hardware.
Advanced tasks that you’ll need to put into a node
include: navigation, image processing and machine-
learning tasks. Some machine learning will already be
on board, while other such tasks must run on separate
servers, or even in the cloud – it’s cheaper and more
doable than you think! Your main tools for running a
ROS system are roslaunch , rosrun and roscore .
In reality, you’ll start the system with the roscore
command and then run a package at a time with
rosrun . The roslaunch command will run all your
nodes using an XML-based file with the launch
extension. The API for the files isn’t stable though, so be
careful with upgrades if you decide to use this tool.
These are the tools you’ll run while exploring the ROS
system. They’ll run many other tools that are specific
for your current task. Turtlesim is one, and you run that
with ros2 run turtlesim turtlesim_node . If you look
for more things to run, just type the same thing but use
tab after ...run and you’ll see what exists.
Once the nodes are running, you need to control
elements of the robot and manage communications.
You saw a little bit about the communication system
earlier – here it is in more detail. Each node will run one
or all of the following:
Services
A service sits ready to answer a request from another
node. The content of the messages cover values such as
a goal, diagnostic values and the state of movements.
You can also pick up information from different sensors,
both the function of the robot and position using GPS
and the other environment sensors that help your robot
complete its task.
If your node needs this information, you need to set
up a service client that asks for this information. The
node will then process it and send other messages.
When there’s data that other parts of the system need
to know about, you create a publisher in your node that
updates a topic. Any node that needs the information
subscribes to the topic. Those nodes then receive
notifications all at once when the publisher sends it.
Most of these will serve streaming data. The ROS
implementation isn’t designed to know what data is
sent – that’s for the implementation to take care of.
Nodes
Each node has a specific task. In your average robot,
you’ll need to control wheels, view the surroundings and
interpret the data to take appropriate action. Each part
RUNNING WITH NIXOS
For fans of the NixOS and its package manager, there’s also a way to
set the whole ROS system up using NIX. Most of the problems with
revisions, particularly those involving libraries, are solved with NixOS
so it enables you to keep a clean system while using ROS. There’s a
solution available at https:/
/aira.life and http:/
/robonomics.network.
You can clone this repository and pick anything from the whole ROS
project. Even if you are using other distributions, you can use this
approach to create a development environment. Learn more at
https:/
/bit.ly/lxf272aira.
If you want to develop with Python, you can always add that in the
call to the shell that you’ll eventually run. It’s as simple as using the
add option to the nix-channel command. You can also make this
work in a directory where the nix-shell command runs. In this case,
you can have different libraries in different directories. It’s equivalent
to having a virtual environment when using Python in other projects.
If you want to contribute your own code, you should fork the code
and clone your own fork. If you want to contribute any changes, you
can raise a Pull Request to the project. Under NixOS, this works from
any git repository. You can find the current status and progress of the
project at https:/
/hydra.aira.life/project/aira/channel/latest. The
name is an acronym that spells out: AUTONOMOUS INTELLIGENT
ROBOT AGENT. Much of the technology revolves around block chain
and the Etherium block chain. This gives you the ability to have more
secure communications.
The RQT displays the format of all the messages that you can create, along with all available
services states.
The turtlesim project stems from the Turtlebot company. It uses ROS
to design its line of robots.
30.
Ultimate Linux Projects29
Rise of the robots IN-DEPTH
MICRO-CONTROLLERS
If you want to use JavaScript and interface directly with Arduino and
other system-on-chip boards, consider these simpler systems.
They’re designed to interface directly to a large amount of boards,
including the Arduino, Raspberry Pi and other small boards.
Johnny-Five is one popular such framework, which interfaces to
these boards using JavaScript. The team behind it, Bocoup, has
partnered with SparkFun to create a kit that you can start playing with
on delivery. At the website (www.johnny-five.io) is a long list of
examples that demonstrate how you can control and read a long list
of servos and sensors.
Cylon is another solution – it’s a single NPM module. If you already
have some JavaScript projects going, this takes minutes to set up and
get started with. It was built using extensions for new hardware and
already supports an impressive list of hardware. These include boards,
OpenCV and even drones. The libraries are full of code samples, so for
a simple way to get started with any of the included platforms, this is
an excellent option. Find out more at www.cylonjs.com.
If you’re more into the Go language, look no further than Gobot
(www.gobot.io). Installation is via the usual Go package system. Use it
with the go get command. As all the others, the first example is a
flashing LED on an Arduino. The Gobot supports many other
platforms though, so you have plenty of options as with the others
micro-controllers mentioned here.
will have its own node. Note that you define what a node
contains; there are no set rules. You must make a node
that makes sense to your specific purposes.
The most expected examples are the ones previously
mentioned. For more advanced projects, you’ll be
separating the hardware layer of a camera from the
interpretation. All these things are already solved for
you, although you may have better solutions. All nodes
communicate using topics and services, and to control
the entire system you have the ROS Master, which
manages all the communication methods. Your node
creates the service by informing the ROS Master about
it. Using this method, you’ll write all the code to send
and receive to topics and services, and never to a
specific IP address. In ROS2, you create components
and the code that contains a string, which registers
a node. The node code contains the protocols that the
node supports and data that it’ll transmit or receive.
Visualisation
You can visualise the robot for several purposes. Ensure
safe and efficient communication between all nodes.
Show the robot in its environment and plan the
movements of the body itself. There are different tools
for each of these jobs, and they come both as command
line and graphical forms. The command line tools are
useful for the basics inside the robot. For the most part,
they’re for the communication that ROS defines, but
when you have made enough progress that your robot
is able to move, you need more advanced kits.
When you use the turtlesim program to run the turtle
around and you want to log what you’re doing, you can
access many commands and have three open terminals
to do it. You have many debugging tools available,
beyond those that cmake provides out of the box. A
graphical way to do things is preferable in most cases.
The tools that are already available in ROS are rqt, rviz
and Gazebo. The first gives you drop-down lists to
activate all the parts of the robot and measuring
messages. The second shows the robot while
navigating. Combining those two approaches is vital to
reach of your robotics goals. Make sure you practise
these techniques as you become acquainted with ROS.
Rviz, Rqt & Gazebo
These default packages will be installed with the full
desktop install. They have different purposes and should
be used only when needed. Rqt shows the messages
that go between all the services you have in your
system. You can choose a node at a time and analyse
what it does. All messages can be broken down and
even sent to test all iterations of the system. You can
also view plots of the messages and images from any
cameras. You use this system to ensure your nodes
communicate correctly. It doesn’t display the
environment around the robot.
Rviz shows the robot in action in a simulated
environment, including obstacles, forces and even
weather. Even more powerful and included in ROS but
developed independently is Gazebo, which enables you
to see environments Gazebo is a separate project but is
included in ROS2. You can use this software to simulate
the robot both visually as it moves around and moves
itself. You can also film an environment and
superimpose the robot on the live feed.
The ROS package is powerful, yet can also be used
by keen amateurs thanks to its many available tools and
examples. To get used to doing all this work is a
challenge worth pursuing but watch out – you’ll spend a
lot of time before you can take new strides in robotics.
As you work with it, you’ll learn many techniques and
technologies. Remember that this will involve a lot of
programming. Running your robot around the room will
be just a small part of your work!
To start the
simulation you
only have to run
one command. All
other commands
need to be run
from other
terminals.
You can use rviz to view environments and create obstacles for your
robots to overcome.
31.
UltimateLinuxProjects
30 Ultimate LinuxProjects
XIBO
Each Region can then display a number of pieces of
content within its timeline. These concepts will become
clearer as we work our way through this tutorial.
Installing the server
The Xibo server utilises a LAMP stack (which refers to
the Linux operating system, Apache web server, MySQL
database server and PHP programming language) as
well as other tools to provide messaging between the
clients and server. In recent years the entire setup has
been wrapped inside Docker containers to make
installation and updates as simple as possible. The
server we’ll use to install this on is Ubuntu 20.04, but
container systems make the base OS fairly unimportant,
so feel free to work with what you’re most familiar with.
The software will work equally as well on bare metal
or in a virtual machine (VM). When used in production,
however, a VM wouldn’t necessarily be the most suitable
choice, especially due to possible issues with video
playback using the VM’s drivers.
Once the base machine has been installed, open a
terminal, run updates and then install Docker and
docker-compose. Commands should be run as root or
prefixed with sudo:
apt update && apt upgrade
ost Linux aficionados will have noticed an
increase in the number of large-format screens
in public places, displaying a range of
information. This is called digital signage. In this tutorial
we’ll be looking at Xibo, a flexible system that can be
used to show images, videos, RSS feeds, weather data,
mapping data, tables of information, websites,
embedded HTML and more. We’ll demonstrate how to
set up a server and client, before finally designing a
layout and scheduling this content.
The system comprises a server component, which is
open source, as well as a number of clients for different
display types. The Windows and Linux clients are both
free and open source, whereas the other platforms are
paid-for, licenced clients. The server can be self-hosted,
or hosting can be provided by the team themselves.
Before going any further, let’s talk about some of the
terminology utilised by the system. Displays is the name
of the device which runs the player software and
displays the content. This could be a Windows/Linux
PC, Android device or large-screen TV running
embedded software. Display groups can be used to
group multiple displays and content can be scheduled
to multiple devices at once. Schedules are then used to
define when content should appear on Displays.
Layouts are designed by the end user to define what
content should be displayed on specific areas of the
display. Layouts are then split into Regions and each
Region contains a playlist. See the diagram (top right),
which explains the basic concepts of the Xibo digital
signage system.
This information is required to configure the client.
Enter your username and password at the login screen.
Build a custom digital
signage system
Discover how to create a digital signage display for an open-source
conference using Xibo digital signage and the help of Matt Holder.
Matt Holder
has worked in IT
support for over a
decade and has
always tried to
utilise Linux
alongside the
other installed
systems.
M
OUR
EXPERT
Using PHP
functions,
more advanced
projects can
be carried out.
For example, if
information is
held in a dataset
about meetings
booked into a
meeting room,
then the current
date and time
can be used
by the CMS to
serve relevant
content to
the player.
See https:/
/
community.
xibo.org.
uk/t/getting-
started-guide-
datasets/14149.
Credit: https://xibo.org.
uk
32.
Build a customdigital signage system TUTORIALS
Ultimate Linux Projects 31
Pressing I when in the client brings up a
status screen.
LINUX PLAYER OPTIONS
apt install apt-transport-https ca-certificates curl
software-properties-common
curl -fsSL https://download.docker.com/linux/ubuntu/
gpg | apt-key add -
add-apt-repository “deb [arch=amd64] https://
download.docker.com/linux/ubuntu $(lsb_release -cs)
stable”
apt install docker-ce
curl -L https://github.com/docker/compose/releases/
download/1.24.1/docker-compose-`uname -s`-`uname
-m` -o /usr/local/bin/docker-compose
chmod +x /usr/local/bin/docker-compose
With the prerequisites installed, there are a few steps
required to configure the docker-compose files to enable
the Docker containers to run and communicate with
one another.
mkdir /opt/xibo
cd /opt/xibo
wget -O xibo-docker.tar.gz https://xibo.org.uk/api/
downloads/cms
tar --strip-components=1 -zxvf xibo-docker.tar.gz
cp config.env.template config.env
nano config.env
On the relevant line, enter a strong password for the
MySQL database and configure any other required
options. Find out more about the docker-compose file
here: https:/
/xibo.org.uk/docs/setup/xibo-cms-with-
docker-on-ubuntu-18-04#create_config.env_file.
Next, bring up the containers using docker-compose
up -d and allow Docker to complete its work. The server
has now been installed and the server can be
accessed from your favourite browser, by entering
http:/
/IP_ADDRESS_OF_XIBO_SERVER – enter your
username and password at the login screen.
The player
There are open source players for Windows and Linux
as well as paid-for options for other platforms as well,
such as Android, Tizen and Web OS. In this article we’ll
install the player on Ubuntu 20.10. The Xibo team uses
Canonical’s Snap packaging system, which makes the
installation of the client straightforward and updates are
applied automatically. Again, back in the terminal the
client can be installed by entering:
$ snap install xibo-player --channel=stable
To enable the client to communicate with the server,
there are a couple of steps that need to be followed.
First, in a web browser, login to the CMS using the
default credentials of xibo_admin and password.
Navigate to the Settings tab and copy the key from the
CMS Secret Key field. The player can be opened from
the Desktop or from a terminal, by entering xibo-player.
The first time this is opened, the configuration screen
will load. Enter the URL of the CMS (server) component,
paste the value from the CMS for the Key and a location
that the client can use to save files to (see screenshot,
left). The information shown in the screenshot is
required to configure the client.
When selecting the Save option, the client will
contact the server, which will report back that the
Display isn’t currently registered. Now, back in the web
browser, navigate to the Displays tab and one entry will
be shown. On the right-hand side of the screen, select
the Options menu and then click Authorise. Finally, back
at the client click Save and the client will report that the
Display is active and ready to start. The options screen
can then be closed and when the client is opened again
the default layout will be displayed (see screenshot,
previous page). Once configured, the client will
download the files required for the default layout. These
will then be displayed.
Conference time
The example that we’ll be walking through are displays
that could be set up around a conference venue. The
layout (see diagram above) will contain a title in
Region 1, text in Region 2 which will relate to videos and
Once the initial configuration of the client has
been carried out, further options are set
from the CMS. To access these options,
navigate to the Display Settings and either
change the relevant profile or create a new
one, which can be assigned to a particular
Display. Within the Display Settings a range
of features can be changed, such as the
interval between the client collecting
information from the server, the size and
position of the player window (the default is
full screen) and whether shell commands
can be executed by the player. The latter
option is useful because a display can be set
to shut down at a certain time of day.
When the client is loaded, press the I key
and then the information screen will load.
This provides access to diagnostic
information such as media that’s being
downloaded, if there are any invalid files and
gives the option to exit the player without it
being reloaded automatically. Because
clients are devices that need to run for large
proportions of the day, should an error occur
then the default behaviour is for the player to
reload itself automatically.
The new third
version of Xibo,
released earlier
in February
2021, contains
lots of exciting
features,
including
interactivity,
folders to
store media,
reworking of
permissions
and support
for sending
commands
via RS232.
This diagram
explains the
concepts of
the Xibo digital
signage system.
REGION 2 REGION 3
Layout
REGION 1
REGION 4
Text
Ticker
Image Image
Image Image
Video Text
33.
UltimateLinuxProjects
32 Ultimate LinuxProjects
the changes that have been made to the layout, set a
light background colour or upload a background image
by using the options in the right-hand panel.
Before carrying on with the setup of the digital
signage, it’s a good idea to take stock of what has been
accomplished. So far, the server/CMS has been
installed, the client has been installed and configured to
communicate with the server, and the basic Layout has
been set up with the correct number of Regions. In the
next step, the Regions will be populated with
information and finally the Layout can be scheduled and
then viewed on the player.
Establish your Region
To start with, the top Region will be populated with a
title. Add the title into Region 1 by selecting the icon that
shows four squares, click the plus on the Text widget
and then select Region 1 in the playlist editor. Select the
Edit icon on the text item and enter a name for the
conference as well as formatting the text. When
completed, select Save (see screenshot, below right).
When editing Regions, options appear on the right-hand
side of the preview. This is an example of the options
associated with the text widget.
The next step is to add an RSS feed of Linux news to
the bottom Region. This is very similar to entering text,
but requires the usage of the Ticker widget. This widget
is formatted from the configuration panel in the top-
right of the Layout editor. The defaults should suffice on
the General tab. On the Configuration tab select the
Feed URL field and add the link to a suitable RSS feed.
On the Templates tab, select Title Only and finally, on
the appearance tab, select Marquee Left. When these
changes have been made, save the changes.
One of the many powerful things about Xibo is the
ability to schedule content in two different Regions that
can change at the same time. This will be useful for the
final part of this tutorial because we’re going to
populate the final two Regions with textual information
on the left-hand side and a video and image on the
right-hand side. The textual information will relate to
the video being shown. When the video changes to a
second piece of content, the text should also change at
the same time.
The content that we’ll be adding is a video of Big
Buck Bunny as well as some information about it. The
second piece of content will be a photograph of Linus
Torvalds, as well as some information about him and the
images in Region 3. Region 4 will contain a scrolling
ticker of an open-source RSS feed.
Before creating the example, we should investigate
the GUI (see below). 1) Layouts are scheduled at a date
and time. 2) Layouts are created here. 3) Media is
managed here. 4) Displays are managed here.
Back in the web browser, login to the Xibo digital
signage CMS, navigate to the Layouts section and
create a new one. Once a name has been entered, the
defaults should suffice. When created, the Layout editor
will open. The first step is to resize the default Region,
which is created by default. Select the option to edit
Regions, which looks like an image of a pencil and
notebook, and use the drag handles to resize the orange
rectangle. Add further Regions to the layout, so that the
image in the diagram has been replicated and four
Regions exist within.
Regions can be set to loop, which is useful when they
contain certain types of content. To do this, select the
Region and then read the guidance before deciding
whether to enable the loop option or not. Before saving
DO MORE WITH XIBO
As well as the media formats that have
been discussed, Xibo can utilise a large
range of resources to create effective
digital signage displays. Audio files can
be loaded as background music, calendar
items can be read from, for example, a
Google Calendar, countdown times can
be displayed and clocks can be added to
alert the user to the current time.
Looking at more data-oriented items
now, currency trackers can be added as
well as displaying data from the tabular
dataset objects. These data can be
displayed by means of a ticker, table view
or chart view. Information from other
websites can also be embedded using
the Embedded HTML widget. When using
this though, make sure you have
permission to display information from
another source.
While not strictly a media type,
playlists are an incredibly powerful
feature as these enable a previously
configured timeline of items to be added
to multiple layouts. When multiple
layouts are scheduled at the same time
they can either play sequentially or one
can be configured to have priority. In this
way an urgent layout can be displayed for
a short period of time before normal
scheduling is resumed.
Campaigns are used to group together
a number of layouts and these can then
be scheduled in one operation, rather
than having to spend time scheduling
multiple layouts separately.
There are four
key areas in the
CMS’ interface (see
below for details).
1
Layouts are
scheduled at a
date and time to
show on a display.
2
Layouts are
created here.
3
Media is
managed here.
4
Displays are
managed here.
1
2
3
4
34.
Build a customdigital signage system TUTORIALS
Ultimate Linux Projects 33
Linux kernel. First of all, download a Creative Commons
licenced photo of Linus Torvalds as well as the Big Buck
Bunny film from https:/
/download.blender.org/demo/
movies/BBB.
To add the video, select the Region you wish to
display it from, and from the toolbox at the bottom,
hover over the video button and then use the Grab
option to drag it to the Region you wish it to appear in.
At this stage, it’s important to know the length of the
video file so that you can set the timing for the text in
the adjacent Region to be the same.
Add text to your display
To add some text, grab some from a suitable source and
store it temporarily in a text file. To add this to Xibo,
select the Region from the Region editor and then
navigate to the Text button. Again, use the Grab button
to drag this to the relevant Region. When the Text widget
has been added, set the duration to be the same as that
of the video file and click the pencil icon on the left of
the Options panel. Paste the content into this Region
and then format appropriately, before saving the Region
settings on the right-hand side. Add a marquee effect to
the Region if you want the text to scroll.
These previous steps can now essentially be
repeated. With the Layout design tool, select the same
Region that contains the video of Big Buck Bunny. From
the Widget selection tool at the bottom of the screen,
select Image and use the grab handle to drag this to
the selected Region. When asked, select Add Files to
select the photograph to be uploaded. When a
thumbnail appears in the Upload media window, click
Start Upload. Now click Done and you’ll see that in the
Region in question there are now two items: a video and
an image (you may need to scroll to the right). Select
the image, click ‘Set a duration’ and set this to 60 before
saving the Region.
Now select the adjacent Region and use the grab
handle on the Text widget to drag it to the Region. This
Region will then contain two text widgets. Make sure you
check that the text widgets appear in the correct order
and therefore match the order of the content in the
other Region. If necessary this can be changed by
dragging the order. With the final text widget selected,
set a duration of 60 again and then use the pencil icon
on the Region preview to enable Edit mode, where you
can paste in your content and format. As before, set a
marquee effect if the text should move in your Region.
Now that the content has all been added to the
layout, this can be previewed within the web browser. To
do so, click the back arrow button, which is underneath
the Region editing preview. This will then display an
overview of the entire layout. Simply selecting the Play
icon will show a preview in the browser. Please note that
not all content can be previewed in this way.
Once the layout has been completed, the final stage
is to use the Actions option at the top of the screen to
publish the Layout. This means that the changes will be
saved and ready to be displayed. When making further
changes to the layout, these can be saved part-way
through and then published at a later time. Also,
publishing changes can be made on a schedule, which
can come in very handy.
The final stage in the process is to schedule the
Layout to the display. To complete this, on the left-hand
side select Schedule and add a new entry. When the
pop-up loads add the Layout, select the Display, Layout
and select the date and time options for the Display.
Use the option to save the schedule addition and this
can be seen on the calendar (make sure to select the
Display in the option at the top of the screen if the
calendar appears empty).
Now, moving back to the Desktop, open the Xibo
player and within a couple of minutes the content will be
downloaded and displayed on the player.
So far we’ve merely scratched the surface of what
this digital signage system is capable of. For some more
advanced things to try, look at using datasets to display
table data (datasets can also be used in a ticker) and
the use of PHP functions to display certain parts of the
dataset data, based on the date and time. For further
information, the Xibo team has spent a considerable
amount of time crafting documentation to support all
users with the software. This can be found at
https:/
/xibo.org.uk/manual/en/index.html.
The default
credentials for
the server are
xibo_admin
and password.
The password
should be
changed after
first login and
can be done
so by selecting
the avatar in
the top right-
hand corner
and selecting
Edit Profile.
When editing
Regions, options
appear on the
right side of the
preview. This is an
example of
the options
associated with
the text widget.
Once configured,
the client will
download the files
required for the
default layout.
These will then
be displayed.
35.
UltimateLinuxProjects
34 Ultimate LinuxProjects
most are no longer operational, including NOAA-16 and
NOAA-17 even though they were launched after
NOAA-15. However, NOAA-15 has been experiencing
operational problems since 2019 so there are no
guarantees that you’ll be able to receive and decode its
transmissions, even though we had no difficulties.
There’s also an NOAA-20, but this is the first of a new
generation of polar orbiting satellites. It transmits on a
much higher frequency which makes it significantly
more difficult to receive. For that reason, decoding
software probably won’t be too plentiful, although one
offering is reportedly available at an alpha testing stage.
The laws of gravity dictate that any Earth satellite
has a velocity and hence also an orbital period, which
depends on its altitude. This means that the launch and
fine-tuning of its altitude is critical to ensuring that it
orbits the Earth in the time that was intended by its
designers. Specifically, the closer a satellite is to the
surface of the Earth, the faster it orbits.
Let’s take the example of a satellite at an altitude of
35,786km. It’ll orbit the Earth every 24 hours so, if it’s in
an equatorial orbit, travelling in the same direction as
the Earth’s rotation, it’ll appear to be stationary above a
particular point on the planet. This is referred to as a
geostationary orbit and there are geostationary weather
satellites, for example NOAA’s GEOS-15, GEOS-16 and
GEOS-17. Turning to our main theme of the polar orbiting
NOAA satellites, their 850km altitude means that they
orbit the Earth just over 14 times every 24 hours. As the
name suggests, the orbits of these particular satellites
take them over both the poles. However, most
importantly, because the Earth is rotating below them,
every orbit is shifted in such a way that it passes over a
different swathe of the Earth’s surface compared to the
previous orbit. This arrangement enables each satellite
to obtain images from any point on the Earth’s surface
twice each day: once during daylight and once at night.
Is it still raining?
That’s enough background for now, so let’s take a look at
how to receive signals from these satellites. Not too long
ago you’d have needed to buy a radio receiver that
covered the frequencies used by the NOAA polar orbiting
satellites, but now you can use so-called Web SDRs,
which are radio receivers hosted on the Web. Take a look
atellite-based images of the Earth showing
cloud cover have been a regular sight in TV
weather broadcasts since the TIROS 1 satellite
launched in 1960. Yet while the end result is familiar, the
technology that brings us those images is much less
well-appreciated. If you want to learn about the
technology involved, though, it’s not too difficult to get a
basic understanding.
However, you can gain some hands-on experience, as
we demonstrate here, and a practical approach is often
one of the best ways of learning. So, we’ll show you how
to receive the radio signals transmitted by these
satellites and how to decode that data to generate
pictures. In addition, we’ll also investigate some ways of
image processing to improve that image and perhaps
introduce some false colour into the inherently
monochrome images transmitted by the satellites.
NOAA satellites
Here we’re going to be looking at the NOAA polar
orbiting satellites – NOAA-15, NOAA-18 and NOAA-19 –
that are operated by America’s National Oceanic and
Atmospheric Administration. We’ve chosen these
satellites because they orbit the Earth at an altitude of
just 850km. Since they aren’t too far above our heads,
their radio signals are quite strong and easy to receive.
If you’re wondering why the satellite numbers aren’t
contiguous, all satellites from NOAA-6 have existed but
Launched in 1998, NOAA-15 is still mostly operational, despite it having
had a design lifetime of just two years. CREDIT: NASA
Decode signals from
weather satellites
Weather satellites transmit signals that you can receive and decode
to generate images of the Earth. Mike Bedford shows you how.
Mike Bedford
is fascinated by
receiving signals
from weather
satellites and
processing
the data to
generate images.
S
SOFTWARE DEFINED RADIO
OUR
EXPERT
Since the NOAA
polar orbiting
satellites orbit
at only 850km
and you can
easily receive
their radio
signals, you
might wonder
if you can
see the NOAA
polar orbiting
satellites by
looking at the
sky. According
to the NOAA,
they are
considered
naked eye
objects but only
just. In practice,
therefore,
you’re only
going to see
them in dark
rural areas.
Credit: https://noaa-apt.mbernardi.com.ar
36.
Decode signals fromweather satellites TUTORIALS
Ultimate Linux Projects 35
Using a satellite prediction utility means you’ll know when each of the
three NOAA polar orbiting satellites is due to fly close to any Web SDR.
USE A LOCAL RECEIVER
at www.websdr.org, which acts as a directory to these
online receivers. For each there’s information on the
receiver’s location, a list of the frequency bands covered
and a link that takes you to that receiver. The ones of
interest are those that cover the 137MHz satellite band,
which is in the VHF part of the radio spectrum, but these
are the exception rather than the rule since most
concentrate on the amateur radio bands.
You’d probably prefer to use a receiver close to your
own location so you’ll be receiving images of your locale.
If you’re based in the UK the closest we found is the one
at http:/
/erc-websdr.esa.int, which is based at the
European Space Research and Technology Centre at
Noordwijkin in the Netherlands. We only found one in
the US – http:/
/websdr2.K3FEF.com:8902 – which is in
Milford, Pennsylvania. There are also Web SDRs in
Germany and Russia that cover the 137MHz band.
Your first task is to become familiar with your Web
SDR of choice (although most share the same user
interface) and try receiving some satellite signals. The
main part of the user interface is a waterfall display that
shows signals graphically with the frequency plotted
horizontally and time vertically. The most recent signals
appear at the bottom of the display and, since the data
scrolls up continuously, you can always see the previous
few seconds of signals. You should also be able to hear
any signals on the selected frequency audibly, although
with some Web SDRs you have to click a button to
enable audio. Note that if you’re using Chrome you
might find you hear no sound, in which case you will
have to enable sound for the website in Settings.
To receive the NOAA satellites you should select FM
as the mode and, because these signals have quite a
high bandwidth, you should increase the receiver
bandwidth to around 40kHz. Do this by clicking “Wider”
repeatedly, but it’s quicker to drag the sides of the
yellow “filter” icon just below the waterfall display. You’ll
need to know that NOAA-15, NOAA-18 and NOAA-19
transmit on 137.6200MHz, 137.9125MHz and
137.1000MHz, respectively, and some of the Web SDRs,
albeit not the one in the Netherlands, help by indicating
the frequencies for the various satellites just below the
waterfall display.
However, for best results you might need to fine-tune
the frequency because the received frequencies will
differ from the transmitted frequencies due to Doppler
shift. At any one time it’s likely that none of the three
satellites will be receivable at your selected Web SDR so
it’s a good idea to use an orbit predictor to find out
when one of the satellites will be flying close to the
receiver – see www.amsat.org/track. Satellites don’t
have to be flying above the receiver – they’ll be
receivable on orbits that are displaced east or west by a
thousand kilometres or more. You’ll soon learn to
recognise a satellite signal from its shape on the
waterfall display and from its pulsing sound.
Now it’s time to acquire some data from a satellite,
so make sure you’re on the correct frequency before
you expect the satellite to come into range. Although
the signal will be strongest at its closest approach, you’ll
be able to receive a reasonable signal for several
minutes before and after that point. You’ll probably also
prefer to record signals when it’s daylight at the receiver
location, although this isn’t essential because the
satellites are able to acquire images in spectral bands
other than visible light.
Once you can see and hear the signal, click Start next
to Audio recording and, after the signal has been lost,
click Stop. We got an error message telling us that our
browser didn’t support downloading of recordings but
this wasn’t true. Having stopped the recording, click the
adjacent download link to grab a copy of the recording.
Decoding signals
We’re about to look at how to decode the signals you’ve
recorded from NOAA satellites, but first a bit more
theory. It might seem surprising – but perhaps less so
when we bear in mind that the current NOAA polar
orbiting satellites are the last of a series that first
entered operation in 1979, well before broadcast TV
migrated to digital – but our satellites of interest
transmit analogue signals. To clarify what we mean by
that, like old analogue TV, the image is discrete
vertically, but each horizontal line is represented by a
continuously varying signal. In the case of the NOAA
polar orbiting satellites, the signal is encoded in a
format referred to as APT, which stands for Automatic
Picture Transmission. In this format, the data for each
If using a remotely hosted Web SDR seems like cheating, it’s possible
to use your own hardware to receive satellite signals. You could put
together all the kit you need for as little as £10 plus the cost of some
bits and pieces to make the antenna. The secret is to use an SDR: a
software-defined radio, just like the ones that form the basis of the
Web SDR sites. Unlike conventional radio receivers, which need a lot
of analogue hardware, an SDR is little more than an analogue-to-
digital converter that relies on software to provide most of the
functionality. The SDR of choice is a USB dongle called RTL-SDR, that
you can read about at www.rtl-sdr.com. The hardware design is open
so you’ll be able to find lots of sources but do shop around. The
software you’ll need is also open source.
The other thing you’ll require is an antenna and you can build one
yourself. The RTL-SDR website has a tutorial on receiving NOAA polar
orbiting satellites and included here are links to a few antenna
designs. Alternatively, lots of other antenna designs are available.
The designs can be as simple as a basic framework made from PVC
electrical conduit, which supports the active elements that are made
from coaxial cable.
Although it’s
easy to receive
signals from the
low-altitude
NOAA satellites,
you might like
to see photos
from the much
more distant
geostationary
weather
satellites.
Near real-time
images are
plentiful. See,
for example,
www.star.
nesdis.noaa.
gov/GOES,
which hosts
images from
the NOAA’s
geostationary
weather
satellites.
37.
UltimateLinuxProjects
36 Ultimate LinuxProjects
together with the licence key. However, given its
questionable legal status, we’re recommending a
different software package which is called noaa-apt. It’s
free and open source, and you can download it from
https:/
/noaa-apt.mbernardi.com.ar.
You’d work it out eventually for yourself, but since it
took us a while to manage to display an image, we’ll
provide some brief instructions on how to use noaa-apt.
If you want to try it out before you’ve recorded any
satellite signals, you can download a sample recording
from https:/
/project.markroland.com/weather-
satellite-imaging/N18_4827.zip. Use the larger of the
two WAV files and note that this zip file also has some
images that show what you ought to see when you’ve
decoded the file.
Start decoding
The software will start up on the Decoding tab and here
you need to select the audio file you recorded (or
downloaded) before clicking Decode. The bar at the
bottom will show progress (it won’t take long) and, on
completion, it’ll indicate “Decoded”
. Note, though, that
this doesn’t necessarily mean that the file contained
valid data, and if it didn’t you’ll only find out in the next
step. This is because, even if a valid signal has been
decoded, no picture is displayed at this point. So, select
the Processing tab and click Process. The image should
appear almost immediately and, in the case of the
sample recording file, it should be fairly easy to
recognise the Great Lakes and the Florida peninsula.
We’ll describe the characteristics of a displayed
image in more detail later, but first you might like to take
a look at the information shown in the panel to the left
of the image. It shows the name of the satellite and
either the start or end time and date of the recording.
These are noaa-apt’s best guesses, based on the file’s
time stamp and its filename. For example, the name of a
file we downloaded from the Dutch Web SDR was
websdr_recording_2020-10-31T16_31_24Z_137109.
0kHz.wav that shows how, at least in this case, the
necessary data can be deduced. This information is
used to calculate the orbit and so add coastlines and
national borders to the image, this being an option you
can select a bit lower down in the panel.
We found that noaa-apt will often guess wrongly. If
this happens you can alter the information manually. If
you change anything anywhere in this panel, though, the
image won’t change until you click Process again. You’ll
probably notice that the map overlay won’t correspond
to the recorded data with the sample audio file, but it
should work correctly with data you record yourself
subject, perhaps, to altering the identity of the satellite.
scan line is an audio tone at 2.4kHz, which is amplitude
modulated with an eight-bit (256-level) signal
representing the visible brightness. In other words, the
brighter the point along the scan line, the louder the
audible tone.
Two such lines are transmitted each second. There
are also periodic synchronisation pulses and telemetry
data. Taken together, this explains why the signal is
audible and can be recorded as a WAV file (2.4kHz is
approximately the fourth D above middle C on a piano
keyboard) and why it has a pulsing sound. This audible
ATTP data is superimposed onto the 137MHz radio
signal by frequency modulation.
The purpose of the decoding software is to translate
the data in the APT signal into an image. One of the best
respected tools to do this job is called WXtoIMG. It’s
referred to as abandonware, which means that its
author no longer supports it and apparently has no
interest in it. However, it isn’t open source and, while
there was a free version, the full version was licenced
commercially and requires a licence key.
Today, enthusiasts are attempting to keep the
software alive by making it available for download,
THE AVHRR SENSOR
The NOAA polar orbiting satellites carry an on-board instrument
called the Advanced Very High Resolution Radiometer (AVHRR). You
can think of this as a camera, although it’s substantially different from
regular cameras. In particular, the sensor isn’t a two-dimensional
array that captures a 2D scene in a single instant. Instead, because
the satellite is continually moving, it’s necessary only to capture a row
of pixels at right angles to the flight path. These rows are acquired
continually and, because the satellite will have moved between any
two adjacent rows, they’ll represent different strips of the Earth’s
surface. Stacking these strips, therefore, creates a two-dimensional
image. The 2D image is infinite in length, even though the image that
can be captured from a receiver at any particular location represents
a limited area due to the range of the radio signal.
Despite it only being necessary to capture a strip of pixels, the
AVHR doesn’t have a sensor containing a row of 2,600 elements, this
being the effective horizontal resolution. More recent sensors do
operate this way, and are referred to as push broom sensors, but the
AVHR, being an older design, utilises a whisk broom sensor. In a
reference to the way a whisk broom or “witch’s broom” is used, the
device scans mechanically back and forth at right angles to the
direction of movement. Using a mirror, it directs the light from
successive points along the horizontal strip to a single sensor for
each spectral band.
Here, on the
Noordwijkin
WebSDR, the signal
from NOAA-15
is clearly visible
in the waterfall
display, on a
frequency close to
137.1000MHz.
noaa-apt output of data from the Noordwijkin Web SDR with coastlines
added. The map is upside down because it was a north-to-south pass.
38.
Decode signals fromweather satellites TUTORIALS
Ultimate Linux Projects 37
Finally, assuming the end result is something you’re
satisfied with, don’t forget to save the image to file
which you can do in the Save tab.
Image processing
Although noaa-apt offers a degree of contrast
enhancement, depending on the lighting at the time the
satellite acquired its image, and on the strength of the
signal when you received it, the image might not be
perfect. In that case you could try improving it in photo-
editing software. Improving the brightness and contrast
is easy, and can make a significant difference. However,
the Curves feature that’s available in many image-
editing packages can make an even more dramatic
difference very easily. If you’ve never used this feature
before it would be worthwhile reading up on it.
One thing you’ll notice the first time you decode an
NOAA polar orbiting satellite image is that you don’t end
up with one map but two, which are displayed side by
side. Both are monochrome, but they’re not identical,
even though they both represent the same area of the
Earth’s surface. This is because the satellites are able to
acquire images in five spectral bands covering the red/
green portion of the visible spectral, near infrared,
mid-infrared, and two wavelengths of thermal infrared.
However, the bandwidth available at 137MHz is
insufficient to transmit them all, so only two channels
are transmitted at any one time, the selection being
made by ground controllers. Normally, during daylight
hours, one of the photos will be the visible light image.
Because only one visible light band is captured – and
you probably won’t get this at night – it isn’t possible to
generate a true full colour image. However, noaa-apt
does offer a false colour option on the Processing tab
that you can fine-tune using the three threshold sliders.
In reality, it’s not false colour but artificially added colour
that aims to approximate actual colours: blue for water,
white for clouds and green for vegetation.
It’s not clear how this works and, since it’s a fairly
recent addition, information isn’t currently provided. All
we can say is that it uses a form of image analysis to
attempt to identify clouds or the type of ground cover.
Apparently it’s not as good as the false colouring feature
that was provided by WXtoIMG so there might be an
opportunity to contribute to this open source project by
helping to enhance this feature.
Another possible way to create a false colour effect –
and here we genuinely do mean false since the colours
will generally bear no resemblance to actual colours – is
to combine the two images externally to noaa-apt using
image manipulation software such as Gimp. Needless to
say this will only give an interesting result if the two
images appear to be substantially different. With
satellites that transmit images in more than two
spectral bands (for example, not the NOAA APT signal),
it’s common to choose combinations of three of the
spectral bands and reproduce them in red, green and
blue. Although the end result is most definitely not
realistic, is does have the potential to produce all
possible colours. With just two spectral bands, though,
things are different.
You could choose two primary colours so, for
example, using red and blue would give you those
colours plus purples, using red and green would give
you those colours plus yellows and oranges, and using
green and blue will give you those colours plus shades
of turquoise or cyan. None of these options enables
white to be represented so you might prefer to go for
one primary colour together with the complementary
secondary colour. Those possible combinations are red
and cyan, green and magenta, or blue and yellow.
We’re not going to give specific instructions on how
to combine the images in Gimp, or any other package,
but here’s the gist of it. First, you need to cut out the
two side-by-side images from the composite photo
generated by noaa-apt and save them as separate files.
Now, convert those files from monochrome to RGB
images and colourise them in your selected colours (in
Gimp you’d do that by adding a separate layer filled with
your selected colour as the top layer and use Darken
only as the mode). Finally, load the two colourised
images as different layers and adjust the transparency
of the top layer.
Initially you should try a transparency of 50 per cent,
but if one of the two colours appears to dominate then
you should increase or decrease the transparency of the
top layer accordingly.
In addition to
the APT signals
transmitted
on 137MHz,
the NOAA
polar-orbiting
satellites also
transmit a so-
called HRPT
(High Resolution
Picture
Transmission)
signal at
a higher
frequency of
around 1.7GHz.
The signal
has a higher
resolution and
dynamic range,
and all five
spectral bands
are transmitted
at all times.
This signal is
much harder to
receive, though.
Each of NOAA’s
geostationary
satellites produce
a true colour
image of almost
half the planet, but
they’re much more
difficult to receive.
By combining images in two different spectral bands a false colour
image can be generated, making some features more recognisable.
39.
UltimateLinuxProjects
38 Ultimate LinuxProjects
SCRIBUS
development version (1.5.7) is on the cusp of replacing
it, so we’ll be focusing on that version in this tutorial.
The PPA version is best for those running the
non-LTS version of Ubuntu, currently 21.04:
$ sudo add-apt-repository ppa:scribus/ppa
$ sudo apt-get update
$ sudo apt install scribus-ng
If you’re on the LTS release cycle (Ubuntu 20.04)
install Scribus through Flatpak if you have that installed,
or use the portable AppImage if not (https:/
/
sourceforge.net/projects/scribus/files/scribus-
devel/1.5.7). If you’re using Flatpak:
$ flatpak install flathub net.scribus.Scribus
Once installed, Scribus can be launched via the Show
Applications button. It’ll be described as Scribus (Beta),
but don’t worry – it’s as close to stable as you can get.
First steps
On first launch, you’ll be taken to the New Document
window where you have a choice of four options:
New Document, New from Template, Open Existing
Document, and Open Recent Document. The New
Document option enables you to create a single blank
page or ‘facing pages’ (a ‘spread’
, in publishing parlance).
To start using Scribus, switch to the ‘New From
Template’ tab where you’ll see a selection of templates,
split into categories such as books and brochures. Start
with a newsletter – pick Newsletter 2 and read through
the ‘About’ description. It’s a simple black and white A4
newsletter template where you right-click existing
images and text to change it to your chosen content.
Click OK and you’ll be warned the file was created in
Scribus 1.3.3 – click OK again. Next, if the Font
Substitution box pops up with a warning telling you the
document’s fonts (Bitstream Vera family) are missing,
then cancel opening the document, close Scribus and
install the missing fonts via the Terminal:
$ sudo apt install ttf-bitstream-vera
Reopen Scribus and create the newsletter template
again – it should now work.
Edit texts
The main Scribus window will open to show you the first
page of your newsletter. It looks rather bare, so let’s
start by seeing how you edit existing components.
ord processors like LibreOffice Writer can do a
great job of sprucing up documents, but if
you’re serious about page design, you can’t
beat a dedicated desktop publishing tool. Scribus is
capable of producing anything from brochures and
flyers to full-blown newsletters, which you can print or
share digitally via PDF as you see fit.
It’s packed with powerful tools and options, but in
this tutorial we’ll introduce you to the fundamentals of
using Scribus: from changing existing content to
designing your own documents from scratch. It can be
installed or run several different ways: via AppImage,
using its own dedicated PPA, or through Flatpak. While
the stable version (1.4.x) is listed as ‘recommended’
, it’s
been effectively abandoned because the current
Sharpen your desktop
publishing skills
Aspiring media mogul Nick Peers reveals how to design newsletters,
flyers and more with Scribus, the powerful open-source DTP tool.
Nick Peers
has been
dabbling with DTP
software since he
kickstarted his
writing career in
– gulp! – 1995.
W
OUR
EXPERT
Credit: www.scribus.net
TAKE THE SCRIBUS TOUR
1
Arrange Pages
Use this box to manage the structure of
your document – view, add and remove pages
as needed.
2
Frame Properties
This box enables you to define the frame’s
properties. Use the Shape section to flow other
objects around it.
3
Item Properties
Press F3 to tweak the properties of a
selected frame’s contents rather than the
frame itself.
4
Page Preview
Click the eye icon shown to show the
page without any invisible elements, such as
grids and frames.
5
Context-sensitive controls
Right-click an object for more options,
including moving it above or below other
elements on the page.
6
Navigation and view controls
Use these controls to zoom into and out
of the page, as well as move between pages
(and layers within a page).
1
4
5
6
3
2
40.
Desktop publishing TUTORIALS
UltimateLinux Projects 39
Use paragraph and
character styles
to ensure your
text is formatted
correctly and
consistently.
Use the Story Editor to edit and style your text without having to worry
about the layout, too.
DESIGN TIPS AND TRICKS
Double-click inside the ‘Newsletter Title’ text box, where
you should now be able to edit the text in the usual
manner. Replace this with the title of your newsletter,
then select all the text and look to replace the font with
something more striking.
This is done using the Text Properties box, a floating
window you can bring up via the Windows menu or by
pressing F3. Click the font drop-down at the top to try
an alternative font and size – see the box (below) for
some hints and tips involving font selection.
The Text Properties box has more options too: line
spacing will be relevant when formatting multi-column
text to ensure it all lines up correctly. Anyone who’s
used DTP software should recognise most of the
options on offer – including the tracking and word
spacing controls under Advanced Settings – but for
most people the basics should be sufficient.
Once you’ve formatted your newsletter text, you can
move on to the rest of the text. When it comes to longer-
formatted text, directly editing it in the Scribus window
can be a little fiddly. Instead, click inside the text box
and press Ctrl+T. This opens the Story Editor window
with the current text on display inside. It’s similar to
your word processor, with one key difference – on the
left you’ll see each paragraph is assigned its own
formatting style: Article First Paragraph, Article
Following Paragraph, and so on.
Formating text
Consistent formatting is key to creating professional-
looking documents, and this can be achieved by
applying styles to entire paragraphs. You can change
existing styles by right-clicking the current style
displayed in the left-hand pane and then clicking the
drop-down menu that pops up to select an alternative,
but how do you edit these styles to fit your own design?
Press F4 (or choose Edit>Styles) to open the Style
Manager to define both paragraph and character styles.
Paragraph styles can be defined from scratch, or you
can save time by defining common character styles and
applying those to your paragraph styles.
Start by selecting Default Character Style and
clicking Edit. This is where you can define the default
font that can be used to build your paragraph styles
down to the smallest detail. Once done, click Apply –
any existing text based on that character style will
automatically update, revealing another advantage of
styles: you can make wholesale changes without having
to reformat everything from scratch.
You can edit existing styles and add new ones of your
own. After choosing your default character style, you
can then start to build out your paragraph styles. As
you’d expect, these add extra elements such as line
spacing, margins, tabs and indentation, and text
alignment. The Paragraph Effects tab is where you can
define bullet and number lists, as well as choose drop
caps. The latter is a great tool to draw people’s eye to
the start of an article.
You’ll also see a Character Style tab – you can select
your previously defined character style here, then make
adjustments (for example, to choose a different style
and size for a header or other page element) or – if
you’re not bothering to use character styles – define
this paragraph’s character style from scratch.
To speed up the generation of paragraph styles, you
can also base new styles on existing ones. They’ll then
inherit all the characteristics of that previous style,
enabling you to concentrate on defining the
characteristics unique to that specific style. You could,
for example, define a default paragraph style, then use it
When it comes to designing a document
in Scribus, one rule of thumb applies: less
is more. This means keep things simple
for your reader, and prioritising
readability and clarity over all else. Start
by keeping your page layouts minimal
and clean, and ensuring page elements
don’t crowd each other out. Consider
restricting the number of columns on the
page to just two or three, and make sure
the text flows logically between them.
Readability is key when picking fonts.
Again, keep the number to a minimum by
using variations from a single font family
– bold, black, italics and so on – to style
different elements such as headlines or
picture captions.
Make sure the font family you choose
matches your document’s theme –
Comic Sans is rarely the best choice for a
work-related or professional document,
for example. One place where you can
look to be a little different is your logo or
masthead, although again this should
reflect your document’s overall theme.
A key choice you’ll need to make is
deciding between serif (traditional,
established) and sans serif (modern,
clean) fonts. Which one you choose
depends on your content, but if you’re
still struggling to choose, visit https:/
/bit.
ly/lxf280-font-advice to read some
expert advice on the subject.
Scribus offers
a third type of
frame: Render
Frames. These
make it possible
to easily insert
specialist
typesetting,
such as musical
notation and
scientific
formulas, into
your document
with the aid
of third-party
programs.Visit
https:/
/wiki.
scribus.net/
canvas/
Help:Manual_
Renderframes
for a guide to
using it.
41.
UltimateLinuxProjects
40 Ultimate LinuxProjects
File> Preferences>External Tools, which is set to GIMP
by default), and Embed Image. Selecting this will
convert the image from a link to an actual object within
the file. You’d do this if you wanted to share the
document with someone else and not have to worry
about including all the images as separate files.
Understanding frames
So far we’ve respected the newsletter’s layout and
focused on populating it with content. You’ll notice that
text and images reside in frames, and that these can be
moved, resized, rotated and more – press F2 to open
the Frame Properties window to access these options.
With images, we’ve already seen how we can resize
them to fit inside their frames, leaving some white space
beneath or to the side. Complete the job by right-
clicking the image again, but this time choosing Image>
Adjust Frame to Image. You’ll see the frame now fit
around the image, leaving white space beneath it.
The next step is to move the caption frame so it sits
underneath the image again. By default, the template
to generate additional paragraph styles such as the first
article in a paragraph, or a crosshead – a sub-heading
within the text itself. Anything specifically defined within
the new style overrides the style it’s based on.
Working with images
Our newsletter template has space for a single image.
To fill this with a new image, right-click it and choose
Content>Get image (or press Ctrl+I). The image will be
placed full-size within the picture frame, so will require
adjusting. Right-click the image and expand the Image
sub-menu where you’ll be able to adjust the frame to
the image or – more likely – resize the image to fit the
frame (choose Adjust Image to Frame). This will resize
the image to fit the frame, while respecting its aspect
ratio, so there will likely be space below or to the side of
the image depending on its aspect ratio.
Other options you’ll see include Image Effects (add
up to ten different effects, then tweak each one using
the preview to see the effect they’ll have), Edit Image
(opens the image in the image editor you specify under
Save time
recreating
frequently
used elements:
group, then
choose
Windows>
Scrapbook
to open the
Scrapbook
window. Drag
your element on
to here to store
it securely. Drag
the element out
of the window
to create a
copy to reuse.
Set up a text frame
After opening a blank document, click the text frame
button, then click and drag on the page where you’d like the frame
to appear. This can then be resized and moved as required. Press
F3 to bring up the Text Properties box to set other attributes
including text columns (under Columns & Text Distances). Be sure
to set a gap between columns as shown.
Make use of guides
To ensure frames line up correctly, create guides to help –
click and drag from the vertical or horizontal rulers to the left and
top of the page respectively to create them. As you click and drag,
you’ll see their exact X or Y position is shown to help you position
them precisely. Choose Page>Snap to Guides to help align frames
more easily to guides.
Link text frames
If you want to flow text between different frames and/or
pages, you need to create links between them. Select your first
frame and press N – you’ll see the cursor change. Simply place
this over your second text frame and click to link them. Repeat the
process for any other frames. You can unlink frames by pressing
the U key instead.
Layer frames
Frames can overlap or be placed one on top of another
thanks to Scribus’s support for layers. Right-click a layer and
choose Level to move it up, down or to the top or bottom of the
current pile. This affects how content in other frames is displayed
– for example, to flow text around an image, place the image at the
top, press F2 and set the flow using the Shape tab.
WORKING WITH FRAMES
1
3
2
4
42.
Desktop publishing TUTORIALS
UltimateLinux Projects 41
has locked all its frames so they can’t be accidentally
moved. To fix this, right-click the frame and choose
Locking>Is Locked. You’ll see the frame change to reveal
drag handles – click and drag it to a new location, or use
the arrow keys to nudge it around the screen.
Now’s the perfect time to discover how you can
group frames together, so they act as a single object.
Doing so would enable you to move the image and its
caption as one: just hold the Shift key as you click each
frame you’d like to group and you’ll see the selection
box encompasses all selected frames. You could drag
this to a new location, or choose Item>Grouping>Group
to convert them into a single object (you can undo this
from the same sub-menu, choosing Ungroup instead).
Next, drag both the headline and the body text
frames beneath so they sit underneath your image
(select both, then unlock them and finally move them
into position). You now have space left over beneath the
text, so select the body text frame to click and drag the
bottom of the frame down to fill the space. You’ll end up
with room with more text to fill too.
Add more pages
Once you’ve filled your first page, move on to the next.
Each template can support multiple page layouts, and
our newsletter is no exception. Choose Page>Insert. You
can insert one or more pages after the current page and
choose different master pages for both left and right-
facing pages. For the purposes of producing a four-page
newsletter, insert three pages, choosing InnerPageLeft
and InnerPageRight as your page templates. Click OK.
Three new pages will be created using the layouts
you specified, ready for you to populate them with
content. This is all very straightforward, but only if
you’re happy to work within the confines of the
newsletter template itself. In reality, you’ll want to make
changes to this layout following the frame tweaks we’ve
discussed, or look to make bigger changes by designing
pages yourself – the walkthrough (opposite) reveals
how to create text and image frames from scratch.
Once you’ve started to master page design, you’ll
want to incorporate those layouts in your own custom
templates. The box (below) reveals how to build a
template using a series of master pages, which are used
to pre-populate pages with non-editable content.
Share your creation
Your work is complete, and you’re ready to print a
physical copy or export it as a PDF to share digitally. The
best way to do this is via File>Print Preview or
File>Output Preview (for PDFs). A Preflight Verifier
window will pop up listing all known errors – including
those frames where there’s too much text to fit. Click an
item to jump to it in the document, check over the
problem and correct it with some editing if necessary,
then click Check again.
Alternatively, click Ignore Errors to see how the
document will look – you’ll see various additional
options depending on whether you’re printing or
exporting to PDF – and finally click Print or Export…
to complete the job.
BUILD A TEMPLATE
Armed with what you’ve learned in this
tutorial, you can now create your own
templates. Before you begin, choose
File>Preferences>Paths to specify
where you’d like to store your templates.
Once done, click OK and create a new
blank document.
Assuming it’s a multi-page document,
select Facing Pages, choose your basic
attributes (size and orientation) and use
the Margin Guides tab to prevent text
from running to the edge of the page
(use one of the Preset Layouts such as
Gutenberg or Magazine if you’re not
sure). Choose 3 or 4 for your pages,
leaving first page set to Right Page to
accommodate a cover. Click OK.
You’ll be presented with a blank
canvas. Follow the walkthrough (facing
page) to discover how to populate this
first cover page with your own design
using a combination of image and text
frames. You can then repeat the process
for the inside pages – remember to
tweak the design for left and right pages.
Once done, choose Page>Convert to
Master Page. Give it a suitably descriptive
name, verify the right type (left or right)
is selected and click OK. Master pages
make it straightforward to pre-populate
pages with previously created content
when inserting new pages. Just select the
chosen master page from the Insert Page
dialog and Scribus will do the rest. Note
that content added to master pages can’t
be edited or removed, so use them for
consistent elements, such as a magazine
title or page numbering.
Once you’ve got your pages and
master pages in place, choose File>Save
as Template, give it a suitable name and
optionally tick More Details to provide
more information about the template.
Scribus makes it easy to fit imported images into an image frame. It’s also possible to embed the
image directly into the document.
You can record details about your new template –
perfect if you plan to share it with others.
Want to add
page numbers
to your
document?
Create a text
frame in the
usual way, then
choose Insert>
Character>Page
Number or
press Ctrl+Shift
+Alt+P. The
inserted
page number
will update
automatically
if the page is
moved around.
43.
UltimateLinuxProjects
42 Ultimate LinuxProjects
hen invitations to Google’s
new mail service found
themselves in the hands of
the great unwashed, the
world of free email changed forever.
No longer did users have to make do
with a handful of megabytes of storage,
obnoxious adverts and the terrible fear
that at any point a connectivity failure
would dash the missive you were
currently working on into oblivion. Now
users could enjoy 2GB of storage, and
further enjoy watching that quota rise,
ever so slowly, in real time. Yes, there were
adverts, but they were small and textual.
They were also relevant because they
were chosen by algorithms that fed off
the contents of your email.
Later, Google would add free, unlimited
storage for all your photos and later still,
free storage for up to 50,000 audio files. A
decade later, however, Google discovered
that even with their impressive resources,
this was untenable – or perhaps a
potential avenue for profit. Google Play
Music shut down at the end of 2020, and
from June 2021, users of Google Photos
(née Picassa) saw new photos count
towards their 15GB storage quota.
At the time of writing, the relevant
support page warns that accounts
exceeding their quota for 24 months face
potential file deletion. So if the aggregate
of your Google Drive and Gmail inbox is
already approaching that, then perhaps
it’s time to take action.
There are all manner of other free
storage options, which we’ll cover in this
exhaustive feature. But there’s also no
shortage of open-source solutions that
you can self-host, either at home (for
free) or in the cloud (for cheap). We’ll look
at two of these: Nextcloud and Lychee. The
former can, of course, do much more
than just photos (it can be a full-blown
groupware suite) while the latter is a
lightweight solution for hosting photos
and hosting them well.
Both of these work can be used locally
or remotely, whether on a rented VPS in
the cloud or a Raspberry Pi under your
desk. And if you just want to pay someone
to take care of your photos, then we’ll
look at some of those services, too.
W
Google’s free photo storage is a thing of
the past. Jonni Bidwell has some free
software to get your albums in order.
ESCAPE
GOOGLE
PHOTOS
44.
Escape Google Photos
UltimateLinux Projects 43
et’s not catastrophise – no one’s going to
lose any photos for a couple of years. But
perhaps it’s a timely reminder that things
freely given can be freely taken away.
We should note that photos uploaded in their original
quality have always counted towards the 15GB Google
quota (and will continue to do so). The new rules
concern images uploaded using High and Express
quality compression. So serious photographers are
unlikely to be bothered by this. But for millions of users,
it’s yet another iteration of a Google service becoming
less useful. Of course, if you want to pay for more
storage then Google One will be happy to take your
money (100GB of storage will cost you £15.99 per year).
If you’re willing to part with cash, then there are
much more privacy-conscious, less Google-ey photo
storage offerings. However, if you want to keep costs at
zero, and don’t fancy partitioning your massive photo
collection across several different providers (or Google
accounts), keeping each collection carefully within the
free storage tier, then you may want to consider
abandoning cloud storage altogether. Or more precisely,
run your own personal cloud at home.
Taking the cloud option
We’re all for self-hosted solutions here and it’ll come as
no surprise that we’ll be looking at Nextcloud over the
page. It’s easy to set up on your desktop or home server,
and it has superb photo management facilities. If you
like, and are prepared to do battle with your router’s
port forwarding configuration, you can make this
remotely accessible and enjoy all the utility of Google
Photos without worrying about quotas. Or at least if you
run out of space you can always add more.
Self-hosting comes with a pretty strong caveat
though: you’re responsible for your data. So you should
Free your photos
Whether at home or in the cloud, your photos deserve a new host.
L
This feature was
originally written
back when you
could upload 20GB
of photography to
Google for free.
always back up, and if you’re serious about backups,
then you should back up off-site, too. At which point you
might start looking at cloud solutions again. Instead of
falling into an infinite loop at this juncture, note that the
hybrid approach is a reasonable one. Cloud storage and
local storage can be synchronised to mutually mirror
one another, and thanks to the Nextcloud Photos mobile
app, it’s easy to ensure new images from your phone are
automatically added into the mix.
Virtual private servers (VPSes) with 20GB of storage
can be rented for around £5/month. You can even rent a
Raspberry Pi from Mythic Beasts at this price. This
offers excellent value, since besides hosting your
photos, these offerings give you root access, enabling
you to burden the machine with whatever duties your
imagination allows (subject to resource constraints).
We’ve looked at setting up VPSes before, and we’ll cover
it again soon. But for now let’s get on with the show.
KEEPING IT SIMPLE
Some people, preferring to avoid
unnecessary thumbnailing, cataloguing,
configuring and hosting complications
(and PHP applications), choose to
manage their photos as regular files.
Some people feel the same way about
their music collections, and keep their
OGGs and FLACs in directory hierarchies
according to tempo, chronology, genre
or whatever else suits their purpose. If
this sounds like you and already have
your photos as you like them, but are
looking for a bloat-free back-up solution
to SSH your photos somewhere safe,
then Duplicity is worth a closer look. It
works incrementally, so once the first
backup is done, only new data is stored,
meaning subsequent runs are much
quicker. It can optionally encrypt data as
well for added privacy (and we’ll look at
this with Nextcloud too).
Duplicity stores backups as archives
though, so you don’t have the immediate
access to files as you would if they were
stored regularly. So you might also
consider SyncThing, which will happily
mirror your photo, video and whatever
else files wherever you like. Or you could
be Puritan hacker about it and have your
Devuan box run a Cron job that rsyncs
your local photo store to a secure server
at an undisclosed location.
These things can be brought down by
a stray ‘/’ though, so always check your
backups are doing what they’re meant to
be through manual inspection.
45.
UltimateLinuxProjects
44 Ultimate LinuxProjects
henever our perennial “Escape Google (et
al)” feature graces pages, we’re always quick
to point out the benefits of Nextcloud. It can
handle storage (like Google Drive), chat (like Zoom)
and, with Collabora Online, even be a full-blown online
office suite. As you may have guessed it can handle
your photos too, and we’re going to show you how to
get the most out of that feature.
It’s entirely possible to set up Nextcloud at home and
access it remotely, but there are a number of reasons to
consider running it in the cloud (not just because it’s in
the name). First, your ISP might let you down at a
critical time (imagine trying to show off your photos at
Tarquin’s dinner party only to be met with a timeout and
the cold stares of your peers). Cloud providers (good
ones at least) take the flow of packets very seriously.
Next, you don’t have to worry about your hardware
breaking, or losing your photos if your house burns
down. Many providers offer daily backups for an
additional fee (as well as having their own redundancy
measures to protect against hardware failure on their
side), affording you some peace of mind and covering
against your own errors too. Finally, it’s just nice to have
a cloud server sometimes, because you’ll never know
when they’ll come in handy.
Setting up Nextcloud from scratch is a slightly
protracted but well-documented affair (we covered
doing it on the Pi in LXF272’s smart home office feature).
Most of the effort expended is in laying the groundwork
– more precisely, installing a web server, database and
PHP and getting them all talking to each other. Once
that LAMP stack is in place it’s all largely plug and play.
Be that as it may, we don’t much care for repetition
here so this time we’ll look at installing Nextcloud using
Docker. This comes with the advantage that your
installation will always be kept up to date and you won’t
have to worry about maintaining a LAMP stack (or
setting it up in an overly permissive manner). If you’re
running Ubuntu (Desktop, Server or Pi) or otherwise,
then make sure you have the Snap daemon installed.
You could equally well use the Snap image that brings
the same benefits, and means you can skip this next
section where we install Docker. Otherwise SSH to your
server (if your installing remotely) and read on.
Get Docker up and running
The easiest method of installing Docker is to use the
official convenience script (it works on Debian,
Raspberry Pi, Fedora and more):
$ wget https://get.docker.com -O get-docker.sh
Before running this as root, it would be prudent to
cast your eyes over the script so you know what it’s
doing. Once you’re satisfied, run it with:
$ sudo sh get-docker.sh
This works on most distributions, and adds the
appropriate repositories so that it’s kept up to date as
part of the regular package management process. The
Docker Engine should start automatically after install on
Debian and Ubuntu, but Fedora users will need to start
it and enable it manually with:
$ sudo systemctl enable –now docker
At this point you could run:
$ sudo docker run -d -p 8080:80 nextcloud
and find Nextcloud by pointing your browser at
port 8080 on that machine,for example
http:/
/localhost:8080. Using the Docker volume directly
like this is fine for testing locally, but since the image
doesn’t provide HTTPS it’s not smart to use this on a
remote server, since traffic could be intercepted. In fact,
Nextcloud will do everything in its power to stop you
using it this way.
We’d recommend reading the documentation at
https:/
/github.com/nextcloud/docker/tree/master/.
examples that covers using Docker Compose to link the
Nextcloud container (running Apache) to an Nginx
reverse proxy, a Let’s Encrypt certificate updater and a
MariaDB database (which will cope much better with
large photo collections than SQLite).
In order to use HTTPS (or use it without generating
warnings) you need a domain name. You can get a free
subdomain (of the form linuxformat.duckdns.org) from
Install Nextcloud
Discover how you can tap into the power of Docker Compose to
get Nextcloud up and running in a jiffy just like the professionals.
W
If you run Docker
Compose without
the -d switch,
you can see some
debugging info
as the containers
spring into life.
RUN NEXTCLOUD IN THE CLOUD
“It’s just nice to have a cloud server
sometimes, because you’ll never
know when they’ll come in handy.”
46.
Escape Google Photos
UltimateLinux Projects 45
DuckDNS or any number of other Dynamic DNS
providers, as well as a script. This will mean that if
you’re running Nextcloud at home and your IP address
changes, your subdomain record is updated.
Check the latest version of Docker Compose at the
releases page (https:/
/github.com/docker/compose/
releases) and if necessary change the version number
below to grab it:
$ sudo wget https://github.com/docker/compose/
releases/download/1.29.0/docker-compose-
Linux-x86_64 -O /usr/local/bin/docker-compose
$ sudo chmod +x /usr/local/bin/docker-compose
The second command makes the script executable,
and so long as /usr/local/bin is in your $PATH, the
system will be able to run it. We’re going to copy the
example Dockerfiles from the official pages, and since
they span two directories we’ll need to match that.
$ mkdir -p ~/docker-nextcloud/proxy
$ cd ~/docker-nextcloud/
$ wget https://github.com/nextcloud/docker/raw/
master/.examples/docker-compose/with-nginx-proxy/
mariadb/apache/docker-compose.yml
We need to modify the reverse proxy container to
allow large uploads. The example also disables request
buffering, so let’s do that too. Create a file ~/docker-
nextcloud/proxy/uploadsize.conf with these contents:
client_max_body_size 10G;
proxy_request_buffering off;
Then in the same directory create a file named
Dockerfile to source this:
FROM jwilder/nginx-proxy:alpine
COPY uploadsize.conf /etc/nginx/conf.d/uploadsize.
conf
Before we can compose all these images, we need to
edit the YAML file with the hostname of the machine
running Docker and, optionally, an email address for
Let’s Encrypt. Open the docker-compose.yml file we
downloaded earlier, populate the MYSQL_ROOT_
PASSWORD variable with a strong password and set the
VIRTUAL_HOST and LETSENCRYPT_HOST variables to,
say, linuxformat.duckdns.org . There’s one more final
tweak to this file since the Let’s Encrypt companion now
requires an additional volume for ACME data. So add
- acme:/etc/acme.sh
to the Let’s Encrypt volumes: section and also add the
acme volume to the list at the end of the file.
Now, in the same directory, create a file db.env with
the contents, ideally using a stronger password than us
(this one is for the user, rather than the root, account on
the database).
MYSQL_PASSWORD=password1
MYSQL_DATABASE=nextcloud
MYSQL_USER=nextcloud
Finally, we should be able to grab the latest images
and orchestrate everything into action with
$ cd ~/docker-nextcloud/
$ sudo docker-compose build –pull
$ sudo docker-compose up -d
You should find the Nextcloud setup screen by
pointing your browser to your host, but don’t be too
quick – it takes a few seconds to set up everything.
Follow the instructions there to set an administrator
password, and if you’re feeling Spartan uncheck the box
that installs collaborative tools.
Note that the database and SSL certificate are all
automagically preconfigured. As an aside, getting
Docker working on an IPv6 only network was an
altogether hellish experience when we tried it, so if you
figure out how that works please do tell us.
Over the page, we’ll set up users and finally get to
some photo management.
Nextcloud’s friendly Welcome screen – note that the SSL certificate
was generated automatically.
This problem with the Compose example almost outfoxed us. If you’re reading from the future
then it’ll probably be fixed.
RASPBERRY Pi REVISIONS
If you try the above on a Pi you’ll find Docker works but Compose
doesn’t. We downloaded an x86 docker-compose binary, when the Pi
needs an ARM one. And sadly there’s no official ARM builds yet. To
remedy this, you can compile Compose yourself, or (much easier)
install the community-composed Compose through Pip, the Python
module installer:
$ sudo apt install python3-pip
$ sudo rm /usr/local/bin/docker-compose
You’ll also find there’s no armhf build of the official MariaDB image,
but that’s okay because the generous humans at linuxconfig.org
provide one, which you can avail yourself of by replacing mariadb
with linuxconfig.org/mariadb in the docker-compose.yml.
At the time of writing, there’s a slightly bizarre Docker problem on a
few Pi distros (including those based on Debian Buster such as the
official Raspberry Pi OS) involving an outdated libseccomp, which the
Docker Engine depends on. Symptoms of this include dates in
containers being set to 1970 (the Unix epoch) and all kinds of other
things not working. A good solution is to install from the Buster
Backports repository, as described at https:/
/docs.linuxserver.io/faq.
Sama paikka kuintoisessa näytöksessä. Aamu.
PAUKKU. Ovatko ne vielä ylhäällä, tuolla?
VUORINEN. Ovat, ikävä kyllä. Palvelija vei heille äsken kahvia.
PAUKKU. Sanotteko sitä ikäväksi, että rosvot ovat käsissämme?
VUORINEN. Jospa ne eivät milloinkaan olisi käsiimme tulleet!
Tiedän kyllä seuraukset! Jo tänään kiertää historia ympäri seutua —
ja huomenna saan lukea sen sanomalehdissä.
PAUKKU. Mitä pahaa siinä sitten on?
VUORINEN. Oo, se kyllä tiedetään, että ihmiset aina pitävät
roistojen puolta. Te kyllä saatte kunnian heidän vangitsemisestaan,
mutta minä saan häpeän ystävällisyydestäni heitä kohtaan. Kukaan
ei tietysti hiisku sanaakaan minun sisällisistä aavistuksistani näitä
ihmisiä kohtaan. Siitä luonnollisesti ei puhuta mitään.
LAURA. Nyt kun olen tarkoin kuullut koko jutun, on mielestäni
varsin naurettavaa uskoa noita kunnon poikia varkaiksi.
VUORINEN. Kyllähän siihen lujaa uskoa tarvitaankin. Niillä
pahuuksilla on sentään koko lailla ihmistapoja. Vaikka kyllä raakuus
sentään toisinaan pistää esiin.
HELLÄ. Mutta ethän sinä, setä kulta, eilen ajatellut sinnepäinkään.
VUORINEN. Eilen! Mistä sinä tiedät mitä minä eilen ajattelin —
vaikka minä en puhunut siitä!
PAUKKU. Eihän neitosilla voi olla kokemusta tällaisissa asian
haaroissa.
49.
LAURA. Eihän tällaistaole vielä ikinä kukaan nähnyt eikä kuullut.
PAUKKU. Eikö kuullut? Miksi ei olisi! Minä tunnen sadottain tällaisia
tapauksia. Antakaas kun kerron! Kerrankin muuan suutari —
HELLÄ. Mutta eiväthän herrat Airio ja Merisaari ole suutareita.
PAUKKU. Ei se mitään tee. Ei kaikki rosvot olekaan suutareita,
mutta —
HELLÄ. Eihän sellaiset esimerkit tähän kelpaa!
PAUKKU. Sallikaa minun puhua loppuun. Te ette tätä ymmärrä!
Teitä ei ole koskaan lurjus vetänyt nenästä. Mutta minua ovat
lukemattomat —
HELLÄ. Sen uskon ilman esimerkkejäkin!
LOTTA ja KAISLA tulevat.
VUORINEN. No, herra Kaisla, onko rouva Paukku kertonut teille?
KAISLA. On.
VUORINEN. Mitä nyt sanotte tähän?
KAISLA. Pitäisikö minun sanoa jotakin?
VUORINEN. Älkää nokitelko! Eikö mielestänne ole syytä ryhtyä
tutkintoon?
KAISLA. Eiköhän?
LOTTA. Herra Kaislalla on viep lisää syytöksiä.
50.
PAUKKU. Sepä mainiota!— Mitä teillä on lisättävänä?
KAISLA. Vähäpätöinen juttu! Lompakkoni on viime yönä
varastettu.
KAIKKI. Kauheata! Onko? Herra jumala!
VUORINEN. Ja sen piti tapahtua minun kattoni alla! — Se on
hävytöntä!
LAURA. Kuinka uskallatte väittää sitä varastetuksi? Huomasitteko
kun se varastettiin?
KAISLA. En — eikä varkaat tahdo tullakaan huomatuiksi!
LAURA. Olettehan siis voinut pudottaa sen jonnekin!
KAISLA. Minä olen etsinyt huoneeni katosta lattiaan, mutta —
turhaan!
Jo eilen illalla panin sen keskilattialla olevalle pöydälle.
PAUKKU. Mitä siinä lompakossa oli?
KAISLA. Parisenkymmentä markkaa ja pari kirjettä.
PAUKKU. Mainiota! Nyt ovat pojat pihdissä!
HELLÄ tuskassa. Mitä sinä uskot, Laura?
KAISLA. Laura-neiti uskoo vain hyvää!
LAURA. Eipä tässä enään usko pahaankaan pitkältä auttane. Pian
kai saadaan nähdä, kuka uskoo oikein!
51.
KAISLA. Laura-neidin läheinentuttavuus noitten lurjusten kanssa
kyllä tukee hänen uskoaan, mutta paras kai sentään lie uskoa
järkiperäisiä syitä ja viedä poikaset arestiin. Siten vapaudumme
kaikista ikävistä tutkimisista!
PAUKKU. Niin juuri! Parasta on heti lähettää vintiöt vangin
kuljettajalle!
VUORINEN. Emmeköhän sentään tutkisi heitä ensin?
LAURA. Niin, isä kulta! Se on paljon parempi!
VUORINEN. Älä luulekaan, että tahdon armahtaa heitä! Olen
päinvastoin, niin suuttunut heihin, että tahtoisin antaa heille vähän
nokan poltetta.
KAISLA. Oikein! Siihen kyllä saatte tilaisuutta!
LAURA. Hyi teitä! (Hiljaa.) Teistä en usko hyvää enään koskaan!
PAUKKU. Mitä nyt tehdään? Paiskaanko minä ne heti kärryille siis?
LAURA. Mutta jos kerran täällä on tapahtunut varkaus, niin on kai
heitä täällä tutkittavakin.
PAUKKU. Jaa-a! Olisikohan —?
KAISLA. Eihän laki sellaista käske!
PAUKKU. Kuules Lotta, kuinkas asetukset —?
VUORINEN. Minä tahdon, että heidät tutkitaan täällä.
LOTTA. Käydään heti toimeen, kun he tulevat ulos!
52.
PAUKKU. Kuulkaa minua,hyvät ystävät!
Laulu n:o 19.
Sallittehan mun heitä tutkia?
Ette tunne rosvojen mutkia!
Ma ne pihtihin kauniisti puserran,
Ja esivallan voimalla muserran.
KAIKKI.
Hän ne pihtihin kauniisti pusertaa
Ja esivallan voimalla musertaa!
PAUKKU.
Kuulkaas, kun mä teitä nyt neuvon näin:
Kiikkiin jos ma joudun, enk' omin päin
Saane roistoja totuutta puhumaan,
Niin silloin vasta tulkaatte auttamaan!
KAIKKI.
Jos ei roistoja totta saa puhumaan,
Niin silloin vasta riennämme auttamaan!
PAUKKU.
Olen kyllä saakelin ovela,
Mutta onpa rosvokin nokkela.
Ne mun ennenkin pussiin on pistäneet
Ja pakanasti kanssani ilveilleet!
53.
KAIKKI.
Hän jo ennenkinpussissa ollut on,
Niin, kruununmiehen virka on onneton!
AIRIO ja MERISAARI tulevat matkavalmiina.
PAUKKU pelästyy. Herran pieksut! Hss!
MERISAARI. Sallikaa meidän kiittää teitä, herra
maanviljelysneuvos, vieraanvaraisuudestanne! Meidän aikamme,
ikävä kyllä, ei enään siedä viivyttelemistä.
VUORINEN erittäin ystävällisesti. Joko aiotte lähteä? (Erikseen.)
Menkää niin pitkälle, kuin hakopuuta piisaa!
AIRIO. Niin — Merisaari on yht'äkkiä saanut omantunnon vaivat
laiskottelemisesta. Minun omatuntoni kyllä on koko lailla laajempi
tässä suhteessa.
VUORINEN. Lienevät saman arvoiset molemmat. Minä tarkoitan,
että olette erinomaisia omantunnon miehiä kumpainenkin.
MERISAARI. Sydämmelliset kiitoksemme siis — ja jääkää hyvästi!
PAUKKU ponnistelemisen jälkeen. To-op! Munsöörit! — Täällä on
tapahtunut — se on sangen paha ja huono asia, että — että — minä
puhun esivallan nimessä — (Lotalle.) Auta minua. Lotta, jos tulee
hätä! (Ääneen.) Näyttäkääs minulle passinne! (Hämmentyy ja sanoo
nöyrästi.) Minä vaan muuten — muodon vuoksi —
AIRIO. Passimme? Ei meillä mitään passeja ole.
54.
PAUKKU hiljaa Vuoriselle.Näetkös — se tepsi heti! (Ääneen.) No,
paperinne sitten!
AIRIO. Mitkä paperit?
PAUKKU uljistuen. Ristimä — rokotus — työ — ja papinkirjat!
AIRIO. Vaaditteko te piirissänne ihmisiltä sellaisen joukon
papereita?
PAUKKU. Vaadin tietysti. Totta kai!
AIRIO. Onko teillä kaikilla sellainen paperivarasto taskuissanne?
Onko teilläkin, herra Kaisla?
KAISLA. Ehkä oli minulla nämä paperit lompakossani, joka viime
yönä varastettiin. Ette suinkaan te ole sitä sattumalta nähnyt
jossain?
AIRIO. Jos se on varastettu, niin mitenkä me olisimme sen voineet
nähdä!
PAUKKU. Eikö teillä ole edes muuttokirjaakaan?
AIRIO. Sepä kumma kysymys! Emmehän me matkustavia kisällejä
ole!
PAUKKU toisille. He eivät ole matkustavia kisällejä — pankaa se
muistiinne!
AIRIO. Mutta mitä tämä kaikki oikeastaan merkitsee?
PAUKKU hiljaa Vuoriselle. Parasta on alkaa pienemmällä
varkaudella — sen ehkä tunnustavat pikemmin. (Ääneen.) Hm! Asia
55.
on näettekös tämä!On nähty teidän näköisenne miehen varastavan
marjoja tuosta puutarhasta.
AIRIO. Niin, se olin minä.
LAURA ja HELLÄ. Mitä?
PAUKKU Vuoriselle. Noin minä vaan niitä nipistelen!
VUORINEN. Te tunnustatte siis varkautenne?
AIRIO. Varkauden? Se on liian törkeä sana! Jos olisin tavannut
jonkun, niin olisin pyytänyt luvan, vaan kun en ketään nähnyt, niin
en välittänyt kursailla muutamien —
PAUKKU. Me emme myöskään välitä kursailla! Ha, ha, ha!
KAISLA. No, mitä Laura-neiti nyt uskoo?
LAURA. Herra Merisaari on kuitenkin viaton?
AIRIO. Vielä vai! — Hän söi samoja marjoja, joita tiesi minun
tuolla hirmuisella tavalla hankkineen.
VUORINEN. Nyt minä en enään kärsi tuota julkeata lörpötystä,
tietäkää se!
AIRIO. Mitä sanotte?
MERISAARI. Herra Vuorinen!
VUORINEN. Suunne kiinni te! Nyt minä puhun.
AIRIO. Puhukaa, olkaa hyvä! Te aloitte niin kauniisti!
56.
VUORINEN. Kauniisti minäteitä kohtelinkin! Otin vastaan ystävinä
ja ihmisinä! Ja te palkitsette minut häväistyksellä ja rikoksella ja —
varkaudella!
AIRIO purskahtaa nauramaan. Suokaa anteeksi, mutta nyt en
enään voi nauruani hillitä!
MERISAARI. Herra Vuorinen! Puhukaa suoraa kieltä! Te tarkoitatte
nähtävästi jotain muuta kuin tuota joutavaa marjajuttua! Mitä se on?
LOTTA. Vielä hän kehtaa kysellä!
VUORINEN. Meillä on syytä luulla, että te yöllä varastitte herra
Kaislan lompakon.
MERISAARI. Mitä sanotte?
AIRIO. Varastimme lompakon? Mitä uskallatte te sanoa?
LOTTA. Niin me vaan uskallamme.
PAUKKU. Kun kerran jo tunnustitte yhden varkauden, niin
voittehan tunnustaa toisenkin.
AIRIO. Ei, mutta kuulkaapas nyt! — Onhan luullakseni
jommoinenkin hyppäys muutamasta marjasta rahalompakkoon! Vai
mitä?
KAISLA. Sellaiset hyppäykset eivät liene varsin outoja —
teikäläisille.
AIRIO kiivaasti. Meikäläisille! (Naureskellen.) Eipä suinkaan! Me
tietysti olemme perehtyneet vaikka minkälaisiin rikoksiin.
Harjoitelleet murhapolttoja, lapsenmurhia, itsemurhia ja —
57.
PAUKKU. Voi noitaverkkasen vietäviä! Kokonainen röykkiö
rikoksia!
Painakaa ne kaikki muistiinne, hyvät ystävät!
AIRIO. Niin — ja myöskin itsemurhat!
PAUKKU. Kaikki — kaikki!
AIRIO nauraen. Mahtuvatko nekin teihin?
MEISAARI. Sallikaahan toki meidän selittää!
PAUKKU. Ei tule kysymykseenkään!
AIRIO. Eipä tietenkään! Rautoihin vain! Mitäpä pitkistä puheista!
Tuhmuutta!
PAUKKU. Tuhmuutta? Tuo hävytön haukkuu minua vielä
kaupanpäälle!
(Toisille.) Älkää vaan unohtako, että minä olen tuhma!
KAISLA. Kyllä minä koetan muistaa.
PAUKKU. Sinä pääset heti putkaan, poikaseni! Kyllä sinut
tunnetaan,
Santtu-sihteeri!
AIRIO. Ei minun nimeni ole Santtu.
PAUKKU. No, sitten sinun nimesi on Nilkku-Ville!
AIRIO. Nilkku — ha, ha, ha! (nauraa makeasti.)
MERISAARI. Mitä naurat?
58.
AIRIO. Meitä luullaannoiksi kahdeksi karanneeksi vangiksi — ha,
ha, ha! Sehän on erinomaista!
VUORINEN. Kylläpä kohta nauratte toisella tavalla!
PAUKKU. Seuratkaa meitä nyt —
LAURA Merisaarelle. Minä en usko teistä mitään pahaa! Luottakaa
siihen!
VUORINEN. Vaiti sinä!
AIRIO. Mitähän Hellä-neiti tästä luulee?
HELLÄ. Minä uskoisin kovin mielelläni vain hyvää teistä!
PAUKKU hommaten ja työntäen toisia pois, jääden itse viimeiseksi.
Mars! Mars matkaan nyt vain — pääsette kanakoppiin ensi aluksi
senkin — kananpojat! (Vuorinen, Lotta, Airio ja Merisaari menevät.)
Pitäkää silmällä etteivät lähde juoksemaan! (Tallustaa perässä.)
LAURA. Miksi ette mene mukana, herra Kaisla?
KAISLA. Sallikaa minun puhua kanssanne pari sanaa! — Miksi
olette suuttunut minuun? Mitä olen teille tehnyt? Jos tietämättäni
olen teitä loukannut, niin antakaa se anteeksi! Tiedättehän, etten
minä ole paha, mutta mustasukkaisuus —
LAURA. Älkää selitelkö!
KAISLA. Tiedättehän, että minä rakastan teitä. Älkää syöskö minua
toivottomuuteen!
LAURA. Jättäkää minut nyt! Minä pyydän teitä!
59.
KAISLA. Lupaatteko, ettetteole minulle suuttunut?
LAURA. Lupaan — kun vain menette.
KAISLA. Minun onneni on teidän käsissänne! (Menee.)
HELLÄ. Hänhän kosi sinua.
LAURA. Minä en voi häntä rakastaa. Nyt sen tiedän varmaan.
HELLÄ. Voi Laura kulta! Mitä ajattelet Airiosta tuon marjajutun
johdosta?
LAURA. Joutavanpäiväinen vallattomuus! Siinä kaikki! Hän on
kelpo mies, sen tiedän varmaan.
HELLÄ. Niin minäkin toivon. Ajatteles, että me puhelimme niin
paljon keskenämme ja — ja minä luulen — että hän kosi minua.
LAURA. Mitä vastasit hänelle?
HELLÄ. Enhän minä voinut sanoa hänelle mitään pahaa. Enhän
voinut aavistaakaan, että hän oli karannut vanki.
LAURA. Ei hän ole vanki, eikä karkuri. Kyllä hän on se, joksi sanoo
itseään.
HELLÄ. Toivon, että olisit oikeassa! — Mutta miksi olet sinä niin
surullinen? Kun et voi herra Kaislaa rakastaa, niin ei sitä sitten
tarvitse surrakaan!
LAURA. Niin.
HELLÄ. Vaikka rakastat häntä — niinkö?
60.
LAURA. Niin —mutta minä tyhmän epäilyni tähden hylkäsin
toisen.
HELLÄ. Merisaarenko?
LAURA. Niin.
HELLÄ. Voihan sen auttaa. Mene sanomaan hänelle, että nyt —
LAURA. Ei, Hellä kulta! Mitä sinä ajattelet! Eihän sellaista voi —
kun kerran hänet hylkäsin. — Huomasitko kuinka hän kiirehti pois
täältä?
HELLÄ. Mutta ovathan he nyt kanakopissa. Minä voisin helposti
auttaa asian, jos vain olisin oikein varma siitä, etteivät he ole
vankeja!
SANTTU tulee. Siitä voitte olla aivan varma!
HELLÄ pelästyy. Oh!
SANTTU. Älkää pelästykö, neiti! Minulla on hyvät aikomukset!
LAURA menee lähemmäksi. Mitä te tahdotte?
SANTTU. Tahdon vain sanoa, että nuo molemmat herrat ovat aivan
syyttömät.
LAURA. Siitä olen minä jo ollut kauvan aikaa varma.
SANTTU. Se on kyllä kiltisti tehty, mutta minä voin todistaa heidän
syyttömyytensä ja se on enemmän, se!
HELLÄ menee hänen luokseen. Sepä hauskaa! Todistakaa se!
61.
SANTTU. Kyllä —kohta! Ensin muutama sana herra Kaislasta.
(Lauralle.) Minä tiedän, että hän kosiskelee teitä. Mistä sen tiedän,
on saman tekevä! Mutta hän ei ole teidän arvoisenne, eikä ole
rehellinen teitä kohtaan! Hänellä on jo lemmitty Helsingissä.
LAURA. Mistä tiedätte sen?
SANTTU ottaa esiin punertavan kirjeen. Tästä! Lukekaa itse!
HELLÄ ottaa kirjeen. Arvasinhan sen! — Nyt saamme nähdä!
LAURA. Ethän vain aikone lukea sitä!
HELLÄ. Hän kyllä antoi luvan, jos saisin sen käsiini — mutta
samapa se! On siitä hyötyä kuitenkin! (Pistää kirjeen taskuunsa.)
SANTTU Lauralle. Olkaa niin hyvä ja sanokaa terveisiä herra
Merisaarelle siltä heittiöltä, jonka hän eilen tapasi.
LAURA. Terveisiäkö vain?
SANTTU. Sanokaa myöskin, että olen koko yön ajatellut sitä
keskustelua, joka meillä oli eilen illalla. Sanokaa hänelle, että minä
muistan mitä hän minulle sanoi ja koetan tehdä parastani. Hän saa
vielä kuulla minusta kerran. — Sanotteko näin hänelle?
LAURA. Kyllä — mielelläni.
SANTTU. Kiitos! — Sitten — te voisitte pitää hänestä vähäisen —
hän on kelpo poika — hän ansaitsee suosionne epäilemättä
parhaiten.
LAURA. Mutta kuka te sitten olette?
62.
SANTTU. Kohta saattesen tietää.
HELLÄ. Tuolla tulee nimismies —
SANTTU. Hyvästi sitten, — Ei sentään! Antaa äijän tulla! Saman
tekevä!
PAUKKU tulee. Kuka tuo on? Ahaa — Mattihan sinä olet! Etkös
olekin?
SANTTU murteella. O'n oikke'!
PAUKKU. Olipa erinomainen asia, että tulit! Minä en saa niitä
veitikoita tunnustamaan, en vaikka —
SANTTU. Siit' mää ny' justii' meinaski praakat'. Täss' on tullu' juur'
vissii pien' trykkveil'. Kas kutei ne okka' ne oik'iat!
PAUKKU. No, voi sun perhana! Mistä sen tiedät?
SANTTU. Juu ku' se Nilkk-Vill' saatii' kii eile' ehroll' Lohjall'.
PAUKKU. Mitä pitää minun kuulla! Hyi saakeli! Tämä on kauheata!
SANTTU. Ja täss' o' sitt' tää kirja kans'! Se varastettii täält' mennät'
yön'.
PAUKKU. Helkkarissa! Onko se Kaislan lompakko?
SANTTU. Kyll' se se piräis' olla.
PAUKKU. Onko rahat jälellä siinä?
SANTTU. Juur' vissist' onki.
63.
PAUKKU. Ihmeellistä! —No, kuka tämän nyt takaisin lähettää?
SANTTU. Se ku' sen o' varastanukki'.
PAUKKU aivan nolona. Soo-o! — Tätä en voi ymmärtää — ja —
kuules —
Nilkku-Ville on kiinni ja — missä on sitten Santtu-sihteeri?
SANTTU. Jaa — kyll' mää senki' tiärä' ja sanon kans' —. Näättenks'
tee tot' paattii' tuoll rannall'?
PAUKKU. Kyllä — kyllä minä näen.
SANTTU. Näättenks' tee to' laivan kanss'?
PAUKKU. Näen kyllä. Mutta miksi sitä kysyt? Olisiko hän siellä?
SANTTU. Ei juur' viel'. — Mää juokse' toho' paattii ny' — ja sitt'
mää melo' toho' laivaa'!
PAUKKU. Miksikä sinä sinne menet?
SANTTU. Seutähre' vaa' ku' oikealla kielellä minä olen Santtu-
sihteeri!
(Juoksee pois.)
KAIKKI hämmästyneinä.
PAUKKU. Topp! Topp! Voi, voi! Ei ole ketään lahdella, ei ketään
rannalla — voi, voi! — Ja hän juoksee niin pakanasti! — Hoooi! Ho-
o-o-oi! Kutsukaa pian ihmisiä apuun — minä seuraan häntä silmilläni
—
LAURA vastahakoisesti. Ei täällä ole ketään —
64.
PAUKKU. Pitäkää tehäntä silmällä! Minä juoksen apua hakemaan.
(Juoksee ulos.) A-a-a-puun!
LAURA. Herralle kiitos! Kohta hän on venheessä!
HELLA. Vai tuo se oli se oikea varas!
PAUKKU palajaa. Tul-tul-tul-tulkaa katsomaan!
VUORINEN tulee. Mikä teillä on hätänä?
PAUKKU. Nyt hän on jo rannalla.
VUORINEN. Kuka?
LOTTA. Missä —?
KAISLA tulee. Mikä melu täällä?
PAUKKU. Nyt hän työnsi veneen vesille ja soutaa — vooi, vo-o-o-i
—
Ettes vähän häpeä!
VUORINEN Oletko tullut hulluksi —?
PAUKKU. Äsken juuri — nyt pääsee laivan viereen —
VUORINEN. Kuka se on?
LOTTA. Kuka siellä menee?
PAUKKU. Ettekö te nyt näe kuka se on! Tietäähän sen ken tahansa
— koska minäkin — Santtu-sihteeri — ettekö näe — voi — vo-o-o-oi!
VUORINEN. Mitä sinä höpiset! Santtuhan on kanakopissa!
65.
PAUKKU. Ei, ei!Ei ole — erehdystä kaikki!
VUORINEN. Entäs Nilkku-Ville?
PAUKKU. Vangittiin eilen Lohjalla.
VUORINEN. Entäs nuo kananpojat — ei — ei — kanakoppilaiset —
tarkoitan —
PAUKKU. Ovat viattomat!
VUORINEN. Mistä sen tiedät?
PAUKKU. Santtu sanoi.
VUORINEN. Sanoi? Oliko hän täällä?
PAUKKU. Tietysti oli.
LOTTA. Miksi et ottanut häntä vangiksi?
PAUKKU. No, kun se ei jäänyt tänne. Hän sen kirjeenkin toi.
LOTTA. Jonka tietysti oli itse kirjoittanut, kuu kerran on sihteeri!
Voi sinuas esivallan pihtipieli!
PAUKKU aivan masentuneena. Itse — sihteeri — pihtipieli —!
(Tarttuu päähänsä.) Vo-o-o-oi!
VUORINEN. Millä nyt tällaisesta häpeästä selviämme? Kuinka
sinäkin — poliisi olet olevinasi ja annat noin vetää itseäsi nenästä!
LOTTA. Mahdoit huutaa meitä apuun!
PAUKKU. En minä sen kovempaa voi huutaa —
66.
VUORINEN. Millä nythyvitämme vieraamme, joita olemme näin
kauheasti häväisseet?
LOTTA. Minä juoksen aukasemaan kanakopin oven. (Menee.)
VUORINEN. Auta nyt meitä Laura ja mene puhumaan
puolestamme!
LAURA. Sen teen ilomielellä!
KAISLA. Kukas minun lompakkoni sitten varasti?
PAUKKU nolona. Santtu tietysti. Hän toi sen takaisin. Tässä se on
ja rahat ovat sisällä! (Antaa lompakon.)
KAISLA katselee lompakon sisusta. Tosiaankin! No nyt tulee
maailman loppu!
PAUKKU. Tällaista ei minulle ole koskaan ennen tapahtunut! —-
Kuules veli (puhelee Vuorisen kanssa.)
HELLÄ. Herra Kaisla! Tässä on se kirje, jonka lupasitte antaa
minun lukea, jos saan sen käsiini.
KAISLA. Ettehän toki ole sitä tehnyt?
HELLÄ. En — sillä minä arvasin asian muutenkin.
KAISLA. Ettehän ole kertonut kellekään?
HELLÄ. En — muille — kuin Lauralle.
KAISLA. Ooh! — Kiitos vaivastanne!
67.
HELLÄ. Ei kestä!
KAISLAitsekseen. Nyt siis on kiire. (Ääneen.) Herra
maanviljelysneuvos!
VUORINEN. Mitä tahdotte?
KAISLA. Minä rakastan Lauraa.
VUORINEN. Oho! — Mutta nyt ei ole sellaiseen aikaa.
KAISLA. Nyt on paras aika, sillä herra Merisaari aikoo kosia —
VUORINEN. Sepä hauskaa —
HELLÄ. Nyt ne jo tulevat —
VUORINEN. Koeta sinäkin Hellä parastasi! Meidän täytyy hyvittää
heidät —
KAISLA. Ettehän vaan tytärtänne anna —
VUORINEN. Miksi en? Herra Merisaari on kelpo mies! Hänelle
antaisin vaikka kymmenen tytärtä. Ha, ha, ha!
KAISLA. Vanhinko vaan, ettei teillä ole kymmentä tytärtä, herra
Vuorinen!
VUORINEN. Mitä se on? (Suuttuu.) Ja vaikka minulla olisi sata
tytärtä, niin teille minä en antaisi ainoatakaan. Tietäkää se!
LOTTA, LAURA, AIRIO ja MERISAARI tulevat.
68.
VUORINEN. Hyvät herrat!Minä pyydän kaikkien meidän puolesta
anteeksi tämän hirveän häväistyksen. Jos vaan —
MERISAARI. Laura-neiti jo kertoi kaikki!
AIRIO. Eihän koko jutulle voi muuta kuin nauraa, ha, ha, ha!
VUORINEN. Sepä mainiota —
MERISAARI. Sanomme siis toisen kerran hyvästit!
VUORINEN. Eikö hemmetissä — ei sitä nyt niin!
MERISAARI. Minä en voi jäädä. En millään ehdolla.
HELLÄ. Ettekö? — Teidän täytyy! (Veitikkamaisesti.) Minä kyllä
hänet taivutan. (Puhelee hänen kanssaan, osoittaen Lauraa.)
PAUKKU. Ai peijakas! Niistä marjoista emme vielä ole —
LOTTA. Pidätkö suusi, sinä harakka!
PAUKKU pahoillaan. Harakka —!
HELLÄ. Herra Merisaari jää!
MERISAARI Menee Lauran luo. Minä jään — kernaasti.
VUORINEN. Hyvä, hyvä! Niin sen piti käydä! Ja jos teillä on joku
toivomus, jonka täyttämisessä minä voisin olla apuna, niin voitte
luottamuksella sanoa sen minulle.
MERISAARI. Kiitän siitä! (Lauralle.) Mitä te arvelette, Laura?
LAURA antaa Merisaarelle kätensä.
69.
AIRIO veitikkamaisesti. Saankominä tehdä samoin?
VUORINEN. Tahdotteko tekin jotakin?
AIRIO. Se on vielä salaisuus, vaan —
HELLÄ panee kätensä hänen suulleen. Et saa sanoa!
KAISLA. Päin mäntyä meni! — No, eipä siitä surra sentään!
VUORINEN. Ja nyt hyvät vieraat — nyt pannaan sellainen riemu
pystyyn, ettei Lahdenpohja mokomaa ole nähnyt.
Laulu n:o 20.
Juhla nyt loistava
Täällä alkakoon!
PAUKKU.
Minä en toistava
Erheitäni oo.
KAISLA.
Sepä hyvä oisi teille
Opiks' jos tää ois!
LOTTA.
Joka elon temppu meille
Järkeä jos tois!
PAUKKU Lotalle.
70.
Vastaisuudessa
Olen varova,
Enkä koskaananna heille
Syytä ilkkua.
KAIKKI.
Vastaisuudessa
On hän varova,
Eikä koskaan anna meille
Syytä ilkkua.
VUORINEN.
Sovinnon juhla tää
Meille olkohon!
Riitaan en syytä nää
Kaikki hyvin on.
MERISAARI.
Eespäin vaan nyt kulkee tiemme.
LAURA.
Onnellemme päin.
AIRIO.
Kohtalon me myötä viemme.
HELLA.
71.
Leikitellen näin.
PAUKKU.
Palkan tästäsain —
KAISLA.
Pitkän nenän vain.
LAURA, HELLÄ, AIRIO ja MEEISAARI.
Meiltä saatte kiitoksemme!
PAUKKU.
Se on ilonain.
KAIKKI.
Ain' ei onneen vie
Jalkamatkain tie.
Tällä kertaa riemuksemme
Kaikki käynyt lie.
ESIRIPPU.
72.
End of ProjectGutenberg's Seikkailu jalkamatkalla, by Jens
Christian Hostrup
73.
*** END OFTHE PROJECT GUTENBERG EBOOK SEIKKAILU
JALKAMATKALLA: VIISINÄYTÖKSINEN LAULUNÄYTELMÄ ***
Updated editions will replace the previous one—the old editions will
be renamed.
Creating the works from print editions not protected by U.S.
copyright law means that no one owns a United States copyright in
these works, so the Foundation (and you!) can copy and distribute it
in the United States without permission and without paying
copyright royalties. Special rules, set forth in the General Terms of
Use part of this license, apply to copying and distributing Project
Gutenberg™ electronic works to protect the PROJECT GUTENBERG™
concept and trademark. Project Gutenberg is a registered trademark,
and may not be used if you charge for an eBook, except by following
the terms of the trademark license, including paying royalties for use
of the Project Gutenberg trademark. If you do not charge anything
for copies of this eBook, complying with the trademark license is
very easy. You may use this eBook for nearly any purpose such as
creation of derivative works, reports, performances and research.
Project Gutenberg eBooks may be modified and printed and given
away—you may do practically ANYTHING in the United States with
eBooks not protected by U.S. copyright law. Redistribution is subject
to the trademark license, especially commercial redistribution.
START: FULL LICENSE
PLEASE READ THISBEFORE YOU DISTRIBUTE OR USE THIS WORK
To protect the Project Gutenberg™ mission of promoting the free
distribution of electronic works, by using or distributing this work (or
any other work associated in any way with the phrase “Project
Gutenberg”), you agree to comply with all the terms of the Full
Project Gutenberg™ License available with this file or online at
www.gutenberg.org/license.
Section 1. General Terms of Use and
Redistributing Project Gutenberg™
electronic works
1.A. By reading or using any part of this Project Gutenberg™
electronic work, you indicate that you have read, understand, agree
to and accept all the terms of this license and intellectual property
(trademark/copyright) agreement. If you do not agree to abide by all
the terms of this agreement, you must cease using and return or
destroy all copies of Project Gutenberg™ electronic works in your
possession. If you paid a fee for obtaining a copy of or access to a
Project Gutenberg™ electronic work and you do not agree to be
bound by the terms of this agreement, you may obtain a refund
from the person or entity to whom you paid the fee as set forth in
paragraph 1.E.8.
1.B. “Project Gutenberg” is a registered trademark. It may only be
used on or associated in any way with an electronic work by people
who agree to be bound by the terms of this agreement. There are a
few things that you can do with most Project Gutenberg™ electronic
works even without complying with the full terms of this agreement.
See paragraph 1.C below. There are a lot of things you can do with
Project Gutenberg™ electronic works if you follow the terms of this
agreement and help preserve free future access to Project
Gutenberg™ electronic works. See paragraph 1.E below.
76.
1.C. The ProjectGutenberg Literary Archive Foundation (“the
Foundation” or PGLAF), owns a compilation copyright in the
collection of Project Gutenberg™ electronic works. Nearly all the
individual works in the collection are in the public domain in the
United States. If an individual work is unprotected by copyright law
in the United States and you are located in the United States, we do
not claim a right to prevent you from copying, distributing,
performing, displaying or creating derivative works based on the
work as long as all references to Project Gutenberg are removed. Of
course, we hope that you will support the Project Gutenberg™
mission of promoting free access to electronic works by freely
sharing Project Gutenberg™ works in compliance with the terms of
this agreement for keeping the Project Gutenberg™ name associated
with the work. You can easily comply with the terms of this
agreement by keeping this work in the same format with its attached
full Project Gutenberg™ License when you share it without charge
with others.
1.D. The copyright laws of the place where you are located also
govern what you can do with this work. Copyright laws in most
countries are in a constant state of change. If you are outside the
United States, check the laws of your country in addition to the
terms of this agreement before downloading, copying, displaying,
performing, distributing or creating derivative works based on this
work or any other Project Gutenberg™ work. The Foundation makes
no representations concerning the copyright status of any work in
any country other than the United States.
1.E. Unless you have removed all references to Project Gutenberg:
1.E.1. The following sentence, with active links to, or other
immediate access to, the full Project Gutenberg™ License must
appear prominently whenever any copy of a Project Gutenberg™
work (any work on which the phrase “Project Gutenberg” appears,
or with which the phrase “Project Gutenberg” is associated) is
accessed, displayed, performed, viewed, copied or distributed:
77.
This eBook isfor the use of anyone anywhere in the United
States and most other parts of the world at no cost and with
almost no restrictions whatsoever. You may copy it, give it away
or re-use it under the terms of the Project Gutenberg License
included with this eBook or online at www.gutenberg.org. If you
are not located in the United States, you will have to check the
laws of the country where you are located before using this
eBook.
1.E.2. If an individual Project Gutenberg™ electronic work is derived
from texts not protected by U.S. copyright law (does not contain a
notice indicating that it is posted with permission of the copyright
holder), the work can be copied and distributed to anyone in the
United States without paying any fees or charges. If you are
redistributing or providing access to a work with the phrase “Project
Gutenberg” associated with or appearing on the work, you must
comply either with the requirements of paragraphs 1.E.1 through
1.E.7 or obtain permission for the use of the work and the Project
Gutenberg™ trademark as set forth in paragraphs 1.E.8 or 1.E.9.
1.E.3. If an individual Project Gutenberg™ electronic work is posted
with the permission of the copyright holder, your use and distribution
must comply with both paragraphs 1.E.1 through 1.E.7 and any
additional terms imposed by the copyright holder. Additional terms
will be linked to the Project Gutenberg™ License for all works posted
with the permission of the copyright holder found at the beginning
of this work.
1.E.4. Do not unlink or detach or remove the full Project
Gutenberg™ License terms from this work, or any files containing a
part of this work or any other work associated with Project
Gutenberg™.
1.E.5. Do not copy, display, perform, distribute or redistribute this
electronic work, or any part of this electronic work, without
prominently displaying the sentence set forth in paragraph 1.E.1
78.
with active linksor immediate access to the full terms of the Project
Gutenberg™ License.
1.E.6. You may convert to and distribute this work in any binary,
compressed, marked up, nonproprietary or proprietary form,
including any word processing or hypertext form. However, if you
provide access to or distribute copies of a Project Gutenberg™ work
in a format other than “Plain Vanilla ASCII” or other format used in
the official version posted on the official Project Gutenberg™ website
(www.gutenberg.org), you must, at no additional cost, fee or
expense to the user, provide a copy, a means of exporting a copy, or
a means of obtaining a copy upon request, of the work in its original
“Plain Vanilla ASCII” or other form. Any alternate format must
include the full Project Gutenberg™ License as specified in
paragraph 1.E.1.
1.E.7. Do not charge a fee for access to, viewing, displaying,
performing, copying or distributing any Project Gutenberg™ works
unless you comply with paragraph 1.E.8 or 1.E.9.
1.E.8. You may charge a reasonable fee for copies of or providing
access to or distributing Project Gutenberg™ electronic works
provided that:
• You pay a royalty fee of 20% of the gross profits you derive
from the use of Project Gutenberg™ works calculated using the
method you already use to calculate your applicable taxes. The
fee is owed to the owner of the Project Gutenberg™ trademark,
but he has agreed to donate royalties under this paragraph to
the Project Gutenberg Literary Archive Foundation. Royalty
payments must be paid within 60 days following each date on
which you prepare (or are legally required to prepare) your
periodic tax returns. Royalty payments should be clearly marked
as such and sent to the Project Gutenberg Literary Archive
Foundation at the address specified in Section 4, “Information


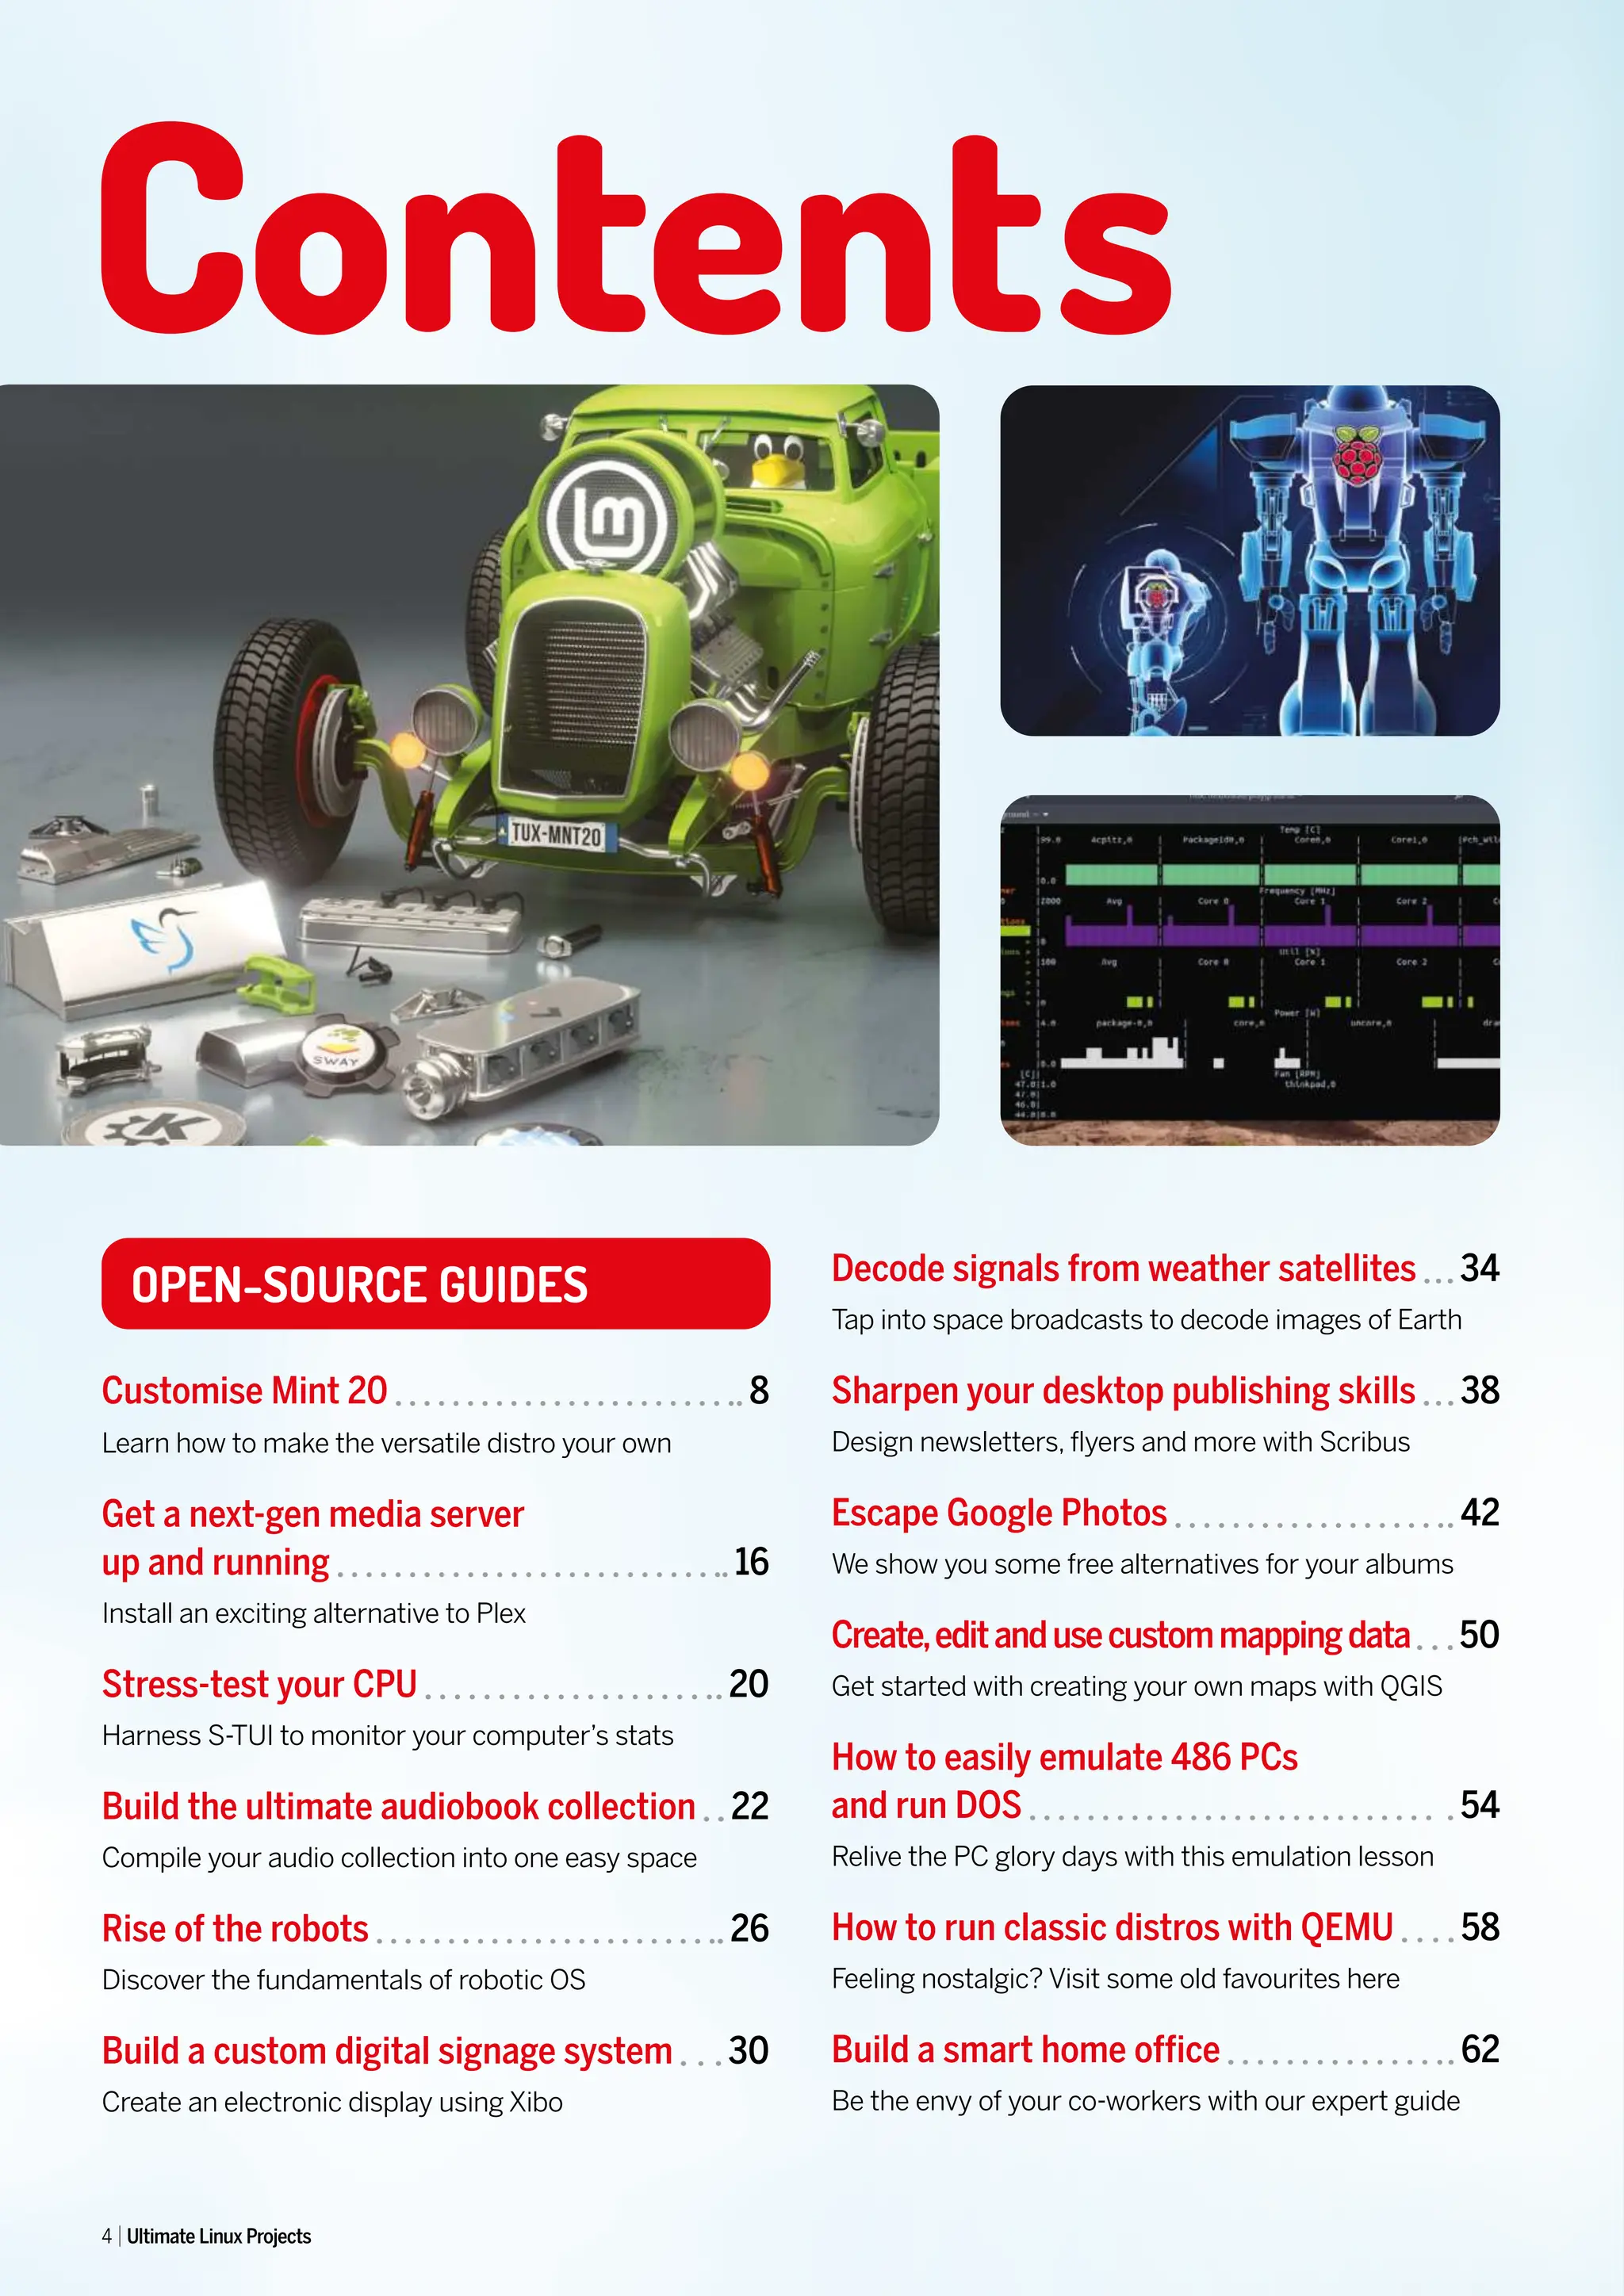
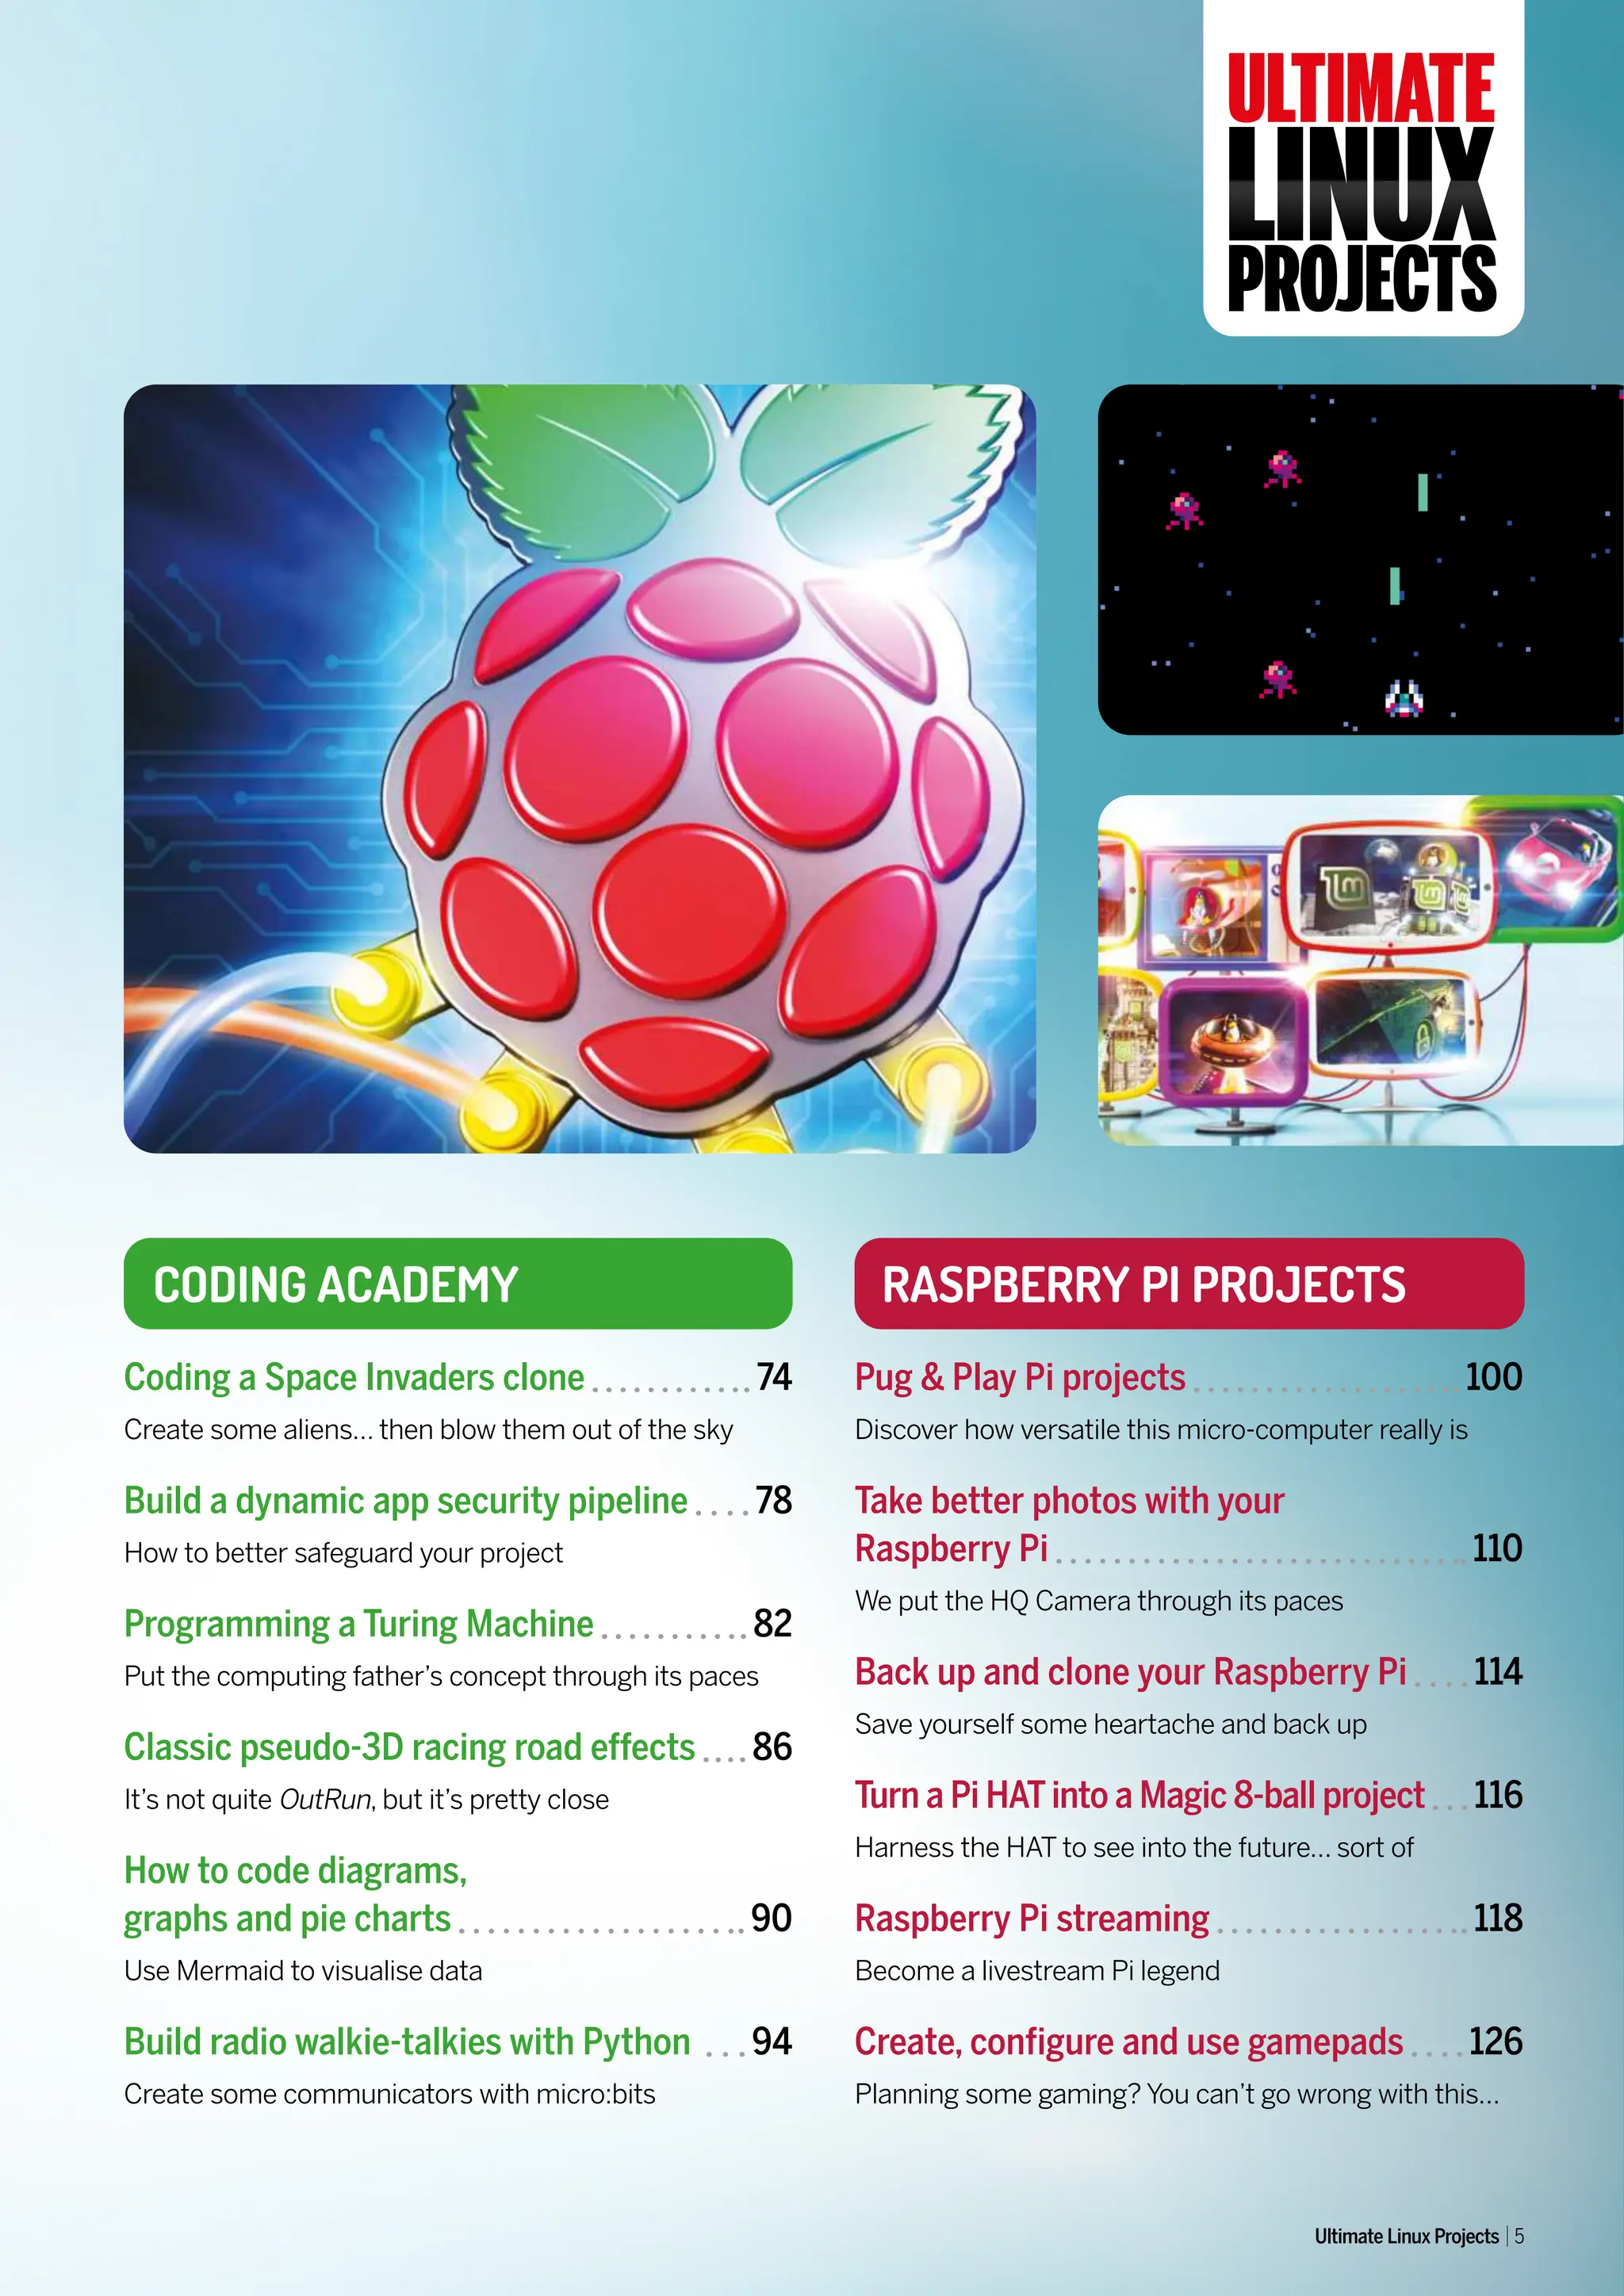
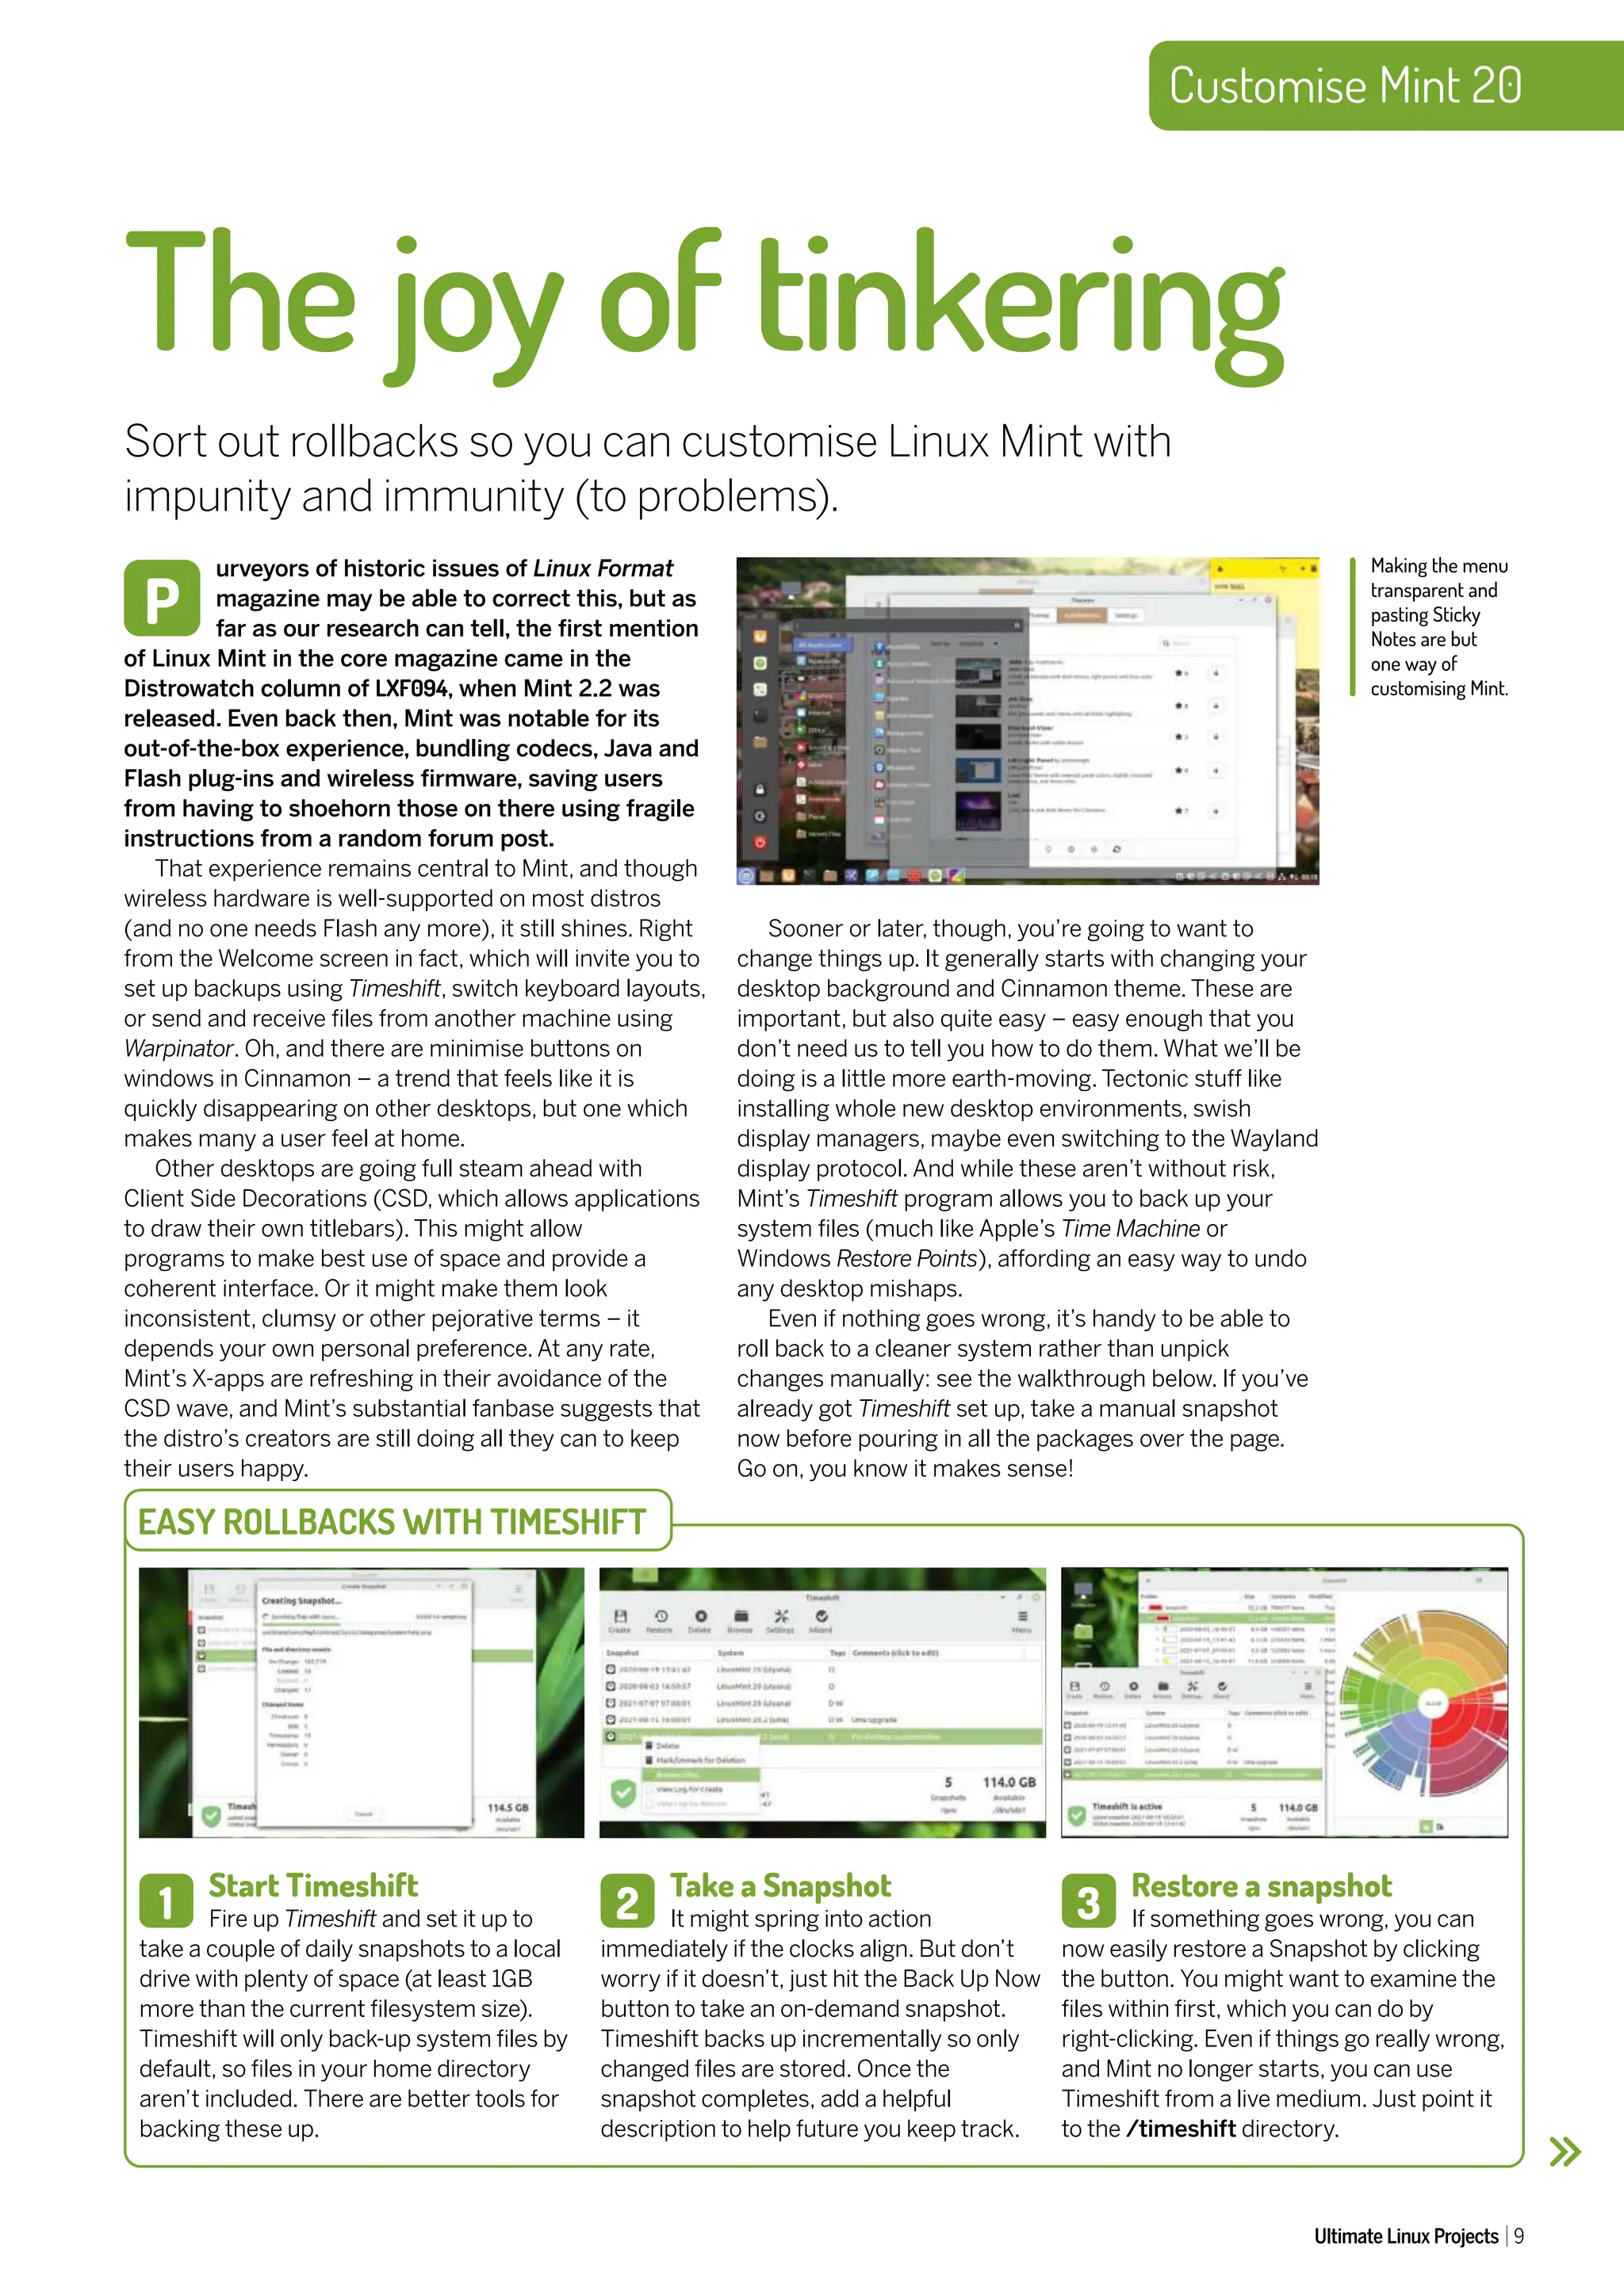
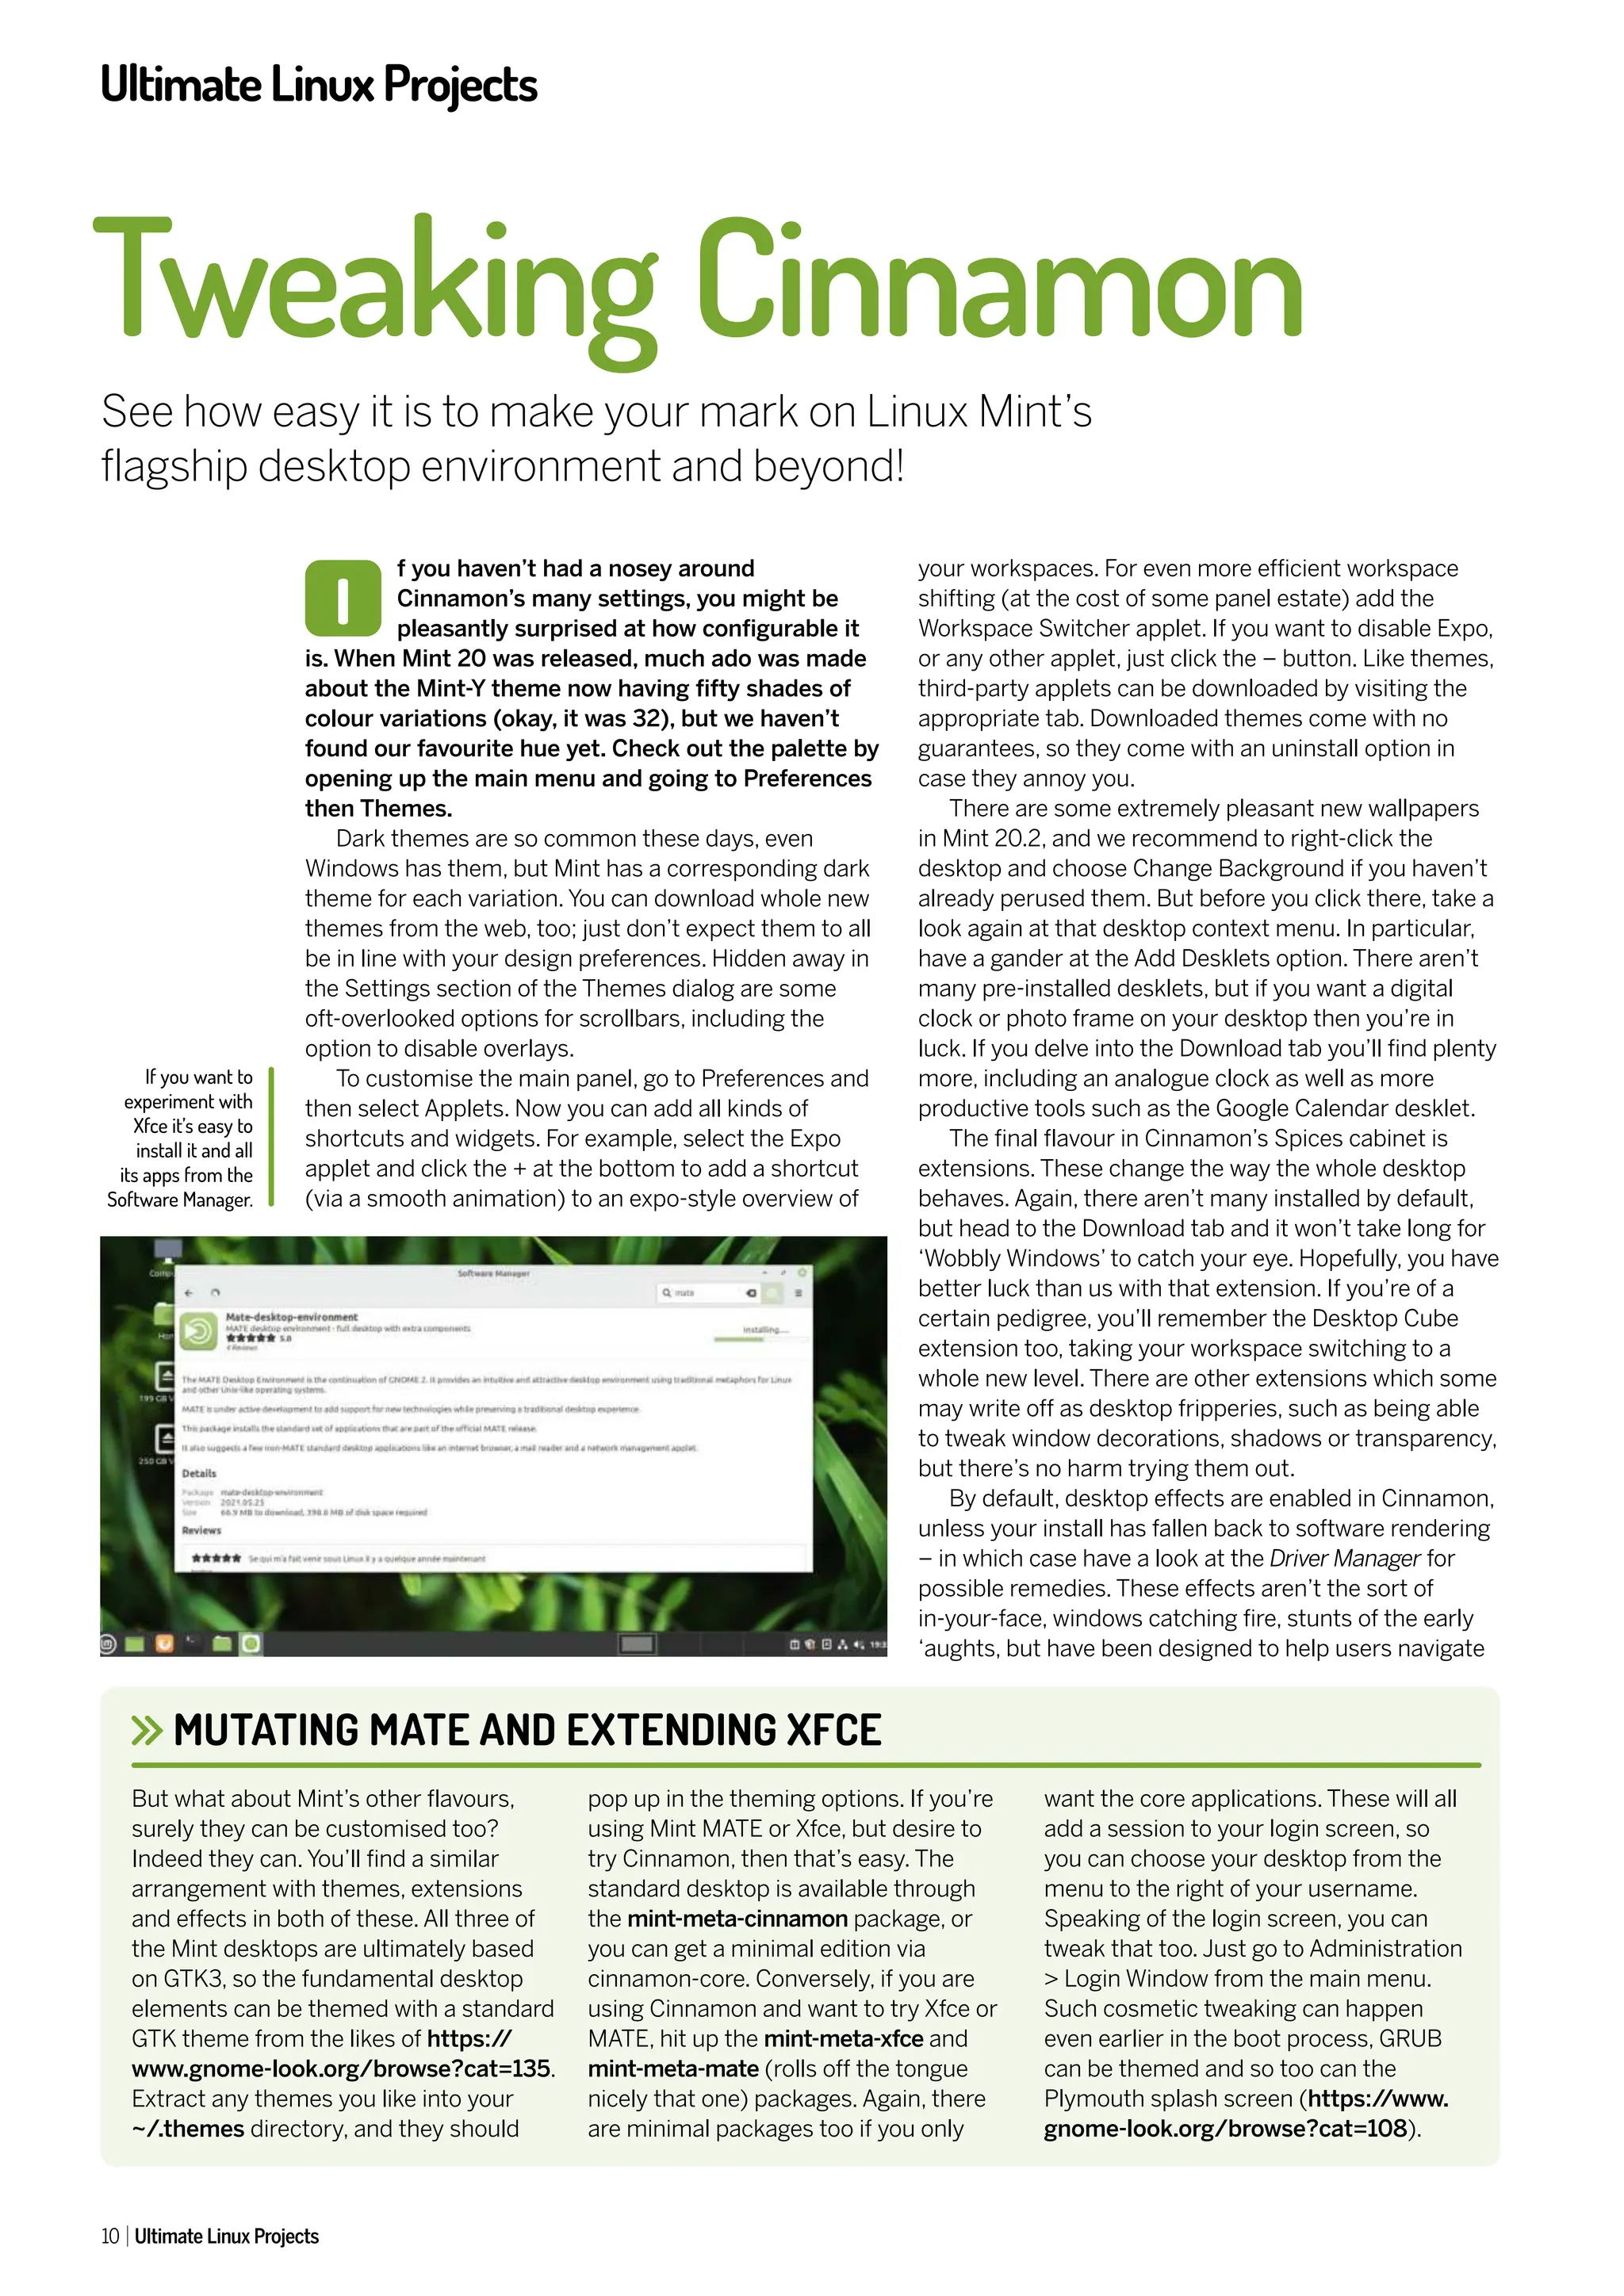
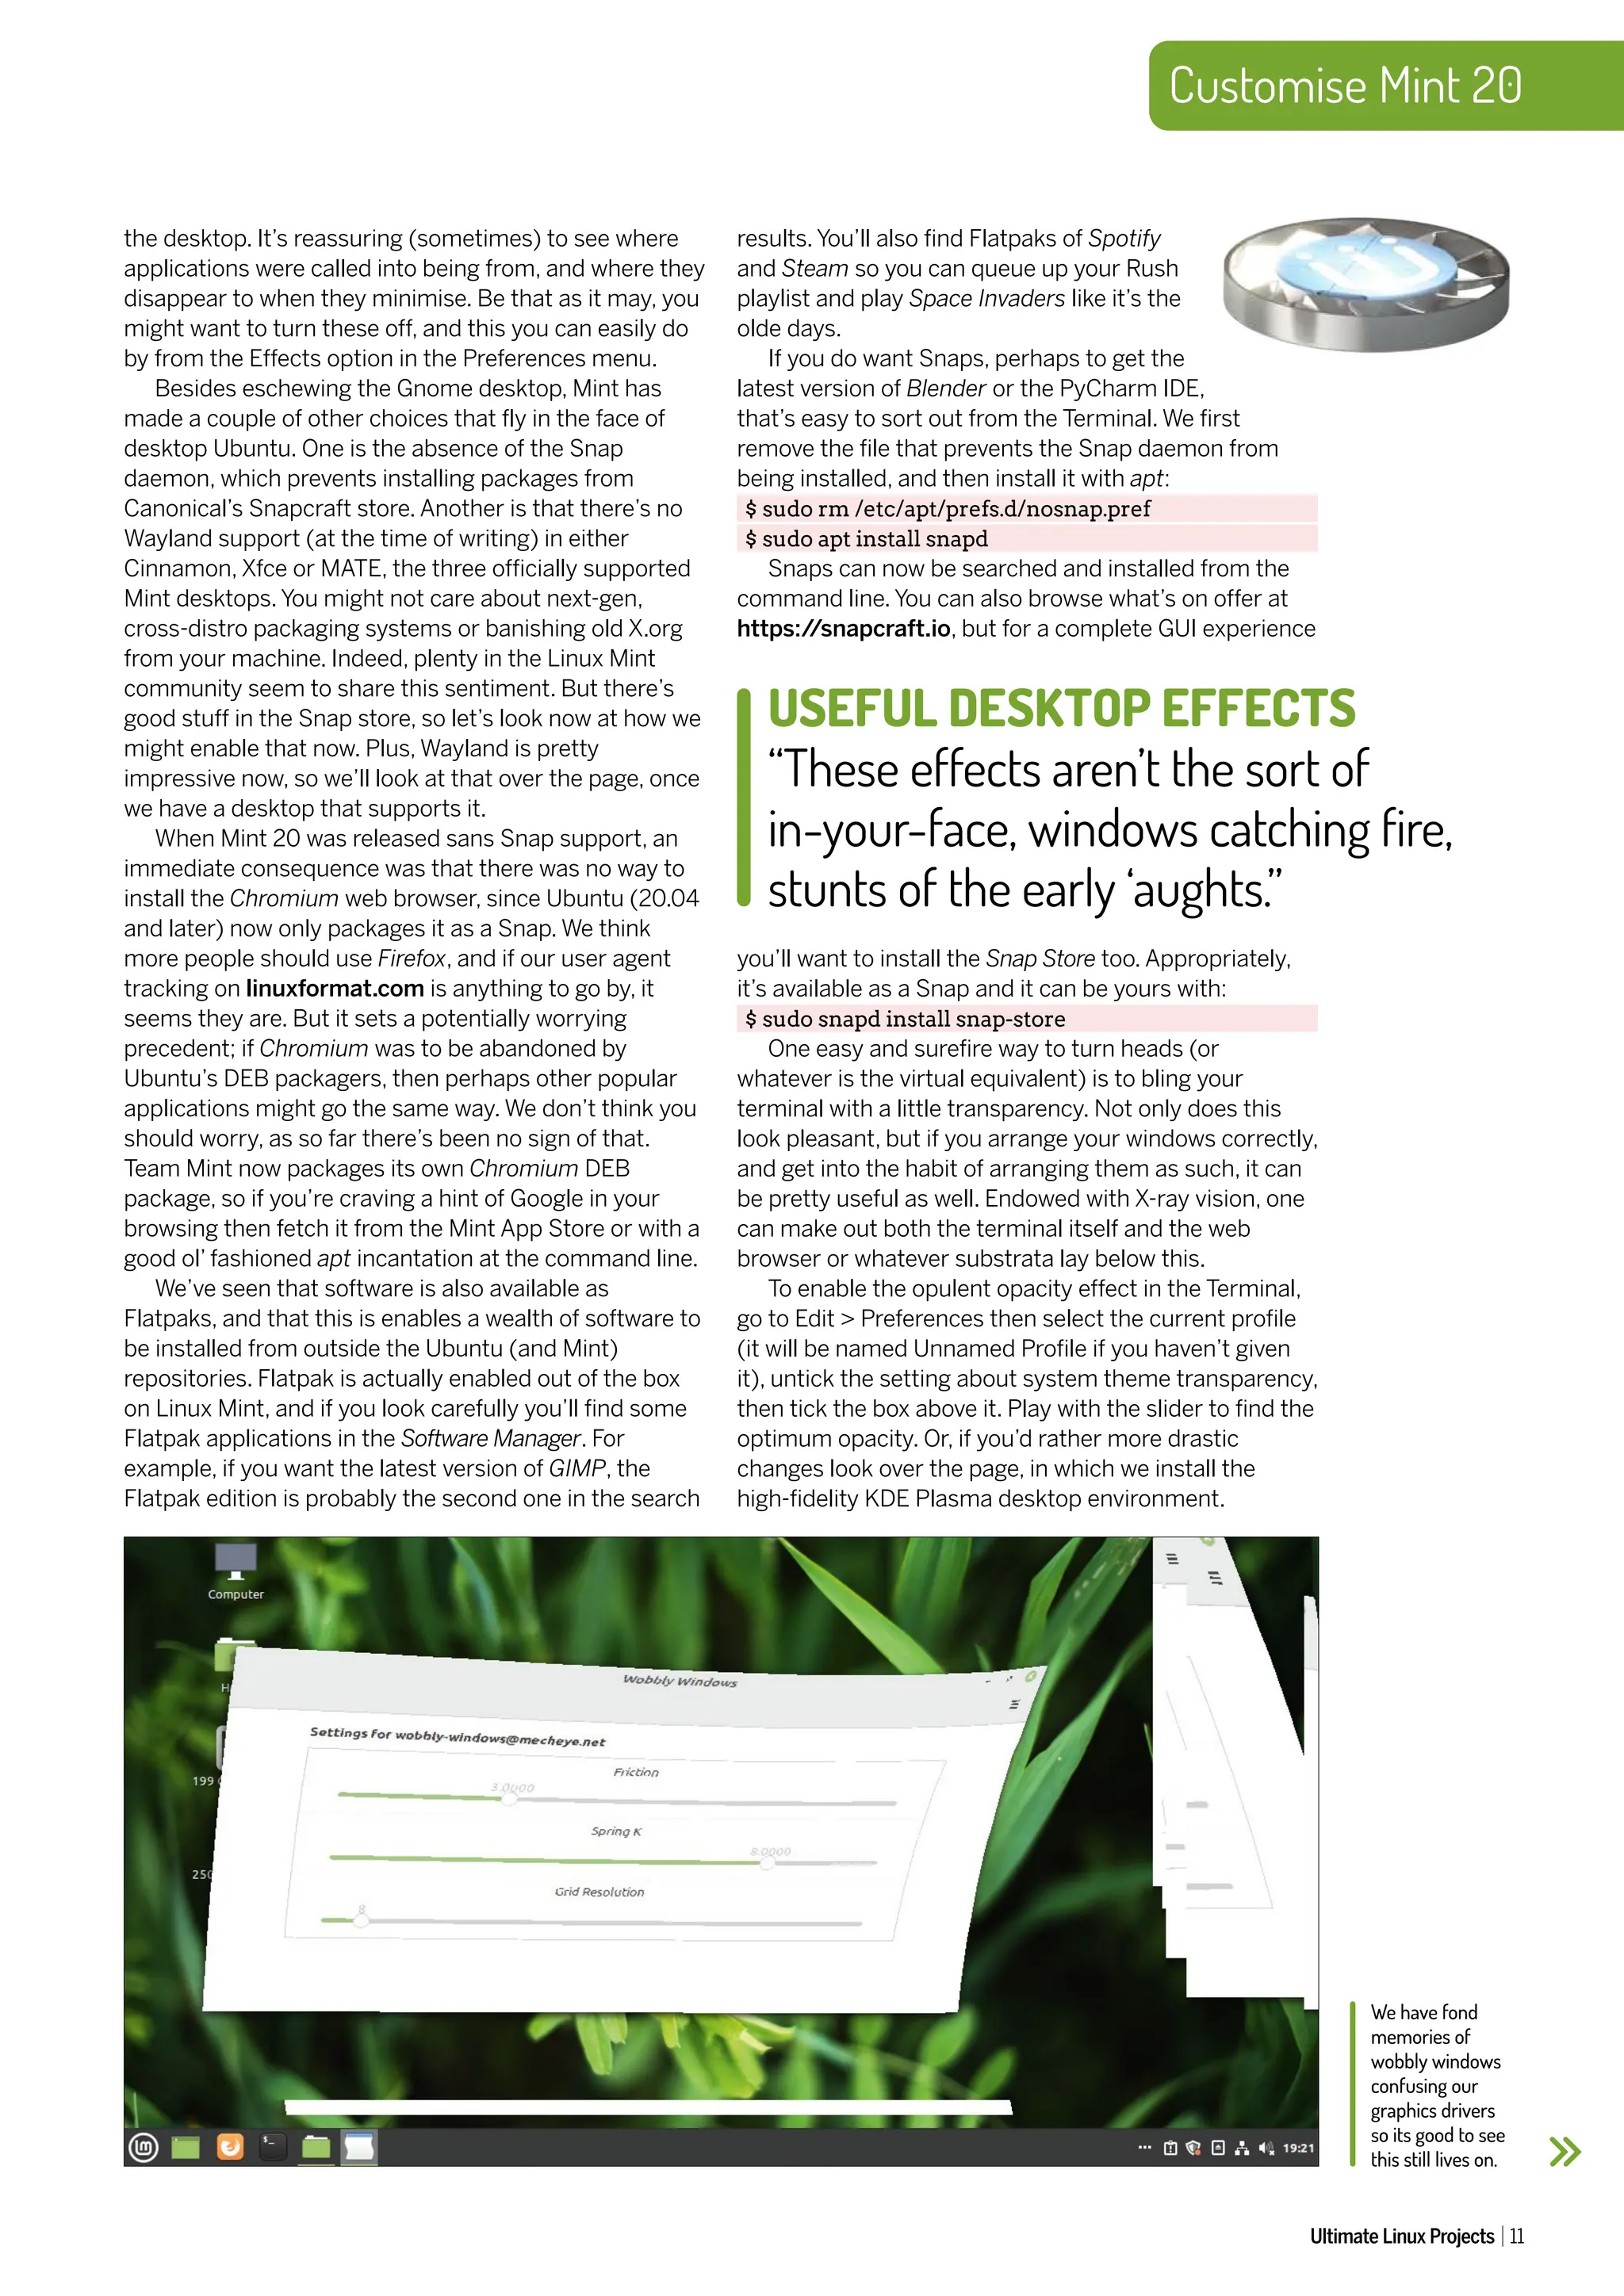
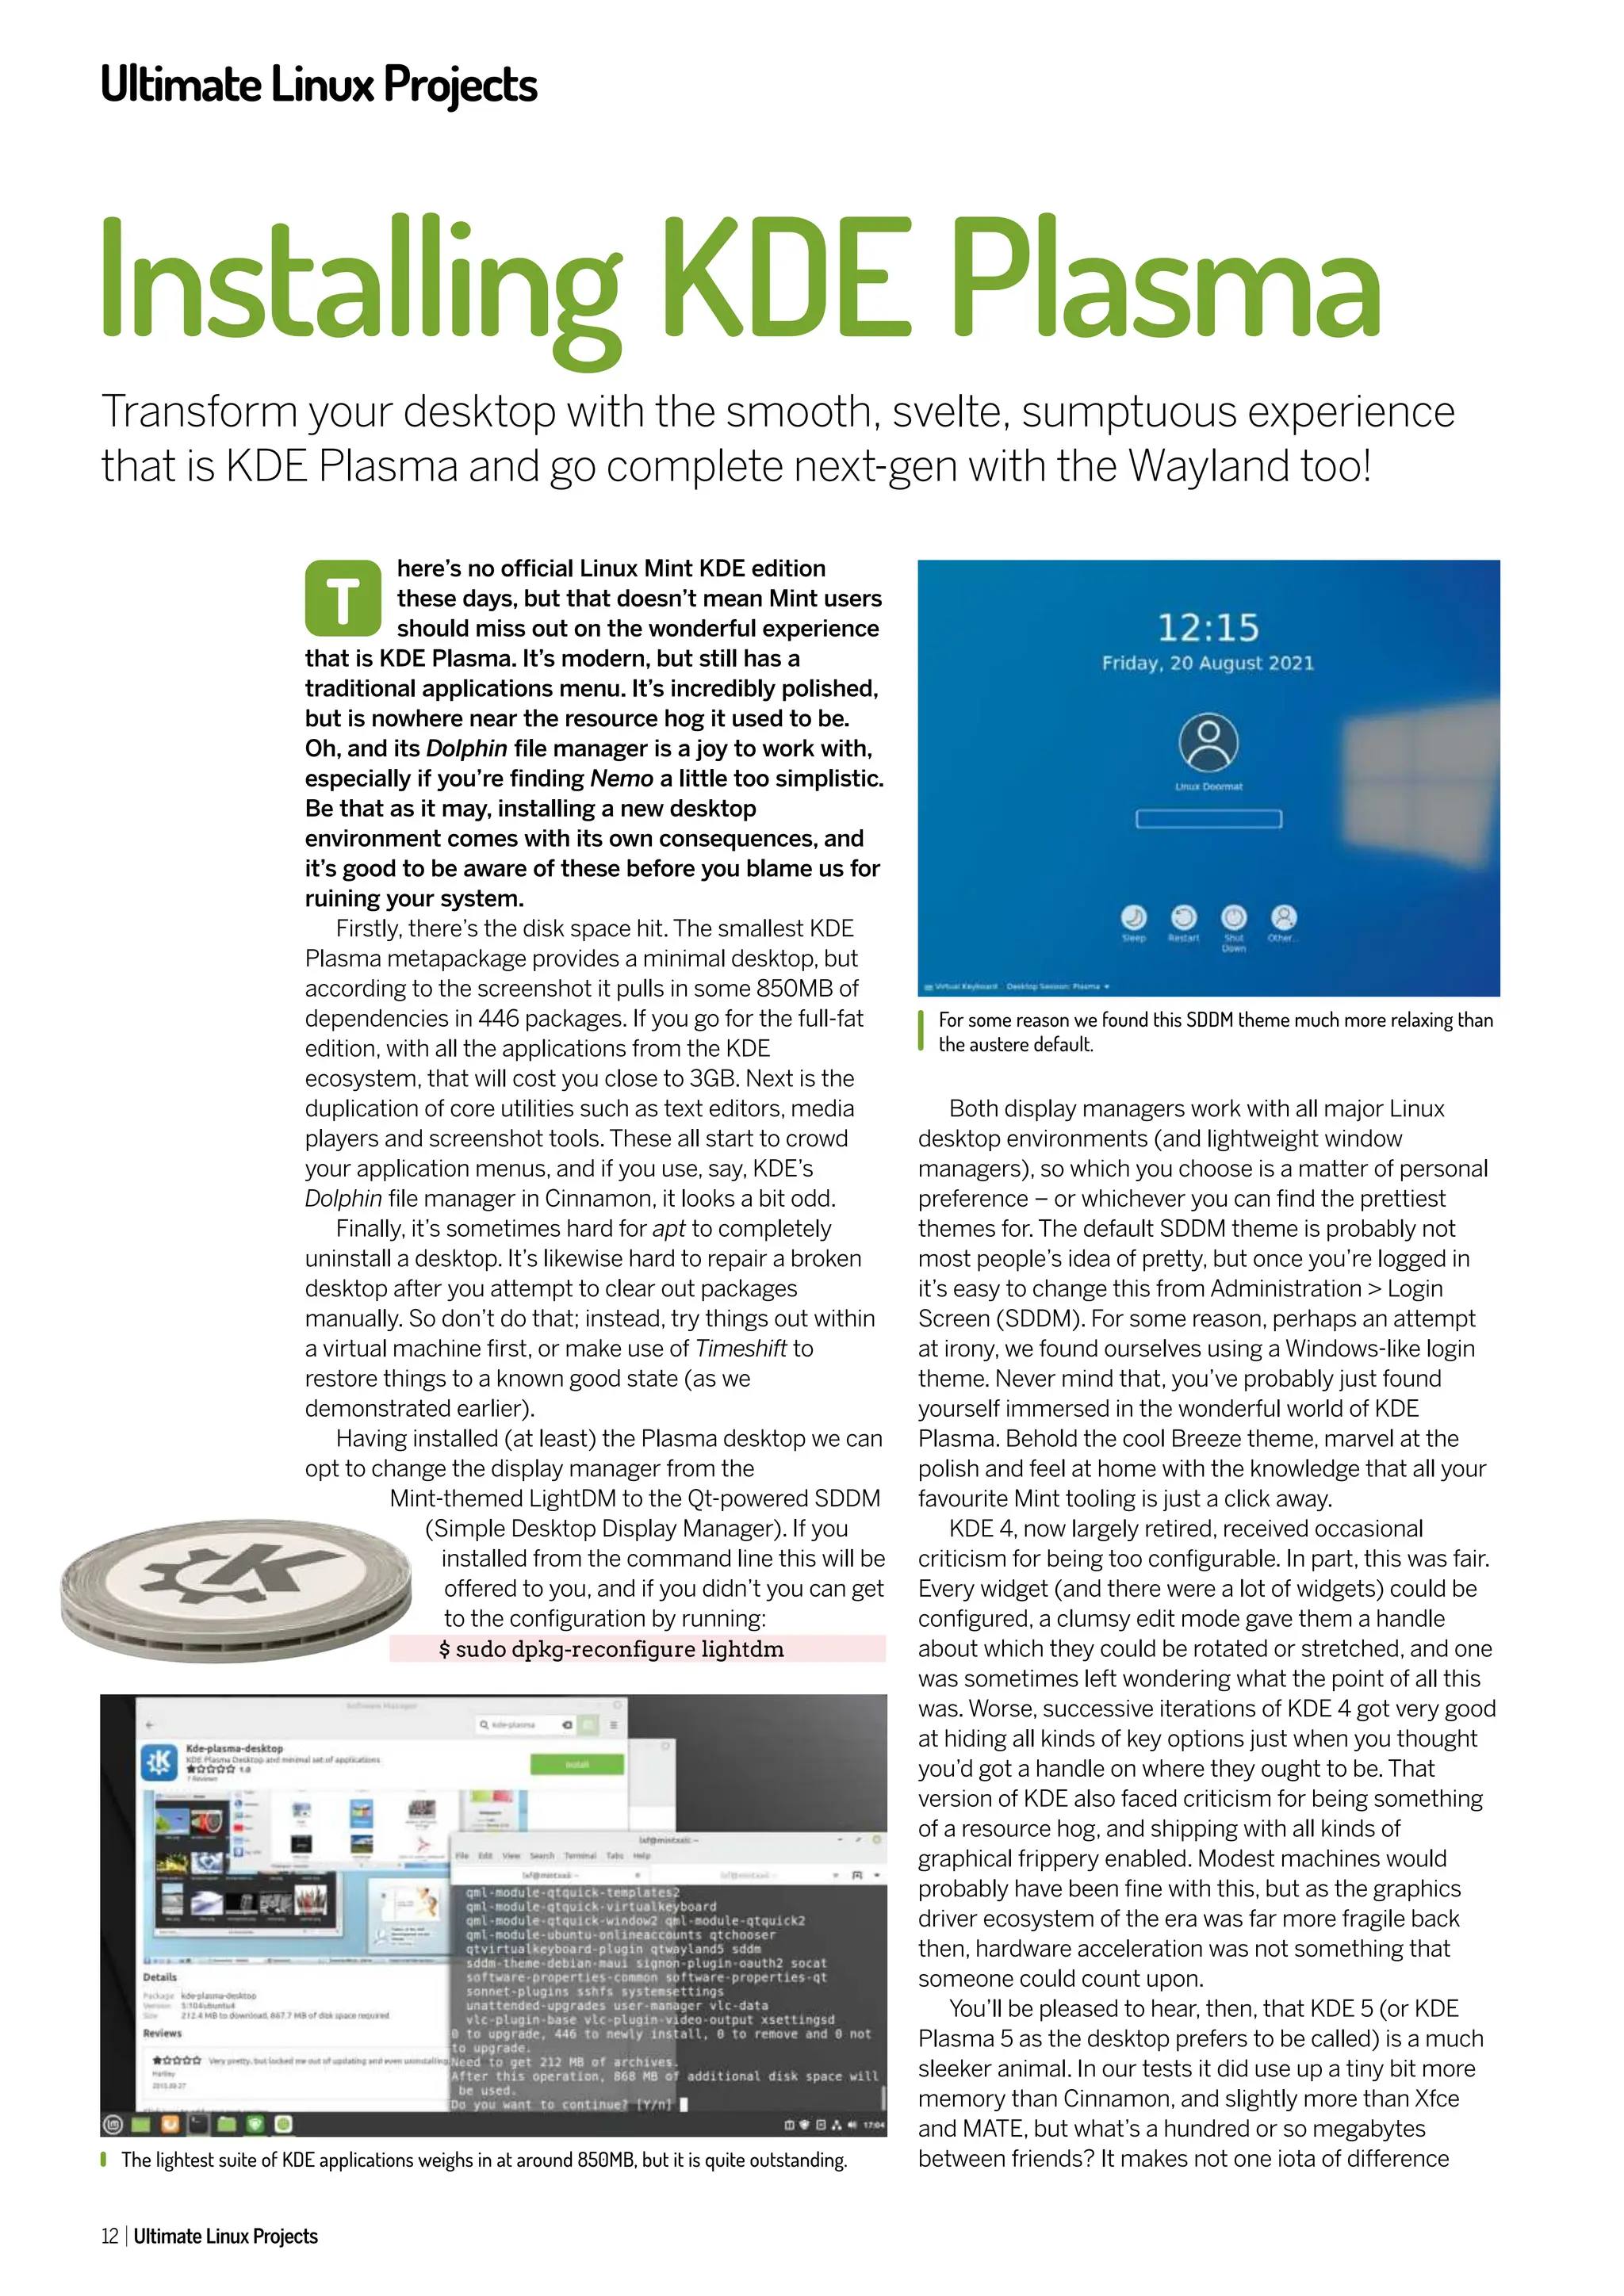
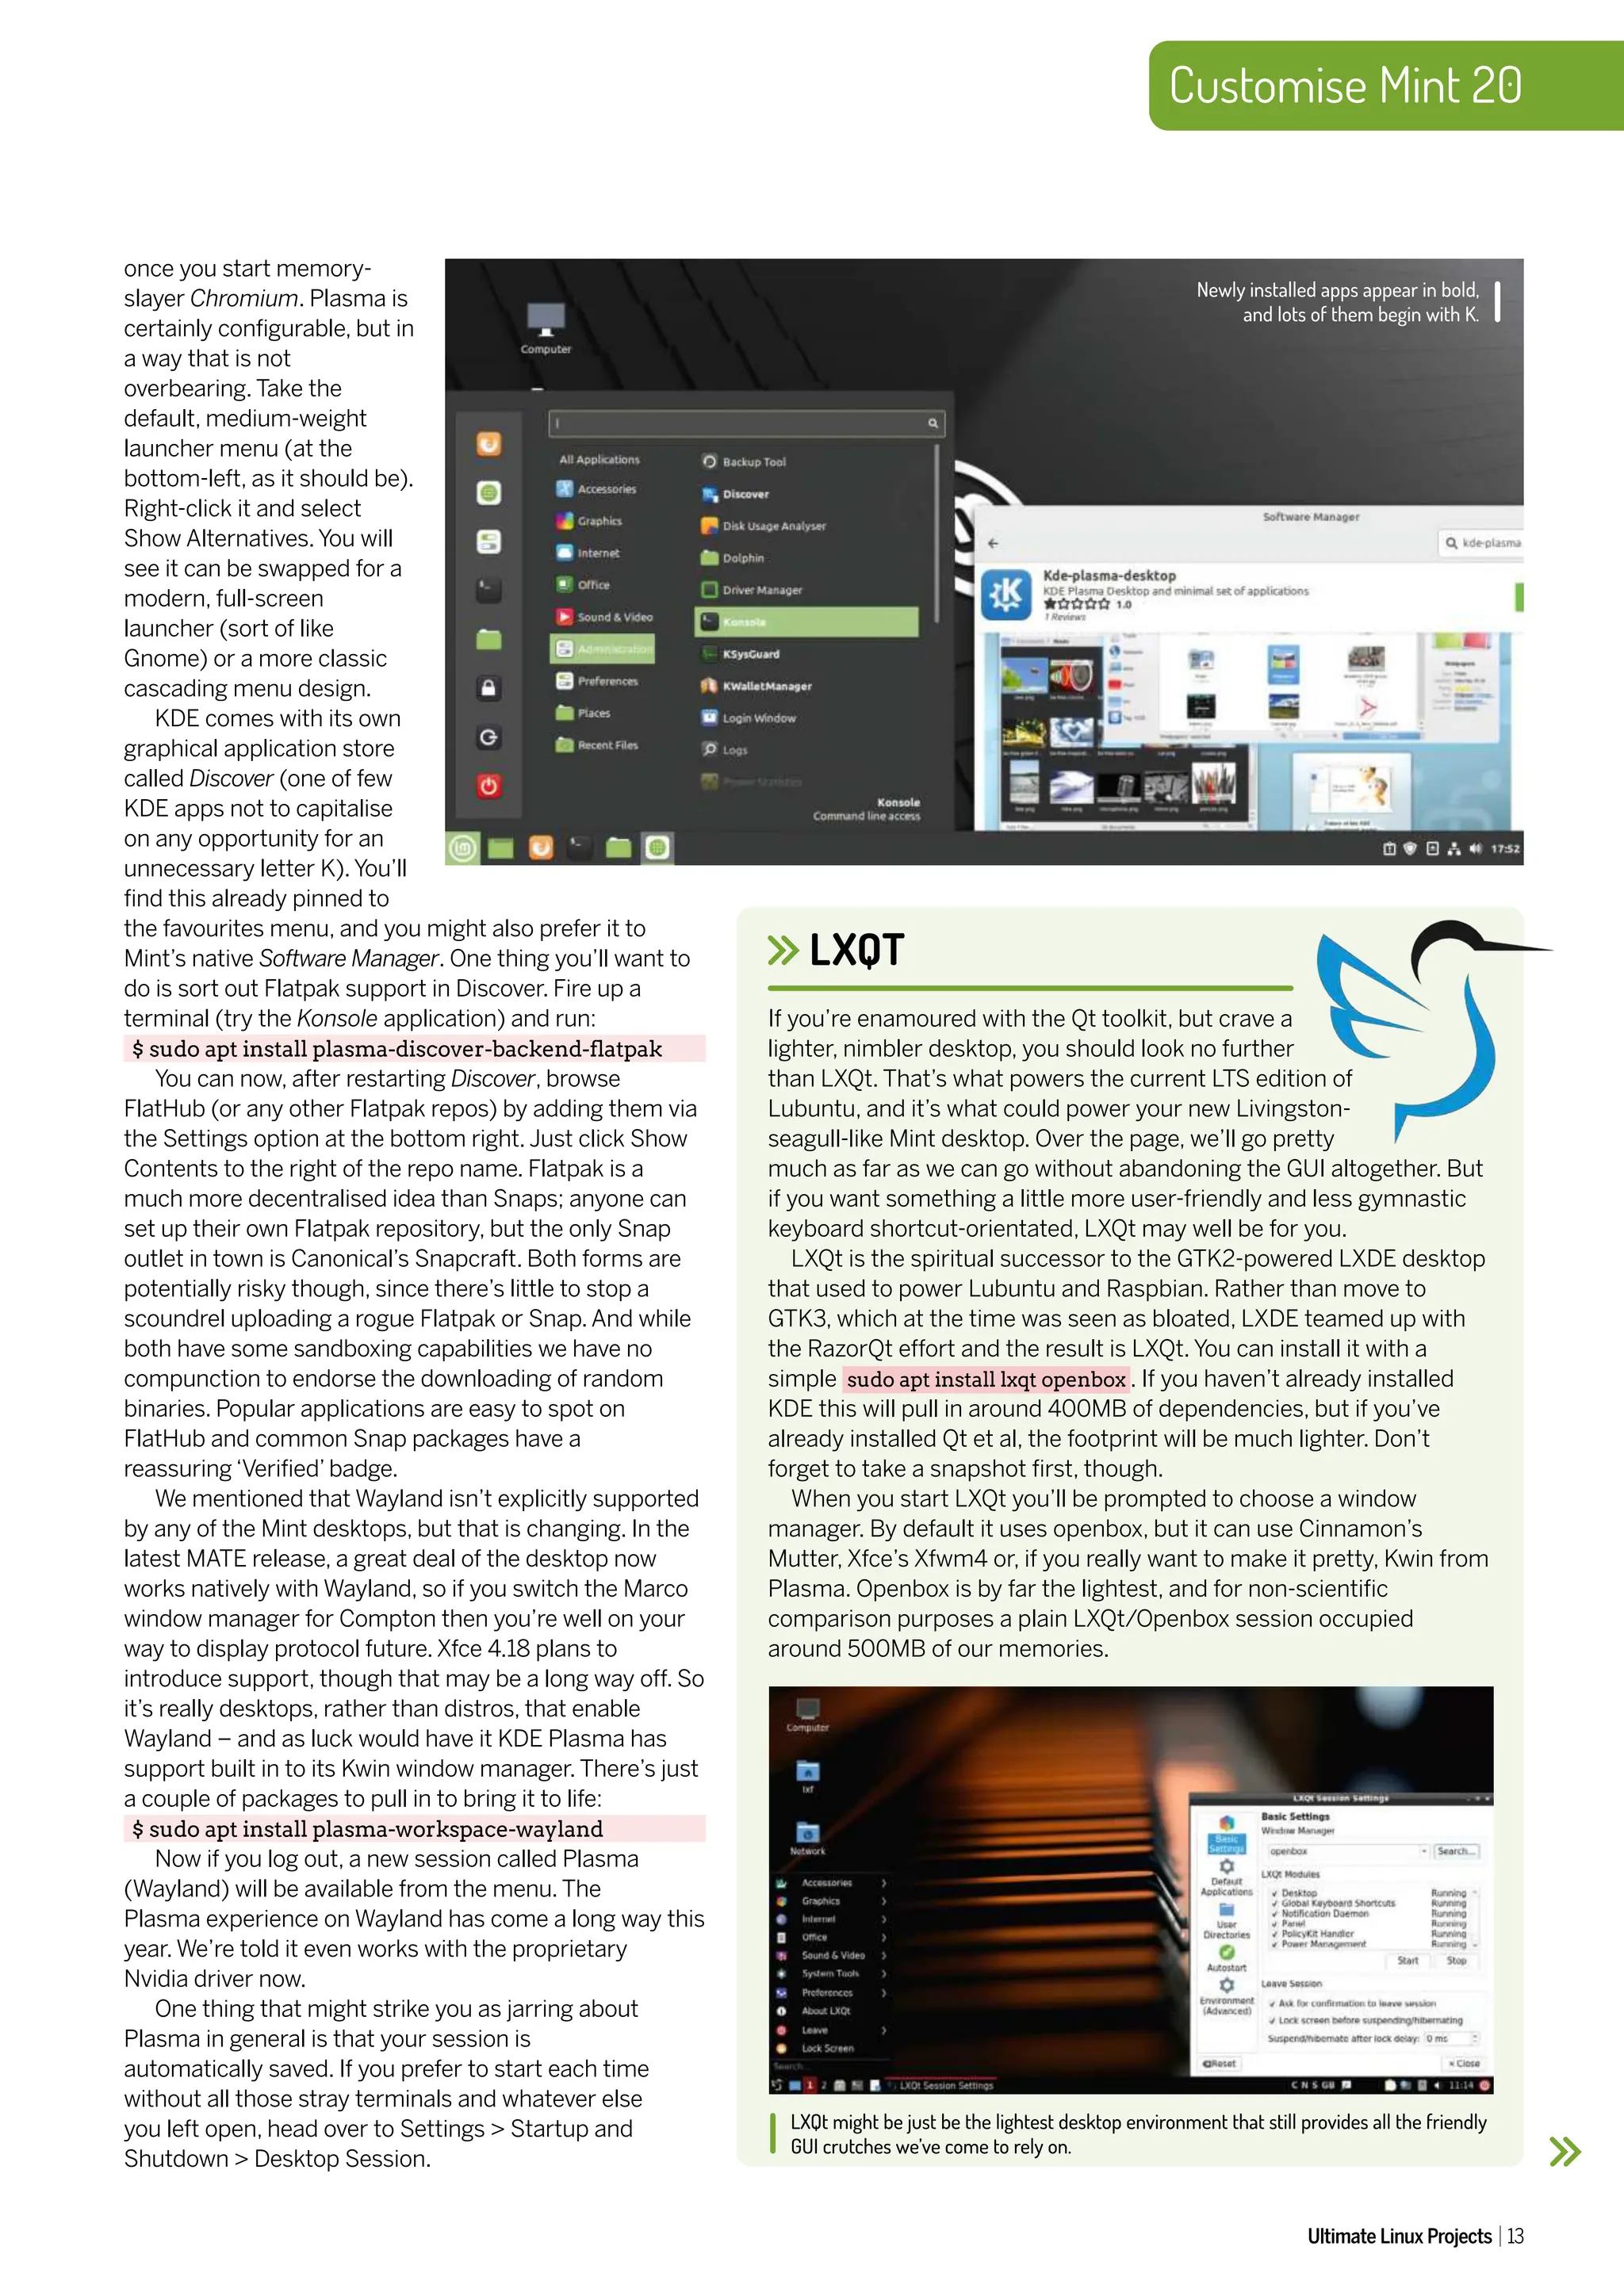
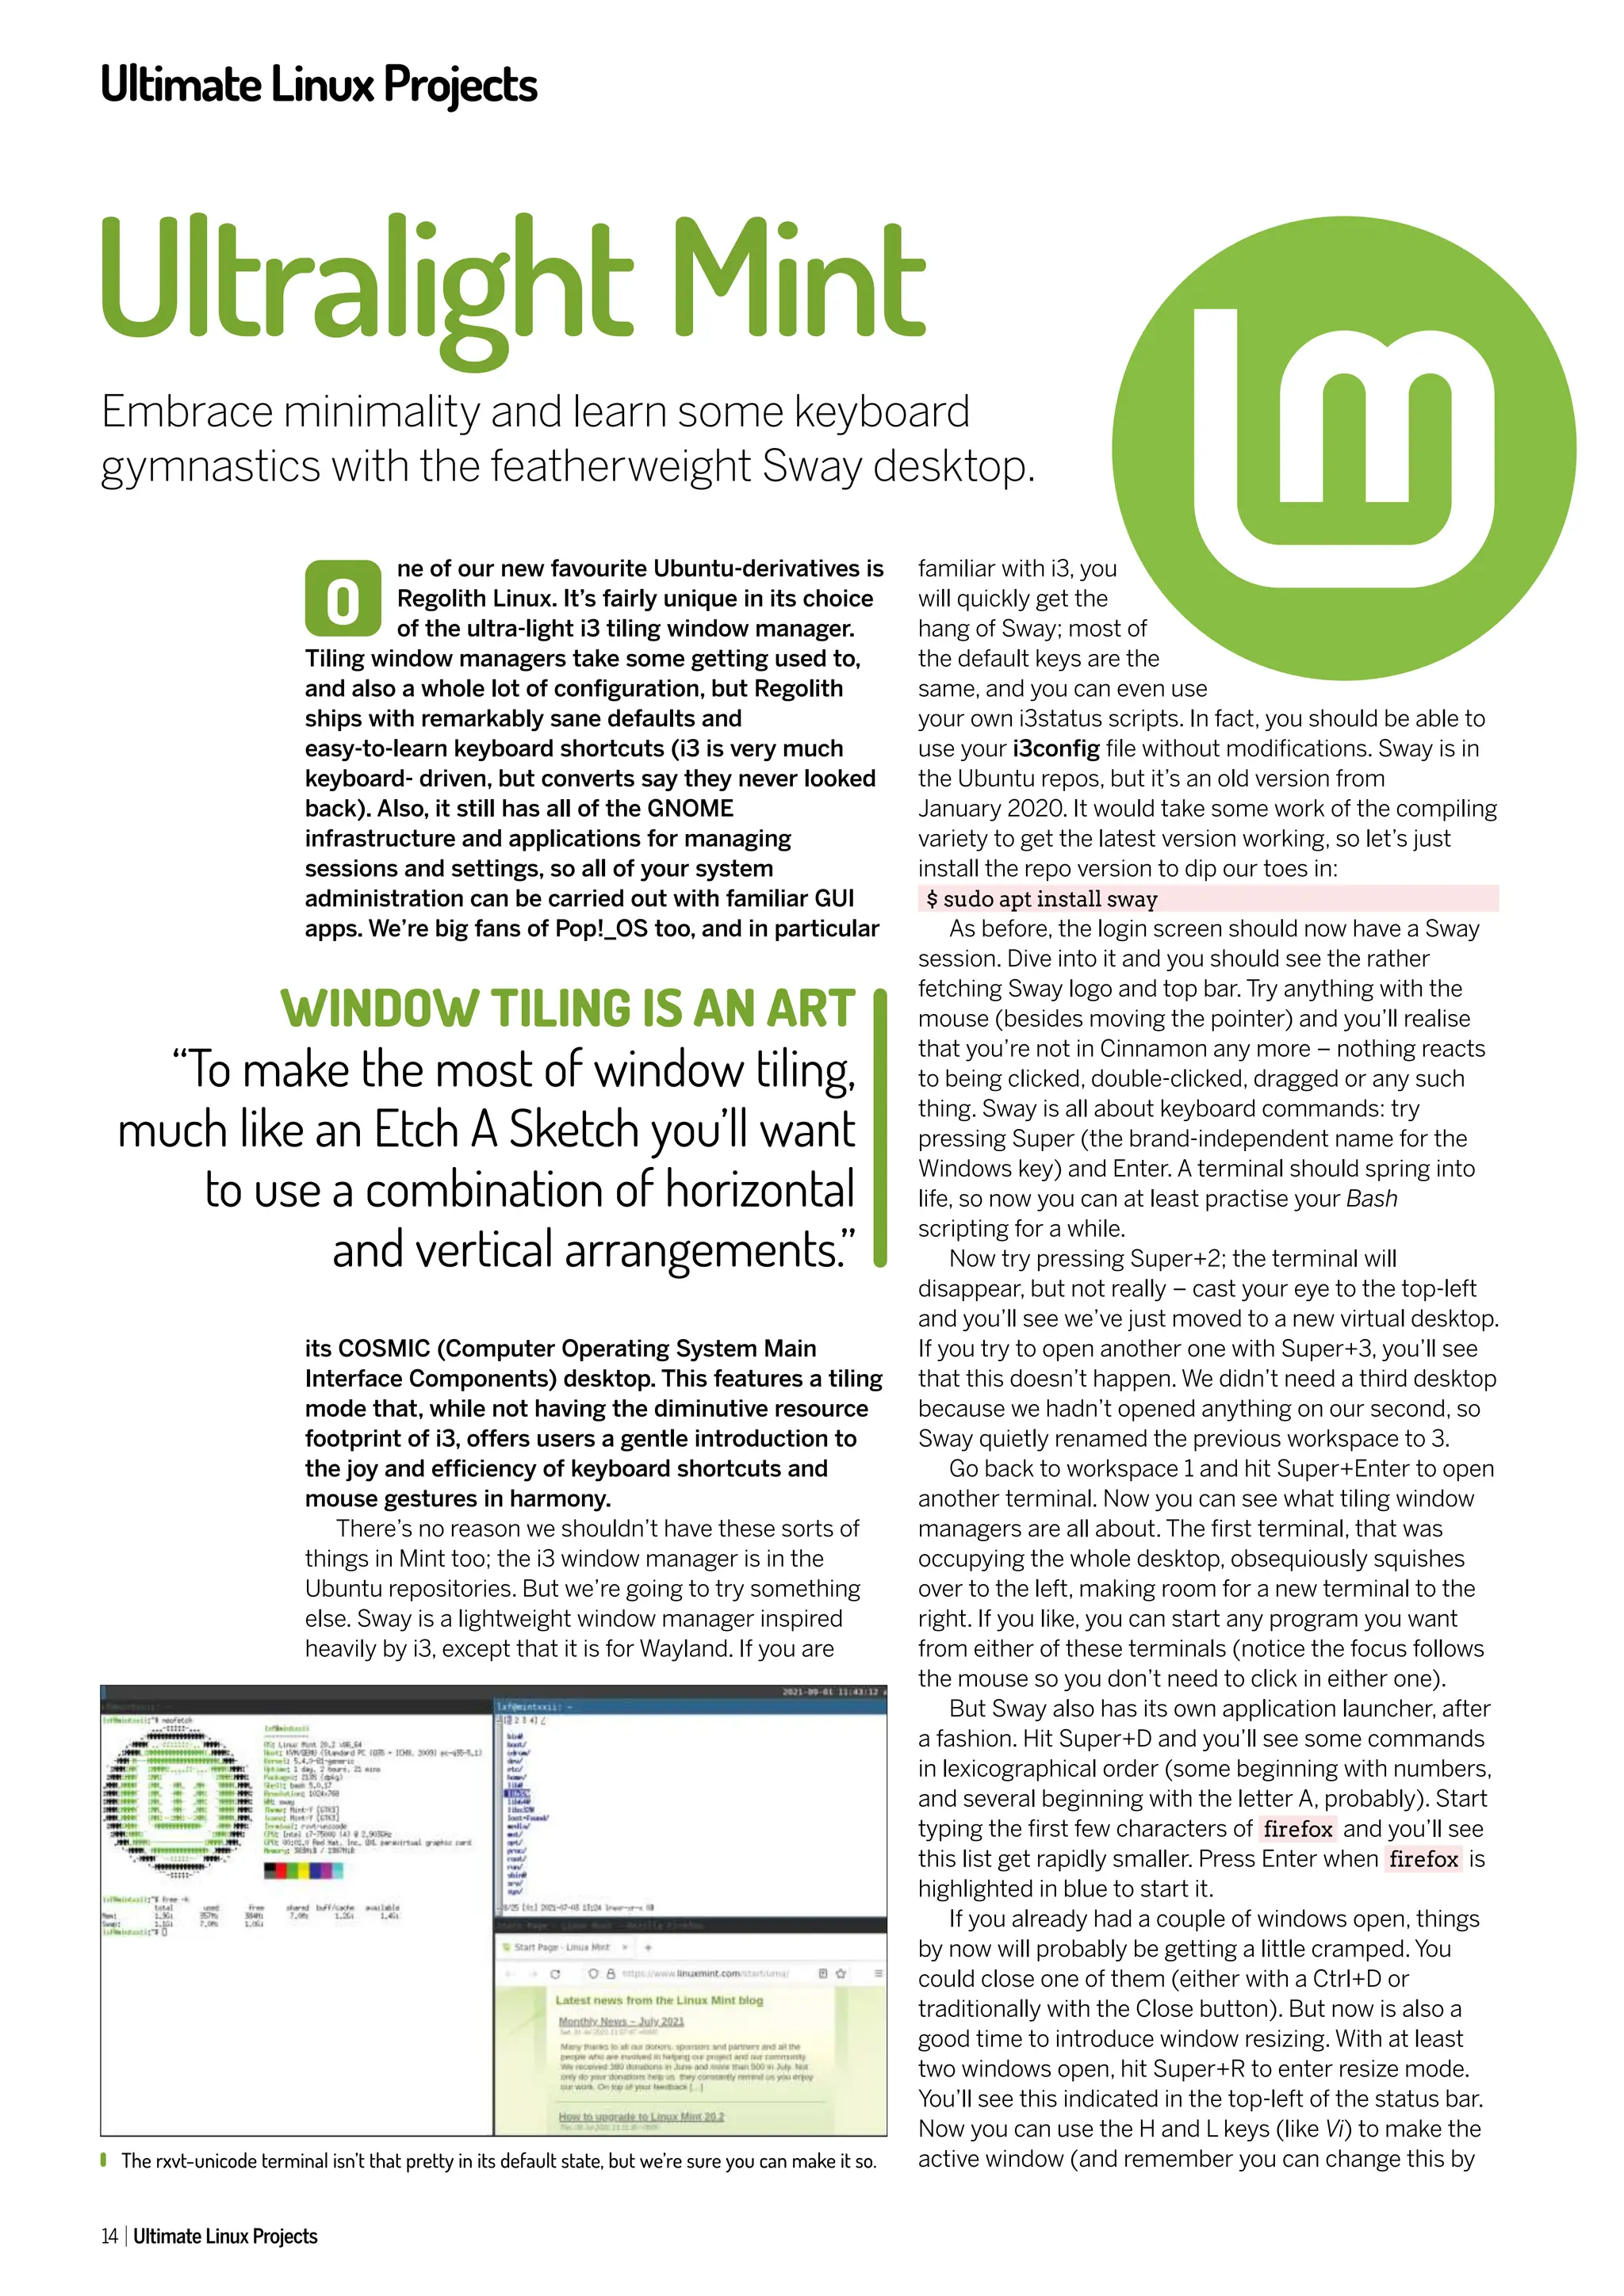
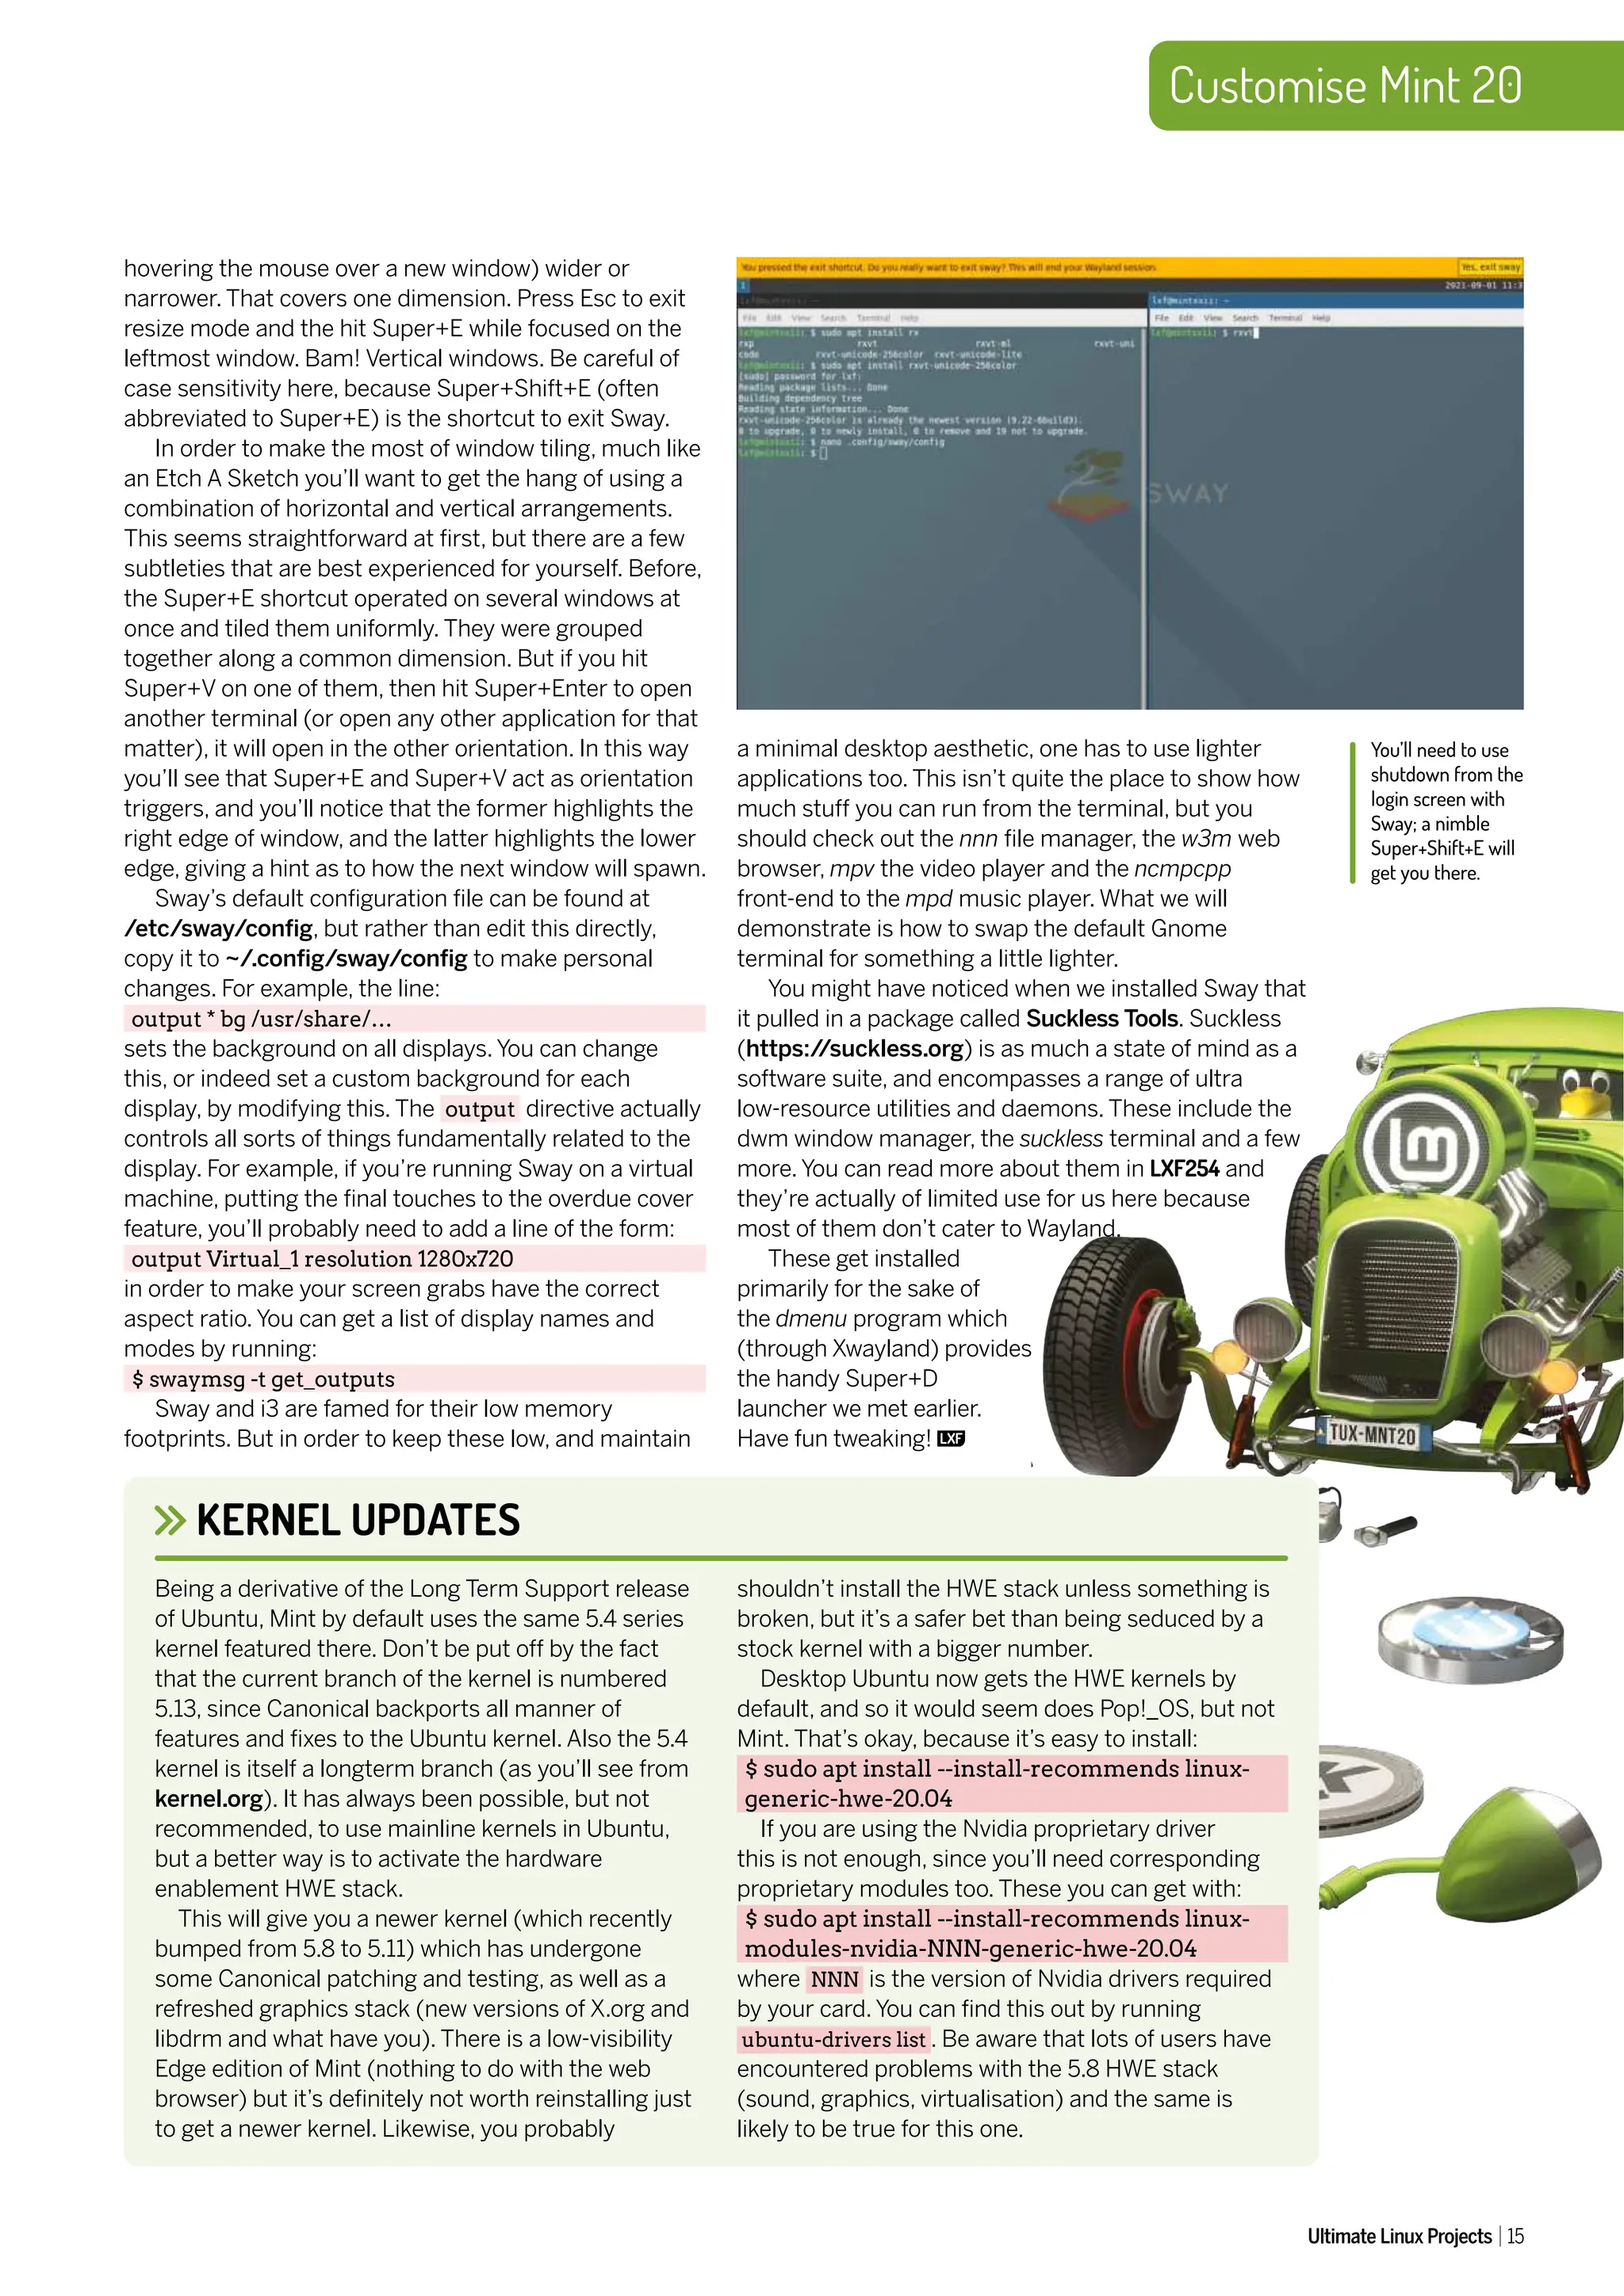
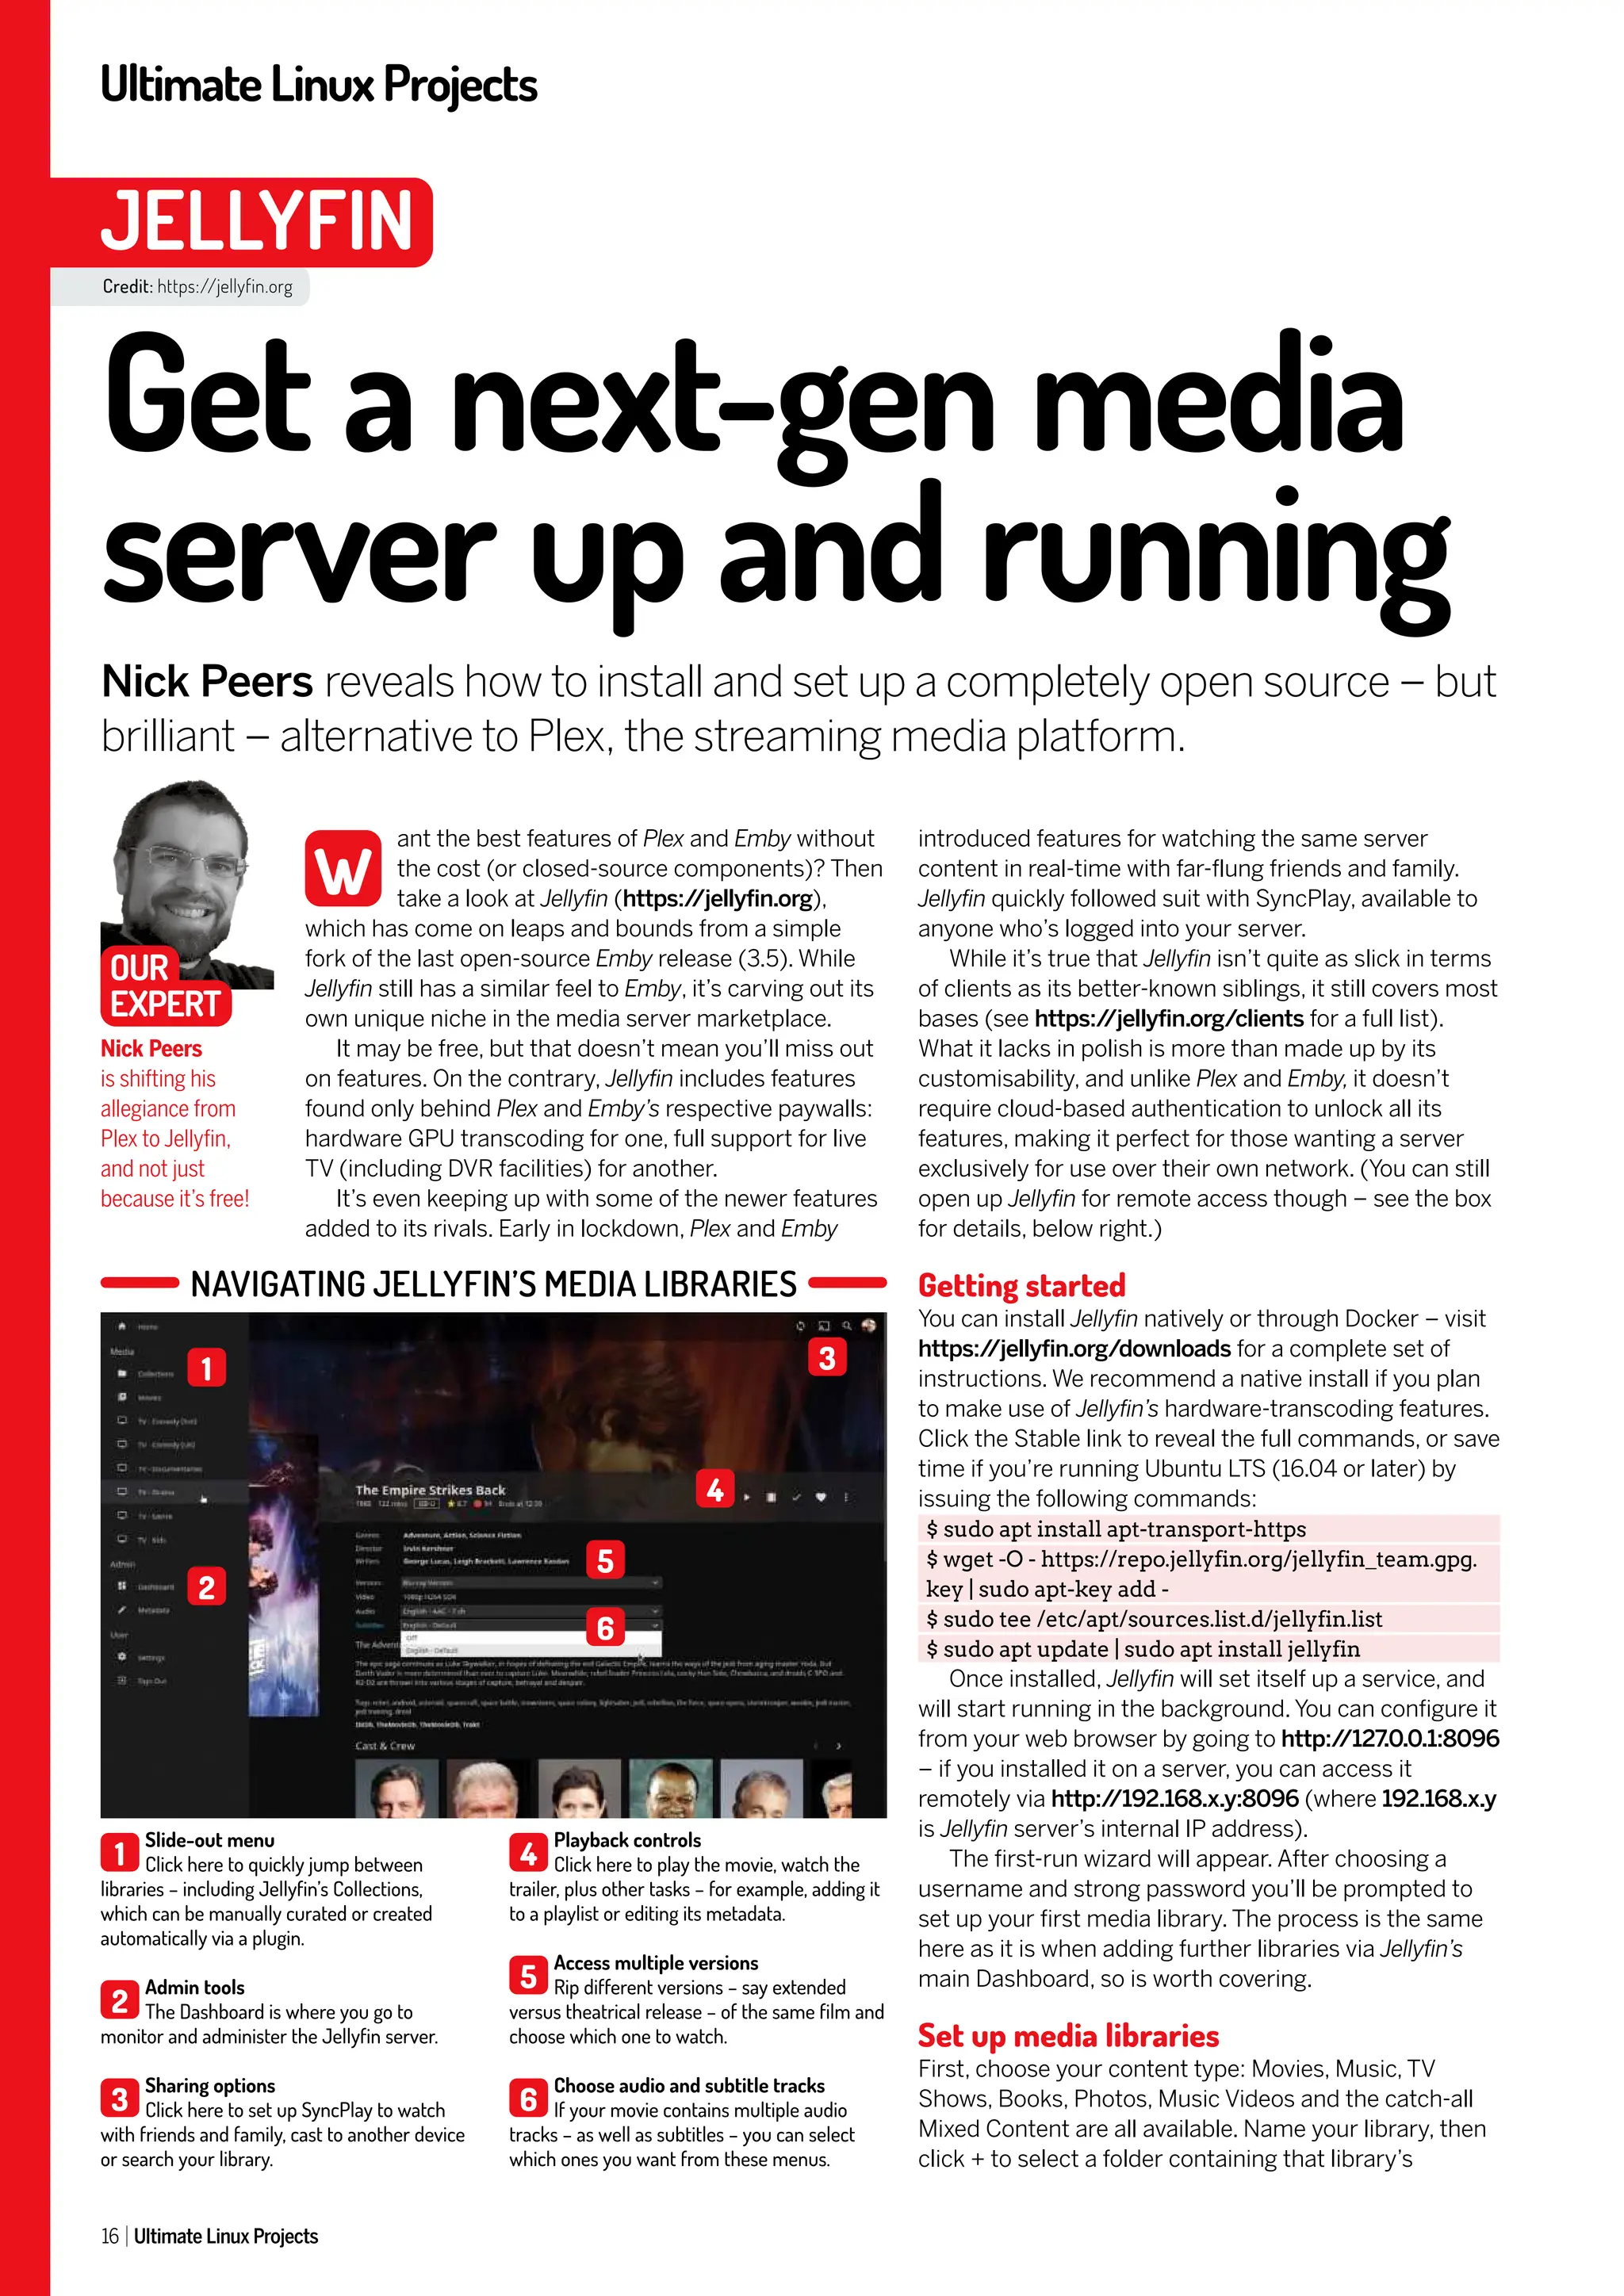
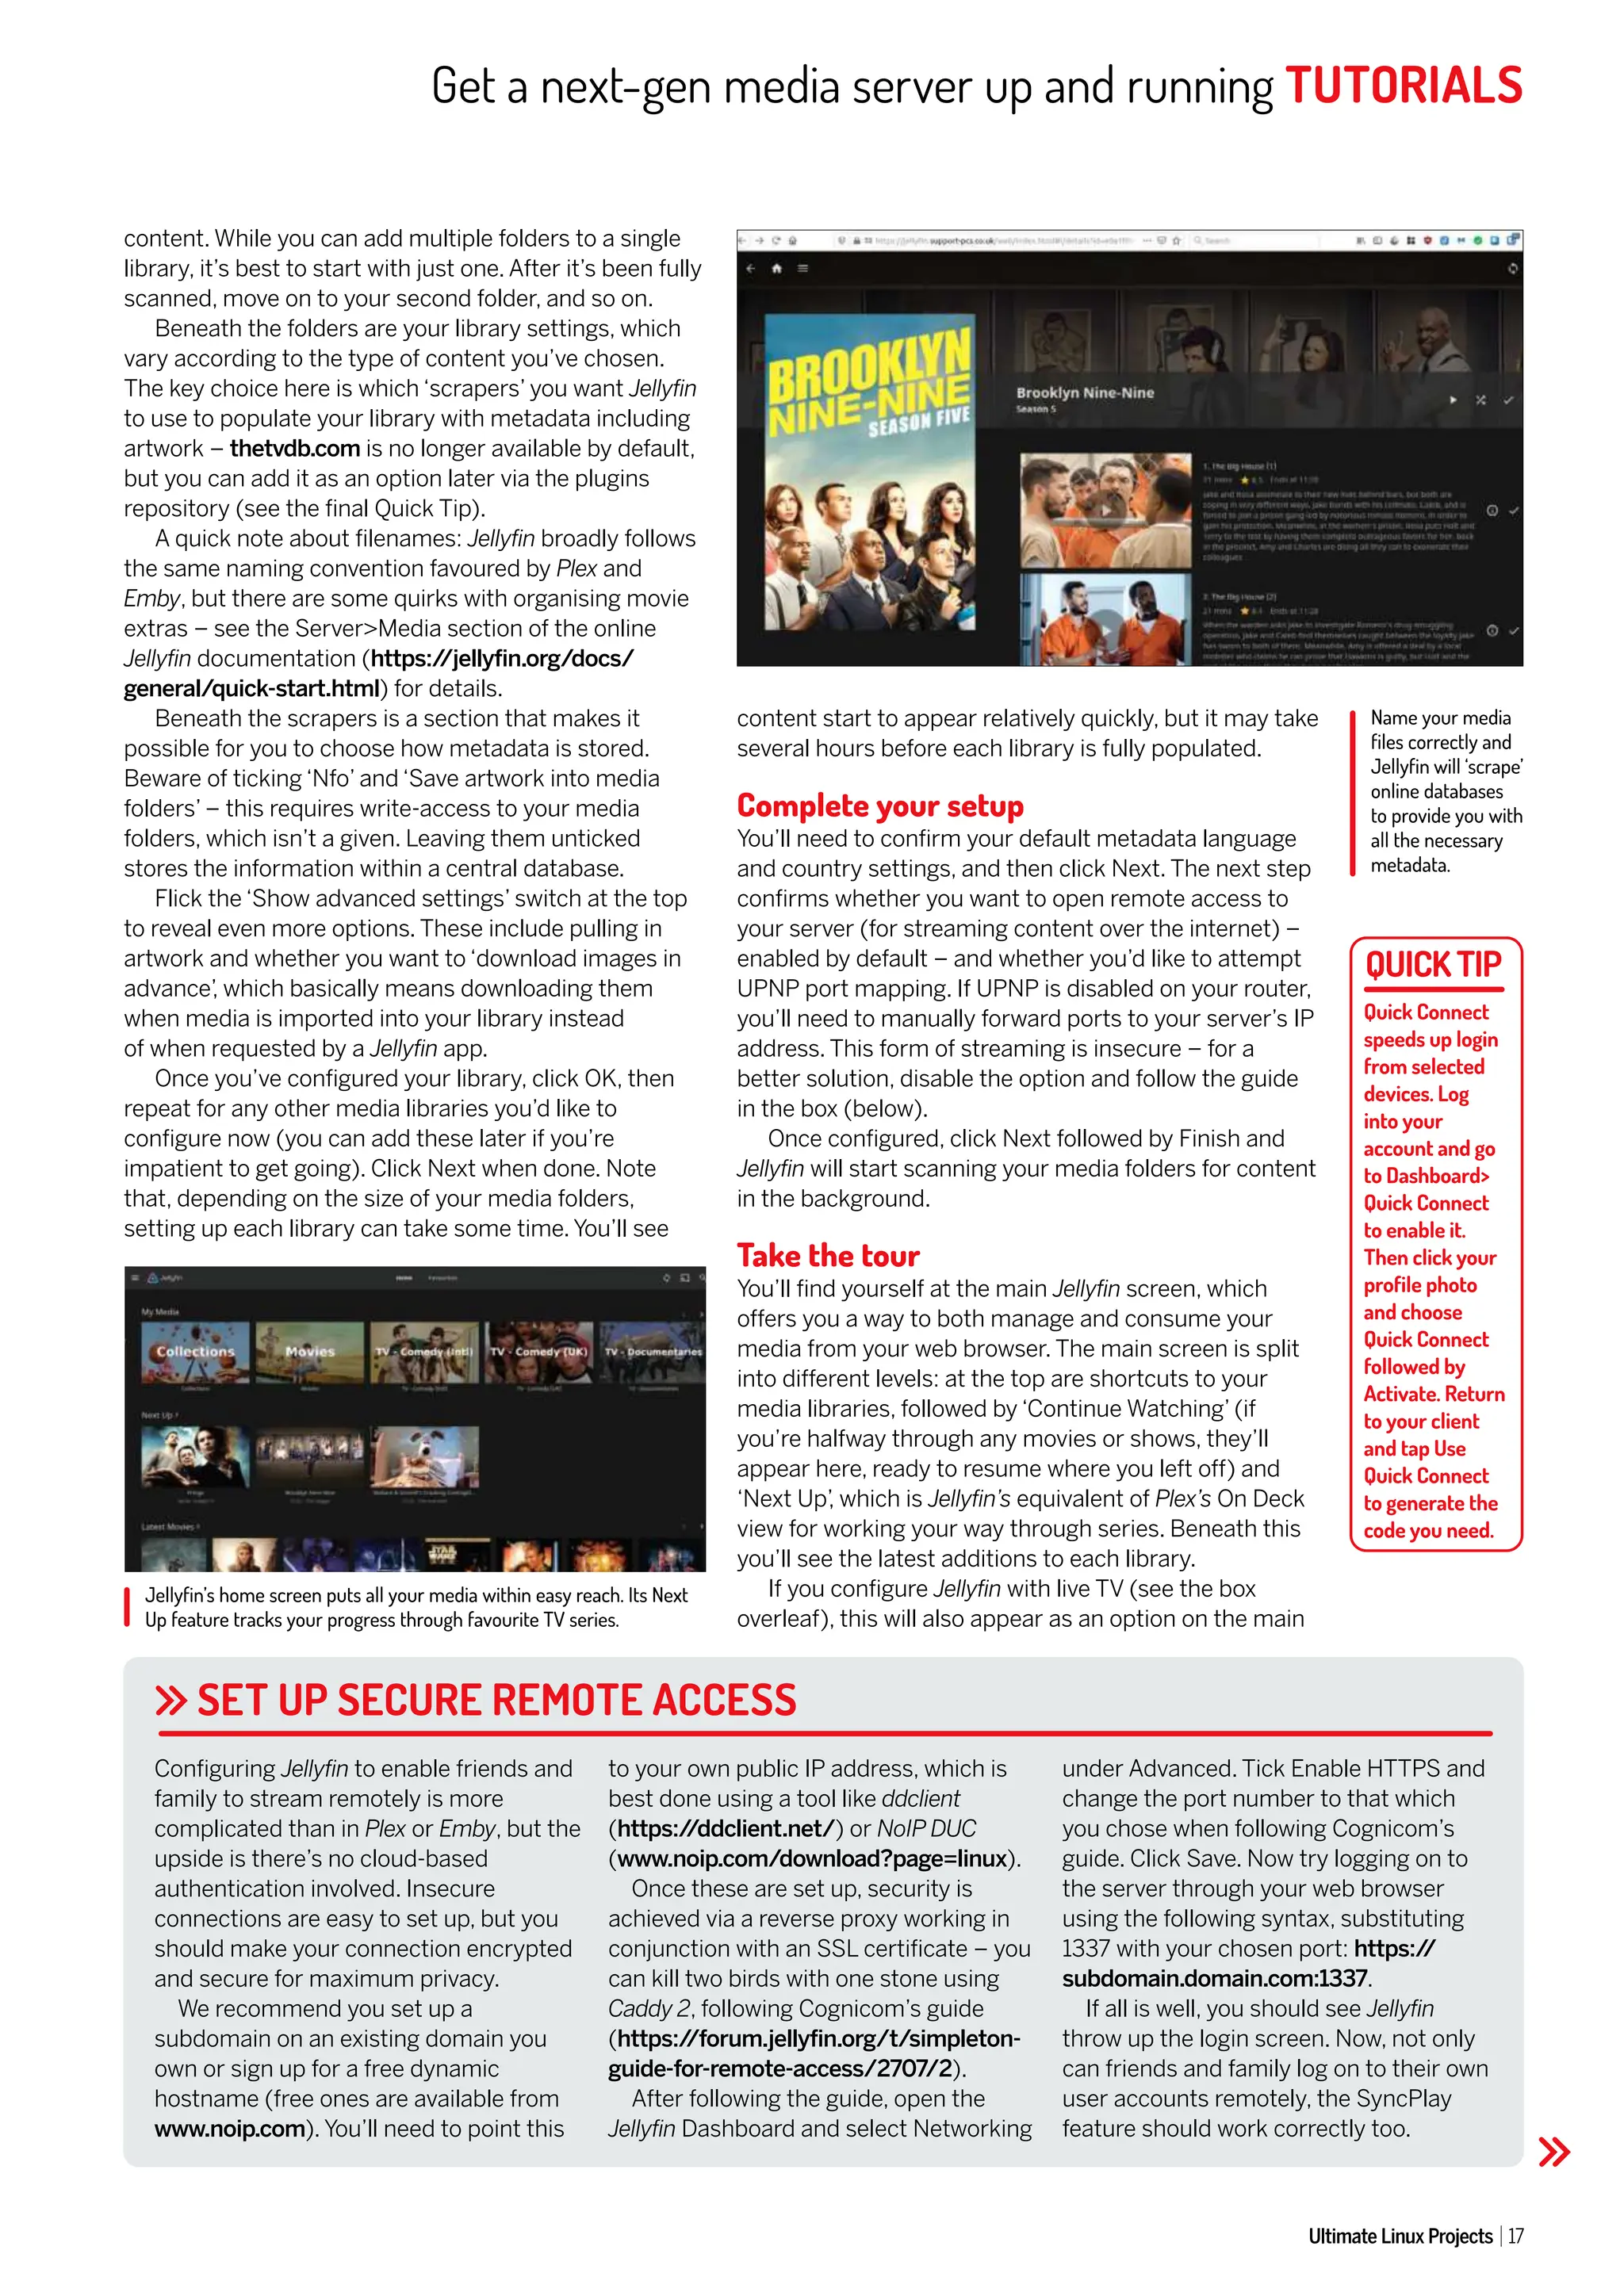
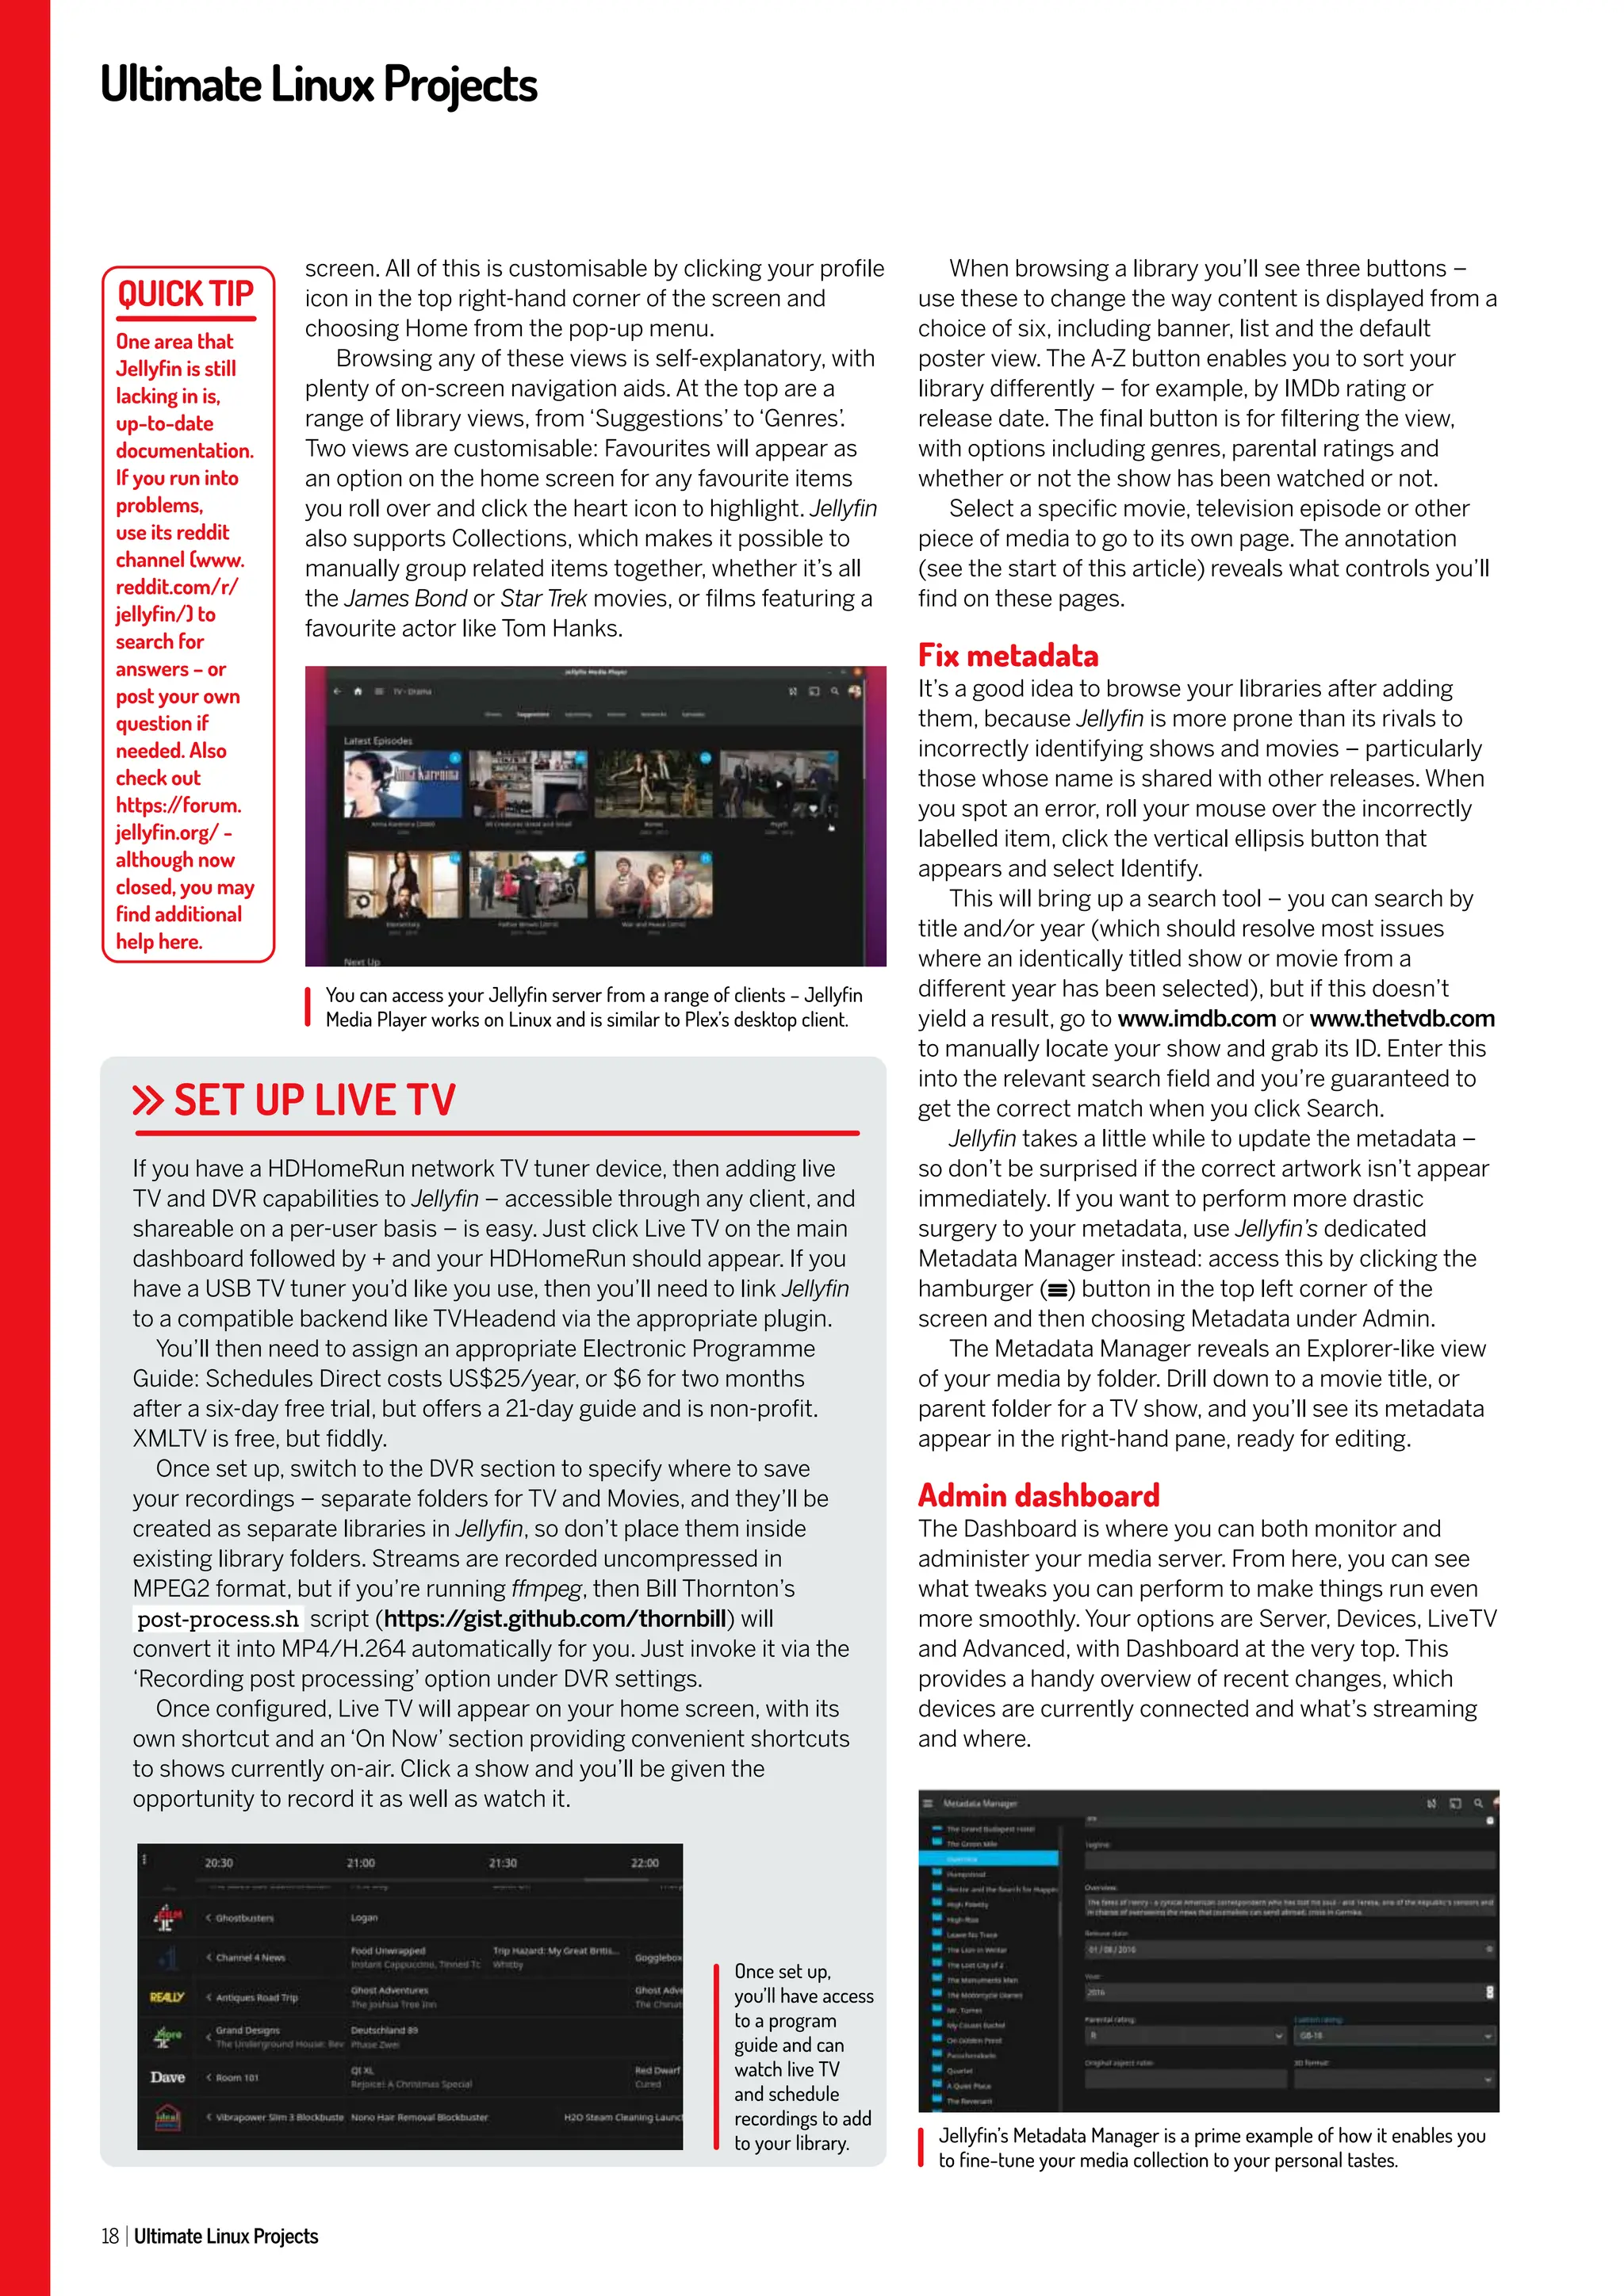
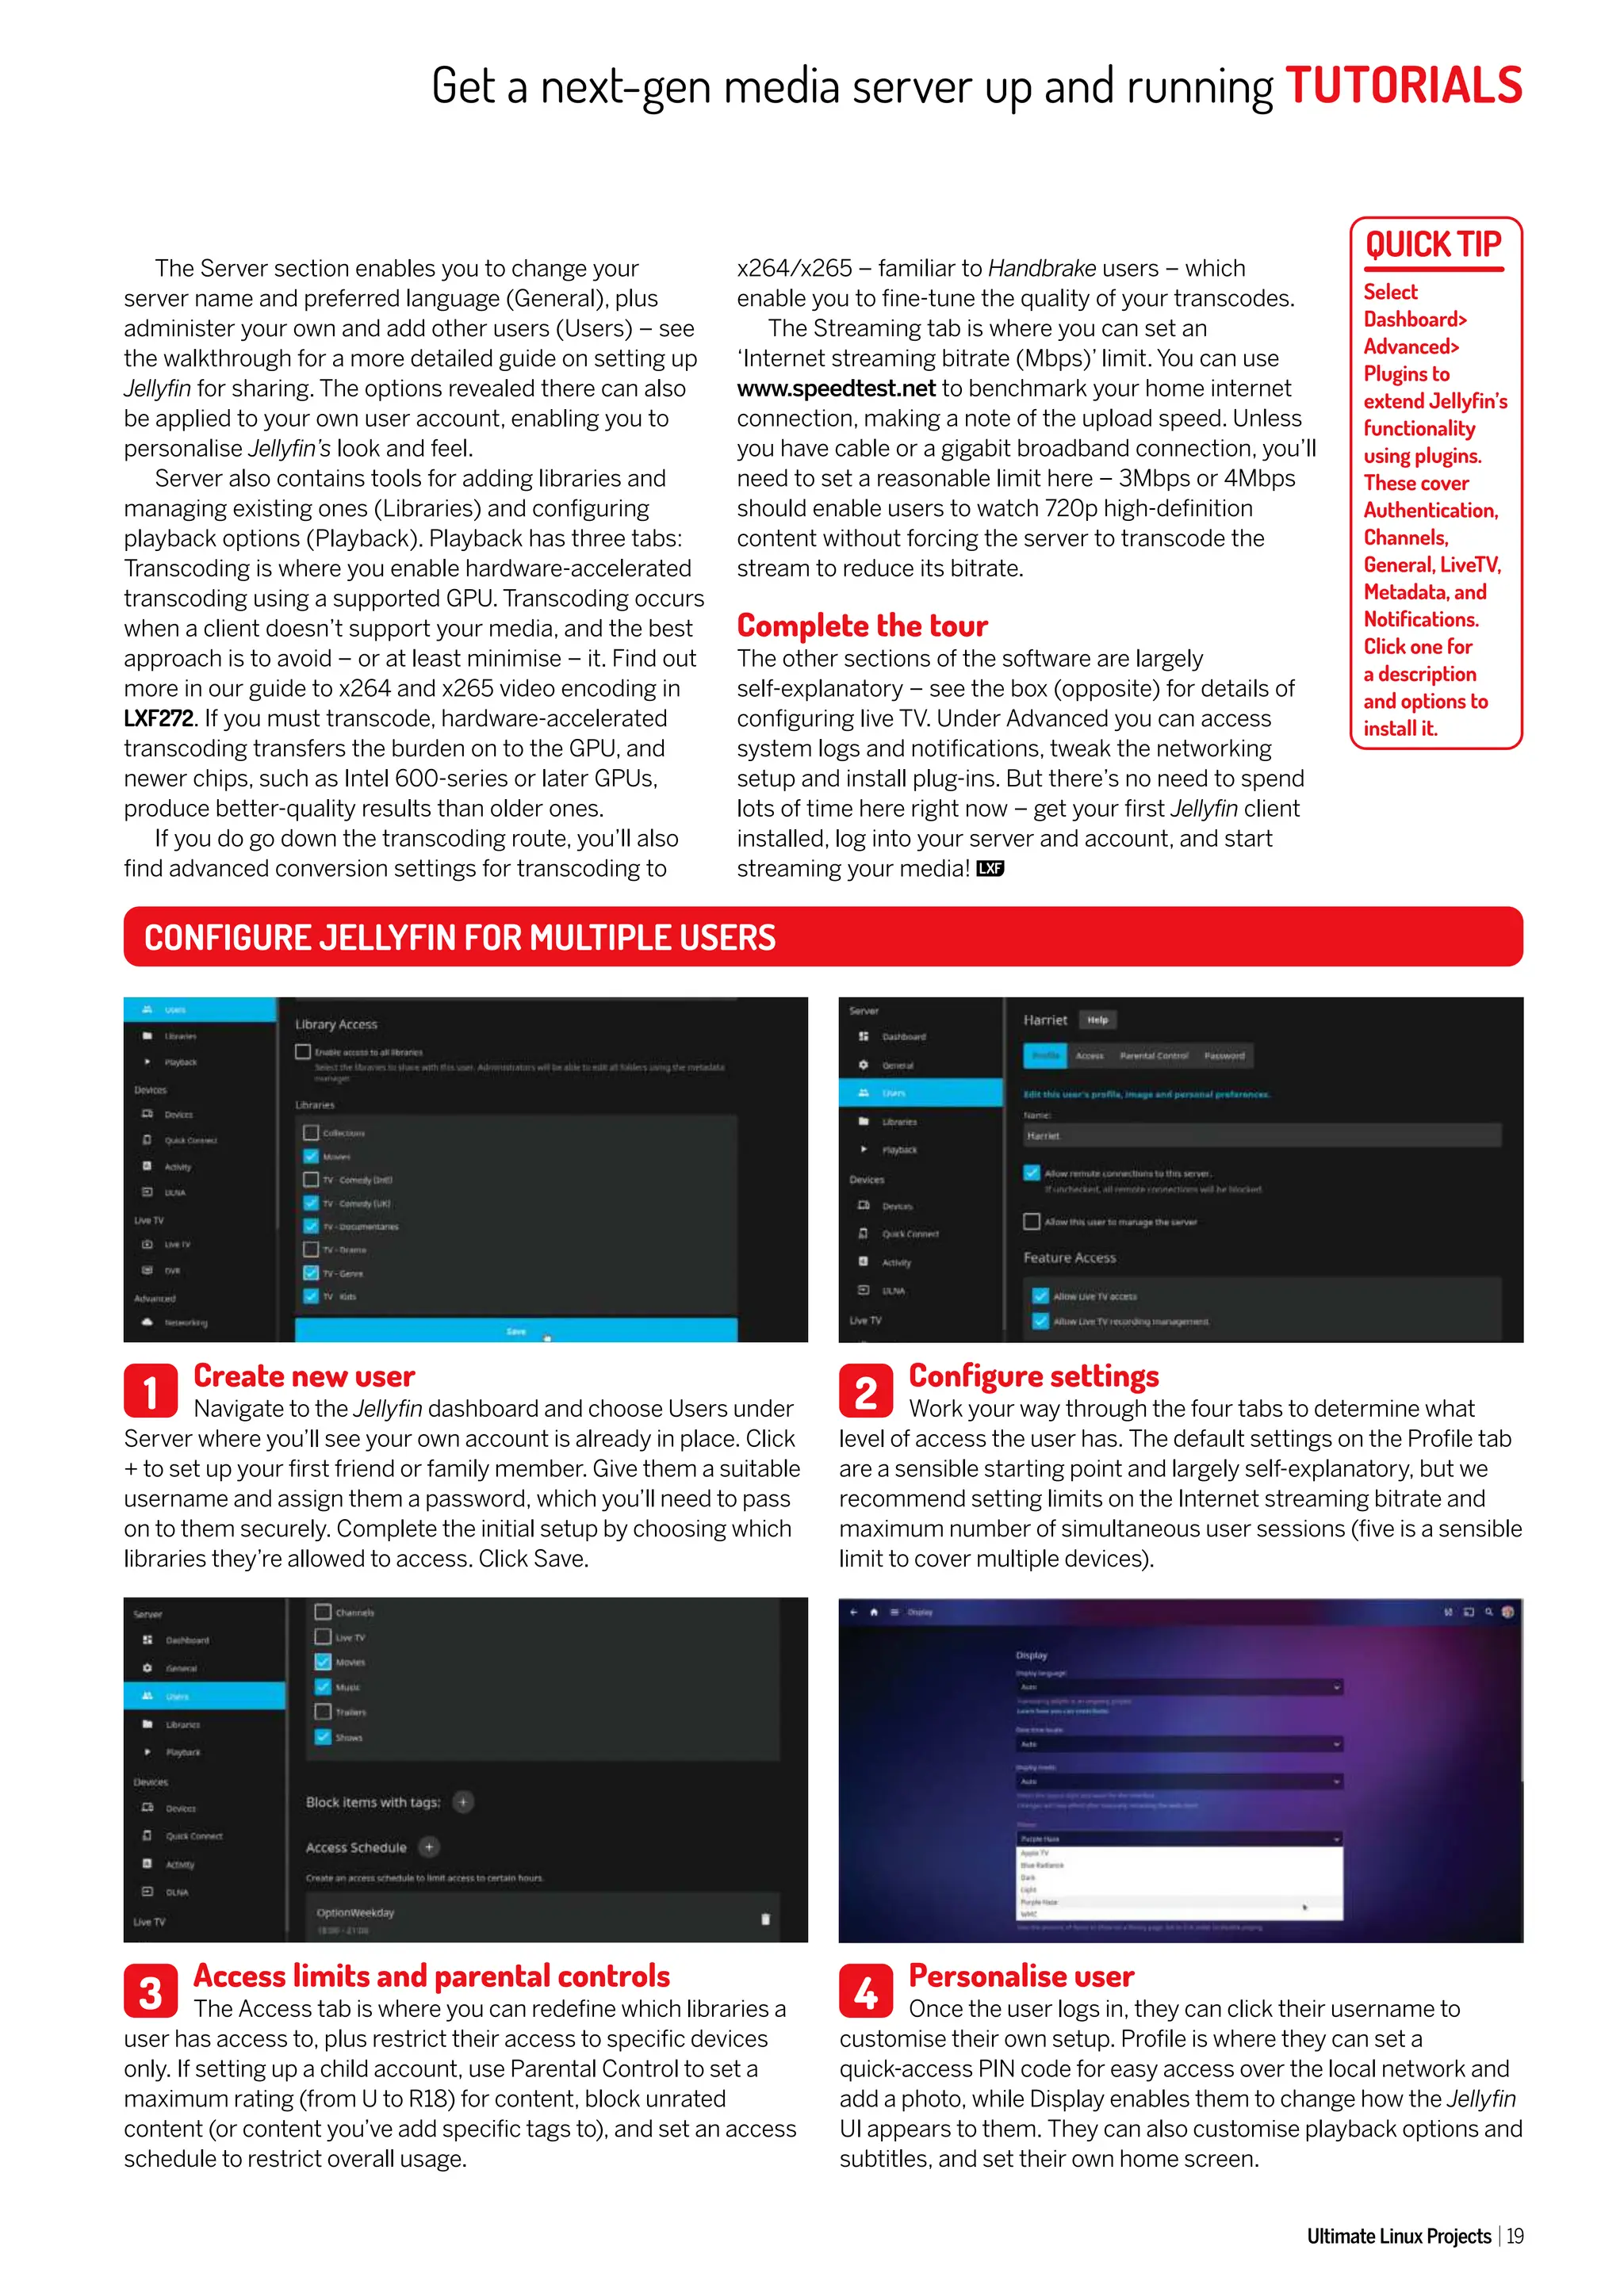
![UltimateLinuxProjects
20 Ultimate Linux Projects
installing the tool is fairly straightforward, and the
project’s GitHub page describes various installation
techniques. If your Linux distribution is already
configured to use pip , you can install S-TUI with the
sudo pip install s-tui command.
For other installation methodologies, such as
installing it from Git, you’ll have to ensure all the
dependencies are installed. These include tools such as
urwid and psutil. Although it isn’t a dependency, if you
decide to use S-TUI to also stress-test your CPU, you
should also install stress or stress-ng. Thankfully, these
are offered in the software repositories of almost all
desktop distributions.
ver the past few years in Linux Format
magazine, we’ve introduced a blend of
powerful and robust as well as nifty and nimble
command utilities that help you perform a variety of
tasks. Everything from everyday text editing, connecting
with remote machines, performing backups and other
administration tasks can be done from the terminal.
A key matrix for determining the vitality of a Linux
distro, or the hardware that it runs on, is system
performance. Depending on your purpose, you can
choose from a variety of dedicated tools to monitor the
different components such as CPU frequency,
temperature and memory utilisation. But if you favour
the CLI, like us, you’ll rather enjoy working with S-TUI.
With S-TUI, which is an acronym for Stress-Terminal
UI, you can simultaneously monitor CPU temperature,
frequency, power and utilisation. The utility presents all
the information graphically and can even be used to
export the data into CSV files. Better still, you can
configure S-TUI to automatically launch scripts when
the values of any of the components being monitored
breaches the defined threshold values. When coupled
with stress, another command-line utility, S-TUI can also
be used to stress-test your system.
Don’t stress over installation
Although S-TUI isn’t available in the software
repositories of most popular desktop distributions,
Some sensors, such as Power, are only available when you run S-TUI as
sudo, and not as a regular user.
Stress-test your CPU
While Shashank Sharma isn’t fond of stress-testing the weighing scale,
he’s fine with tools like S-TUI, which help him monitor CPU performance.
Shashank
Sharma
is a trial lawyer in
Delhi and an avid
Arch Linux user.
He’s always on
the hunt
for geeky
memorabilia.
O
S-TUI
MAKING USE OF THRESHOLD SCRIPTS
In addition to the s-tui.conf file, the
~/.config/s-tui directory also contains a
directory called hooks-d. You can place
custom scripts you wish to execute
when a certain threshold, such as CPU
temperature or frequency is exceeded,
within this directory. The name of the
script must be <name>source.sh, where
<name> is the name of the supported
source. While you can use S-TUI to track
various sources, for now it only supports
running scripts based on CPU
temperature threshold setting.
The default threshold value for the
CPU temperature is 80. To change this
value, you must invoke S-TUI with the
s-tui --t_thresh <value> command.
You can then save the new threshold
value into the ~/.config/s-tui/s-tui.conf
file by saving the settings from within
S-TUI itself.
If you make any changes to the
settings from within the S-TUI interface,
and wish to save them for future use,
you’ll need to navigate to the Save
Settings option on the sidebar and then
press Enter. Depending on how you
installed S-TUI, you may have to amend
the file permissions on the s-tui.conf
file for it to be writeable, otherwise the
tool will exit with a curt ‘Permission
Denied’ error.
When you now open the s-tui.conf file
in a text editor, you’ll find a new entry
showing the newly defined temperature
threshold value:
[GraphControll]
refresh = 2.0
utf8 = True
tthresh = 70
While the stress testing feature is of
little use to home Linux users, there’s no
denying the benefit of graphical
representation of the collected data for
administrators and programmers.
OUR
EXPERT](https://image.slidesharecdn.com/74366-250527055205-d49fc57f/75/Ultimate-Linux-Projects-2nd-Edition-2023-Unknown-21-2048.jpg)
![Stress-test your CPU TUTORIALS
Ultimate Linux Projects 21
You must refer to the man page and documentation on the stress utility to understand the
different supported functions.
Unlike many other command-line utilities, S-TUI
requires no configuration and you can begin using it
immediately after installation. Run the s-tui command
to launch the utility.
At the top of the sidebar on the left are the details
about your CPU. Our Lenovo test machine was correctly
identified as running an Intel Core i3-5005U CPU @
2.00GHz processor. This is because S-TUI utilises
various other native tools and utilities to gather the
relevant information. For instance, the same information
and far more details can be ascertained from running
the cat /proc/cpuinfo command.
When you first launch S-TUI, it displays all four
parameters – Frequency, Utilization, Temperature and
Power – and refreshes the data for each every second.
You can change the refresh rate by changing the value
of Refresh[s]:1.0 on the sidebar.
Depending on your terminal application, and the
colour scheme, you may not be able to clearly see the
different elements on the S-TUI interface. Should this
happen, exit S-TUI, then switch to a basic White-on-
Black colour scheme on your terminal emulator, and run
S-TUI again. You should now be able to see all the
different colours used by S-TUI to display all the
collected information, and you can edit your terminal
profile accordingly.
You can use the up and down arrow keys to navigate
the sidebar, but S-TUI also supports the use of H and J
to scroll, much like you would in Vim.
Add some stress
By default, S-TUI is configured to only monitor your
system. This is evident from the (X) next to Monitor on
the sidebar. If you installed the stress utility as well, you
can enable the stress feature by navigating to the Stress
entry on the sidebar and pressing the spacebar. You’ll
notice the empty brackets would be replaced with (X)
now. You can similarly enable or disable monitoring of
the different components. When you disable a
component, the corresponding graph will automatically
disappear from the interface.
Unlike most other command-line utilities, S-TUI can
also be controlled with the mouse. You can left-click on
an entry/option in the sidebar to select it. You must still
hit Escape to return to the main screen and use the
arrow keys to scroll through the sidebar as the
scroll-wheel on your mouse doesn’t work with S-TUI. To
disable the mouse, you must invoke S-TUI with the
s-tui -nm command.
You can also switch to a different temperature sensor
from within S-TUI itself, if you believe the graph is
inaccurate. Navigate to the ‘Temp Sensors >’ entry on
the sidebar, and press Enter. This opens the Available
Temperature Sensors dialog, and you can then select
one from the list. As before, after navigating to an entry
in the list, press Spacebar to select it. Remember to
select Apply for the changes to take effect.
You must hit Escape to return back to the main
screen of the application, such as from the About>
Help or Temp Sensors section.
While the graphical interface for S-TUI also has a
Help section in the sidebar, it provides little more than a
quick introduction. For a complete list of all the
supported command options, you must run the
s-tui –help command.
The collected data is lost as soon as you exit S-TUI,
because the tool doesn’t save it by default. If you want
all the collected information to be automatically saved
to a CSV file when you exit S-TUI, you must invoke the
utility with the s-tui -c command. The collected data
will be stored in the users’ home directory. You can then
view the s-tui_log_<TIME>.csv file in your preferred text
editor. You can also provide a custom name for the CSV
log file with the s-tui -c <path_to_CSV_file> command.
Another useful command option is -j , which can be
used to print on the screen the current status of the
machine in JSON format. The output generated by the
s-tui -j command is a record of the current status of
the machine, and not a running log:
$ s-tui -j
{
“Frequency": {
“Avg": “1282.1”,
“Core 0": “1630.6”,
“Core 1": “1295.6”,
“Core 2": “1175.6”,
“Core 3": “1026.4”
},
“Temp": {
“Acpitz,0": “48.0”,
“PackageId0,0": “49.0”,
“Core0,0": “47.0”,
“Core1,0": “47.0”,
“Pch_Wildcat_Point,0": “40.5”
},
}
S-TUI supports a number of different temperature
sensors and you can choose a different one by
navigating to the Temp Sensors screen. This is only
needed if the default configuration fails to accurately
graph the CPU temperature on your machine.
All the basic settings, such as the refresh rate (in
seconds) and which components to graph, by default
are stored in ~/.config/s-tui/s-tui.conf. Unfortunately,
you must set the Stress options and the temperature
sensors every time you run S-TUI as the tool doesn’t
permit saving these settings in the configuration file.
The stress
utility performs
a loop that
calculates the
square root
of a random
number in order
to stress the
CPU. You can
customise the
stress options
by navigating
to the Stress
Options screen
from the S-TUI
sidebar. The
graphical
interface
enables you to
define all the
major settings
such as the
worker count
for the sqrt(),
sync(), malloc()
functions, as
well as choose
whether to dirty
the memory.](https://image.slidesharecdn.com/74366-250527055205-d49fc57f/75/Ultimate-Linux-Projects-2nd-Edition-2023-Unknown-22-2048.jpg)
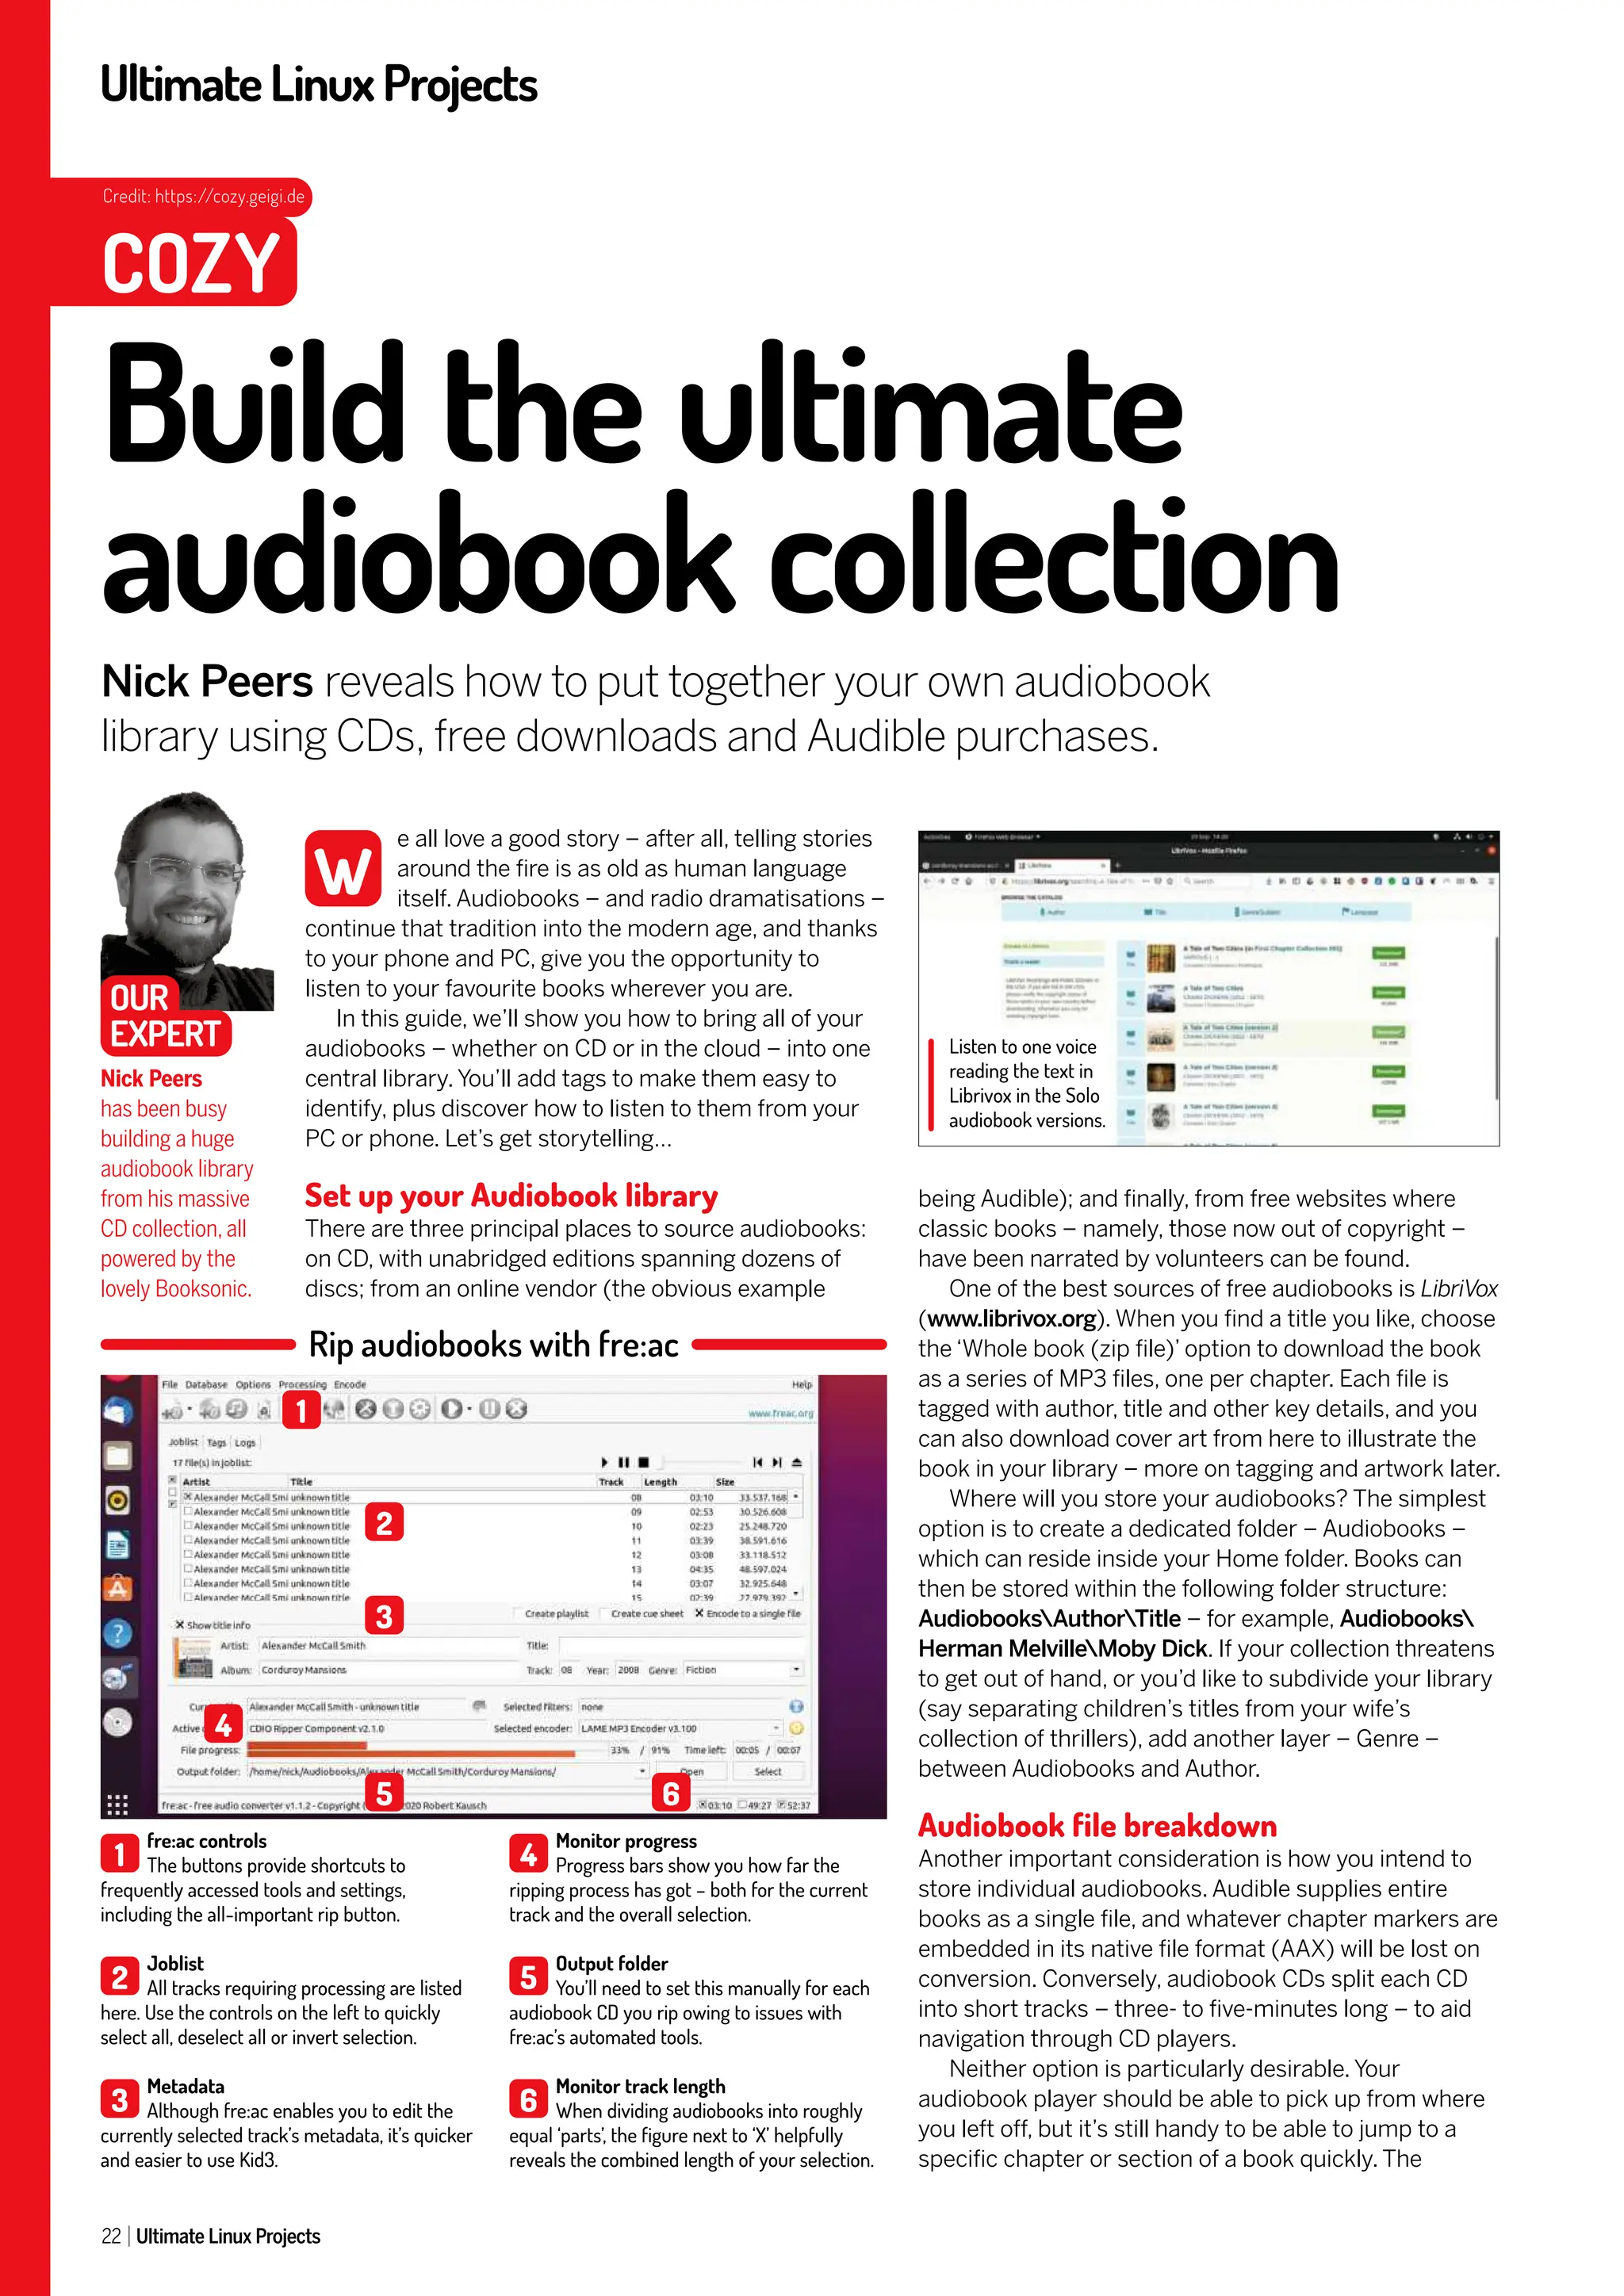
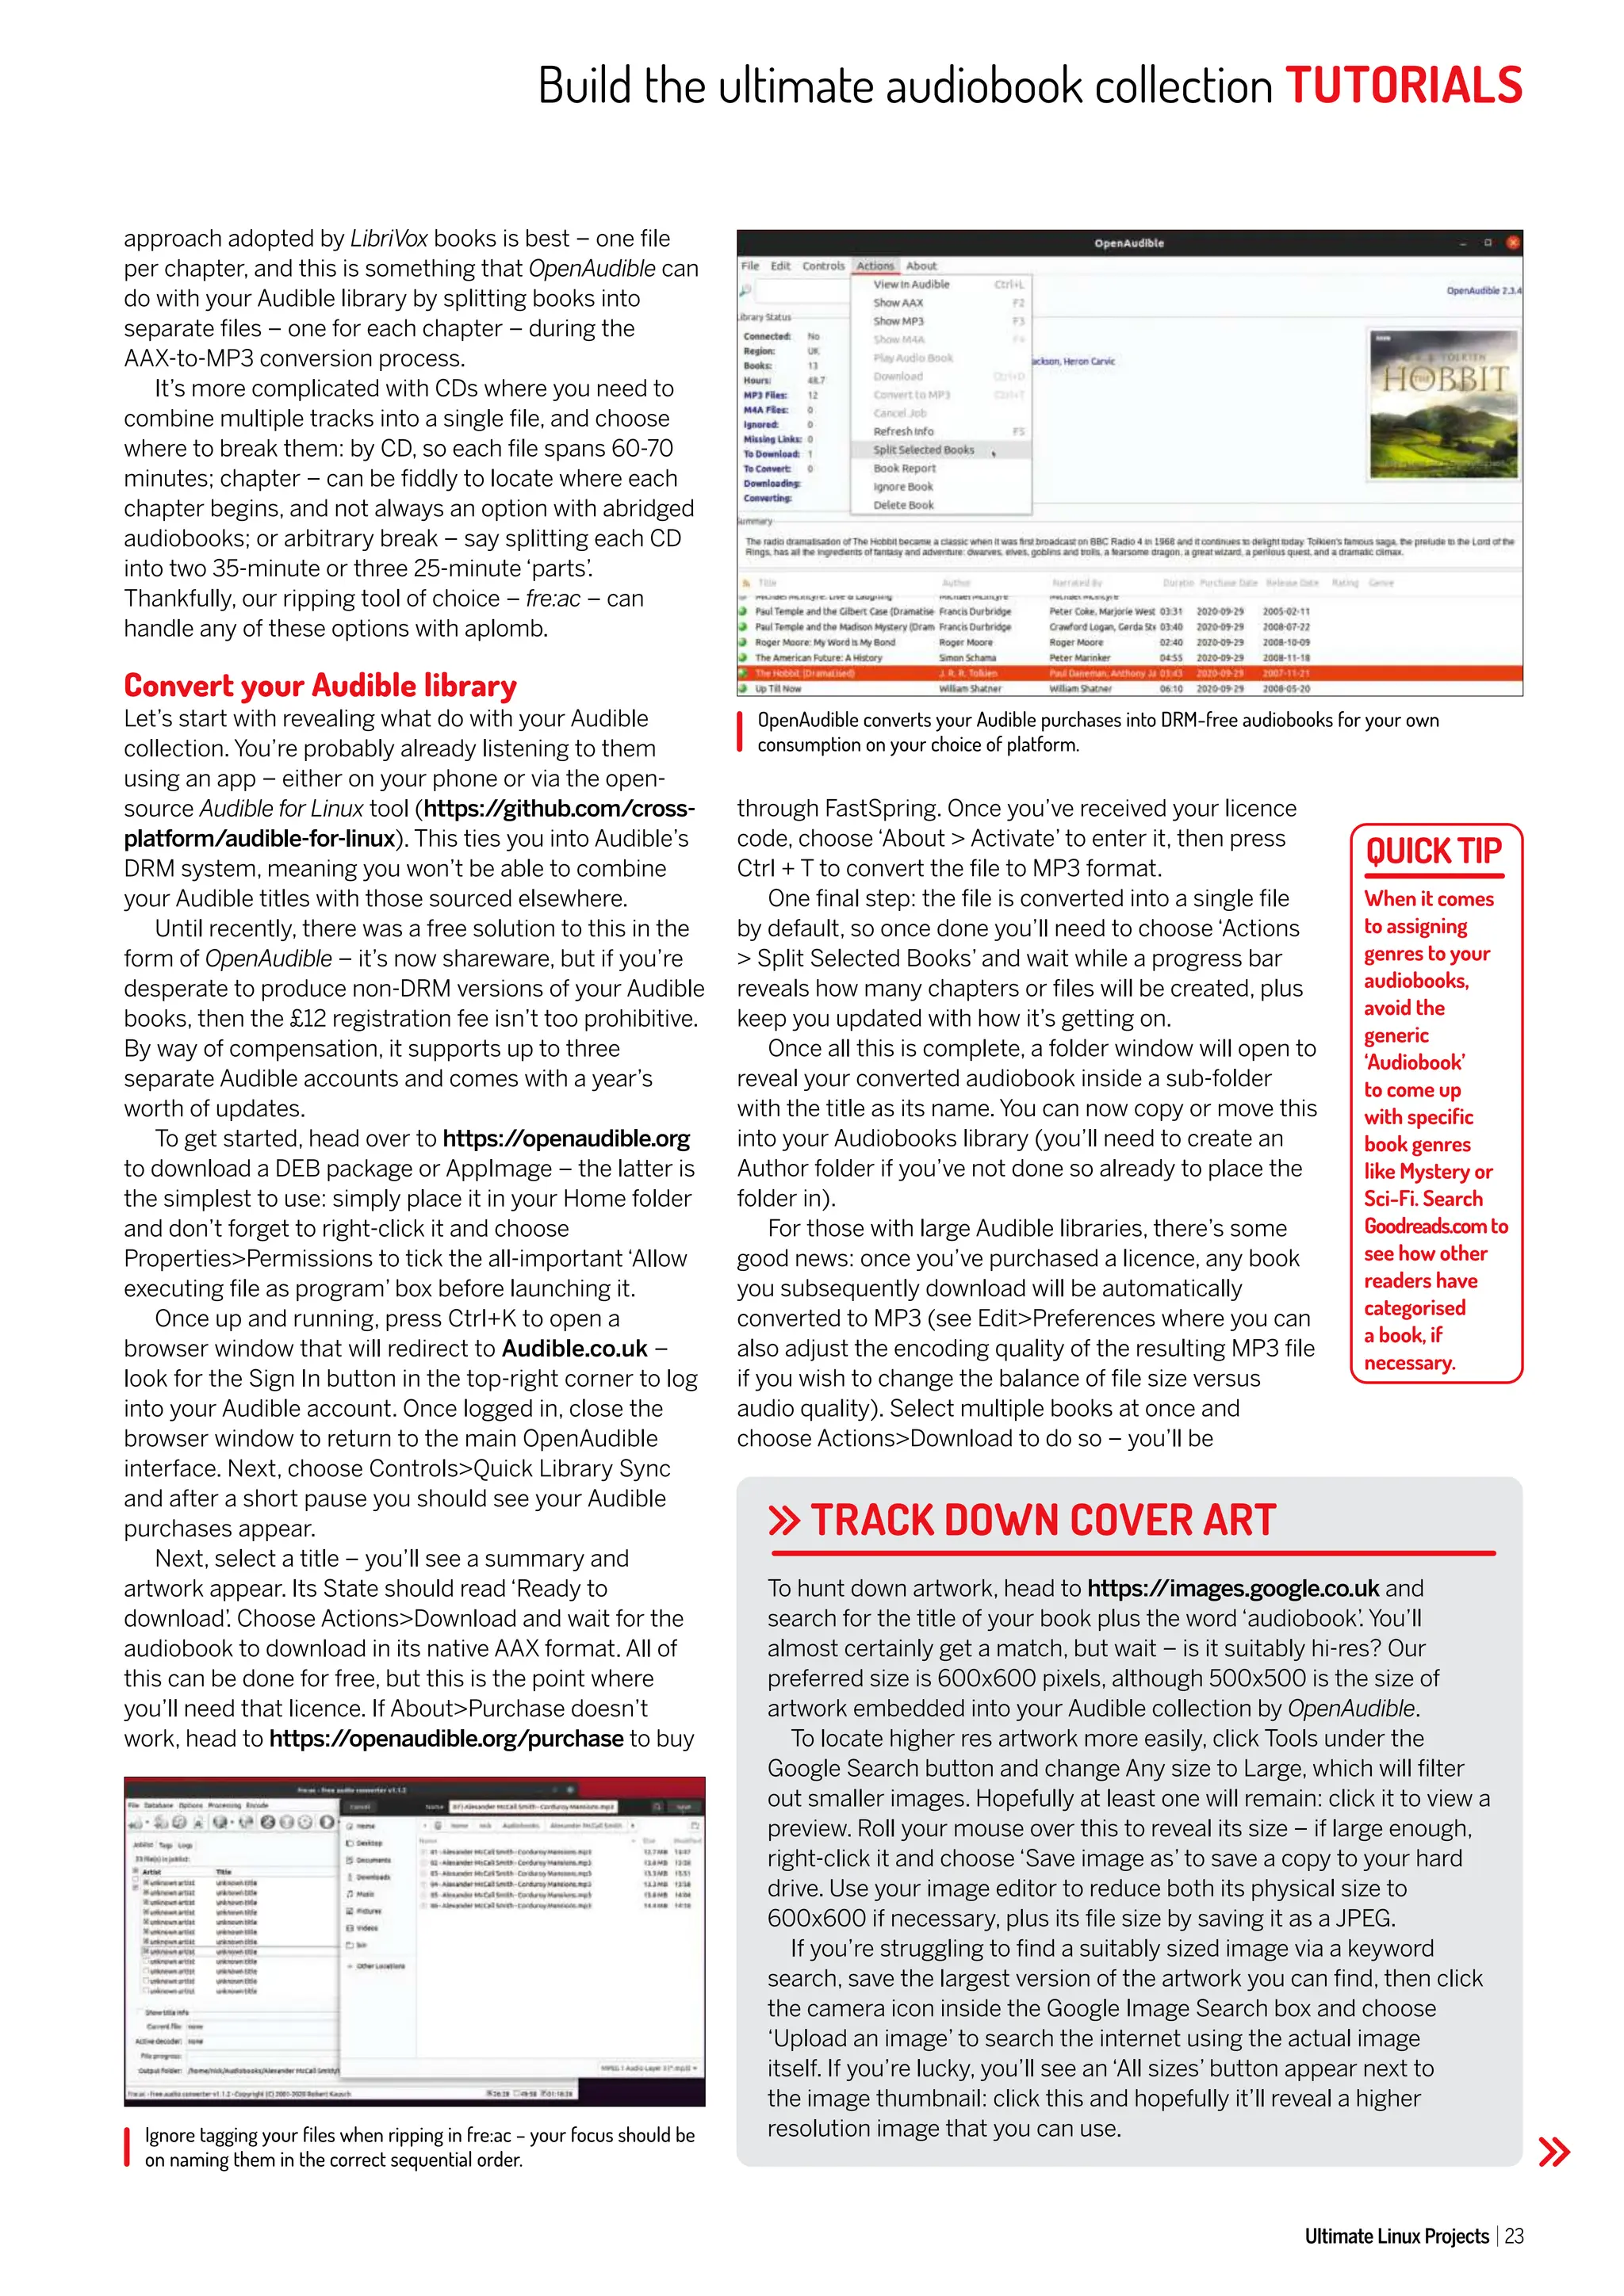
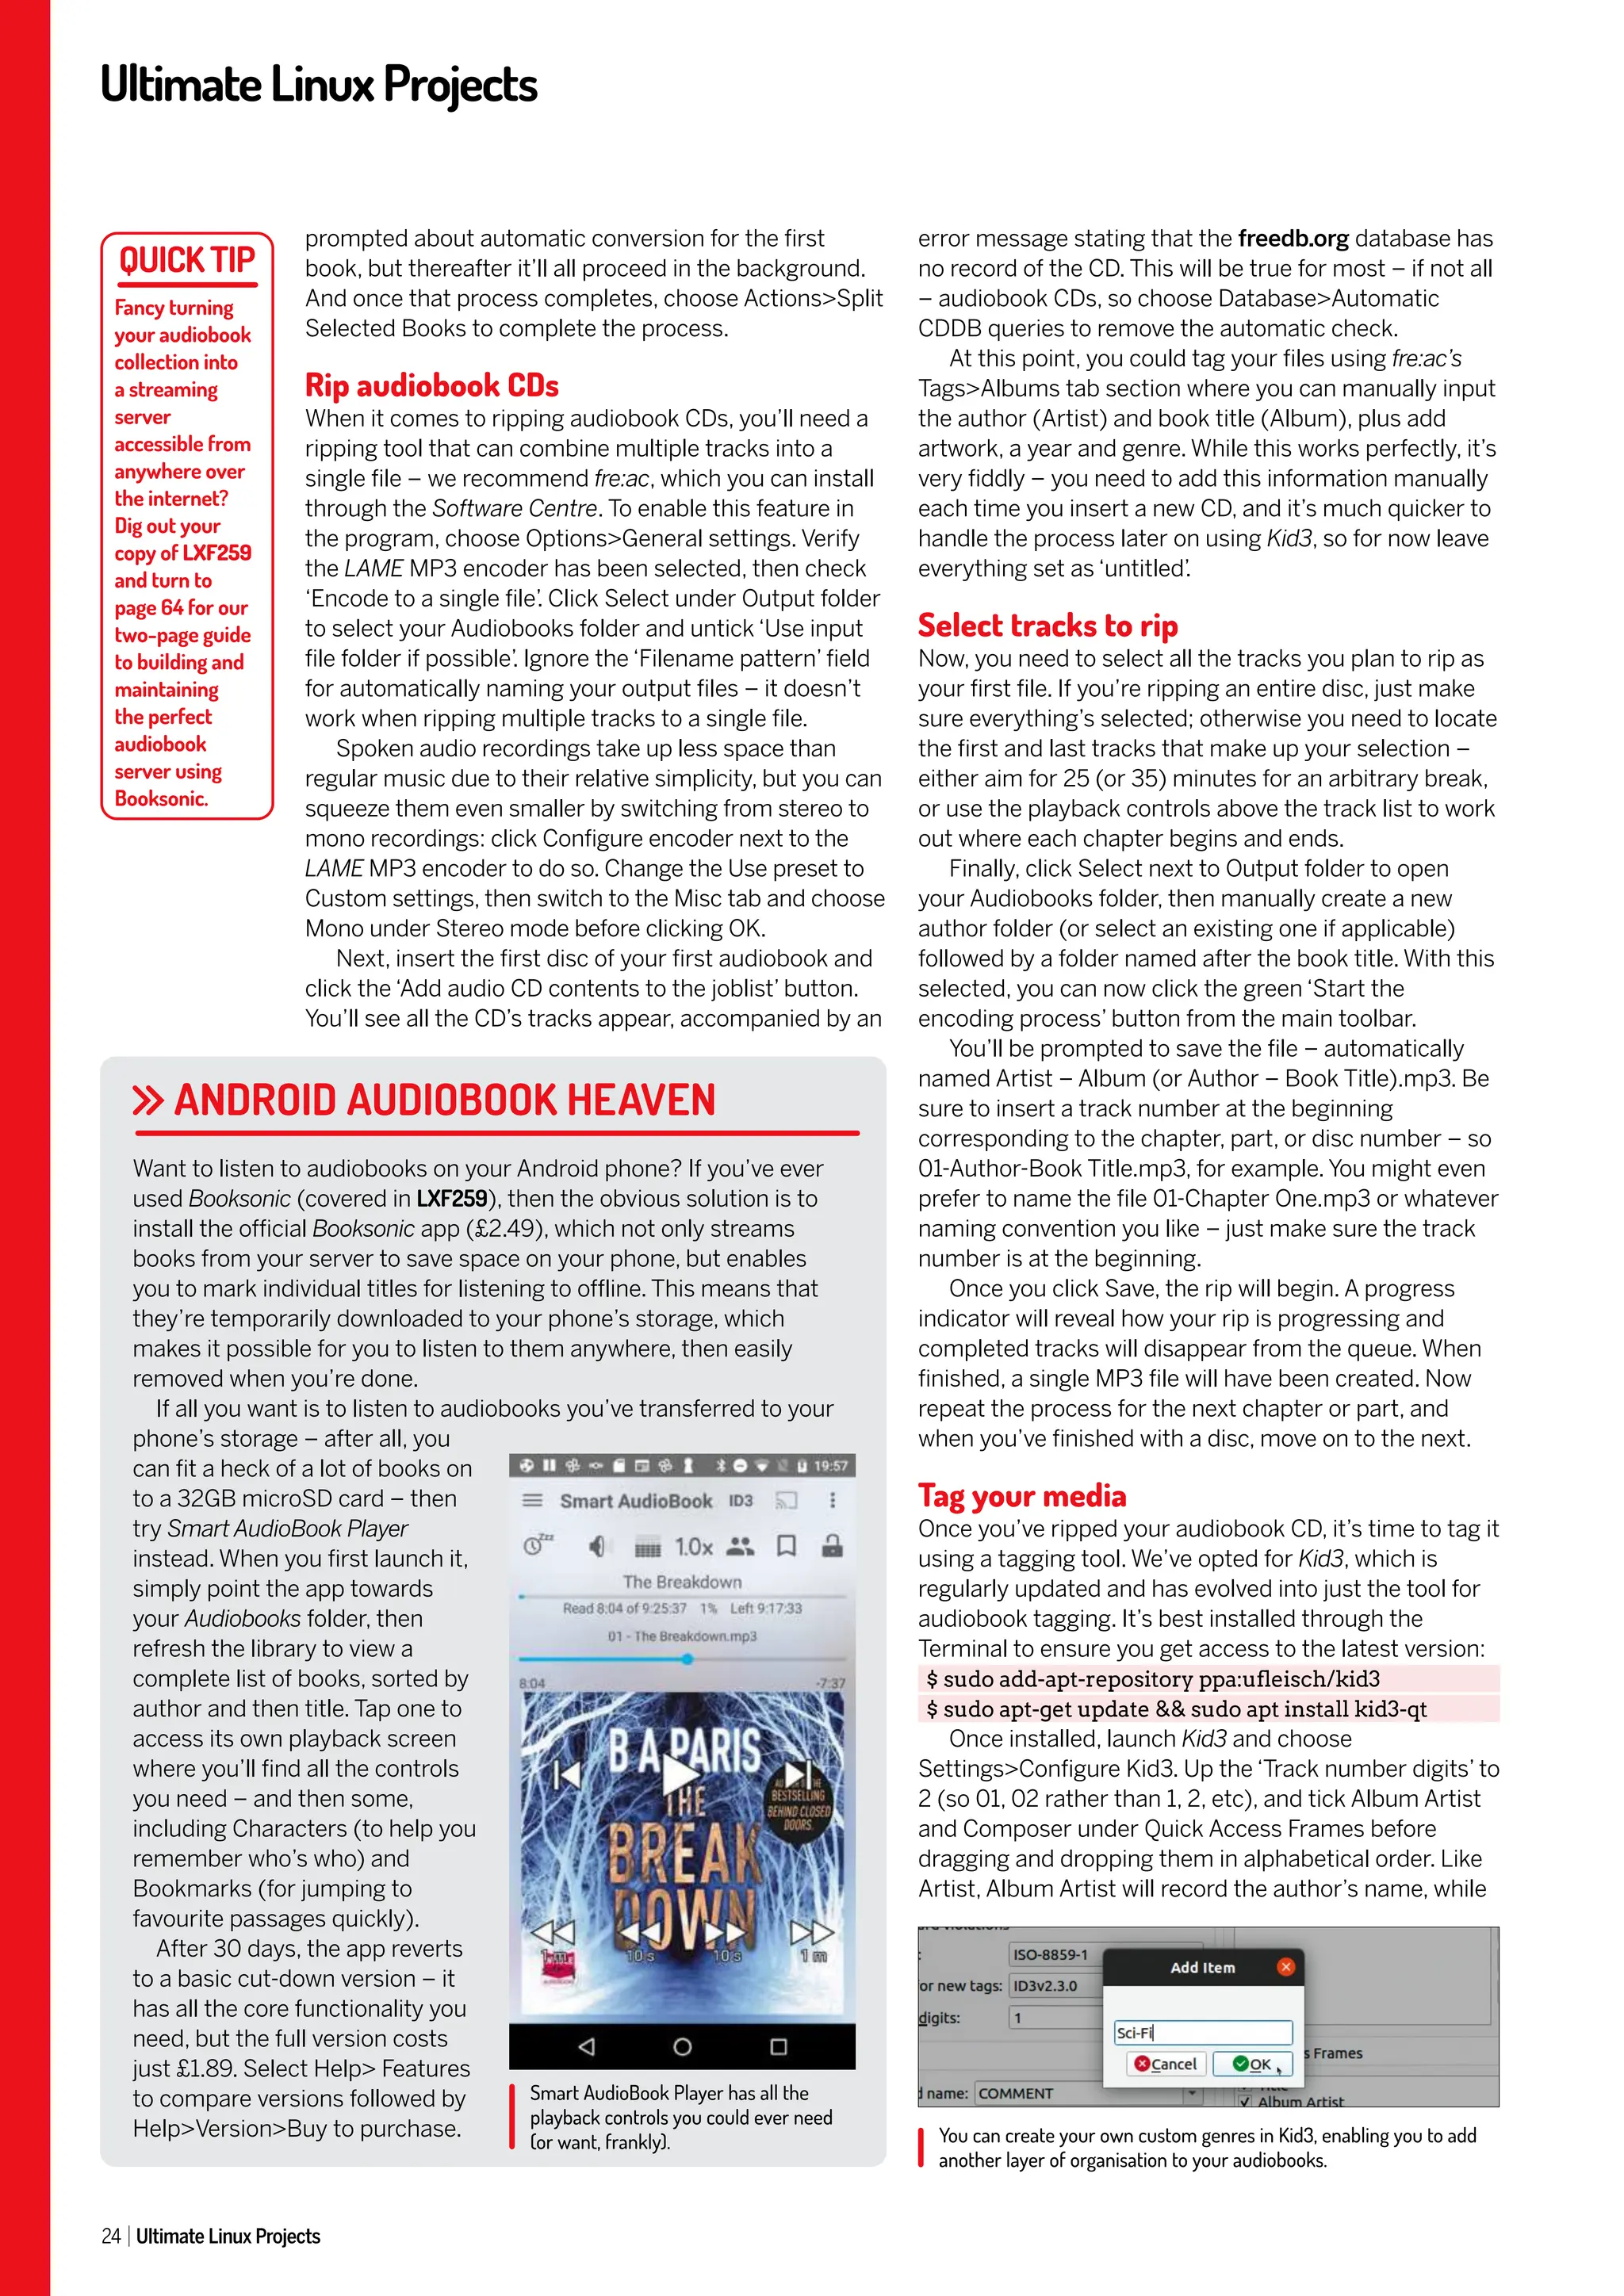
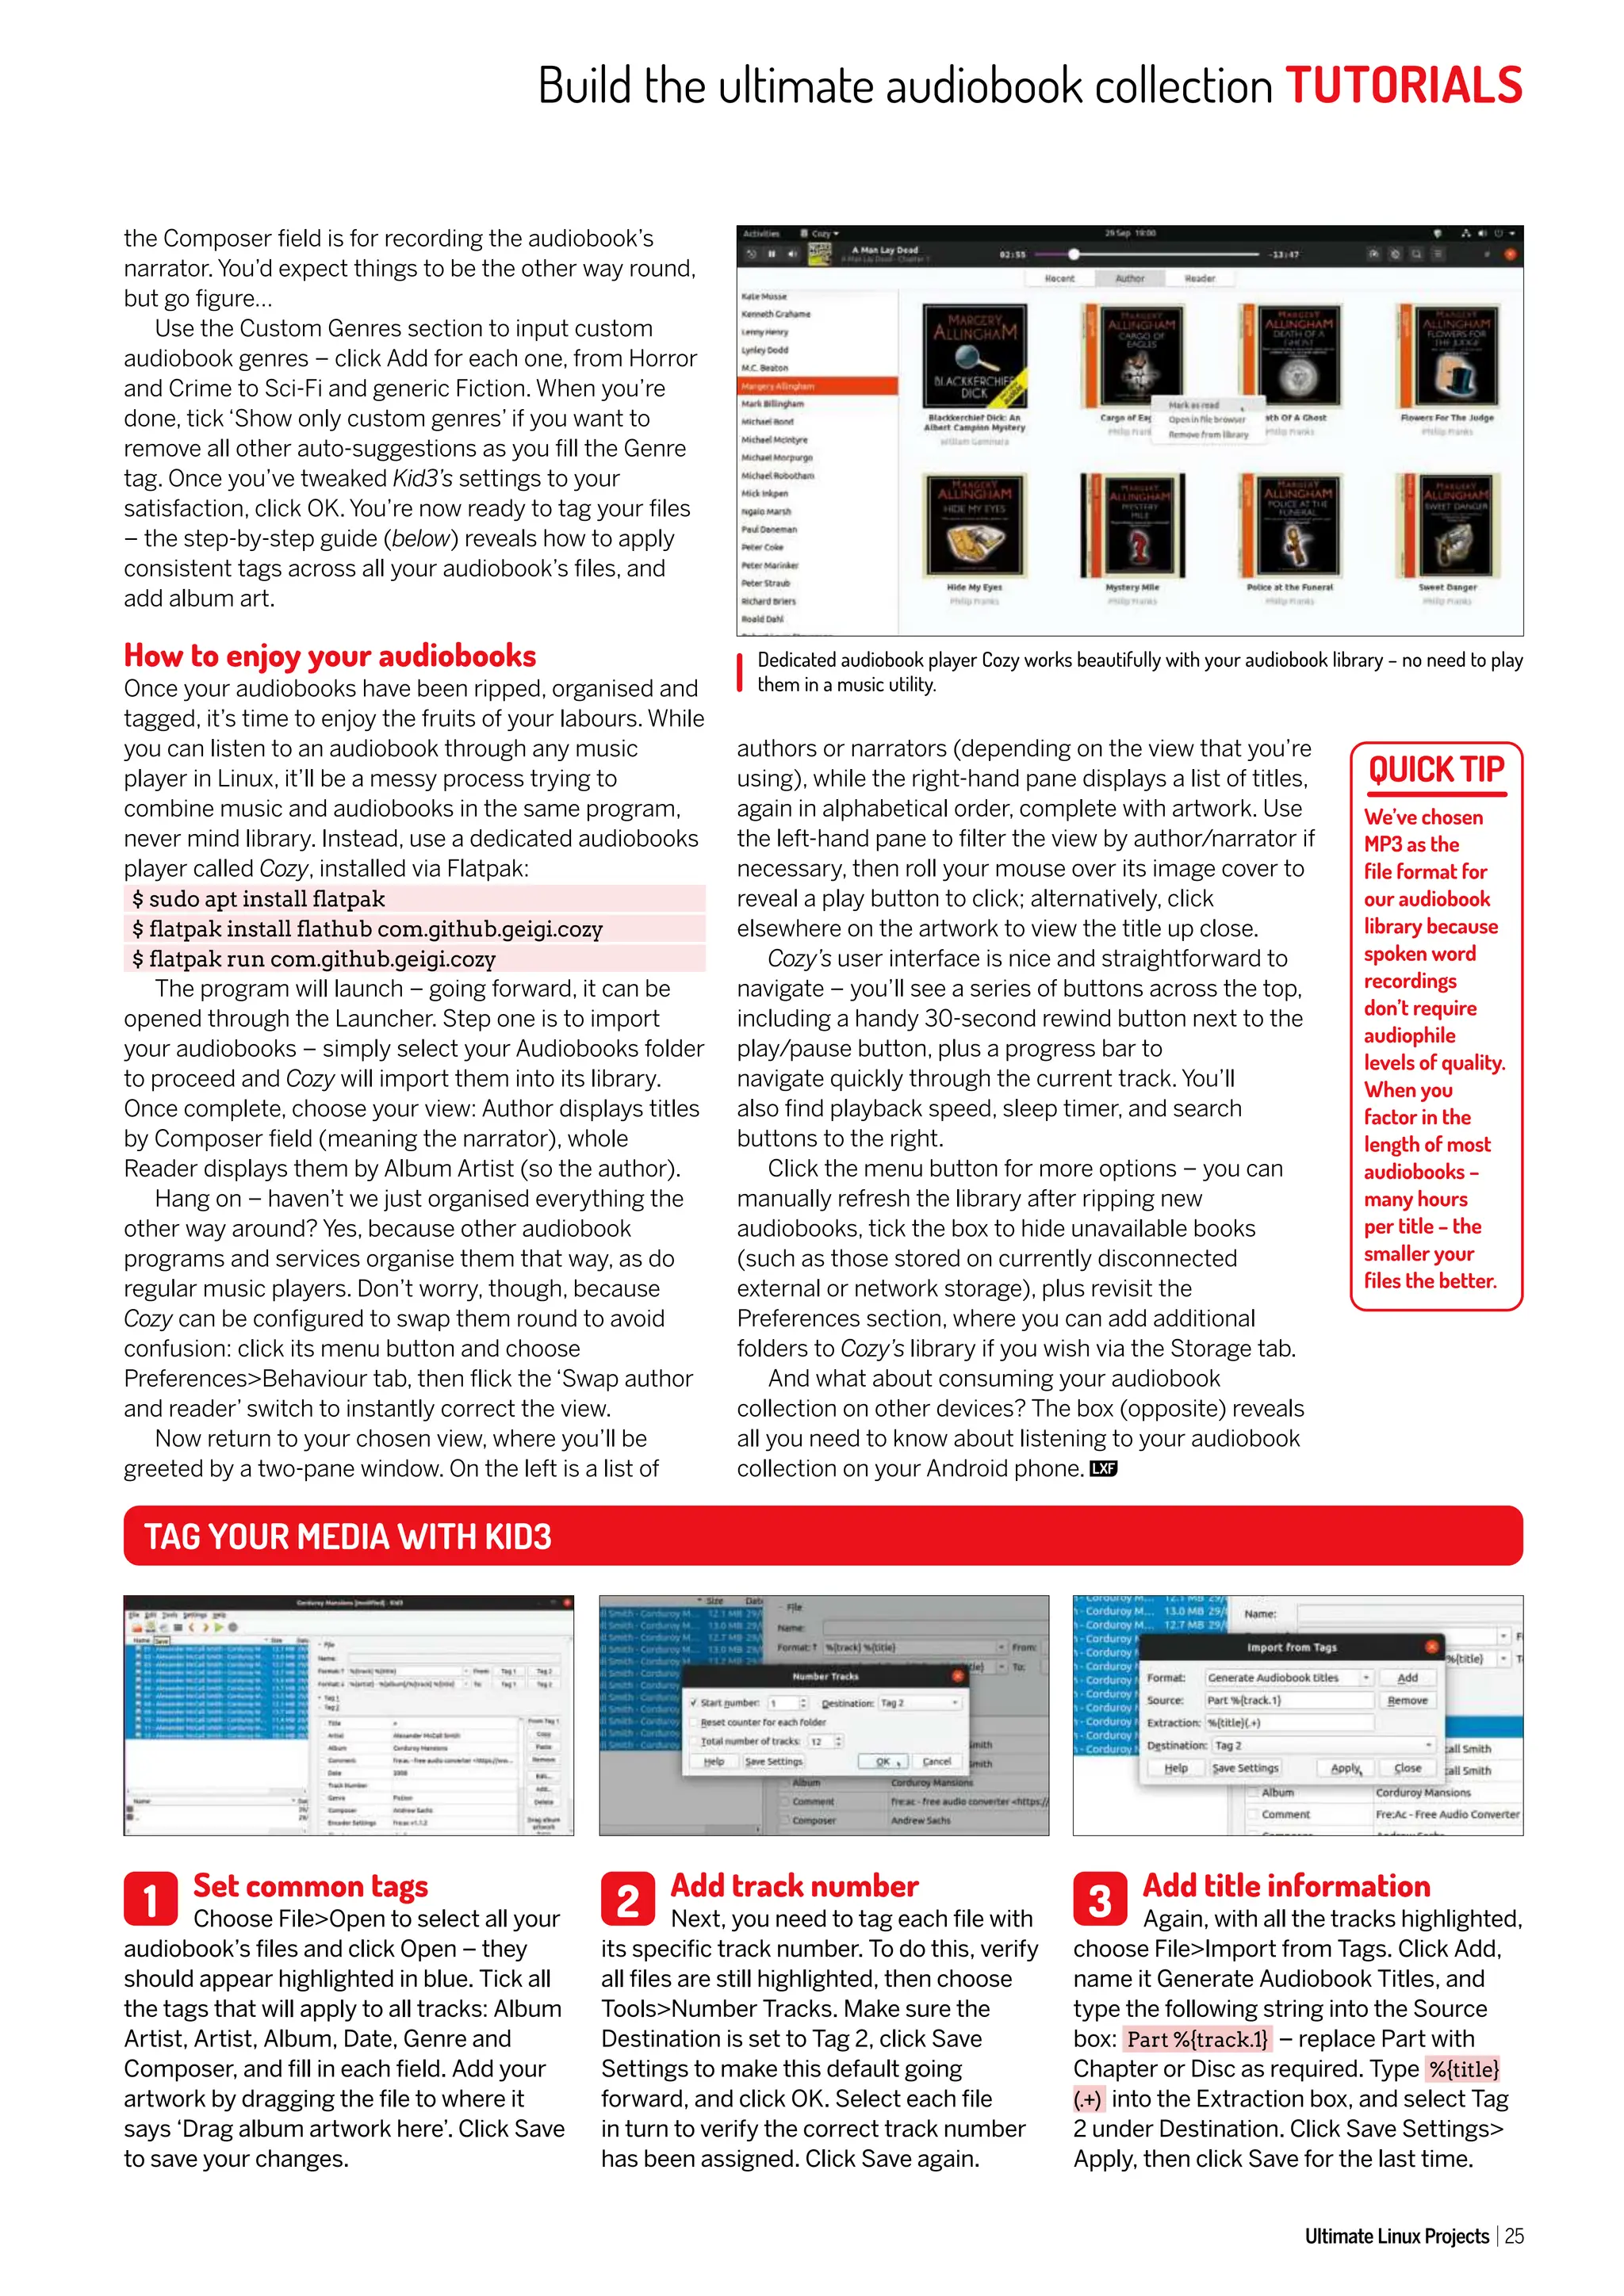

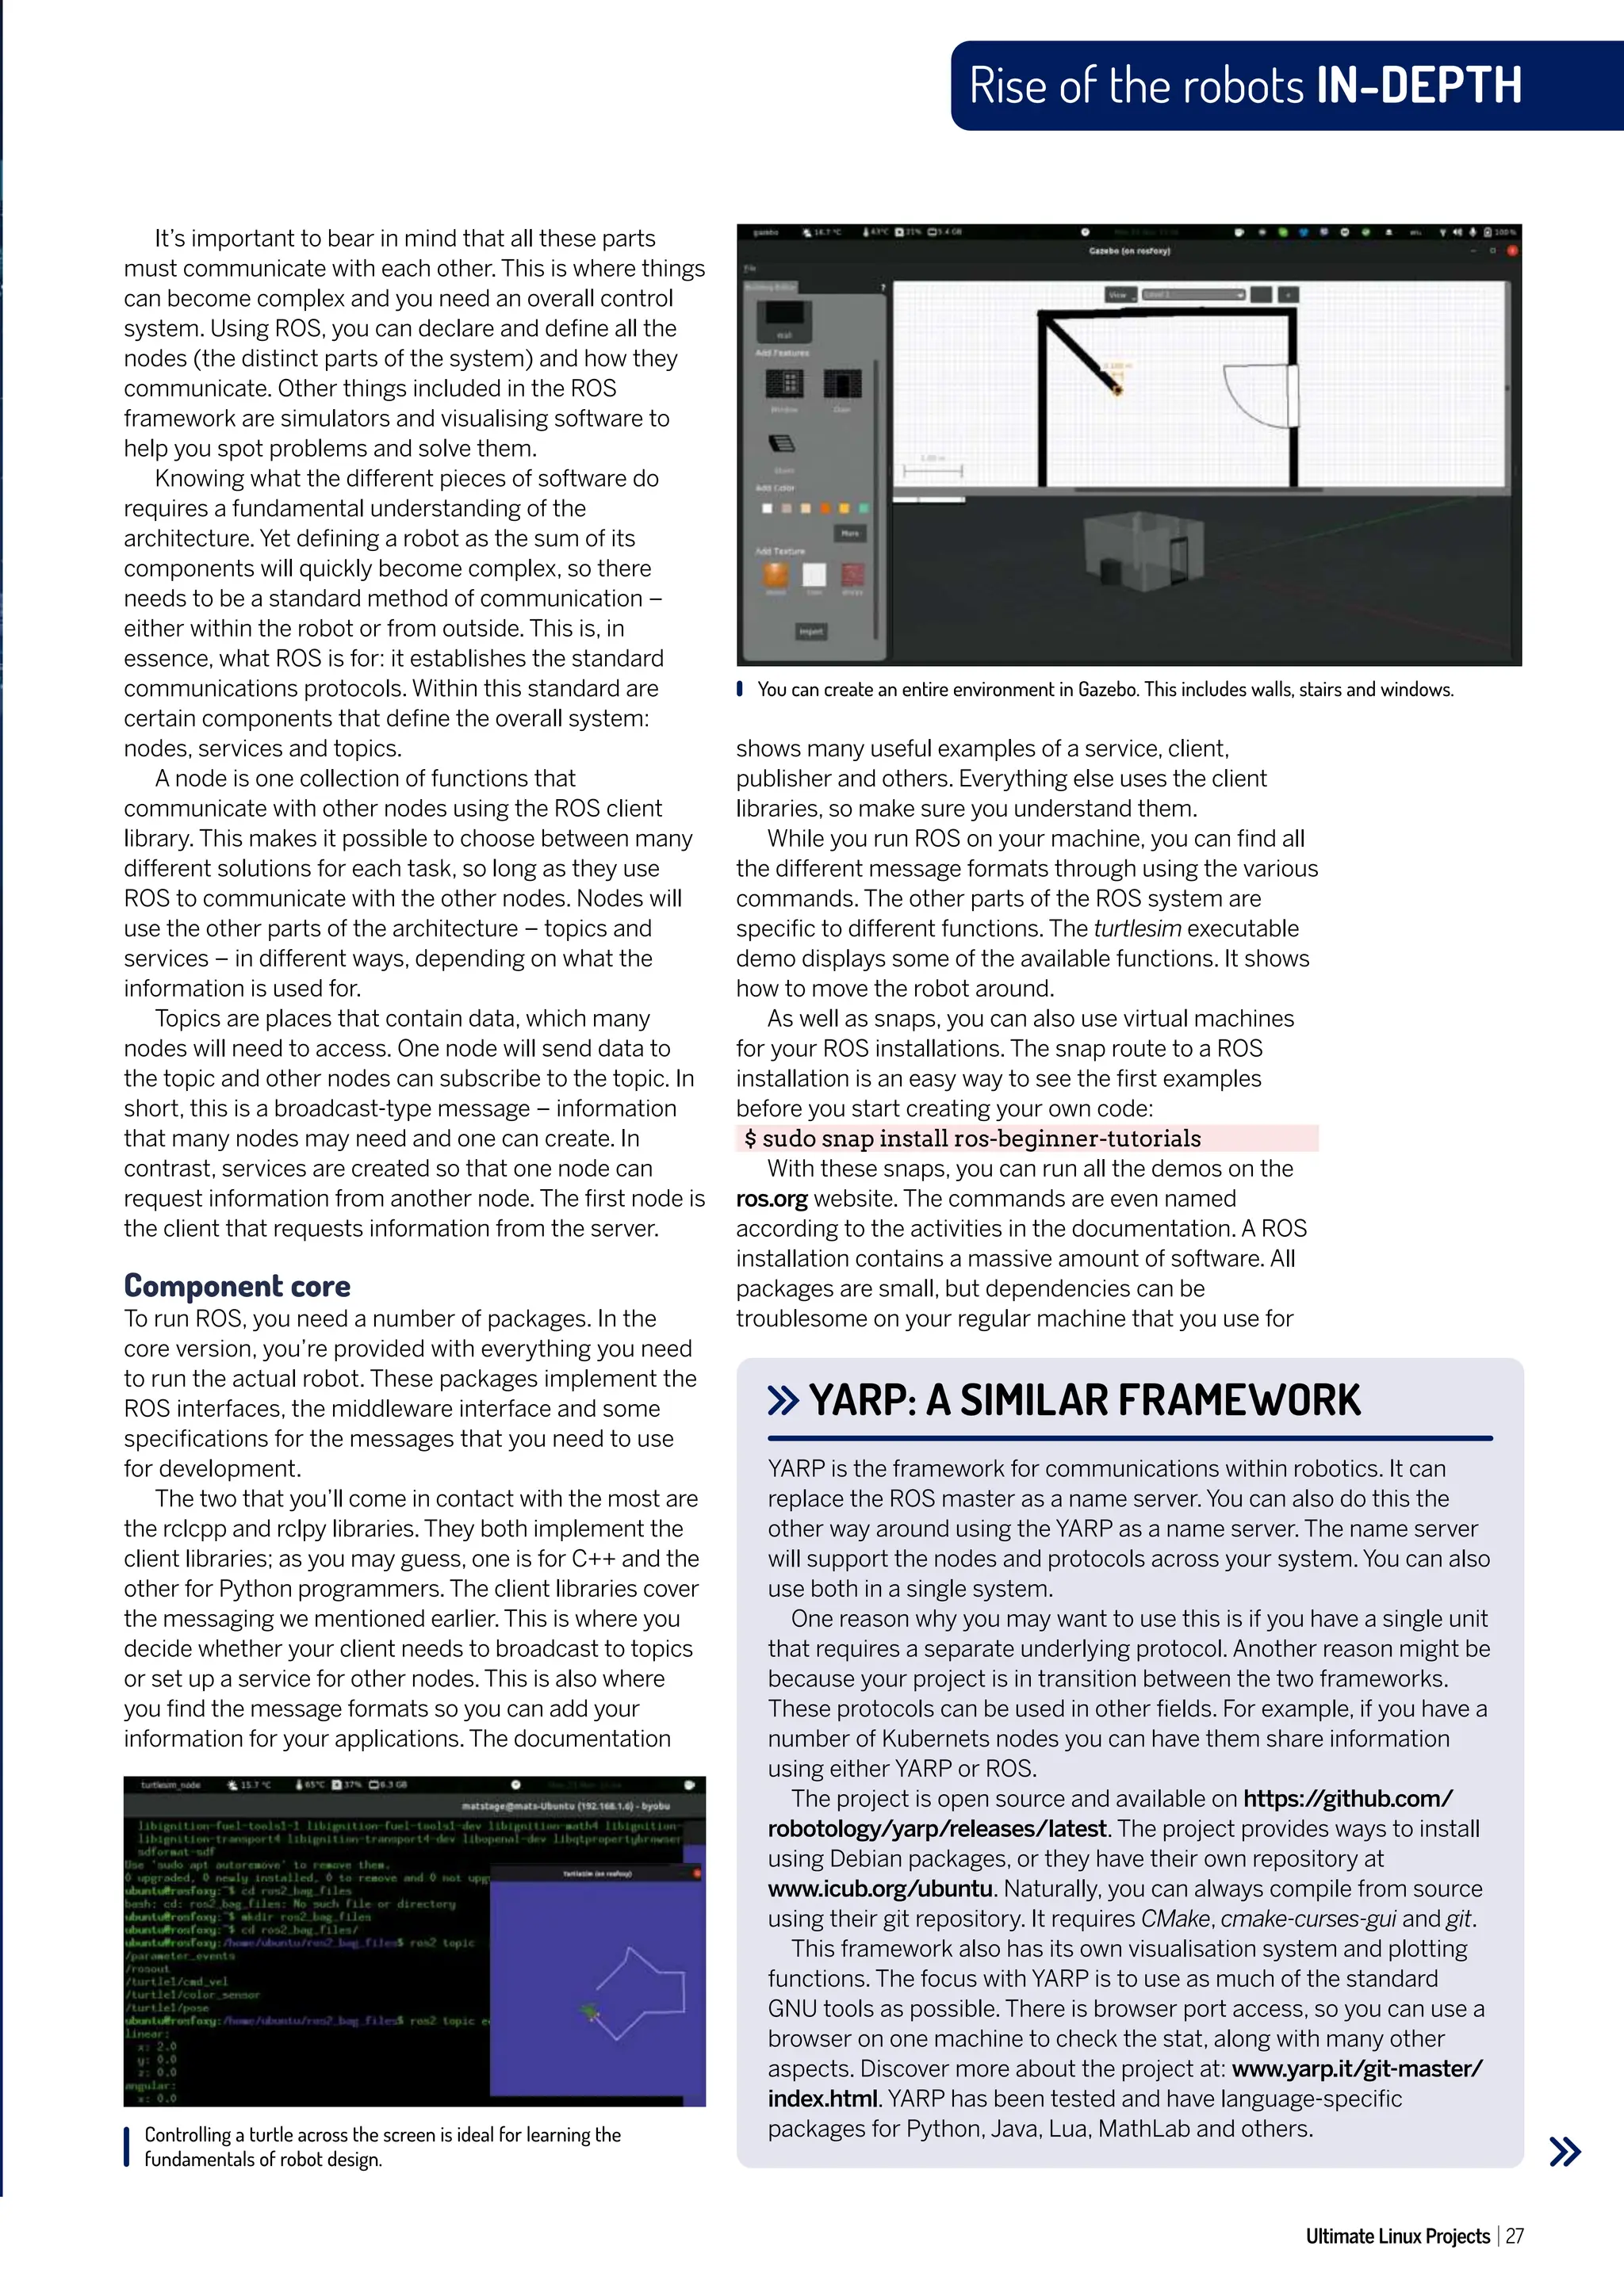
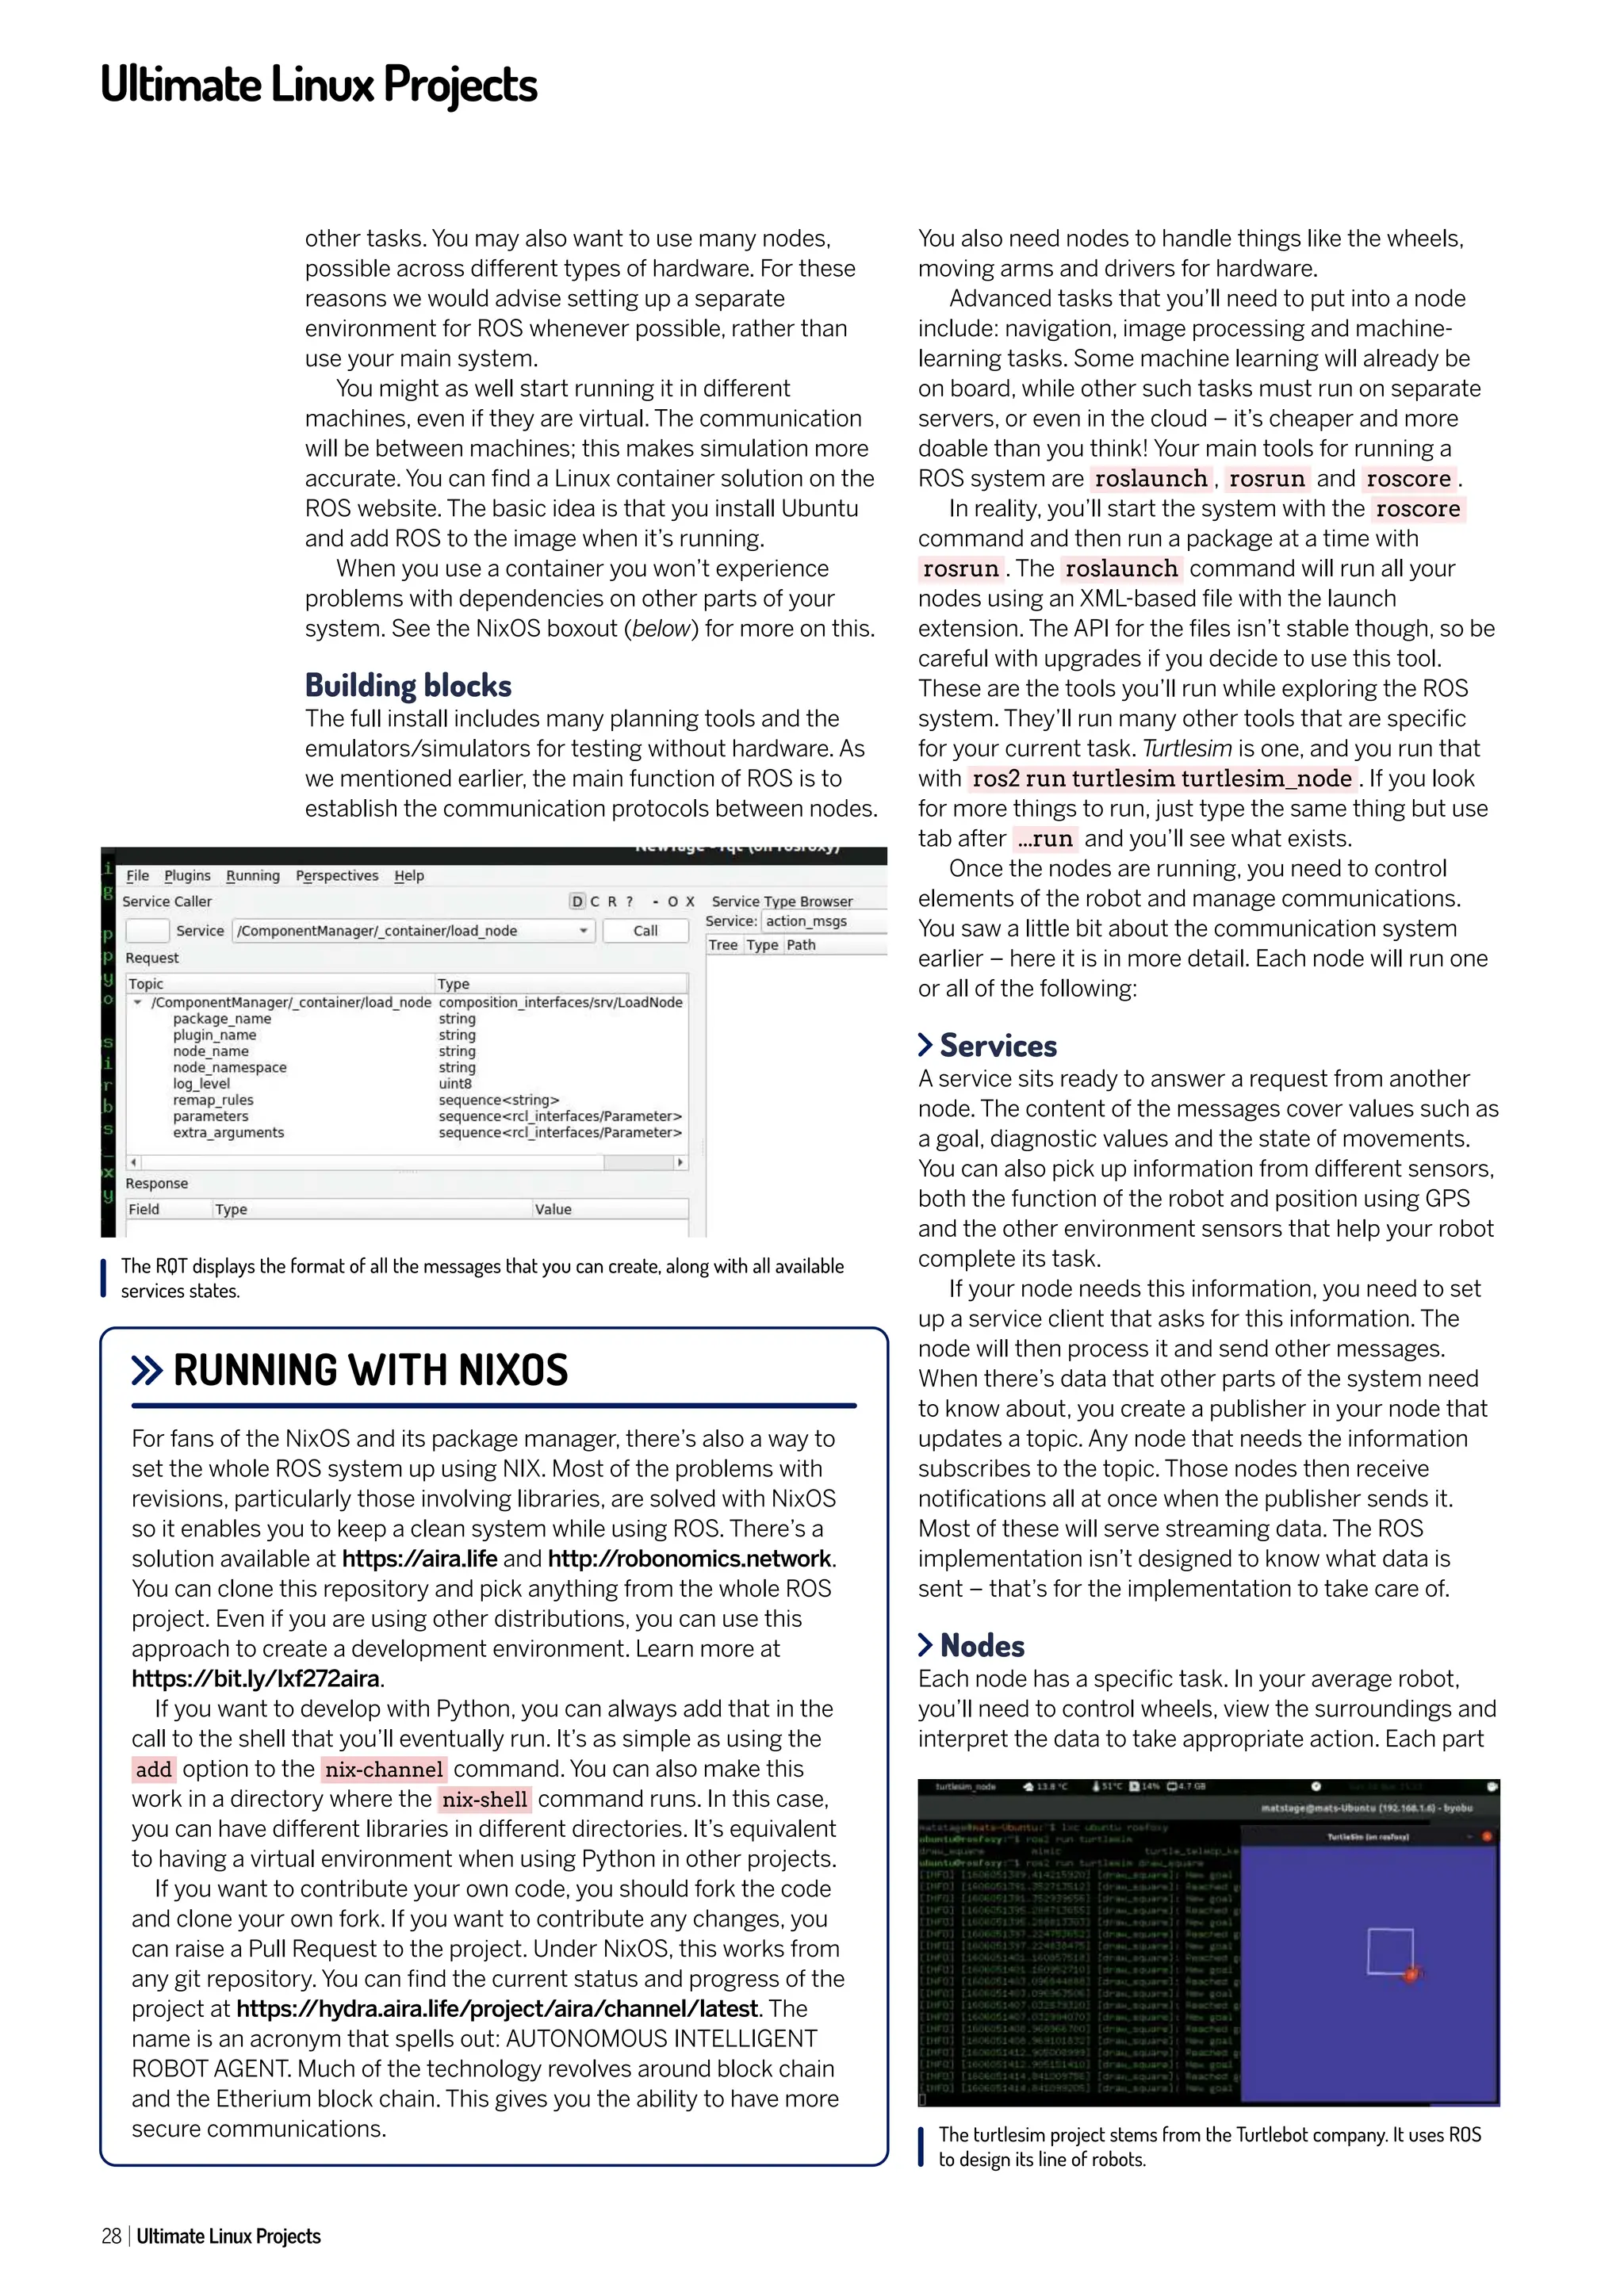
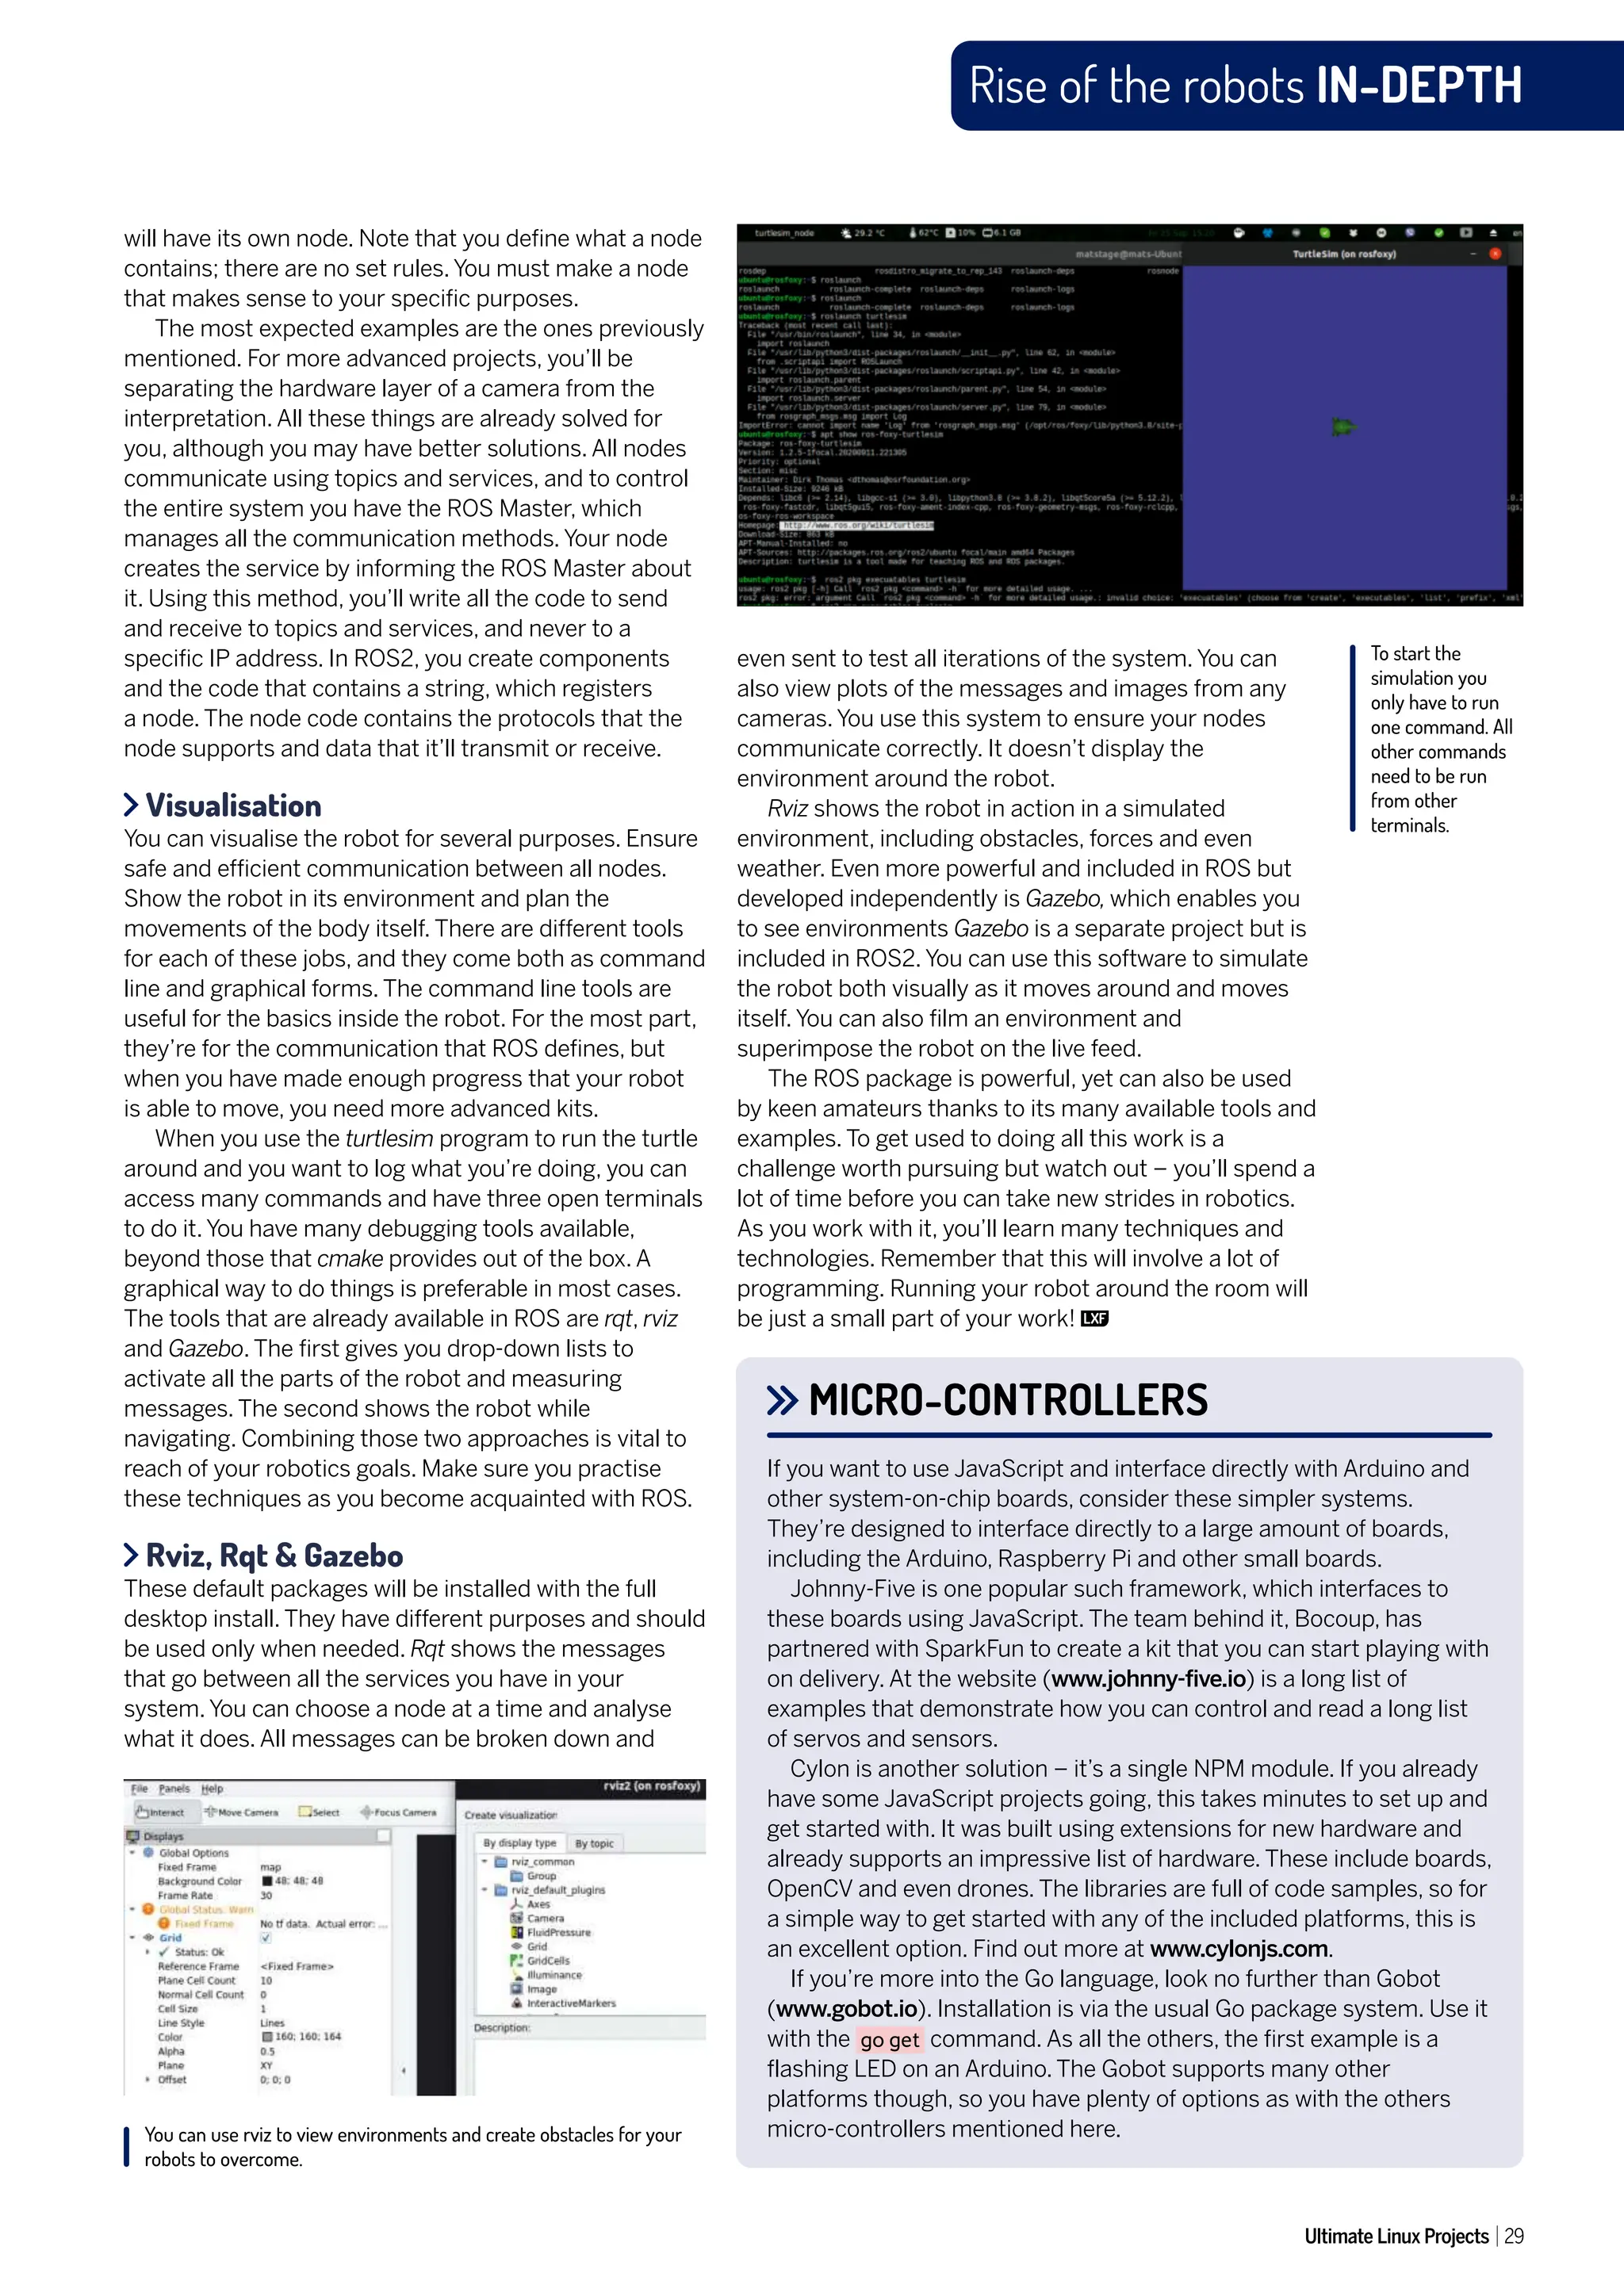

![Build a custom digital signage system TUTORIALS
Ultimate Linux Projects 31
Pressing I when in the client brings up a
status screen.
LINUX PLAYER OPTIONS
apt install apt-transport-https ca-certificates curl
software-properties-common
curl -fsSL https://download.docker.com/linux/ubuntu/
gpg | apt-key add -
add-apt-repository “deb [arch=amd64] https://
download.docker.com/linux/ubuntu $(lsb_release -cs)
stable”
apt install docker-ce
curl -L https://github.com/docker/compose/releases/
download/1.24.1/docker-compose-`uname -s`-`uname
-m` -o /usr/local/bin/docker-compose
chmod +x /usr/local/bin/docker-compose
With the prerequisites installed, there are a few steps
required to configure the docker-compose files to enable
the Docker containers to run and communicate with
one another.
mkdir /opt/xibo
cd /opt/xibo
wget -O xibo-docker.tar.gz https://xibo.org.uk/api/
downloads/cms
tar --strip-components=1 -zxvf xibo-docker.tar.gz
cp config.env.template config.env
nano config.env
On the relevant line, enter a strong password for the
MySQL database and configure any other required
options. Find out more about the docker-compose file
here: https:/
/xibo.org.uk/docs/setup/xibo-cms-with-
docker-on-ubuntu-18-04#create_config.env_file.
Next, bring up the containers using docker-compose
up -d and allow Docker to complete its work. The server
has now been installed and the server can be
accessed from your favourite browser, by entering
http:/
/IP_ADDRESS_OF_XIBO_SERVER – enter your
username and password at the login screen.
The player
There are open source players for Windows and Linux
as well as paid-for options for other platforms as well,
such as Android, Tizen and Web OS. In this article we’ll
install the player on Ubuntu 20.10. The Xibo team uses
Canonical’s Snap packaging system, which makes the
installation of the client straightforward and updates are
applied automatically. Again, back in the terminal the
client can be installed by entering:
$ snap install xibo-player --channel=stable
To enable the client to communicate with the server,
there are a couple of steps that need to be followed.
First, in a web browser, login to the CMS using the
default credentials of xibo_admin and password.
Navigate to the Settings tab and copy the key from the
CMS Secret Key field. The player can be opened from
the Desktop or from a terminal, by entering xibo-player.
The first time this is opened, the configuration screen
will load. Enter the URL of the CMS (server) component,
paste the value from the CMS for the Key and a location
that the client can use to save files to (see screenshot,
left). The information shown in the screenshot is
required to configure the client.
When selecting the Save option, the client will
contact the server, which will report back that the
Display isn’t currently registered. Now, back in the web
browser, navigate to the Displays tab and one entry will
be shown. On the right-hand side of the screen, select
the Options menu and then click Authorise. Finally, back
at the client click Save and the client will report that the
Display is active and ready to start. The options screen
can then be closed and when the client is opened again
the default layout will be displayed (see screenshot,
previous page). Once configured, the client will
download the files required for the default layout. These
will then be displayed.
Conference time
The example that we’ll be walking through are displays
that could be set up around a conference venue. The
layout (see diagram above) will contain a title in
Region 1, text in Region 2 which will relate to videos and
Once the initial configuration of the client has
been carried out, further options are set
from the CMS. To access these options,
navigate to the Display Settings and either
change the relevant profile or create a new
one, which can be assigned to a particular
Display. Within the Display Settings a range
of features can be changed, such as the
interval between the client collecting
information from the server, the size and
position of the player window (the default is
full screen) and whether shell commands
can be executed by the player. The latter
option is useful because a display can be set
to shut down at a certain time of day.
When the client is loaded, press the I key
and then the information screen will load.
This provides access to diagnostic
information such as media that’s being
downloaded, if there are any invalid files and
gives the option to exit the player without it
being reloaded automatically. Because
clients are devices that need to run for large
proportions of the day, should an error occur
then the default behaviour is for the player to
reload itself automatically.
The new third
version of Xibo,
released earlier
in February
2021, contains
lots of exciting
features,
including
interactivity,
folders to
store media,
reworking of
permissions
and support
for sending
commands
via RS232.
This diagram
explains the
concepts of
the Xibo digital
signage system.
REGION 2 REGION 3
Layout
REGION 1
REGION 4
Text
Ticker
Image Image
Image Image
Video Text](https://image.slidesharecdn.com/74366-250527055205-d49fc57f/75/Ultimate-Linux-Projects-2nd-Edition-2023-Unknown-32-2048.jpg)