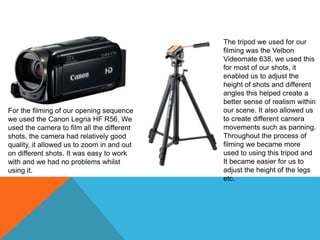
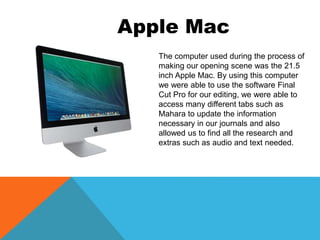
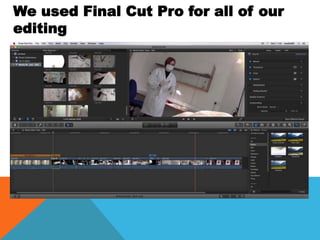
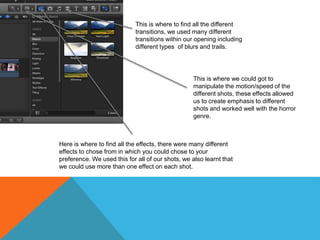
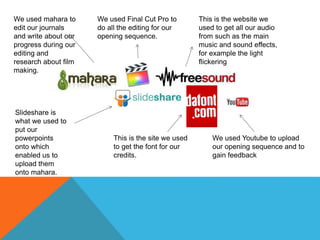
For the filming of our opening sequence
we used the Canon Legria HF R56. We
used the camera to film all the different
shots, the camera had relatively good
quality, it allowed us to zoom in and out
on different shots. It was easy to work
with and we had no problems whilst
using it.
The tripod we used for our
filming was the Velbon
Videomate 638, we used this
for most of our shots, it
enabled us to adjust the
height of shots and different
angles this helped create a
better sense of realism within
our scene. It also allowed us
to create different camera
movements such as panning.
Throughout the process of
filming we became more
used to using this tripod and
It became easier for us to
adjust the height of the legs
etc.
The computer used during the process of
making our opening scene was the 21.5
inch Apple Mac. By using this computer
we were able to use the software Final
Cut Pro for our editing, we were able to
access many different tabs such as
Mahara to update the information
necessary in our journals and also
allowed us to find all the research and
extras such as audio and text needed.
Apple Mac
We used Final Cut Pro for all of our
editing
Here is where to find all the effects, there were many different
effects to chose from in which you could chose to your
preference. We used this for all of our shots, we also learnt that
we could use more than one effect on each shot.
This is where to find all the different
transitions, we used many different
transitions within our opening including
different types of blurs and trails.
This is where we could got to
manipulate the motion/speed of the
different shots, these effects allowed
us to create emphasis to different
shots and worked well with the horror
genre.
This is where we added all of the different shots
we got whilst filming, we displayed them all here
so we could see every different shot clearly
which enabled us to see where we wanted it and
whether the shot needed cropping or not.
To upload our content we had to go to file add
new event and then create a new project within
that, this enabled us to easily find the work we
had done each lesson.
This is the main screen in which we were
able to see the progress we were making on
our opening scene. This was helpful and it
allowed us to get a clear view on what
effects and transitions would look best on
each shot.
This is the website we
used to get all our audio
from such as the main
music and sound effects,
for example the light
flickering
We used mahara to
edit our journals
and write about our
progress during our
editing and
research about film
making.
Slideshare is
what we used to
put our
powerpoints
onto which
enabled us to
upload them
onto mahara.
This is the site we used
to get the font for our
credits.
We used Youtube to upload
our opening sequence and to
gain feedback
We used Final Cut Pro to
do all the editing for our
opening sequence.

Task 6

  • 2.
    For the filmingof our opening sequence we used the Canon Legria HF R56. We used the camera to film all the different shots, the camera had relatively good quality, it allowed us to zoom in and out on different shots. It was easy to work with and we had no problems whilst using it. The tripod we used for our filming was the Velbon Videomate 638, we used this for most of our shots, it enabled us to adjust the height of shots and different angles this helped create a better sense of realism within our scene. It also allowed us to create different camera movements such as panning. Throughout the process of filming we became more used to using this tripod and It became easier for us to adjust the height of the legs etc.
  • 3.
    The computer usedduring the process of making our opening scene was the 21.5 inch Apple Mac. By using this computer we were able to use the software Final Cut Pro for our editing, we were able to access many different tabs such as Mahara to update the information necessary in our journals and also allowed us to find all the research and extras such as audio and text needed. Apple Mac
  • 4.
    We used FinalCut Pro for all of our editing
  • 5.
    Here is whereto find all the effects, there were many different effects to chose from in which you could chose to your preference. We used this for all of our shots, we also learnt that we could use more than one effect on each shot. This is where to find all the different transitions, we used many different transitions within our opening including different types of blurs and trails. This is where we could got to manipulate the motion/speed of the different shots, these effects allowed us to create emphasis to different shots and worked well with the horror genre.
  • 6.
    This is wherewe added all of the different shots we got whilst filming, we displayed them all here so we could see every different shot clearly which enabled us to see where we wanted it and whether the shot needed cropping or not. To upload our content we had to go to file add new event and then create a new project within that, this enabled us to easily find the work we had done each lesson. This is the main screen in which we were able to see the progress we were making on our opening scene. This was helpful and it allowed us to get a clear view on what effects and transitions would look best on each shot.
  • 7.
    This is thewebsite we used to get all our audio from such as the main music and sound effects, for example the light flickering We used mahara to edit our journals and write about our progress during our editing and research about film making. Slideshare is what we used to put our powerpoints onto which enabled us to upload them onto mahara. This is the site we used to get the font for our credits. We used Youtube to upload our opening sequence and to gain feedback We used Final Cut Pro to do all the editing for our opening sequence.