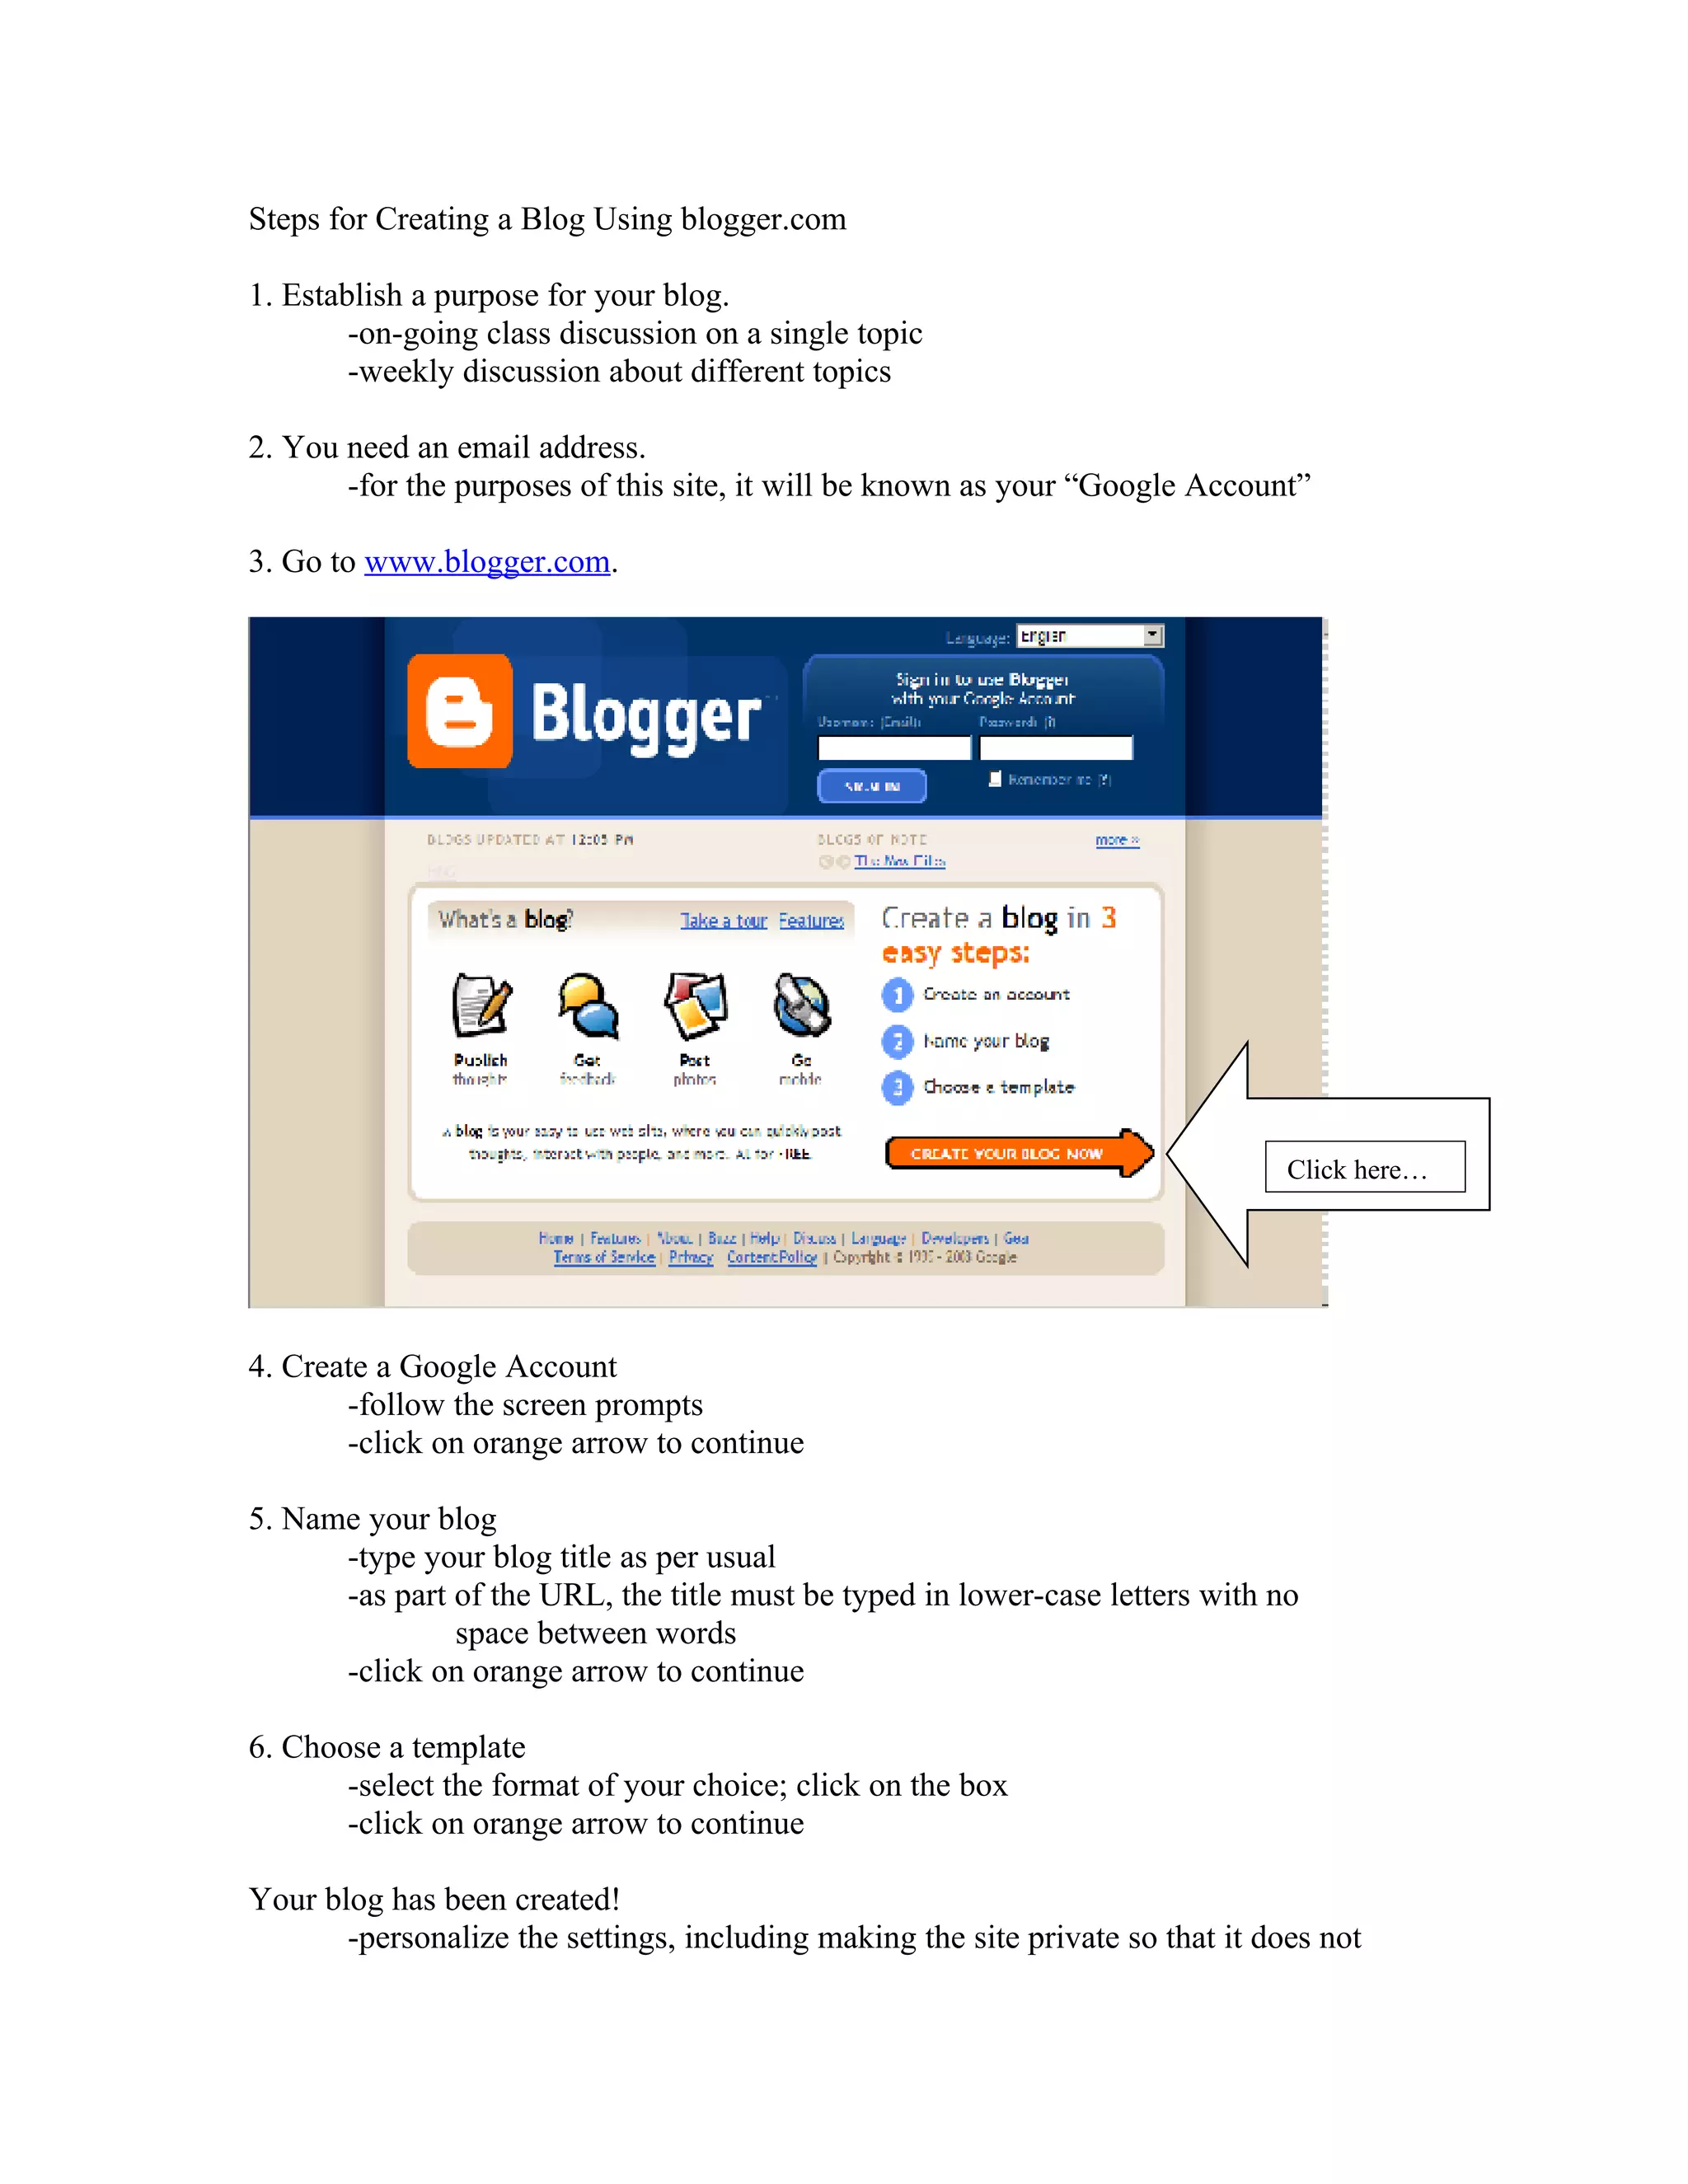
Steps for Creating a Blog Using blogger.com

1. Establish a purpose for your blog.
        -on-going class discussion on a single topic
        -weekly discussion about different topics

2. You need an email address.
       -for the purposes of this site, it will be known as your “Google Account”

3. Go to www.blogger.com.


                                                                                 Click here…


4. Create a Google Account
       -follow the screen prompts
       -click on orange arrow to continue

5. Name your blog
      -type your blog title as per usual
      -as part of the URL, the title must be typed in lower-case letters with no
               space between words
      -click on orange arrow to continue

6. Choose a template
       -select the format of your choice; click on the box
       -click on orange arrow to continue

Your blog has been created!
       -personalize the settings, including making the site private so that it does not
appear on the server’s list of blogs
-when you select “start blogging”, select the “settings” tab and you can establish
        the security parameters for the site:


                                Selecting “NO” from the drop-down menu secures your
                                blog. Only people who are given the URL know it exists (i.e
                                parents, students and administration)


-“muck around” in the Posting and Layout tabs and you can personalize the
        blog to look as you wish

Steps for Creating a Blog using Blogger

  • 1.
    Steps for Creatinga Blog Using blogger.com 1. Establish a purpose for your blog. -on-going class discussion on a single topic -weekly discussion about different topics 2. You need an email address. -for the purposes of this site, it will be known as your “Google Account” 3. Go to www.blogger.com. Click here… 4. Create a Google Account -follow the screen prompts -click on orange arrow to continue 5. Name your blog -type your blog title as per usual -as part of the URL, the title must be typed in lower-case letters with no space between words -click on orange arrow to continue 6. Choose a template -select the format of your choice; click on the box -click on orange arrow to continue Your blog has been created! -personalize the settings, including making the site private so that it does not
  • 2.
    appear on theserver’s list of blogs -when you select “start blogging”, select the “settings” tab and you can establish the security parameters for the site: Selecting “NO” from the drop-down menu secures your blog. Only people who are given the URL know it exists (i.e parents, students and administration) -“muck around” in the Posting and Layout tabs and you can personalize the blog to look as you wish