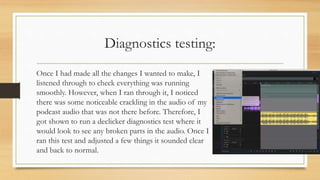
2. Importing footage:
At first when I first opened Audition, I had to
figure out how to work it. At first, I found how to
import footage since it was quite like Premiere Pro.
However, when I first imported it, it was only 6
minutes long which I knew wasn’t right as I had
sampled the audio when it was still in teams, and it
was around half an hour long. I did not know how
this happened, but I deleted the audio that was 6
minutes long and redownloaded it from teams
which fixed the problem. I then reimported it back
into Audition and it worked, and I had all 36
minutes of the audio ready to edit.
3. Cutting audio:
First thing I did, when I had my footage, all
imported, was spent 3 days cutting through the
blank or gaps in the audio to make it flush and
synced in. It took me this long because I was
going through carefully to cut out as much as I
could. As I went through, I cut out the repeated
words and long pauses in the audio from gaps to
the next question or thinking of an answer. I
managed to cut the audio down from 36
minutes to 23 minutes in the end by cutting out
unnecessary bits.
4. Markers:
As I was going through, I used the markers
for various reasons. At first, I started using
them to mark where I needed to fix the audio
on bits further ahead then, where I was if I
had to back and fix things. I then started
using them to mark where I finished for the
day, so I knew exactly where I had to start
the next day instead of writing the timing
down. Once I started using many markers, I
started labelling them, so I knew why I put it
there.
5. Picking music:
Once I fully cut through the audio through and cut it
to the length that I wanted, I started to have a look
on a website called ‘Pixabay’ which gives you loads
of different music and other things that is royalty
free. I started to search loads of different intros I
could use and found an upbeat intro that I could use
and cut it down and fade it out, so it was smooth
into the start of the actual podcast. I then had a look
for background music as well and picked a good
upbeat background but had to duplicate it multiple
times to fit how long my audio ended up being.
6. Multi session and adding extra audio:
Next, I converted my edited and cut down file into multiplayer so I
could start adding my intro, outro and background music. I first
started with my intro by choosing my favourite part of the sound I
downloaded. Once I had cut that down to the length that I wanted, I
moved onto a different track slide to add in my main audio, I initially
had a different background chosen but it had a messy transition from
my intro into to my background track so instead I used my full intro
track (not my chosen segment for the intro) and copied them over
again to last the full podcast which ended up sounding a lot smoother.
Because I used the same audio repeatedly, I cut off the beginning and
end and lined it up so that it would flow from one to another. For my
ending I decided to keep with the background music but add on the
ending to it, which I initially cut off, to make a smooth and precise
ending to my podcast.
7. Labelling tracks:
Once I had put all my background audios in place, I seen that I
needed to label my tracks, so I knew what each one was for. I
did this initially, but I ended up removing my backing track so
that got rid of my labelled tracks and put it back to the default
versions. Once I renamed all the tracks, they all became much
clearer for me which one was which.
I also moved my tracks around so that my main podcast was at
the top, then my background music, then my outro all on
different tracks so it was in chronological order.
8. Rough draft- ducking:
Once I had all the audio in place, I knew I needed to add a
transition between my intro and the start of my podcast and
my background music. However, I did not know how to do
this and could not find any bottoms indicating how to either.
When I seaked help from my teacher they told me about
ducking. I had a play around with it as I found it difficult and
technical to use. Once I got it to how it was supposed to be
and had a play around with the controls, I knew it wasn’t
how I wanted to be and the transition I wanted.
9. Transitioning:
After I tried ducking, I went onto the adobe YouTube
for further help because I knew transitioning in Audition
was possible to do. I then discovered that doing a
transition was an easy to do with the button right in
front of me on the track. It took a bit of adjusting and a
few play throughs but eventually I got the fade into my
podcast and into the background just right. I made the
line of transition the same level as the background so
they would seamlessly fade into one another.
10. Scaling sound:
Once I had finished the transitions, I knew I needed to change the
audio levels, so I tried adjusting the audio level of the background
track, so my podcast was clear over the top. This didn’t work fully
though so I adjusted each track individually. I increased my podcast
audio by 15 and decreased my background by 10. I left the intro and
outro the same because the podcast audio would not be playing
during them durations and by smoothly transitioned in and out so
would not need to be louder or quitter because no audio would be
overlapping it.
11. Diagnostics testing:
Once I had made all the changes I wanted to make, I
listened through to check everything was running
smoothly. However, when I ran through it, I noticed
there was some noticeable crackling in the audio of my
podcast audio that was not there before. Therefore, I
got shown to run a declicker diagnostics test where it
would look to see any broken parts in the audio. Once I
ran this test and adjusted a few things it sounded clear
and back to normal.
13. Adding a new ending:
When I got some feedback, it was recommended to me to add a bit onto the
ending as it sounds a bit rushed. It sounded like that because we did not realise
how far along we were with the podcast, so we finished it to not make it go on
any longer. What I decided to do to fix this issue was to rerecord an ending on
my phone and smoothly add it in. I made the ending, so I told the audience
where to find the band if they wanted to follow them on social media and then
played a snippet of their newest release Viper Queen. I got this from screen
recording the chorus from their Spotify and adapting it to smoothly transition
in.
15. Podcast sign off:
After I got some feedback, I got recommended to add an
ending on who the podcast was made by as that is part of a
normal podcast that everyone can stream. From listening to
popular podcasts myself, I knew about that added ending
about the productions but never thought to include one on
my own podcast however after I received the feedback, I
realised my podcast would sound more professional if I
included one. Adding one in was simple. I recorded the
ending on my phone and exported it onto my one drive to
add into Audition. After that just added it onto the end of
my outro track and double check that it fit in