Downloaded 464 times
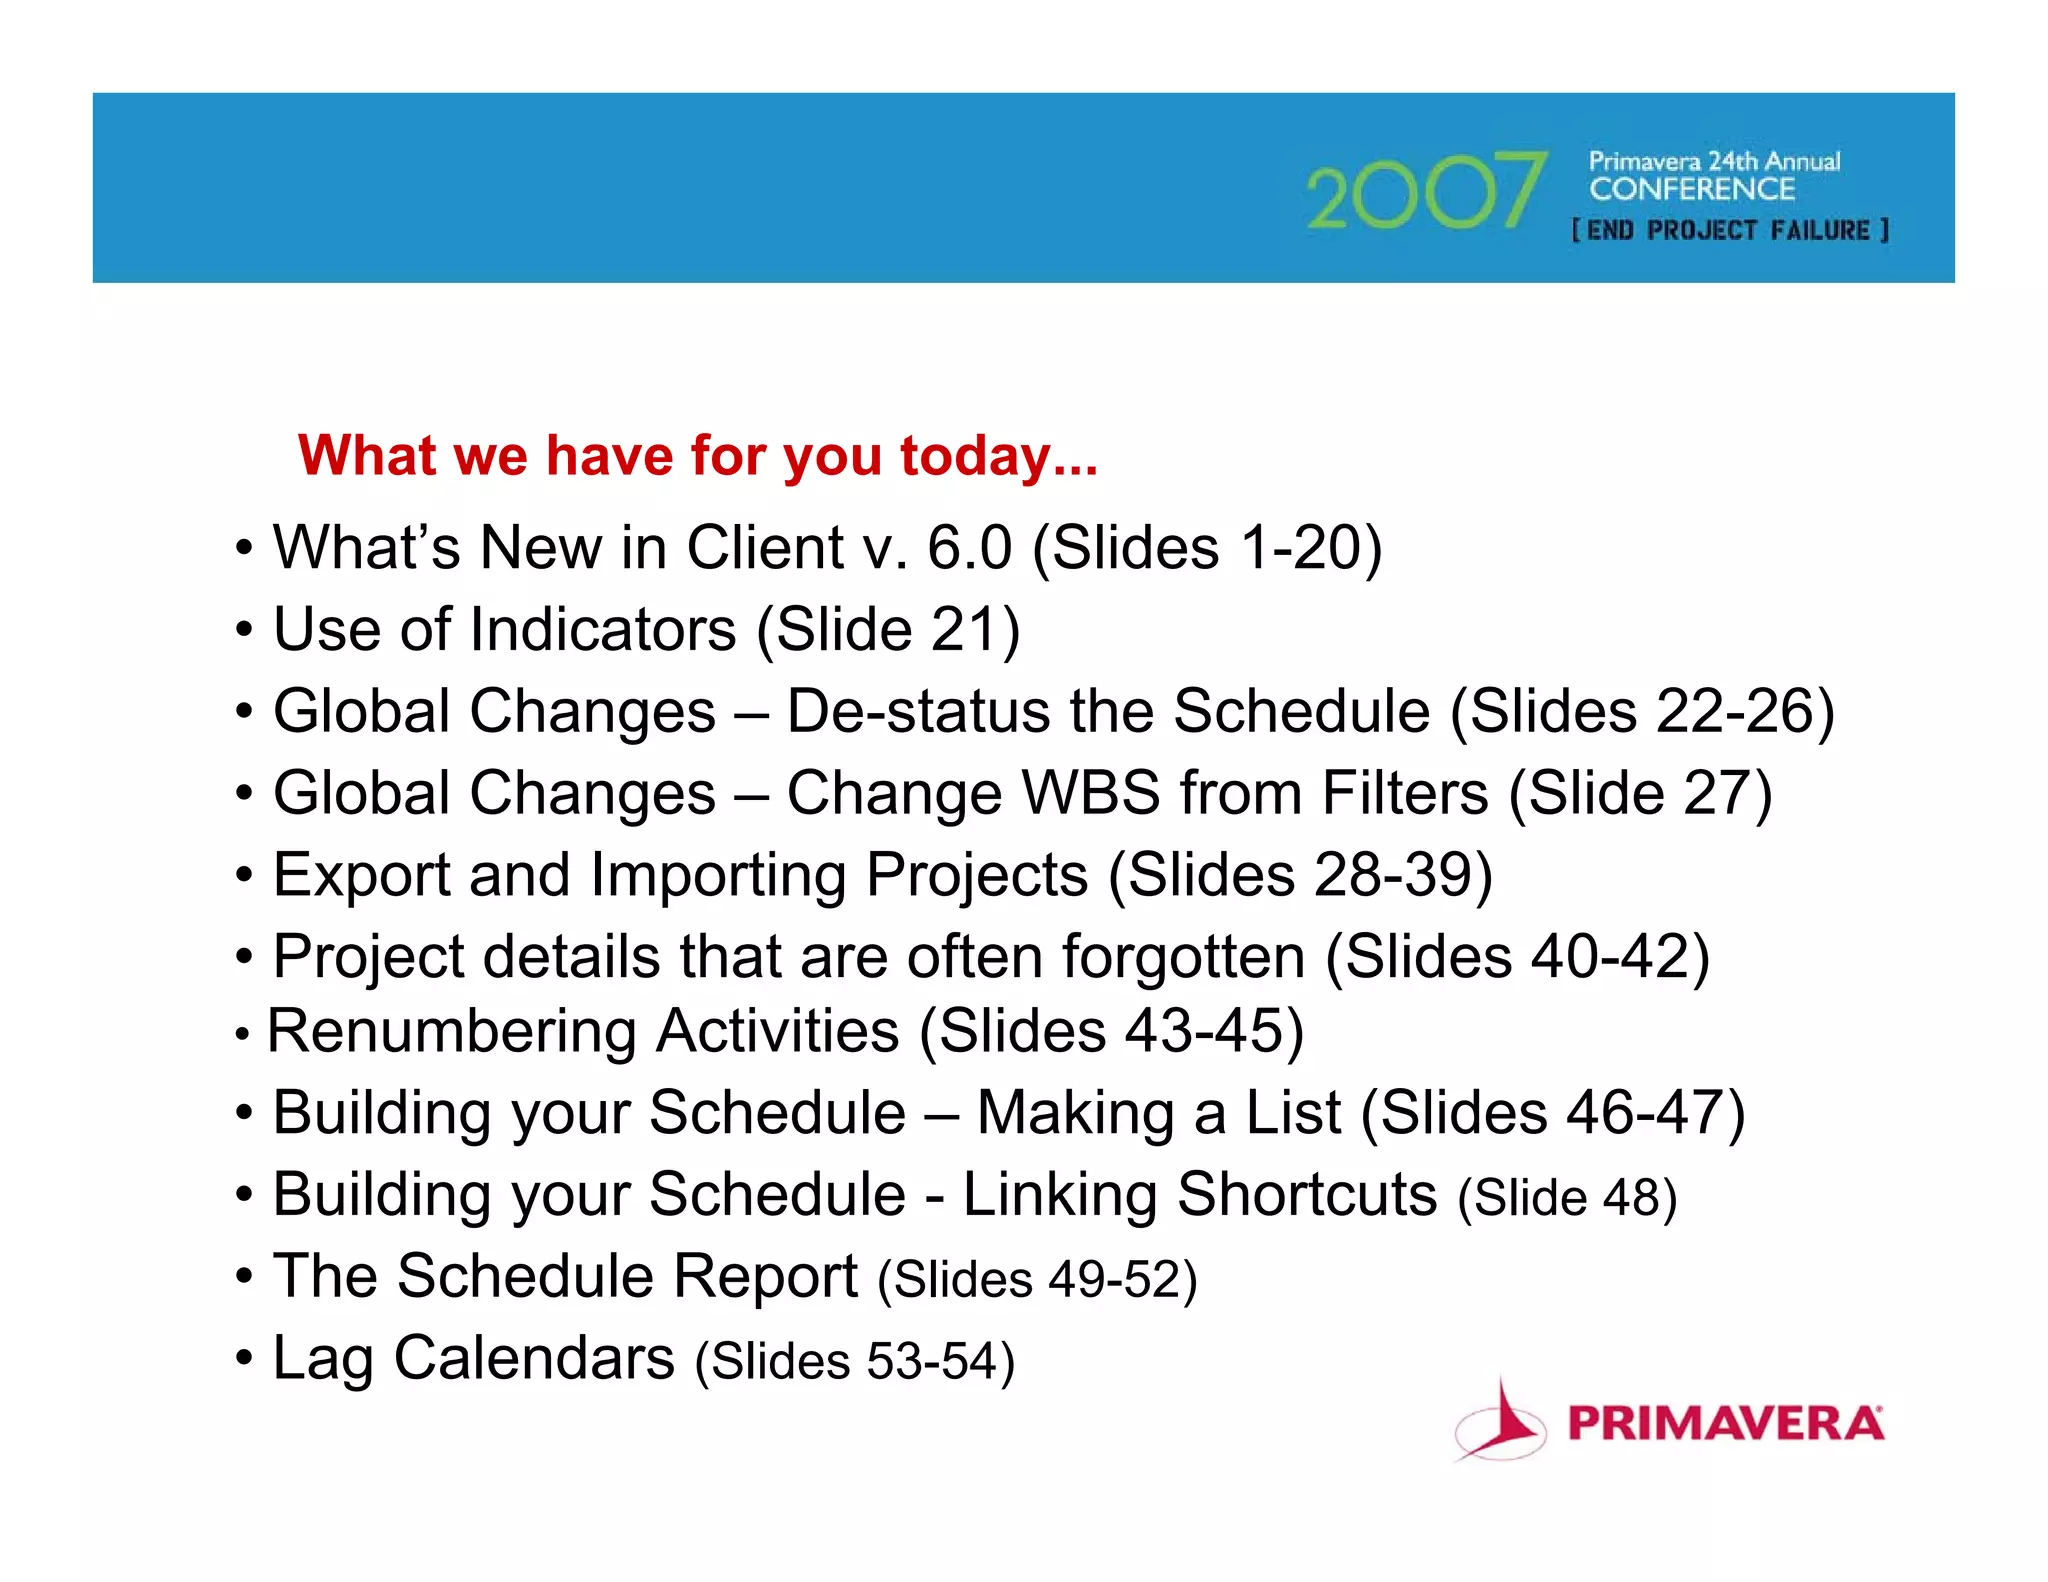
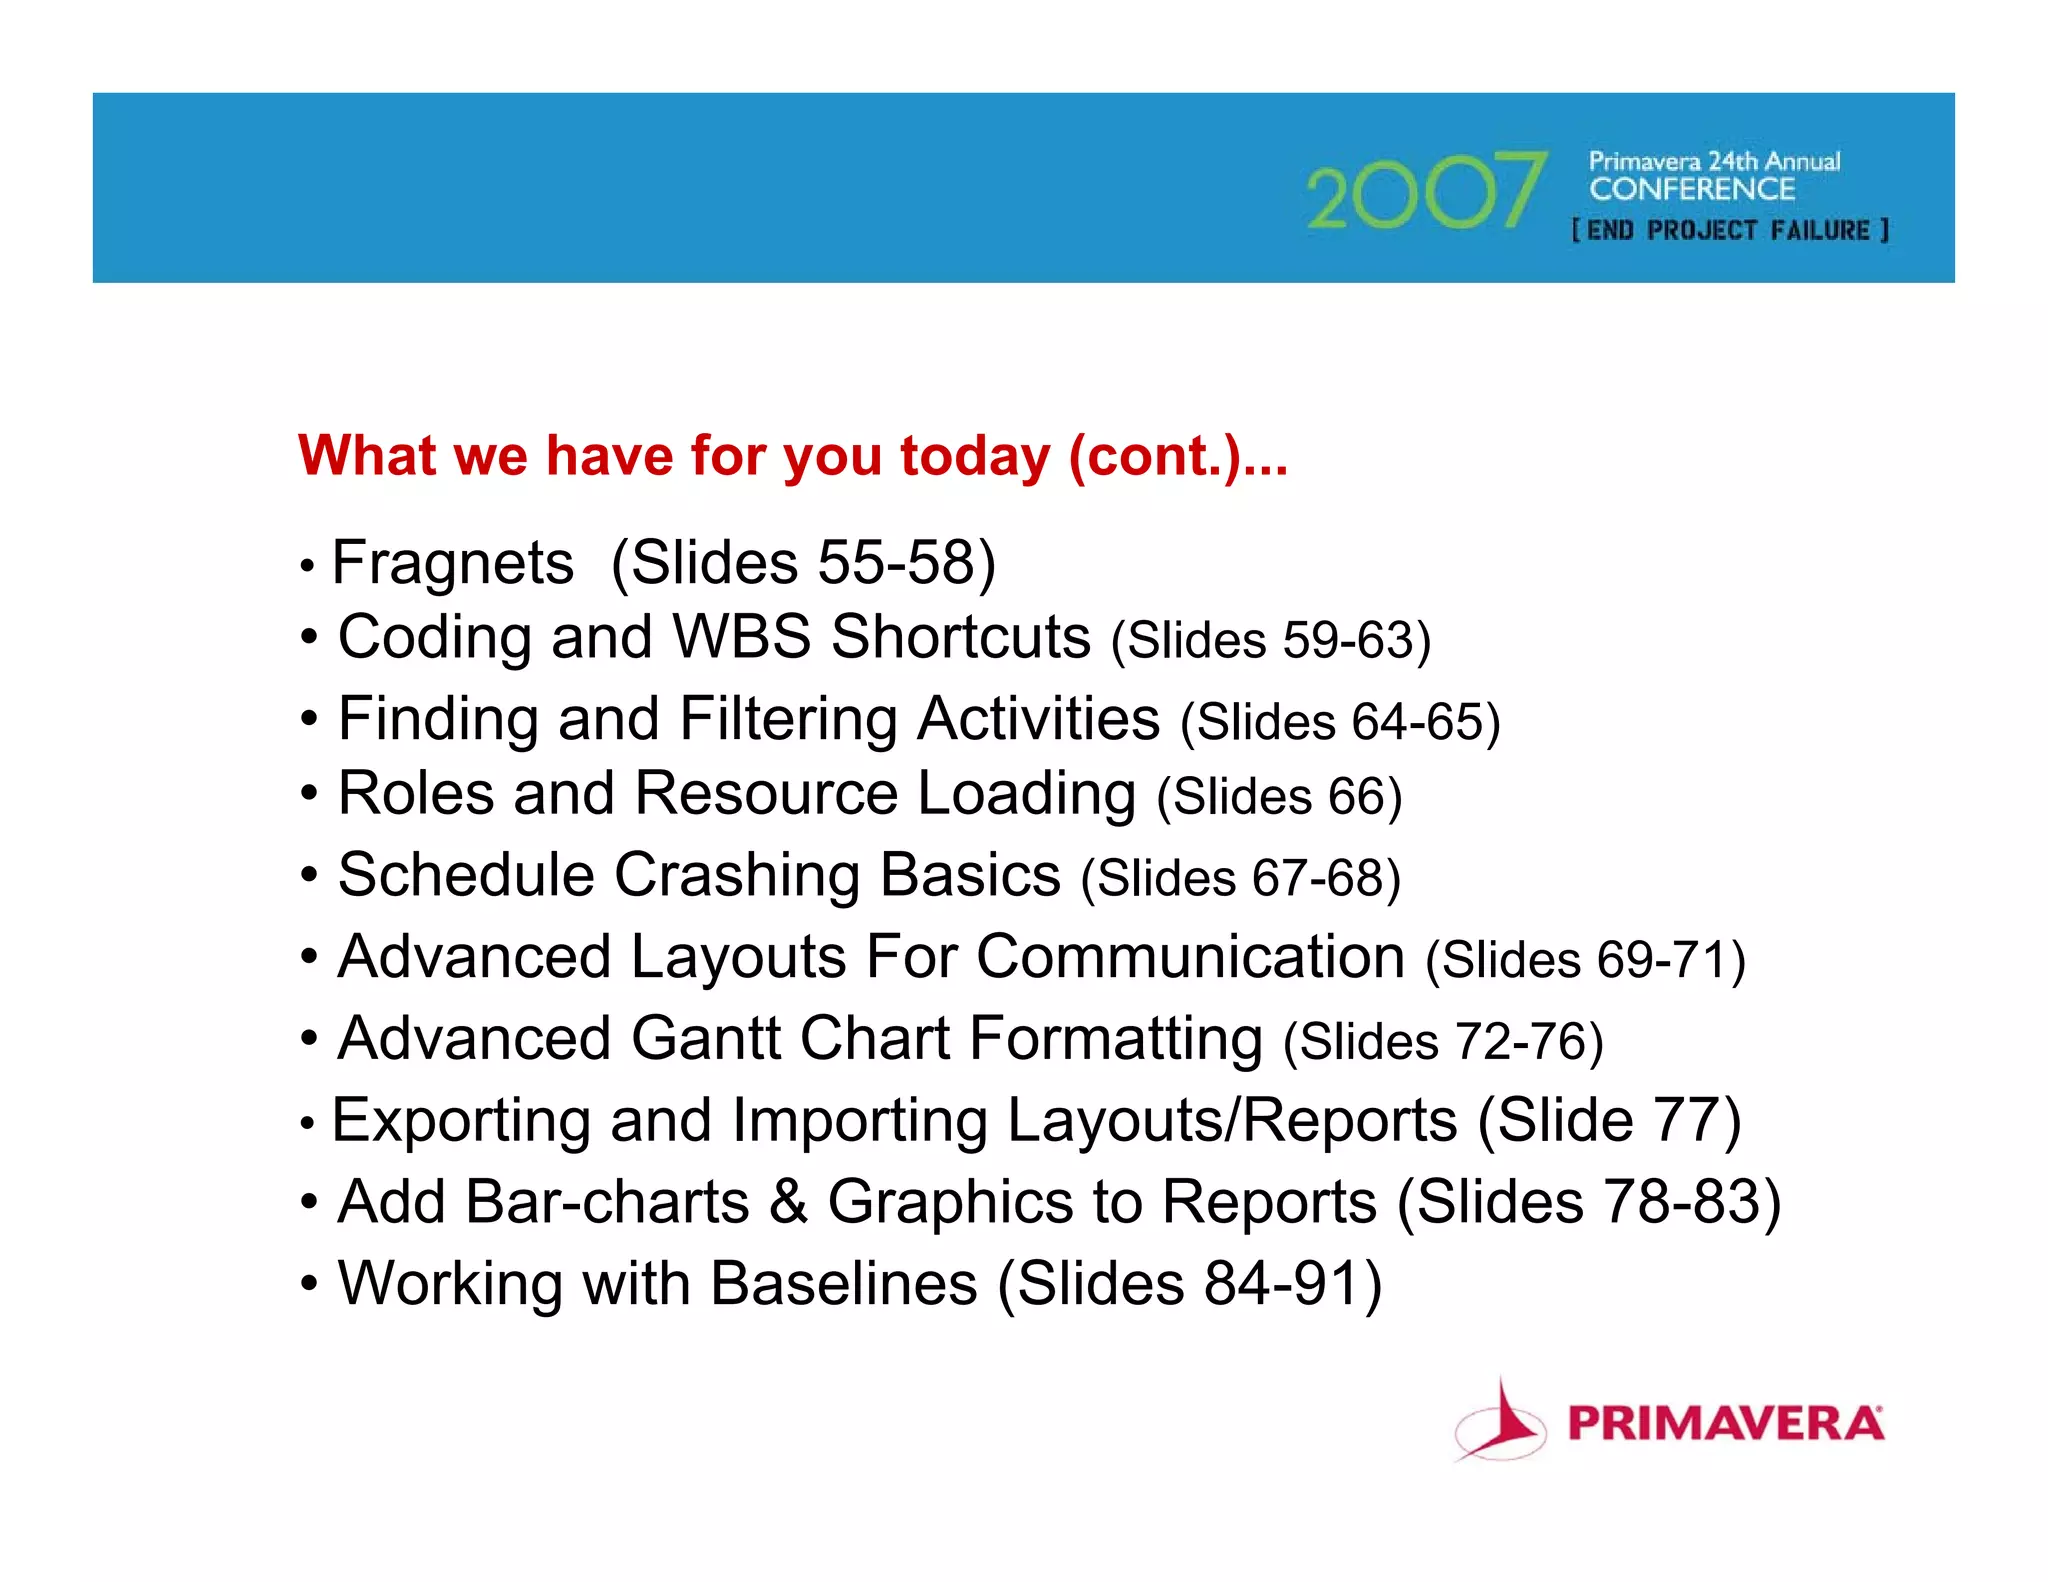
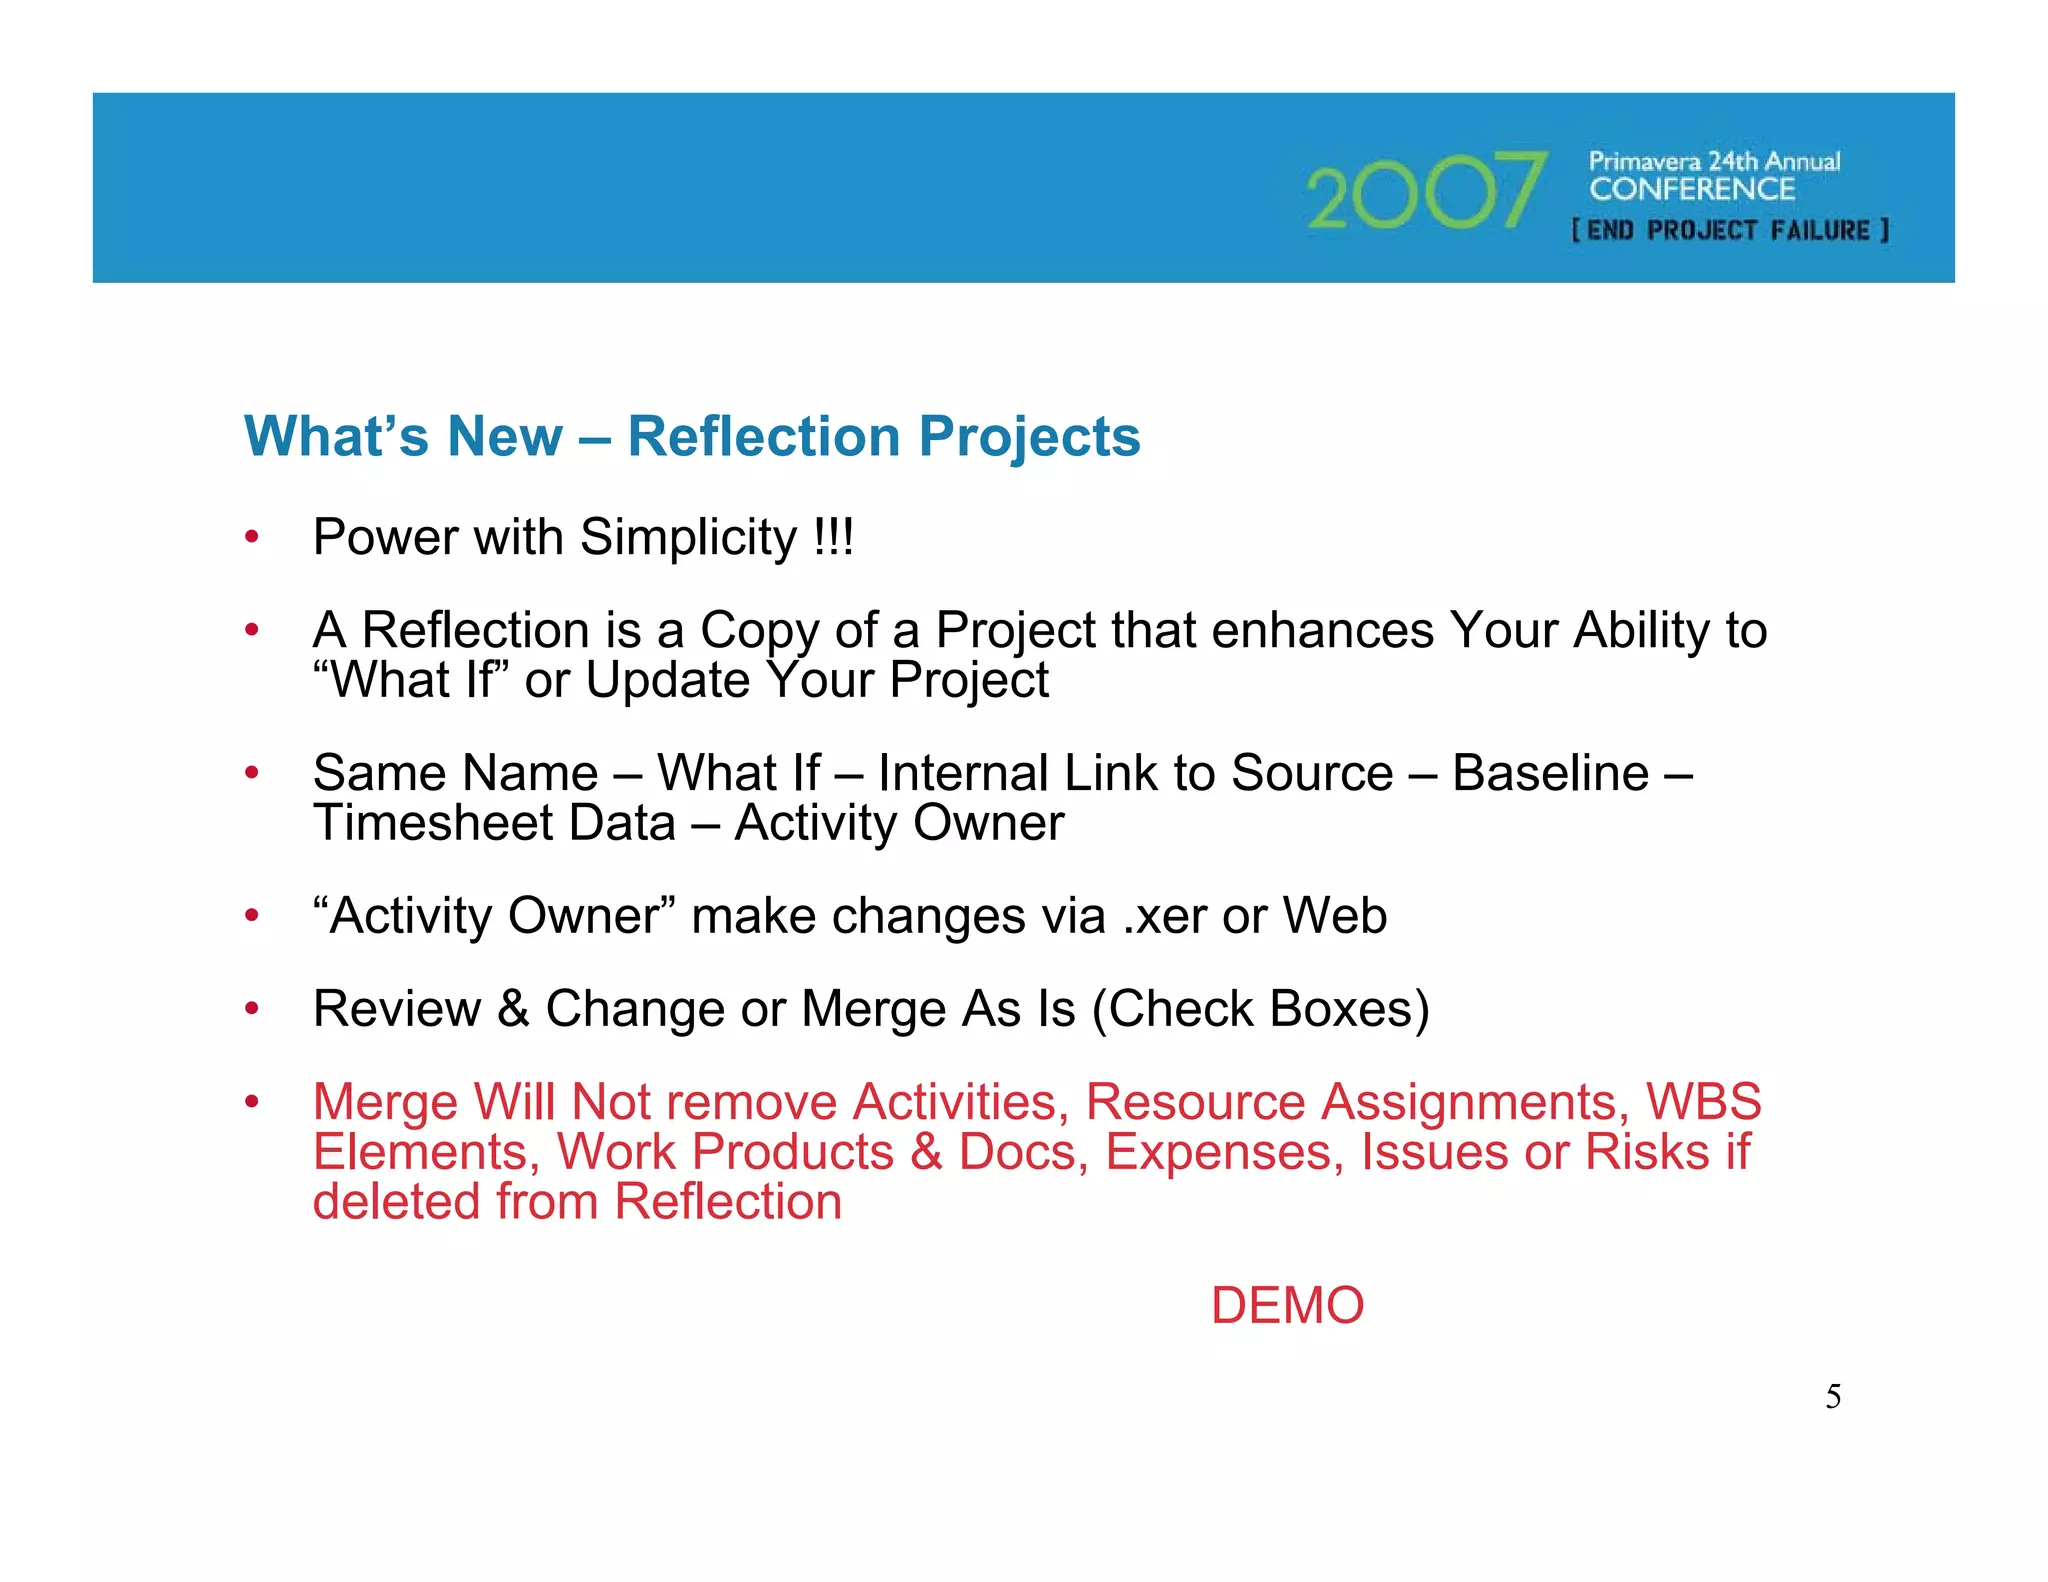
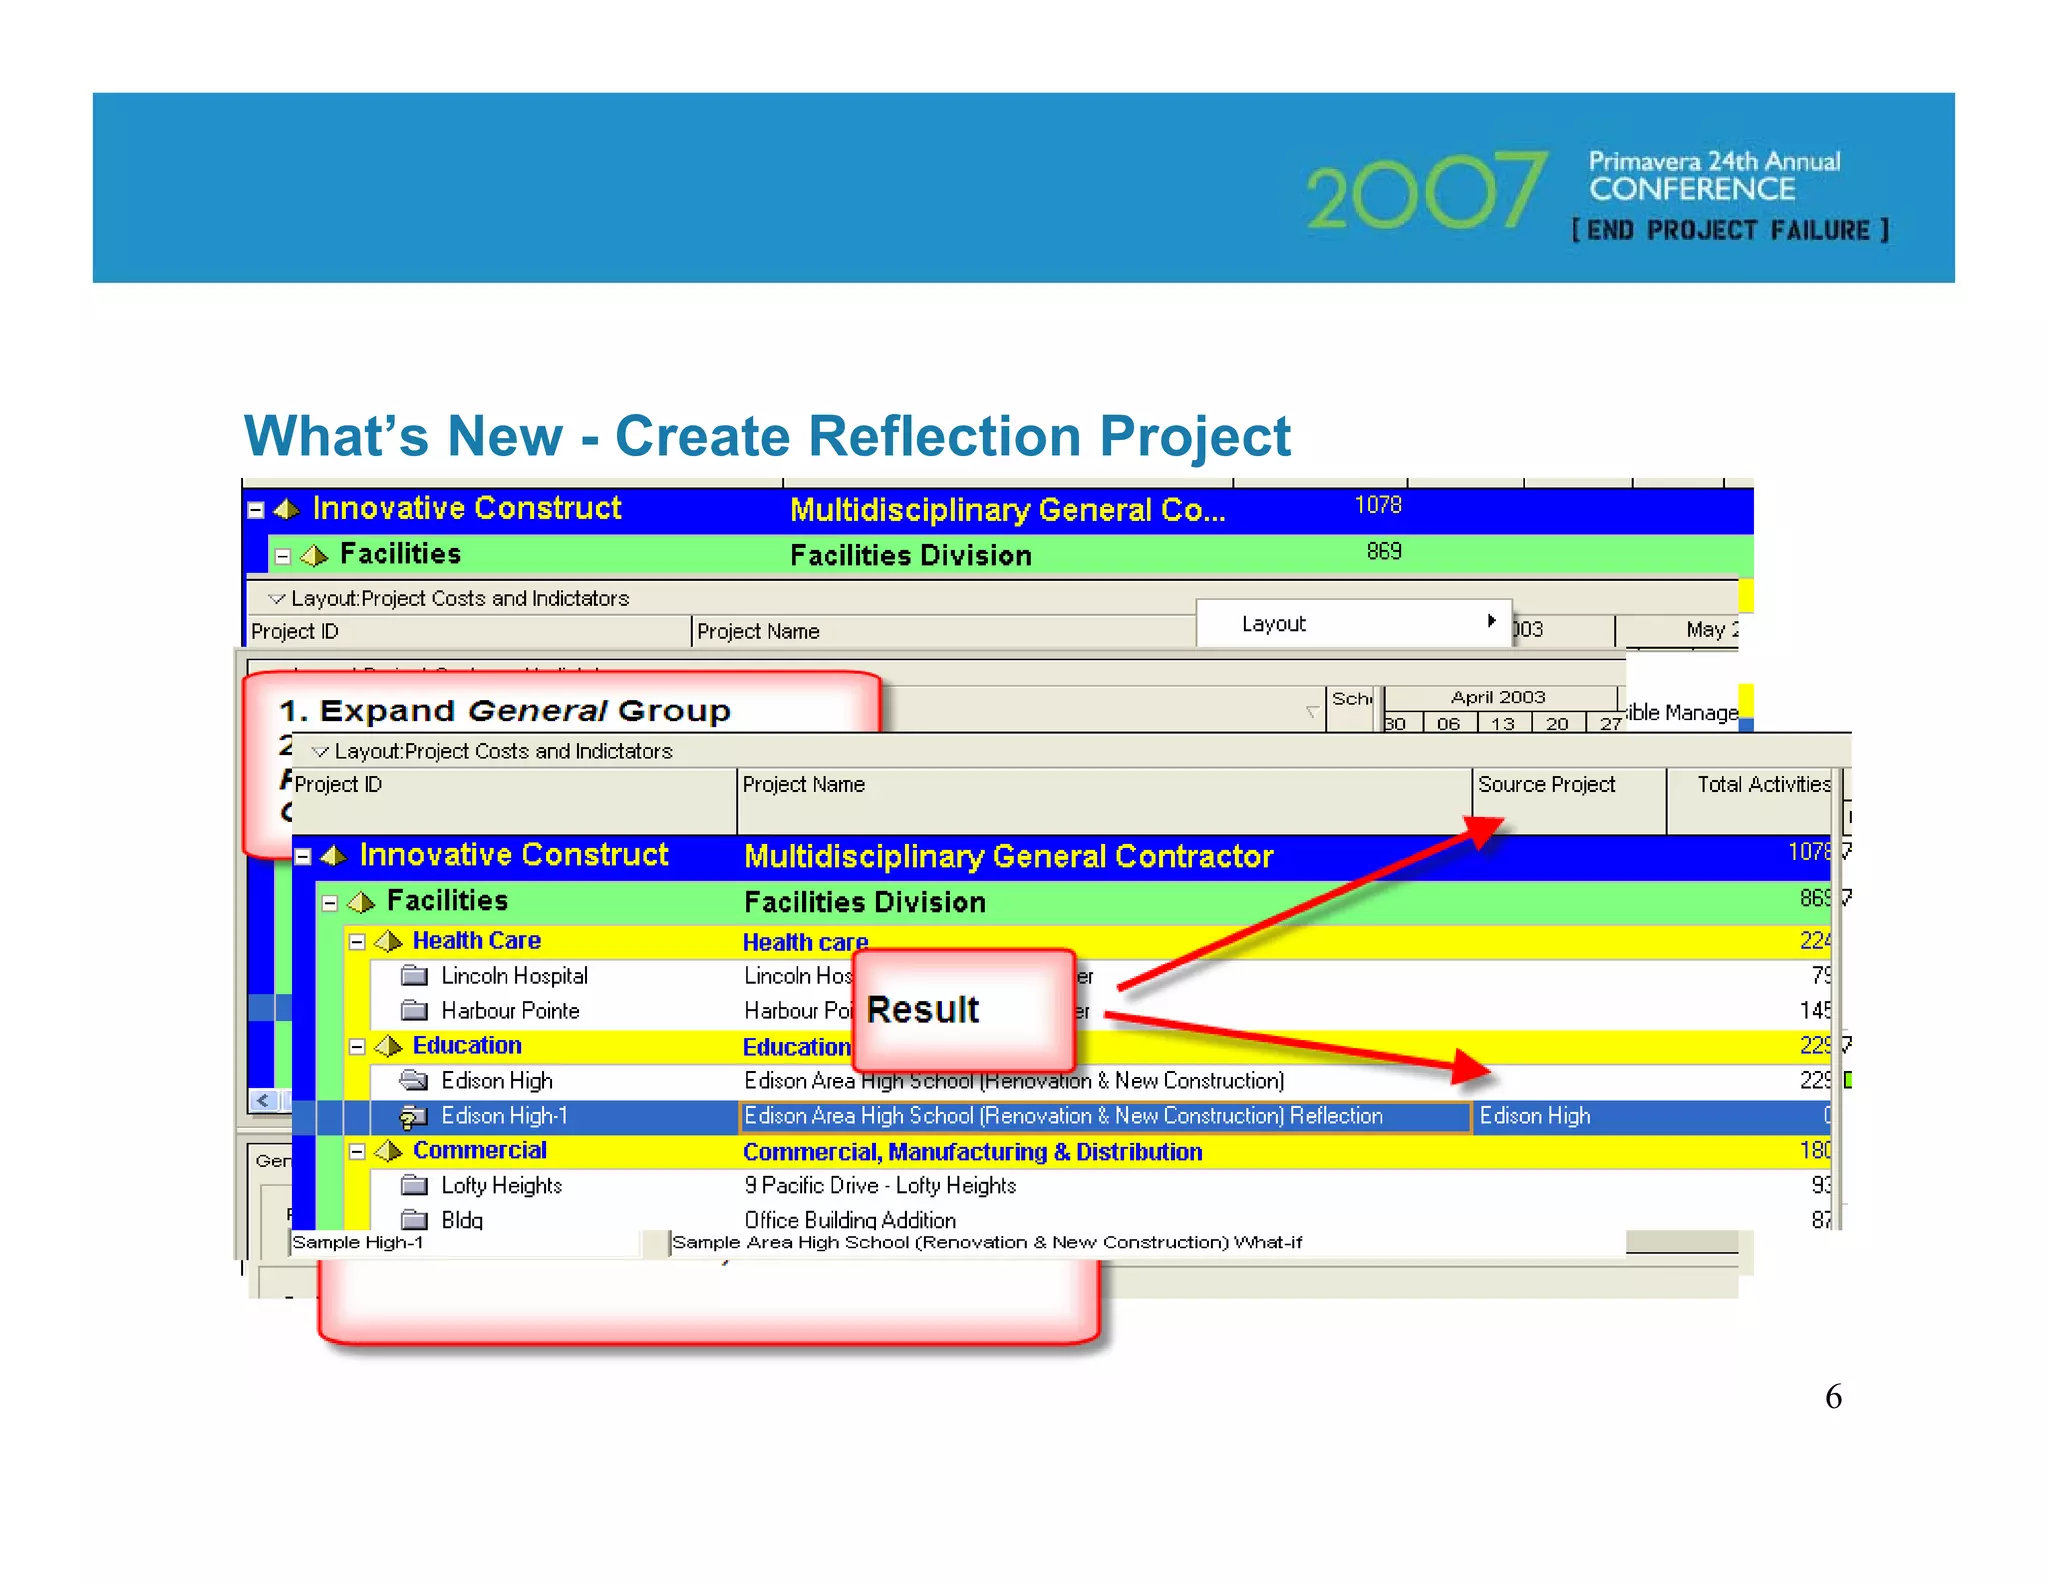
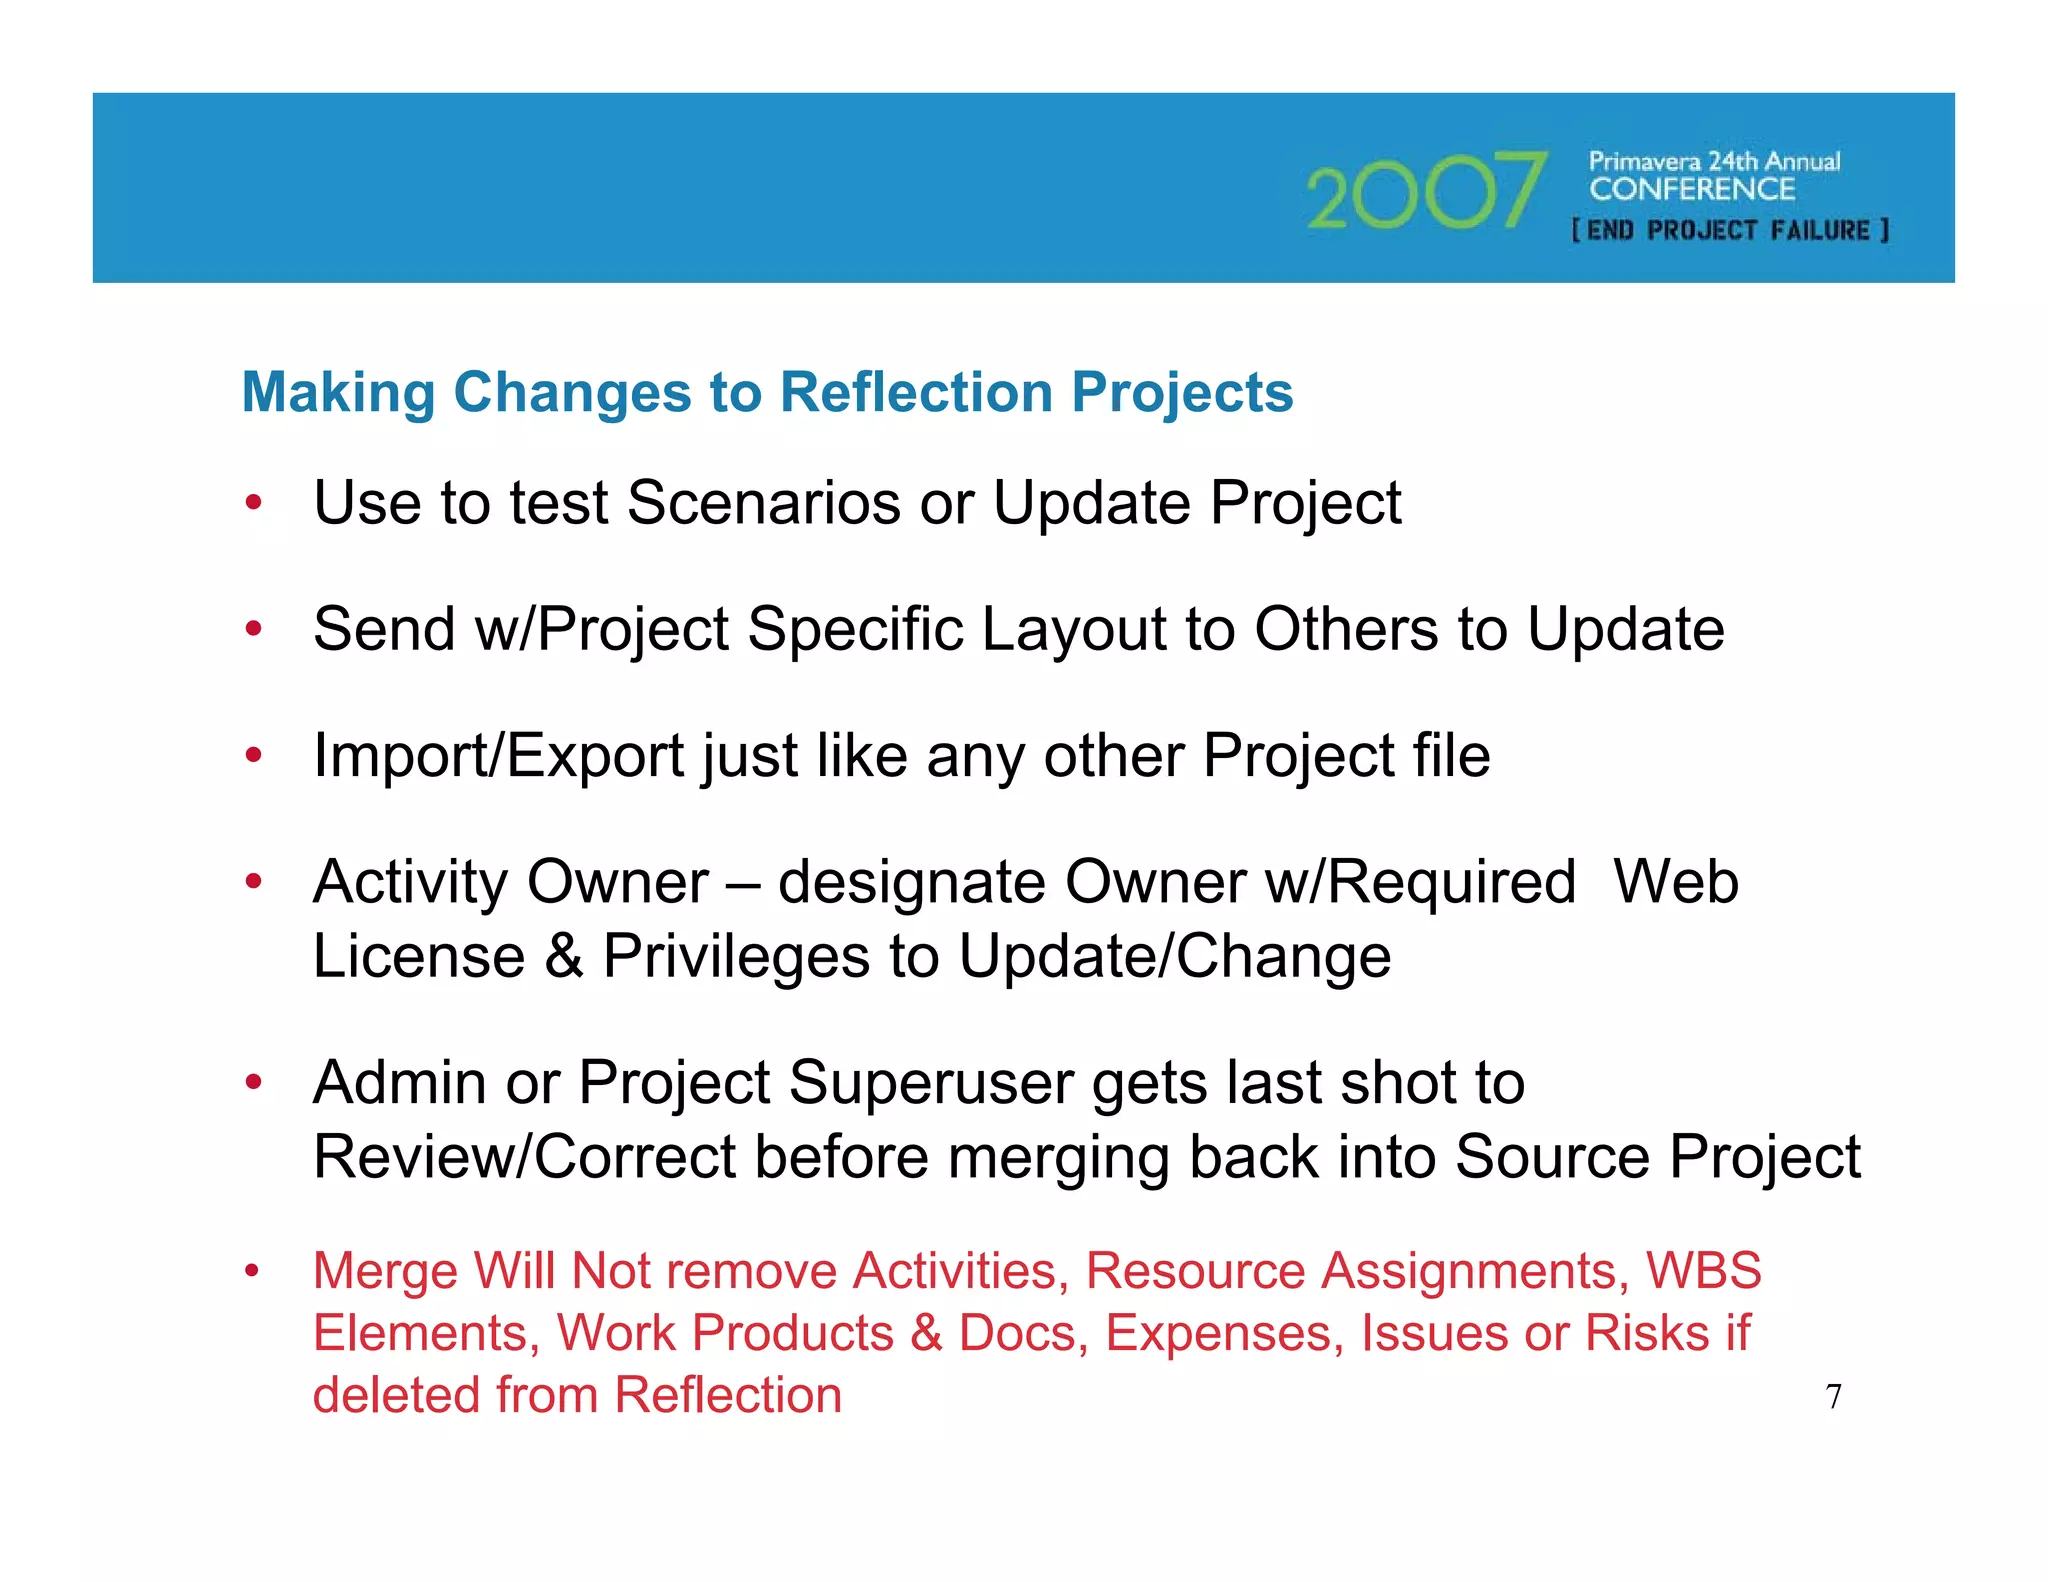
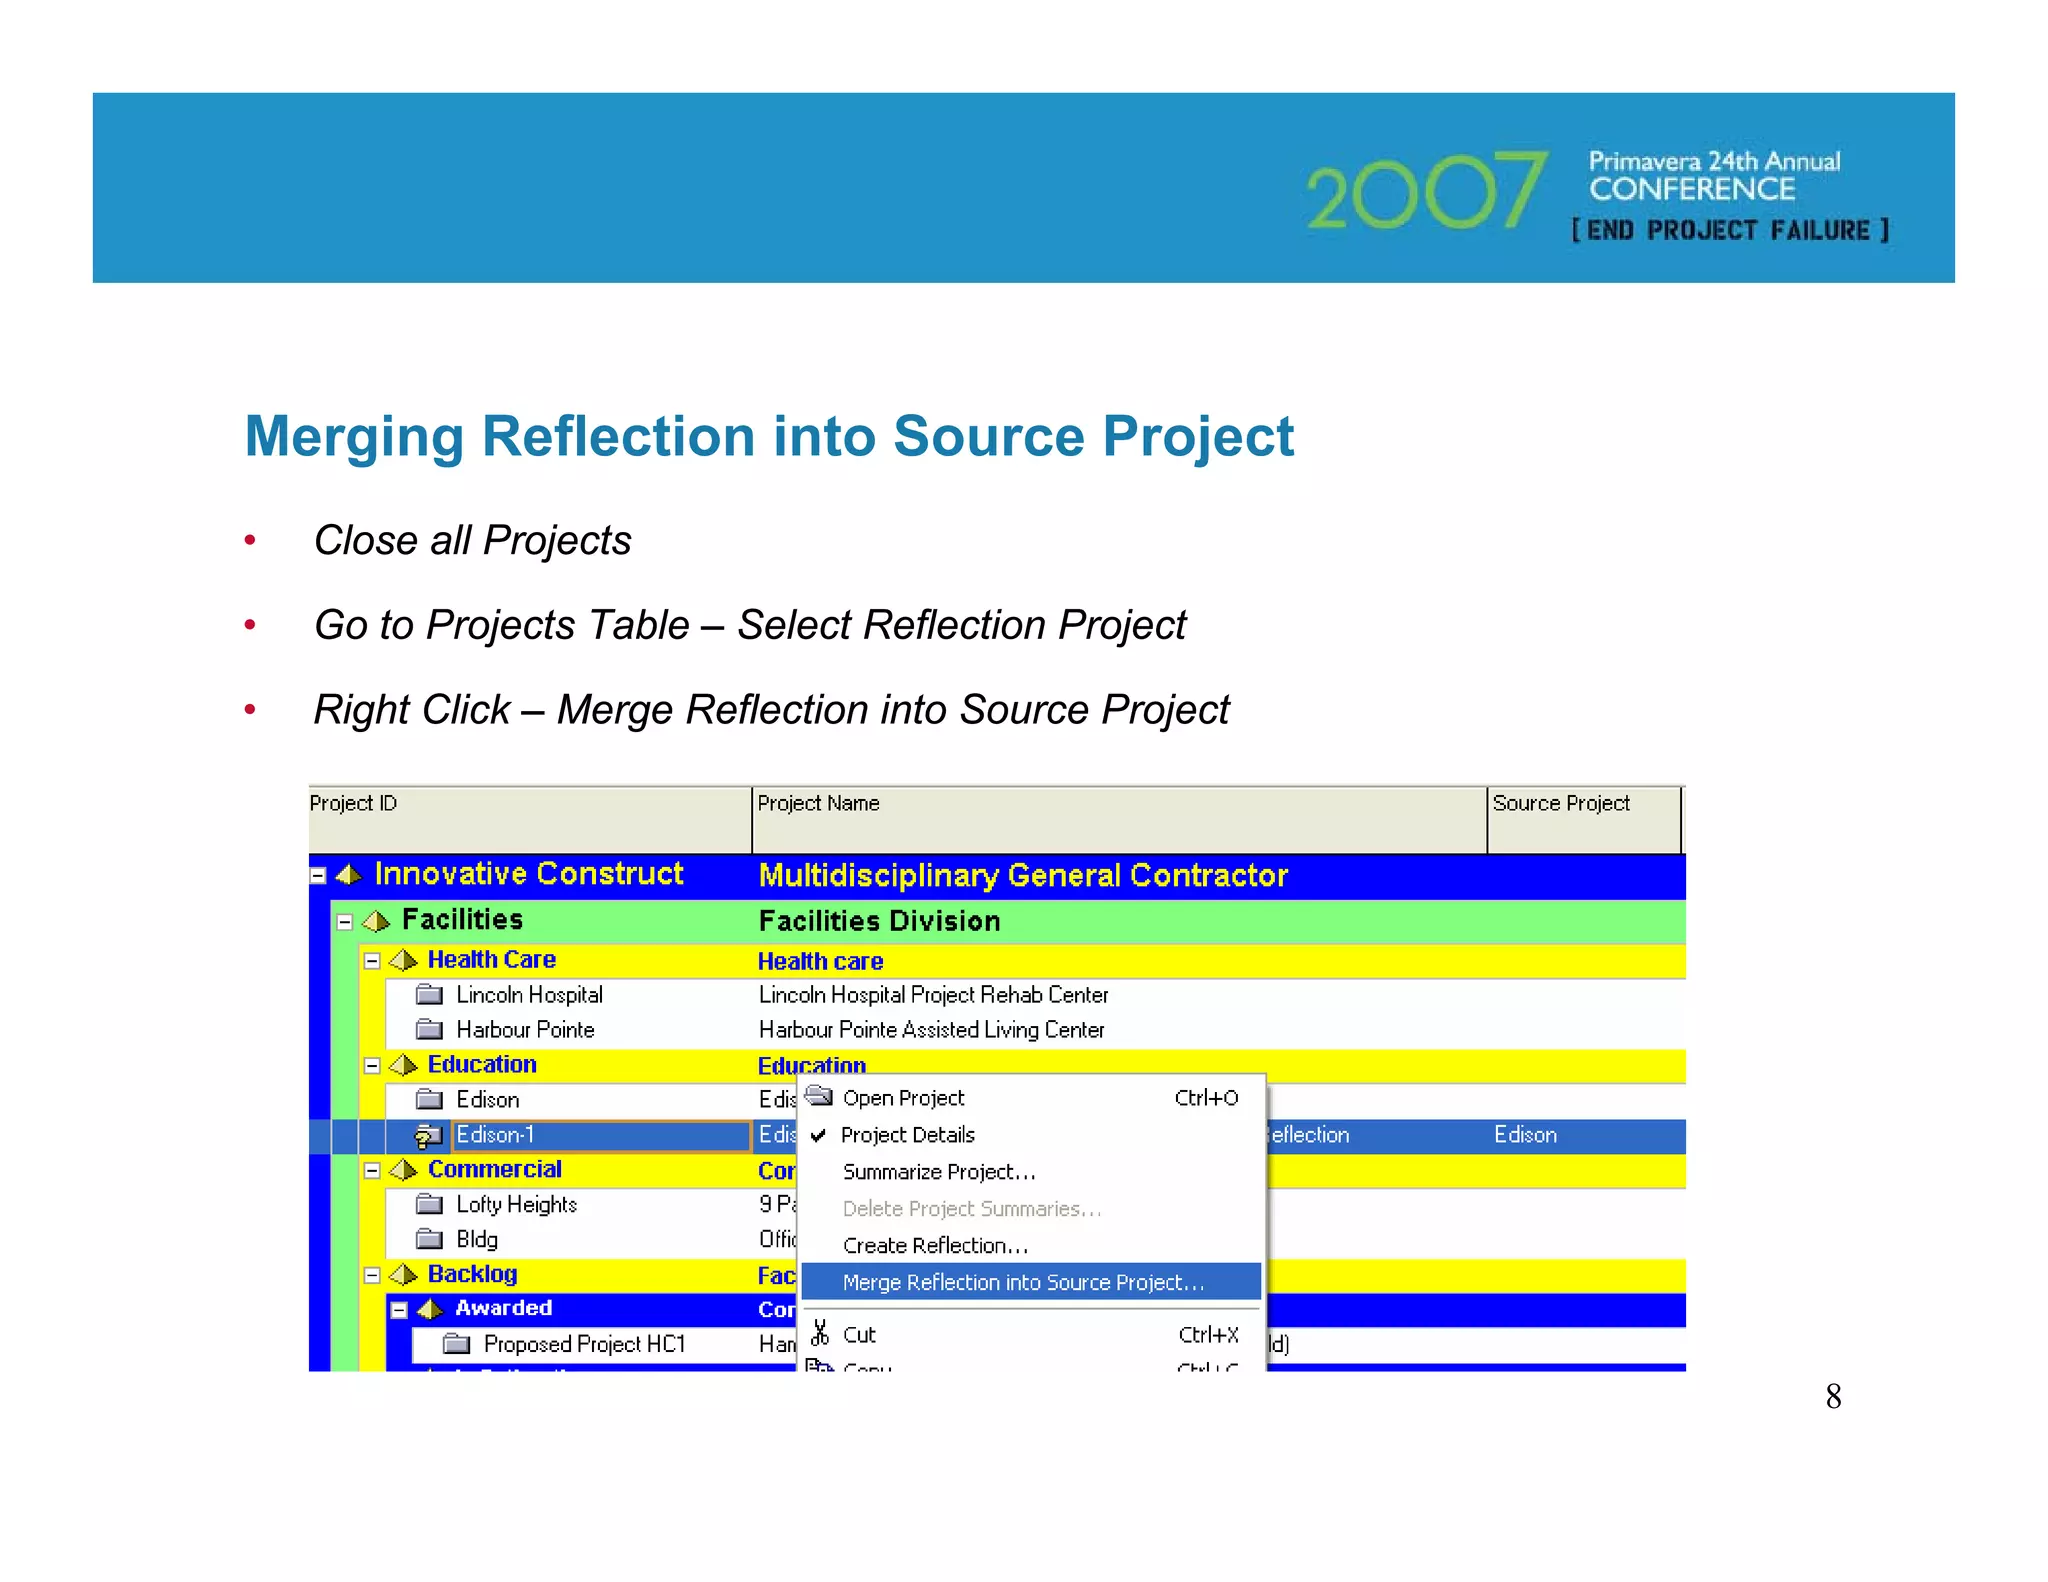
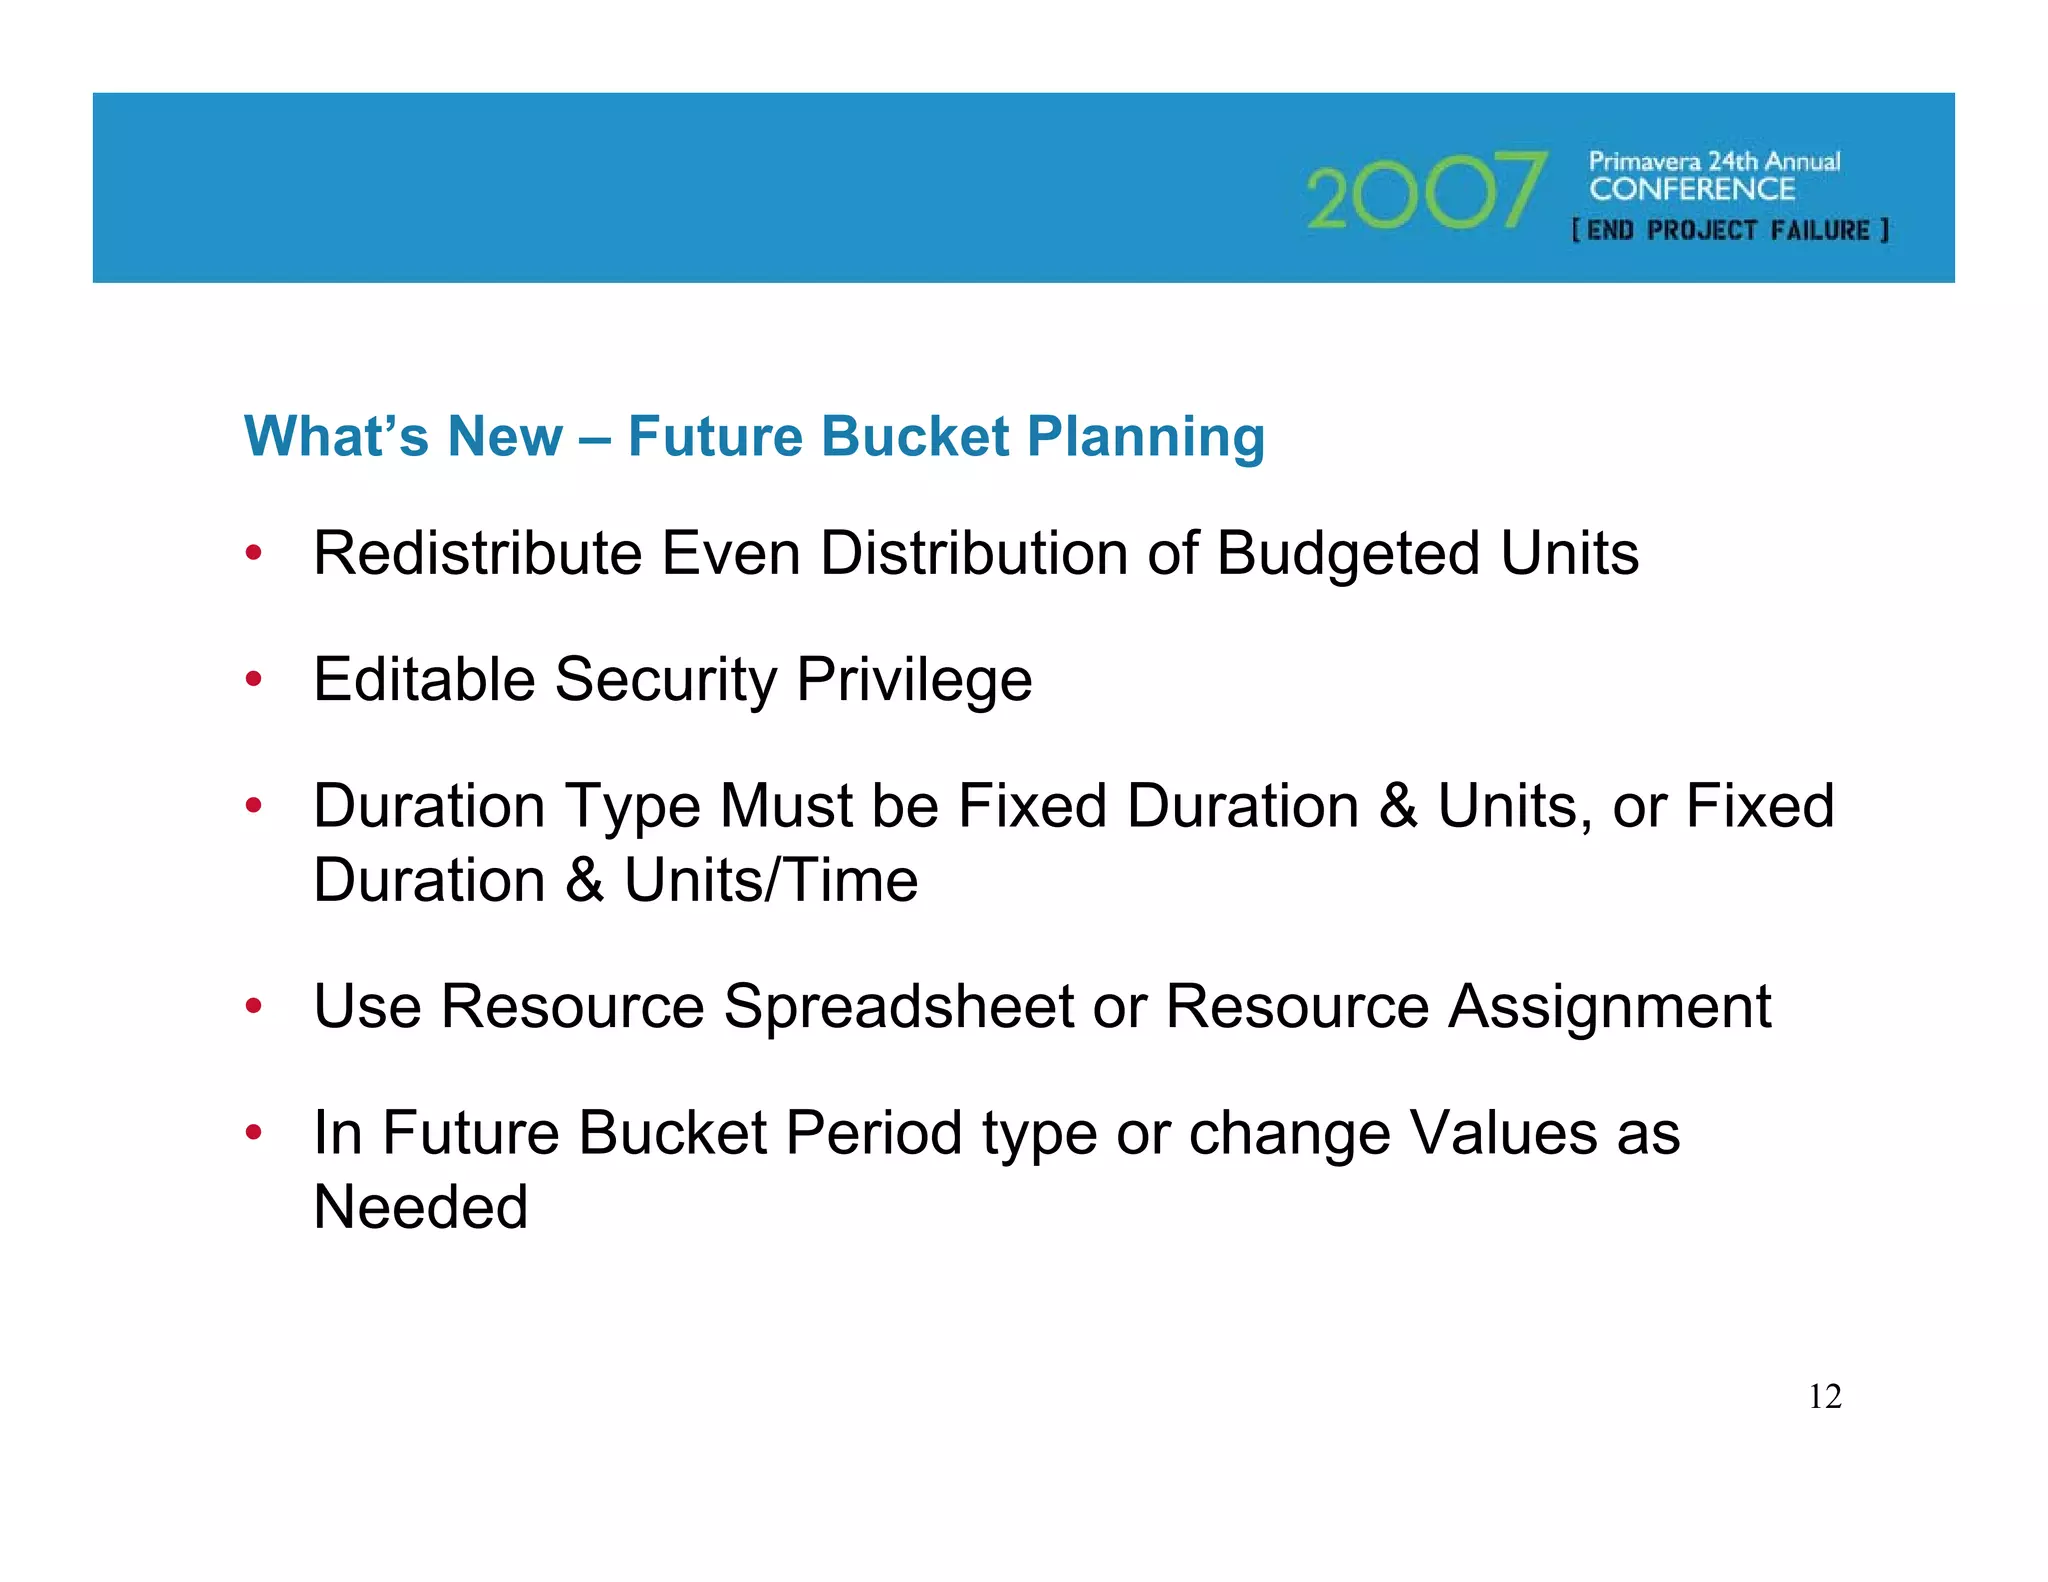
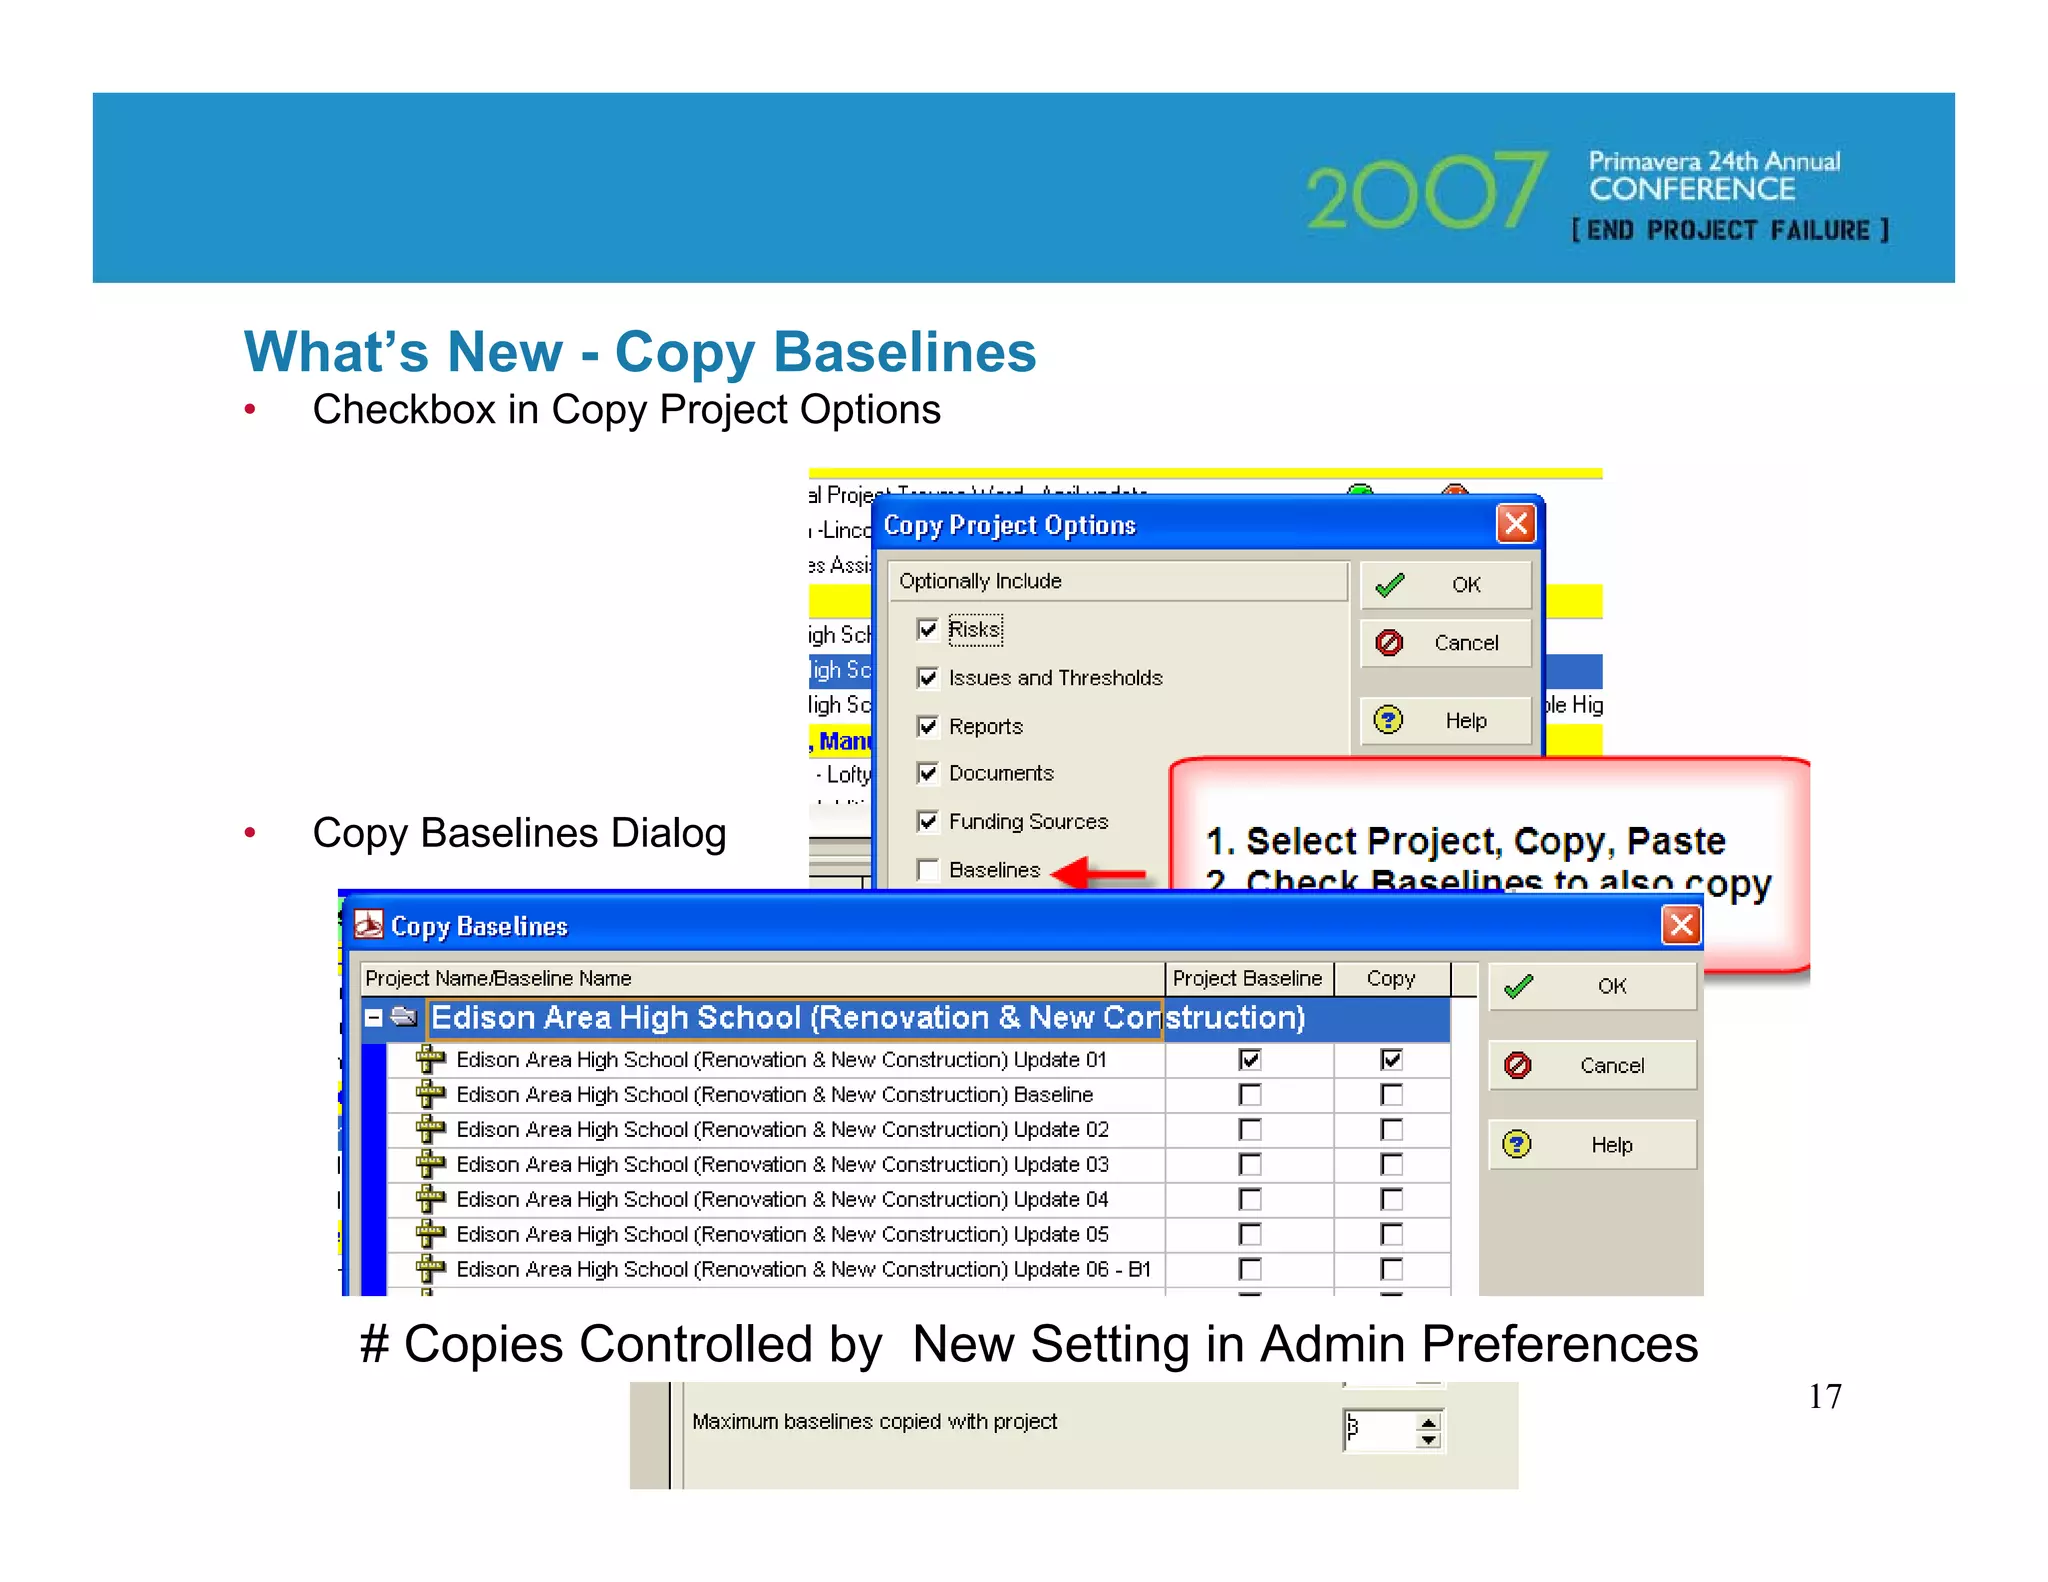
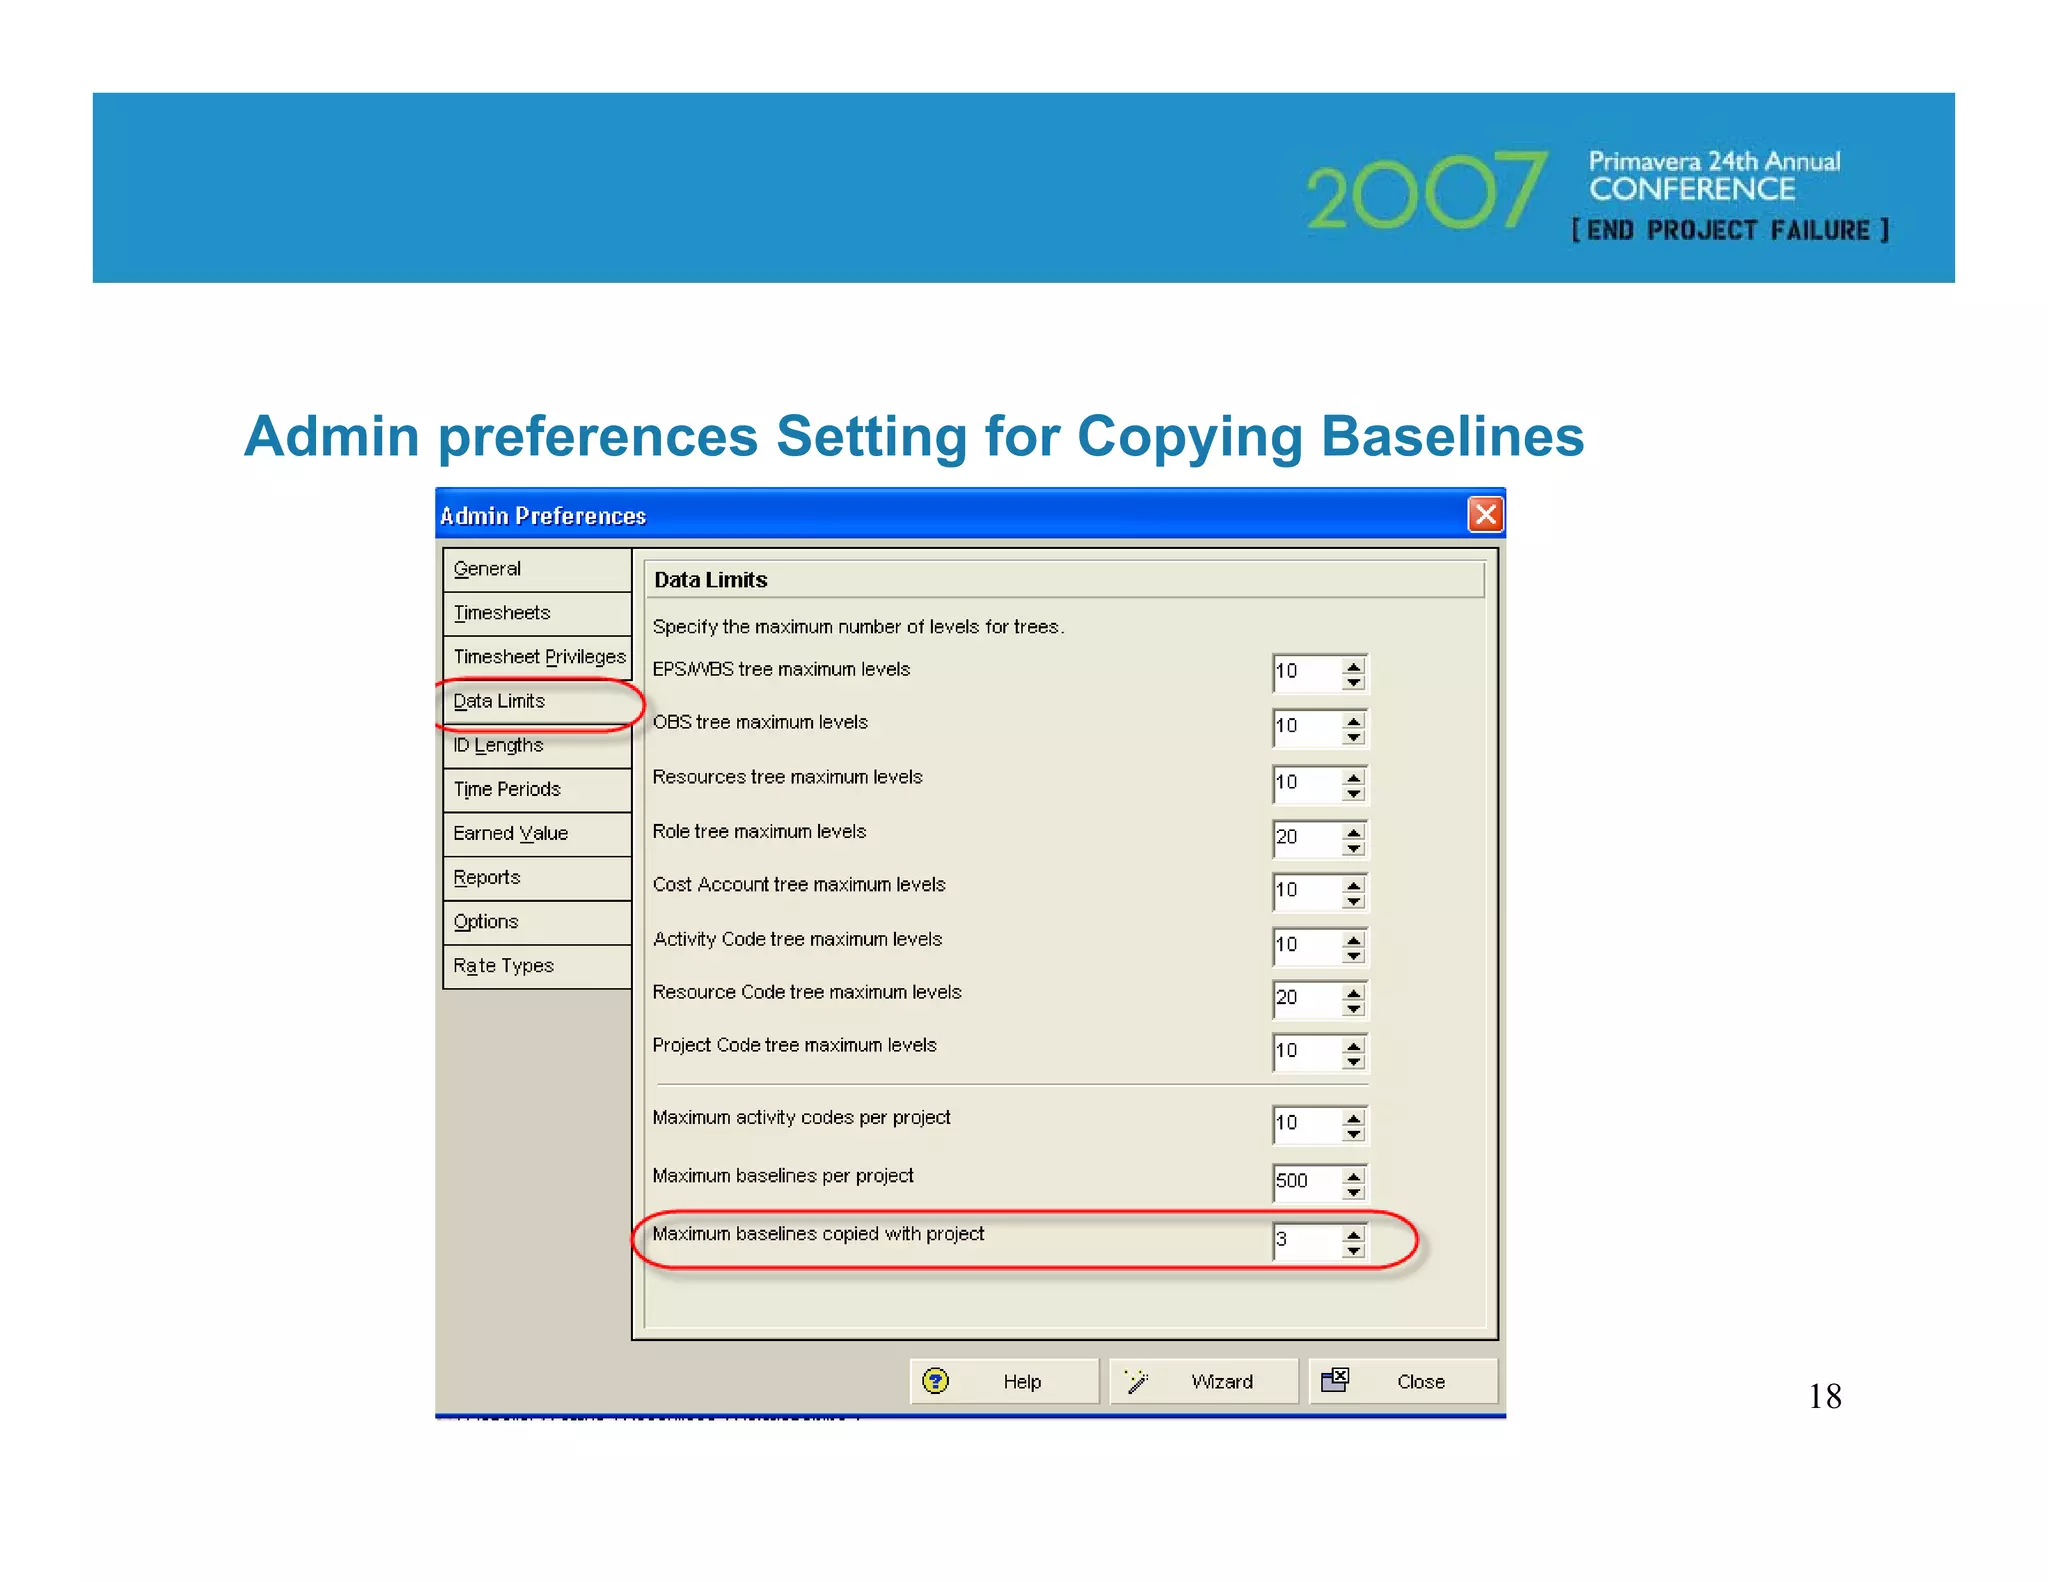
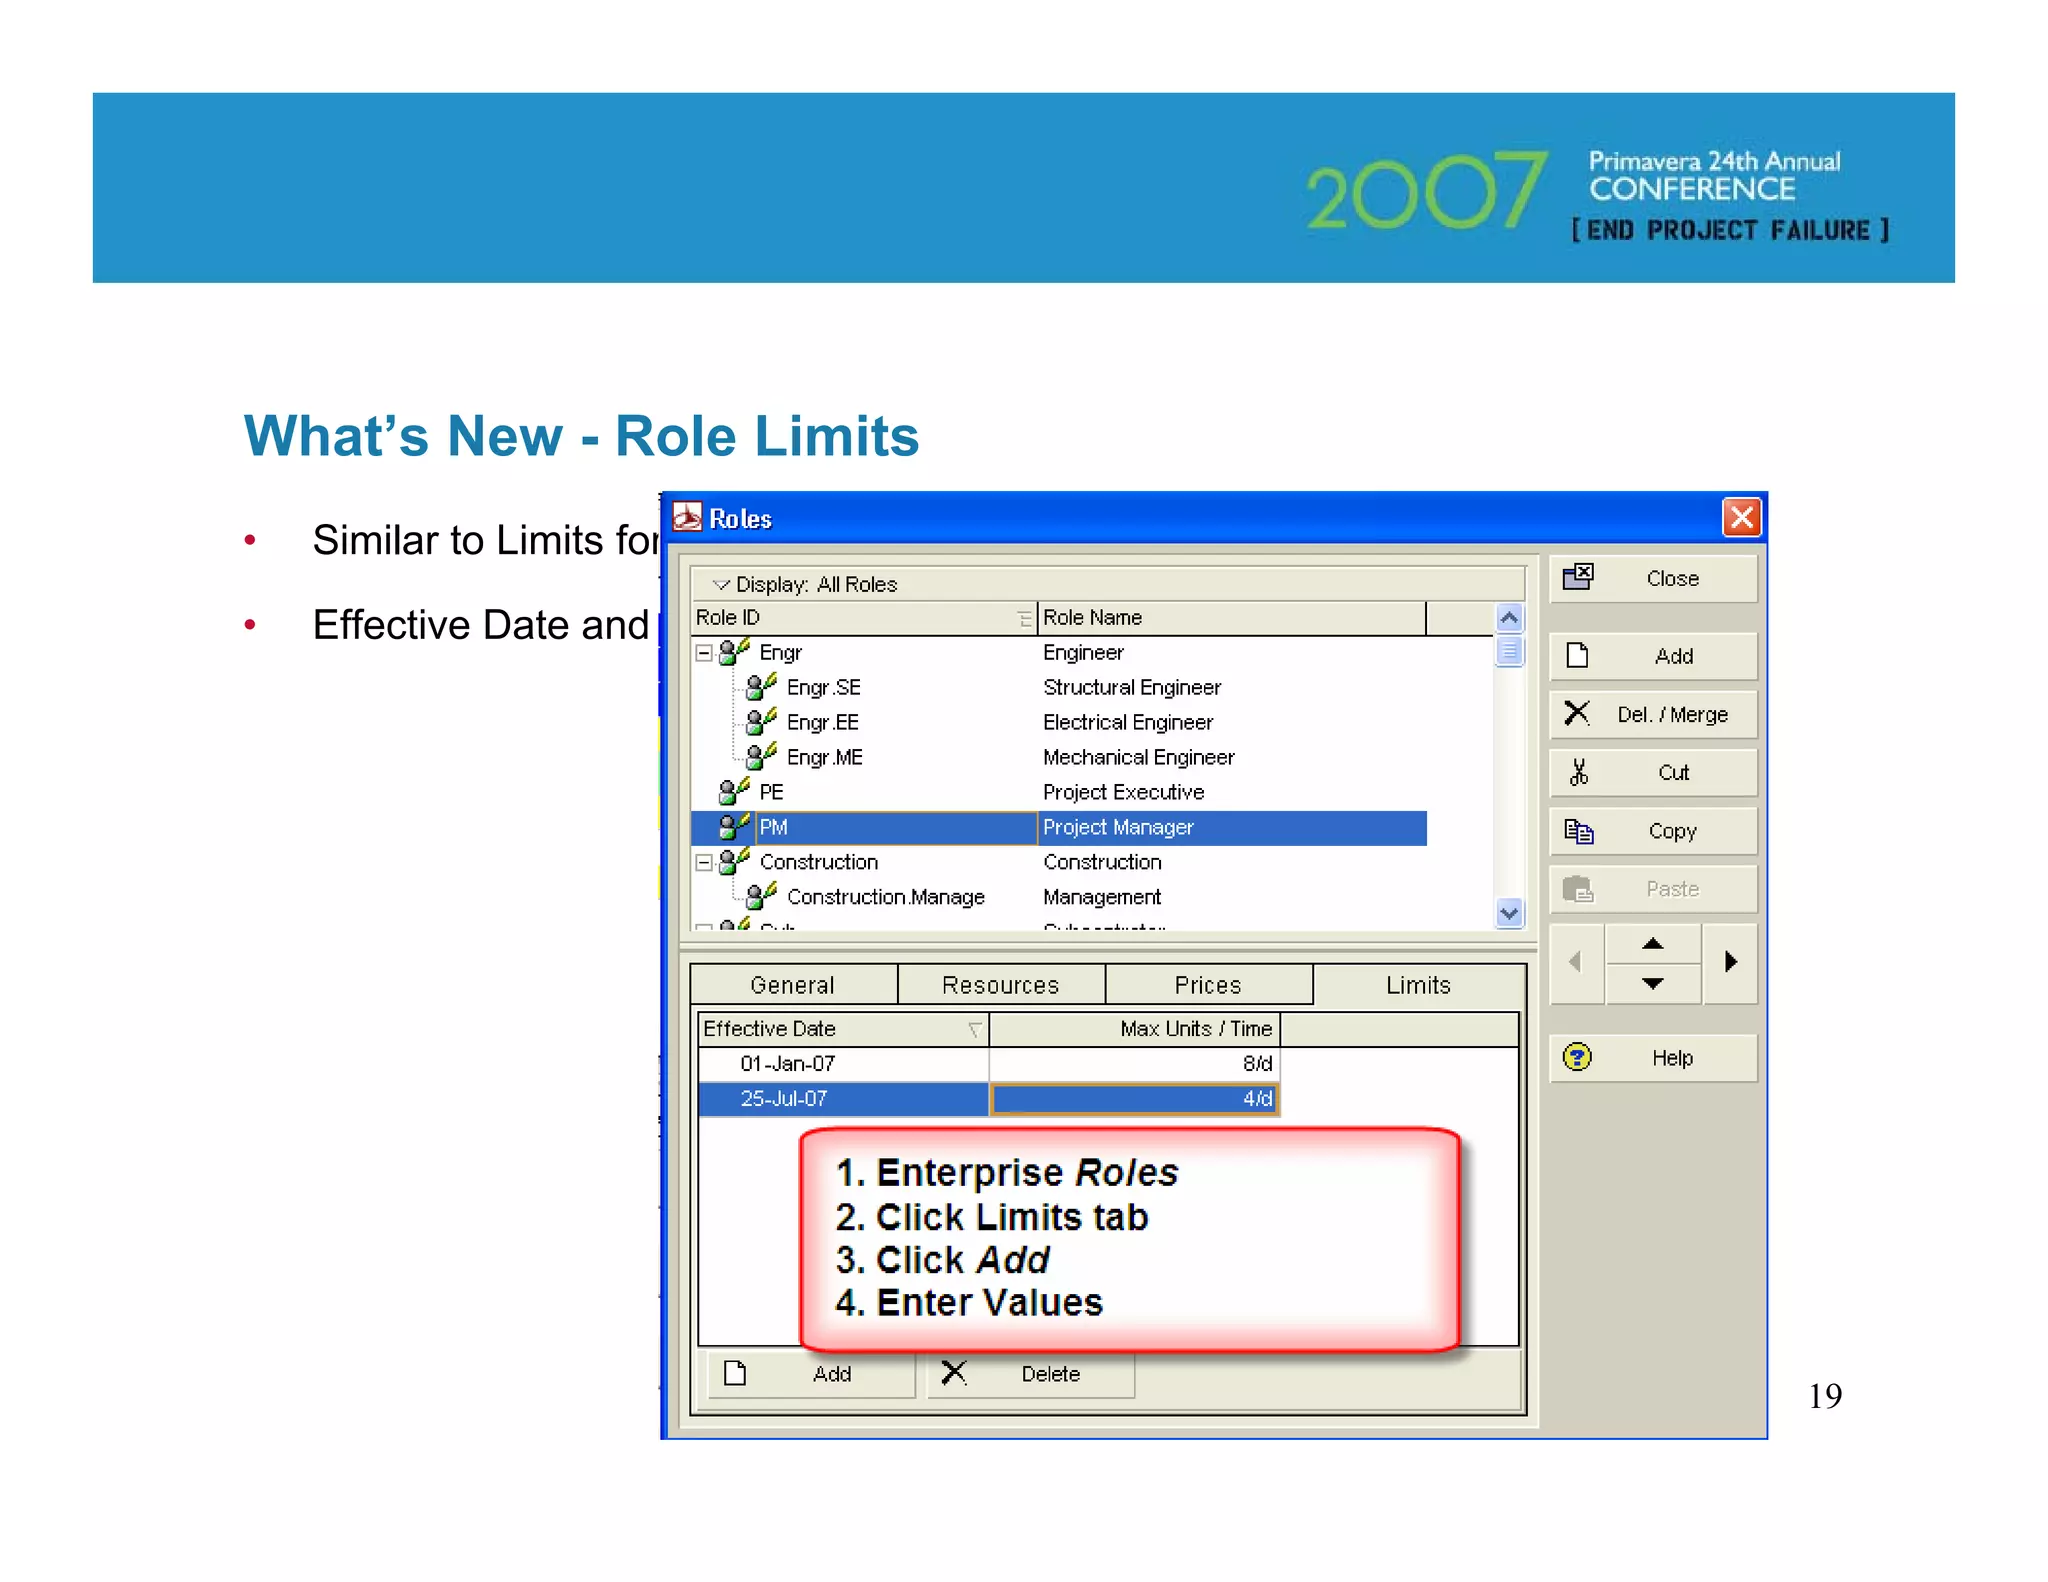
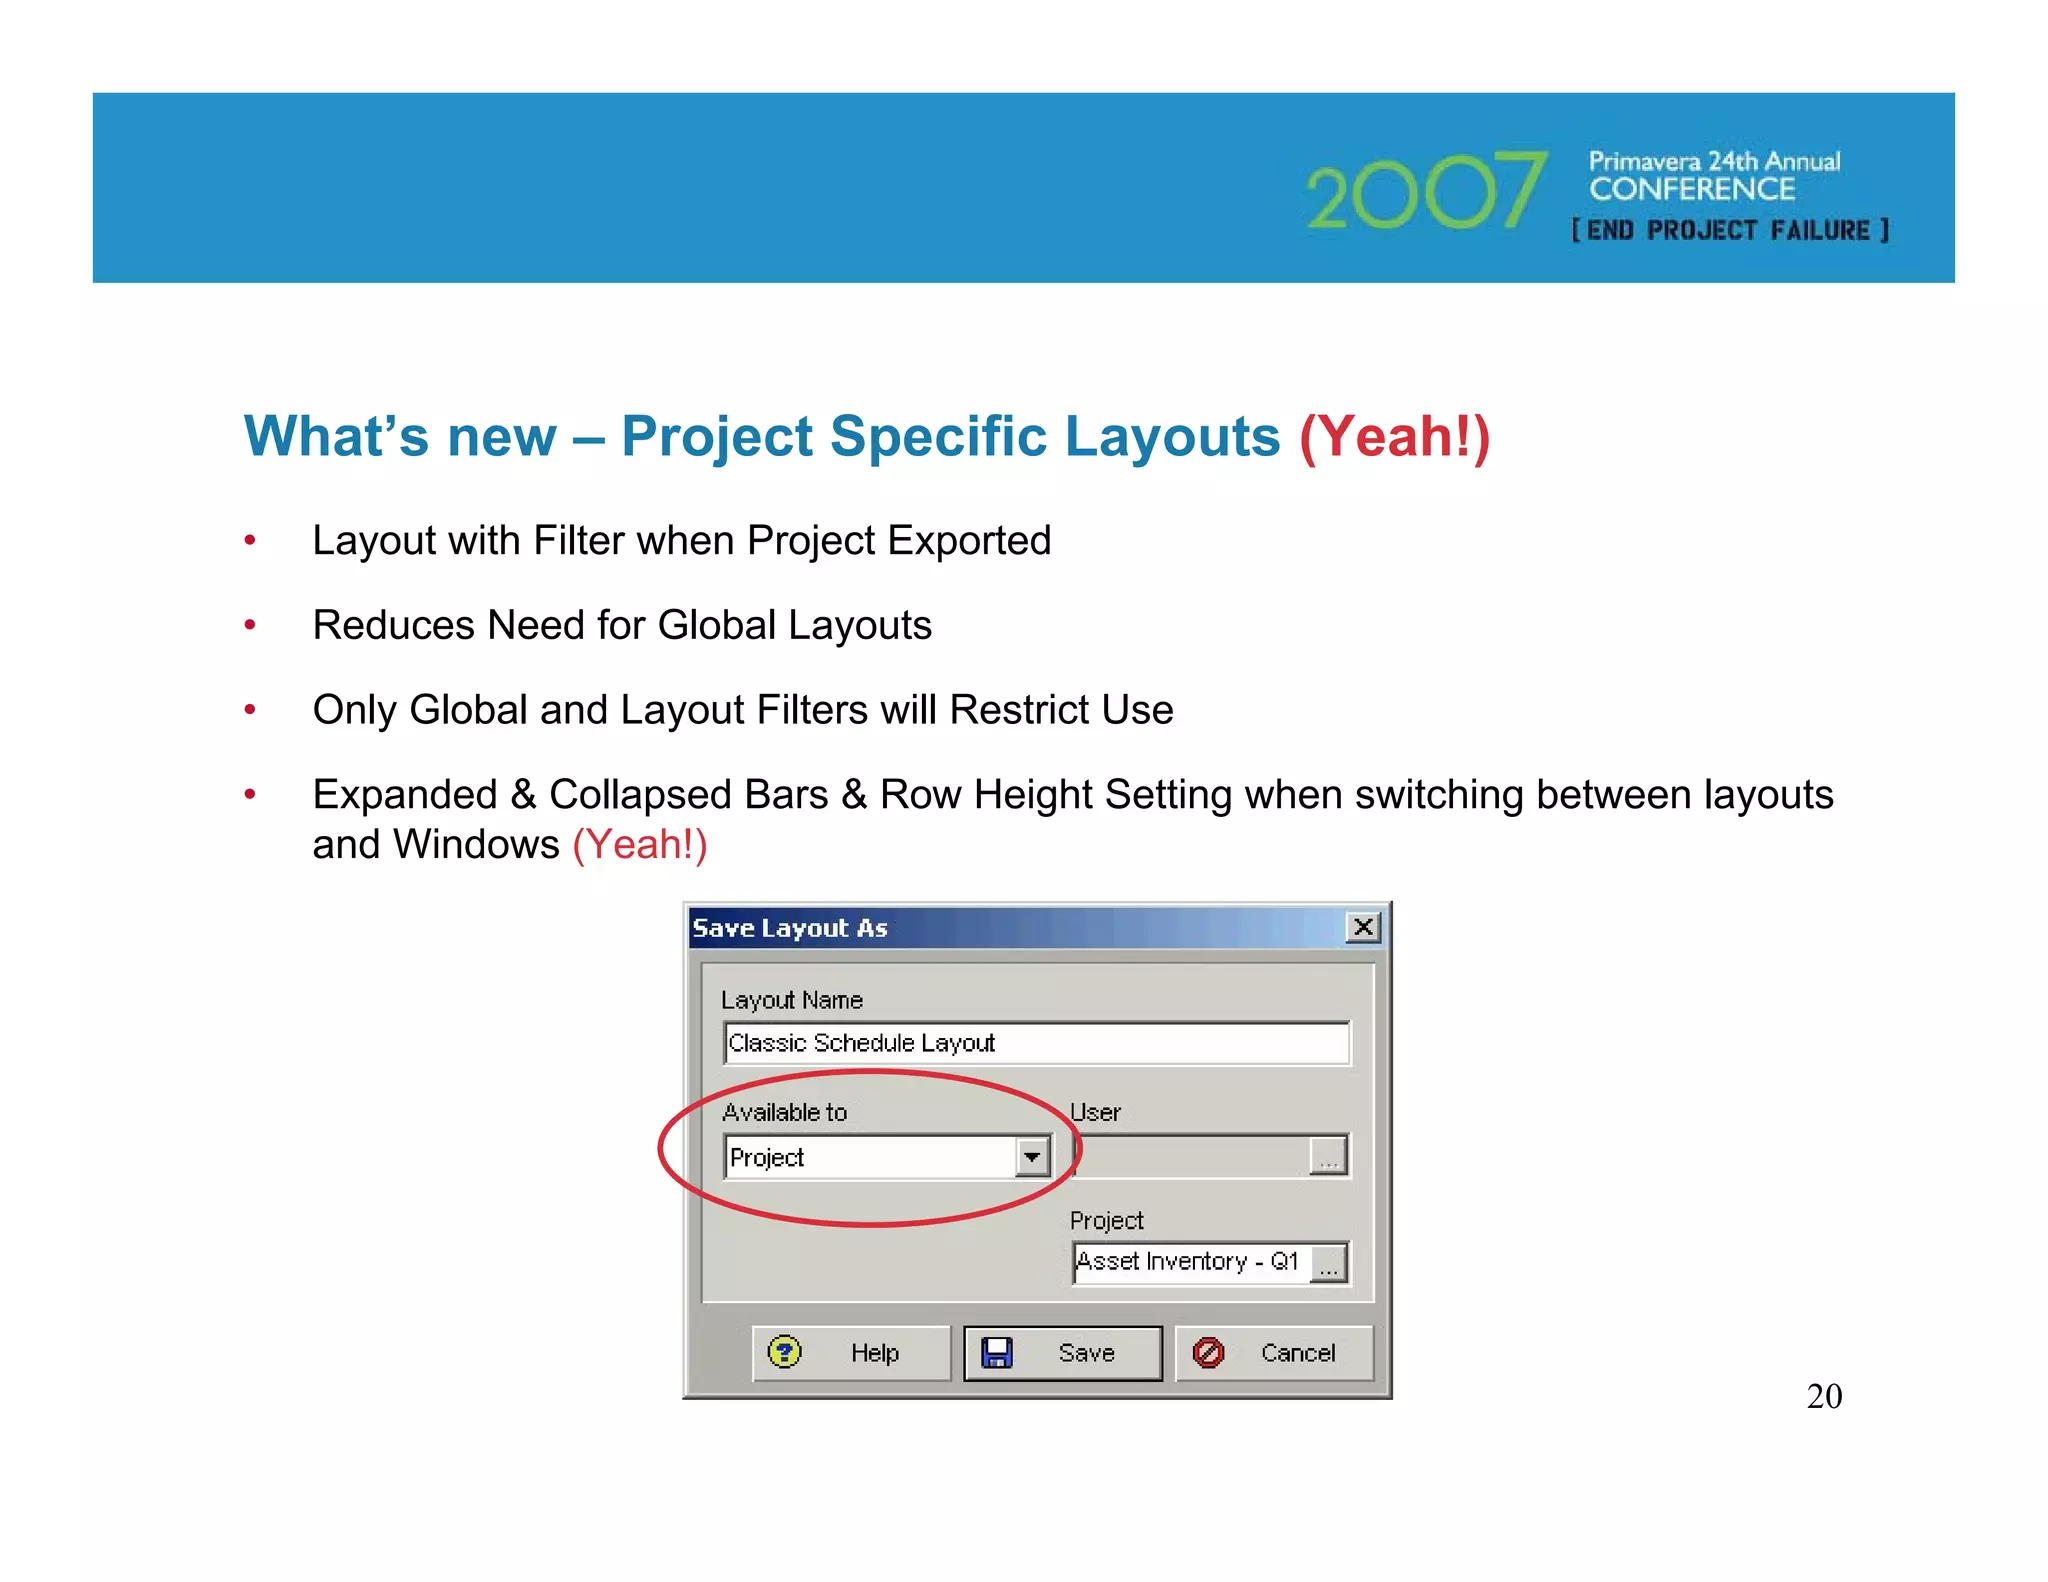
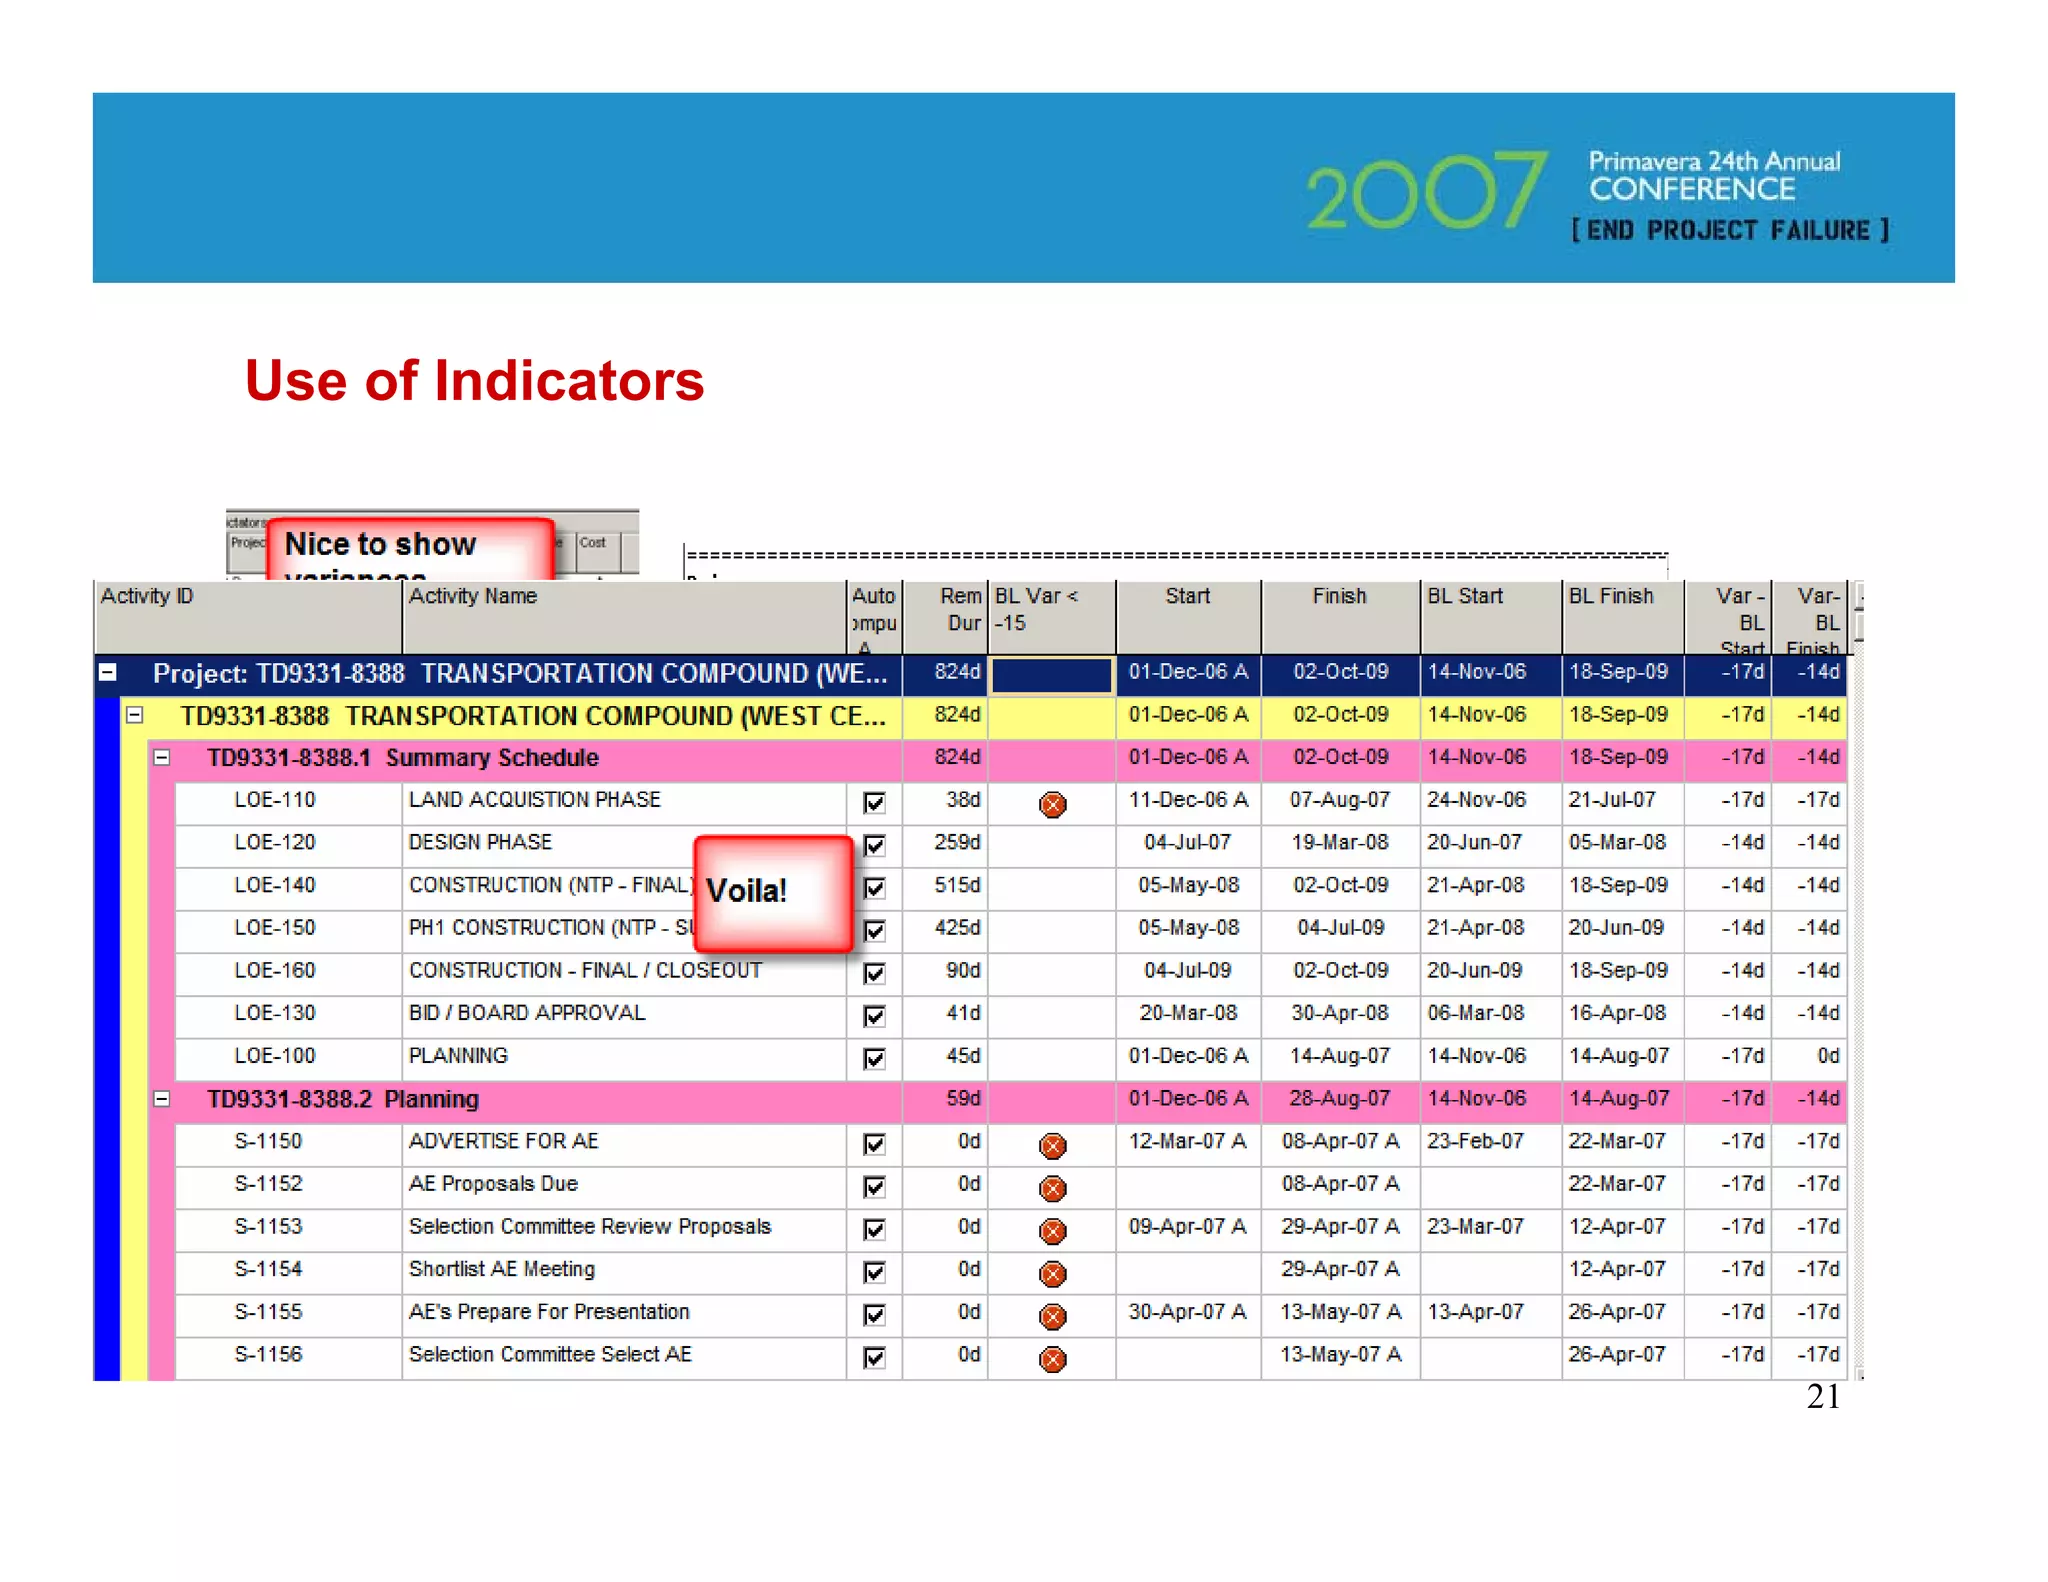
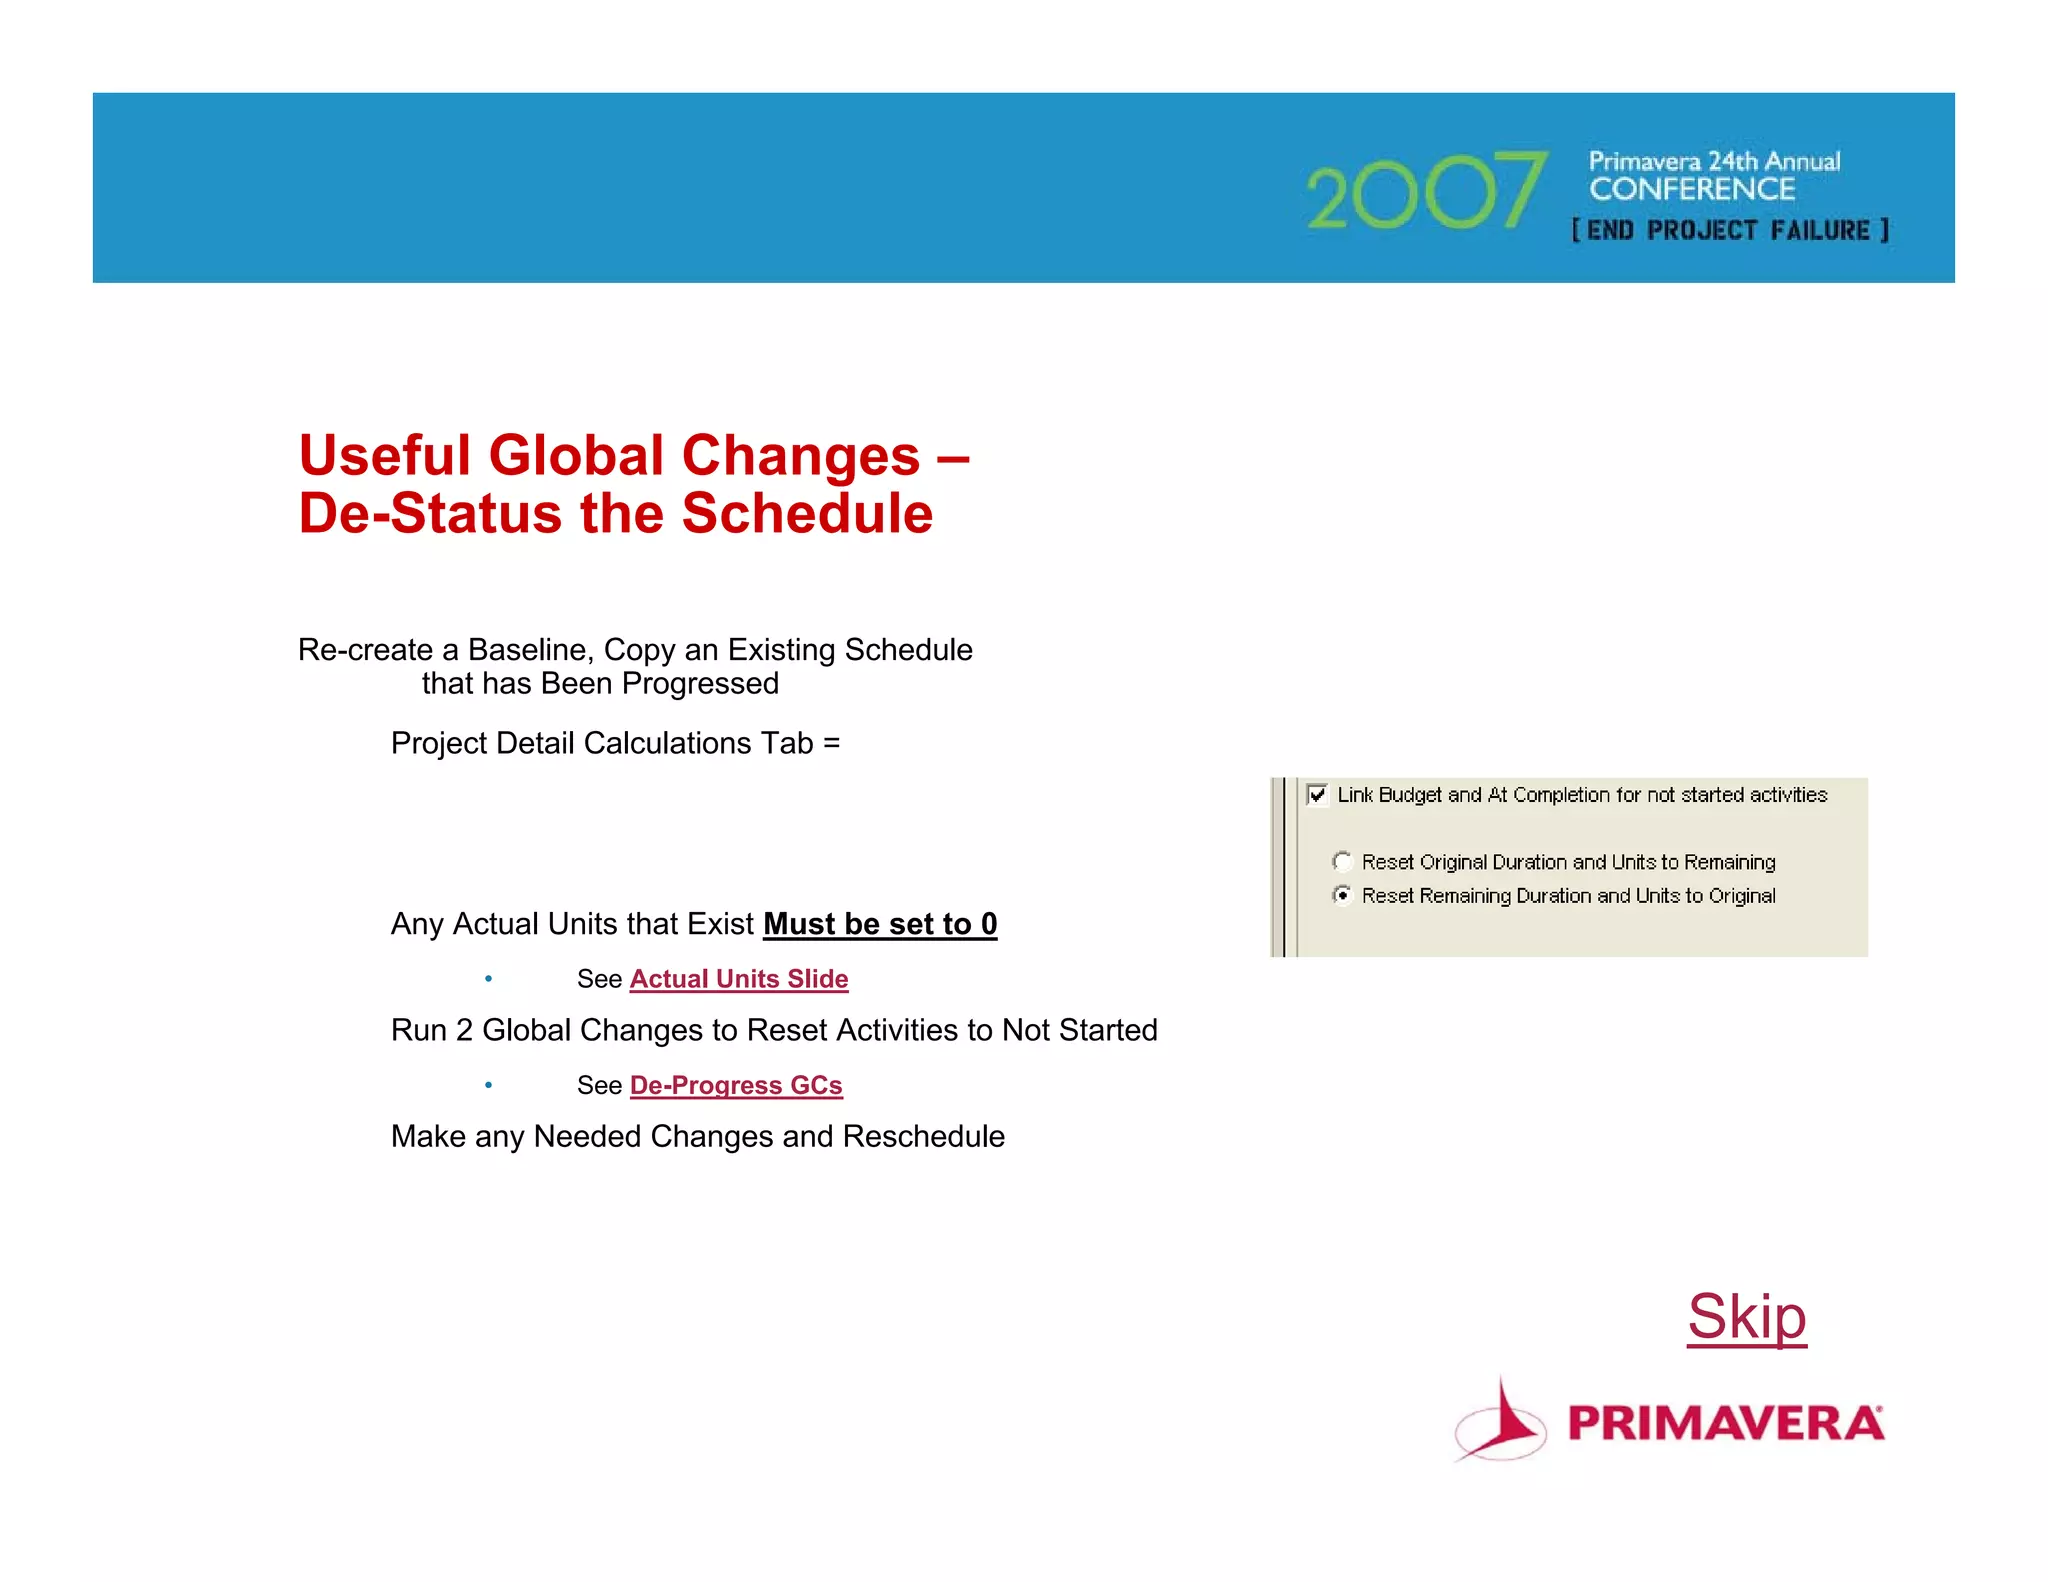
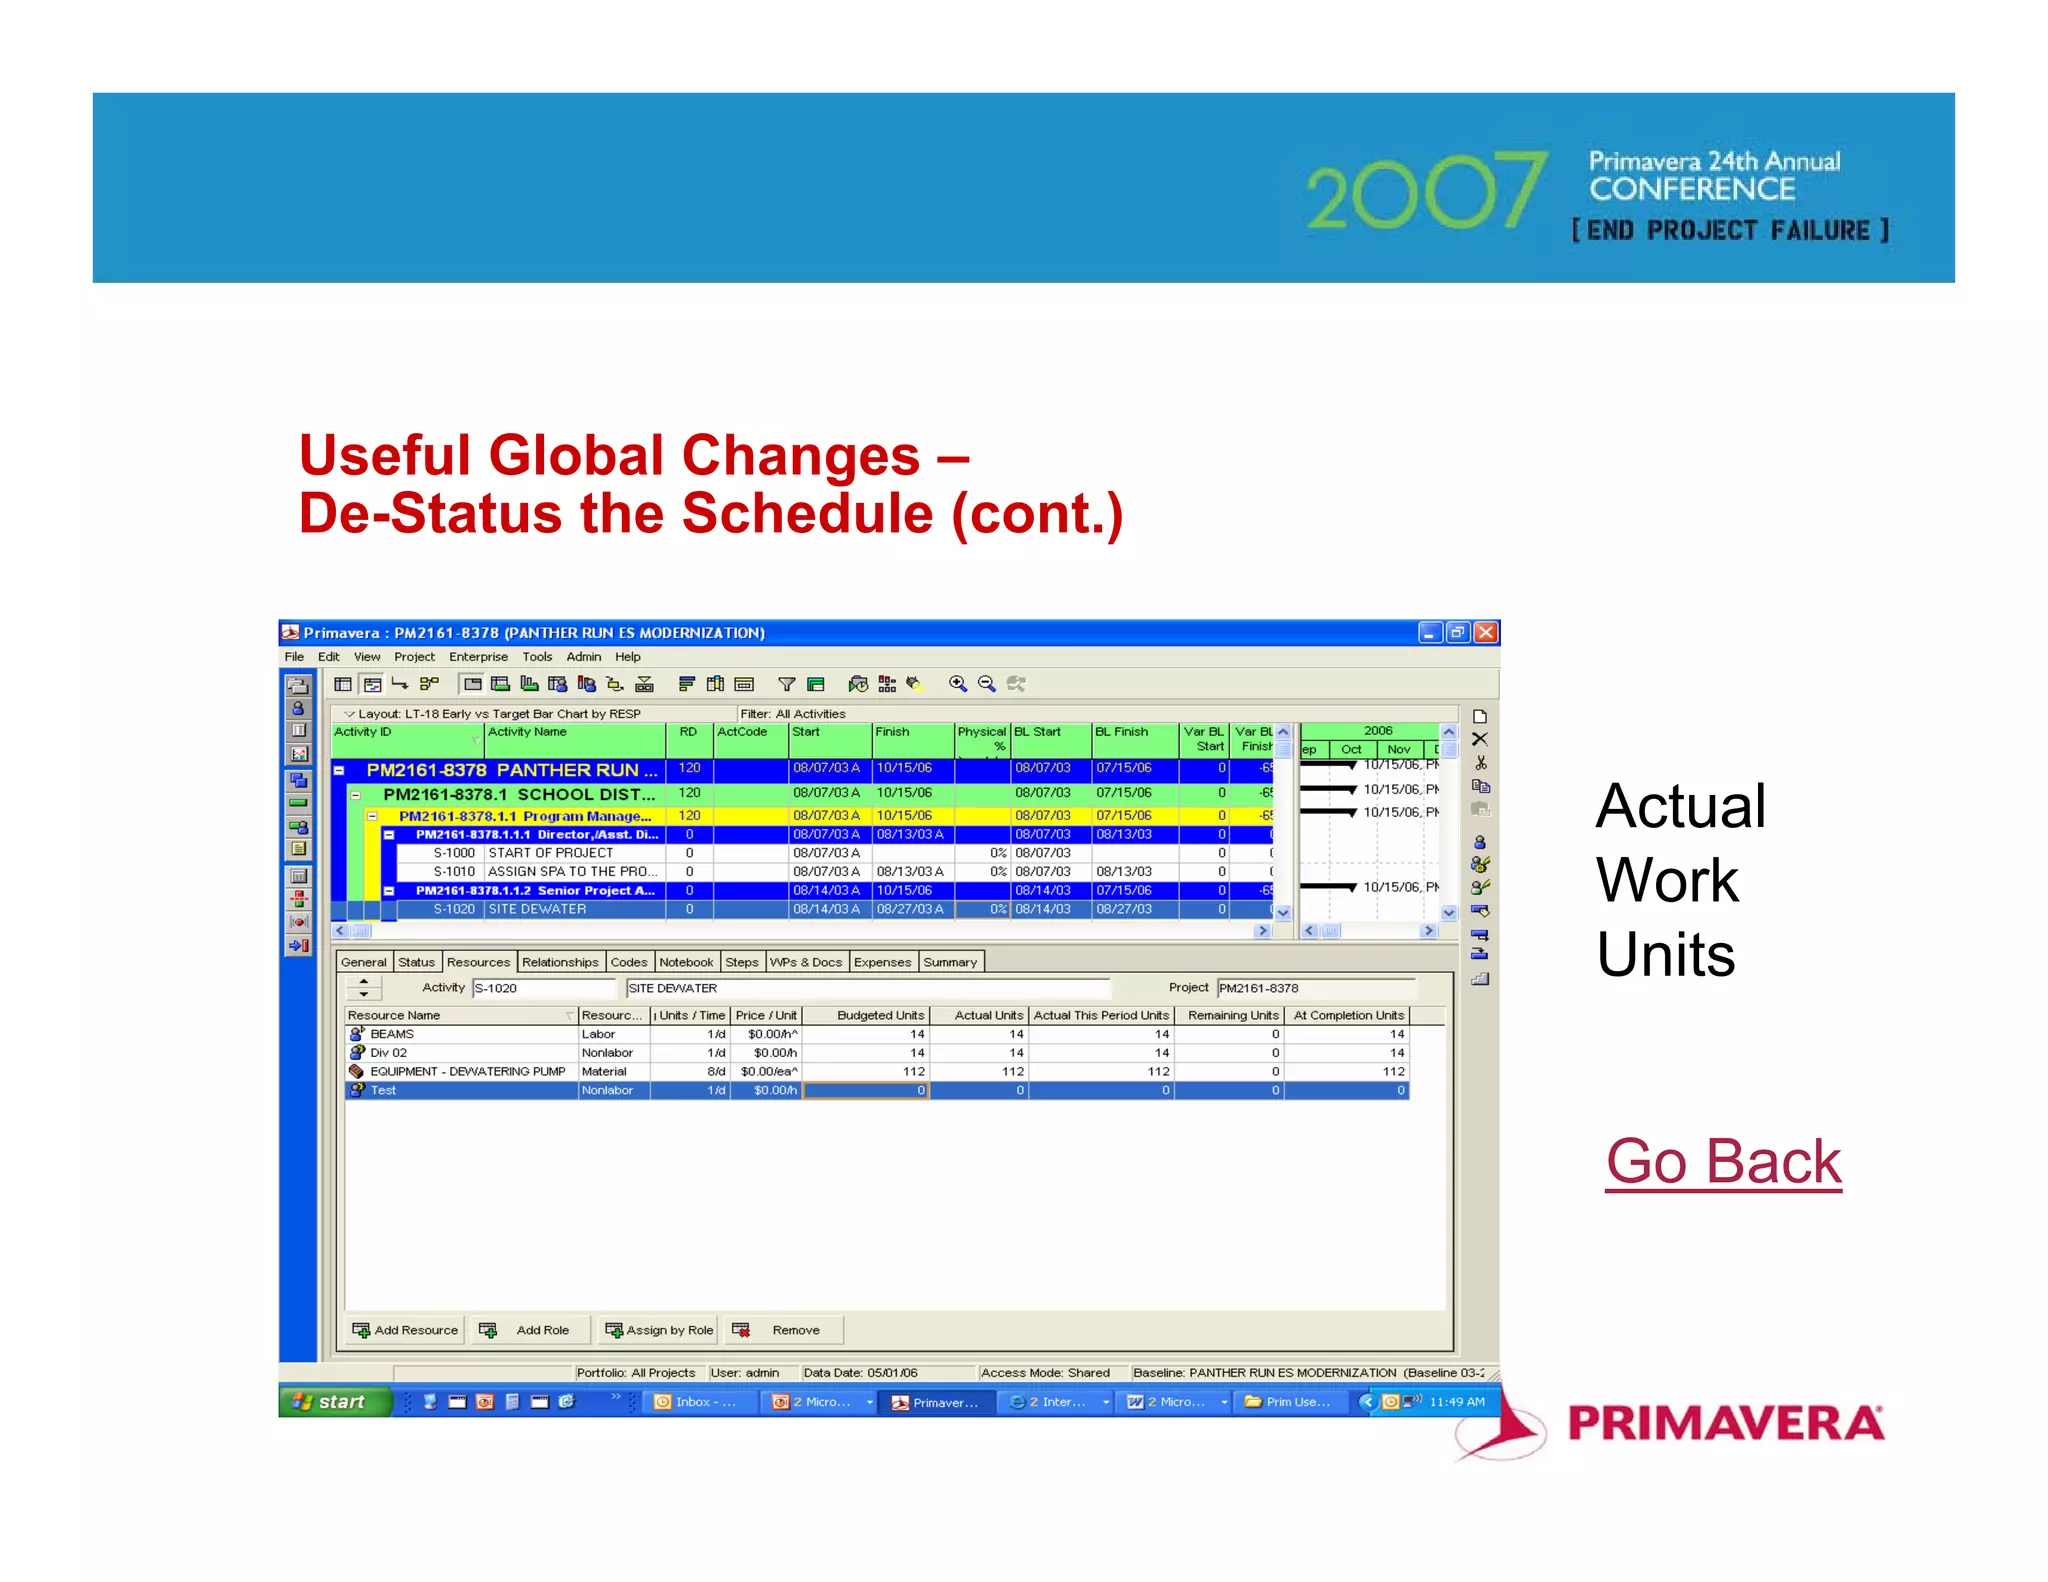
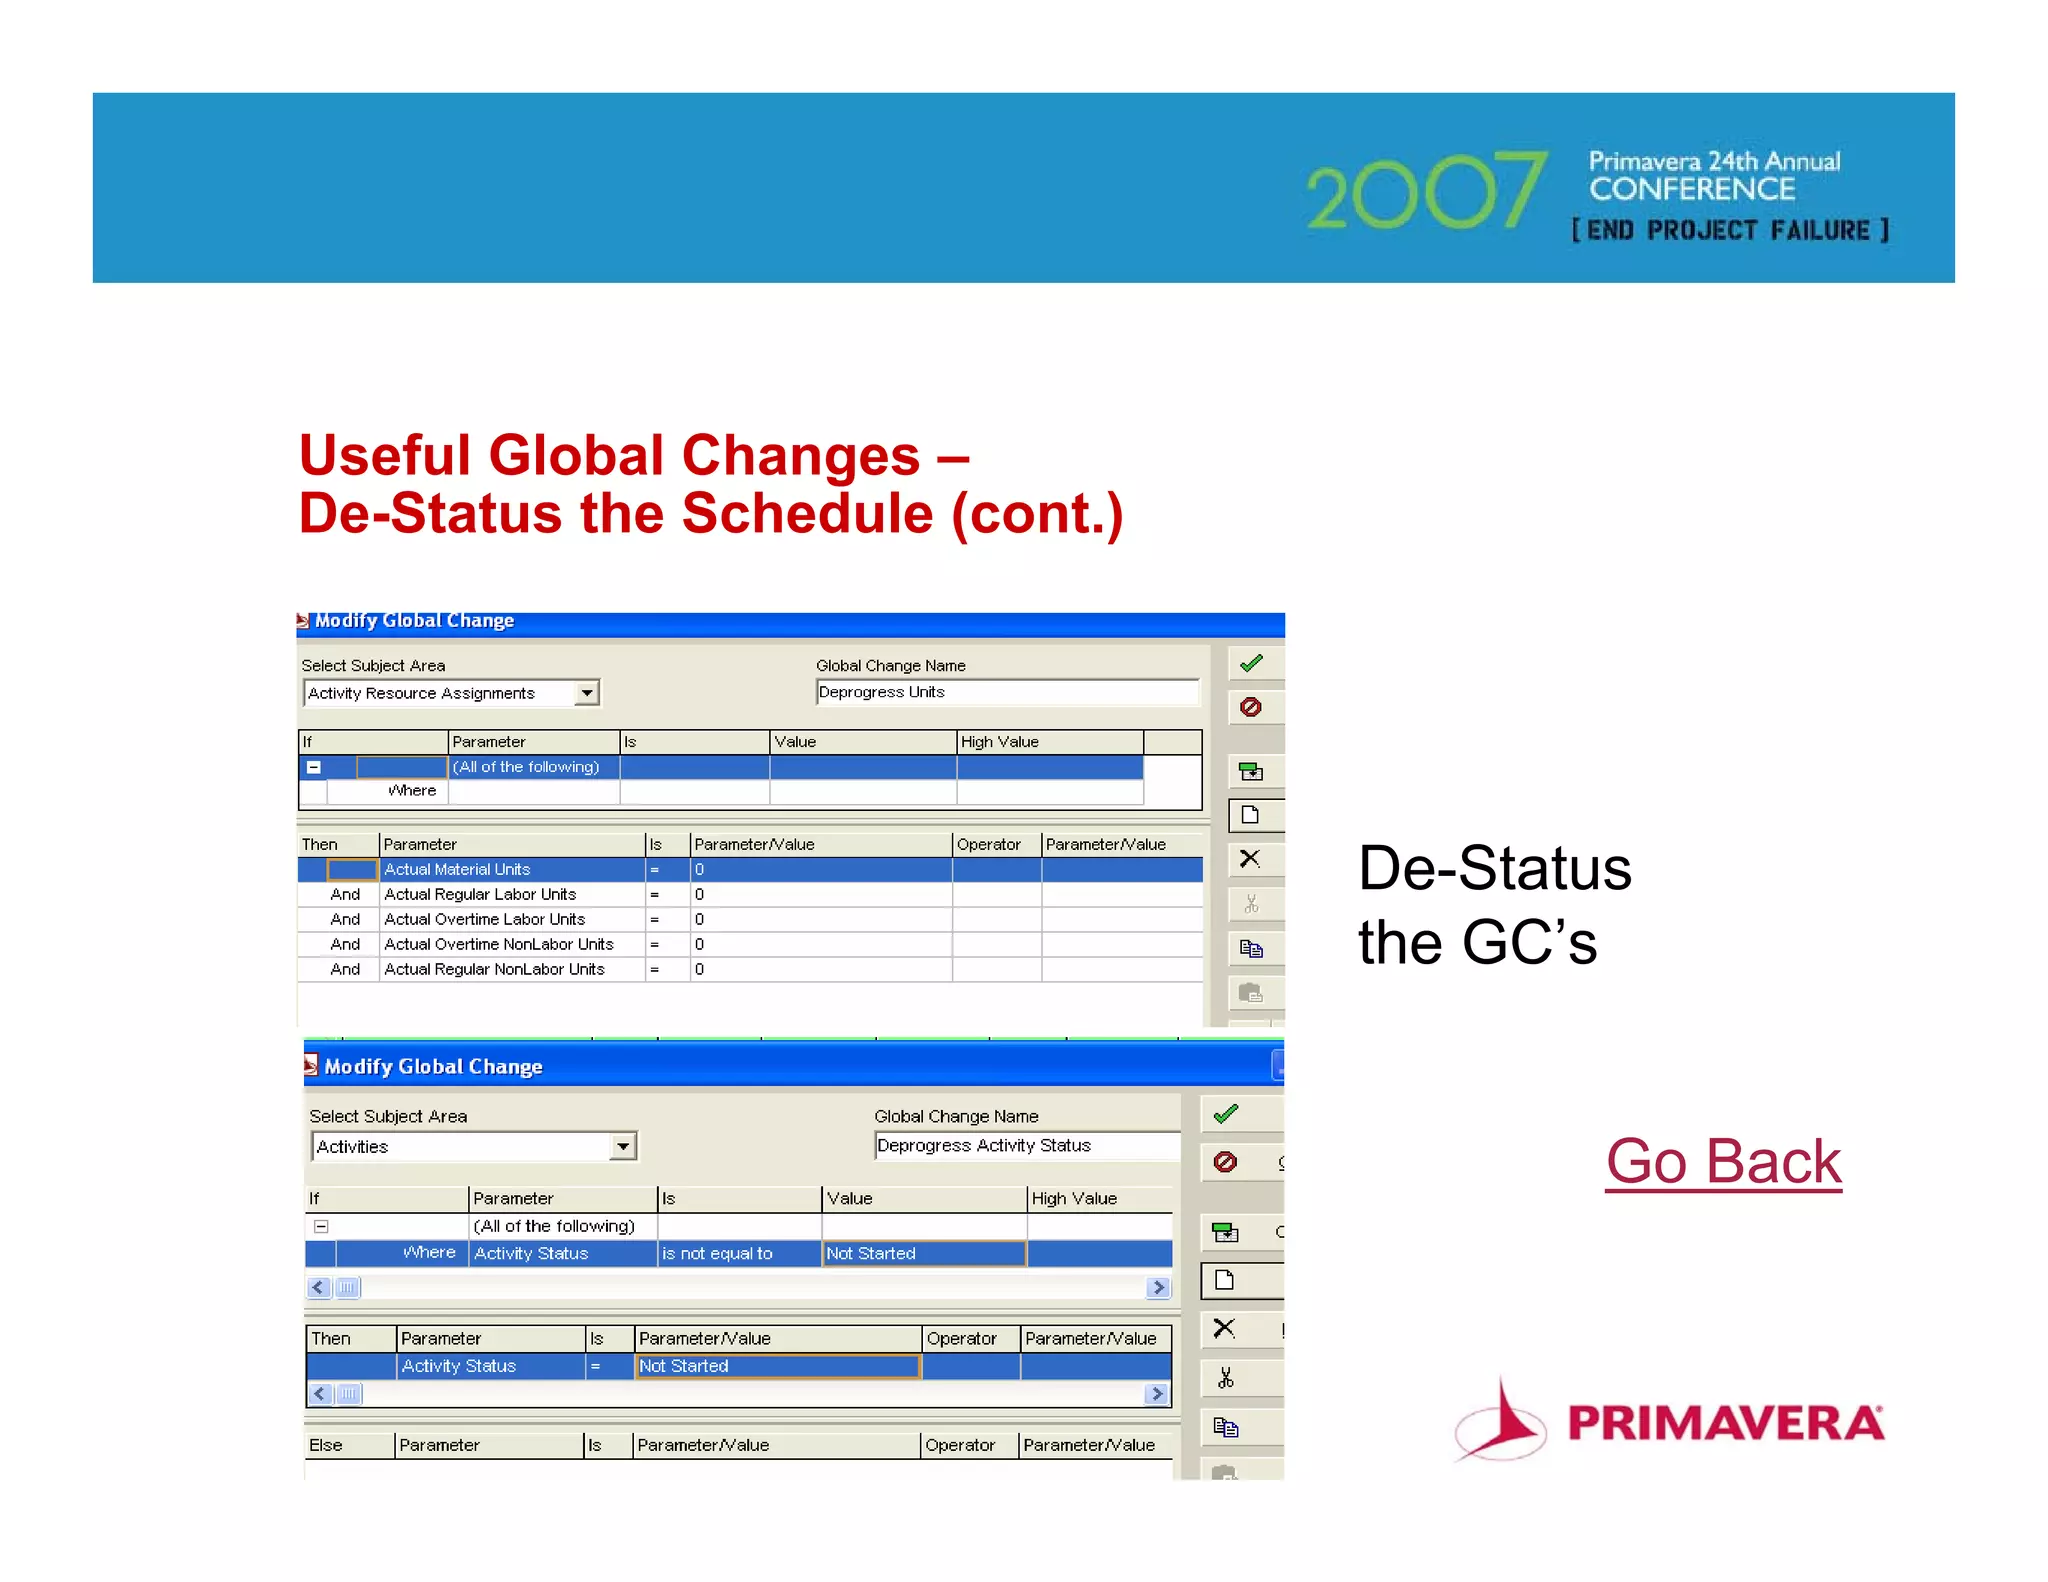
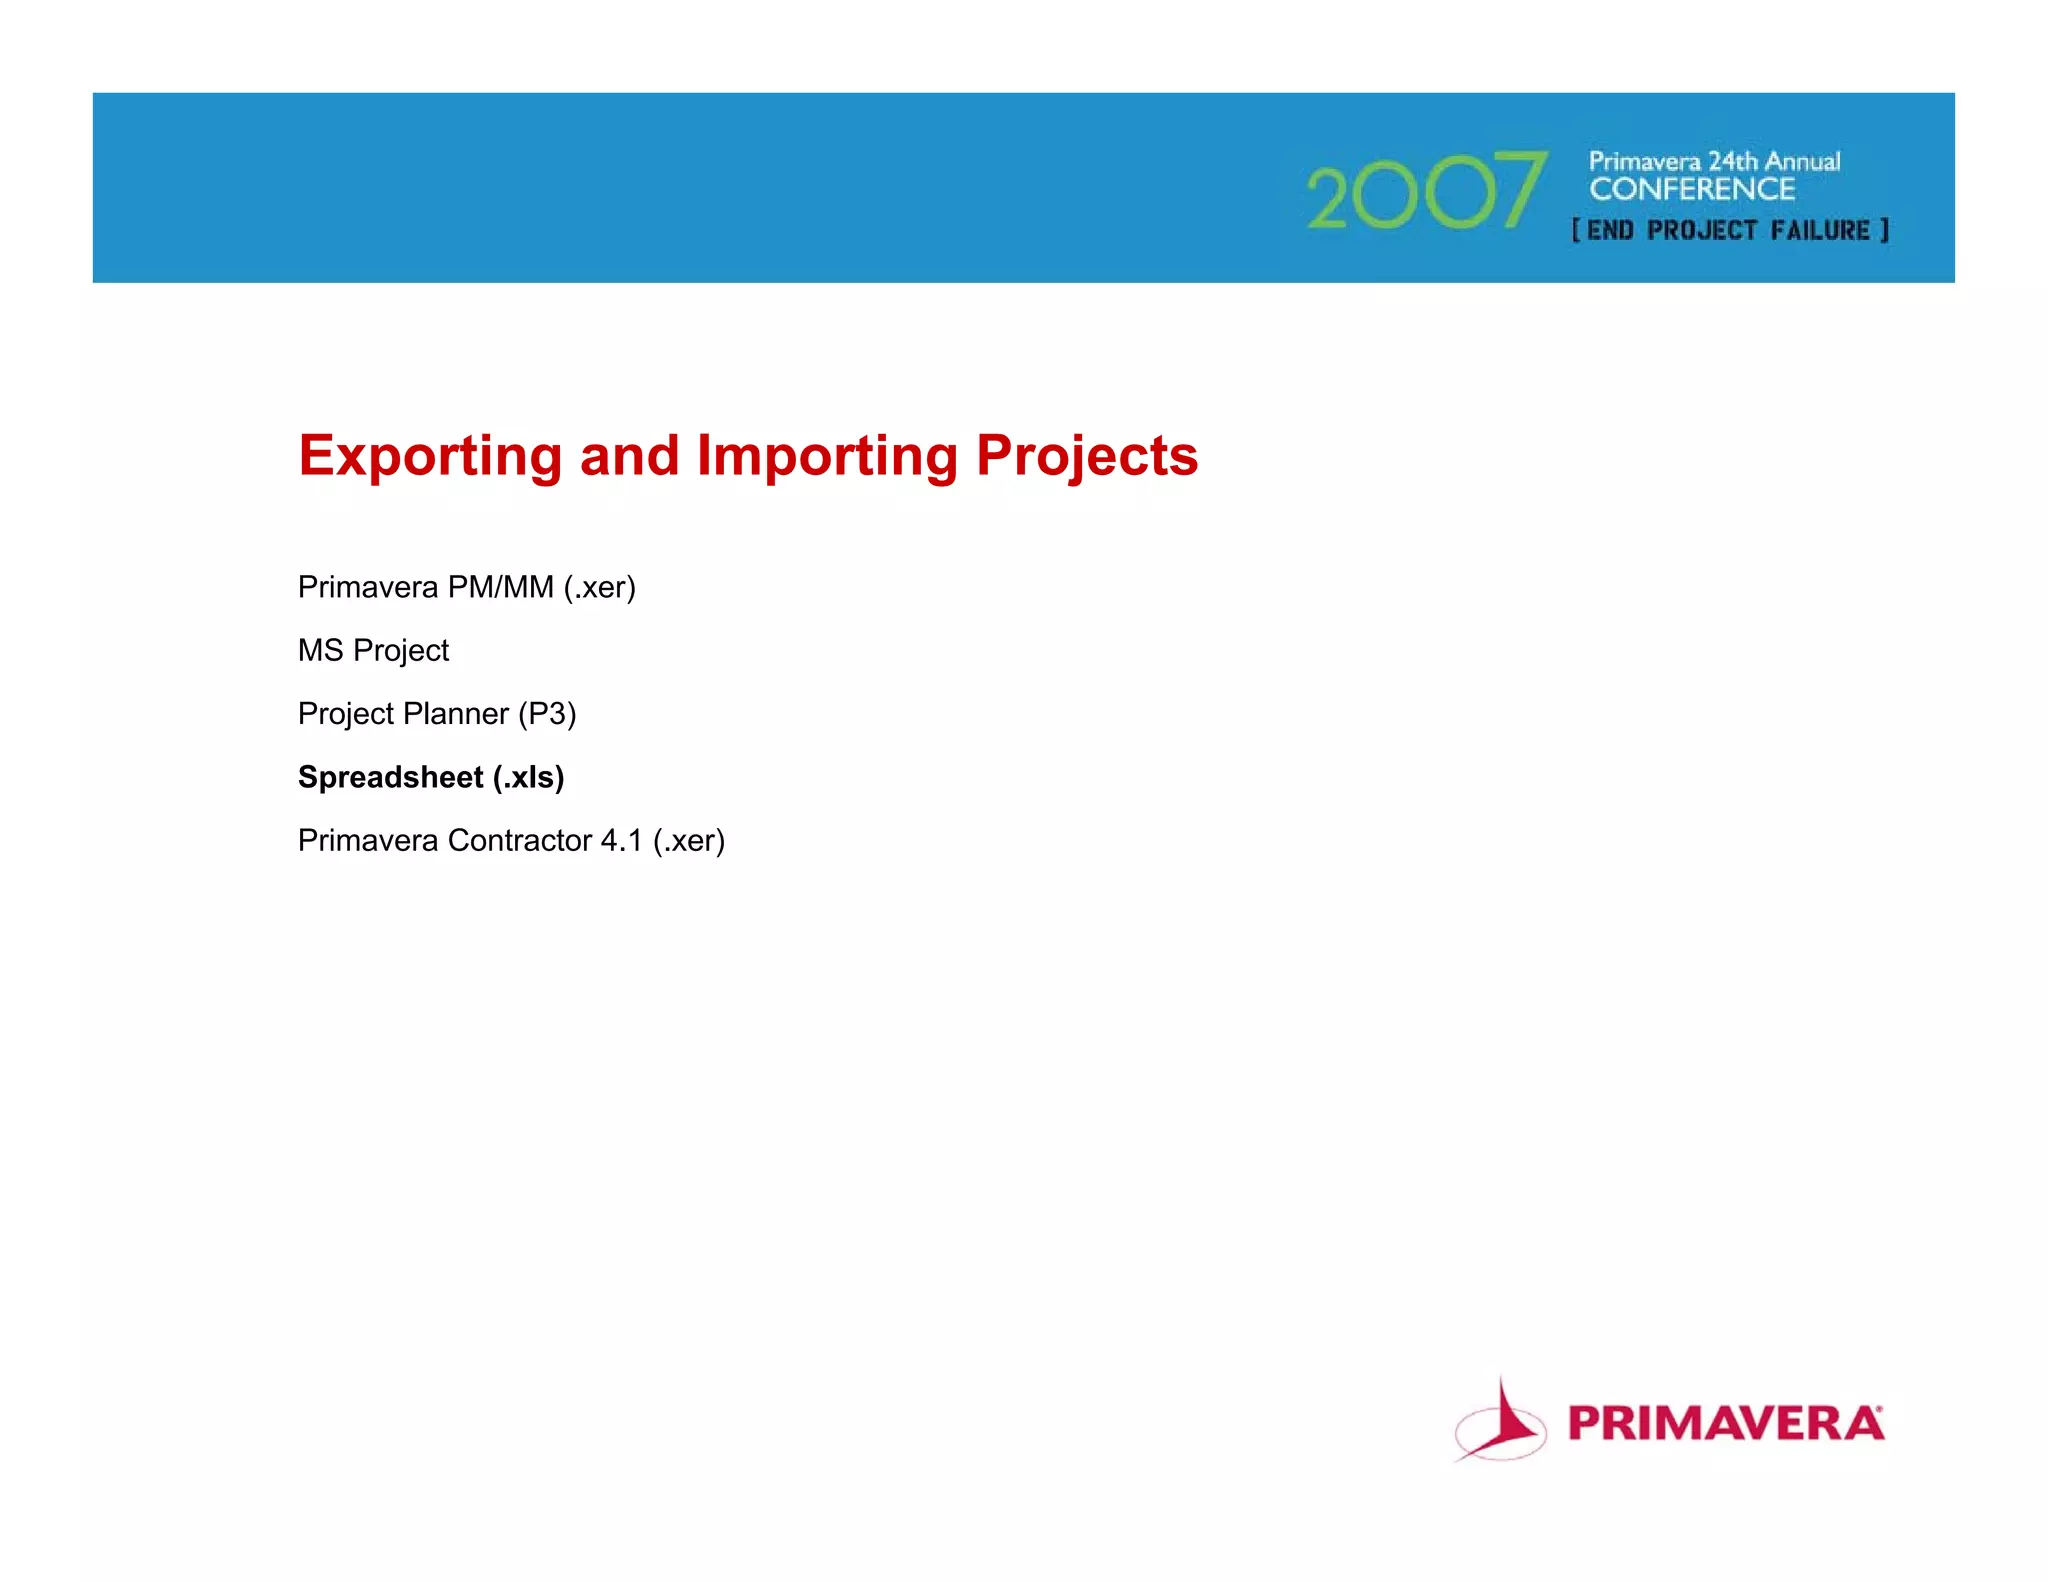

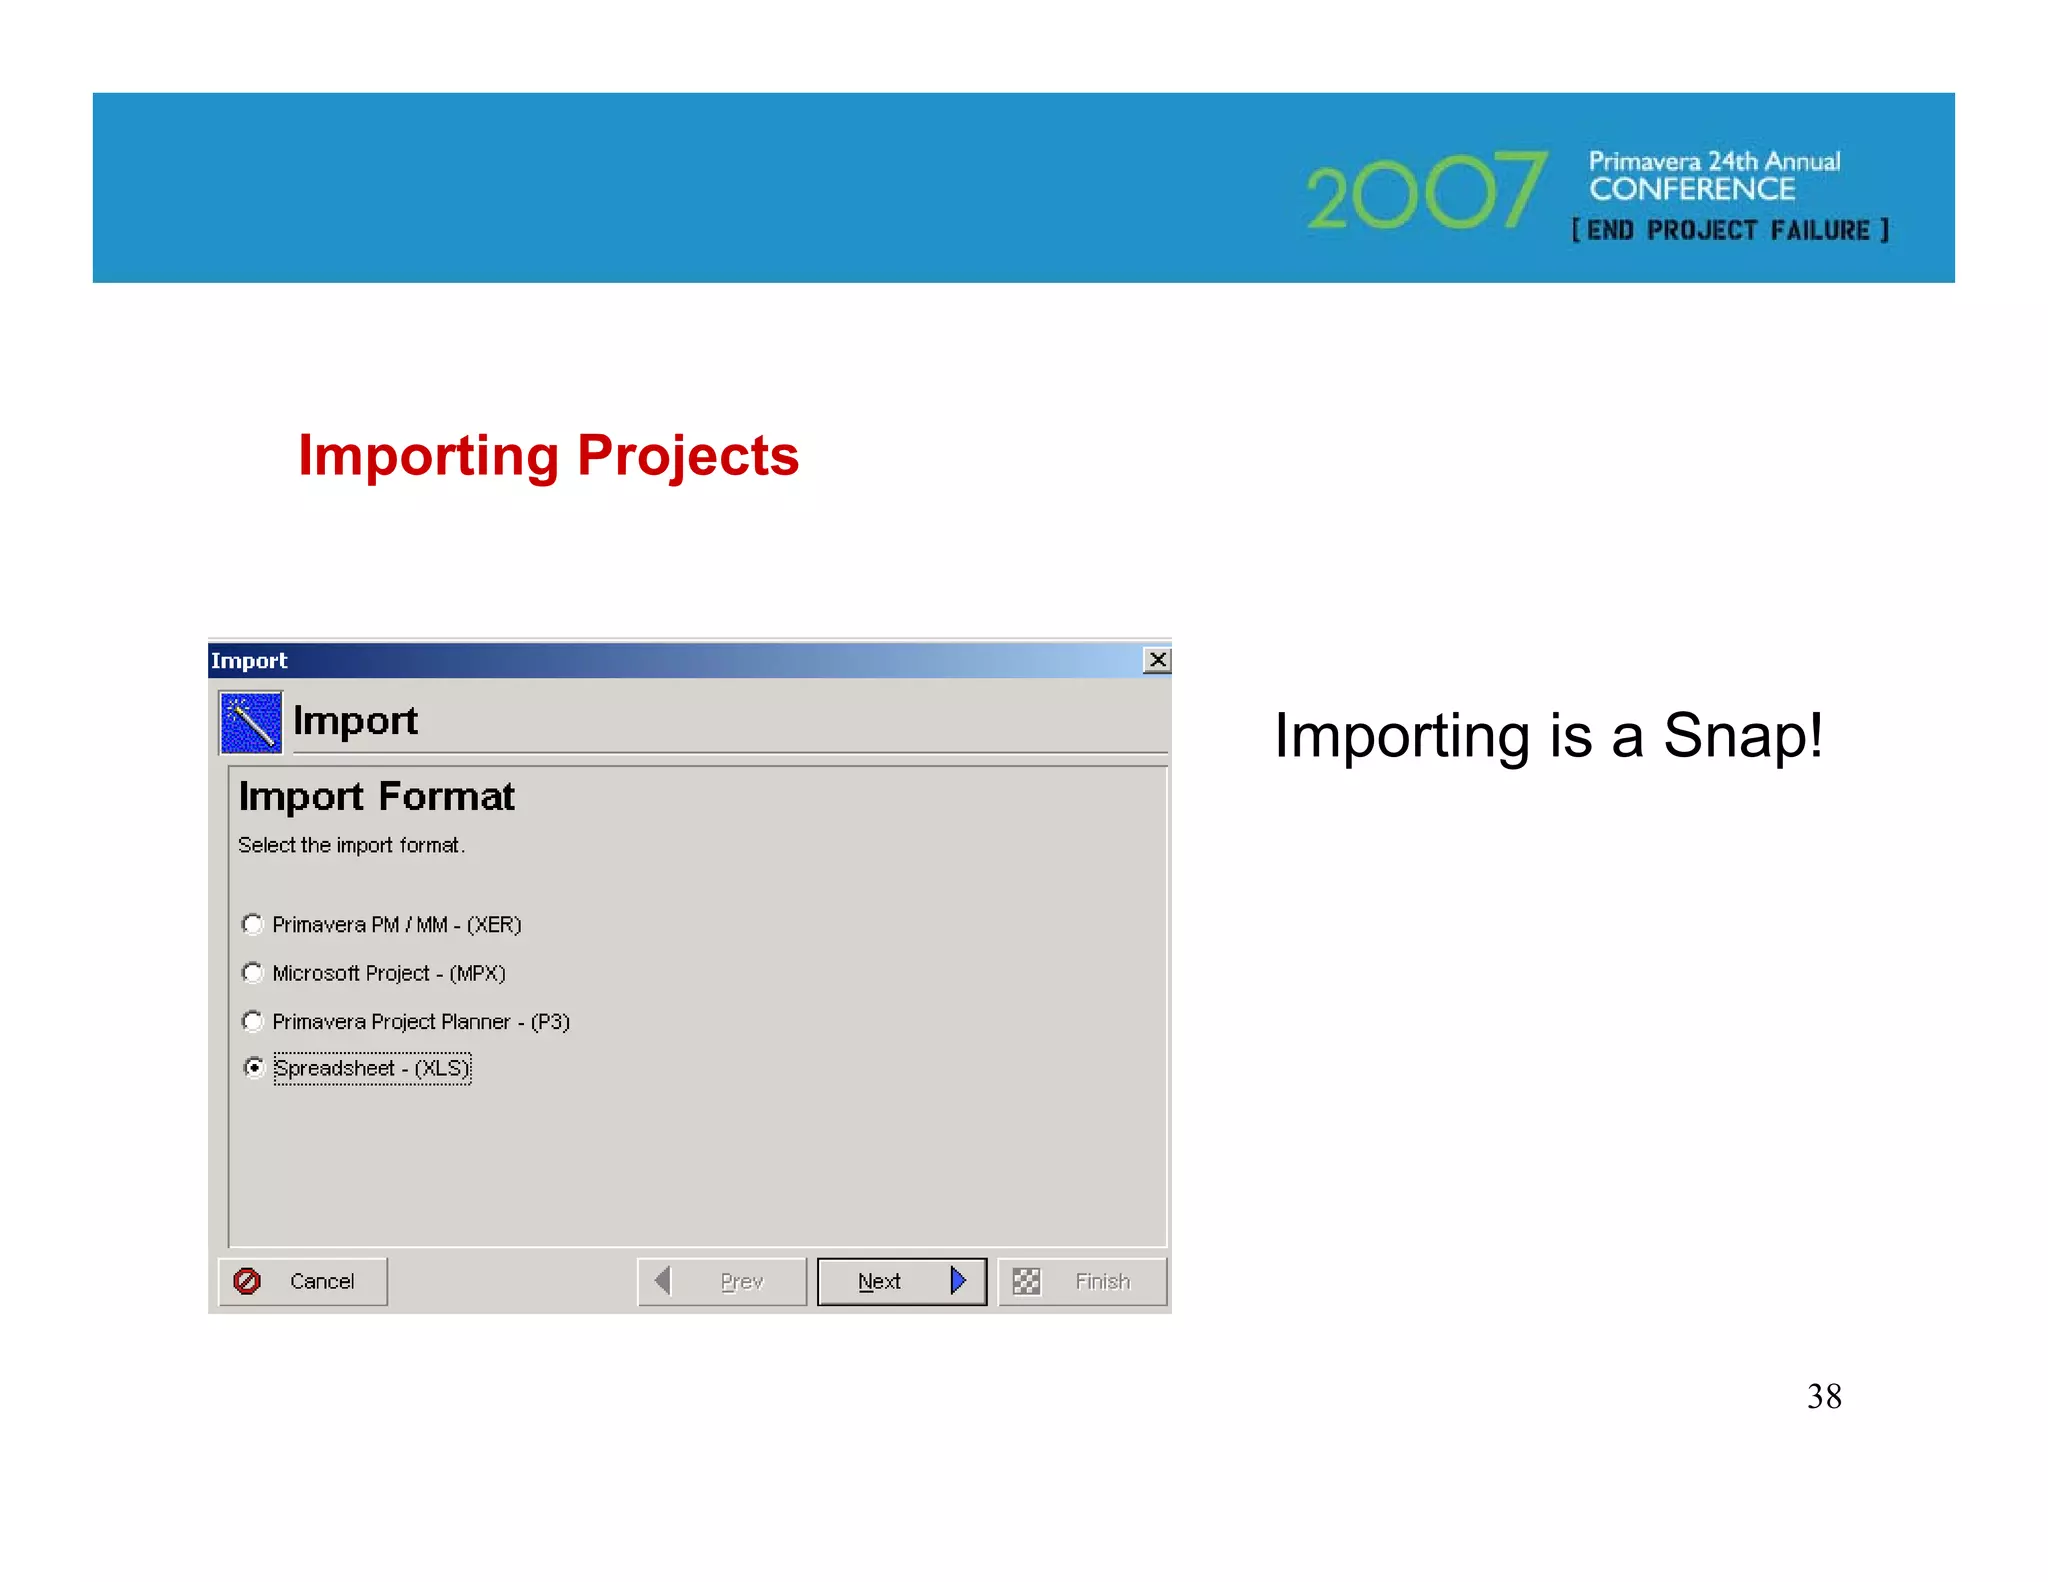
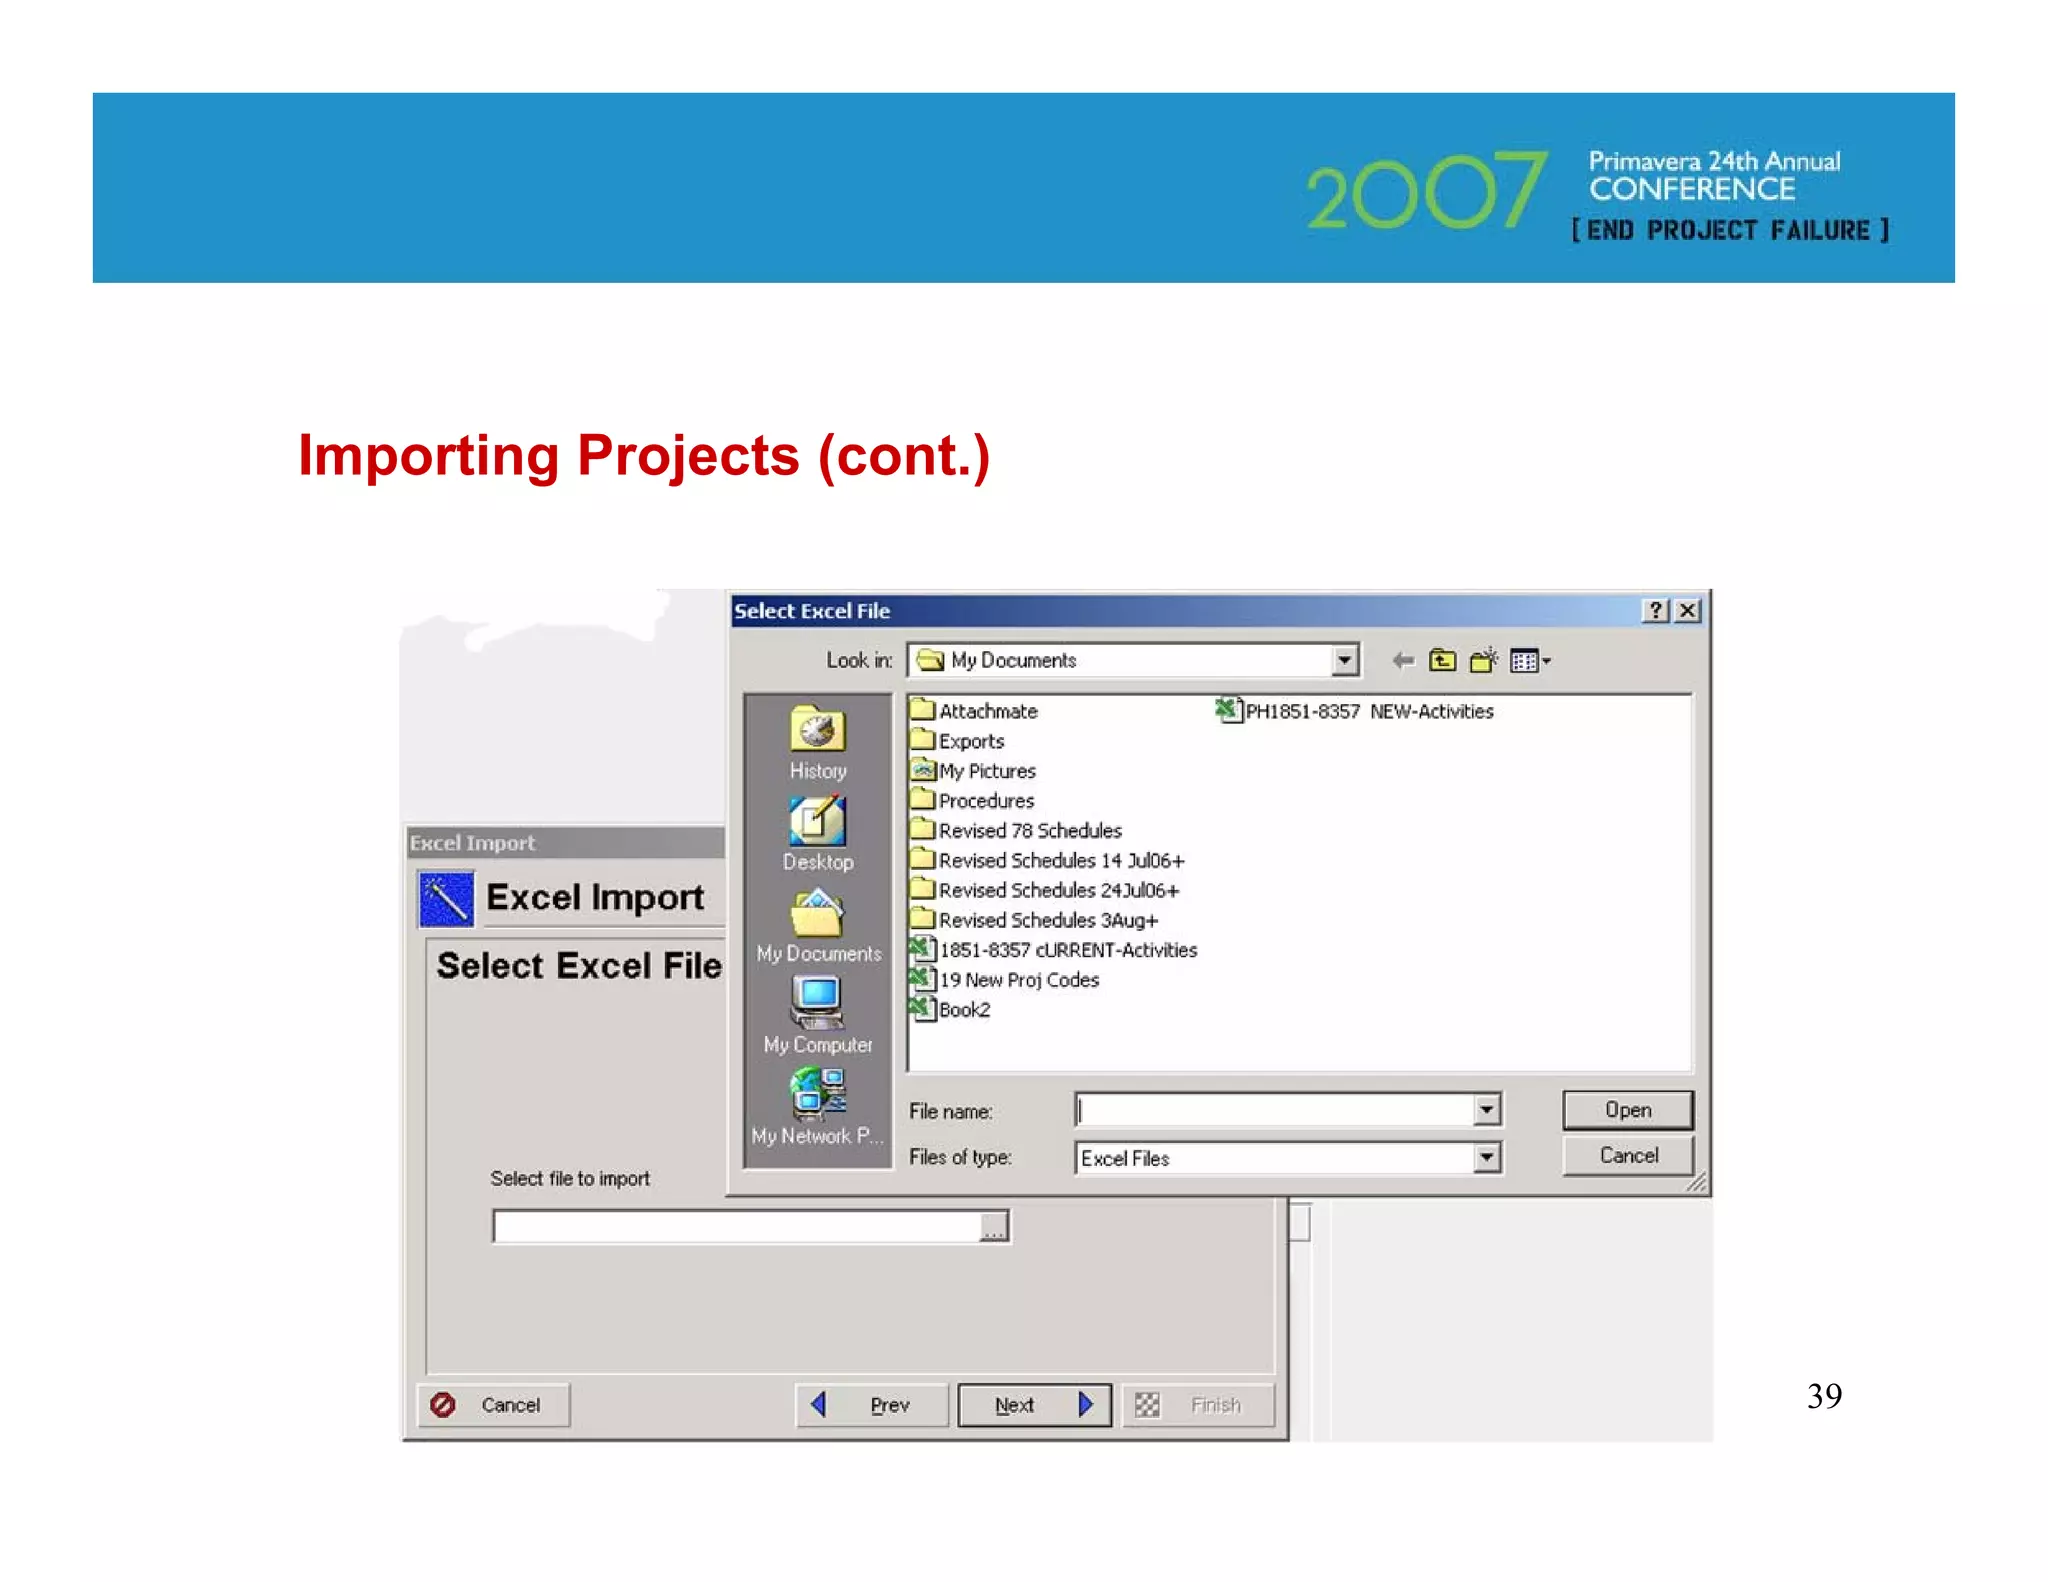

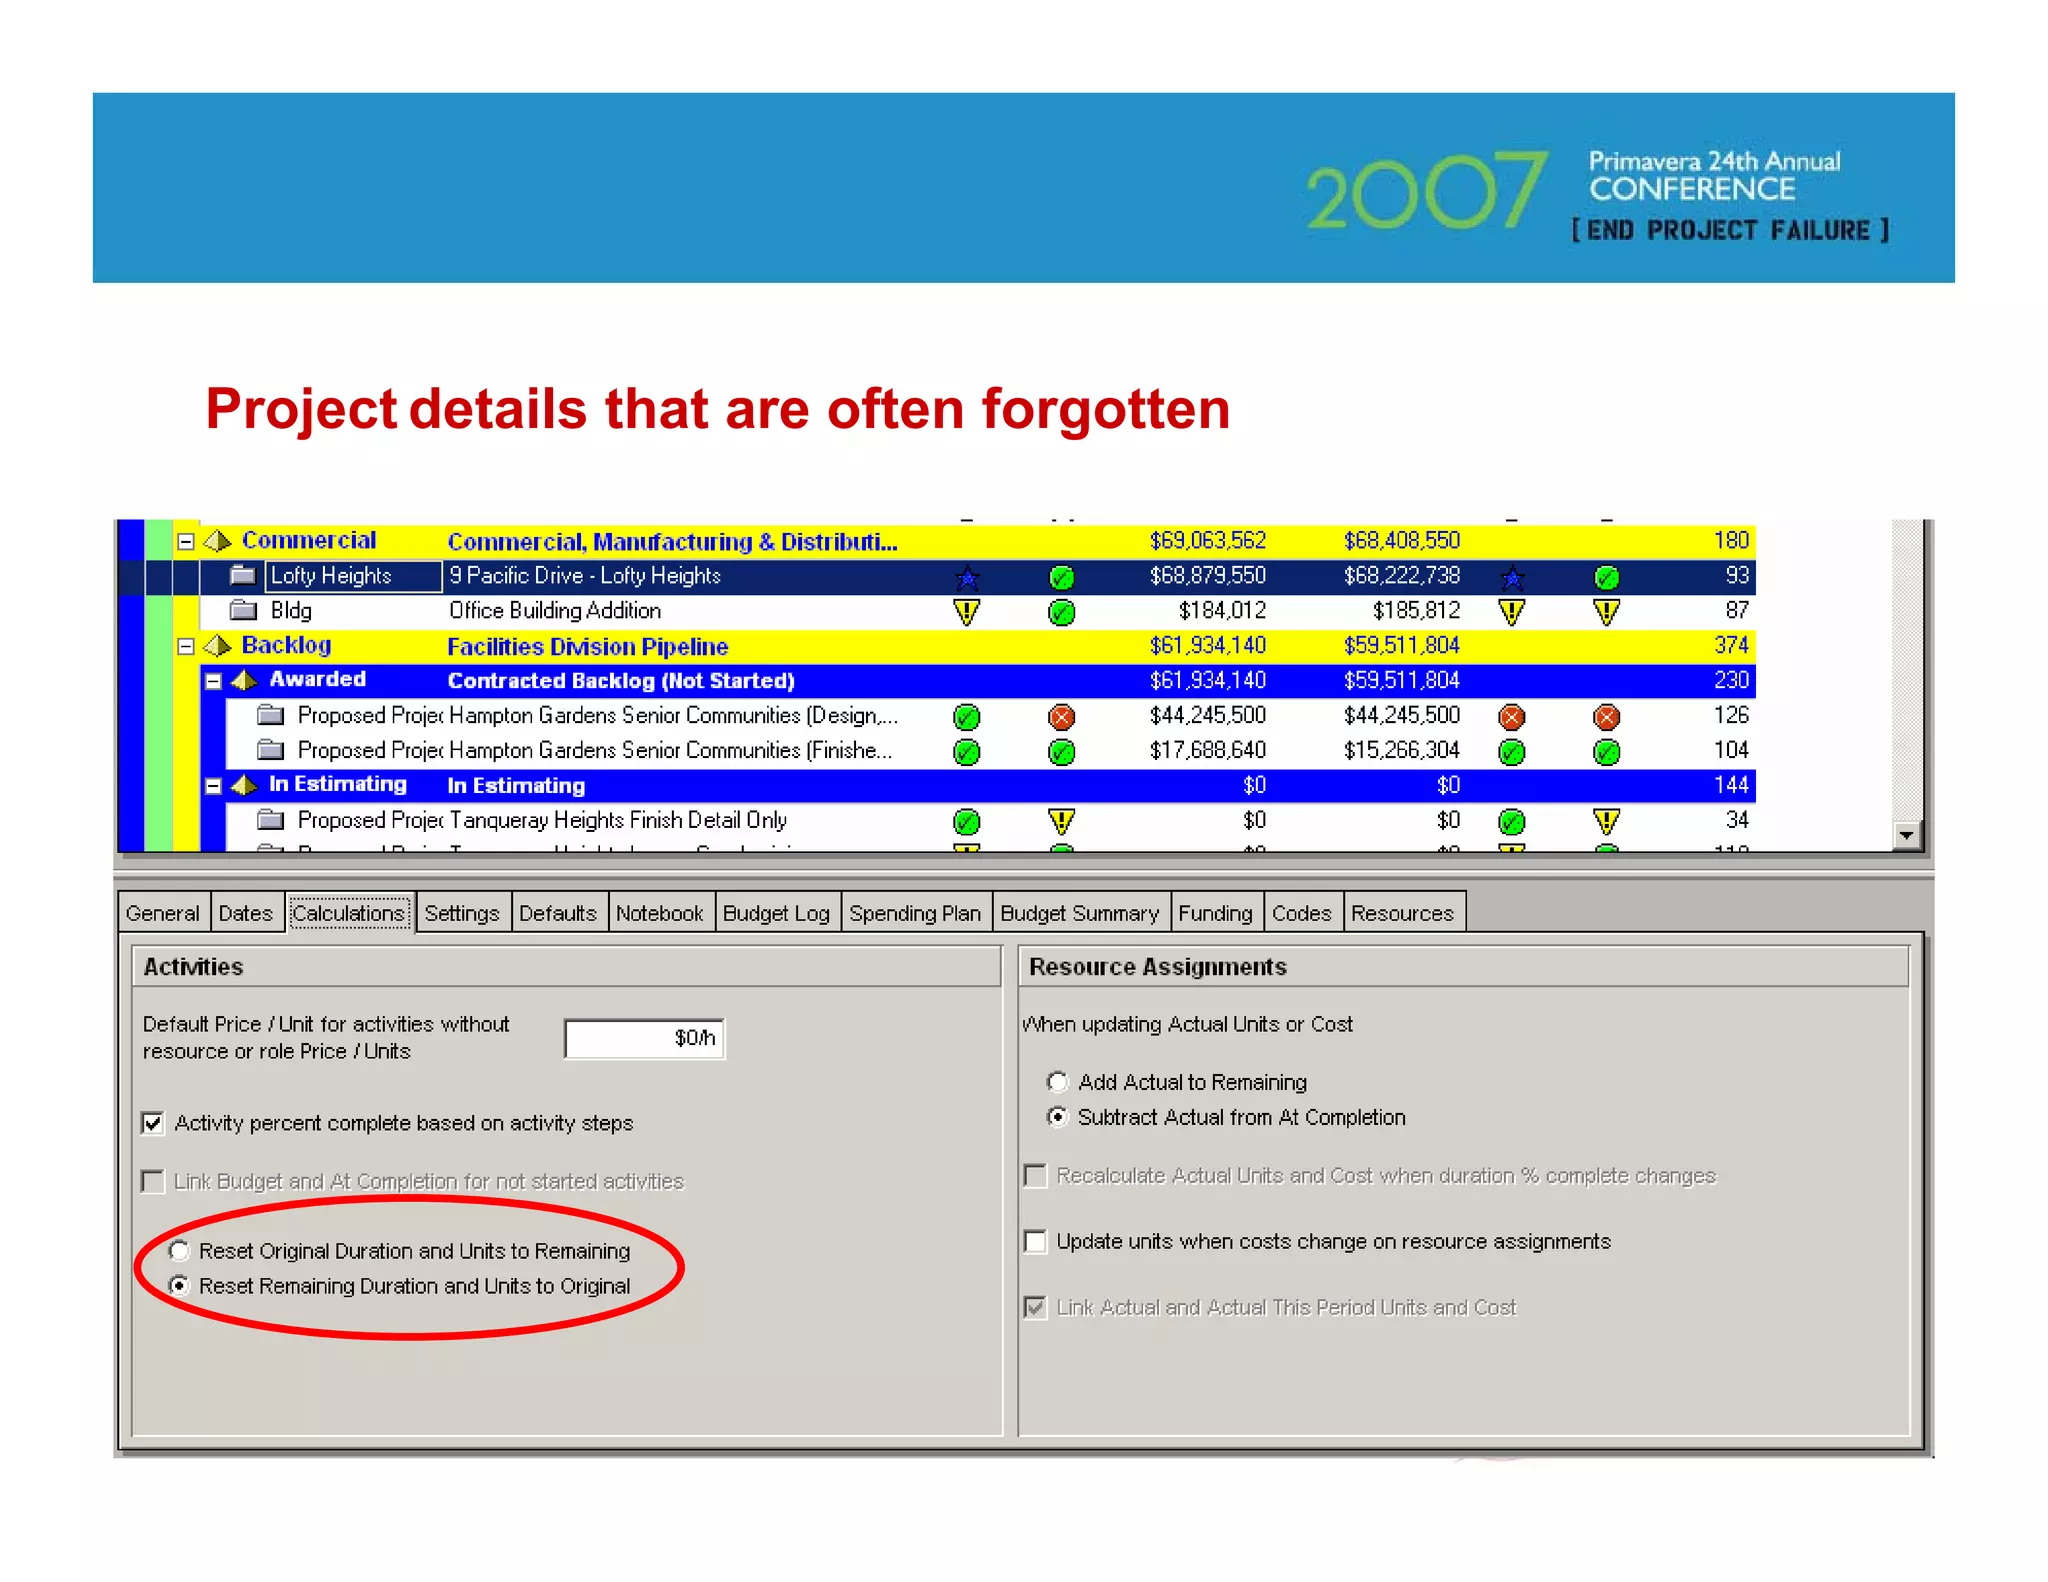
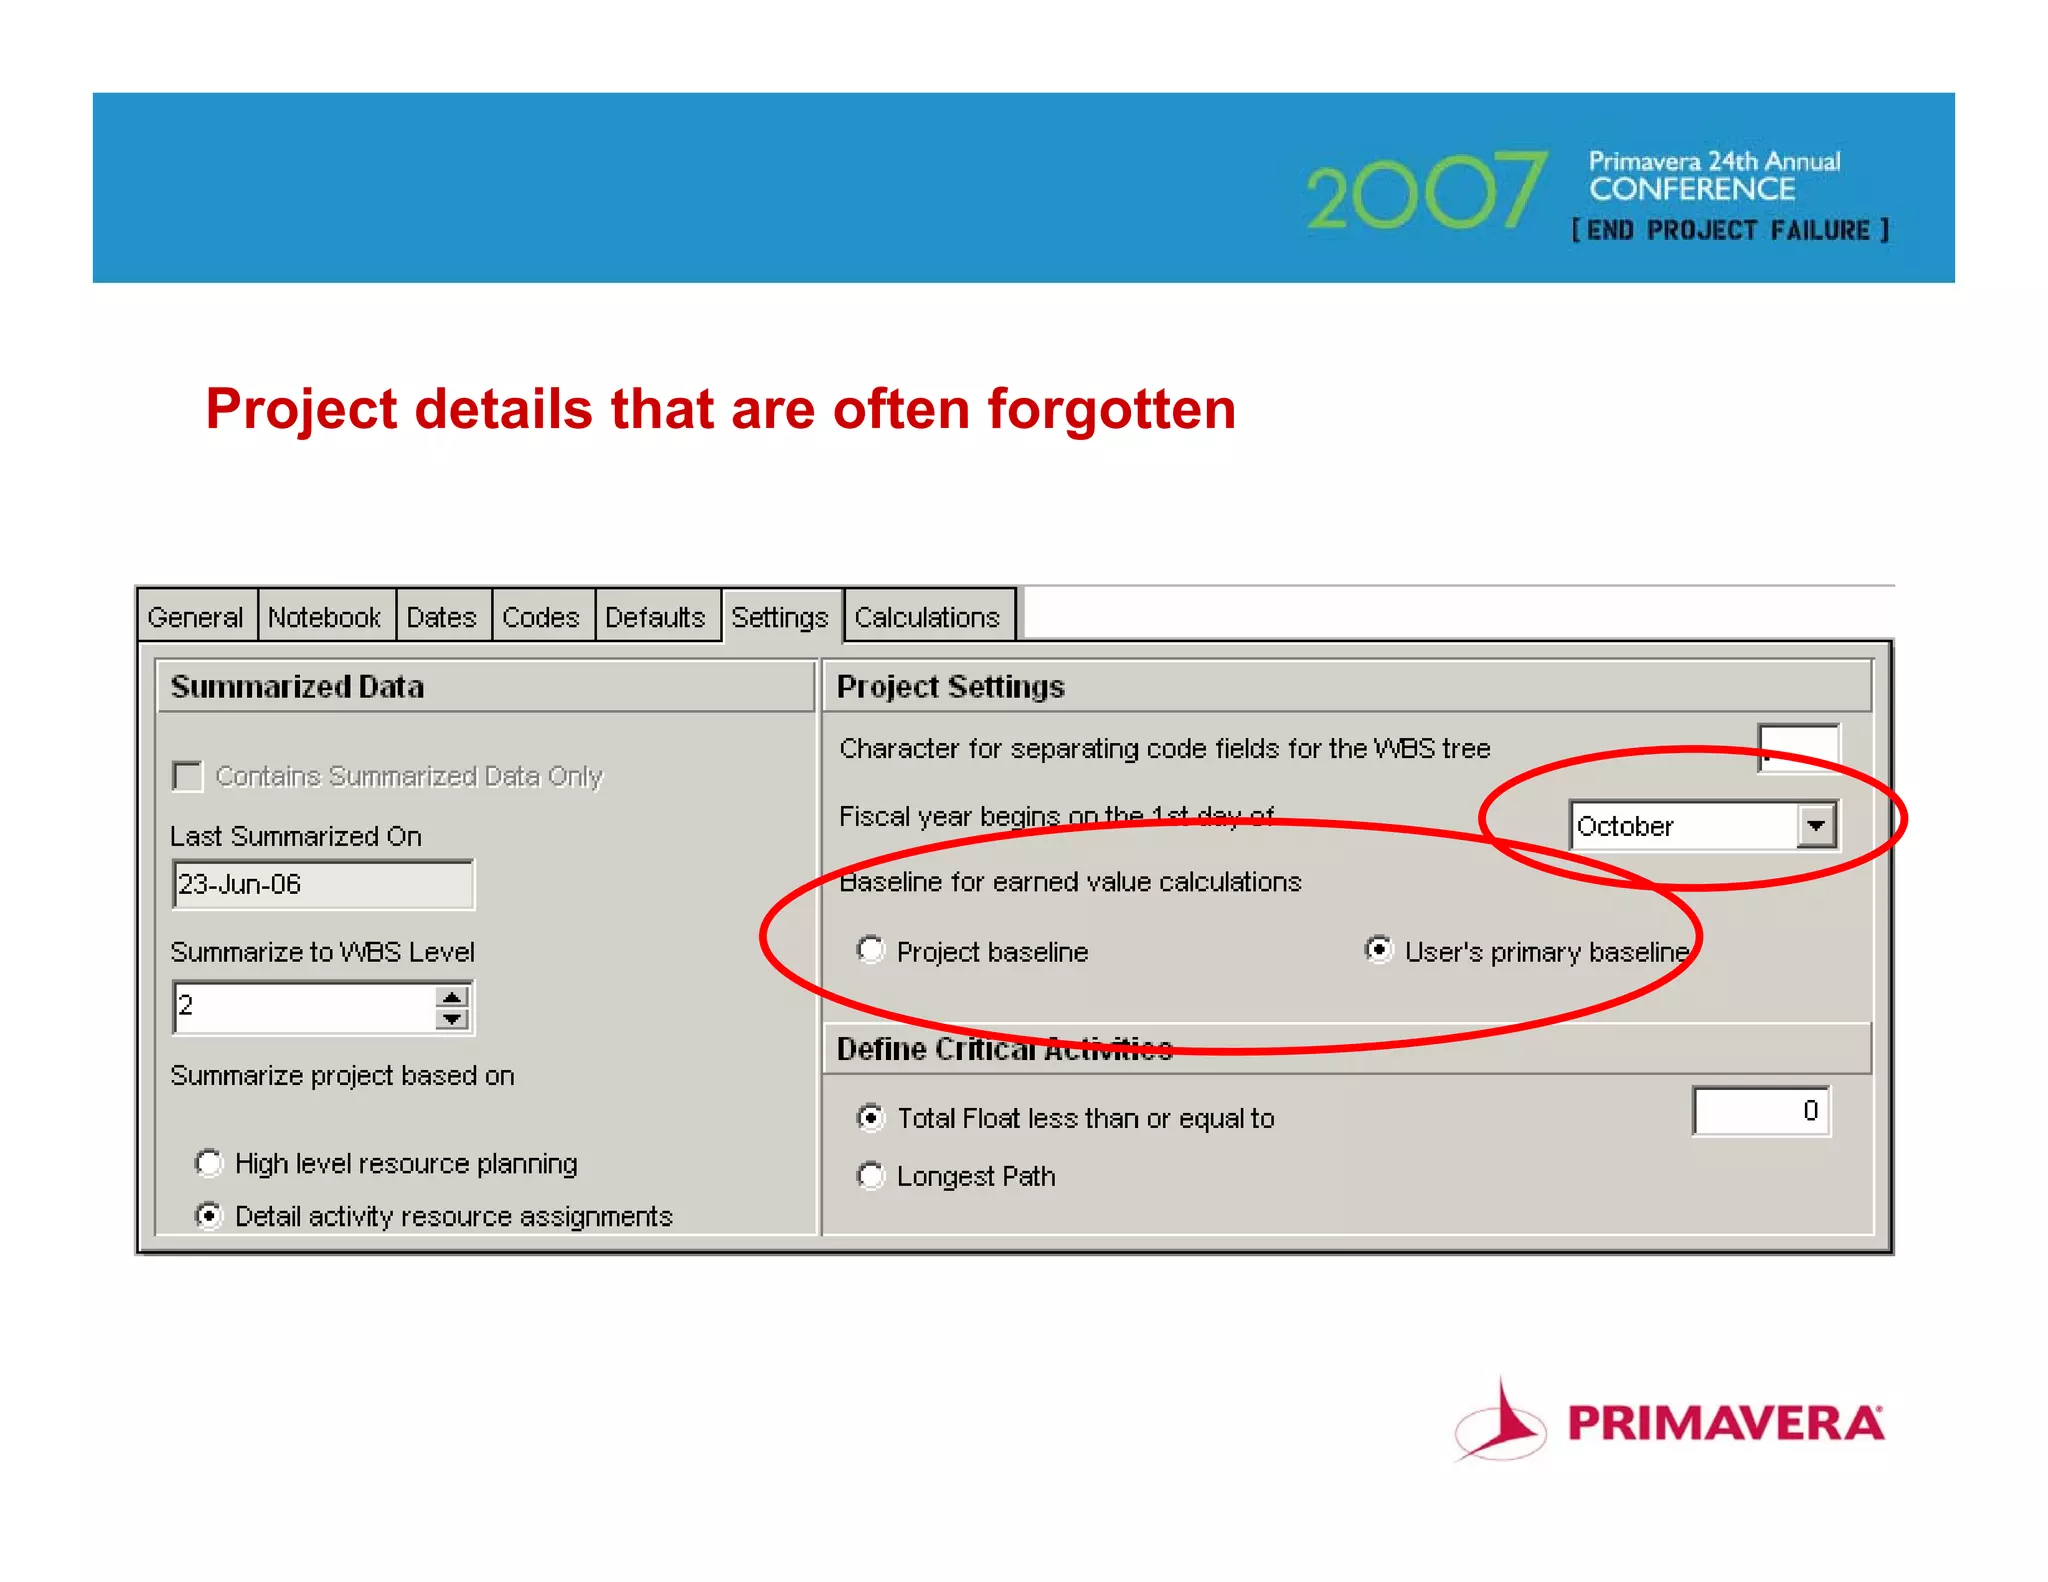
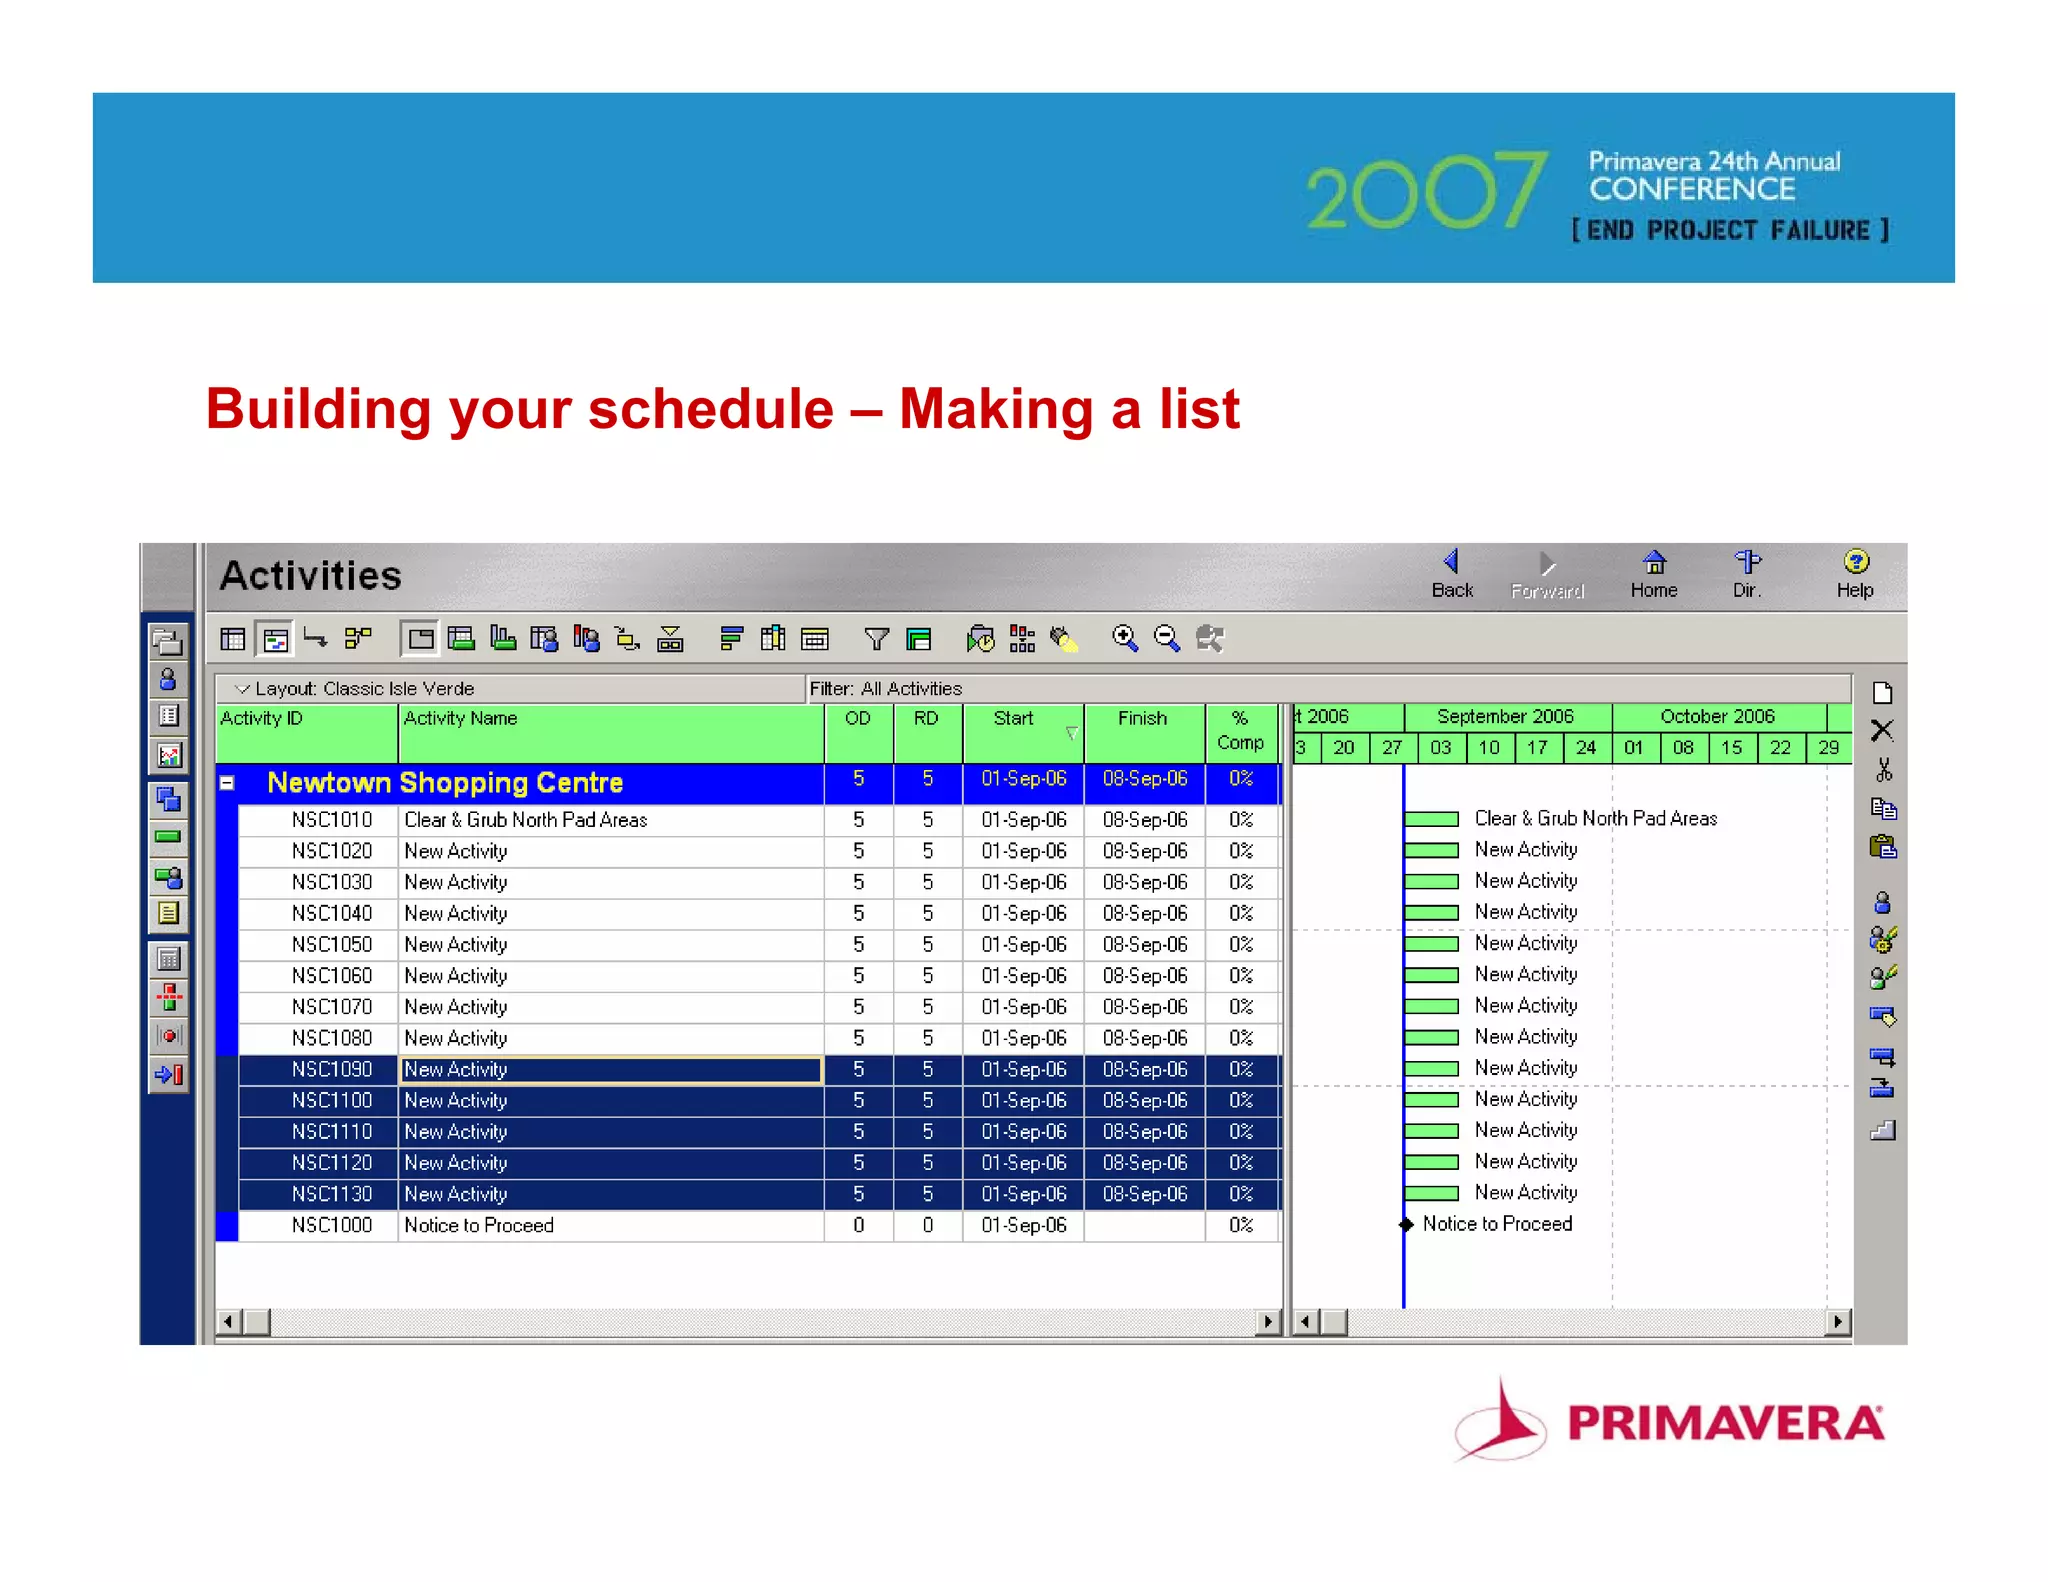

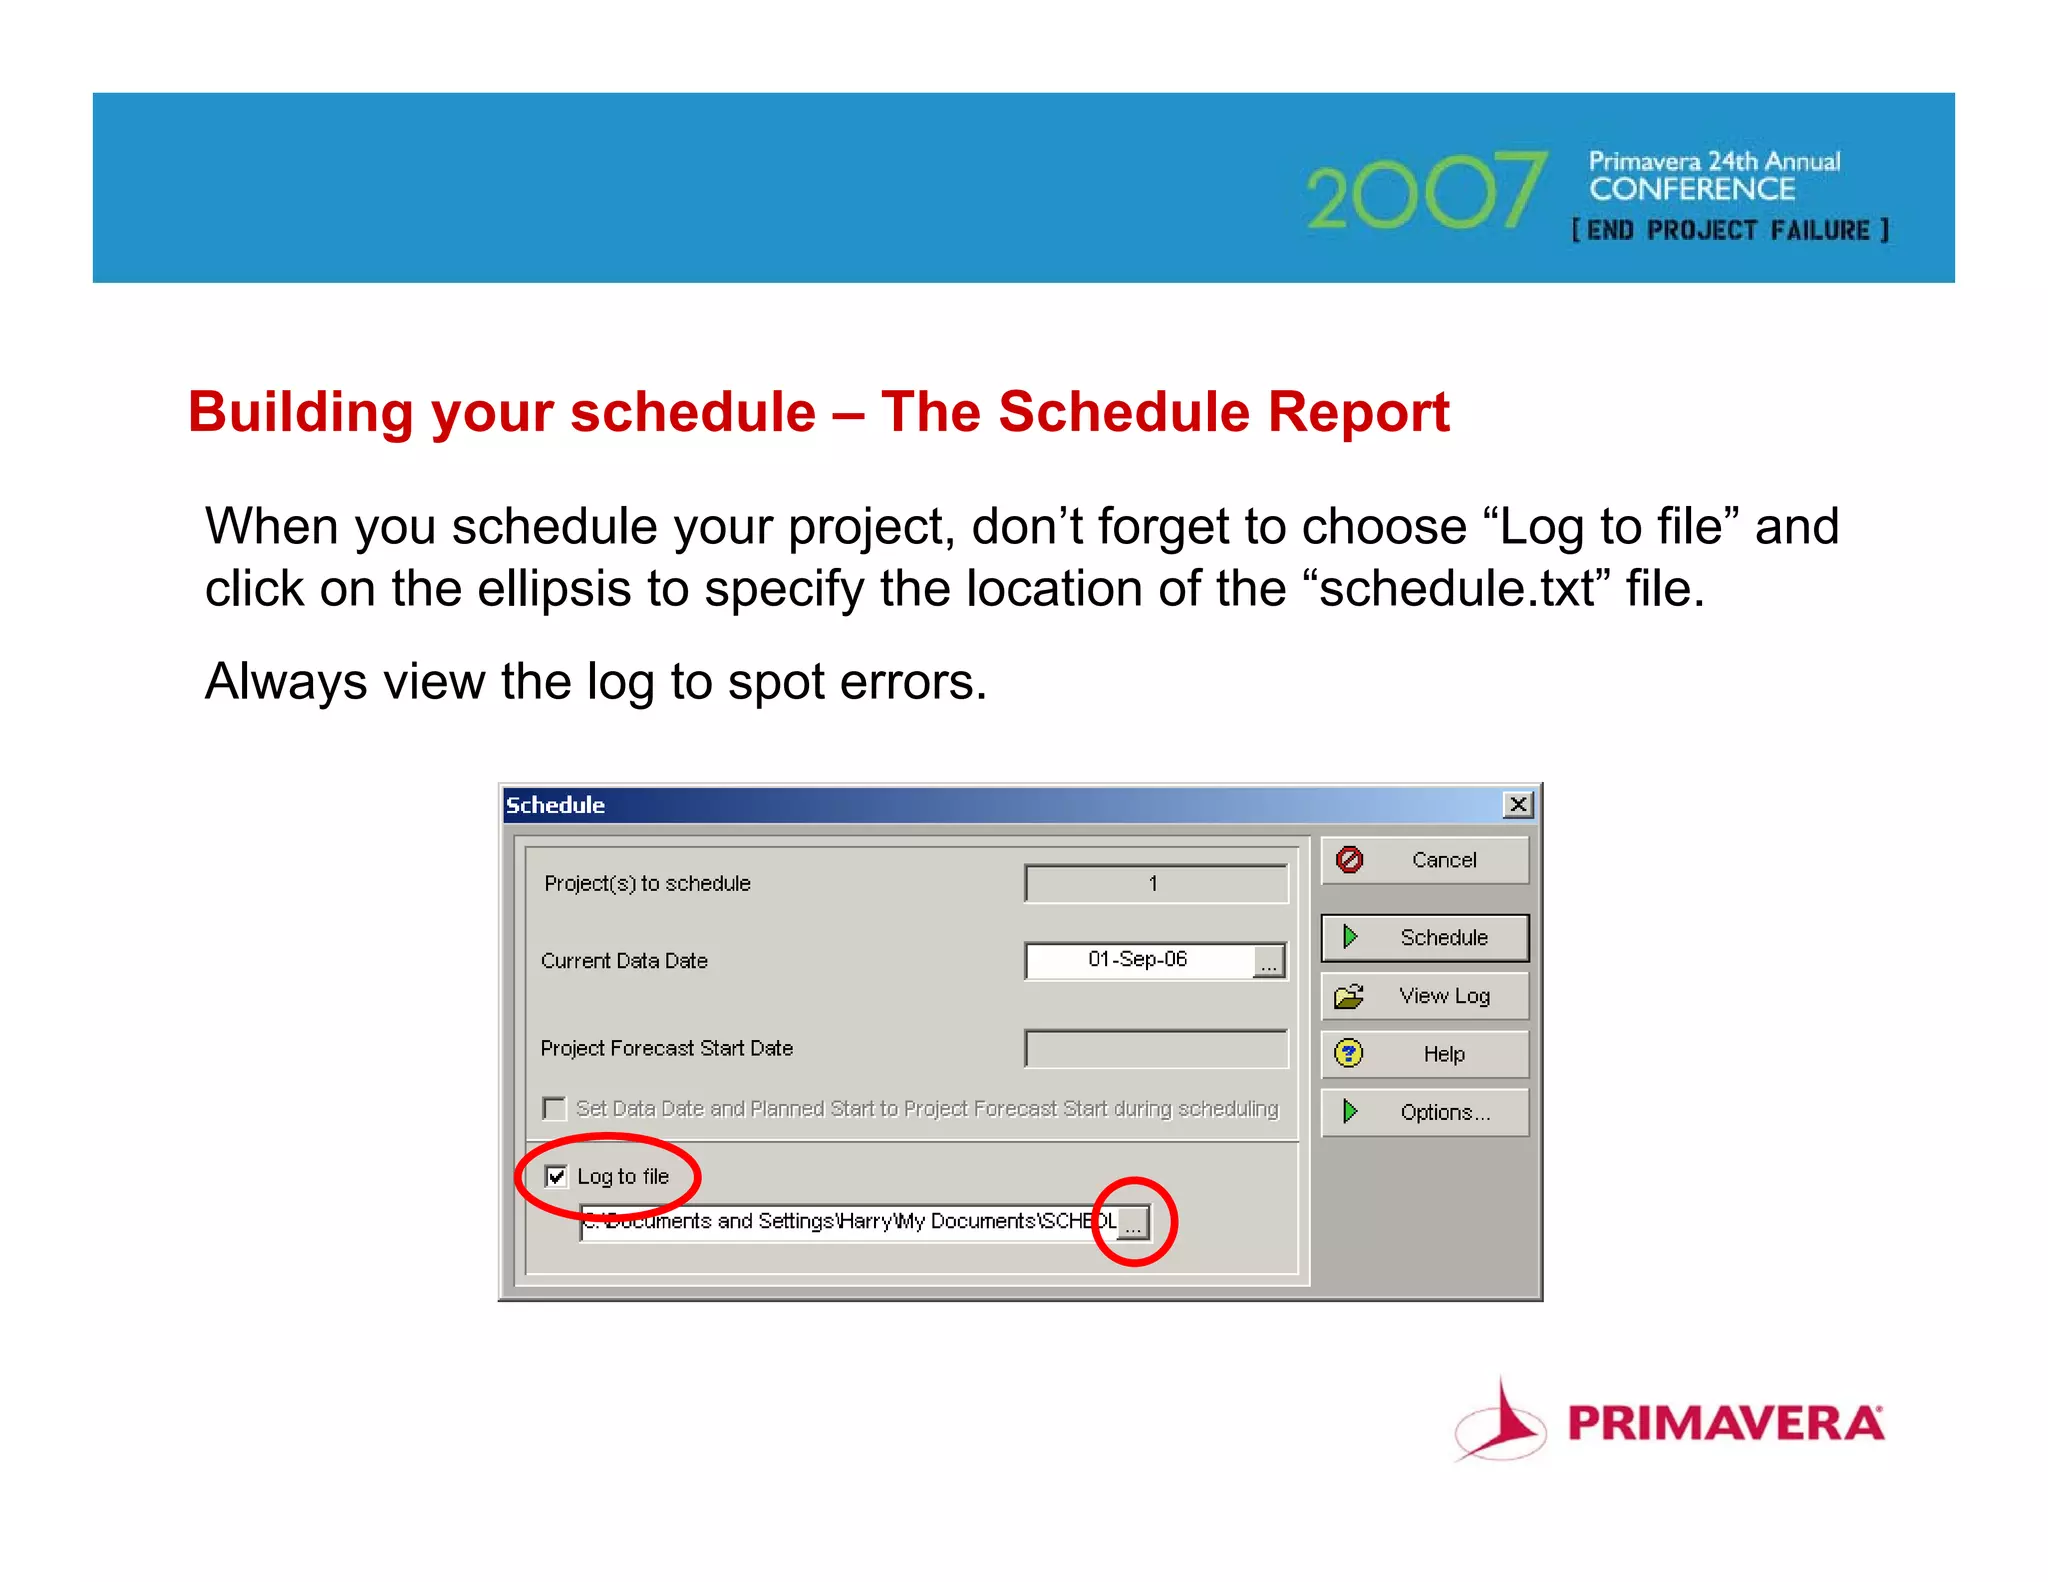
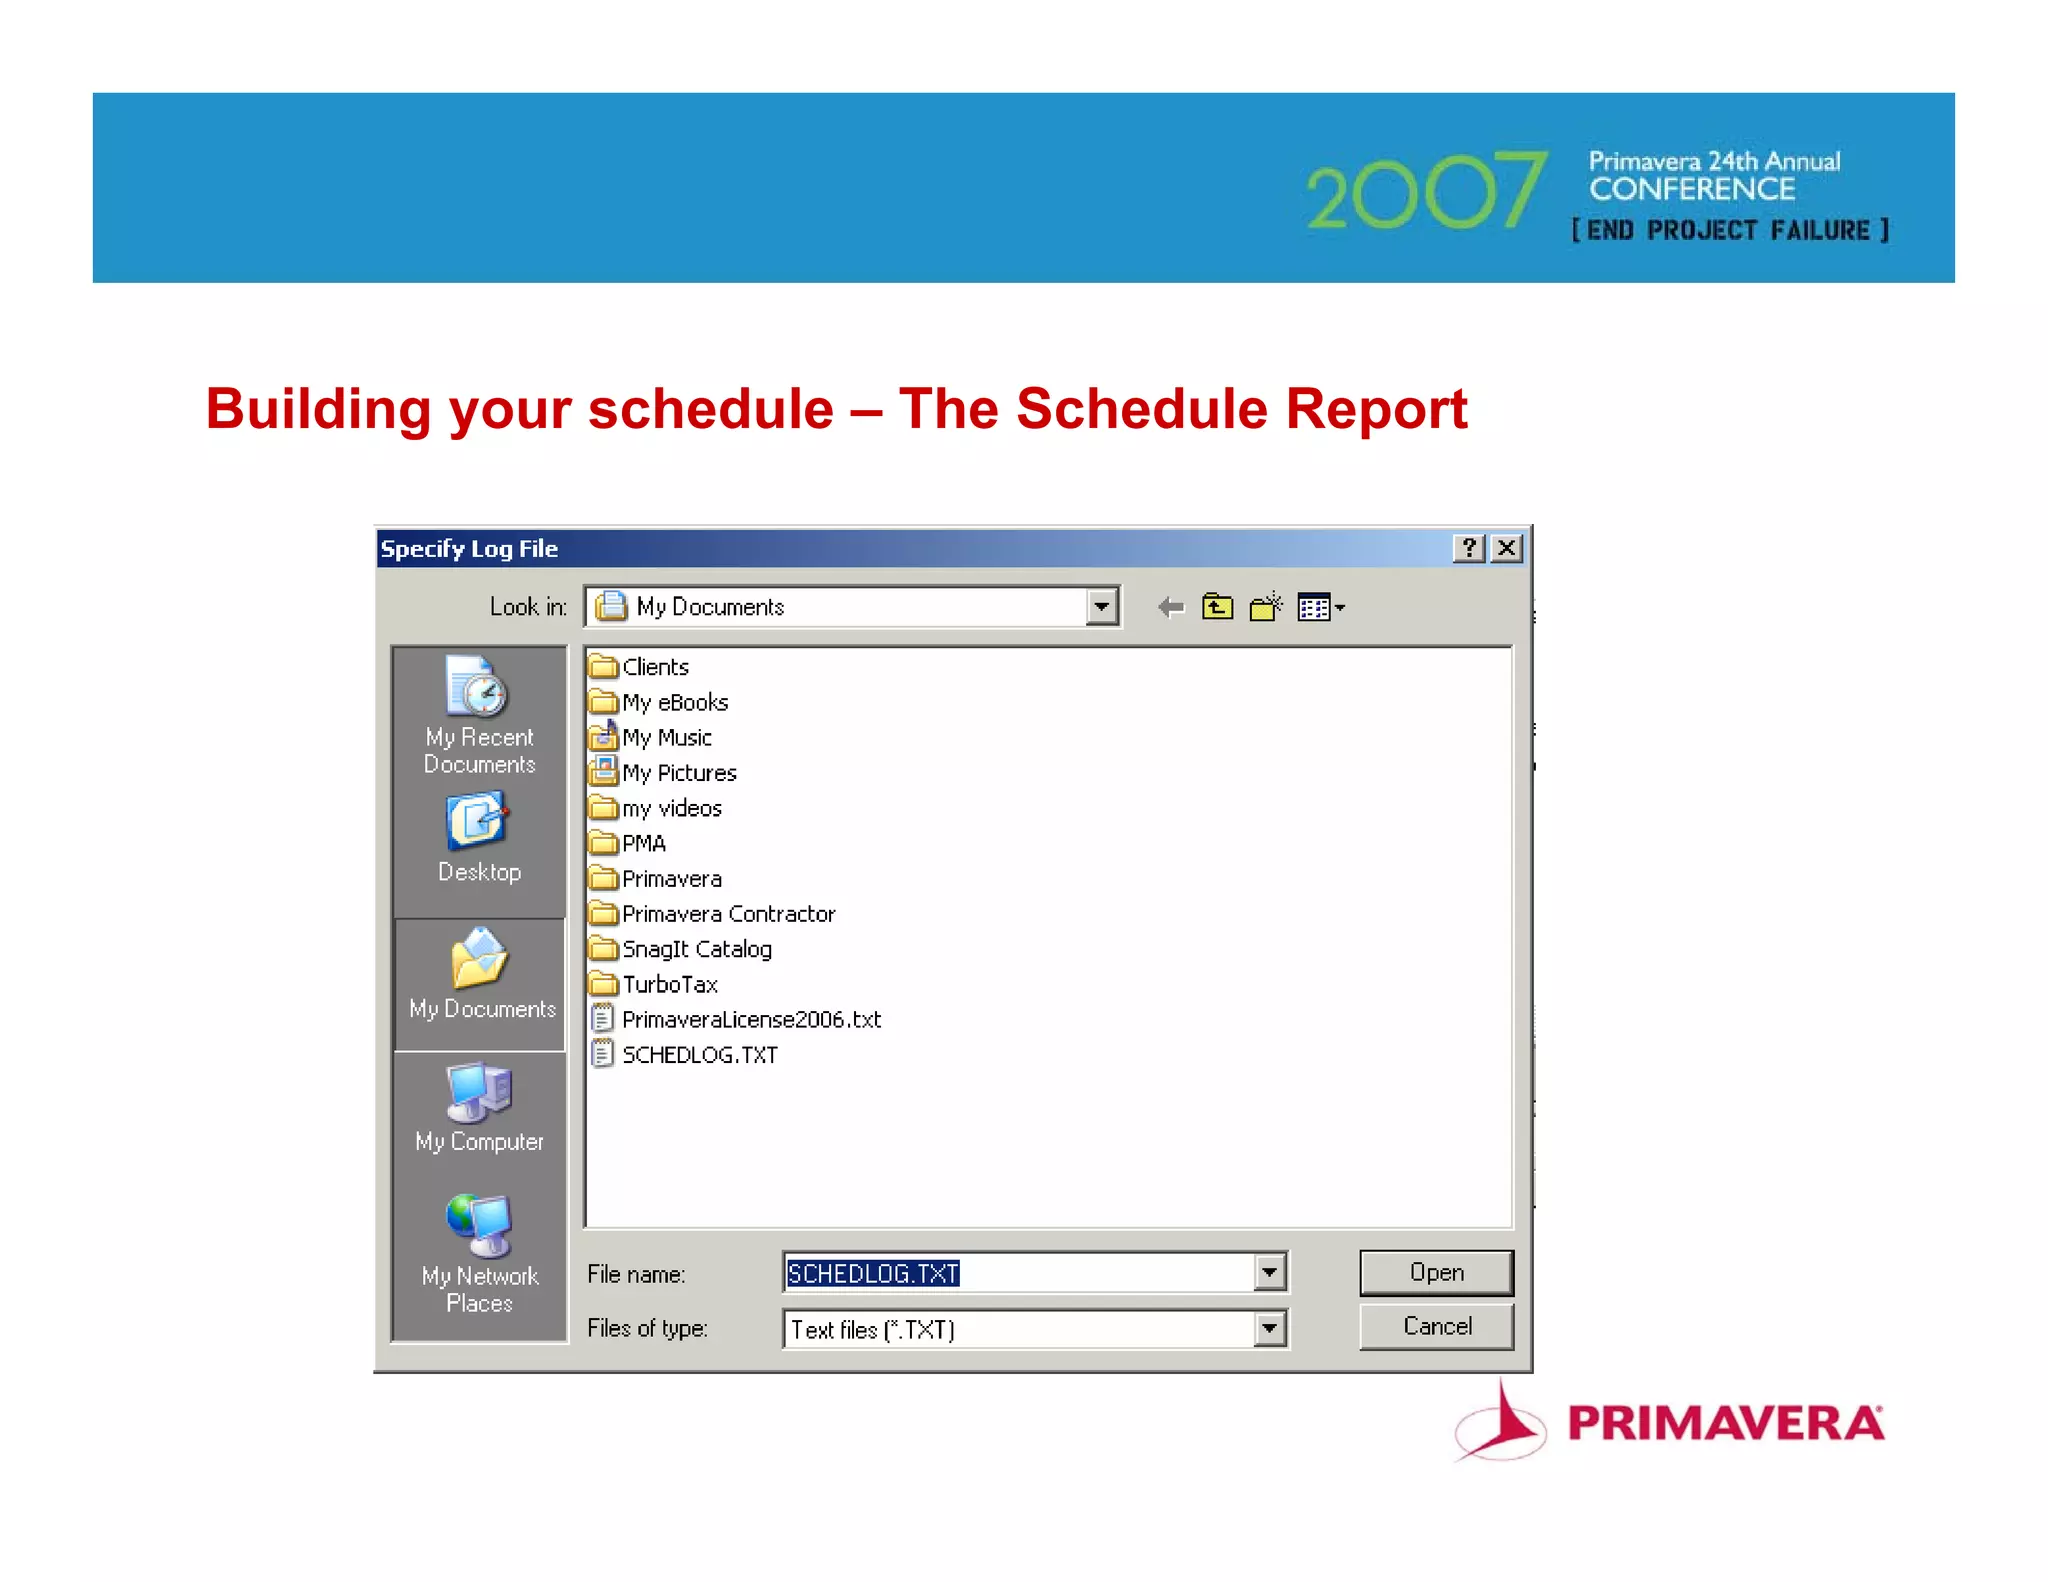
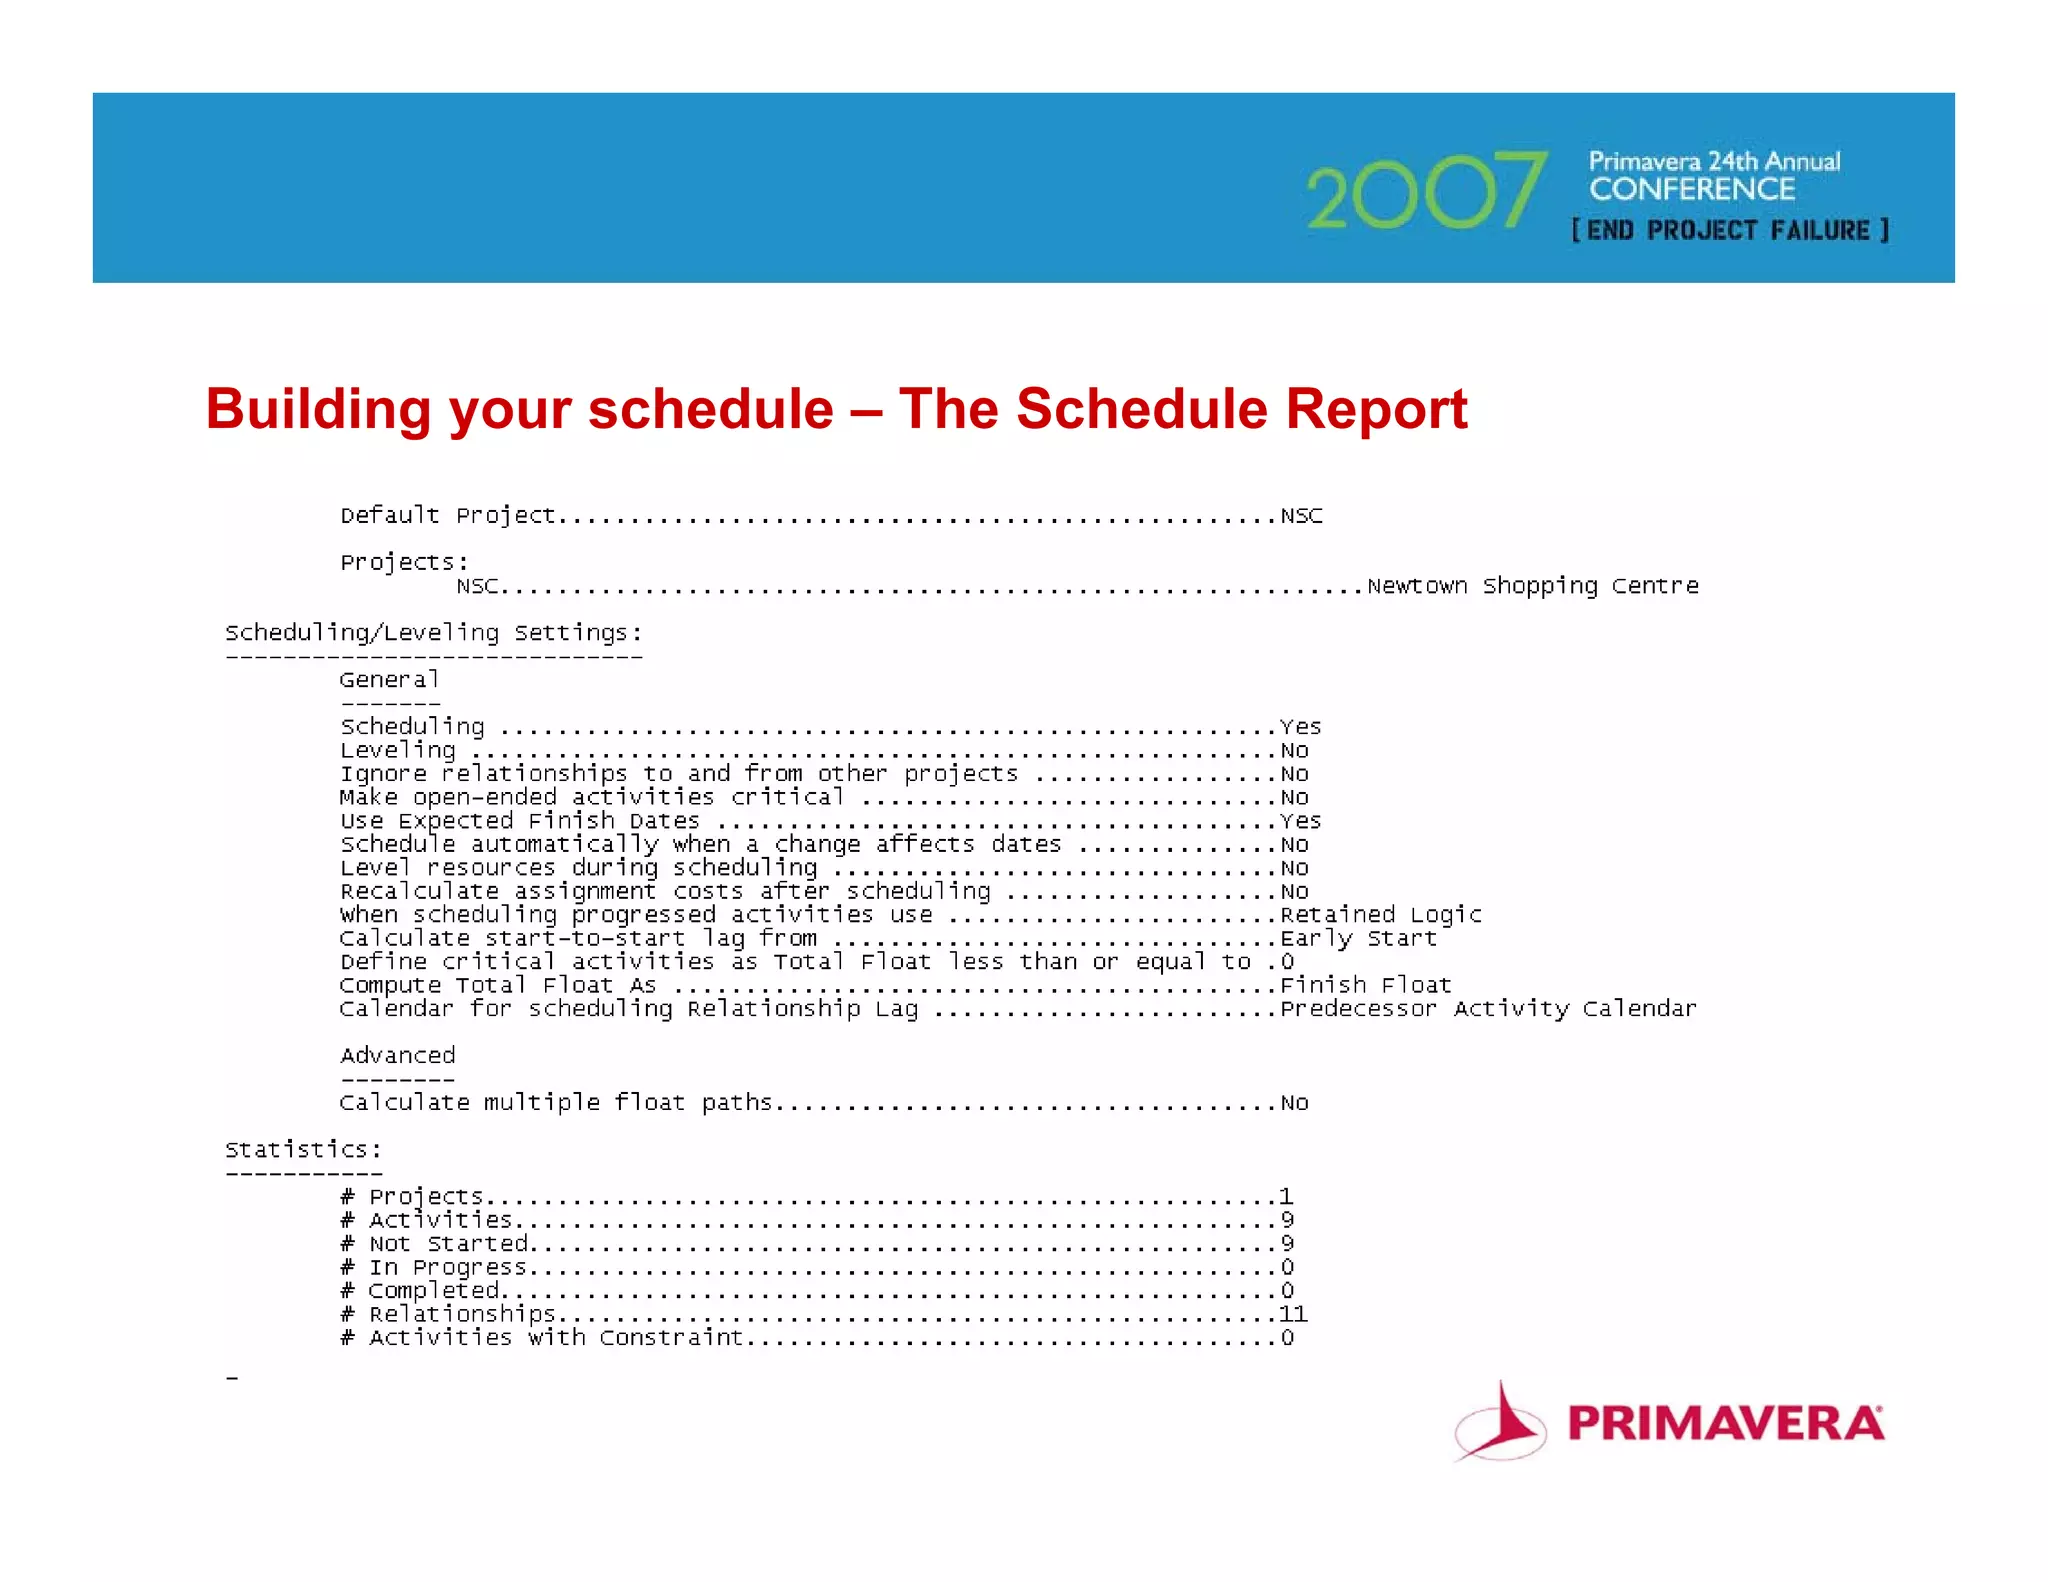
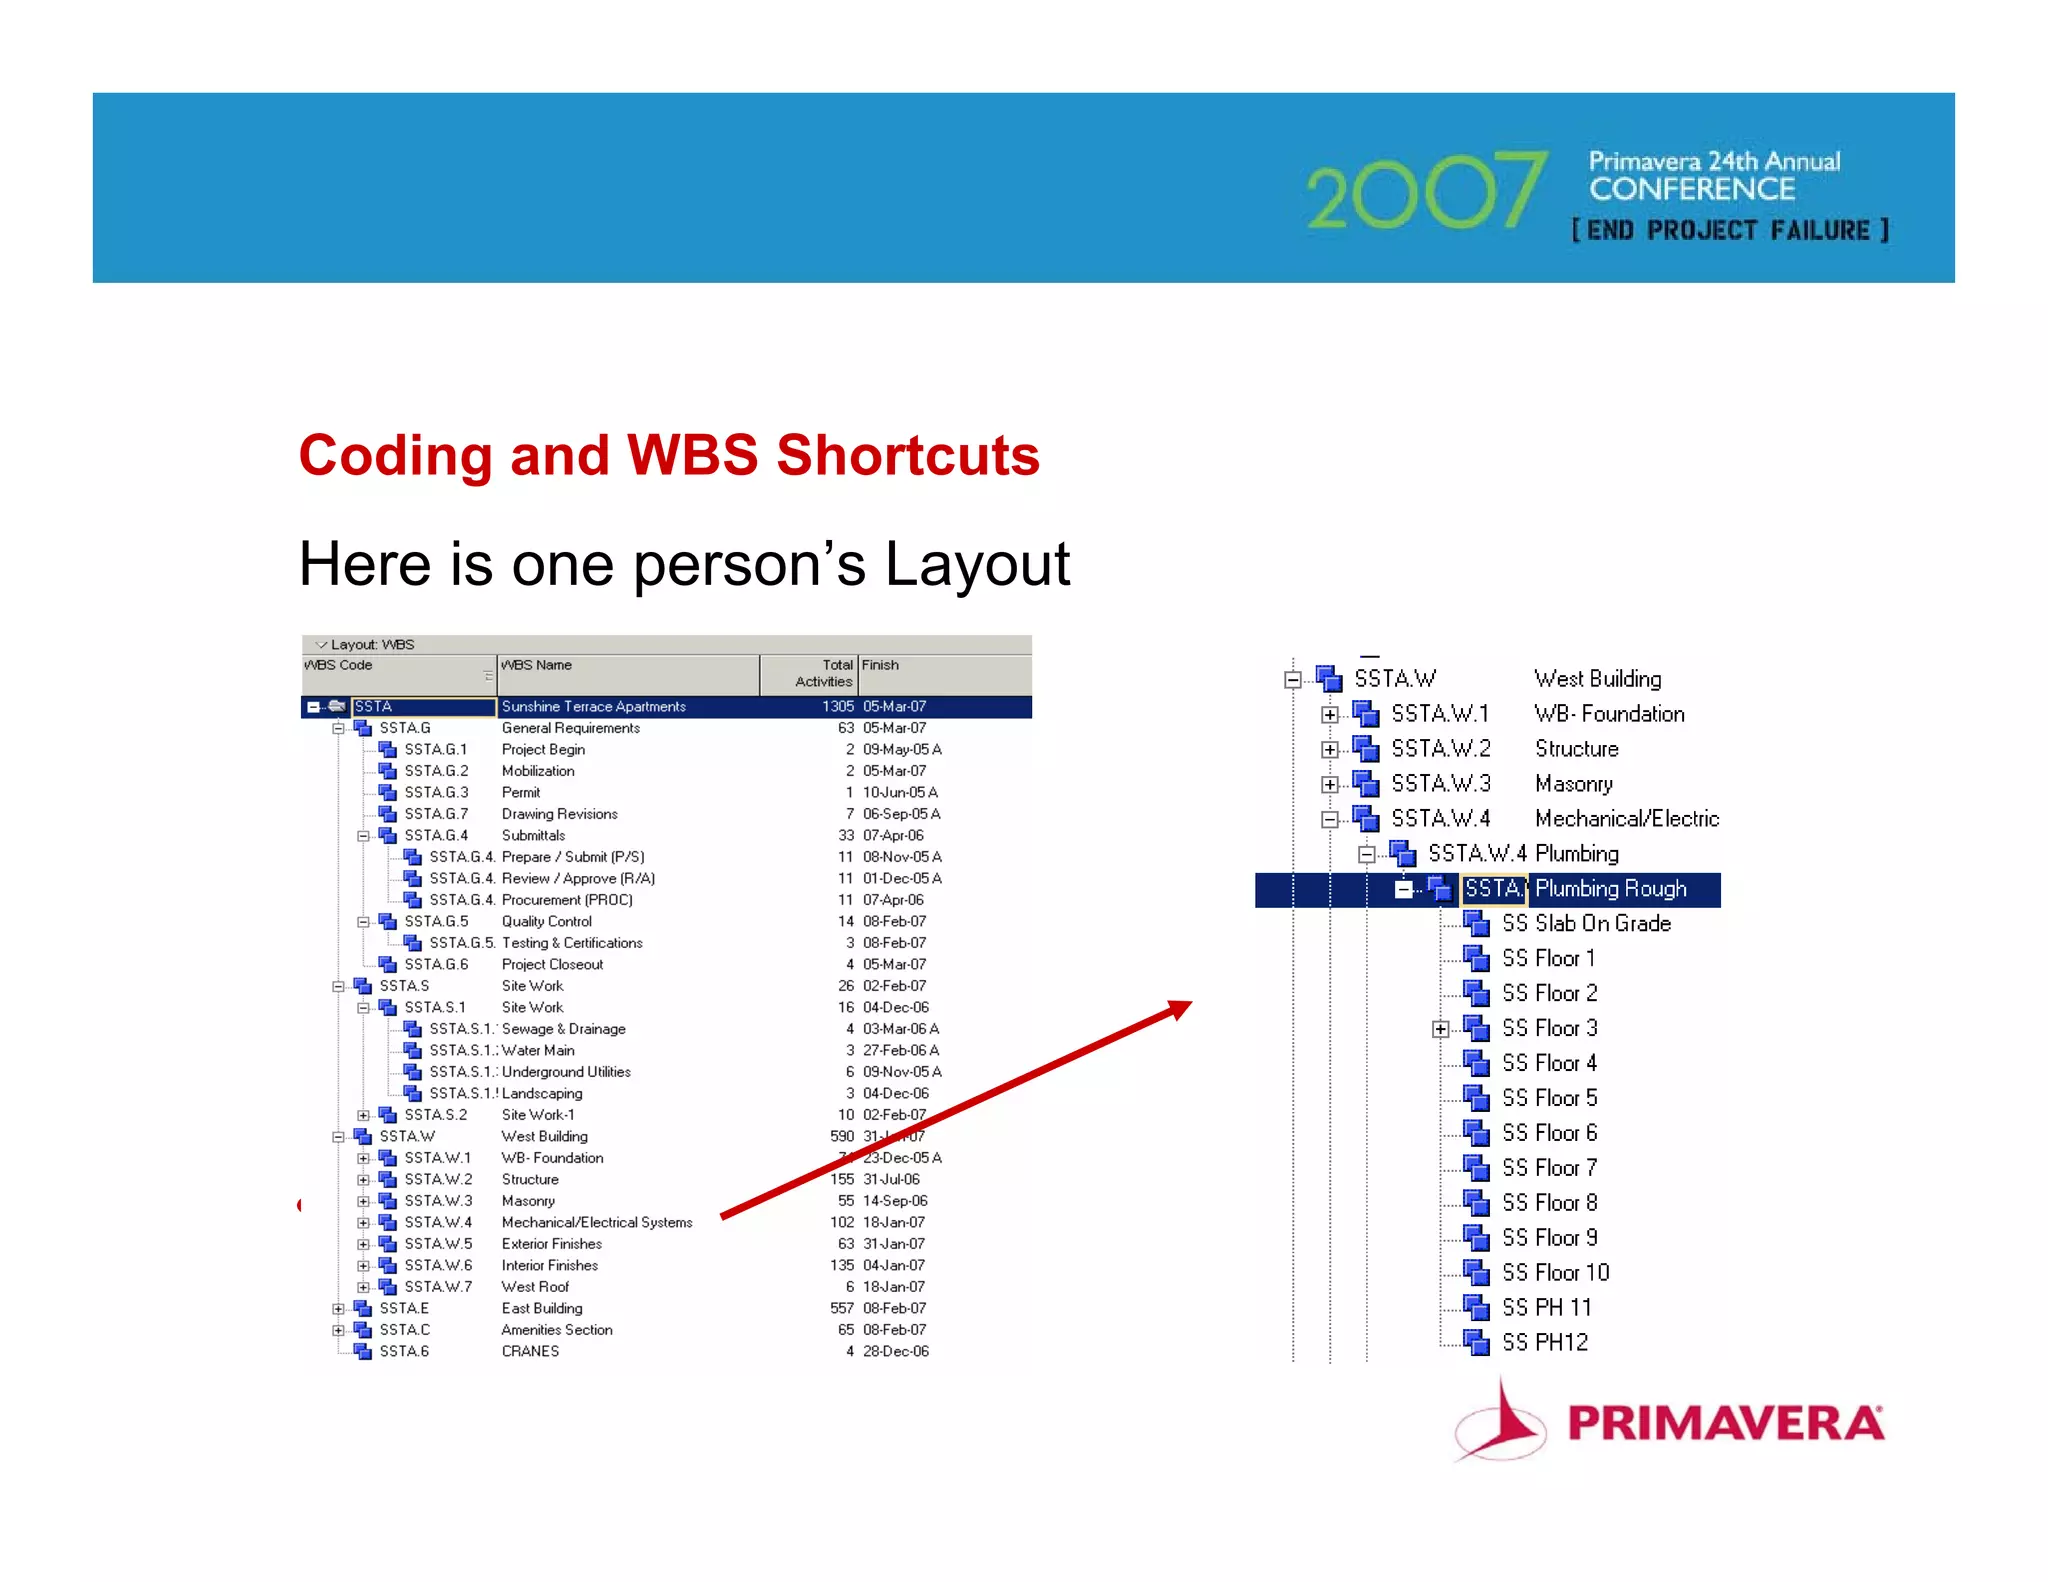


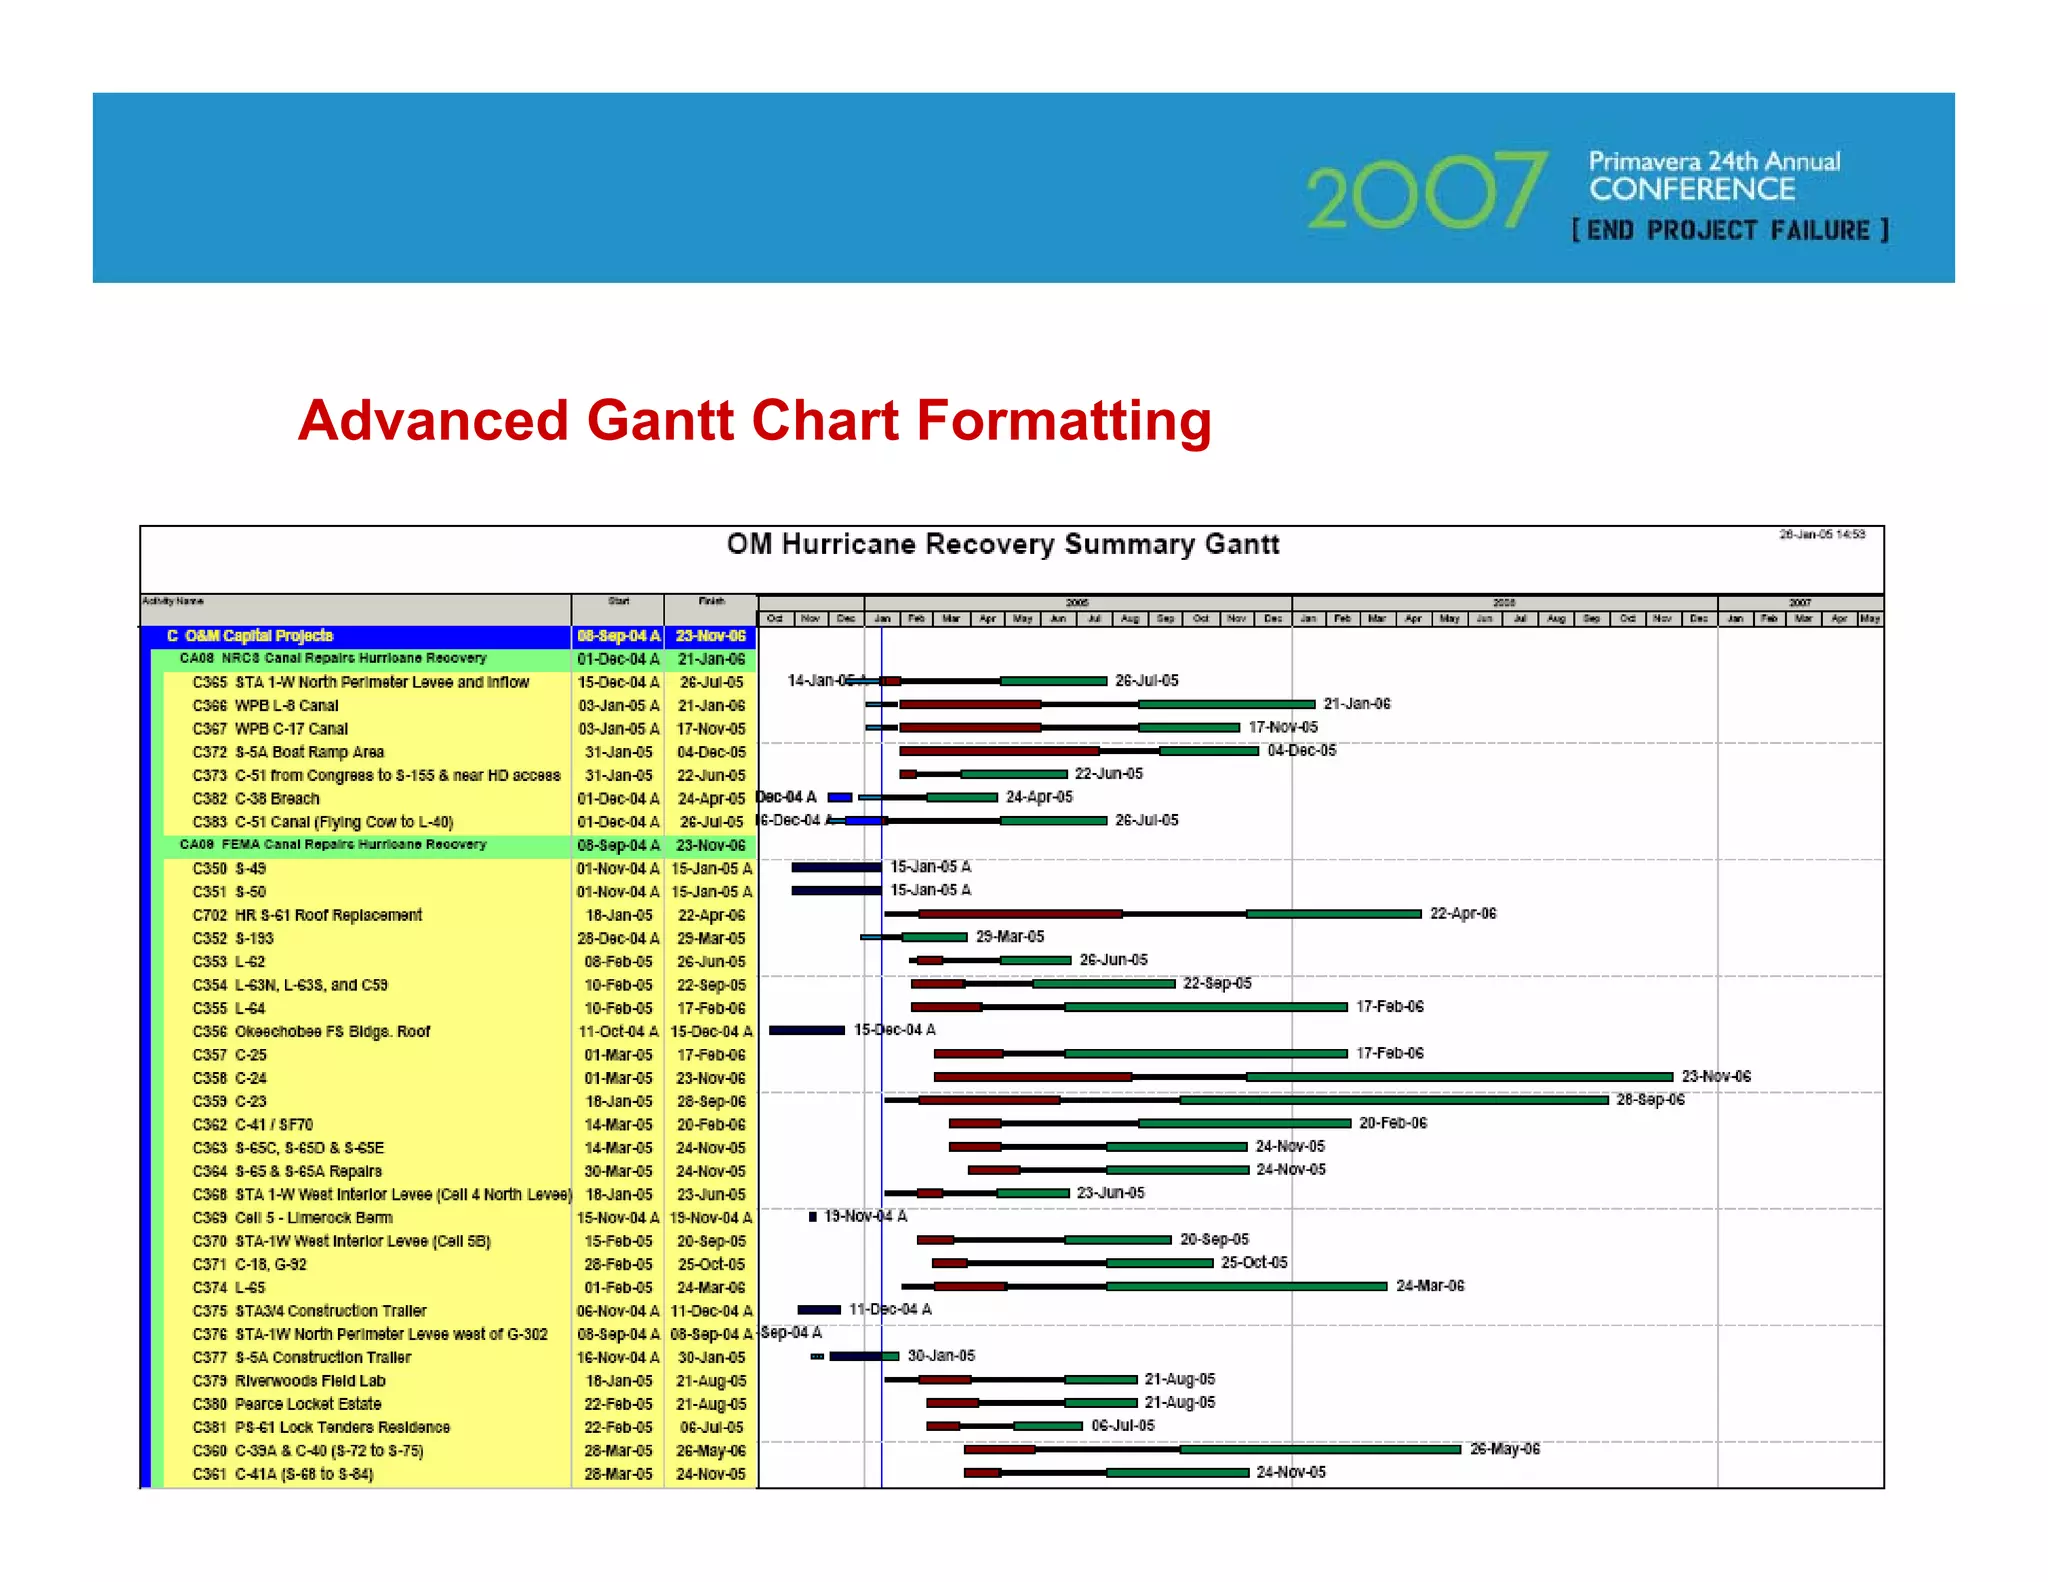
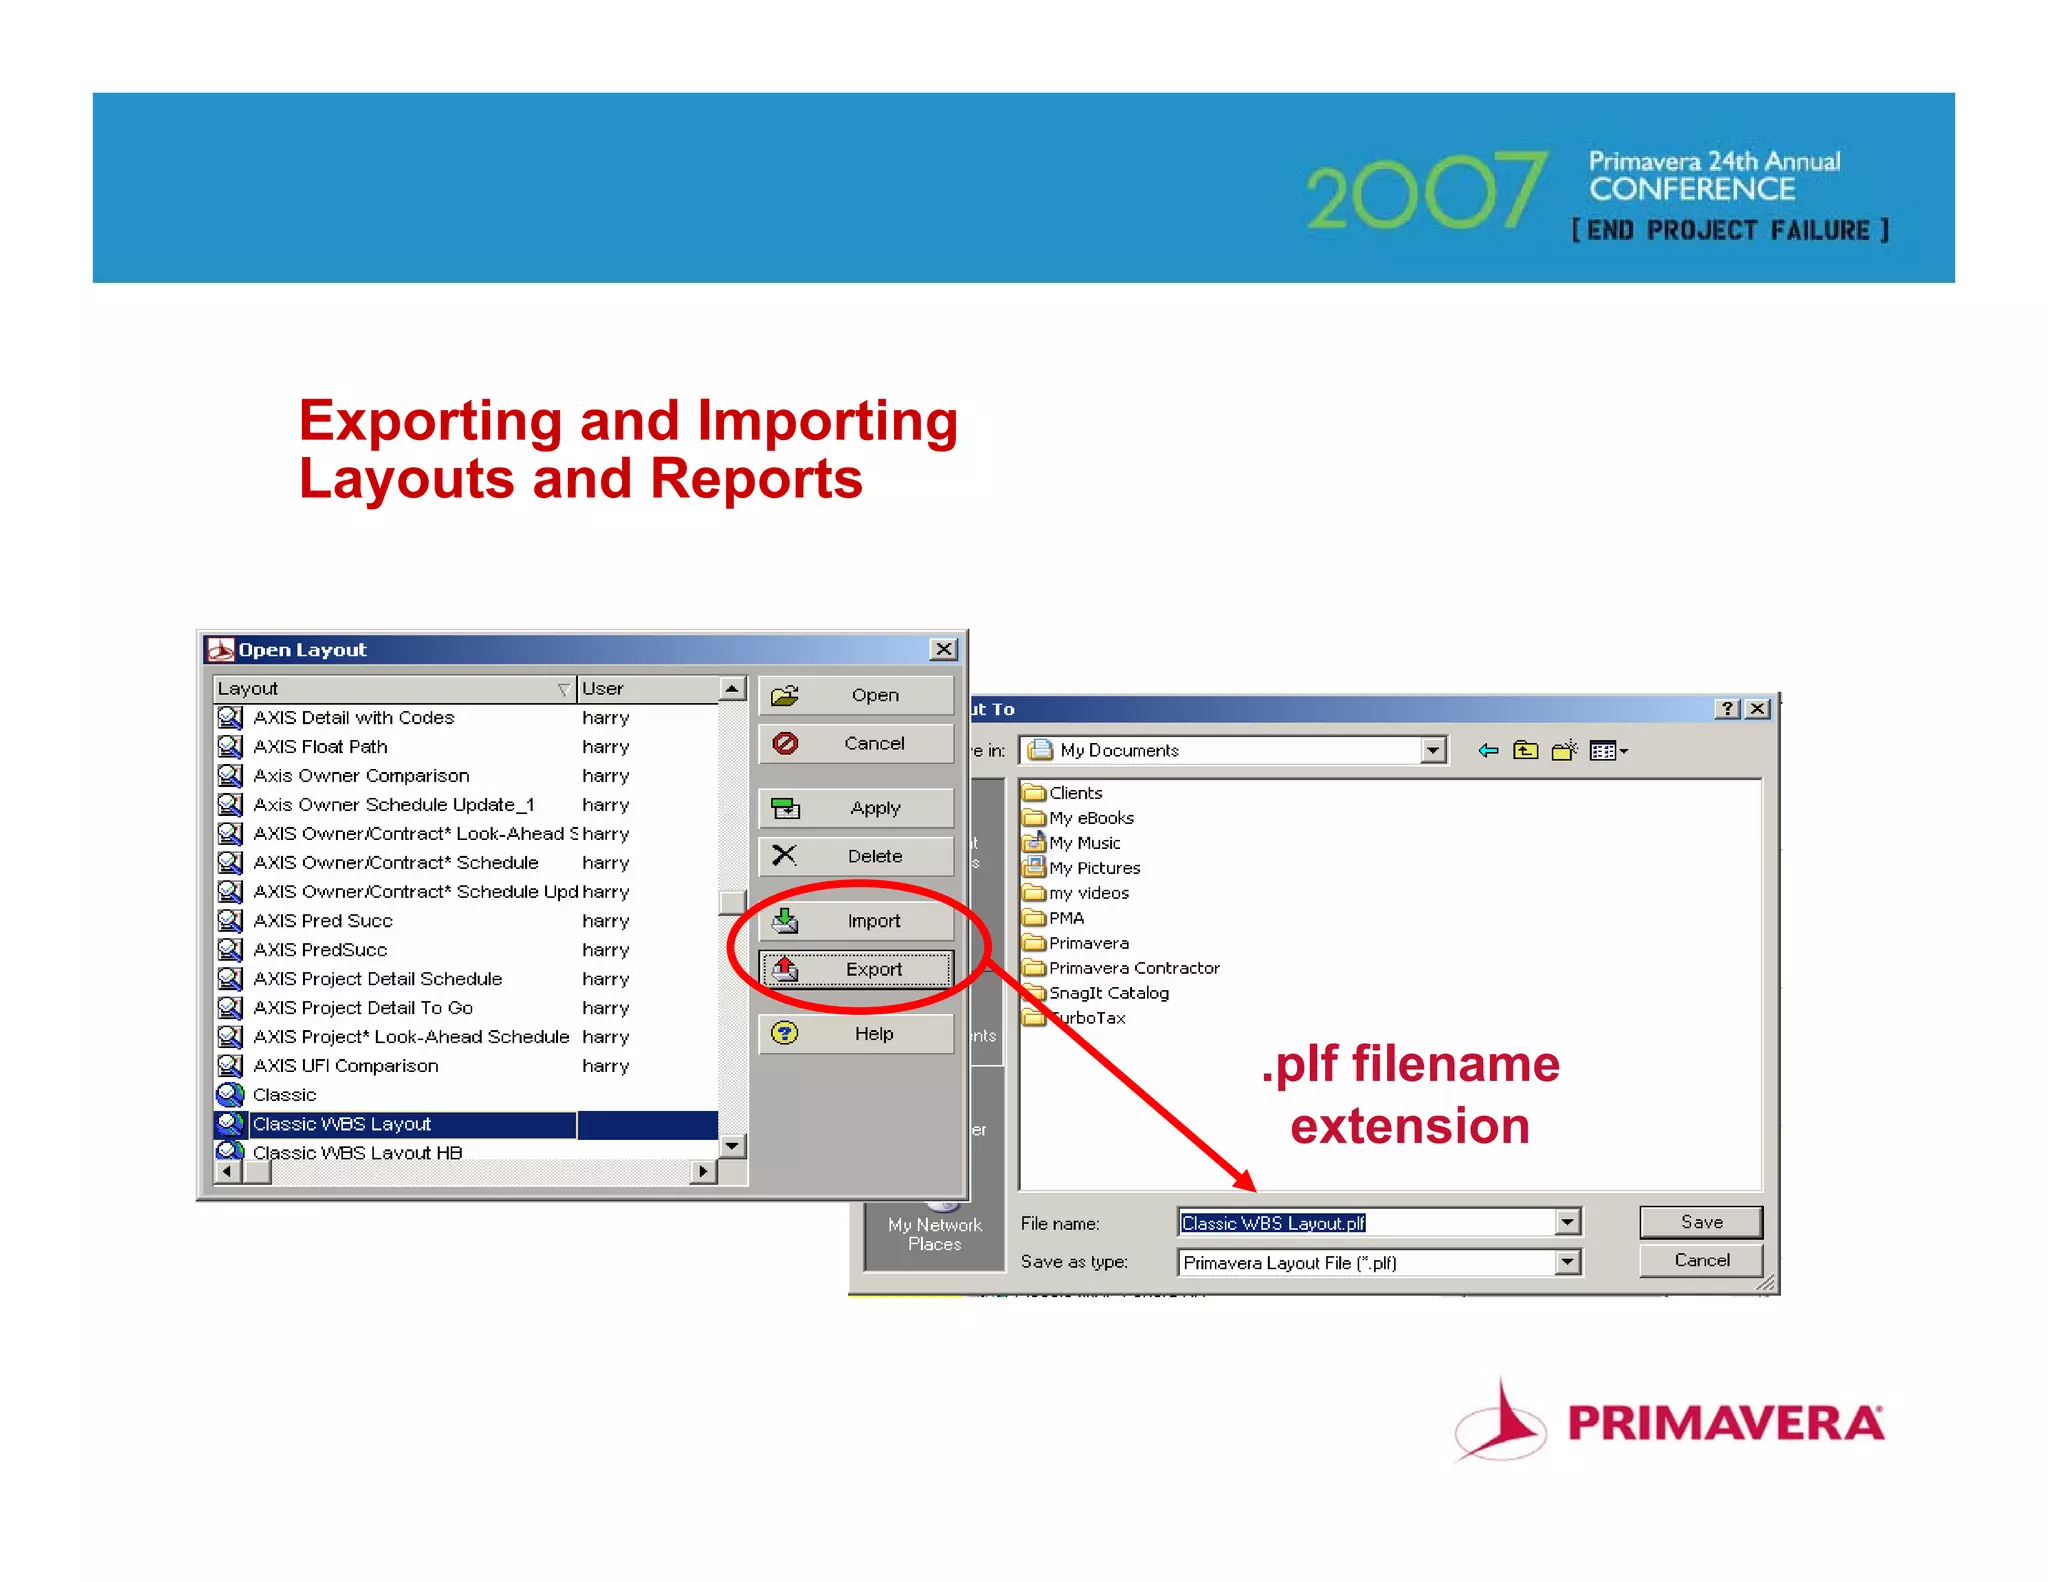

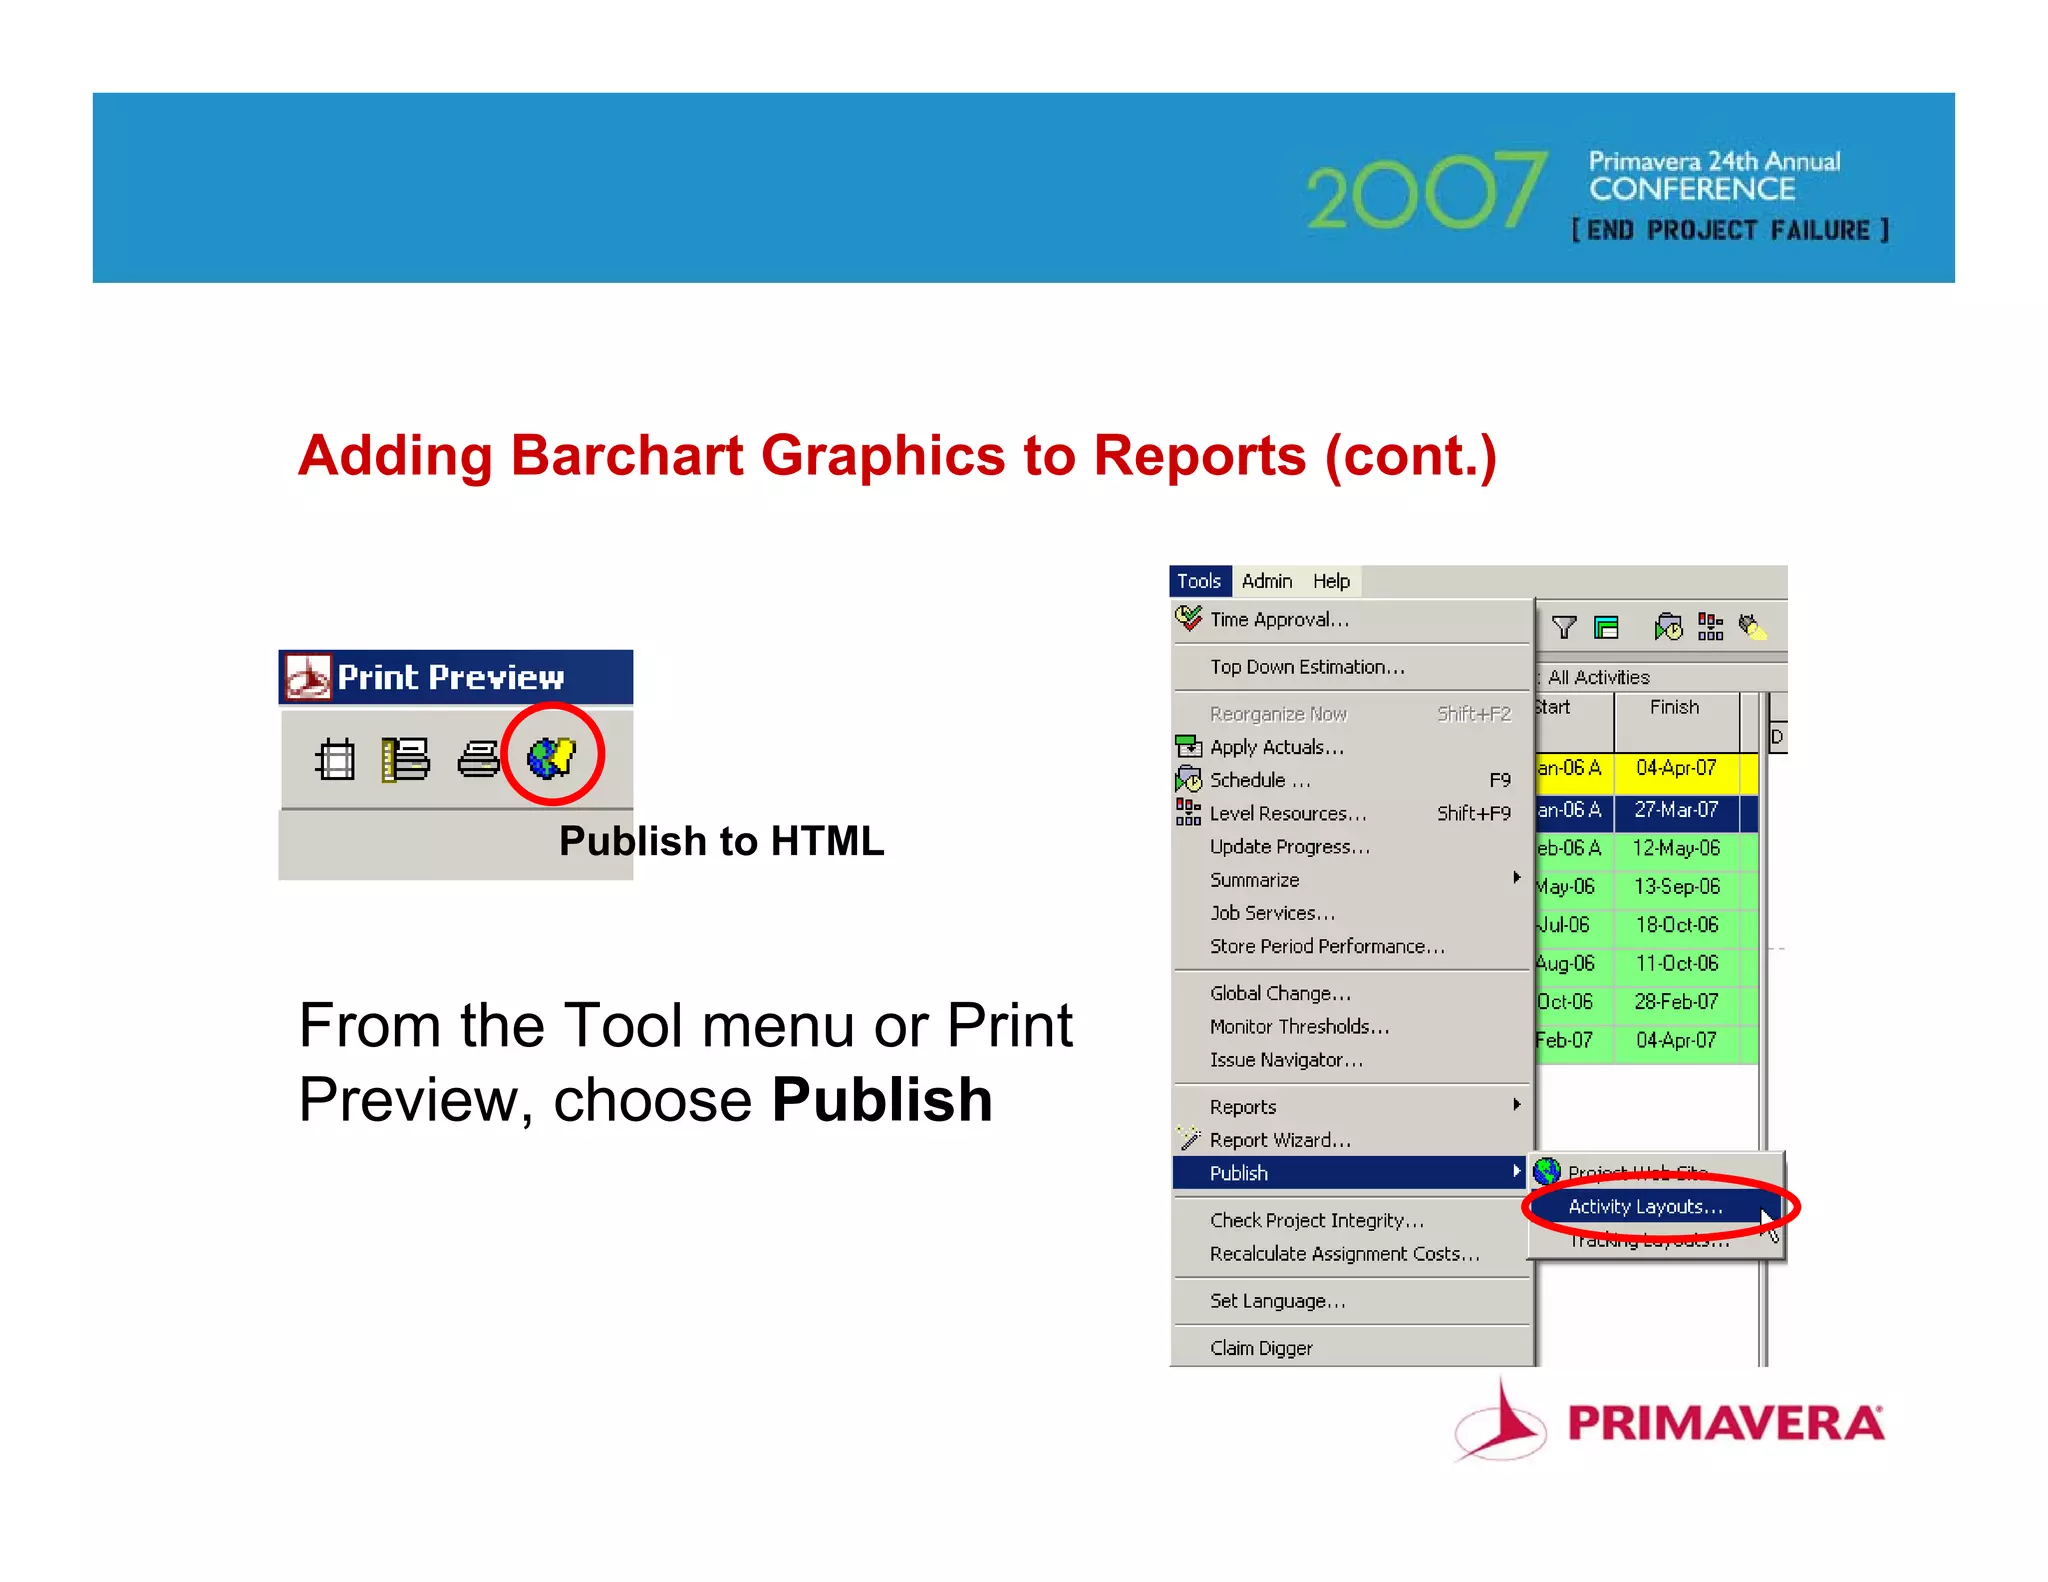
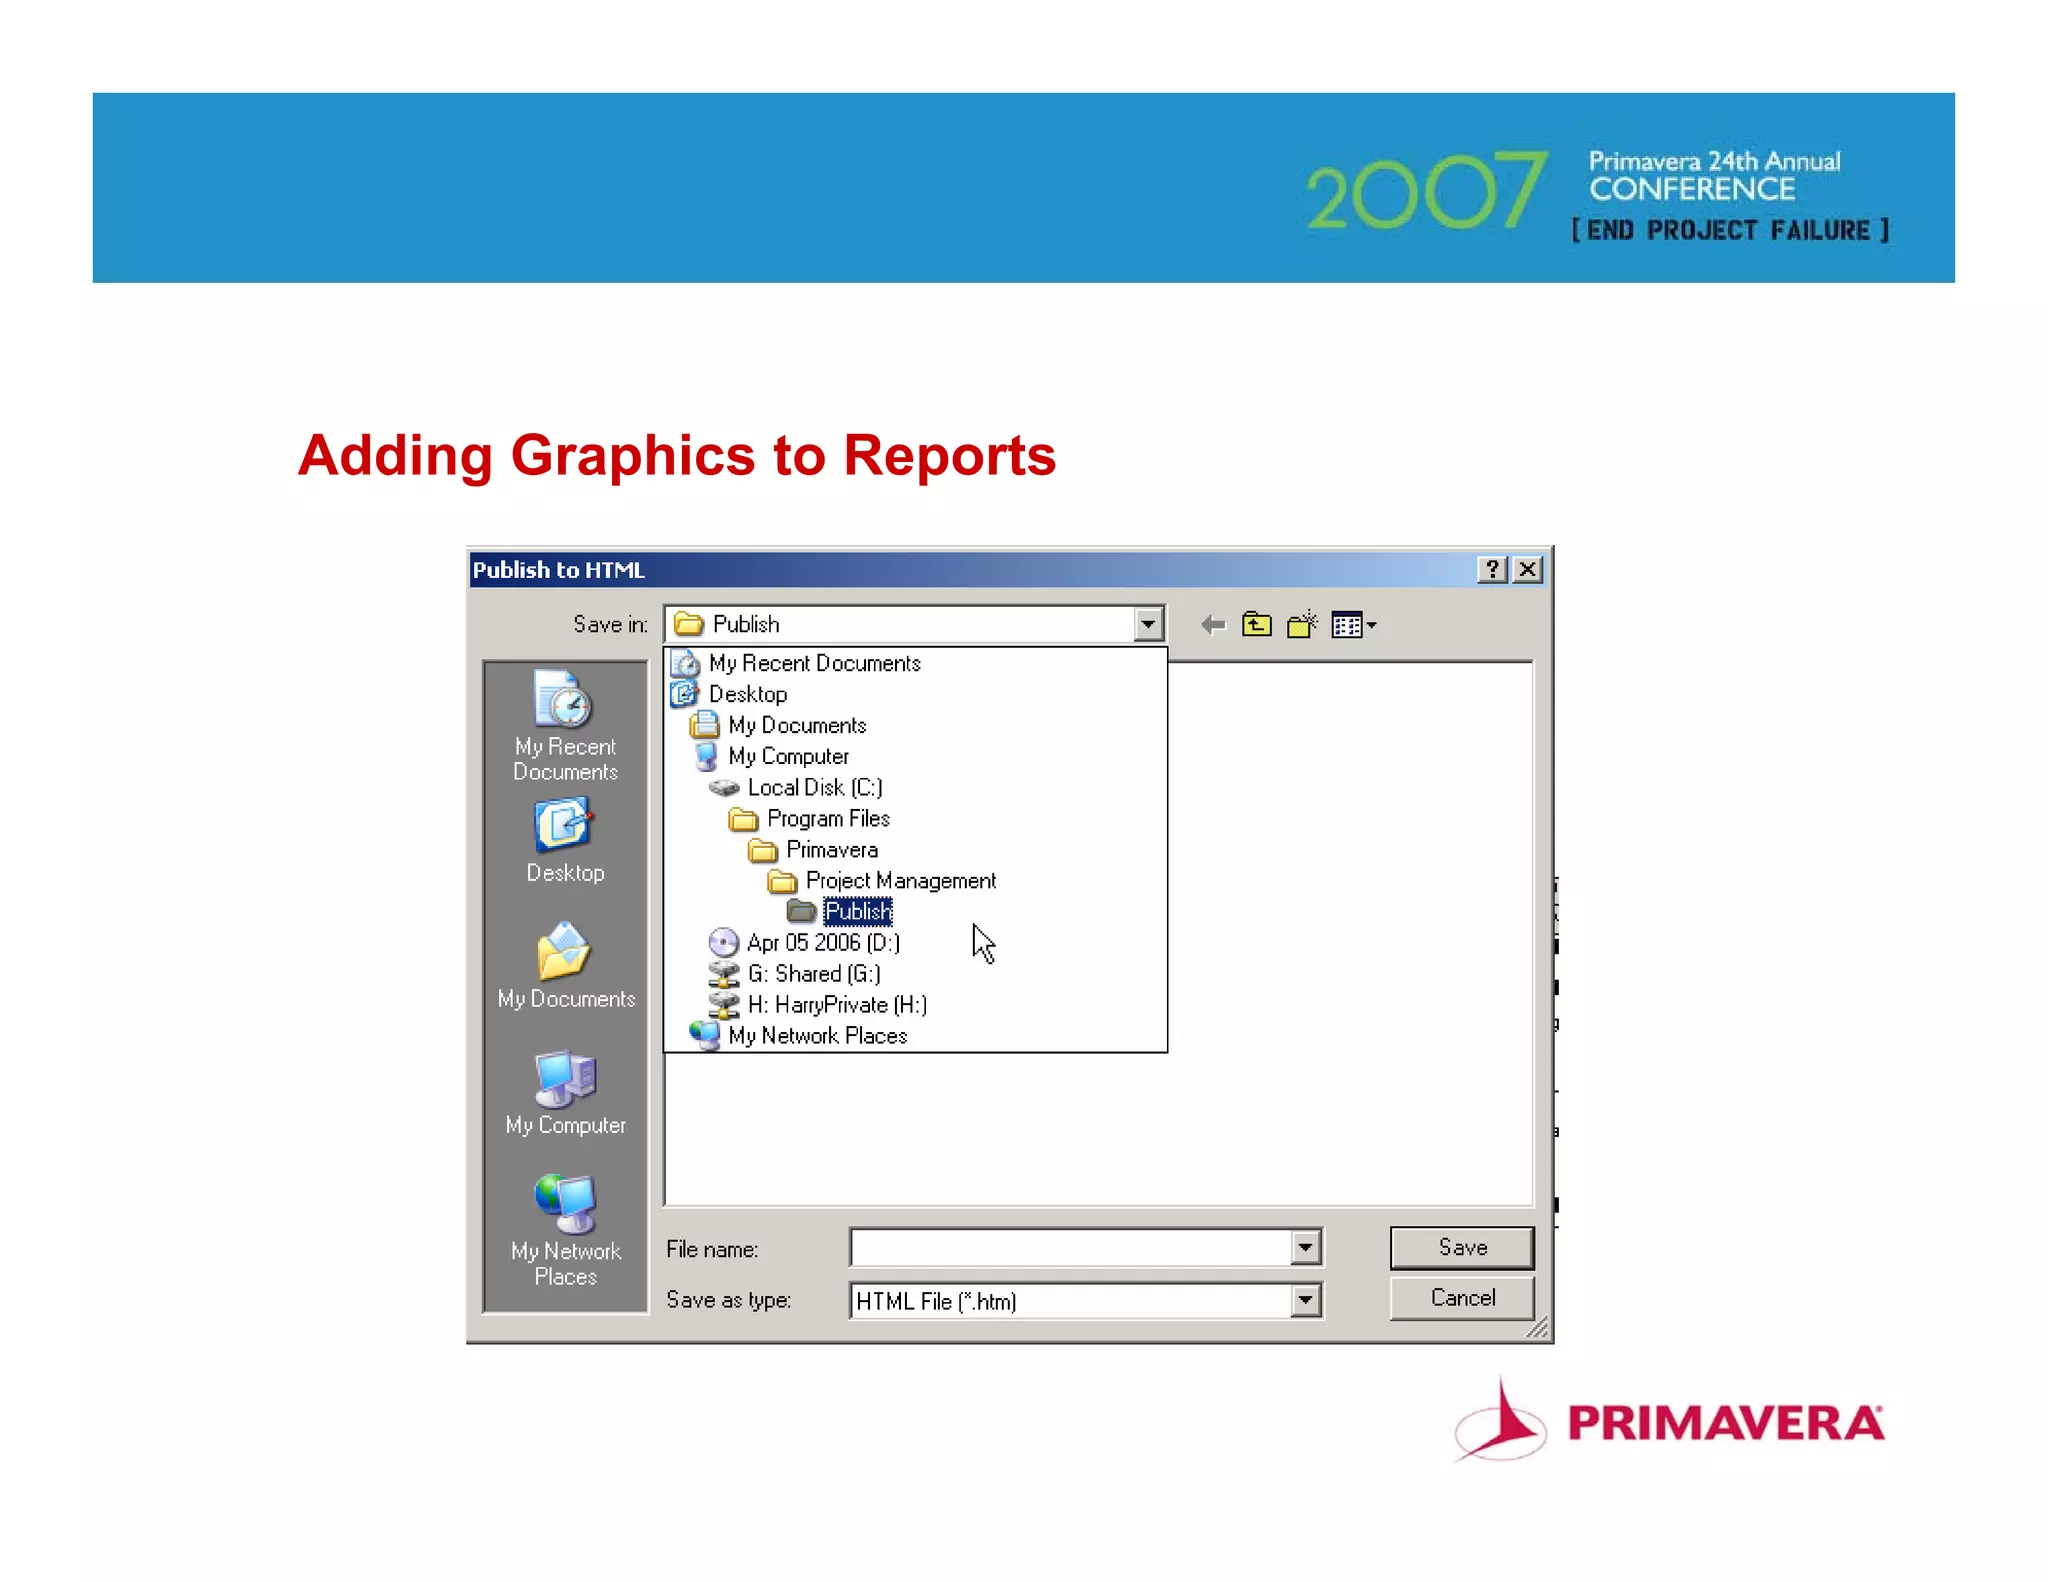

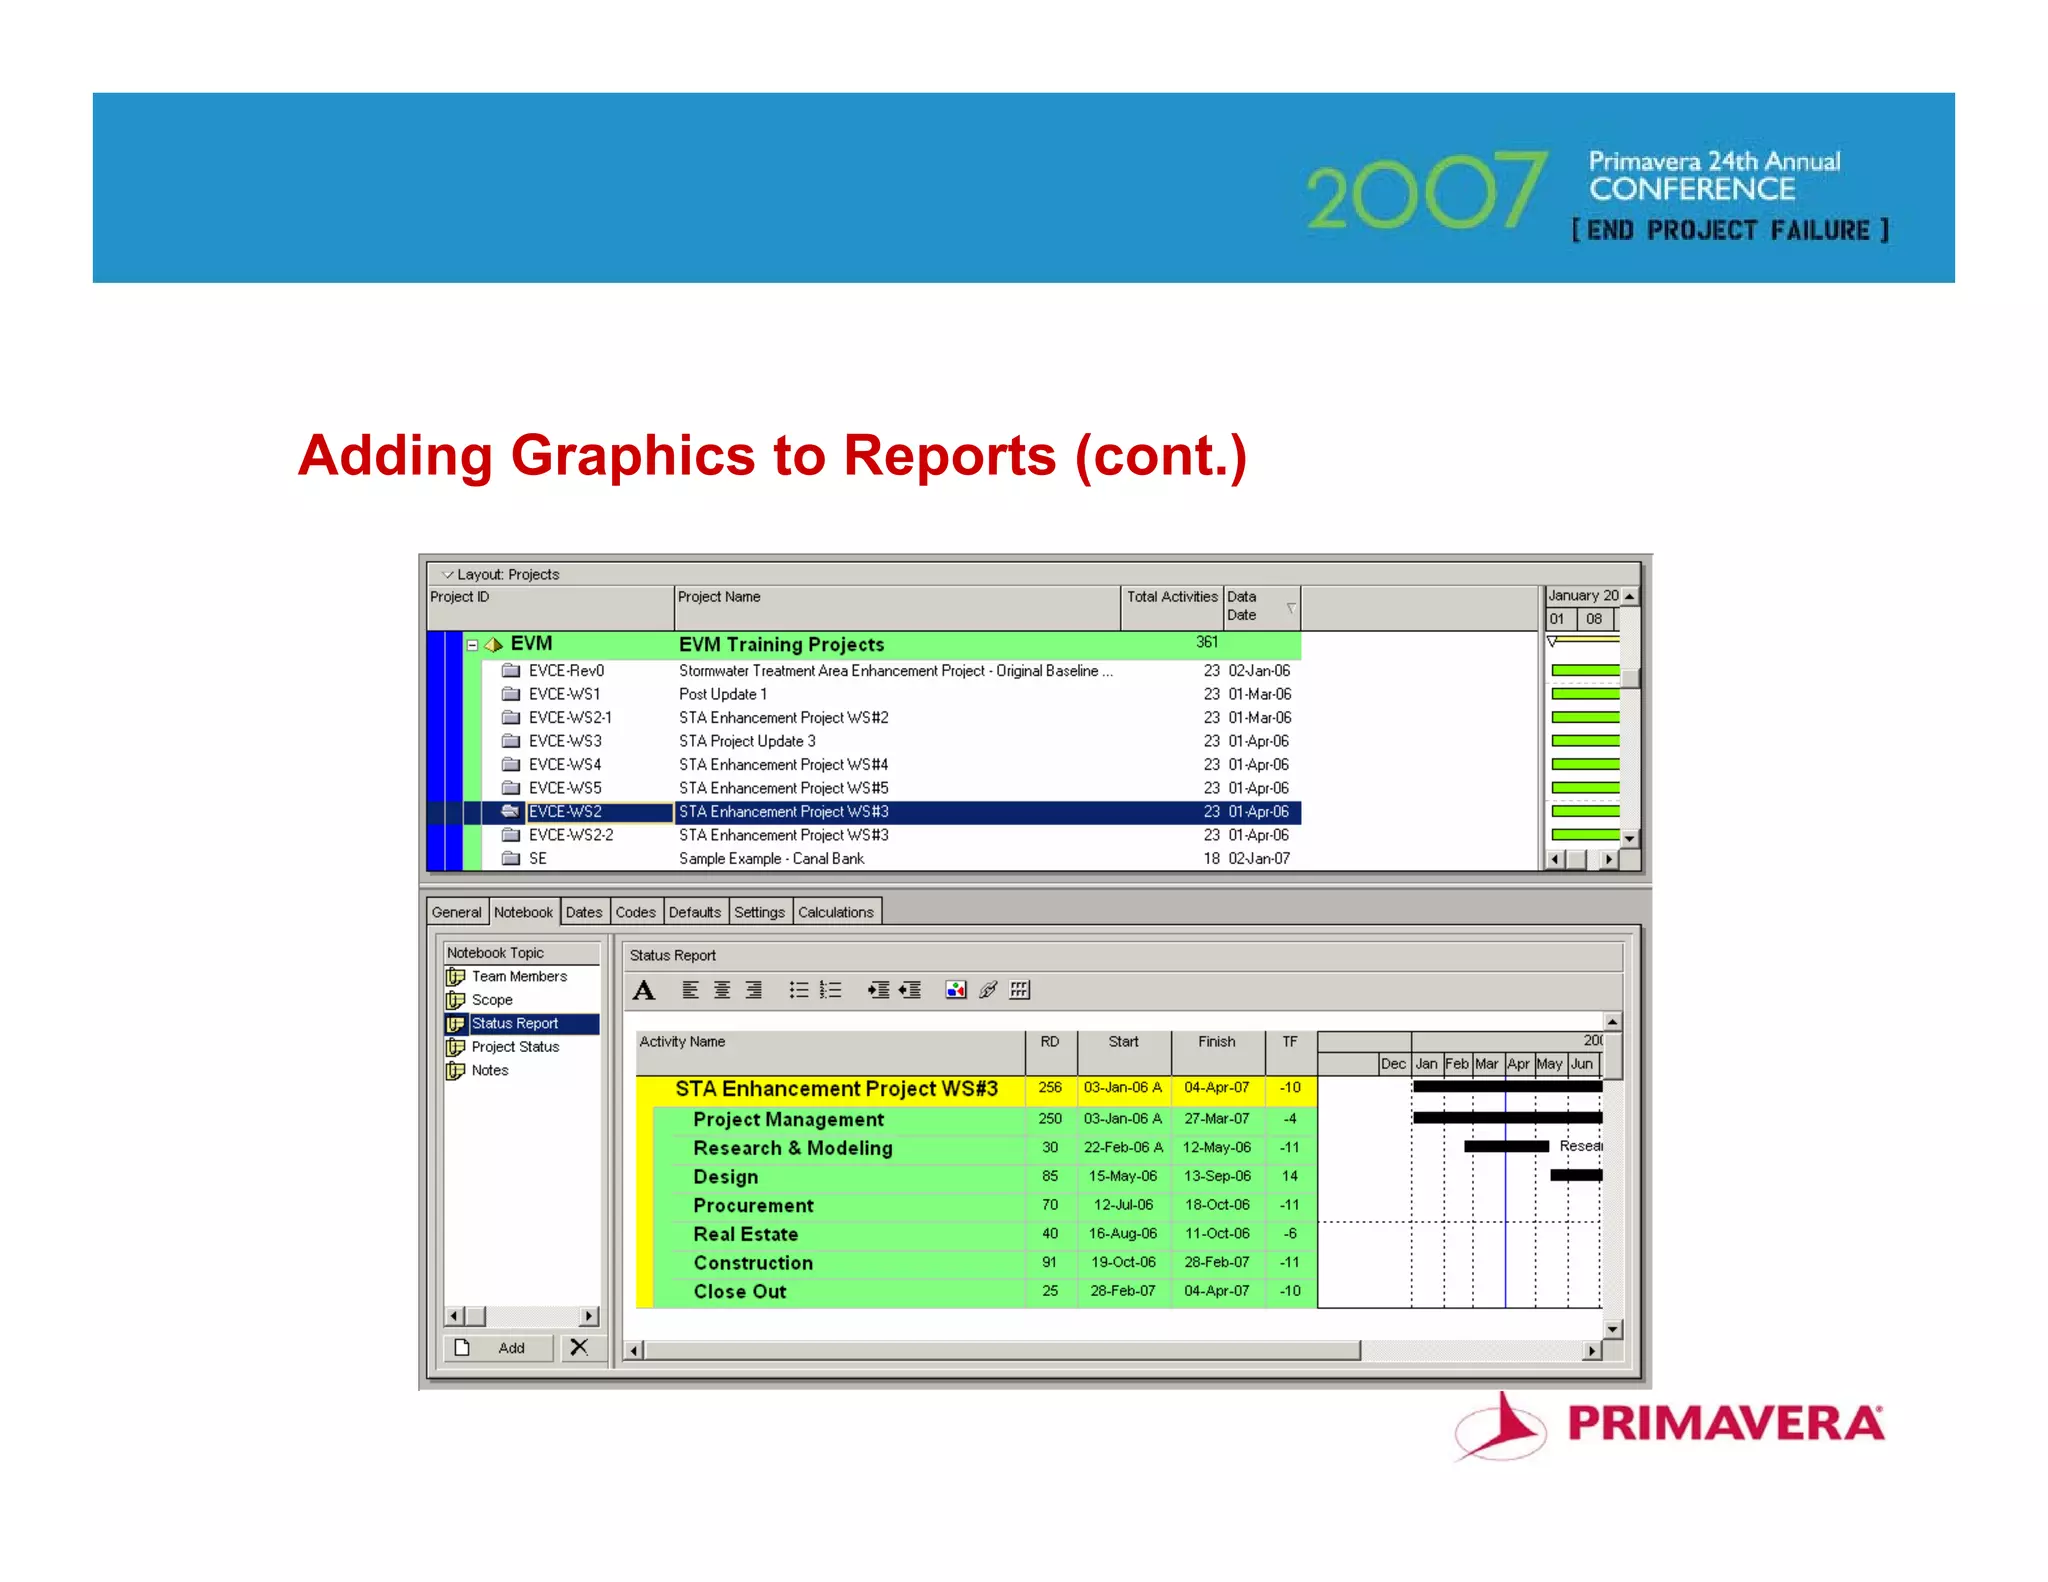

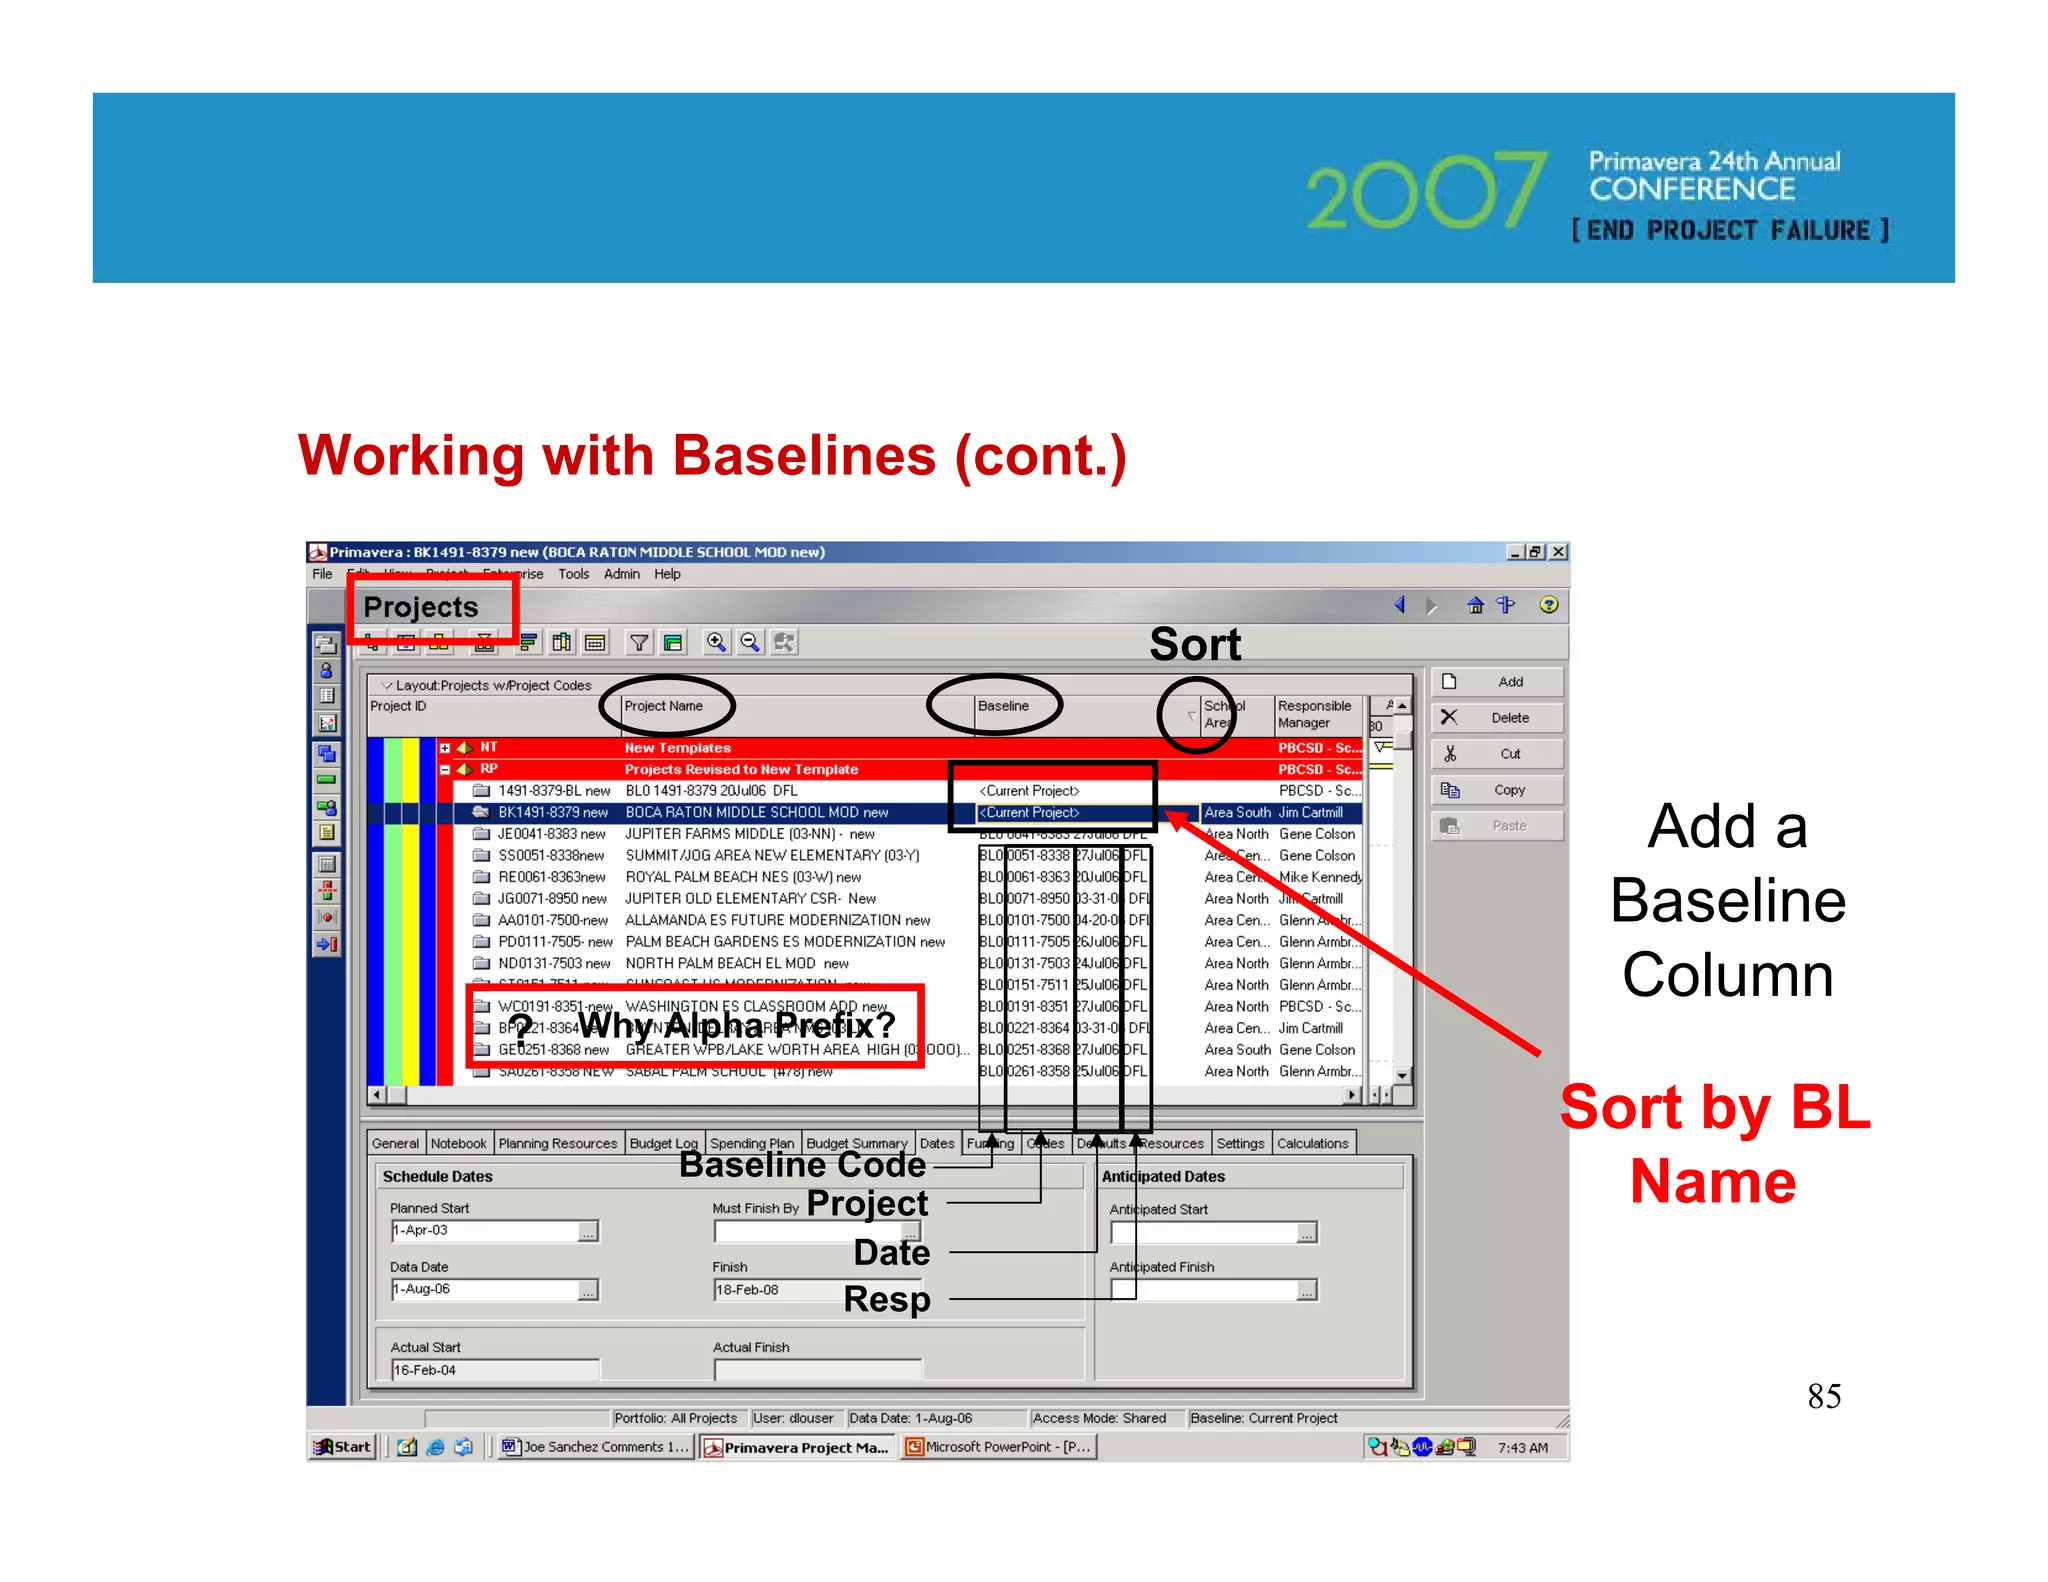
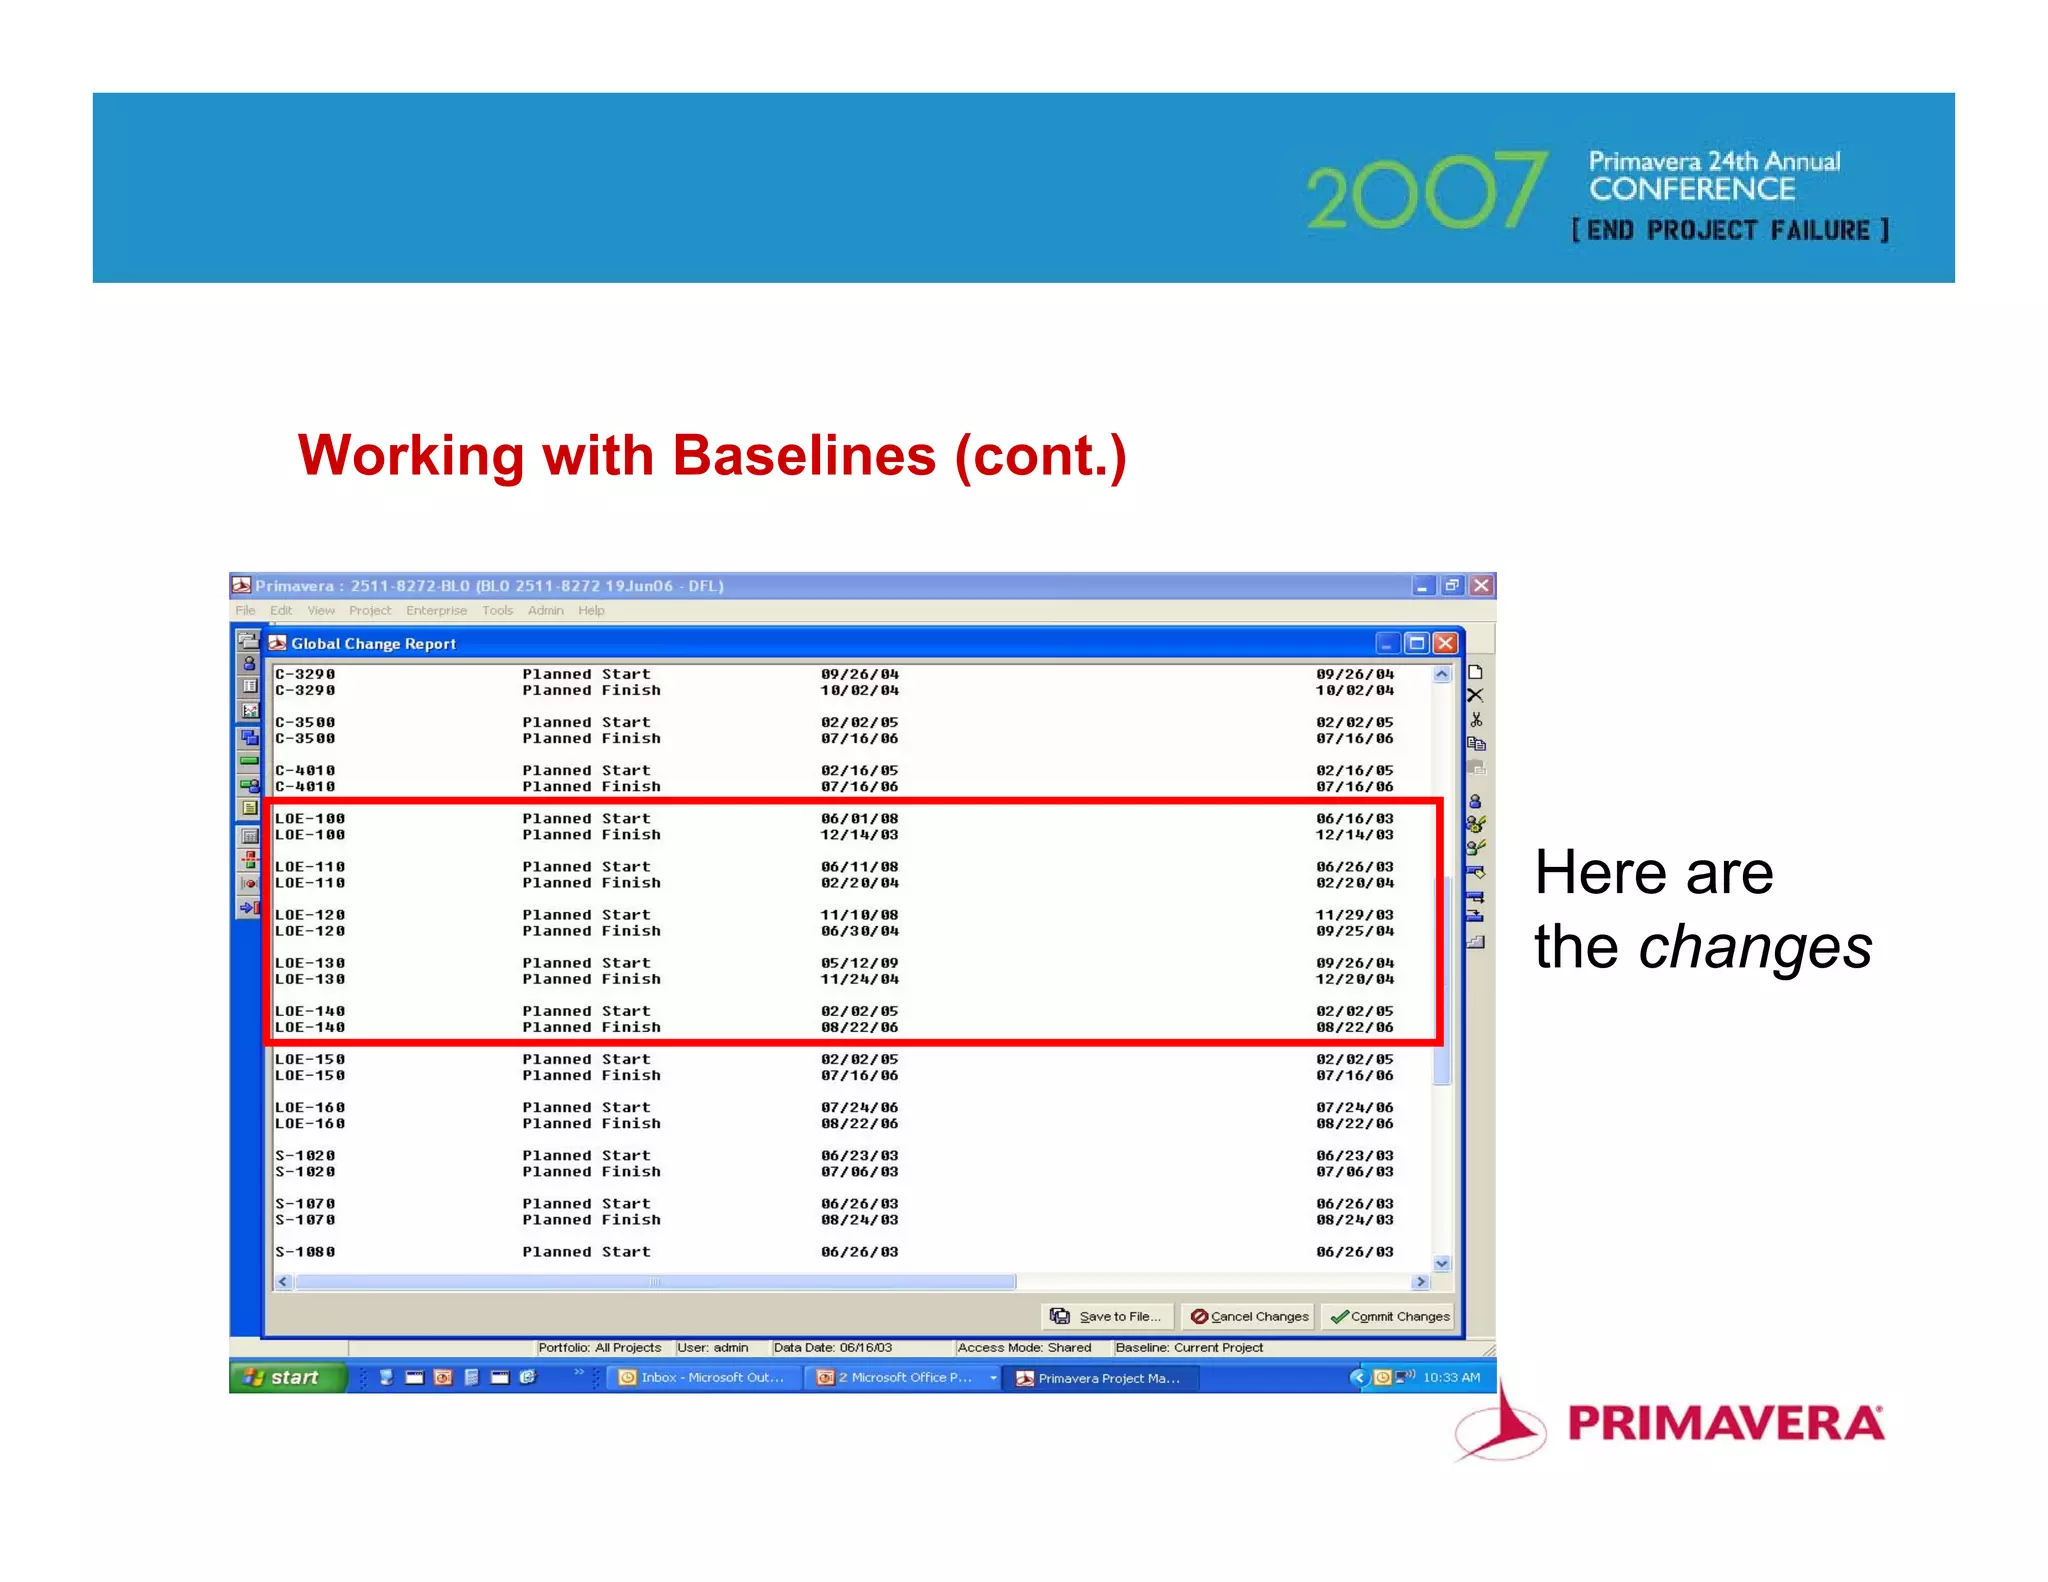

This document provides an overview and agenda for a presentation on using Primavera Client version 6. It includes sections on what's new in version 6 like reflections projects and future bucket planning. It also covers topics like exporting and importing projects, useful global changes, coding and WBS shortcuts, finding activities, resource loading, schedule crashing, advanced layouts, baselines, and more. The presentation aims to demonstrate tips, tricks, and best practices for effectively using the Primavera Client scheduling software.


![Vibe Coding vs. Spec-Driven Development [Free Meetup]](https://cdn.slidesharecdn.com/ss_thumbnails/vibecodingvsspecdrivendevelopment-251209105622-43f455e7-thumbnail.jpg?width=640&height=640&fit=bounds)


