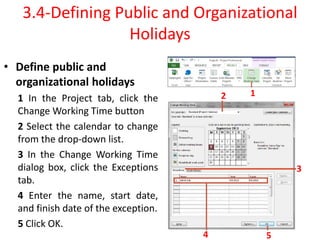
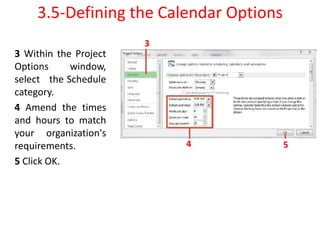
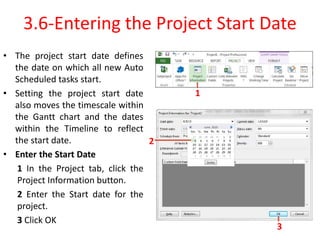
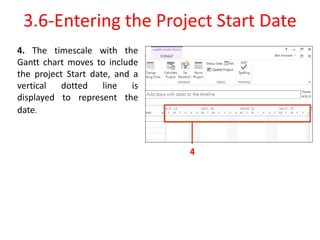
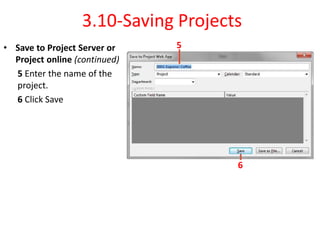
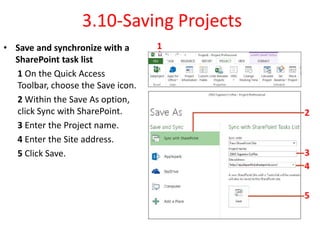
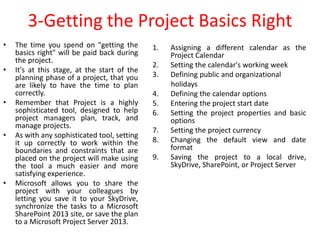
The document provides guidance on setting up a Microsoft Project plan correctly by getting the basics right. It discusses assigning the project calendar, defining working times and exceptions, setting project properties and options, and saving the project locally, to the cloud, or a Project Server. Setting up the project correctly at the start includes tasks like configuring the calendar, dates, and saving location to facilitate effective project planning and management.


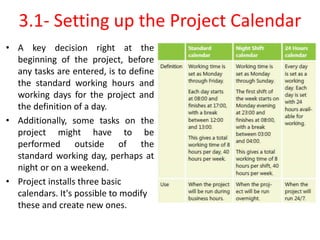

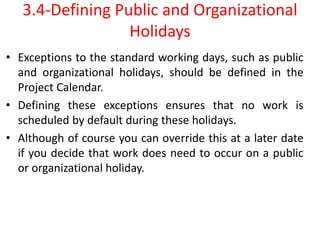
![3.3-Setting the Calendar's Working Week
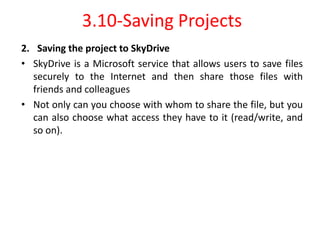
• The working week within a
calendar defines the
working days and the start
& finish time for each day
• Set the calendar's
working week
1 In the Project tab, click the
Change Working Time button.
2 Select the calendar to
change from the drop-down
list.
3 Click the Work Weeks tab to
change the [Default] work
week.
4 Click the Details button.
1
2
3
4](https://image.slidesharecdn.com/lesson3pmtgettingtheprojectbasicsright-240229061919-359a8a26/85/Lesson-3-PMT-Getting-the-Project-basics-right-pptx-7-320.jpg)