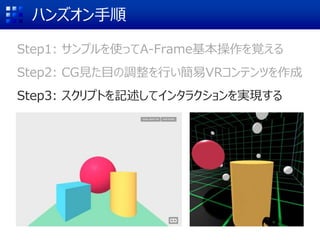
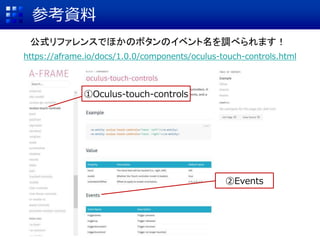
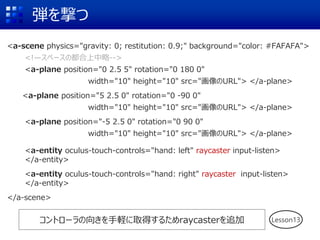
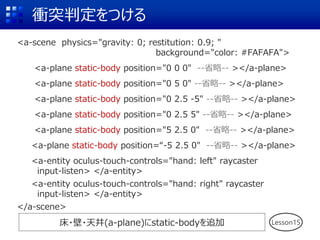
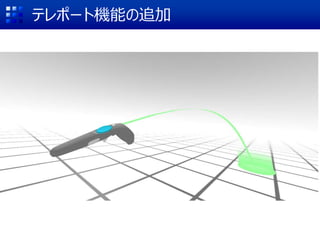
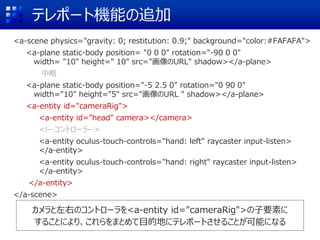
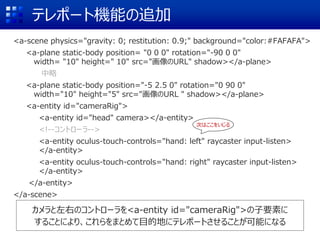
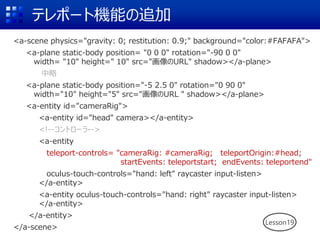
弾を撃つ
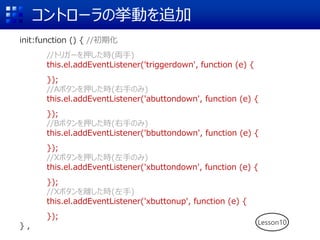
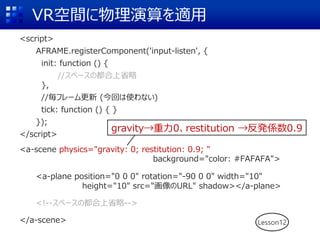
init:function () {//初期化
//トリガーを押した時(両手)
this.el.addEventListener('triggerdown', function (e) {
});
//Aボタンを押した時(右手のみ)
this.el.addEventListener('abuttondown', function (e) {
});
//Bボタンを押した時(右手のみ)
this.el.addEventListener('bbuttondown', function (e) {
});
//Xボタンを押した時(左手のみ)
this.el.addEventListener('xbuttondown', function (e) {
});
//Xボタンを離した時(左手)
this.el.addEventListener('xbuttonup', function (e) {
});
} ,
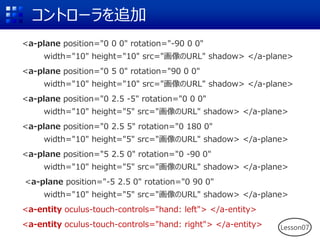
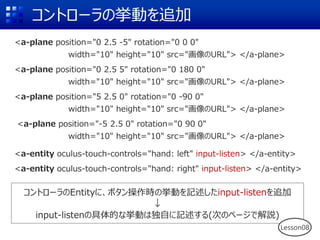
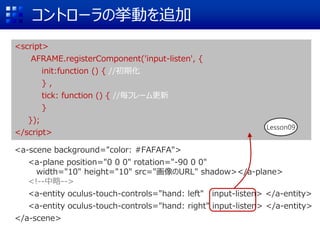
ここを編集
68.
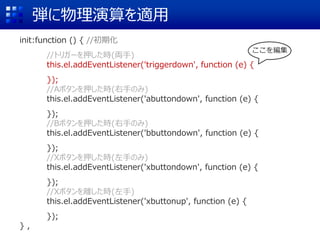
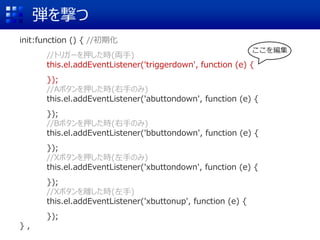
弾を撃つ
this.el.addEventListener('triggerdown', function (e){
//コントローラの3次元的な位置を取得
var point = this.object3D.getWorldPosition();
//ボールを生成
var ball = document.createElement('a-sphere');
ball.setAttribute('position', point);
ball.setAttribute('scale', '0.2 0.2 0.2');
ball.setAttribute('class', 'ball');
//物理演算を適用
ball.setAttribute('dynamic-body', 'shape: sphere; sphereRadius:0.2; ');
//a-sceneにアクセス
var scene = document.querySelector('a-scene');
//VR空間に弾を登場させる
scene.appendChild(ball);
});
このあとここに弾を発射するコードを追加
69.
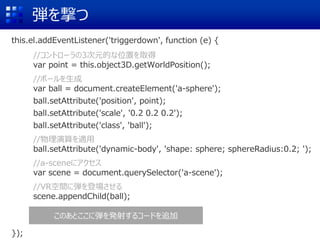
弾を撃つ
//コントローラのレイキャスターを取得
var dir =this.getAttribute("raycaster").direction;
//コントローラに対するレイの向きと力を設定
var force = new THREE.Vector3(dir.x, dir.y, dir.z);
force.multiplyScalar(2500);
//ボールにforceというプロパティを宣言して代入
ball.force = this.object3D.localToWorld(force);
//弾の準備ができたら上記で設定した力を加える
ball.addEventListener('body-loaded', function (e) {
var p = this.object3D.position;
var f = this.force;
this.body.applyForce(
new CANNON.Vec3(f.x, f.y, f.z),
new CANNON.Vec3(p.x, p.y, p.z)
);
});
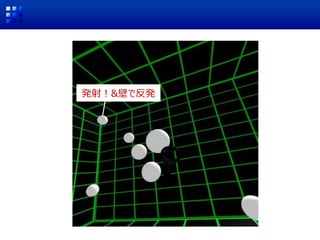
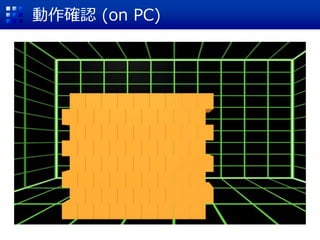
Lesson14
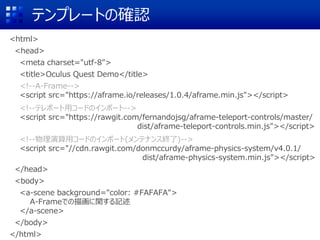
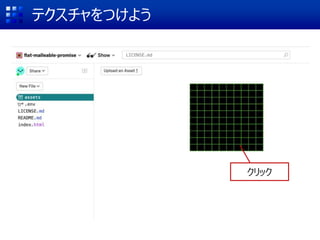
![動作確認
画面をクリック
回転:マウスでドラッグ
左右:[←][→]キー
前後:[↑][↓]キー
※前後左右は自分がどちらに動くかで考える](https://image.slidesharecdn.com/yoshinagass-201121012437/85/Oculus-Quest-1-2-with-A-Frame-WebVR-21-320.jpg)
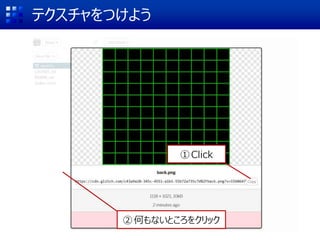


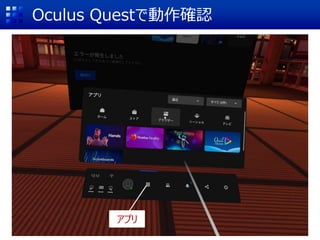


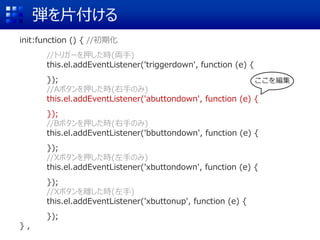
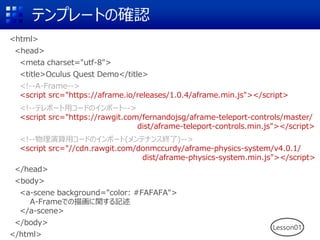
![弾を片付ける
this.el.addEventListener('abuttondown', function (e) {
//全ての弾(クラス名=.ball)を取得
var els = document.querySelectorAll('.ball');
//ボールを一つ一つ削除
for (var i = 0; i < els.length; i++) {
els[i].parentNode.removeChild(els[i]);
}
});
Lesson16](https://image.slidesharecdn.com/yoshinagass-201121012437/85/Oculus-Quest-1-2-with-A-Frame-WebVR-73-320.jpg)
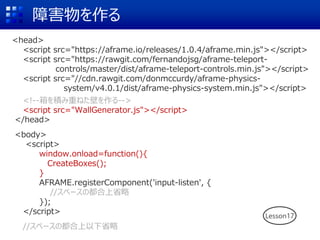
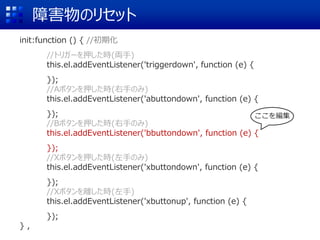
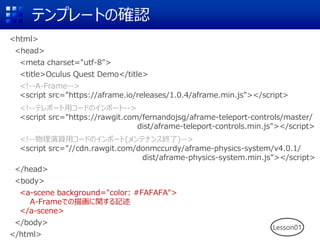
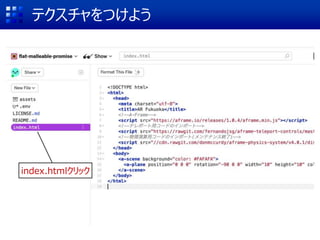
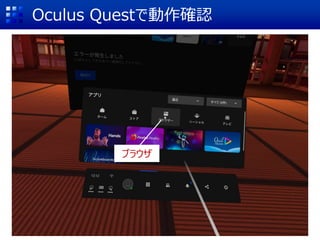
![障害物のリセット
this.el.addEventListener('bbuttondown', function (e) {
//全ての箱(クラス名=.box)を取得
var els=document.querySelectorAll('.box');
for (var i = 0; i < els.length; i++) {
els[i].parentNode.removeChild(els[i]);
}
//再び箱を生成
CreateBoxes();
});
Lesson18](https://image.slidesharecdn.com/yoshinagass-201121012437/85/Oculus-Quest-1-2-with-A-Frame-WebVR-77-320.jpg)
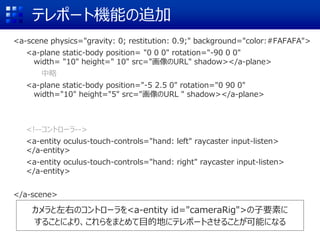


![[Glitch版] 0から始めようWebAR/VR入門ハンズオン with 織りなすラボ](https://cdn.slidesharecdn.com/ss_thumbnails/yoshinagaglitchss2-200719023821-thumbnail.jpg?width=640&height=640&fit=bounds)
![[Netlify版] 0から始めようWebAR/VR入門ハンズオン with 織りなすラボ](https://cdn.slidesharecdn.com/ss_thumbnails/yoshinaganetlifyss-200719024058-thumbnail.jpg?width=640&height=640&fit=bounds)


![[BurpSuiteJapan]HTTP基礎入門](https://cdn.slidesharecdn.com/ss_thumbnails/http-170529011332-thumbnail.jpg?width=640&height=640&fit=bounds)


![[BurpSuiteJapan]Burp Suite導入・操作](https://cdn.slidesharecdn.com/ss_thumbnails/burpsuite-170529011515-thumbnail.jpg?width=640&height=640&fit=bounds)


