Downloaded 128 times
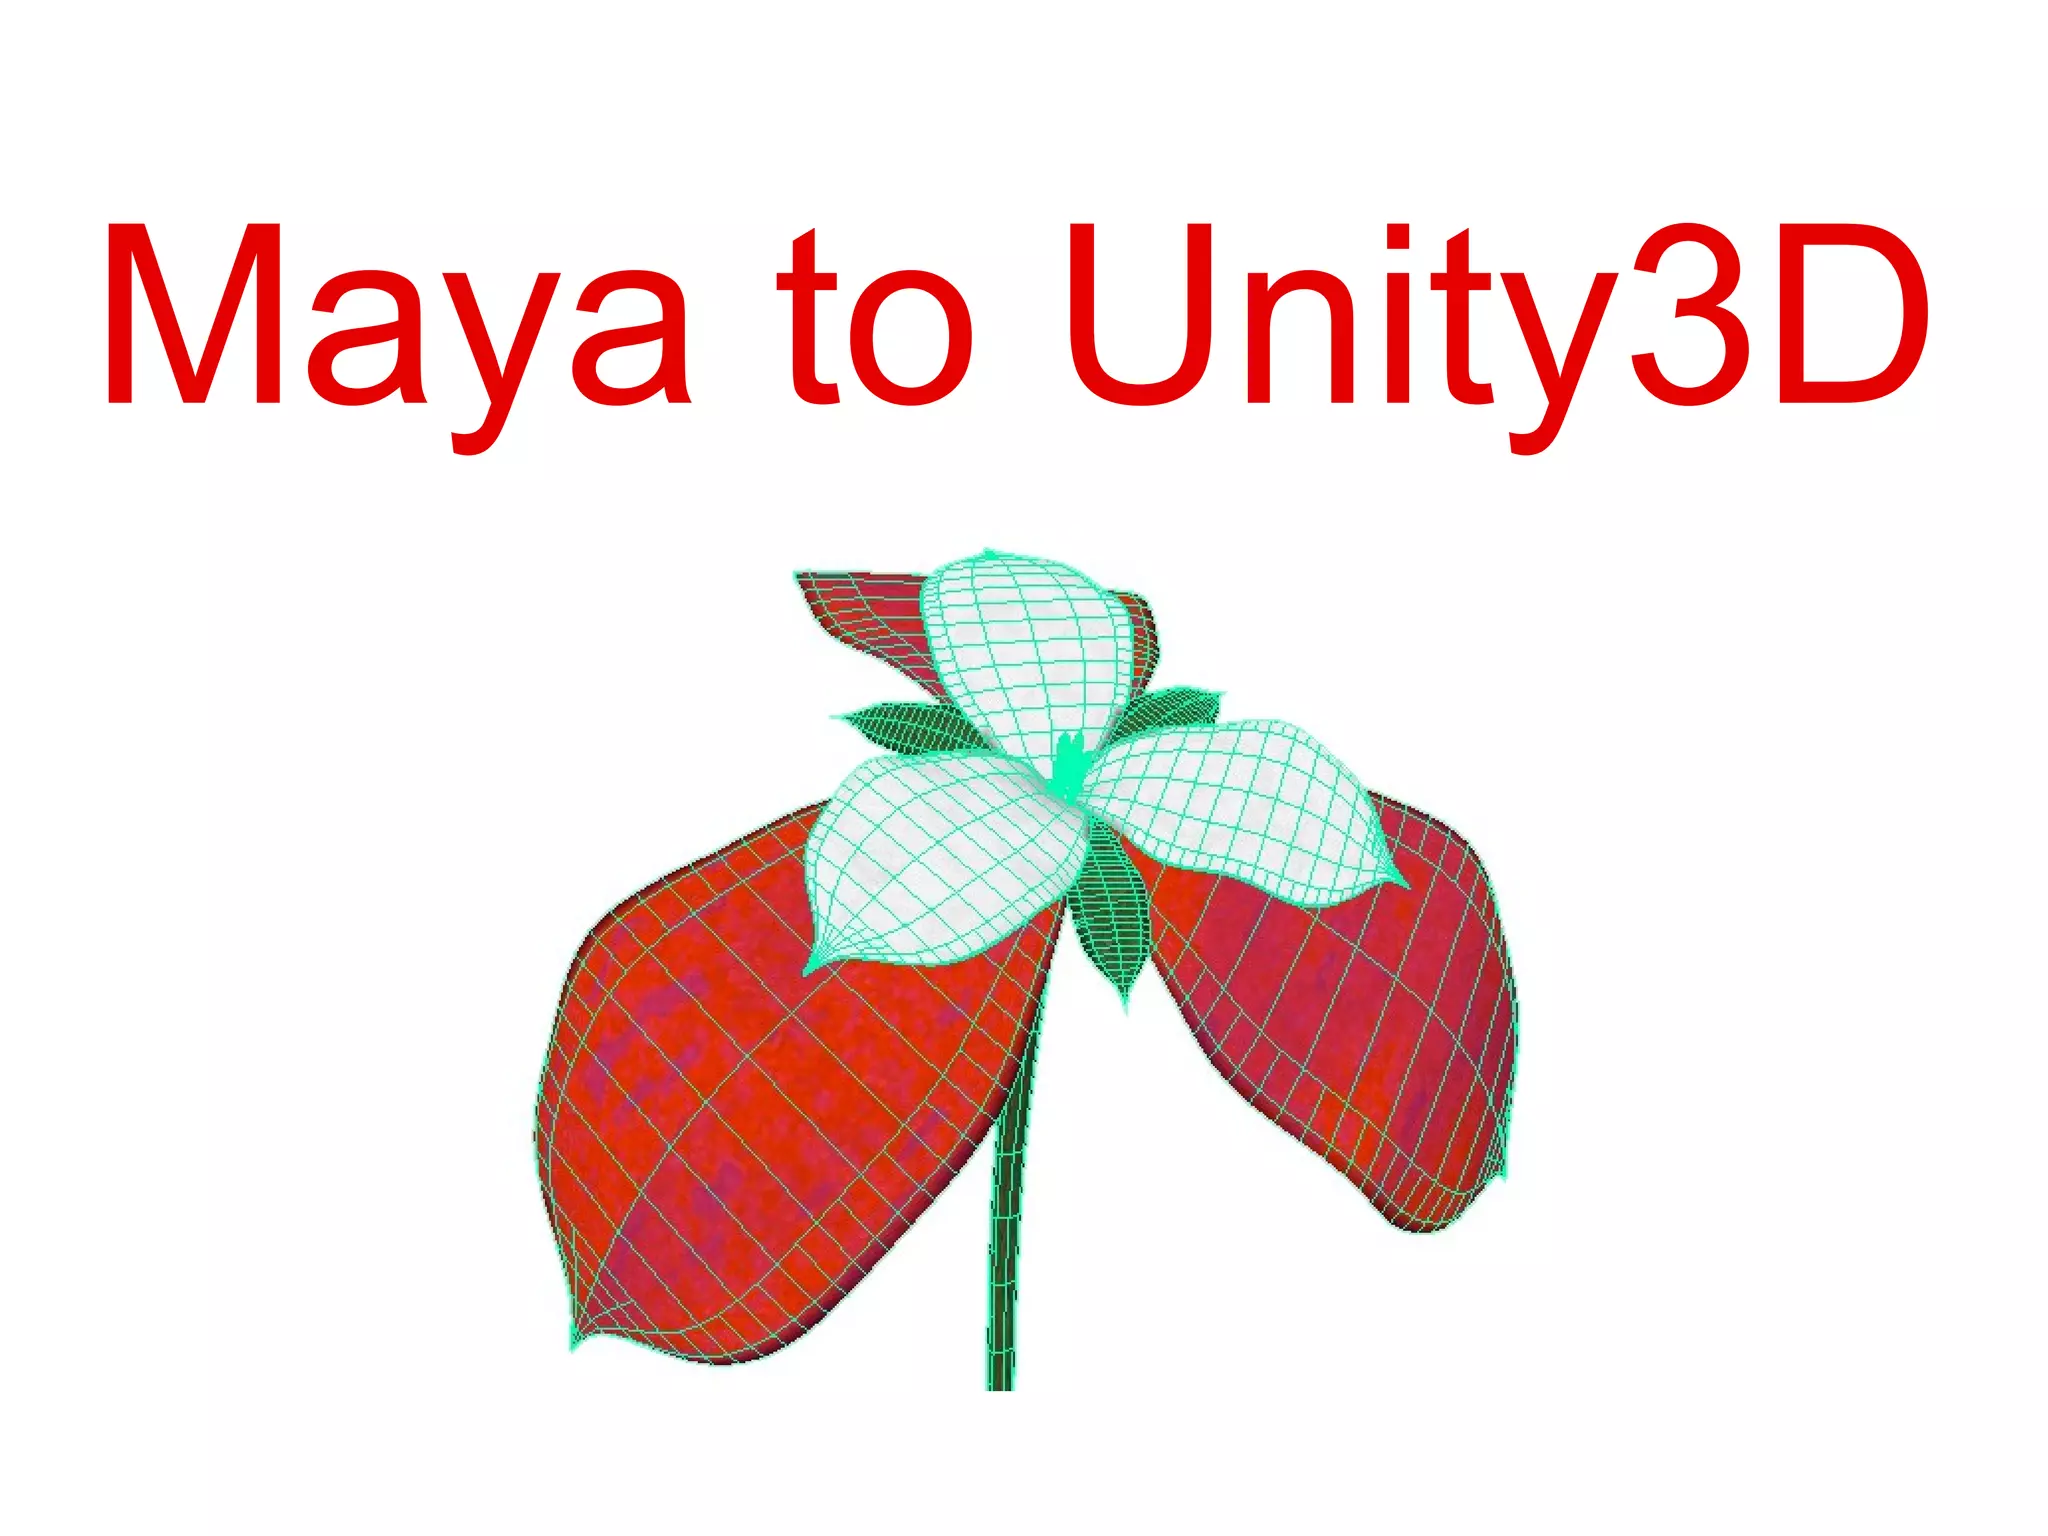
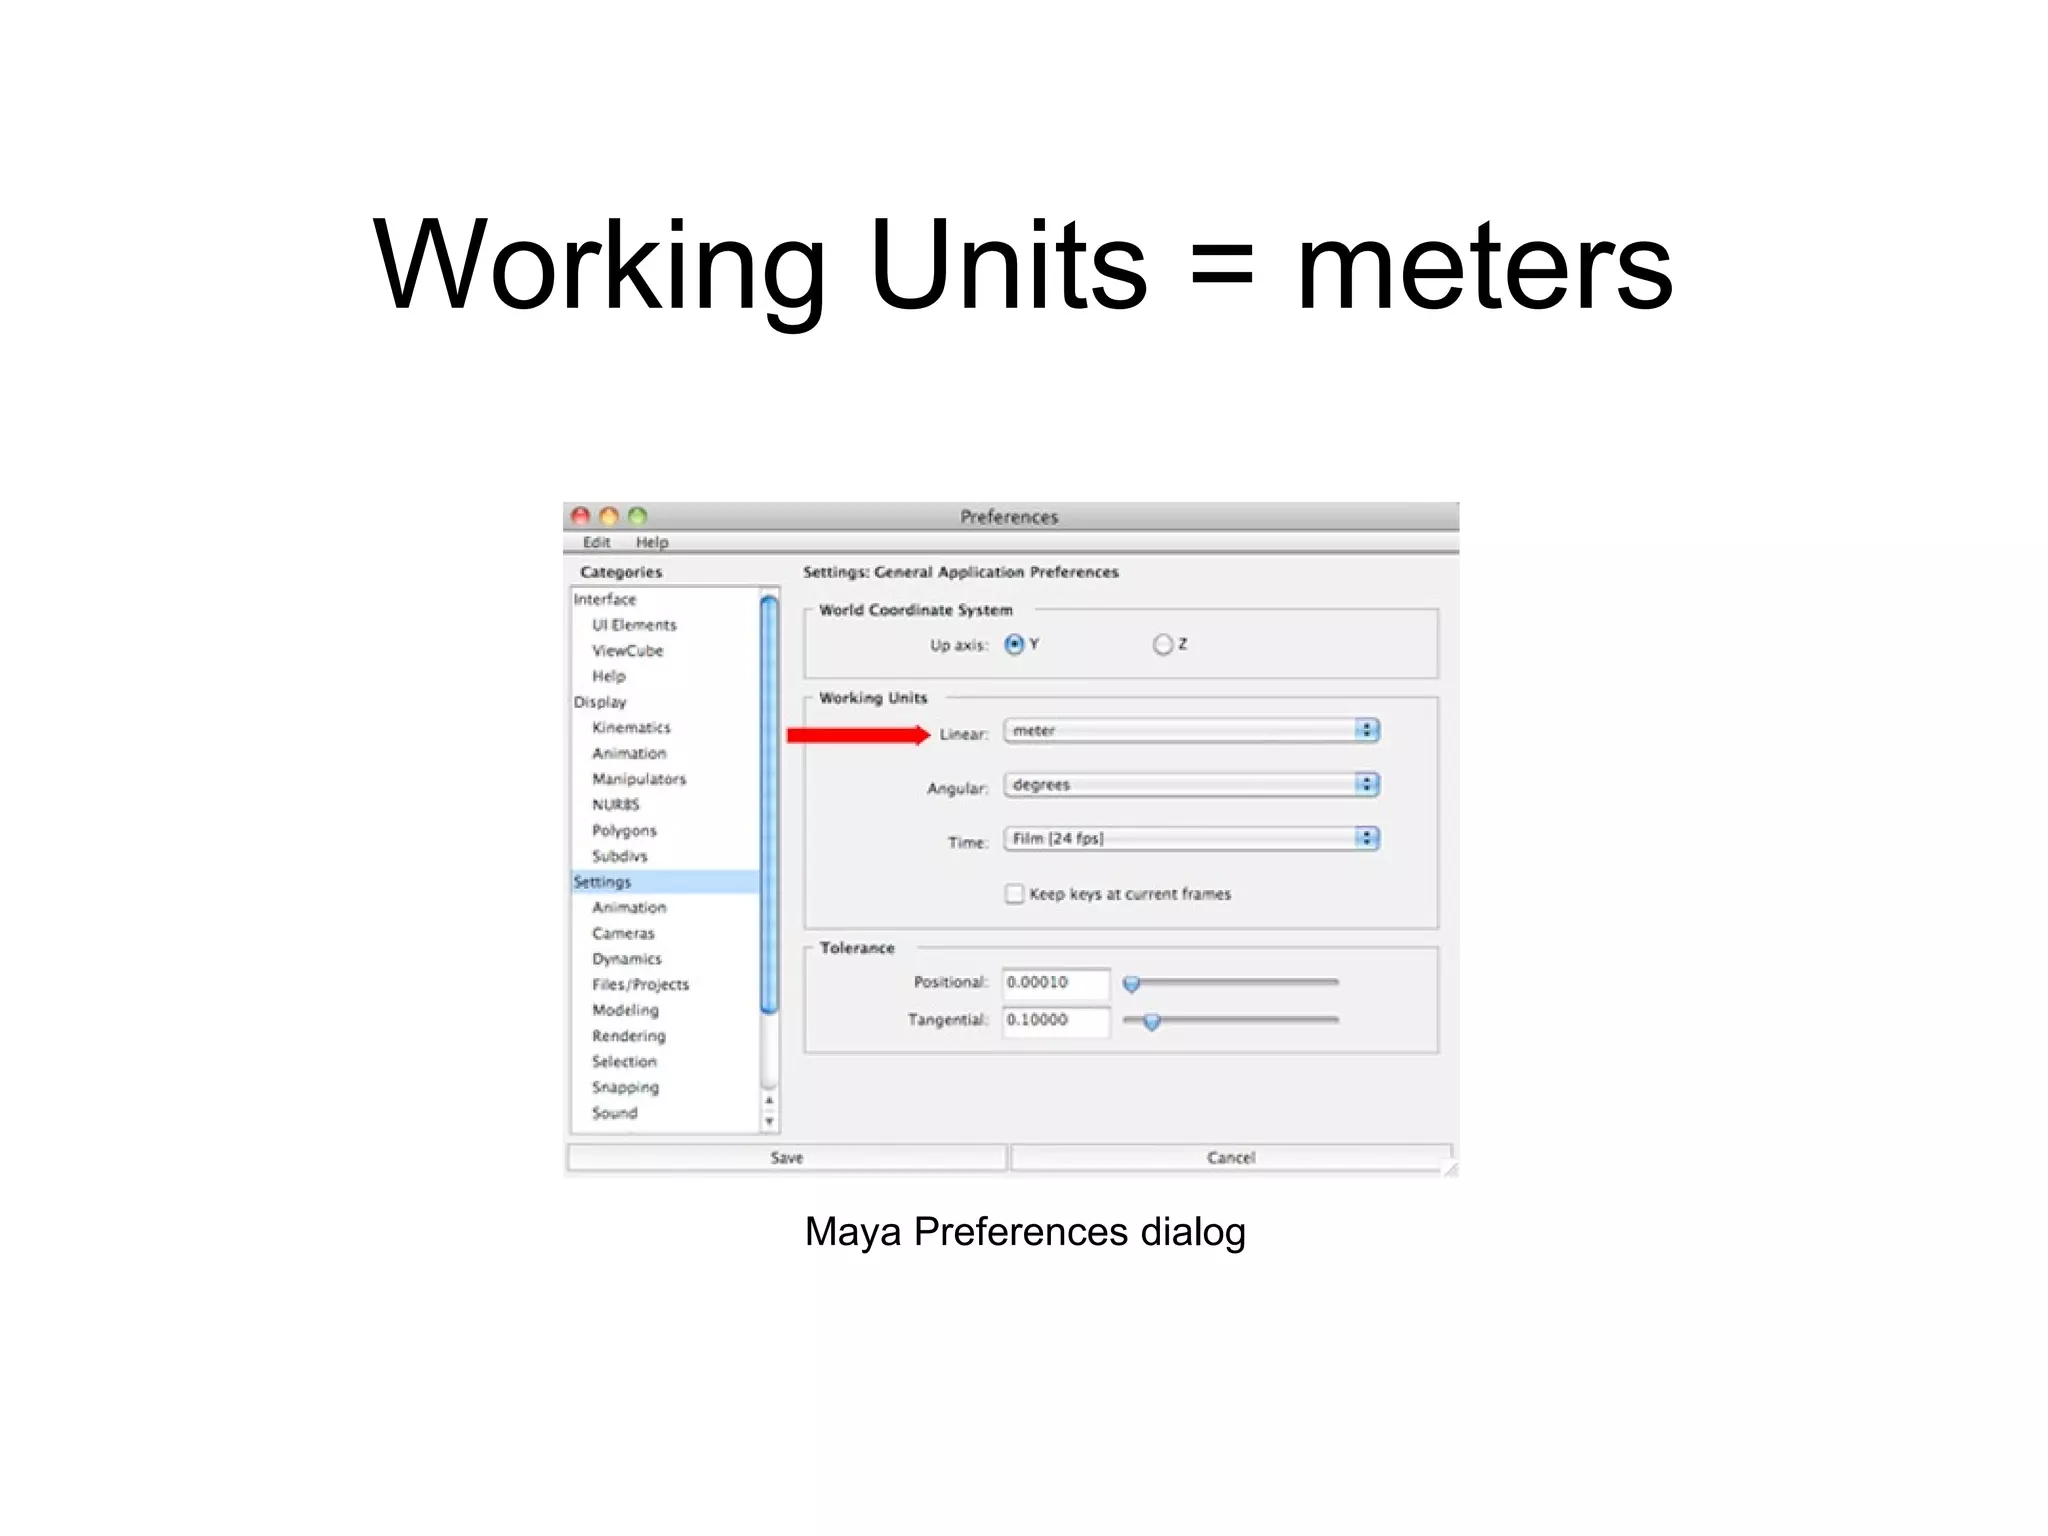
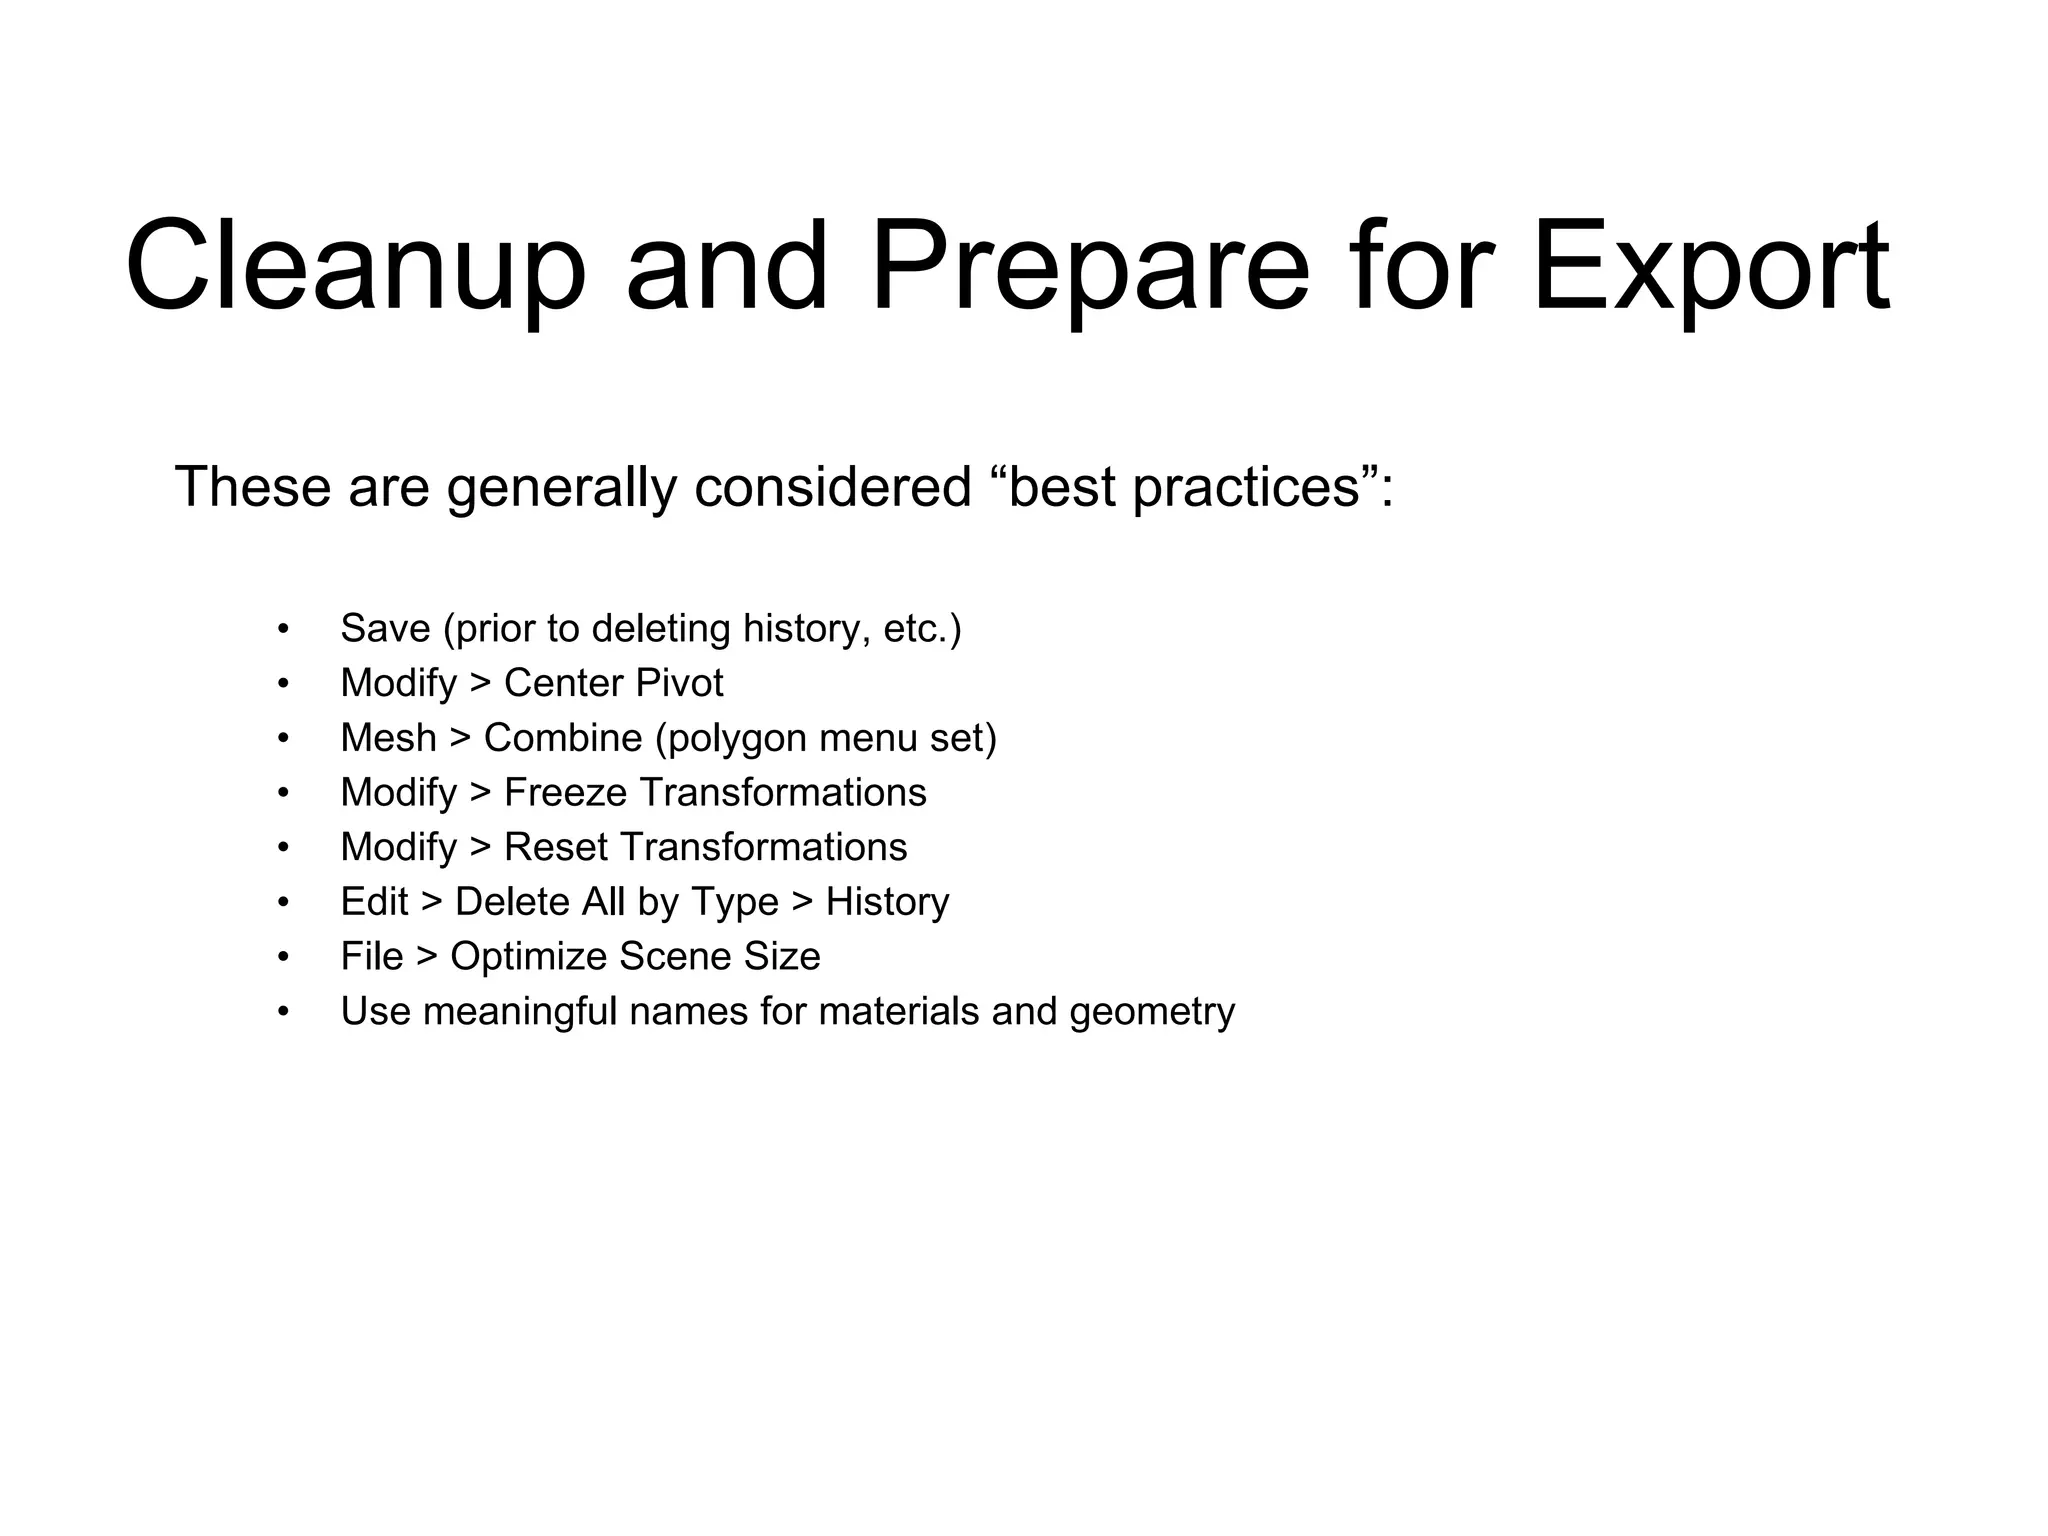
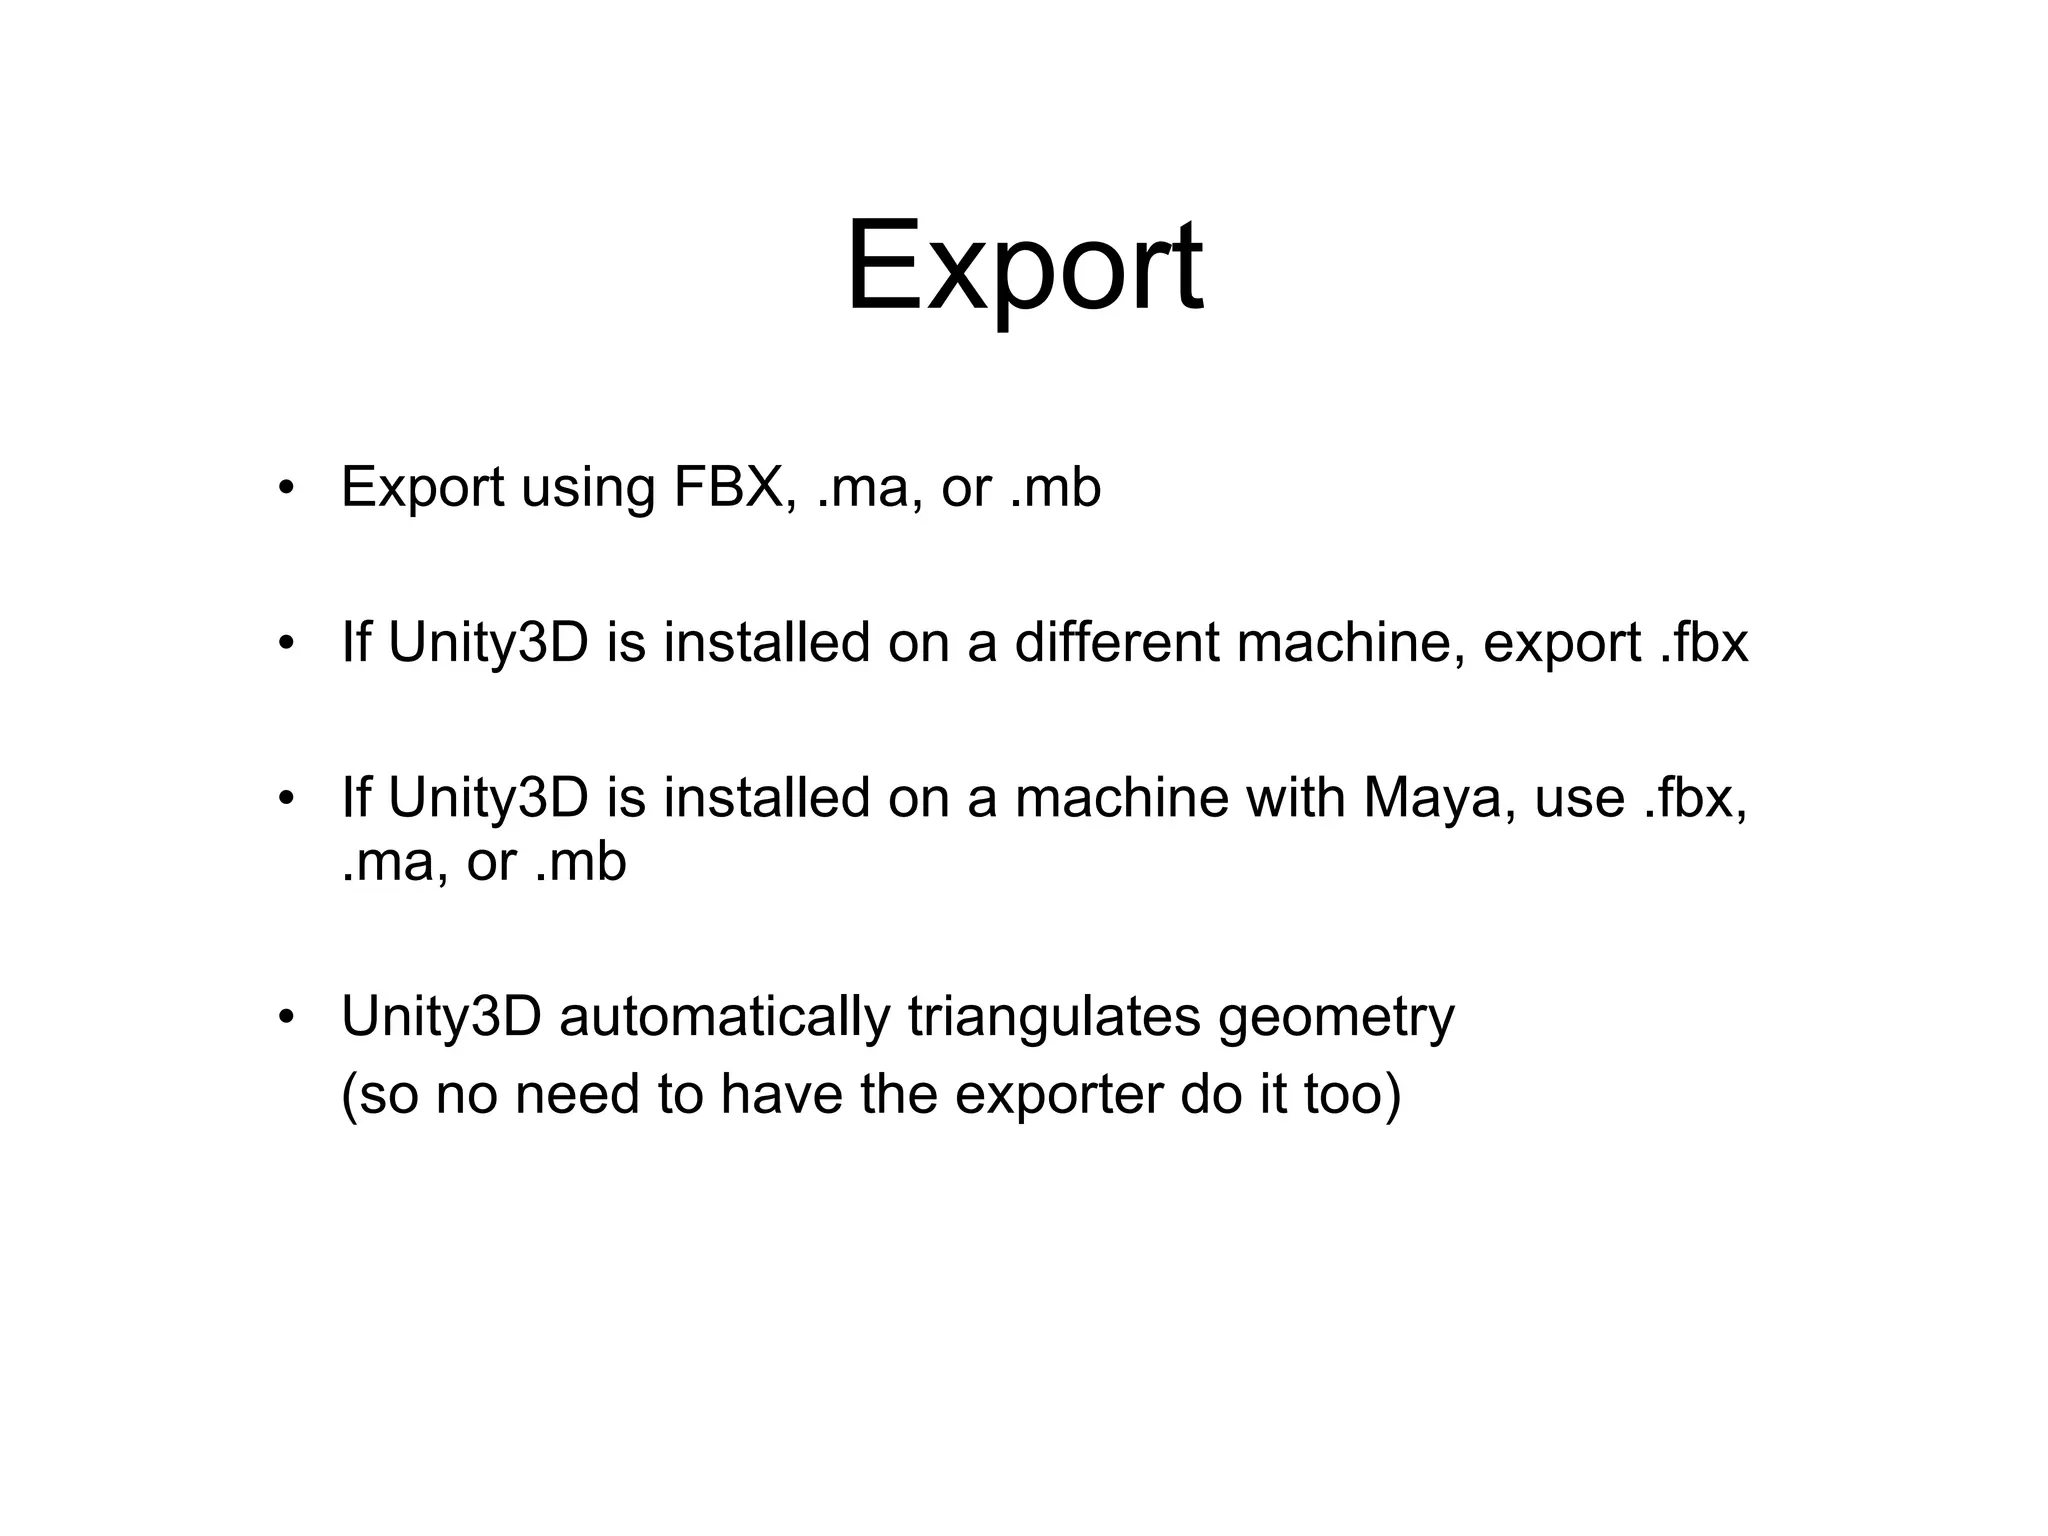
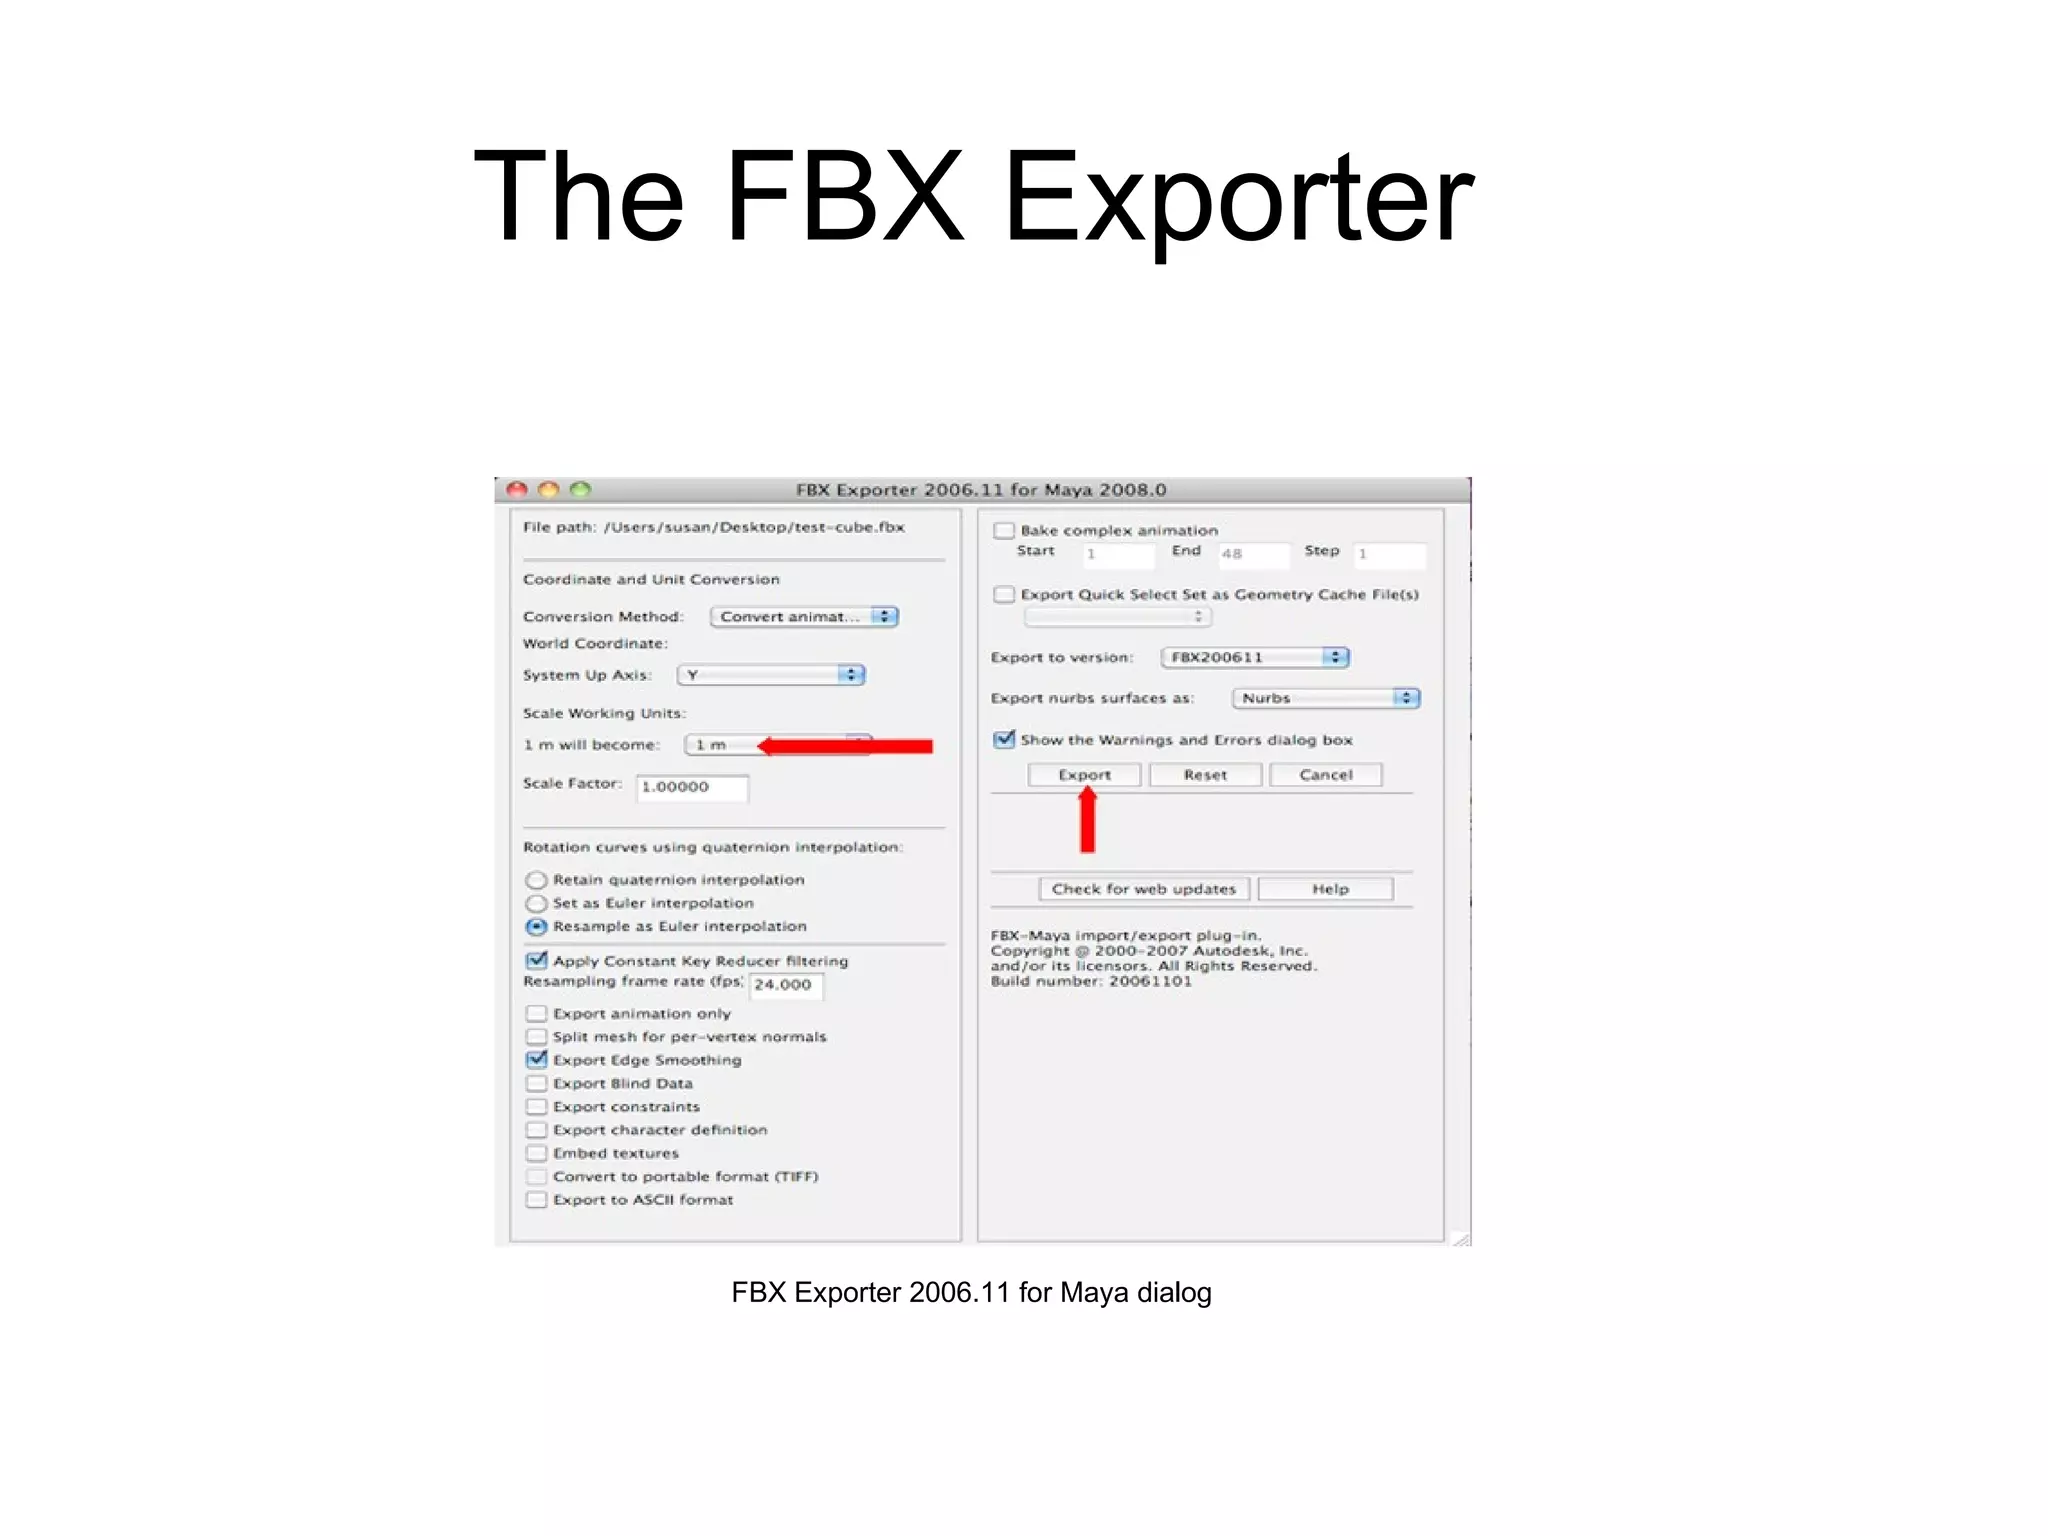
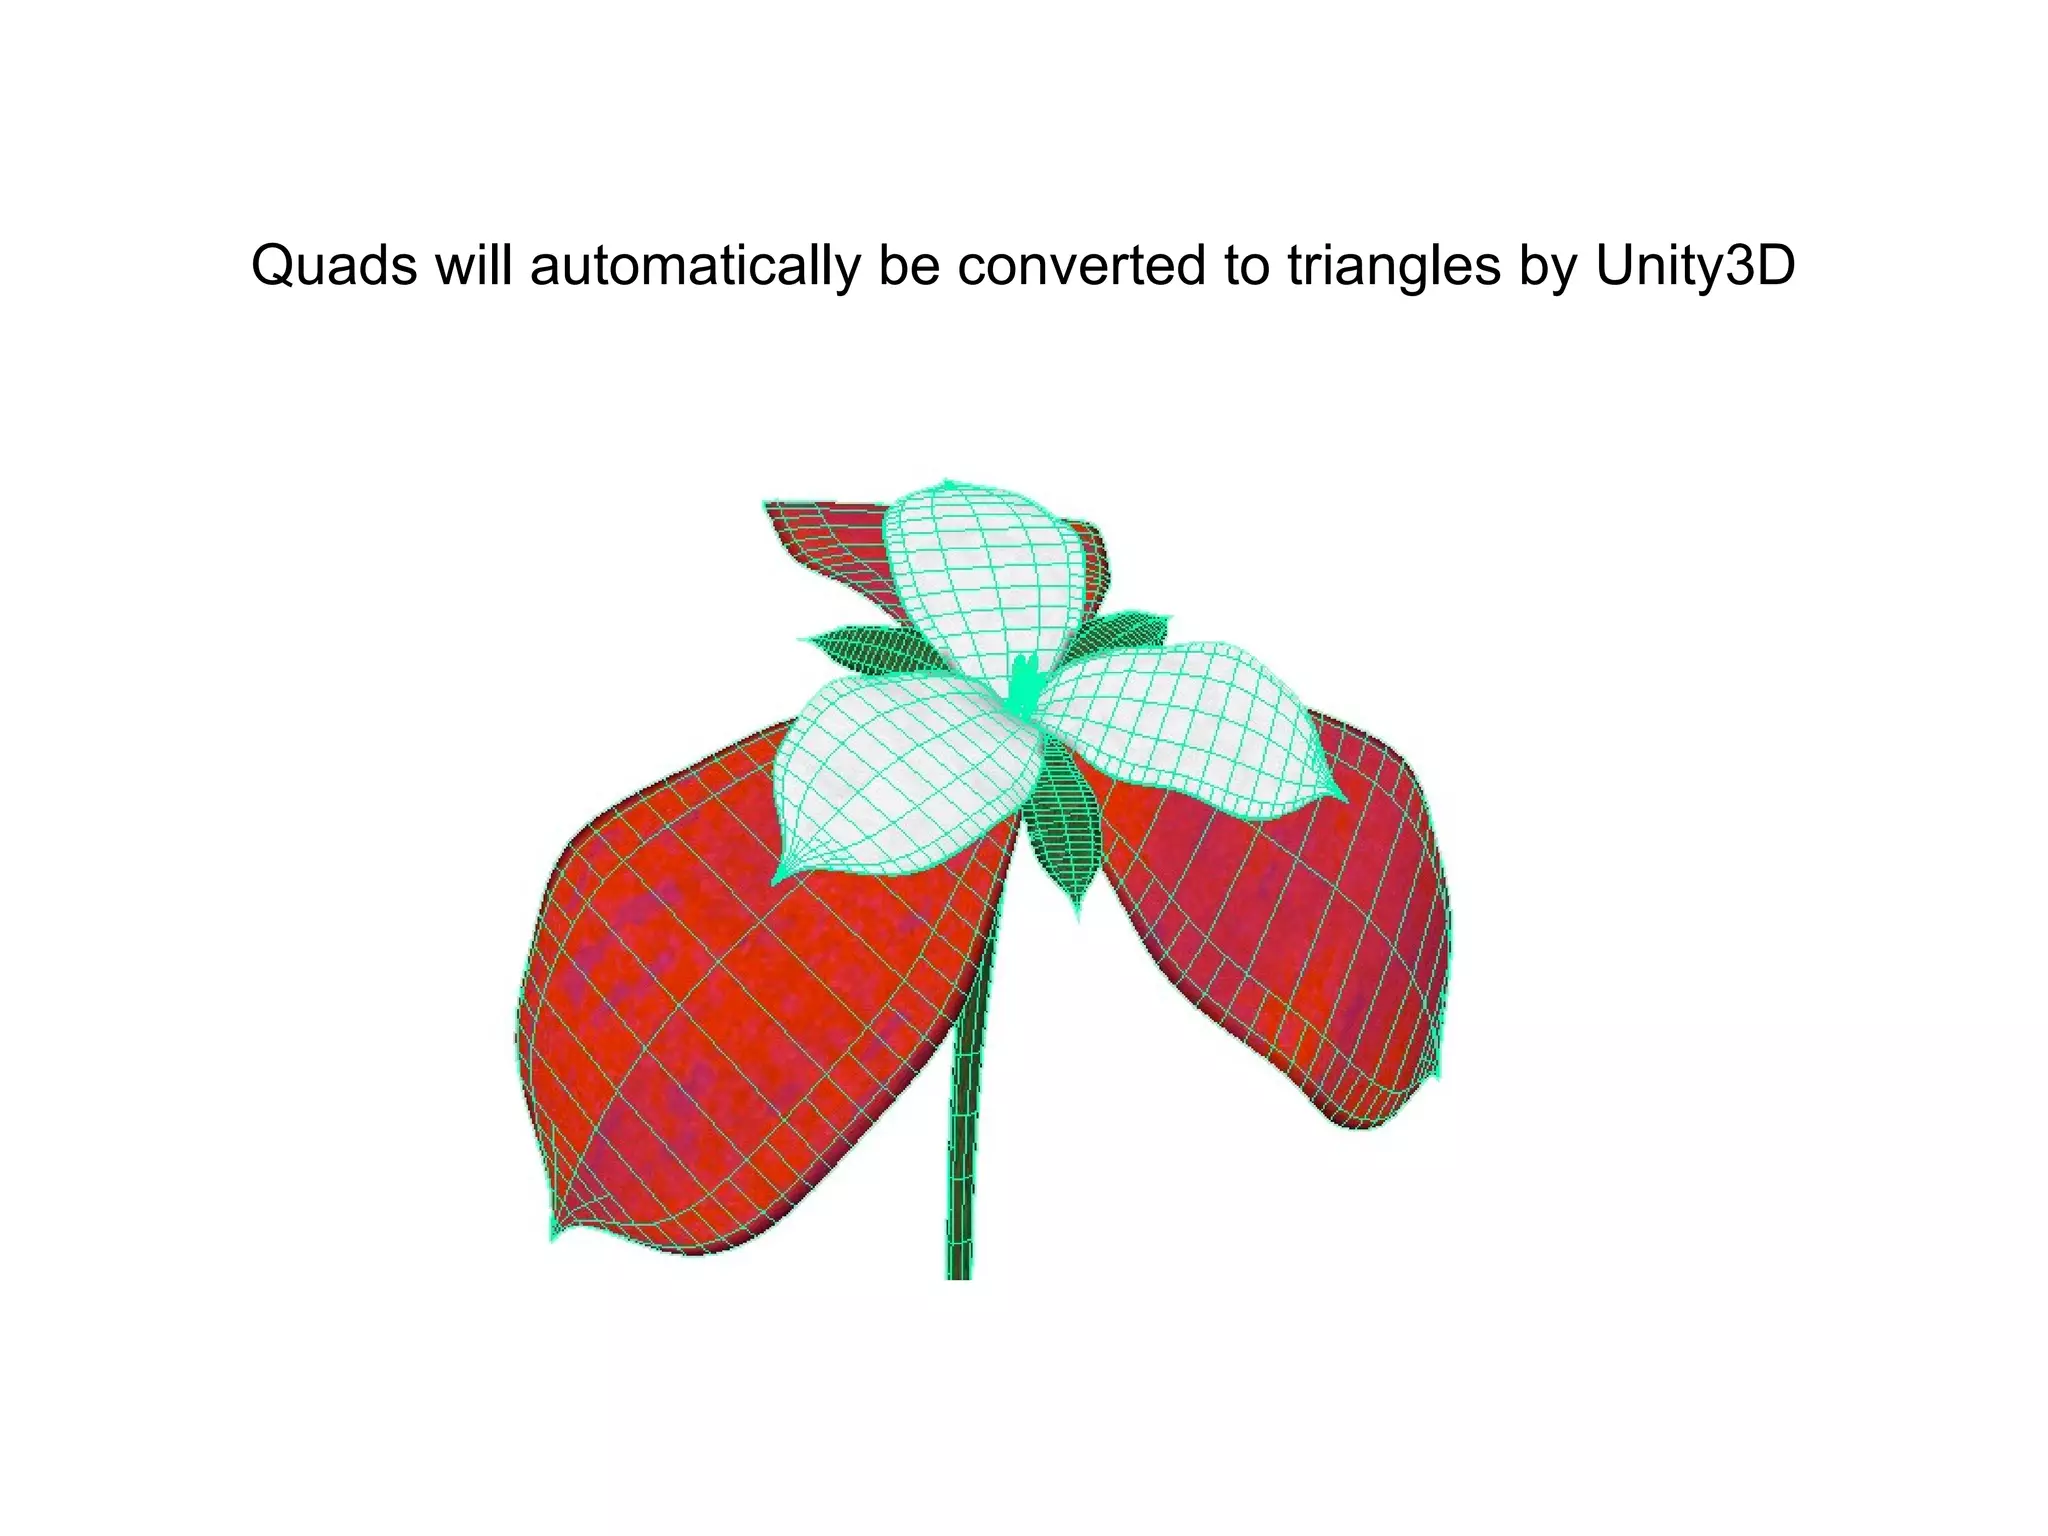

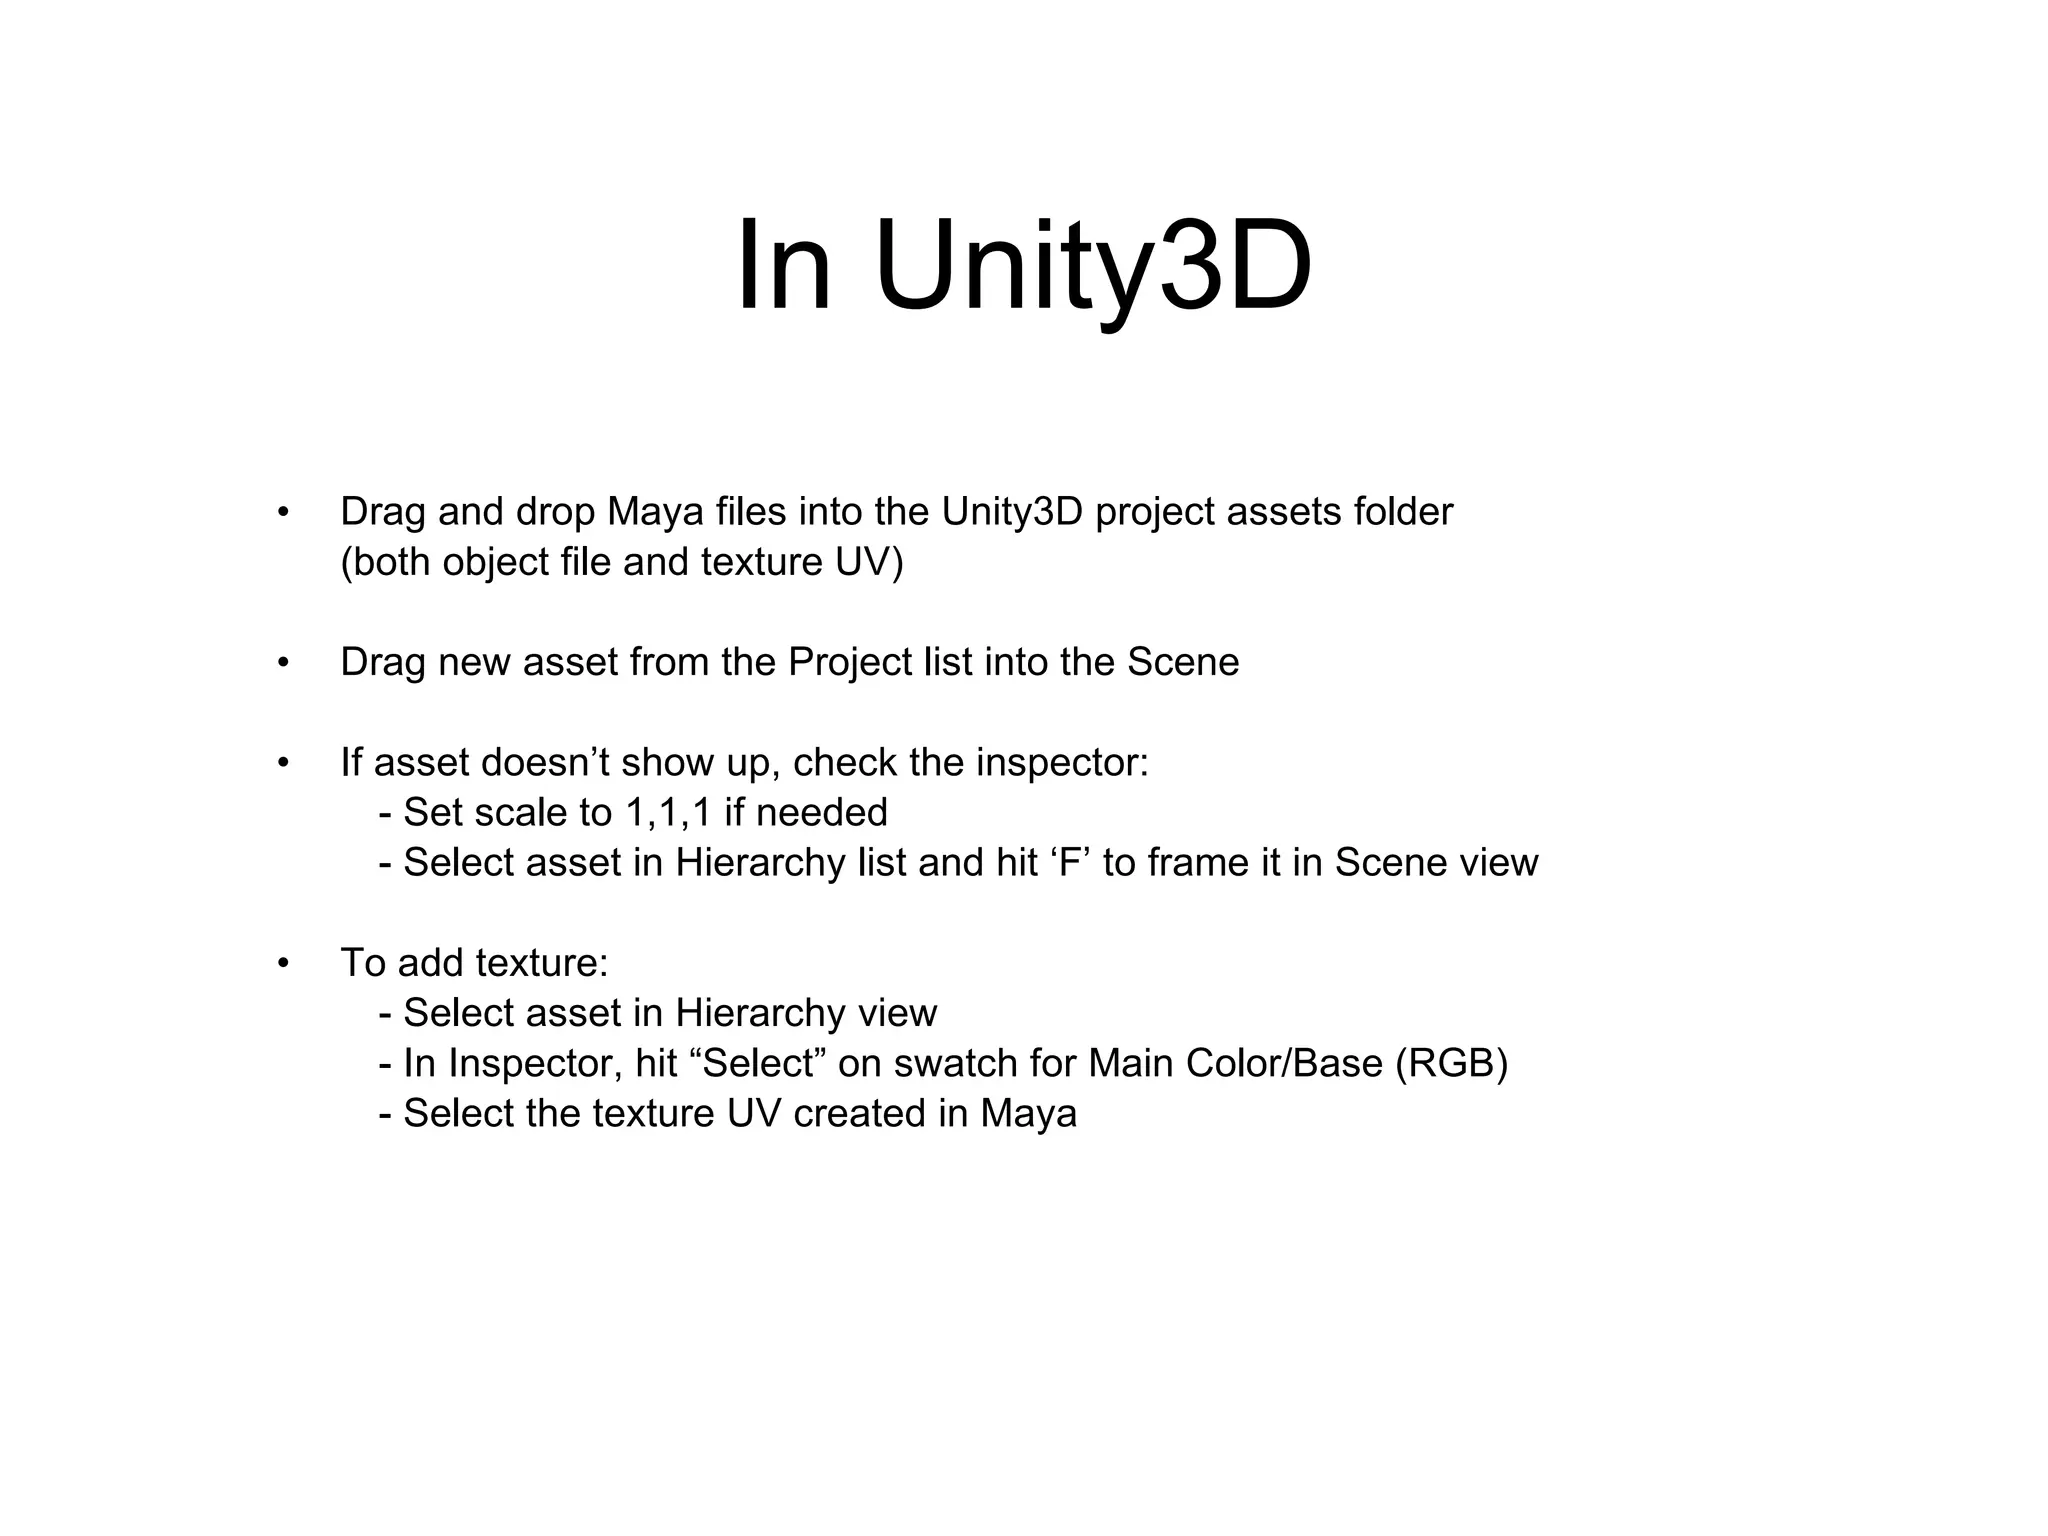
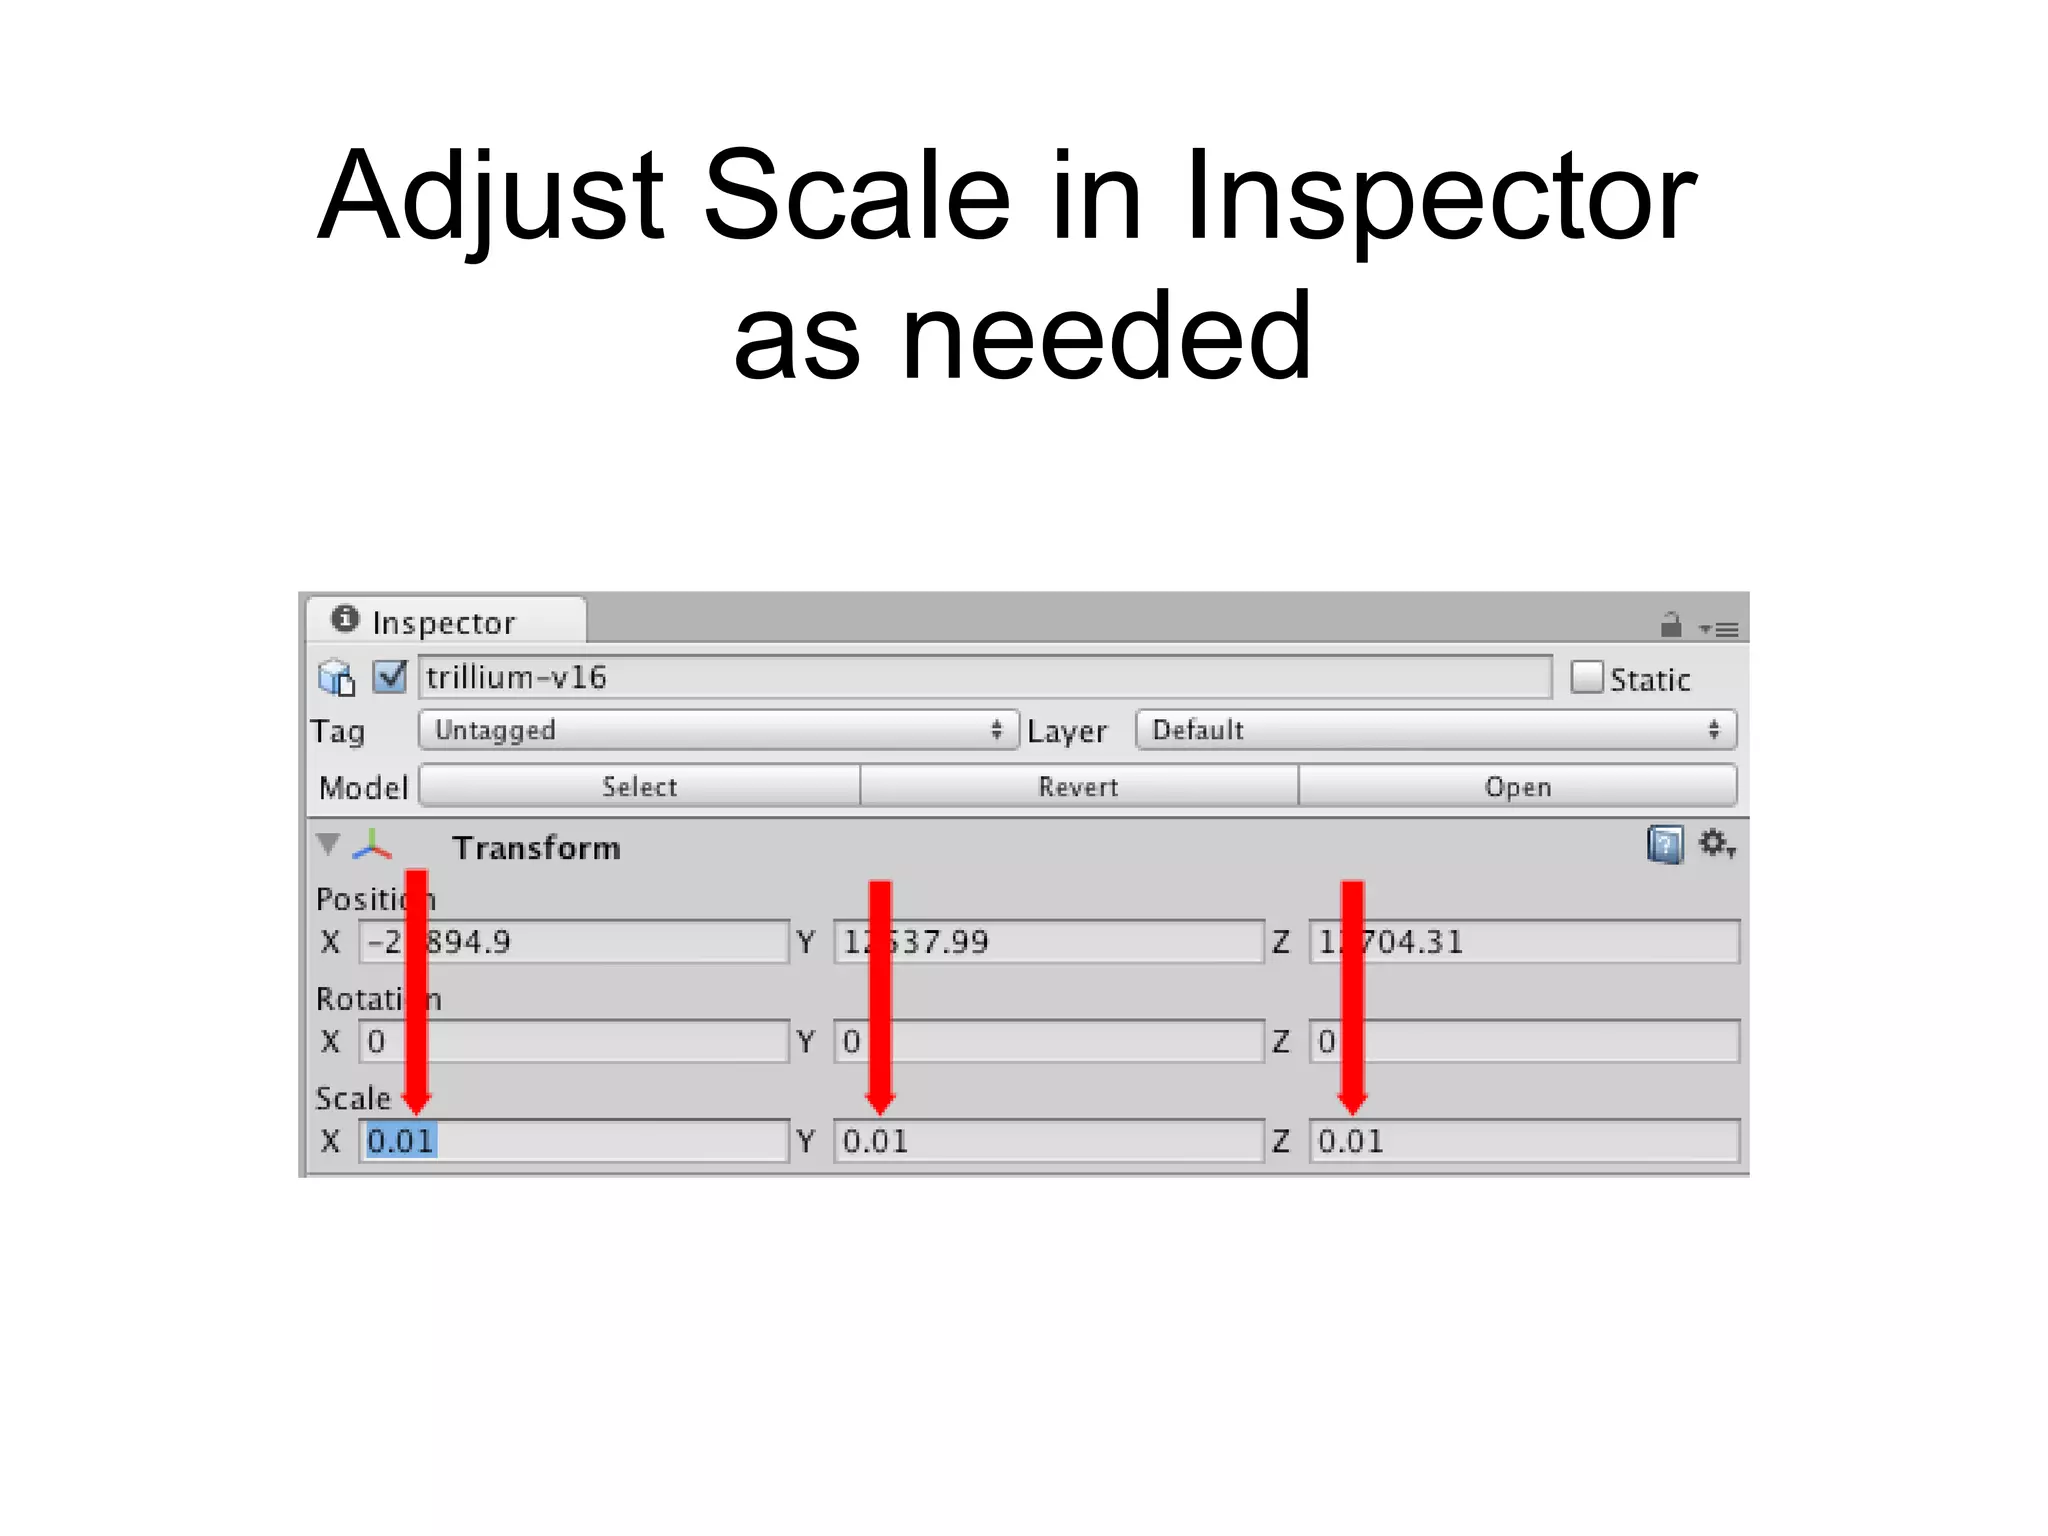
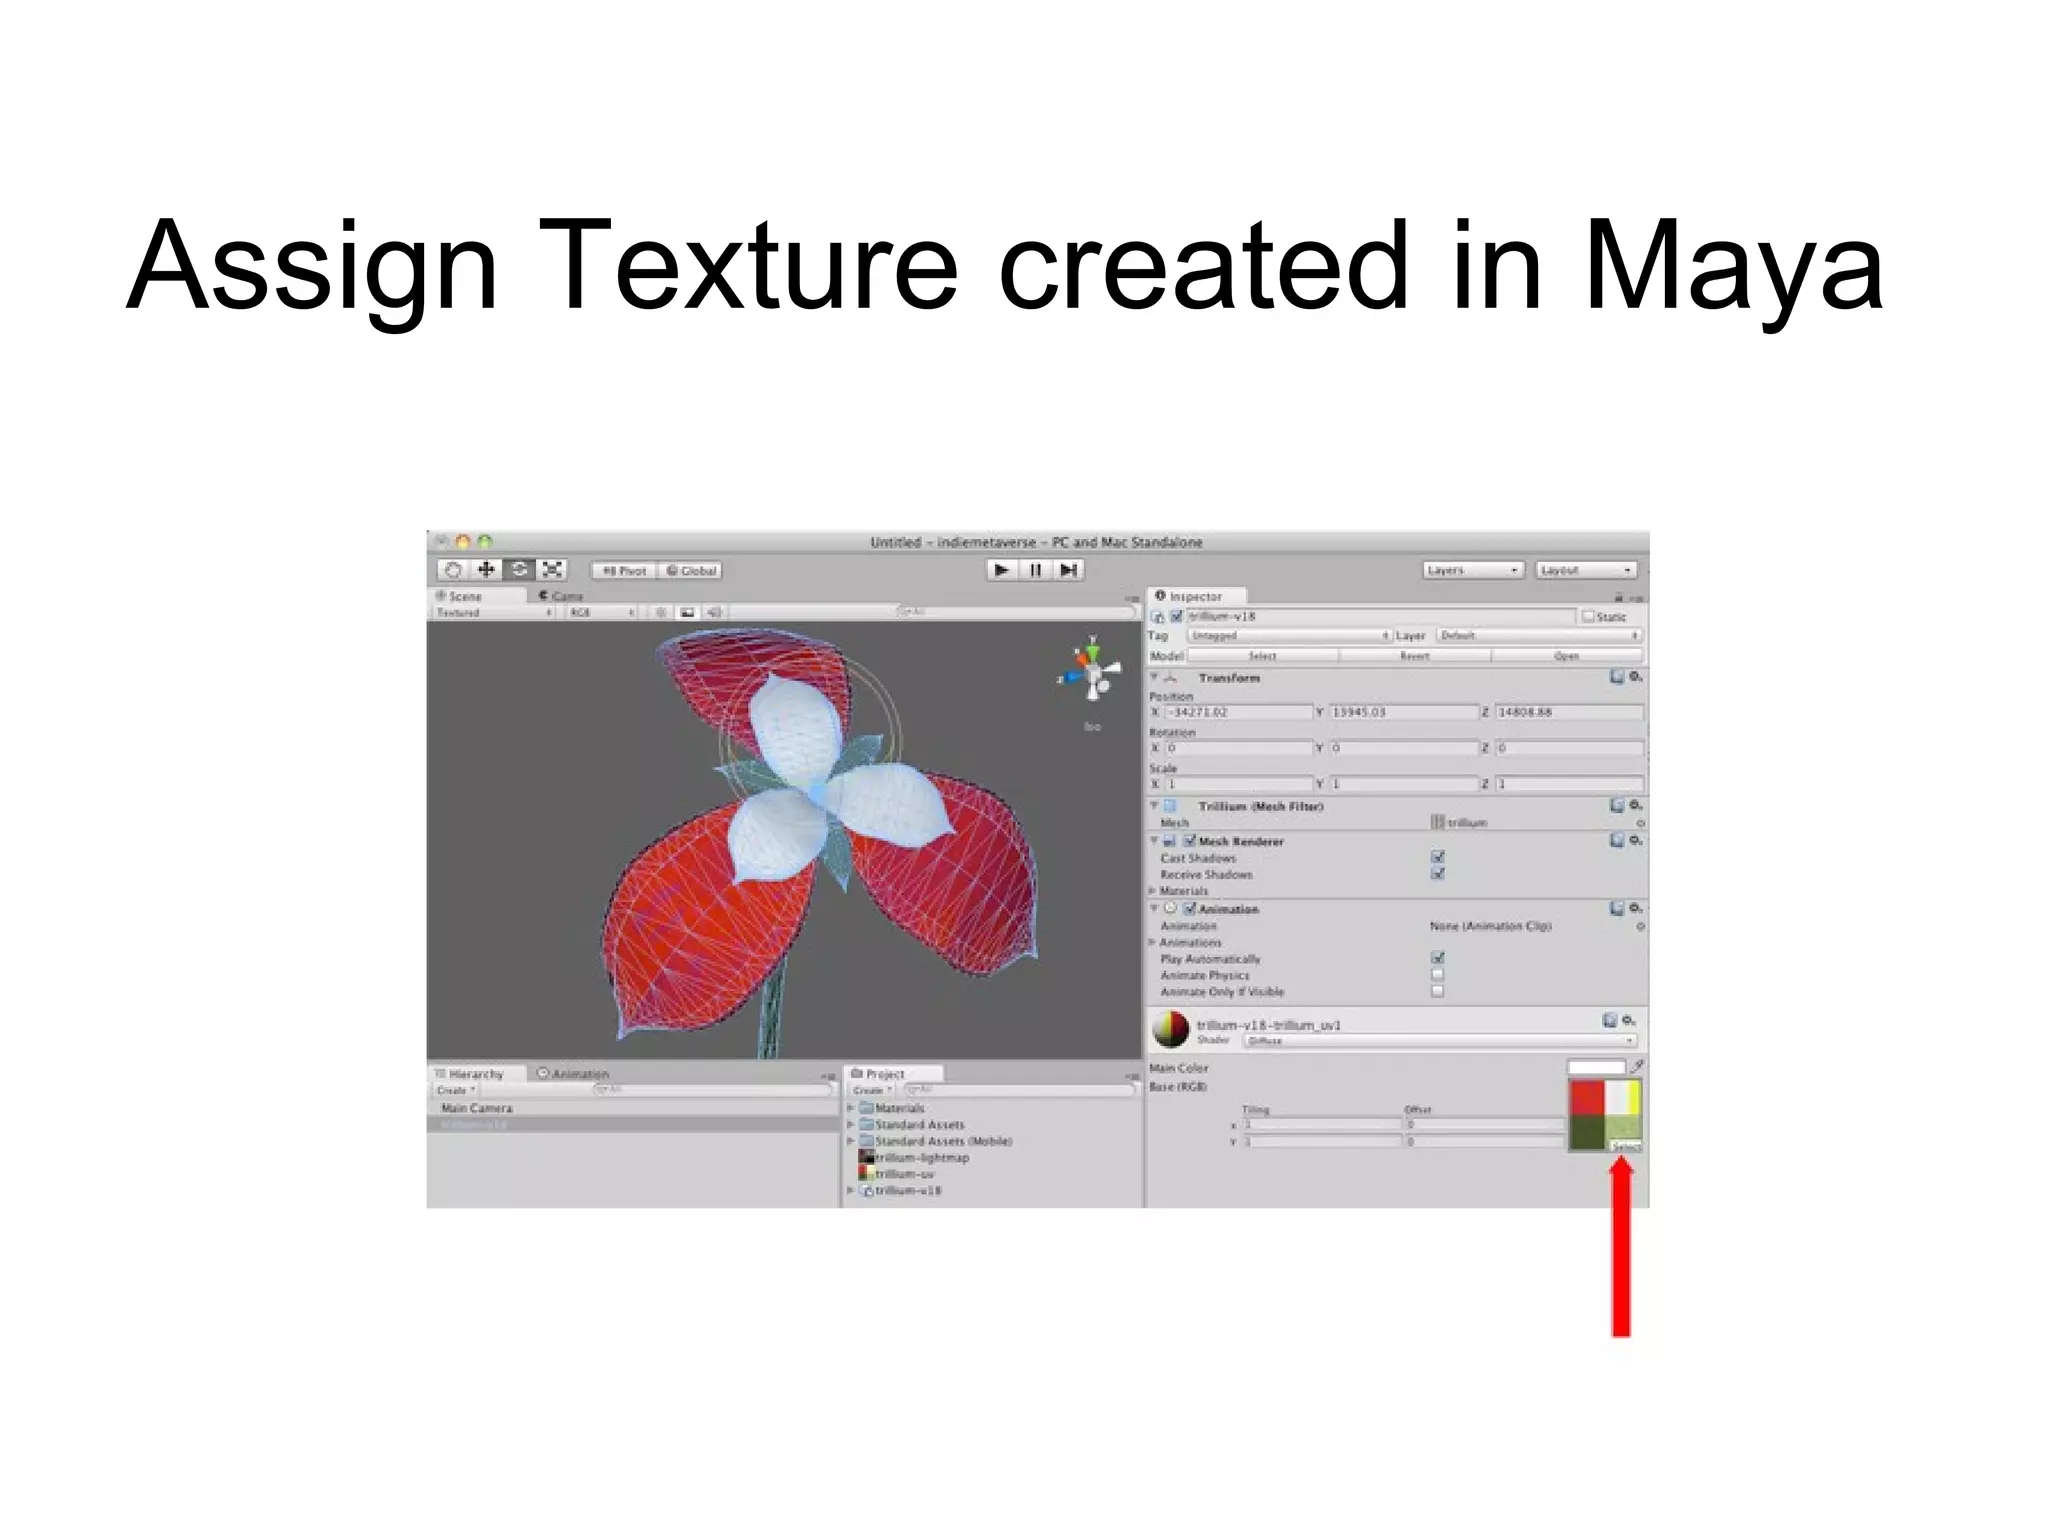

This document outlines the critical steps for utilizing the Maya to Unity3D pipeline, emphasizing preparation, modeling, and exporting techniques. It includes best practices for ensuring correct scaling and UV mapping, as well as guidelines for exporting assets effectively. The document also provides tips for adding textures and optimizing scenes for integration into Unity3D.


![Handwritten Digit Recognition and performance of various modelsation[autosaved]](https://cdn.slidesharecdn.com/ss_thumbnails/presentationautosaved-210810075721-thumbnail.jpg?width=640&height=640&fit=bounds)


![[Unite Seoul 2020] Mobile Graphics Best Practices for Artists](https://cdn.slidesharecdn.com/ss_thumbnails/arm-uniteseoul2020final-210524084305-thumbnail.jpg?width=640&height=640&fit=bounds)


![[UniteKorea2013] Art tips and tricks](https://cdn.slidesharecdn.com/ss_thumbnails/arttipsandtricksdavidllewelynv3-130501205433-phpapp01-thumbnail.jpg?width=640&height=640&fit=bounds)