The document describes the steps taken to secure a wireless network using Cisco Packet Tracer:
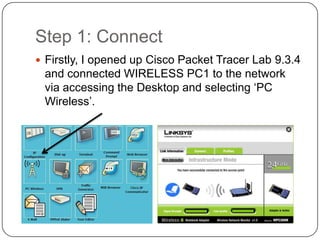
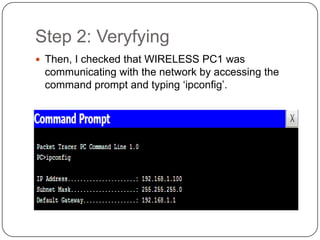
1. The wireless PC was connected to the default wireless network and the network connection was verified.
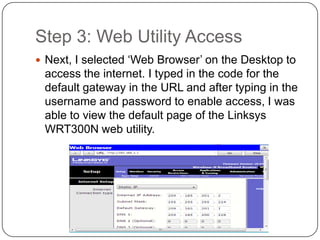
2. The web utility of the Linksys WRT300N wireless router was accessed using the default credentials to begin securing the network.
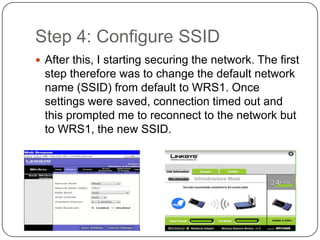
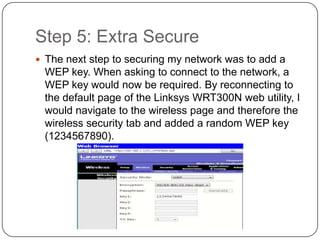
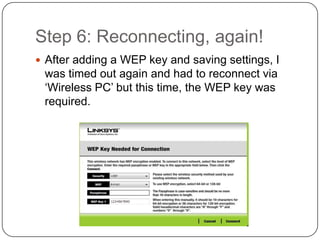
3. The SSID was changed from the default and a WEP key was added, requiring reconnection with the new SSID and WEP key.