Led cube
•Download as PPTX, PDF•
1 like•1,226 views
The LED matrix we decided to use is a 4 x 4 x 4 monochromatic LED Matrix. This is a total of 64 LEDs. The reason we chose this size, is that it provides the best of overall cube size, construction time & easier programming.
Report
Share
Report
Share

Recommended
Led cube
This document provides instructions for building a 4x4x4 LED cube controlled by an Arduino. The summary is:
The components needed include 64 LED lights, resistors, transistors, perfboard, Arduino, and wire. The LEDs are arranged in a grid and soldered together in layers. A circuit is built with the columns connected to Arduino pins through resistors and the layers connected to ground through transistors controlled by Arduino pins. Finally, the cube is connected to the Arduino and programmed to control which LEDs light up.
Introduction to wiring (Days 1,2, and 3)
This document provides an introduction to wiring and electricity. It discusses:
- The basics of electricity, circuits, and what the different wire colors mean (black, white, green)
- How power gets to homes from power stations through transformers and circuit breakers
- The purpose and function of circuit breakers to regulate current and prevent overloads
- Different types of wires (interior, exterior, gauges), how to choose the right wire for an application, and color coding
- What constitutes a short circuit and safety precautions around wiring.
Led bracelet instructions
This document provides instructions for making an LED bracelet. It contains 3 steps: 1) trim felt into a wristband shape and add snaps, 2) cut a slit for an LED and thread it through, and 3) sew the LED, battery holder, and snaps together to create a circuit that lights up when snapped onto the wrist. Decorations can then be added to complete the bracelet. LEDs only light up when electricity flows through them in the correct direction from the battery.
Fun 3.3 series and parallel circuits - notes
This document discusses series and parallel circuits. In a series circuit, the current is the same throughout the circuit but the potential difference is shared between components. Adding more components in series causes lamps to dim because the potential difference and current are reduced for each component. In a parallel circuit, the potential difference is the same across all branches but the current splits and combines at junctions. Parallel circuits allow components to work even if one fails and keep all lamps fully lit when adding more.
Presentation2
This document summarizes a student project that aims to prevent car theft and accidents. It presents the contents, introduction, flow chart, interfacing diagram, description of the hardware and software used, and features of the key components - ARM7 microcontroller, alcohol sensor, speed sensor, and ultrasonic sensor. The system works by storing owner details in the microcontroller. If the car is stolen, the owner can send an SMS to locate it using the GSM modem and GPS. Sensors can also detect alcohol levels, speed, and obstacles to prevent accidents and unauthorized driving. The main advantages are easy vehicle recovery and accident prevention.
8TH FINAL REPORT PRINT
The document is a project report for an 8x8x8 3D LED cube created by three students - Darshak Panchal, Bhaumik Patel, and Anand Shah - to fulfill their degree requirements. It includes certificates of completion, acknowledgments, an abstract describing the LED cube's ability to display graphics and respond to motion, and forms related to applying for a patent on the LED cube invention.
Smart fuel theft detector
This document summarizes a smart fuel theft detector system that uses ultrasonic sensors and microcontrollers. It detects fuel theft by monitoring fuel levels and comparing consumption rates to changes in fuel levels over time. The system measures fuel levels using ultrasonic sensors and slope sensors to account for tilting. A microcontroller filters readings and detects theft based on inconsistent fuel changes and consumption rates. It sends data to a database using GPRS modules for companies to monitor fuel usage. The system aims to prevent fuel theft from vehicle tanks and identify thieves.
Fuel theft prevention system
This document describes a fuel theft prevention system developed by students at Dayananda Sagar College of Engineering. It includes designs for a locking fuel cock made of aluminum alloy to replace the standard fuel taps on motorbikes. A solenoid valve is used to open and close the fuel cock electrically based on signals from an ignition switch and handlebar switch. The device was prototyped using CNC machining and tested for effectiveness in preventing fuel theft and maintaining suitable fuel flow rates when activated properly. The document outlines the system design, fabrication, testing process, and discusses the scope for mass production.
Wireless ai based intelli industrial security robot 2 ppt
This document describes a wireless industrial security robot project. The robot is designed to detect dangerous events like fires, gas leaks, or high temperatures using sensors. It can provide live video streaming to a remote monitor. The robot uses a microcontroller, motors, sensors and a mechanical arm. It aims to save manpower and improve safety by allowing work in hazardous environments. When issues are detected, it can send alert messages via GSM. The robot is expected to measure environmental data, detect obstacles, and change speed based on sensor readings.
Advanced vehicle security system 2016 upload
This document presents an advanced vehicle security system that uses GPS and GSM technology to prevent theft and track vehicle location. The system contains components like a GPS module, GSM modem, infrared sensors, microcontroller, relay switch, and security measures. It works by detecting motion with infrared sensors and alerting the owner via GSM. The owner can then activate security measures like ignition cutoff by sending DTMF tones to the GSM modem. The GPS tracks location which is sent to the owner. In an accident, sensors detect impact and send an alert message with location to emergency contacts. The system provides cost-effective vehicle security and tracking.
Vehicle Over Speed Detection on Highways
While driving on highways, motorists should not exceed the maximum speed limit permitted for their vehicle. This speed checker will come handy for the highway traffic police as it will not only provide a digital display in accordance with a vehicle’s speed but also sound an alarm if the vehicle exceeds the permissible speed for the highway.
Coal Mine Robot (project report)
This document summarizes a student project report on developing a coal mine surveillance robot. The project aims to reduce coal mine fatalities by having an autonomous robot detect toxic gases, temperature, and transmit the data wirelessly. The report outlines the objectives of gas and temperature detection as well as data transmission. It provides a system overview showing the key components including an Arduino microcontroller, gas and temperature sensors, motors for locomotion, and Bluetooth for wireless communication. The project seeks to create a low-cost robot that can operate in harsh mining environments and transmit sensor data to any nearby device.
Led cube presentation
The document describes a major project report on creating an 8x8x8 LED cube. It includes an introduction, theory, list of hardware and materials used, circuit diagram, assembly instructions, programming, and conclusions. The project involved an AVR microcontroller, latch and decoder ICs, LEDs, resistors, and other components to create an 8x8x8 LED cube that can be programmed to display patterns. The report discusses the assembly, wiring, programming challenges faced and future applications of LED lighting.
SMART HELMET
To design a smart helmet with features like road hazard warnings, finger print
authentication and alcoholic detection
INTELLIGENT HELMET FOR COAL MINERS
The document describes an intelligent helmet being developed for coal miners that aims to provide greater safety. It contains sensors like gas, temperature, and humidity sensors as well as a microcontroller and LCD display. The transmitting end will contain these sensors and microcontroller and the receiving end will monitor the data received. It provides block diagrams of the system components and circuit diagrams for the power supply and microcontroller connections. The power supply converts mains AC to regulated 5V and 9V DC required for components using a transformer, rectifier, and voltage regulators.
smart helmet
This document describes the implementation of a smart helmet system using solar power. The system includes an alcohol sensor, temperature sensor, vibration sensor, GPS module, GSM module, and microcontroller to provide safety features like detecting accidents, monitoring alcohol levels, tracking location, and regulating temperature. The smart helmet aims to reduce accidents by preventing intoxicated riding and automatically alerting emergency contacts in the event of a crash. It can also be used to remotely immobilize a vehicle if the helmet is removed or stolen. The system design uses low power components like a solar cell to allow for portable operation.
anti theft vehicular security system
This document describes a low-cost anti-theft system for vehicles. It uses an embedded chip with a proximity sensor that requires a unique password to start the car. If an incorrect password is entered three times, the system sends a text message with the vehicle location to local police and the owner. It also deactivates the fuel injector and activates a secret lock trapping the unauthorized user inside the car until the owner arrives. The system uses common components like a microcontroller, keypad, LCD screen, and GSM module to send alerts for around Rs. 7,300, providing sophisticated security at low cost.
Zigbee based intelligent helemet for coal miners ppt
This one is the useful project for embedded students..and it is the real time project ...
so guys u can download and implement with your useful thoughts ...
SMART Vehicle Secure PPT
Today, every person facing the problem of traffic jam on the road, road accident is the measure problem for us. So this device “SMART VEHICLE SECURA”, which can be useful for stopping the accident and also useful for saving the life of human being. It is a device that works to provide the security of the vehicles.
final_report
This document describes a system called "Accident Detection, Theft and Drive Protection using Intelligent Wireless Safety Helmet". The system consists of a helmet unit and vehicle unit that communicate wirelessly. The helmet unit ensures the rider is wearing a helmet and not under the influence of alcohol throughout the ride. If these conditions are not met, it communicates with the vehicle unit to prevent the ignition from starting. The vehicle unit detects accidents using sensors and notifies emergency contacts by SMS with the rider's location using GPS coordinates. The system also provides theft protection as the helmet is required along with the key to start the vehicle.
The Smart Helmet
The Smart Helmet is an innovative idea for a business proposal. This proposal aims at the security and safety of the bikers against road accidents, while also providing them with a luxurious, comfortable two-wheeler experience. Each Smart Helmet has been designed and assembled by our own mechanics and engineers, and each helmet has an in-built circuit and software with various functions.
Wireless power-theft-monitering-ppt
This document describes a proposed system for wirelessly monitoring power theft. A microcontroller would be interfaced with a meter and sensors to detect abnormal power usage. If power theft is detected, it would trigger a relay to cut power and send a wireless message to alert authorities. The goal is to reduce losses from power theft by identifying exact locations of theft in real-time.
ppt on embedded system
This presentation provides an overview of embedded systems and describes a collision avoidance robot project. It introduces embedded systems and gives examples. It then describes the key components of embedded systems like processors and memory. It discusses the software used for the project. It introduces the collision avoidance robot project, describing its sensors, control unit, actuators and working. It provides code snippets to show how the robot's movement is controlled based on sensor input to avoid collisions.
Secured vehicle control system
This document presents a vehicle theft control system project that was submitted by K. Saikrishna. The project aims to develop a secured vehicle control system using various hardware components like an IR sensor, microcontroller, LCD display and buzzer to detect unauthorized access and alert the owner. The system works by monitoring the vehicle's doors and ignition with sensors connected to a microcontroller that can detect intrusions and activate an alarm.
How to install under counter LED strip lights
Here is a step-by-step documented guide that will walk you through exactly how we installed under counter LED strip lighting at a local cafe. With this guide you will learn how to cut, connect and install strip lights into place as well as how to install a LED strip light dimmer. These steps can also be used for other LED strip light projects, such as cove lighting and under cabinet LED strip lighting installations. http://www.flexfireleds.com/how-to-install-led-strip-lights-under-counter-under-cabinet-led-install
295889096 music-reactive-multicolor-led-lights
This document provides instructions for building music reactive multicolor LED lights that change color in response to the beat of music. The lights are made using an Arduino, RGB LED strip, audio input jack, and transistor circuit to amplify the Arduino signal. The 11 step instructions cover preparing an enclosure, soldering components, connecting the circuit to Arduino, adding an audio input, power, code upload, and using the finished project.
Multiplexing With Arduino and the 74HC595
Multiplexing With Arduino and the 74HC595
For more informations, please check it here: http://www.componentschip.com/details/Texas-Instruments/74HC595D.html
Electronic Circuit For Christmas Tree
This document provides instructions for building a Christmas decoration project that uses 18 LEDs flashed at different rates by a 4060B IC. The circuit is powered by a 9V battery and uses the 4060B oscillator to flash the LEDs arranged on a printed template in the shape of a Christmas tree. Parts required include LEDs, resistors, a capacitor, IC socket, switch and battery clip. The stripboard circuit is simple but wiring the many LEDs carefully is important to avoid damage. Adjusting the preset resistor controls the flash rates of the LEDs on different pins of the 4060B IC.
Insructables fm listening bug
This document provides instructions for building an FM listening bug kit that can transmit audio from a room to an FM radio within a 100 meter range. It uses a simple circuit with few components including a transistor, resistors, capacitors and an antenna to pick up audio with a microphone and transmit it via frequency modulation between 80-150 MHz. The instructions explain how to lay out the circuit on a pegboard, assemble the components, solder connections and conceal the bug in an Altoids tin for discreet listening. A second document provides instructions for a mini audio transmitter that works on similar principles to transmit recorded audio wirelessly via FM frequencies.
How to Install LED Flexible Strips ?
Don't know how to install LED flexible strips? Never mind, here's an easy step-by-step beginner's guide for you! Check out these simple 7 steps and do it yourself now!
More Related Content
Viewers also liked
Wireless ai based intelli industrial security robot 2 ppt
This document describes a wireless industrial security robot project. The robot is designed to detect dangerous events like fires, gas leaks, or high temperatures using sensors. It can provide live video streaming to a remote monitor. The robot uses a microcontroller, motors, sensors and a mechanical arm. It aims to save manpower and improve safety by allowing work in hazardous environments. When issues are detected, it can send alert messages via GSM. The robot is expected to measure environmental data, detect obstacles, and change speed based on sensor readings.
Advanced vehicle security system 2016 upload
This document presents an advanced vehicle security system that uses GPS and GSM technology to prevent theft and track vehicle location. The system contains components like a GPS module, GSM modem, infrared sensors, microcontroller, relay switch, and security measures. It works by detecting motion with infrared sensors and alerting the owner via GSM. The owner can then activate security measures like ignition cutoff by sending DTMF tones to the GSM modem. The GPS tracks location which is sent to the owner. In an accident, sensors detect impact and send an alert message with location to emergency contacts. The system provides cost-effective vehicle security and tracking.
Vehicle Over Speed Detection on Highways
While driving on highways, motorists should not exceed the maximum speed limit permitted for their vehicle. This speed checker will come handy for the highway traffic police as it will not only provide a digital display in accordance with a vehicle’s speed but also sound an alarm if the vehicle exceeds the permissible speed for the highway.
Coal Mine Robot (project report)
This document summarizes a student project report on developing a coal mine surveillance robot. The project aims to reduce coal mine fatalities by having an autonomous robot detect toxic gases, temperature, and transmit the data wirelessly. The report outlines the objectives of gas and temperature detection as well as data transmission. It provides a system overview showing the key components including an Arduino microcontroller, gas and temperature sensors, motors for locomotion, and Bluetooth for wireless communication. The project seeks to create a low-cost robot that can operate in harsh mining environments and transmit sensor data to any nearby device.
Led cube presentation
The document describes a major project report on creating an 8x8x8 LED cube. It includes an introduction, theory, list of hardware and materials used, circuit diagram, assembly instructions, programming, and conclusions. The project involved an AVR microcontroller, latch and decoder ICs, LEDs, resistors, and other components to create an 8x8x8 LED cube that can be programmed to display patterns. The report discusses the assembly, wiring, programming challenges faced and future applications of LED lighting.
SMART HELMET
To design a smart helmet with features like road hazard warnings, finger print
authentication and alcoholic detection
INTELLIGENT HELMET FOR COAL MINERS
The document describes an intelligent helmet being developed for coal miners that aims to provide greater safety. It contains sensors like gas, temperature, and humidity sensors as well as a microcontroller and LCD display. The transmitting end will contain these sensors and microcontroller and the receiving end will monitor the data received. It provides block diagrams of the system components and circuit diagrams for the power supply and microcontroller connections. The power supply converts mains AC to regulated 5V and 9V DC required for components using a transformer, rectifier, and voltage regulators.
smart helmet
This document describes the implementation of a smart helmet system using solar power. The system includes an alcohol sensor, temperature sensor, vibration sensor, GPS module, GSM module, and microcontroller to provide safety features like detecting accidents, monitoring alcohol levels, tracking location, and regulating temperature. The smart helmet aims to reduce accidents by preventing intoxicated riding and automatically alerting emergency contacts in the event of a crash. It can also be used to remotely immobilize a vehicle if the helmet is removed or stolen. The system design uses low power components like a solar cell to allow for portable operation.
anti theft vehicular security system
This document describes a low-cost anti-theft system for vehicles. It uses an embedded chip with a proximity sensor that requires a unique password to start the car. If an incorrect password is entered three times, the system sends a text message with the vehicle location to local police and the owner. It also deactivates the fuel injector and activates a secret lock trapping the unauthorized user inside the car until the owner arrives. The system uses common components like a microcontroller, keypad, LCD screen, and GSM module to send alerts for around Rs. 7,300, providing sophisticated security at low cost.
Zigbee based intelligent helemet for coal miners ppt
This one is the useful project for embedded students..and it is the real time project ...
so guys u can download and implement with your useful thoughts ...
SMART Vehicle Secure PPT
Today, every person facing the problem of traffic jam on the road, road accident is the measure problem for us. So this device “SMART VEHICLE SECURA”, which can be useful for stopping the accident and also useful for saving the life of human being. It is a device that works to provide the security of the vehicles.
final_report
This document describes a system called "Accident Detection, Theft and Drive Protection using Intelligent Wireless Safety Helmet". The system consists of a helmet unit and vehicle unit that communicate wirelessly. The helmet unit ensures the rider is wearing a helmet and not under the influence of alcohol throughout the ride. If these conditions are not met, it communicates with the vehicle unit to prevent the ignition from starting. The vehicle unit detects accidents using sensors and notifies emergency contacts by SMS with the rider's location using GPS coordinates. The system also provides theft protection as the helmet is required along with the key to start the vehicle.
The Smart Helmet
The Smart Helmet is an innovative idea for a business proposal. This proposal aims at the security and safety of the bikers against road accidents, while also providing them with a luxurious, comfortable two-wheeler experience. Each Smart Helmet has been designed and assembled by our own mechanics and engineers, and each helmet has an in-built circuit and software with various functions.
Wireless power-theft-monitering-ppt
This document describes a proposed system for wirelessly monitoring power theft. A microcontroller would be interfaced with a meter and sensors to detect abnormal power usage. If power theft is detected, it would trigger a relay to cut power and send a wireless message to alert authorities. The goal is to reduce losses from power theft by identifying exact locations of theft in real-time.
ppt on embedded system
This presentation provides an overview of embedded systems and describes a collision avoidance robot project. It introduces embedded systems and gives examples. It then describes the key components of embedded systems like processors and memory. It discusses the software used for the project. It introduces the collision avoidance robot project, describing its sensors, control unit, actuators and working. It provides code snippets to show how the robot's movement is controlled based on sensor input to avoid collisions.
Secured vehicle control system
This document presents a vehicle theft control system project that was submitted by K. Saikrishna. The project aims to develop a secured vehicle control system using various hardware components like an IR sensor, microcontroller, LCD display and buzzer to detect unauthorized access and alert the owner. The system works by monitoring the vehicle's doors and ignition with sensors connected to a microcontroller that can detect intrusions and activate an alarm.
Viewers also liked (16)
Wireless ai based intelli industrial security robot 2 ppt
Wireless ai based intelli industrial security robot 2 ppt
Zigbee based intelligent helemet for coal miners ppt
Zigbee based intelligent helemet for coal miners ppt
Similar to Led cube
How to install under counter LED strip lights
Here is a step-by-step documented guide that will walk you through exactly how we installed under counter LED strip lighting at a local cafe. With this guide you will learn how to cut, connect and install strip lights into place as well as how to install a LED strip light dimmer. These steps can also be used for other LED strip light projects, such as cove lighting and under cabinet LED strip lighting installations. http://www.flexfireleds.com/how-to-install-led-strip-lights-under-counter-under-cabinet-led-install
295889096 music-reactive-multicolor-led-lights
This document provides instructions for building music reactive multicolor LED lights that change color in response to the beat of music. The lights are made using an Arduino, RGB LED strip, audio input jack, and transistor circuit to amplify the Arduino signal. The 11 step instructions cover preparing an enclosure, soldering components, connecting the circuit to Arduino, adding an audio input, power, code upload, and using the finished project.
Multiplexing With Arduino and the 74HC595
Multiplexing With Arduino and the 74HC595
For more informations, please check it here: http://www.componentschip.com/details/Texas-Instruments/74HC595D.html
Electronic Circuit For Christmas Tree
This document provides instructions for building a Christmas decoration project that uses 18 LEDs flashed at different rates by a 4060B IC. The circuit is powered by a 9V battery and uses the 4060B oscillator to flash the LEDs arranged on a printed template in the shape of a Christmas tree. Parts required include LEDs, resistors, a capacitor, IC socket, switch and battery clip. The stripboard circuit is simple but wiring the many LEDs carefully is important to avoid damage. Adjusting the preset resistor controls the flash rates of the LEDs on different pins of the 4060B IC.
Insructables fm listening bug
This document provides instructions for building an FM listening bug kit that can transmit audio from a room to an FM radio within a 100 meter range. It uses a simple circuit with few components including a transistor, resistors, capacitors and an antenna to pick up audio with a microphone and transmit it via frequency modulation between 80-150 MHz. The instructions explain how to lay out the circuit on a pegboard, assemble the components, solder connections and conceal the bug in an Altoids tin for discreet listening. A second document provides instructions for a mini audio transmitter that works on similar principles to transmit recorded audio wirelessly via FM frequencies.
How to Install LED Flexible Strips ?
Don't know how to install LED flexible strips? Never mind, here's an easy step-by-step beginner's guide for you! Check out these simple 7 steps and do it yourself now!
Electronic Valentine Heart Project
This project uses 18 LEDs and a 4060B IC to create a flashing Valentine heart display. The circuit is powered by a 9V battery and uses the 4060B IC to oscillate the LEDs at different flash rates. Users can assemble the circuit on stripboard, connect 18 LEDs to a printed heart template, and adjust the flash rate using a preset resistor. Detailed instructions are provided on building the circuit, arranging the LEDs, and wiring them to create an eye-catching flashing heart for Valentine's Day.
HAKKO_936_Schematic_Rendered_by_Tom_Hamm.pdf
This document provides instructions for adding an on/off LED indicator to Hakko 936-x temperature-controlled soldering stations. The modification involves drilling a small hole in the front panel and adding a green LED and resistor to the circuit board. When installed, the LED will illuminate anytime power is applied to the station, providing a visual status indicator that was lacking in the original design. The instructions include diagrams of the necessary modifications and clearly outline the steps needed to complete the process in under 15 steps.
Hakko 936 schem-pcb_&_mod_v1r7
This document provides instructions for adding an on/off LED indicator to Hakko 936-x temperature-controlled soldering stations. The modification involves drilling a hole in the front panel and PC board to mount a green LED. A resistor is also added to the PC board to limit the LED current. The LED will illuminate whenever power is applied, providing a visual status indicator that was lacking in the original design. The instructions include diagrams of the front panel and PC board layout and provide detailed steps for implementation.
Problemas de aplicación ley de ohm y ley de watt
This document discusses problems applying Ohm's Law and Watt's Law. It begins by explaining color codes used on resistors to indicate resistance, tolerance, and other parameters. It then defines a breadboard (protoboard), explaining that it is a temporary PCB used for testing circuit prototypes by inserting component leads into holes. The document concludes by presenting 13 sample problems applying Ohm's Law and Watt's Law to calculate values like resistance, voltage, and power given other known values in various circuit scenarios.
Led strip light buyers guide
Check out our LED Strip Light Buyers Guide Now. Find out all you should consider when buying an LED Strip Light.
Electronics Project Book
A book for students and hobbyists to learn basic electronics through practical presentable circuits.
A handy guide for school science fair projects or for making personal hobby gadgets.
Design new panels and make new circuit designs.
For more info : please visit www.hobbyelectronics.in
Simple Amp
This document provides instructions for building a simple audio amplifier circuit using only a few basic components. The circuit uses two LM386 integrated circuits to provide amplification with a gain of 200. It can be built and tested on a breadboard before permanently assembling the circuit on a small printed circuit board. The assembled amplifier requires only a 9V battery, audio input, and speaker to operate and provides excellent sound quality with a minimal component design.
Infrared string bass
This document summarizes the construction of an infrared string bass musical instrument. It uses infrared LEDs and phototransistors to create an optical pickup system that detects vibrations in elastic strings. The system has four "strings" that are detected independently. A printed circuit board houses the infrared and detection components along with an audio amplifier. The components are installed onto a wooden body to create the final infrared string bass.
Circuit For Continuity Tester
This document describes a simple computer network lead tester project that uses LEDs and integrated circuits to check if network leads are correctly wired. The tester connects each wire in a network lead to an LED. The LEDs will light up in sequence if the lead is wired correctly. If an LED fails to light or they light in the wrong order, it indicates an incorrect wiring. The circuit uses a 555 timer and 4017 counter IC to sequentially activate the LEDs. A stripboard layout and circuit diagram are provided to construct the tester.
Harddisk pcb repairing
This document provides instructions for repairing hard disk circuit boards using a soldering station and hot air gun. It discusses common faults like burned diodes or fuses and their solutions. It explains how to check if a diode is functioning using a multimeter and how to replace components like the spindle motor IC. The document demonstrates how to repair circuits from hard disk models like Seagate 7200.11/12 when only the fuse or diode is burned by bypassing them with a wire. It also shows how to replace ROM ICs between similar but different numbered circuits and repair a WD L-shaped circuit by re-soldering burned points and replacing the spindle motor IC.
LED CUBE PROJECT.pptx
The LED cube project uses an Arduino Nano controller to automatically light up 64 blue LEDs arranged in a 4x4x4 cube formation. The project aims to learn about the Arduino Nano and create an interactive LED cube like those seen online. Key components include the Arduino Nano, blue LEDs, resistors, transistors, a PCB board and headers. The Arduino controls the LEDs by addressing their positives on 4 layers and negatives on 16 columns. Advantages of LEDs are their speed, color options, lack of toxins, brightness control and longevity. Disadvantages include lower efficiency and need for more power than normal diodes. Coding is needed for automatic control of lighting patterns.
Demo Teaching about visual basic eme.pptx
This document provides instructions for building a disco strobe light with adjustable speed settings using an Arduino board. The summary is:
The strobe light uses two green LEDs, two red LEDs, four 220-ohm resistors, a potentiometer, an Arduino board and breadboard. LEDs of the same color are connected together via resistors and assigned to different Arduino pins. A potentiometer connected to an analog pin controls the strobe speed. Instructions detail placing components on the breadboard and uploading code to create an adjustable speed strobe light.
Project 1 Tutorial 1a rev 2.pptx
1. The document provides tutorials on using LEDs with an Arduino board. It explains how to connect an LED and resistor to the Arduino and upload a basic blinking code.
2. The code causes the LED to turn on and off alternately with a 1 second delay between each state change. Tables provide information on how to calculate delay times in milliseconds and microseconds.
3. Additional pages describe LED components and workings, how to interpret code flowcharts, and tips for modifying delays in blink code.
Simple led flasher circuits
This document discusses several simple LED flasher circuits that can be used to flash one or two LEDs. The simplest circuit uses a flashing LED with no control over the flash rate. The transistor LED flasher circuit consists of two transistors, two capacitors and four resistors and allows control over the flash rate and duty cycle. The basic LED flasher circuit uses a NE555 timer IC and allows for a variable flash rate. Finally, the document discusses the now discontinued LM3909 LED flasher chip which was not found to be very useful.
Similar to Led cube (20)
Recently uploaded
HCL Notes und Domino Lizenzkostenreduzierung in der Welt von DLAU
Webinar Recording: https://www.panagenda.com/webinars/hcl-notes-und-domino-lizenzkostenreduzierung-in-der-welt-von-dlau/
DLAU und die Lizenzen nach dem CCB- und CCX-Modell sind für viele in der HCL-Community seit letztem Jahr ein heißes Thema. Als Notes- oder Domino-Kunde haben Sie vielleicht mit unerwartet hohen Benutzerzahlen und Lizenzgebühren zu kämpfen. Sie fragen sich vielleicht, wie diese neue Art der Lizenzierung funktioniert und welchen Nutzen sie Ihnen bringt. Vor allem wollen Sie sicherlich Ihr Budget einhalten und Kosten sparen, wo immer möglich. Das verstehen wir und wir möchten Ihnen dabei helfen!
Wir erklären Ihnen, wie Sie häufige Konfigurationsprobleme lösen können, die dazu führen können, dass mehr Benutzer gezählt werden als nötig, und wie Sie überflüssige oder ungenutzte Konten identifizieren und entfernen können, um Geld zu sparen. Es gibt auch einige Ansätze, die zu unnötigen Ausgaben führen können, z. B. wenn ein Personendokument anstelle eines Mail-Ins für geteilte Mailboxen verwendet wird. Wir zeigen Ihnen solche Fälle und deren Lösungen. Und natürlich erklären wir Ihnen das neue Lizenzmodell.
Nehmen Sie an diesem Webinar teil, bei dem HCL-Ambassador Marc Thomas und Gastredner Franz Walder Ihnen diese neue Welt näherbringen. Es vermittelt Ihnen die Tools und das Know-how, um den Überblick zu bewahren. Sie werden in der Lage sein, Ihre Kosten durch eine optimierte Domino-Konfiguration zu reduzieren und auch in Zukunft gering zu halten.
Diese Themen werden behandelt
- Reduzierung der Lizenzkosten durch Auffinden und Beheben von Fehlkonfigurationen und überflüssigen Konten
- Wie funktionieren CCB- und CCX-Lizenzen wirklich?
- Verstehen des DLAU-Tools und wie man es am besten nutzt
- Tipps für häufige Problembereiche, wie z. B. Team-Postfächer, Funktions-/Testbenutzer usw.
- Praxisbeispiele und Best Practices zum sofortigen Umsetzen
GraphSummit Singapore | The Art of the Possible with Graph - Q2 2024
Neha Bajwa, Vice President of Product Marketing, Neo4j
Join us as we explore breakthrough innovations enabled by interconnected data and AI. Discover firsthand how organizations use relationships in data to uncover contextual insights and solve our most pressing challenges – from optimizing supply chains, detecting fraud, and improving customer experiences to accelerating drug discoveries.
National Security Agency - NSA mobile device best practices
Threats to mobile devices are more prevalent and increasing in scope and complexity. Users of mobile devices desire to take full advantage of the features
available on those devices, but many of the features provide convenience and capability but sacrifice security. This best practices guide outlines steps the users can take to better protect personal devices and information.
Programming Foundation Models with DSPy - Meetup Slides
Prompting language models is hard, while programming language models is easy. In this talk, I will discuss the state-of-the-art framework DSPy for programming foundation models with its powerful optimizers and runtime constraint system.
GraphRAG for Life Science to increase LLM accuracy
GraphRAG for life science domain, where you retriever information from biomedical knowledge graphs using LLMs to increase the accuracy and performance of generated answers
Unlock the Future of Search with MongoDB Atlas_ Vector Search Unleashed.pdf
Discover how MongoDB Atlas and vector search technology can revolutionize your application's search capabilities. This comprehensive presentation covers:
* What is Vector Search?
* Importance and benefits of vector search
* Practical use cases across various industries
* Step-by-step implementation guide
* Live demos with code snippets
* Enhancing LLM capabilities with vector search
* Best practices and optimization strategies
Perfect for developers, AI enthusiasts, and tech leaders. Learn how to leverage MongoDB Atlas to deliver highly relevant, context-aware search results, transforming your data retrieval process. Stay ahead in tech innovation and maximize the potential of your applications.
#MongoDB #VectorSearch #AI #SemanticSearch #TechInnovation #DataScience #LLM #MachineLearning #SearchTechnology
Building Production Ready Search Pipelines with Spark and Milvus
Spark is the widely used ETL tool for processing, indexing and ingesting data to serving stack for search. Milvus is the production-ready open-source vector database. In this talk we will show how to use Spark to process unstructured data to extract vector representations, and push the vectors to Milvus vector database for search serving.
Full-RAG: A modern architecture for hyper-personalization
Mike Del Balso, CEO & Co-Founder at Tecton, presents "Full RAG," a novel approach to AI recommendation systems, aiming to push beyond the limitations of traditional models through a deep integration of contextual insights and real-time data, leveraging the Retrieval-Augmented Generation architecture. This talk will outline Full RAG's potential to significantly enhance personalization, address engineering challenges such as data management and model training, and introduce data enrichment with reranking as a key solution. Attendees will gain crucial insights into the importance of hyperpersonalization in AI, the capabilities of Full RAG for advanced personalization, and strategies for managing complex data integrations for deploying cutting-edge AI solutions.
“Building and Scaling AI Applications with the Nx AI Manager,” a Presentation...
“Building and Scaling AI Applications with the Nx AI Manager,” a Presentation...Edge AI and Vision Alliance
For the full video of this presentation, please visit: https://www.edge-ai-vision.com/2024/06/building-and-scaling-ai-applications-with-the-nx-ai-manager-a-presentation-from-network-optix/
Robin van Emden, Senior Director of Data Science at Network Optix, presents the “Building and Scaling AI Applications with the Nx AI Manager,” tutorial at the May 2024 Embedded Vision Summit.
In this presentation, van Emden covers the basics of scaling edge AI solutions using the Nx tool kit. He emphasizes the process of developing AI models and deploying them globally. He also showcases the conversion of AI models and the creation of effective edge AI pipelines, with a focus on pre-processing, model conversion, selecting the appropriate inference engine for the target hardware and post-processing.
van Emden shows how Nx can simplify the developer’s life and facilitate a rapid transition from concept to production-ready applications.He provides valuable insights into developing scalable and efficient edge AI solutions, with a strong focus on practical implementation.Presentation of the OECD Artificial Intelligence Review of Germany
Consult the full report at https://www.oecd.org/digital/oecd-artificial-intelligence-review-of-germany-609808d6-en.htm
Observability Concepts EVERY Developer Should Know -- DeveloperWeek Europe.pdf
Monitoring and observability aren’t traditionally found in software curriculums and many of us cobble this knowledge together from whatever vendor or ecosystem we were first introduced to and whatever is a part of your current company’s observability stack.
While the dev and ops silo continues to crumble….many organizations still relegate monitoring & observability as the purview of ops, infra and SRE teams. This is a mistake - achieving a highly observable system requires collaboration up and down the stack.
I, a former op, would like to extend an invitation to all application developers to join the observability party will share these foundational concepts to build on:
20240609 QFM020 Irresponsible AI Reading List May 2024
Everything I found interesting about the irresponsible use of machine intelligence in May 2024
Video Streaming: Then, Now, and in the Future
In his public lecture, Christian Timmerer provides insights into the fascinating history of video streaming, starting from its humble beginnings before YouTube to the groundbreaking technologies that now dominate platforms like Netflix and ORF ON. Timmerer also presents provocative contributions of his own that have significantly influenced the industry. He concludes by looking at future challenges and invites the audience to join in a discussion.
HCL Notes and Domino License Cost Reduction in the World of DLAU
Webinar Recording: https://www.panagenda.com/webinars/hcl-notes-and-domino-license-cost-reduction-in-the-world-of-dlau/
The introduction of DLAU and the CCB & CCX licensing model caused quite a stir in the HCL community. As a Notes and Domino customer, you may have faced challenges with unexpected user counts and license costs. You probably have questions on how this new licensing approach works and how to benefit from it. Most importantly, you likely have budget constraints and want to save money where possible. Don’t worry, we can help with all of this!
We’ll show you how to fix common misconfigurations that cause higher-than-expected user counts, and how to identify accounts which you can deactivate to save money. There are also frequent patterns that can cause unnecessary cost, like using a person document instead of a mail-in for shared mailboxes. We’ll provide examples and solutions for those as well. And naturally we’ll explain the new licensing model.
Join HCL Ambassador Marc Thomas in this webinar with a special guest appearance from Franz Walder. It will give you the tools and know-how to stay on top of what is going on with Domino licensing. You will be able lower your cost through an optimized configuration and keep it low going forward.
These topics will be covered
- Reducing license cost by finding and fixing misconfigurations and superfluous accounts
- How do CCB and CCX licenses really work?
- Understanding the DLAU tool and how to best utilize it
- Tips for common problem areas, like team mailboxes, functional/test users, etc
- Practical examples and best practices to implement right away
Artificial Intelligence for XMLDevelopment
In the rapidly evolving landscape of technologies, XML continues to play a vital role in structuring, storing, and transporting data across diverse systems. The recent advancements in artificial intelligence (AI) present new methodologies for enhancing XML development workflows, introducing efficiency, automation, and intelligent capabilities. This presentation will outline the scope and perspective of utilizing AI in XML development. The potential benefits and the possible pitfalls will be highlighted, providing a balanced view of the subject.
We will explore the capabilities of AI in understanding XML markup languages and autonomously creating structured XML content. Additionally, we will examine the capacity of AI to enrich plain text with appropriate XML markup. Practical examples and methodological guidelines will be provided to elucidate how AI can be effectively prompted to interpret and generate accurate XML markup.
Further emphasis will be placed on the role of AI in developing XSLT, or schemas such as XSD and Schematron. We will address the techniques and strategies adopted to create prompts for generating code, explaining code, or refactoring the code, and the results achieved.
The discussion will extend to how AI can be used to transform XML content. In particular, the focus will be on the use of AI XPath extension functions in XSLT, Schematron, Schematron Quick Fixes, or for XML content refactoring.
The presentation aims to deliver a comprehensive overview of AI usage in XML development, providing attendees with the necessary knowledge to make informed decisions. Whether you’re at the early stages of adopting AI or considering integrating it in advanced XML development, this presentation will cover all levels of expertise.
By highlighting the potential advantages and challenges of integrating AI with XML development tools and languages, the presentation seeks to inspire thoughtful conversation around the future of XML development. We’ll not only delve into the technical aspects of AI-powered XML development but also discuss practical implications and possible future directions.
“I’m still / I’m still / Chaining from the Block”
“An Outlook of the Ongoing and Future Relationship between Blockchain Technologies and Process-aware Information Systems.” Invited talk at the joint workshop on Blockchain for Information Systems (BC4IS) and Blockchain for Trusted Data Sharing (B4TDS), co-located with with the 36th International Conference on Advanced Information Systems Engineering (CAiSE), 3 June 2024, Limassol, Cyprus.
20240605 QFM017 Machine Intelligence Reading List May 2024
Everything I found interesting about machines behaving intelligently during May 2024
UiPath Test Automation using UiPath Test Suite series, part 5
Welcome to UiPath Test Automation using UiPath Test Suite series part 5. In this session, we will cover CI/CD with devops.
Topics covered:
CI/CD with in UiPath
End-to-end overview of CI/CD pipeline with Azure devops
Speaker:
Lyndsey Byblow, Test Suite Sales Engineer @ UiPath, Inc.
Mind map of terminologies used in context of Generative AI
Mind map of common terms used in context of Generative AI.
Infrastructure Challenges in Scaling RAG with Custom AI models
Building Retrieval-Augmented Generation (RAG) systems with open-source and custom AI models is a complex task. This talk explores the challenges in productionizing RAG systems, including retrieval performance, response synthesis, and evaluation. We’ll discuss how to leverage open-source models like text embeddings, language models, and custom fine-tuned models to enhance RAG performance. Additionally, we’ll cover how BentoML can help orchestrate and scale these AI components efficiently, ensuring seamless deployment and management of RAG systems in the cloud.
Recently uploaded (20)
HCL Notes und Domino Lizenzkostenreduzierung in der Welt von DLAU
HCL Notes und Domino Lizenzkostenreduzierung in der Welt von DLAU
GraphSummit Singapore | The Art of the Possible with Graph - Q2 2024
GraphSummit Singapore | The Art of the Possible with Graph - Q2 2024
National Security Agency - NSA mobile device best practices
National Security Agency - NSA mobile device best practices
Programming Foundation Models with DSPy - Meetup Slides
Programming Foundation Models with DSPy - Meetup Slides
GraphRAG for Life Science to increase LLM accuracy
GraphRAG for Life Science to increase LLM accuracy
Unlock the Future of Search with MongoDB Atlas_ Vector Search Unleashed.pdf
Unlock the Future of Search with MongoDB Atlas_ Vector Search Unleashed.pdf
Building Production Ready Search Pipelines with Spark and Milvus
Building Production Ready Search Pipelines with Spark and Milvus
Full-RAG: A modern architecture for hyper-personalization
Full-RAG: A modern architecture for hyper-personalization
“Building and Scaling AI Applications with the Nx AI Manager,” a Presentation...
“Building and Scaling AI Applications with the Nx AI Manager,” a Presentation...
Presentation of the OECD Artificial Intelligence Review of Germany
Presentation of the OECD Artificial Intelligence Review of Germany
Observability Concepts EVERY Developer Should Know -- DeveloperWeek Europe.pdf
Observability Concepts EVERY Developer Should Know -- DeveloperWeek Europe.pdf
20240609 QFM020 Irresponsible AI Reading List May 2024
20240609 QFM020 Irresponsible AI Reading List May 2024
HCL Notes and Domino License Cost Reduction in the World of DLAU
HCL Notes and Domino License Cost Reduction in the World of DLAU
20240605 QFM017 Machine Intelligence Reading List May 2024
20240605 QFM017 Machine Intelligence Reading List May 2024
UiPath Test Automation using UiPath Test Suite series, part 5
UiPath Test Automation using UiPath Test Suite series, part 5
Mind map of terminologies used in context of Generative AI
Mind map of terminologies used in context of Generative AI
Infrastructure Challenges in Scaling RAG with Custom AI models
Infrastructure Challenges in Scaling RAG with Custom AI models
Led cube
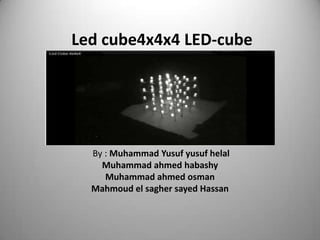
- 1. Led cube4x4x4 LED-cube By : Muhammad Yusuf yusuf helal Muhammad ahmed habashy Muhammad ahmed osman Mahmoud el sagher sayed Hassan
- 2. The LED matrix we decided to use is a 4 x 4 x 4 monochromatic LED Matrix. This is a total of 64 LEDs. The reason we chose this size, is that it provides the best of overall cube size, construction time & easier programming. TOOLS: copper wire, piece of cork ,computer with Arduino software USB-cable , solder PARTS: 64 led's ,16 resistors that go with the LED's 1 Arduino, some wire(isolated wire) 16 headerpins , 9V battery
- 3. LED Cube Construction: Step by Step Guide:
- 4. Step 1Drill the fixed holes(Making the rig): • Draw on the box a grid with the lines 12,5 mm apart. Draw 4 lines horizontally and 4 lines vertically. You will now have 16 crossings. Drill some 5 mm holes (if your LEDs are 5 mm) at the crossings of the lines. If you first drill small holes, the location of your holes will probably be more exact.
- 5. Step 2 Bending the legs of the led: Bend the 64 leds as shown in the figure
- 6. Step 3 Placeing the LED and solder them: after that I fix the cathode terminal of the leds on the copper wire as shown in the figure Make sure that you don’t solder an anode to an cathode.
- 7. Then ,repeat this step for the 64 leds So the result is 4 layers each has 16 leds as shown in the figure Notice that there is along terminal in each layer
- 8. Step 4 Soldering the 4 layer LED This step is a little difficult. By shortening the anode of the leds to asuitable length ,then by soldering every anode to the vertical copper wires (called column) as shown in the figure ,in addition to the 4 wires of the ground
- 9. Step 5 fixing the led cube on the piece of cork: in this step the most important thing is to be very careful while you fix the 20 copper wires in the piece of cork an advice you can fix a free copper wire in the places that the wires of the cube will penetrate the piece of cork and then fix the cube as shown in the figure.
- 10. so the view from the bottom after fixing the cube is as shown in the figure
- 11. Step 6 is fixing the 16 resistors with every column : fix one terminal of the resistor with the terminal of the column that penetrate the pice of cork ,and fix the other terminal of the resistor with the isolated wire ,repeat this 16 times as shown in the figure .an advice not to use soldering in this step as the column will be heated so the leds maybe falls and also the cork will be damaged .
- 12. Step 7 is fixing the 16 header with every isolated wire : Fix each header with each isolated wire to be easy to connect with the arduino as shown in the figure .
- 13. the code and the algorithms that used: every line representing all the led cube ,every 4 parts as(B1111,B1111,B1111,B1111) representing acomplete layer and every part representing a row so by this algorithm we can make any design we want this is an example for adesign of some shapes // 3 2 1 B1111,B1111,B1111,B1111,B0110,B0110,B0110,B0110,B0110,B0110,B0110,B0110,B11 11,B1111,B1111,B1111,60, B0000,B0000,B0000,B0000,B0000,B0000,B0000,B0000,B0000,B0000,B0000,B0000,B00 00,B0000,B0000,B0000,20, B1111,B1111,B1111,B1111,B0010,B0010,B0010,B0010,B0100,B0100,B0100,B0100,B11 11,B1111,B1111,B1111,60, B0000,B0000,B0000,B0000,B0000,B0000,B0000,B0000,B0000,B0000,B0000,B0000,B00 00,B0000,B0000,B0000,20, B1110,B1110,B1110,B1110,B0110,B0110,B0110,B0110,B0110,B0110,B0110,B0110,B01 10,B0110,B0110,B0110,60, B0000,B0000,B0000,B0000,B0000,B0000,B0000,B0000,B0000,B0000,B0000,B0000,B00 00,B0000,B0000,B0000,20,