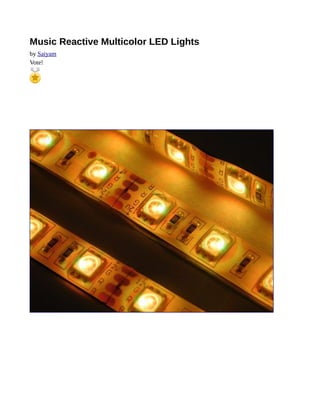
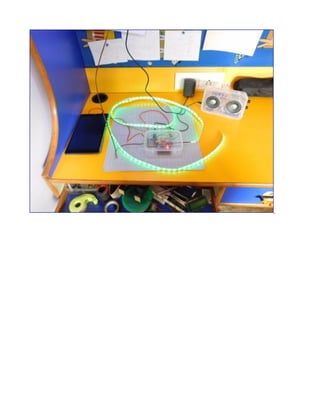
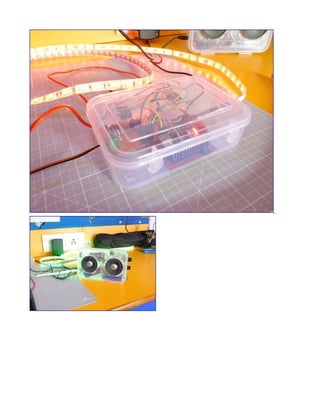
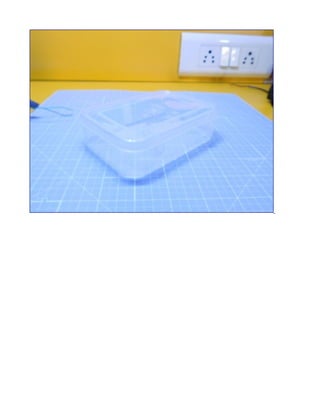
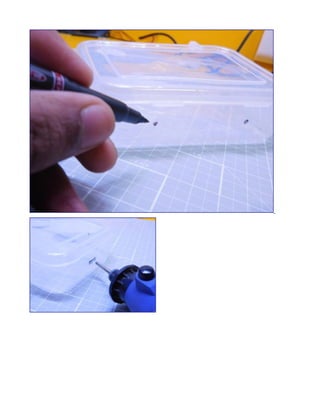
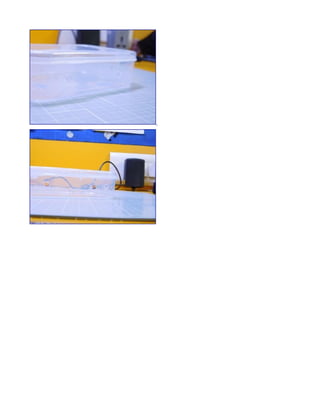
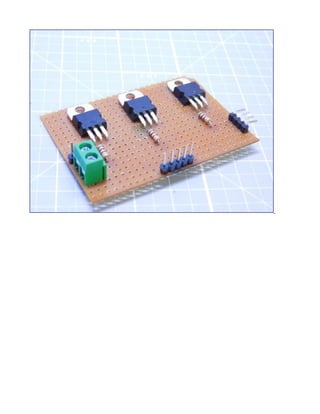
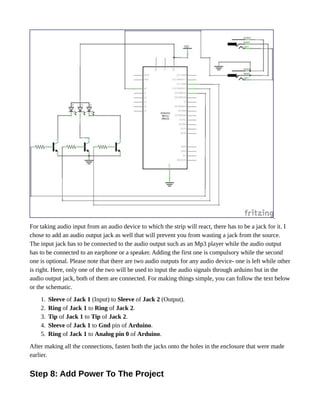
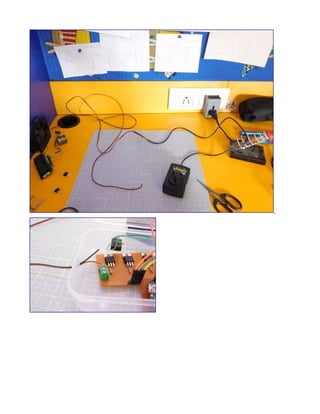
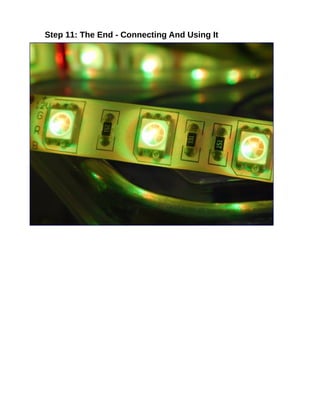
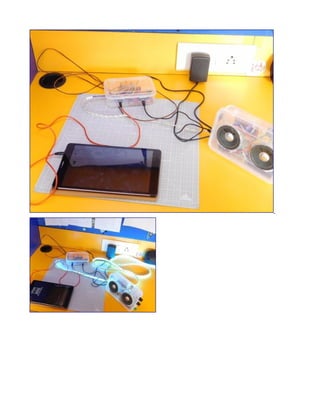
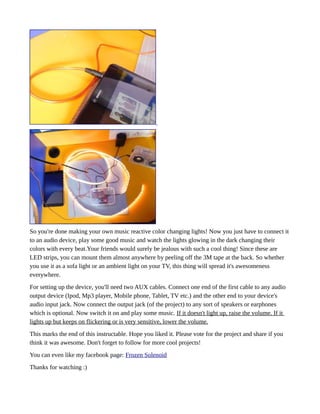
This document provides instructions for building music reactive multicolor LED lights that change color in response to the beat of music. The lights are made using an Arduino, RGB LED strip, audio input jack, and transistor circuit to amplify the Arduino signal. The 11 step instructions cover preparing an enclosure, soldering components, connecting the circuit to Arduino, adding an audio input, power, code upload, and using the finished project.
Youtube Link: https://youtu.be/DFbhpQpqyuo
** Android Certification Training: https://www.edureka.co/android-development-certification-course **
This Edureka ppt on "Android SDK Tutorial" (Blog Series: http://bit.ly/2MJ6zbc ) will help you understand how Android SDK works.
Follow us to never miss an update in the future.
YouTube: https://www.youtube.com/user/edurekaIN
Instagram: https://www.instagram.com/edureka_learning/
Facebook: https://www.facebook.com/edurekaIN/
Twitter: https://twitter.com/edurekain
LinkedIn: https://www.linkedin.com/company/edureka
Castbox: https://castbox.fm/networks/505?country=in
1. Explaining the importance of platform based development
2. Understanding The importance of NodeMCU and demonstrate its interfacing with various devices and sensors.
Getting started with Arduino Programming can be daunting. These are slides I used in my classes which introduced programming concepts to non-engineers, non-programmers, but totally people who wanted to learn more about electronics.
Arduino first and foremost is an open-source computer hardware and software company. The Arduino Communityrefers to the project and user community that designs and utilizes microcontroller-based development boards. These development boards are known as Arduino Modules, which are open-source prototyping platforms.
Introduction to ESP32 Programming [Road to RIoT 2017]Alwin Arrasyid
Introduction to ESP32 programming using official development framework, ESP-IDF and Arduino for ESP32.
Every demo code is published in this github repository:
https://github.com/alwint3r/RTR_Surabaya2017
Arduino for beginners- Introduction to Arduino (presentation) - codewithgauriGaurav Pandey
Arduino for beginners- Introduction to Arduino presentation
Learn Arduino basics in easy steps. Arduino for beginners course series.Arduino is an open-source platform used for building electronics projects. All Arduino boards have a microcontroller.
A microcontroller is basically a really small computer.
Arduino is the popular open-source electronics prototyping platform based on easy-to-use hardware and software. It's intended for artists, designers, hobbyists, and anyone interested in creating interactive objects or environments and is designed to be as flexible as possible to fit your project's needs.
If you want to start a good career in Android Development, this presentation gives you a basic introduction about Android, and how you can develop your very first Android Application.
Introduction to Android and Android StudioSuyash Srijan
This is a presentation that I gave at Google Developer Group Oxford to introduce people to Android development and Android Studio IDE, which is used to build Android apps. This presentation gives a brief overview of the platform and fundamentals of the app and what developer tools are available.
PS: Some slides do not have any text accompanying it. That is either because it wasn't relevant or because the text would've been too long to put on the corresponding slide.
Arduino is an open-source platform that allows users to create interactive electronics projects. It consists of a microcontroller board, which is essentially a small computer, and various input and output pins that can be programmed using the Arduino Integrated Development Environment (IDE). The platform is relatively inexpensive and easy to use, making it popular among hobbyists, students, and professionals alike.
The Arduino board is the heart of the platform, and it comes in different variations that cater to different projects. At the center of the board is a microcontroller, which is essentially a small computer that controls the inputs and outputs of the board.
In addition to the microcontroller, the board also has various input and output pins that can be used to connect different sensors and actuators to the board. These pins allow the board to interact with the outside world and perform different functions depending on the project.
Visit https://robomart.com/ for more info
Explore the innovative world of trenchless pipe repair with our comprehensive guide, "The Benefits and Techniques of Trenchless Pipe Repair." This document delves into the modern methods of repairing underground pipes without the need for extensive excavation, highlighting the numerous advantages and the latest techniques used in the industry.
Learn about the cost savings, reduced environmental impact, and minimal disruption associated with trenchless technology. Discover detailed explanations of popular techniques such as pipe bursting, cured-in-place pipe (CIPP) lining, and directional drilling. Understand how these methods can be applied to various types of infrastructure, from residential plumbing to large-scale municipal systems.
Ideal for homeowners, contractors, engineers, and anyone interested in modern plumbing solutions, this guide provides valuable insights into why trenchless pipe repair is becoming the preferred choice for pipe rehabilitation. Stay informed about the latest advancements and best practices in the field.
NO1 Uk best vashikaran specialist in delhi vashikaran baba near me online vas...Amil Baba Dawood bangali
Contact with Dawood Bhai Just call on +92322-6382012 and we'll help you. We'll solve all your problems within 12 to 24 hours and with 101% guarantee and with astrology systematic. If you want to take any personal or professional advice then also you can call us on +92322-6382012 , ONLINE LOVE PROBLEM & Other all types of Daily Life Problem's.Then CALL or WHATSAPP us on +92322-6382012 and Get all these problems solutions here by Amil Baba DAWOOD BANGALI
#vashikaranspecialist #astrologer #palmistry #amliyaat #taweez #manpasandshadi #horoscope #spiritual #lovelife #lovespell #marriagespell#aamilbabainpakistan #amilbabainkarachi #powerfullblackmagicspell #kalajadumantarspecialist #realamilbaba #AmilbabainPakistan #astrologerincanada #astrologerindubai #lovespellsmaster #kalajaduspecialist #lovespellsthatwork #aamilbabainlahore#blackmagicformarriage #aamilbaba #kalajadu #kalailam #taweez #wazifaexpert #jadumantar #vashikaranspecialist #astrologer #palmistry #amliyaat #taweez #manpasandshadi #horoscope #spiritual #lovelife #lovespell #marriagespell#aamilbabainpakistan #amilbabainkarachi #powerfullblackmagicspell #kalajadumantarspecialist #realamilbaba #AmilbabainPakistan #astrologerincanada #astrologerindubai #lovespellsmaster #kalajaduspecialist #lovespellsthatwork #aamilbabainlahore #blackmagicforlove #blackmagicformarriage #aamilbaba #kalajadu #kalailam #taweez #wazifaexpert #jadumantar #vashikaranspecialist #astrologer #palmistry #amliyaat #taweez #manpasandshadi #horoscope #spiritual #lovelife #lovespell #marriagespell#aamilbabainpakistan #amilbabainkarachi #powerfullblackmagicspell #kalajadumantarspecialist #realamilbaba #AmilbabainPakistan #astrologerincanada #astrologerindubai #lovespellsmaster #kalajaduspecialist #lovespellsthatwork #aamilbabainlahore #Amilbabainuk #amilbabainspain #amilbabaindubai #Amilbabainnorway #amilbabainkrachi #amilbabainlahore #amilbabaingujranwalan #amilbabainislamabad
Hybrid optimization of pumped hydro system and solar- Engr. Abdul-Azeez.pdffxintegritypublishin
Advancements in technology unveil a myriad of electrical and electronic breakthroughs geared towards efficiently harnessing limited resources to meet human energy demands. The optimization of hybrid solar PV panels and pumped hydro energy supply systems plays a pivotal role in utilizing natural resources effectively. This initiative not only benefits humanity but also fosters environmental sustainability. The study investigated the design optimization of these hybrid systems, focusing on understanding solar radiation patterns, identifying geographical influences on solar radiation, formulating a mathematical model for system optimization, and determining the optimal configuration of PV panels and pumped hydro storage. Through a comparative analysis approach and eight weeks of data collection, the study addressed key research questions related to solar radiation patterns and optimal system design. The findings highlighted regions with heightened solar radiation levels, showcasing substantial potential for power generation and emphasizing the system's efficiency. Optimizing system design significantly boosted power generation, promoted renewable energy utilization, and enhanced energy storage capacity. The study underscored the benefits of optimizing hybrid solar PV panels and pumped hydro energy supply systems for sustainable energy usage. Optimizing the design of solar PV panels and pumped hydro energy supply systems as examined across diverse climatic conditions in a developing country, not only enhances power generation but also improves the integration of renewable energy sources and boosts energy storage capacities, particularly beneficial for less economically prosperous regions. Additionally, the study provides valuable insights for advancing energy research in economically viable areas. Recommendations included conducting site-specific assessments, utilizing advanced modeling tools, implementing regular maintenance protocols, and enhancing communication among system components.
Final project report on grocery store management system..pdfKamal Acharya
In today’s fast-changing business environment, it’s extremely important to be able to respond to client needs in the most effective and timely manner. If your customers wish to see your business online and have instant access to your products or services.
Online Grocery Store is an e-commerce website, which retails various grocery products. This project allows viewing various products available enables registered users to purchase desired products instantly using Paytm, UPI payment processor (Instant Pay) and also can place order by using Cash on Delivery (Pay Later) option. This project provides an easy access to Administrators and Managers to view orders placed using Pay Later and Instant Pay options.
In order to develop an e-commerce website, a number of Technologies must be studied and understood. These include multi-tiered architecture, server and client-side scripting techniques, implementation technologies, programming language (such as PHP, HTML, CSS, JavaScript) and MySQL relational databases. This is a project with the objective to develop a basic website where a consumer is provided with a shopping cart website and also to know about the technologies used to develop such a website.
This document will discuss each of the underlying technologies to create and implement an e- commerce website.
Water scarcity is the lack of fresh water resources to meet the standard water demand. There are two type of water scarcity. One is physical. The other is economic water scarcity.
Student information management system project report ii.pdfKamal Acharya
Our project explains about the student management. This project mainly explains the various actions related to student details. This project shows some ease in adding, editing and deleting the student details. It also provides a less time consuming process for viewing, adding, editing and deleting the marks of the students.
CFD Simulation of By-pass Flow in a HRSG module by R&R Consult.pptxR&R Consult
CFD analysis is incredibly effective at solving mysteries and improving the performance of complex systems!
Here's a great example: At a large natural gas-fired power plant, where they use waste heat to generate steam and energy, they were puzzled that their boiler wasn't producing as much steam as expected.
R&R and Tetra Engineering Group Inc. were asked to solve the issue with reduced steam production.
An inspection had shown that a significant amount of hot flue gas was bypassing the boiler tubes, where the heat was supposed to be transferred.
R&R Consult conducted a CFD analysis, which revealed that 6.3% of the flue gas was bypassing the boiler tubes without transferring heat. The analysis also showed that the flue gas was instead being directed along the sides of the boiler and between the modules that were supposed to capture the heat. This was the cause of the reduced performance.
Based on our results, Tetra Engineering installed covering plates to reduce the bypass flow. This improved the boiler's performance and increased electricity production.
It is always satisfying when we can help solve complex challenges like this. Do your systems also need a check-up or optimization? Give us a call!
Work done in cooperation with James Malloy and David Moelling from Tetra Engineering.
More examples of our work https://www.r-r-consult.dk/en/cases-en/
Immunizing Image Classifiers Against Localized Adversary Attacksgerogepatton
This paper addresses the vulnerability of deep learning models, particularly convolutional neural networks
(CNN)s, to adversarial attacks and presents a proactive training technique designed to counter them. We
introduce a novel volumization algorithm, which transforms 2D images into 3D volumetric representations.
When combined with 3D convolution and deep curriculum learning optimization (CLO), itsignificantly improves
the immunity of models against localized universal attacks by up to 40%. We evaluate our proposed approach
using contemporary CNN architectures and the modified Canadian Institute for Advanced Research (CIFAR-10
and CIFAR-100) and ImageNet Large Scale Visual Recognition Challenge (ILSVRC12) datasets, showcasing
accuracy improvements over previous techniques. The results indicate that the combination of the volumetric
input and curriculum learning holds significant promise for mitigating adversarial attacks without necessitating
adversary training.
Cosmetic shop management system project report.pdfKamal Acharya
Buying new cosmetic products is difficult. It can even be scary for those who have sensitive skin and are prone to skin trouble. The information needed to alleviate this problem is on the back of each product, but it's thought to interpret those ingredient lists unless you have a background in chemistry.
Instead of buying and hoping for the best, we can use data science to help us predict which products may be good fits for us. It includes various function programs to do the above mentioned tasks.
Data file handling has been effectively used in the program.
The automated cosmetic shop management system should deal with the automation of general workflow and administration process of the shop. The main processes of the system focus on customer's request where the system is able to search the most appropriate products and deliver it to the customers. It should help the employees to quickly identify the list of cosmetic product that have reached the minimum quantity and also keep a track of expired date for each cosmetic product. It should help the employees to find the rack number in which the product is placed.It is also Faster and more efficient way.
4. Light up your new year parties and impress all your friends with these amazing music reactive
multicolor LED lights that response and change their colors on every loud beat. These lights are
nothing but simple RGB LED strips connected to arduino - the brain of this project. LED strips mean
that you can mount them anywhere in your home and even outdoors. The main purpose of this project
was to use it in parties but you can also use it for daily purpose for making your music more
interesting! Whether you mount in on your entrance door, around your sofa, your LED TV, on your
computer desk or walls, that's up to you. The uses of this thing are endless! The only condition is that
you have to have an audio output device near your lights to feed them with audio signals which can be
processed and reacted upon.
As told above, this project uses an arduino for taking the audio input, processing it and then giving an
output through it's digital pins to the LED strip controller circuit which then drives the strips. It uses a
12v power supply to power both the strip and arduino. An advantage of this project is that it doesn't
'waste' any audio jacks. It has an input jack which sends the input signal to arduino and an output jack
to send the same signal to your speakers or earphones. The entire project can be completed within 2
hours (or 3 hours maximum) and requires just one of the basic parts that can be found easily. I assure
that you will be really surprised on watching the final result of the project (it looks much better in real
than in the images).
5. Here is a short video of the project in action:
Object 1
You are free to ask any question related to this project in the comment section below. Please vote for in
the 'Make It Glow' and 'Arduino All The Things' Contests if you like the concept and presentation. Do
follow me for more cool projects!
You can like my facebook page: Frozen Solenoid for more projects, updates and videos.
Let's Party!
6. Object 2
Step 1: How It Works?
Before starting with the project, I have added this step to give you a better understanding of the
working of this project. This helps you to learn some awesome stuff which lacks when you just copy
everything up without knowing the actual working.
As explained in the introduction, the LED strip connected to the project glow and changes it's color
whenever arduino detects a loud beat of music. Audio signals are very weak as compared to electronic
7. current so the audio input wire from an audio output device (such as an Mp3 player) is connected to
arduino's analog input pin which can detect even very weak electrical signals. Now as you play a music
track, whenever there is a loud beat of high amplitude, the arduino detects it as the audio signal goes
higher than a set threshold.
On detecting such kind of a change, it changes the LED color to any random one. However, it must be
noted that arduino doesn't drive the LED strip directly. It rather sends signals to an external transistor
circuit which drives the strip. The reason for this is that the output voltage of Arduino's digital pins is
5v while LED strips require 12v to operate.
Step 2: Parts And Tools
8.
9.
10.
11.
12.
13.
14.
15. The following parts and tools are required to make this project. The total cost of the entire project was
$30 or 1800INR which may vary with the store you buy the parts from. The length of your LED strip
that you will need depends on your requirements.
Parts:
• 1x Arduino nano OR uno (Or any other arduino compatible board)
• 1x RGB LED strip (Length as per your choice)
• 3x NPN power transistors (TIP 31C, TIP122 or any other compatible)
• 2x 3.5mm female audio jacks
• 3x 1K resistors
• 2x AUX cables (For connecting the device to an audio output)
• 1x 12v power supply (Can be a battery or an adapter)
• Male headers
• Wire
• A suitable enclosure
• Perforated board
Tools:
16. • Soldering iron
• Soldering wire
• Hot glue gun w/glue sticks
• Rotatory tool
• Wire cutter/stripper
• Pliers
Step 3: Prep Your Enclosure
17.
18.
19.
20. The very first step is to prepare your enclosure so as to mount all your components in place. But before
that, you must select the type of enclosure and it's dimensions. The simplest way is to use a plastic
kitchen ware box or a tupperware container as plastic is quite easy to work with. I wouldn't recommend
a metal enclosure as you would need to insulate it entirely with still a risk of short circuits.
Now for the holes to make, use a simple drill or multi purpose rotatory tool with drill bit. You need to
make a total of four holes- one for power supply wires, one for RGB LED strip which should be big
while two for audio output and input jacks. Please wear safety equipment before working with power
tools. You can also use a heated knife or paper cutter.
Step 4: Solder The RGB Strip Controller Circuit
21.
22.
23.
24. Now an important step, here you have to solder a circuit that will control the RGB LED strip through
the signals received by arduino. The need for such a circuit here is that since the output voltage of
arduino's digital pins in just 5v while LED strips require atleast 12v to operate. To provide them power,
the circuit consists of three power transistors that receive a low power signal from arduino and amplify
that signal which is enough to power the strips. There is one transistor for each of the three colors- Red,
Green and Blue.
For soldering the circuit, refer to the schematic given above. Please note that you need to solder male
headers with four pins for RGB LED strip and the same for connecting it to arduino. Solder two more
of them for supply 12 to arduino. Lastly, solder a screw terminal to connect the power supply to the
circuit board. Using male headers and screw terminals is optional but is a much better option that
directly soldering everything to the circuit. It makes connecting all the components easily through
jumper cables.
Step 5: Make A Shield For Arduino
25.
26. The next step is to make a shield for arduino which is helpful in connecting all the components easily
although making it is optional. For UNO users, they won't need this type of shield. The main objective
while making it was that it helps you to make any required changes in the pin connections at any time
very easily against directly soldering all the wires where you will have to de-solder everything in order
to make any changes. This also makes uploading codes to arduino by simply plugging it out from the
shield.
You can make your own shield by looking at the image above. It basically consists of some female
headers in which the arduino is plugged in and male headers corresponding to each pin on arduino. You
may also need to solder some more headers for GND and 5v pins as there are the ones that are mostly
used. The best part now is that you can use the same shield for even other projects by simply
unplugging all the jumper wires.
Step 6: Connect The Circuit To Arduino
27.
28.
29.
30. After your shield is ready and your circuit is soldered, now it's time to connect both of them together.
First, plug in your arduino to the shield to that the pin labels can be identified. Now using some female
jumper wires, connect it to arduino as per the following:
1. Emitter pins of all the transistors to Gnd pin on Arduino.
2. Base pin of Transistor 1 to Digital pin 09 on Arduino through a 1K resistor.
3. Base pin of Transistor 2 to Digital pin 10 on Arduino through a 1K resistor.
4. Base pin of Transistor 3 to Digital pin 11 on Arduino through a 1K resistor.
Then finally, glue the circuit as well as the arduino along with shield inside the enclosure.
Step 7: Add The Audio Input/Output Jacks
31.
32.
33.
34.
35.
36.
37. For taking audio input from an audio device to which the strip will react, there has to be a jack for it. I
chose to add an audio output jack as well that will prevent you from wasting a jack from the source.
The input jack has to be connected to the audio output such as an Mp3 player while the audio output
has to be connected to an earphone or a speaker. Adding the first one is compulsory while the second
one is optional. Please note that there are two audio outputs for any audio device- one is left while other
is right. Here, only one of the two will be used to input the audio signals through arduino but in the
audio output jack, both of them are connected. For making things simple, you can follow the text below
or the schematic.
1. Sleeve of Jack 1 (Input) to Sleeve of Jack 2 (Output).
2. Ring of Jack 1 to Ring of Jack 2.
3. Tip of Jack 1 to Tip of Jack 2.
4. Sleeve of Jack 1 to Gnd pin of Arduino.
5. Ring of Jack 1 to Analog pin 0 of Arduino.
After making all the connections, fasten both the jacks onto the holes in the enclosure that were made
earlier.
Step 8: Add Power To The Project
38.
39.
40.
41.
42.
43.
44. Although this is an easy step, it can be difficult for you if you don't have a proper 12v power supply.
Before selecting your choice, you should consider the life of that supply (i.e. how long would it last)
and whether it can supply the proper amount of current to arduino as well as LED strip or not. The best
and the cheapest option is to use a 12v/2A adapter. Please note that a 1A adapter may not work properly
if you are using a lengthy LED strip as it draws a lot of current.
You can extend the wire of your power supply if you want. Connect both the positive and negative
wires to the controller circuit (the screw terminals). Now for arduino, you can use the same power
supply as Arduino UNO and nano (NOT pro-mini) already have an in-built voltage regulator to convert
12 volts to 5 volts. Using some jumper cables, connect Positive wire from the power supply to
Arduino Vcc while the Negative one to Arduino Gnd.
Step 9: Connect The RGB LED Strip To Circuit
45.
46. All you have to do in this step is to connect the RGB LED strip to it's respective socket in the controller
circuit. Make sure that you have connected it in the correct way. Before connecting, cut your strip to
the required length and solder wires on the copper pads present at the back of the strip.
If you want, you can extend the wire if you wish to mount the strip away from the controller and other
circuitry.
Step 10: Upload The Code
47. Connect your arduino to a PC and upload the code given below through Arduino IDE. Under
Tools>Boards, select arduino nano and under Tools>Serial Port, select your correct COM port number
of your arduino. If you look at the code, it is very easy to understand. The basic steps that occur are:
1. The arduino checks if the audio signal goes higher than a set threshold.
2. If no, it moves ahead and keeps on checking until the condition becomes true.
3. If yes, it creates a random number between 1 to 6.
4. Depending upon the number, it sets the LED strip of a particular color.
5. After waiting for 10ms, it moves further.
6. In this way, whenever the audio signal goes high, the color of LED strip changes to a random
one.
You can change the threshold value under if() condition as per your requirements and can change the
pin numbers remembering that all of them must be PWM pins.
<p>/*<br>Music Reactive Color Changing Lights
Source code
Made by- Saiyam Agrawal
*/
int threshold = 20;</p><p>void setup()
{
pinMode(9, OUTPUT); // set all the pins as output
pinMode(10, OUTPUT);
48. pinMode(11, OUTPUT);
}</p><p>void loop()
{ // enter the loop
if(analogRead(A0) > threshold) // check if audio signal goes above threshold
{
int a = random(1, 6); // store a random number
if(a == 1) // glow red
{
digitalWrite(9, HIGH);
digitalWrite(10, LOW);
digitalWrite(11, LOW);
}
if(a == 2) // glow green
{
digitalWrite(9, 0);
digitalWrite(10, 1);
digitalWrite(11, 0);
}
if(a == 3) // glow orange
{
analogWrite(9, random(100, 255));
analogWrite(10, random(100, 255));
digitalWrite(11, 0);
}
if(a == 4) // glow cyan
{
digitalWrite(9, 0);
analogWrite(10, random(100, 255));
analogWrite(11, random(100, 255));
}
if(a == 5) // glow purple
{
analogWrite(9, random(100, 255));
digitalWrite(10, 0);
analogWrite(11, random(100, 255));
}
if(a == 6) // glow blue
{
digitalWrite(9, 0);
digitalWrite(10, 0);
digitalWrite(11, 1);
}
delay(20); // wait for 20ms
}
else
digitalWrite(9, LOW); // if audio signal is less than 20, set all the pins low
digitalWrite(10, LOW);
digitalWrite(11, LOW);
// again reach the top and start
}</p>
• Project_code.ino
52. So you're done making your own music reactive color changing lights! Now you just have to connect it
to an audio device, play some good music and watch the lights glowing in the dark changing their
colors with every beat.Your friends would surely be jealous with such a cool thing! Since these are
LED strips, you can mount them almost anywhere by peeling off the 3M tape at the back. So whether
you use it as a sofa light or an ambient light on your TV, this thing will spread it's awesomeness
everywhere.
For setting up the device, you'll need two AUX cables. Connect one end of the first cable to any audio
output device (Ipod, Mp3 player, Mobile phone, Tablet, TV etc.) and the other end to your device's
audio input jack. Now connect the output jack (of the project) to any sort of speakers or earphones
which is optional. Now switch it on and play some music. If it doesn't light up, raise the volume. If it
lights up but keeps on flickering or is very sensitive, lower the volume.
This marks the end of this instructable. Hope you liked it. Please vote for the project and share if you
think it was awesome. Don't forget to follow for more cool projects!
You can even like my facebook page: Frozen Solenoid
Thanks for watching :)