Download to read offline


![Chapter 2 — Connecting the Printer
PX4i and PX6i High Performance Printer User’s Manual 61
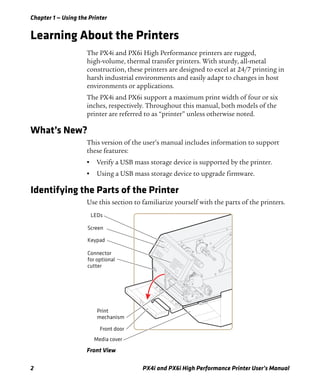
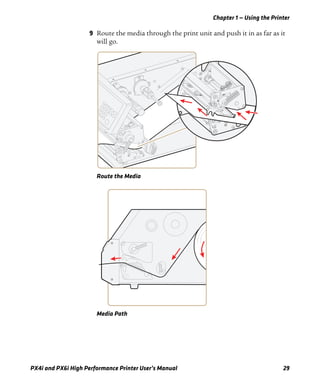
2 Send the following commands to permanently assign the IP
address, subnet mask, default router, and name server:
<SI>nn[,m1[,m2]]
where:
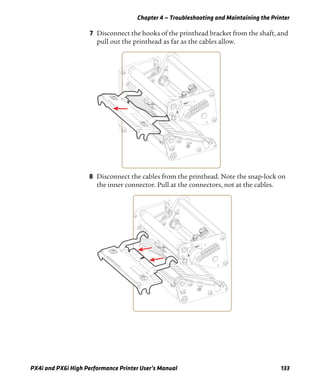
n is the IP address of the printer in the format n.n.n.n, where n is a
number from 0 to 255.
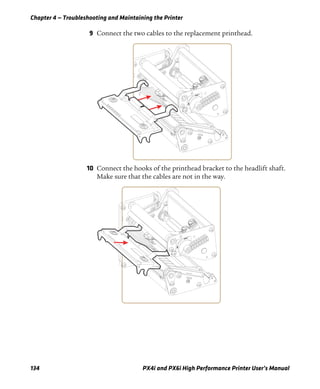
,m1 is the subnet mask address in the format n.n.n.n, where n is a
number from 0 to 255.
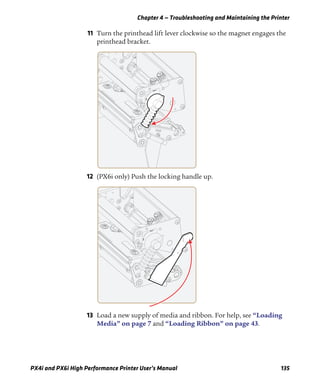
,m2 is the router address in the format n.n.n.n, where n is a
number from 0 to 255.
3 Disconnect the printer from the PC.
4 On your PC, enter the IP address of the printer in the address field
of your web browser (for example http://10.200.27.94) and press
Enter.
The home page of the printer appears.
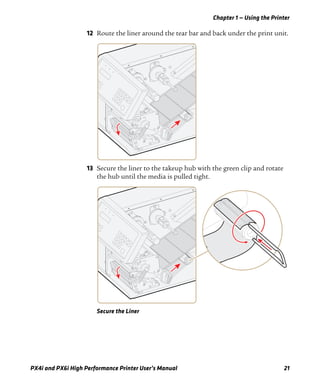
Setting Up 802.11 Radio Communications
If your printer has an optional 802.11 b/g radio, you can transfer and
receive data using wireless communications. This manual assumes
that you have already set up your wireless communications network
including your access points. This section describes how to set up
wireless security on your printer.
The printer supports these authentication modes:
• none
• WEP (64 bit and 128 bit)
• WPA Personal and Enterprise mode (802.1x authentication)
• WPA2 Personal and Enterprise mode (802.1x authentication)
Note: You must specify at least two of the three parameters for the
command to take effect.
Note: WPA and WPA2 Enterprise mode currently support PEAP,
TTLS, LEAP, and EAP-FAST. For LEAP authentication, the printer
supports Open EAP, but does not support Network EAP.](https://image.slidesharecdn.com/intermecpx4ipx6irfidbarcodeprinterusermanualhionit-190724044315/85/Intermec-PX4i-PX6i-RFID-75-320.jpg)


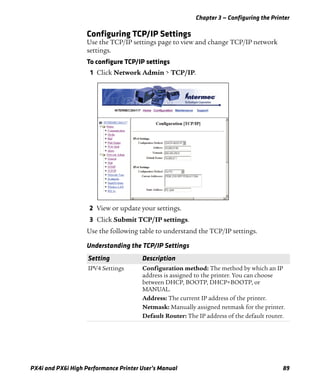
![Chapter 3 — Configuring the Printer
80 PX4i and PX6i High Performance Printer User’s Manual
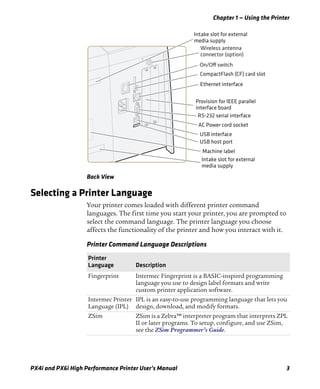
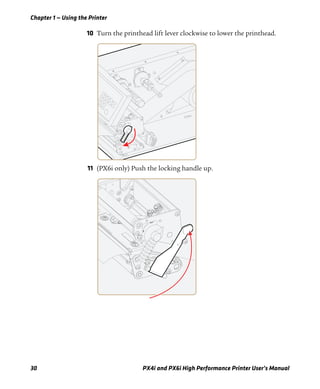
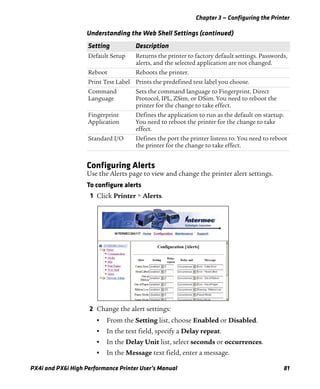
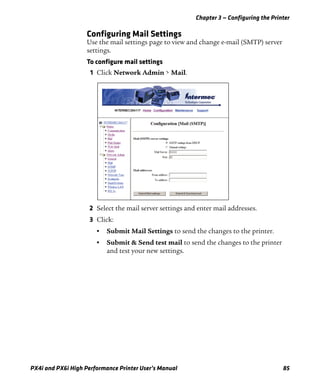
Configuring Web Shell Settings
Use the Web Shell page to view and change test and default settings.
You can also use the Web Shell page to print test labels and change the
command language.
To configure Web Shell settings
1 Click Printer > Web Shell.
2 Select the action you want to take or the setting you want to
change.
• For the actions in the top of the screen, the printer performs
the action and may prompt you to reboot the printer.
• For the settings in the bottom of the screen, select the settings
you want and click Submit Setup. A message appears stating,
“Application change will take effect at reboot.” You can select
Reboot or wait until you are done making other configuration
changes.
Use the following table to understand the Web Shell settings.
Understanding the Web Shell Settings
Setting Description
Testfeed [value] Calibrates the label stop sensor performs a testfeed.
Selecting this setting is equivalent to issuing the
TESTFEED command on the printer.
Ribbon Sensor
[value]
Detects if the printer runs out of ribbon during printing.](https://image.slidesharecdn.com/intermecpx4ipx6irfidbarcodeprinterusermanualhionit-190724044315/85/Intermec-PX4i-PX6i-RFID-94-320.jpg)


![Chapter 4 — Troubleshooting and Maintaining the Printer
126 PX4i and PX6i High Performance Printer User’s Manual
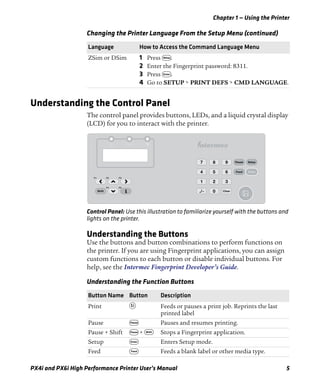
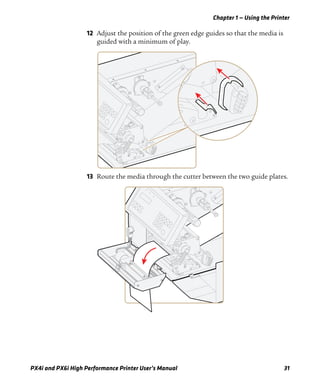
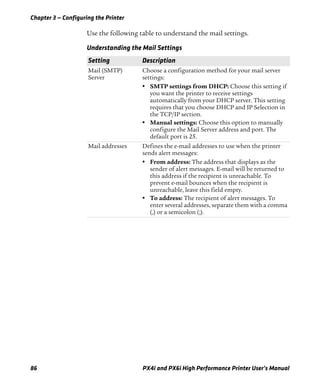
Follow these guidelines for cleaning the printer:
• Always remove the power cord before cleaning.
• Never spray the printer. Protect it from water when cleaning the
premises.
• Never use any sharp tools for removing stuck labels. The printhead
and rollers are delicate.
Cleaning the Exterior of the Printer
Clean the exterior of the printer as needed.
To clean the exterior of the printer
• Wipe external surfaces with a soft cloth slightly moistened with
water or a mild detergent.
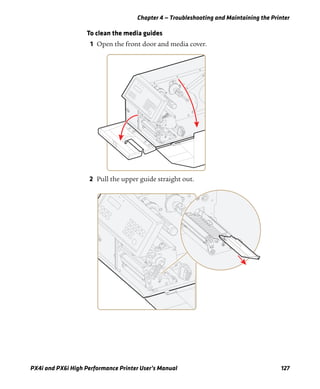
Cleaning the Media Guides
The label stop sensor, which controls the media feed, is covered by two
plastic guides. The guides are transparent to allow the light to pass
between the two parts of the label stop sensor. These areas must be
kept clean from dust, stuck labels, and adhesive residue.
If your printer starts to feed labels in an unexpected way, pull out
the upper guide check for objects, such as dust, adhesive residue, or
labels, that may be blocking the beam of light. If necessary, clean the
guides.
Use only the cleaning agents specified in this section. Intermec is
not responsible for damage caused by any other cleaning
materials used on this printer. Clean the printer with a cotton
swab saturated with alcohol.
When cleaning or replacing the printhead, take precautions to
avoid electrostatic discharges.
Isopropyl alcohol [(CH 3)2CHOH; CAS 67-63-0] is a highly
flammable, moderately toxic, and mildly irritating substance.](https://image.slidesharecdn.com/intermecpx4ipx6irfidbarcodeprinterusermanualhionit-190724044315/85/Intermec-PX4i-PX6i-RFID-140-320.jpg)
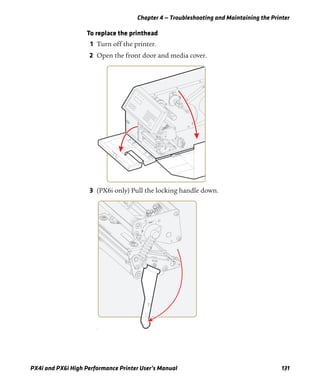
![Chapter 4 — Troubleshooting and Maintaining the Printer
128 PX4i and PX6i High Performance Printer User’s Manual
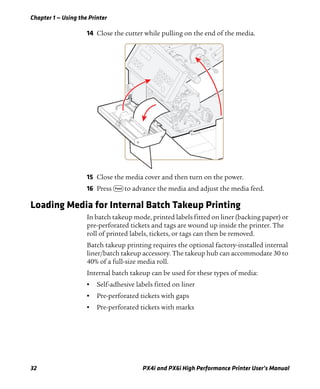
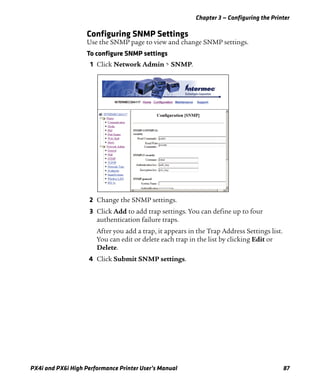
3 Press the snap-lock, lift the edge of the lower guide, and pull the
lower guide straight out.
4 Clean the guides with a cleaning card or a soft cloth soaked in
isopropyl alcohol. Be careful not to scratch the guides.
5 Replace the upper and lower guides.
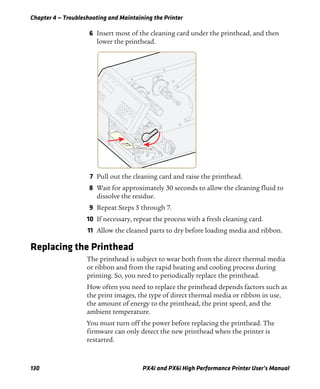
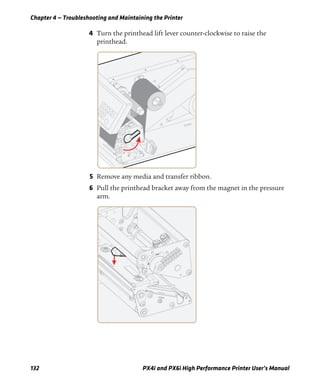
Cleaning the Printhead
Cleaning the printhead on a regular basis is important for the life of
the printhead and for the printout quality. You should clean the
printhead each time you replace the media. This section describes how
to clean the printhead using cleaning cards. If additional cleaning is
required, for example removing adhesive residue from the platen
roller or tear bar, use a cotton swab moistened with isopropyl alcohol.
Isopropyl alcohol [(CH 3)2CHOH; CAS 67-63-0] is a highly
flammable, moderately toxic, and mildly irritating substance.](https://image.slidesharecdn.com/intermecpx4ipx6irfidbarcodeprinterusermanualhionit-190724044315/85/Intermec-PX4i-PX6i-RFID-142-320.jpg)


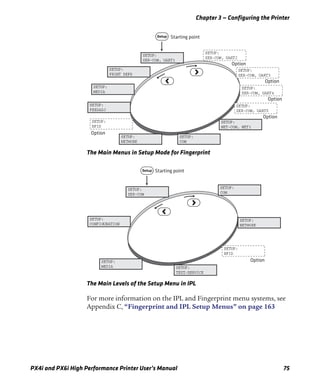
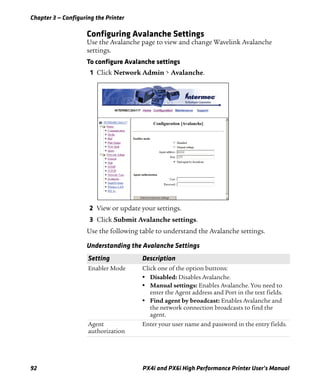
![Appendix C — Fingerprint and IPL Setup Menus
PX4i and PX6i High Performance Printer User’s Manual 167
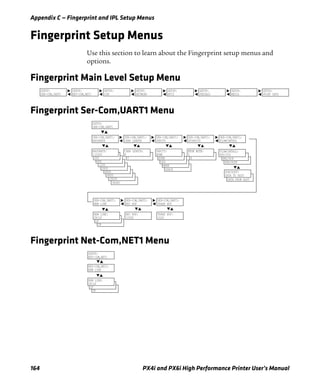
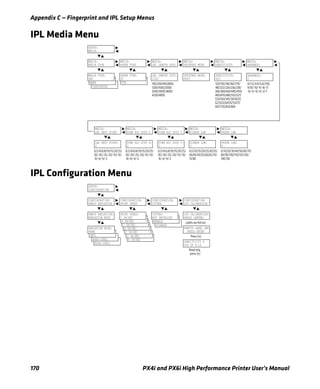
Fingerprint Print Defs Menu
CMD LANGUAGE:
DSim
CMD LANGUAGE:
ZSim
CMD LANGUAGE:
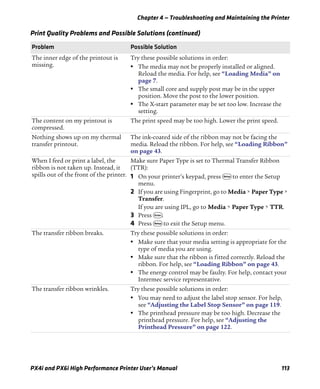
IPL
CLIP DEFAULT:
OFF
TESTPRINT:
NETWORK INFO
TESTPRINT:
RFID TEST LABEL
TESTPRINT:
HARDWARE INFO
TESTPRINT:
SETUP INFO
TESTPRINT:
BAR CODES #2
TESTPRINT:
BAR CODES #1
TESTPRINT:
CHESS
PRINT DEFS:
TESTPRINT
LTS:
LTS ADJUST
LTS:
LTS TEST
LTS:
LTS VALUE
LTS VALUE:
10
TESTPRINT:
DIAMONDS
PRINT DEFS:
PRINT SPEED
PRINT DEFS:
LSS TEST
PRINT SPEED:
100
LSS TEST:
LSS MANUAL
LSS [G: 1]D: 13
REMOVE LABEL
ENTER TO STOP
REMOVE LABEL AND
PRESS ENTER
SETUP:
PRINT DEFS
PRINT DEFS:
HEAD RESIST
HEAD RESIST:
nnn
LSS TEST:
LSS AUTO
LSS AUTO:
Toggle between
gain (G) and drive (D)
Decrease or increase
value in brackets
PRINT DEFS:
LTS
SENSITIVITY 10
OUT OF 9-10
PRINT DEFS:
CMD LANGUAGE
PRINT DEFS:
CLIP DEFAULT
CLIP DEFAULT:
ON CMD LANGUAGE:
Direct Protocol
CMD LANGUAGE:
Fingerprint
Only displayed if a paper sensor is installed.](https://image.slidesharecdn.com/intermecpx4ipx6irfidbarcodeprinterusermanualhionit-190724044315/85/Intermec-PX4i-PX6i-RFID-183-320.jpg)


The px4i and px6i high performance printer user’s manual provides essential operational and service information for users of Intermec's printers. It includes details on configurations, connecting to various devices, and loading media, along with safety information and warranties. The document is proprietary and subject to change, with a recording of updates and support resources available.


