This document is a user's guide for a printer that covers:
1. Copyright and trademark information stating that no part of the publication can be reproduced without permission.
2. Safety instructions for setting up and using the printer, handling ink, and restrictions on copying.
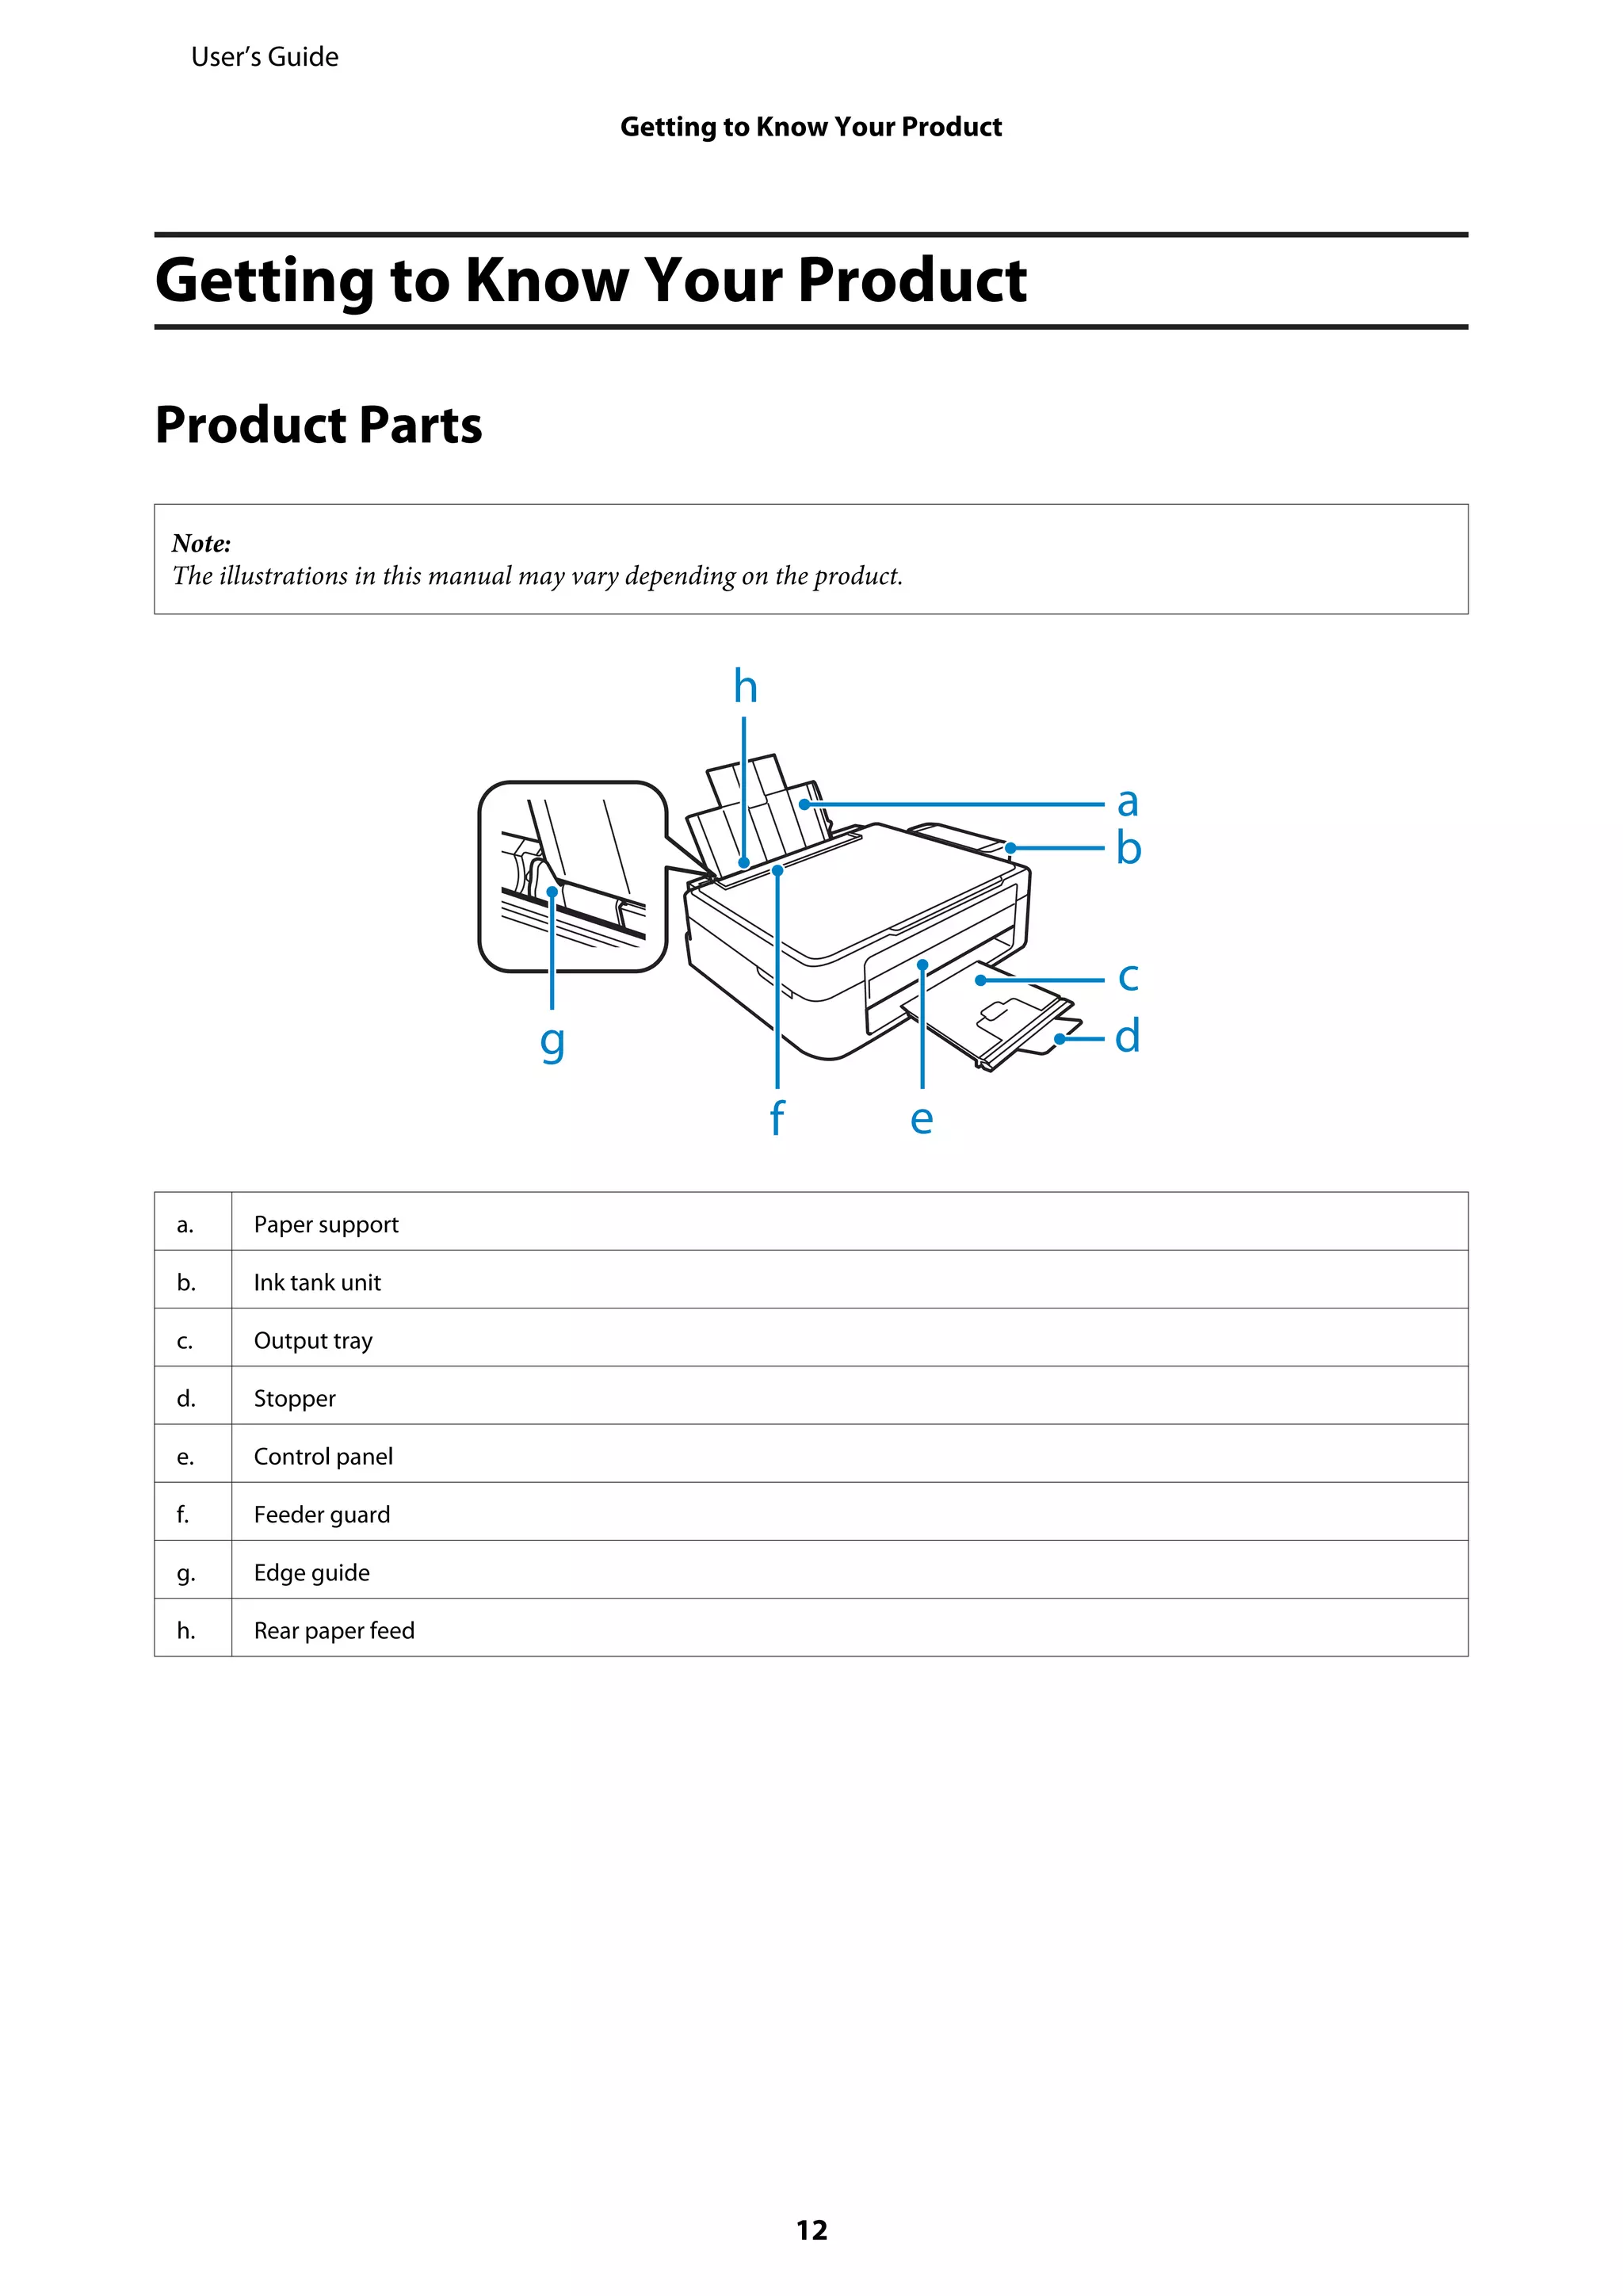
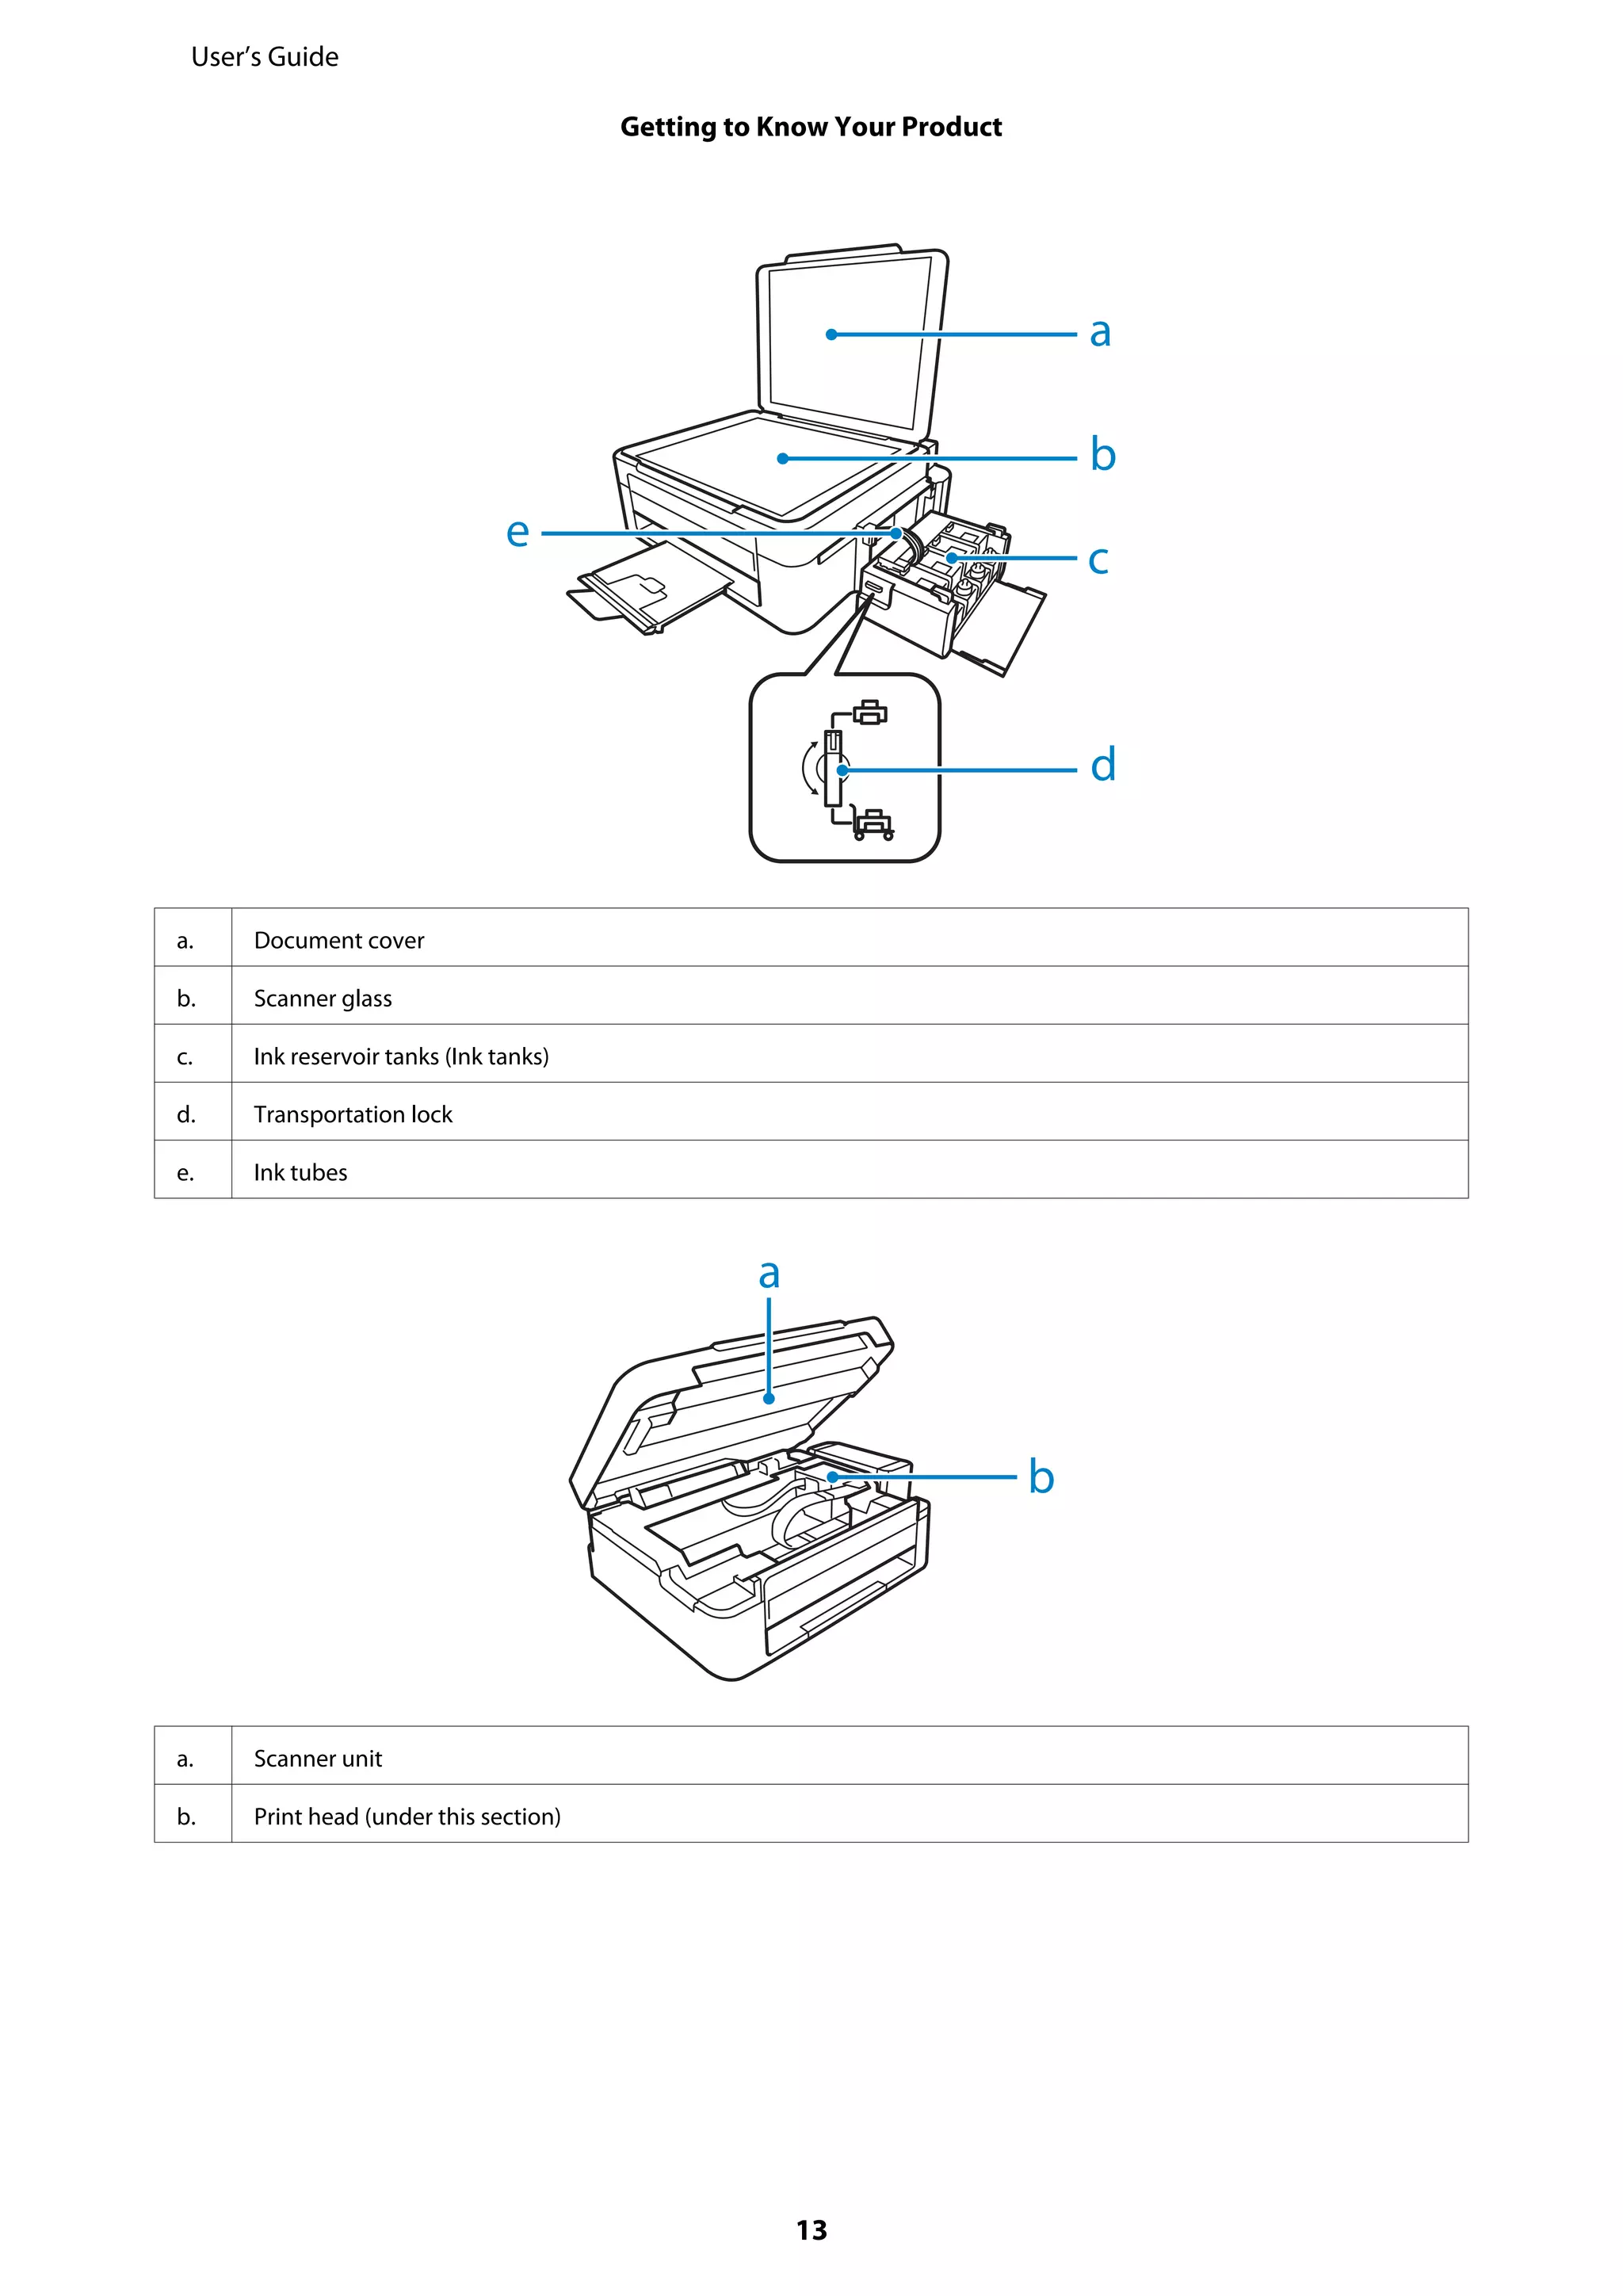
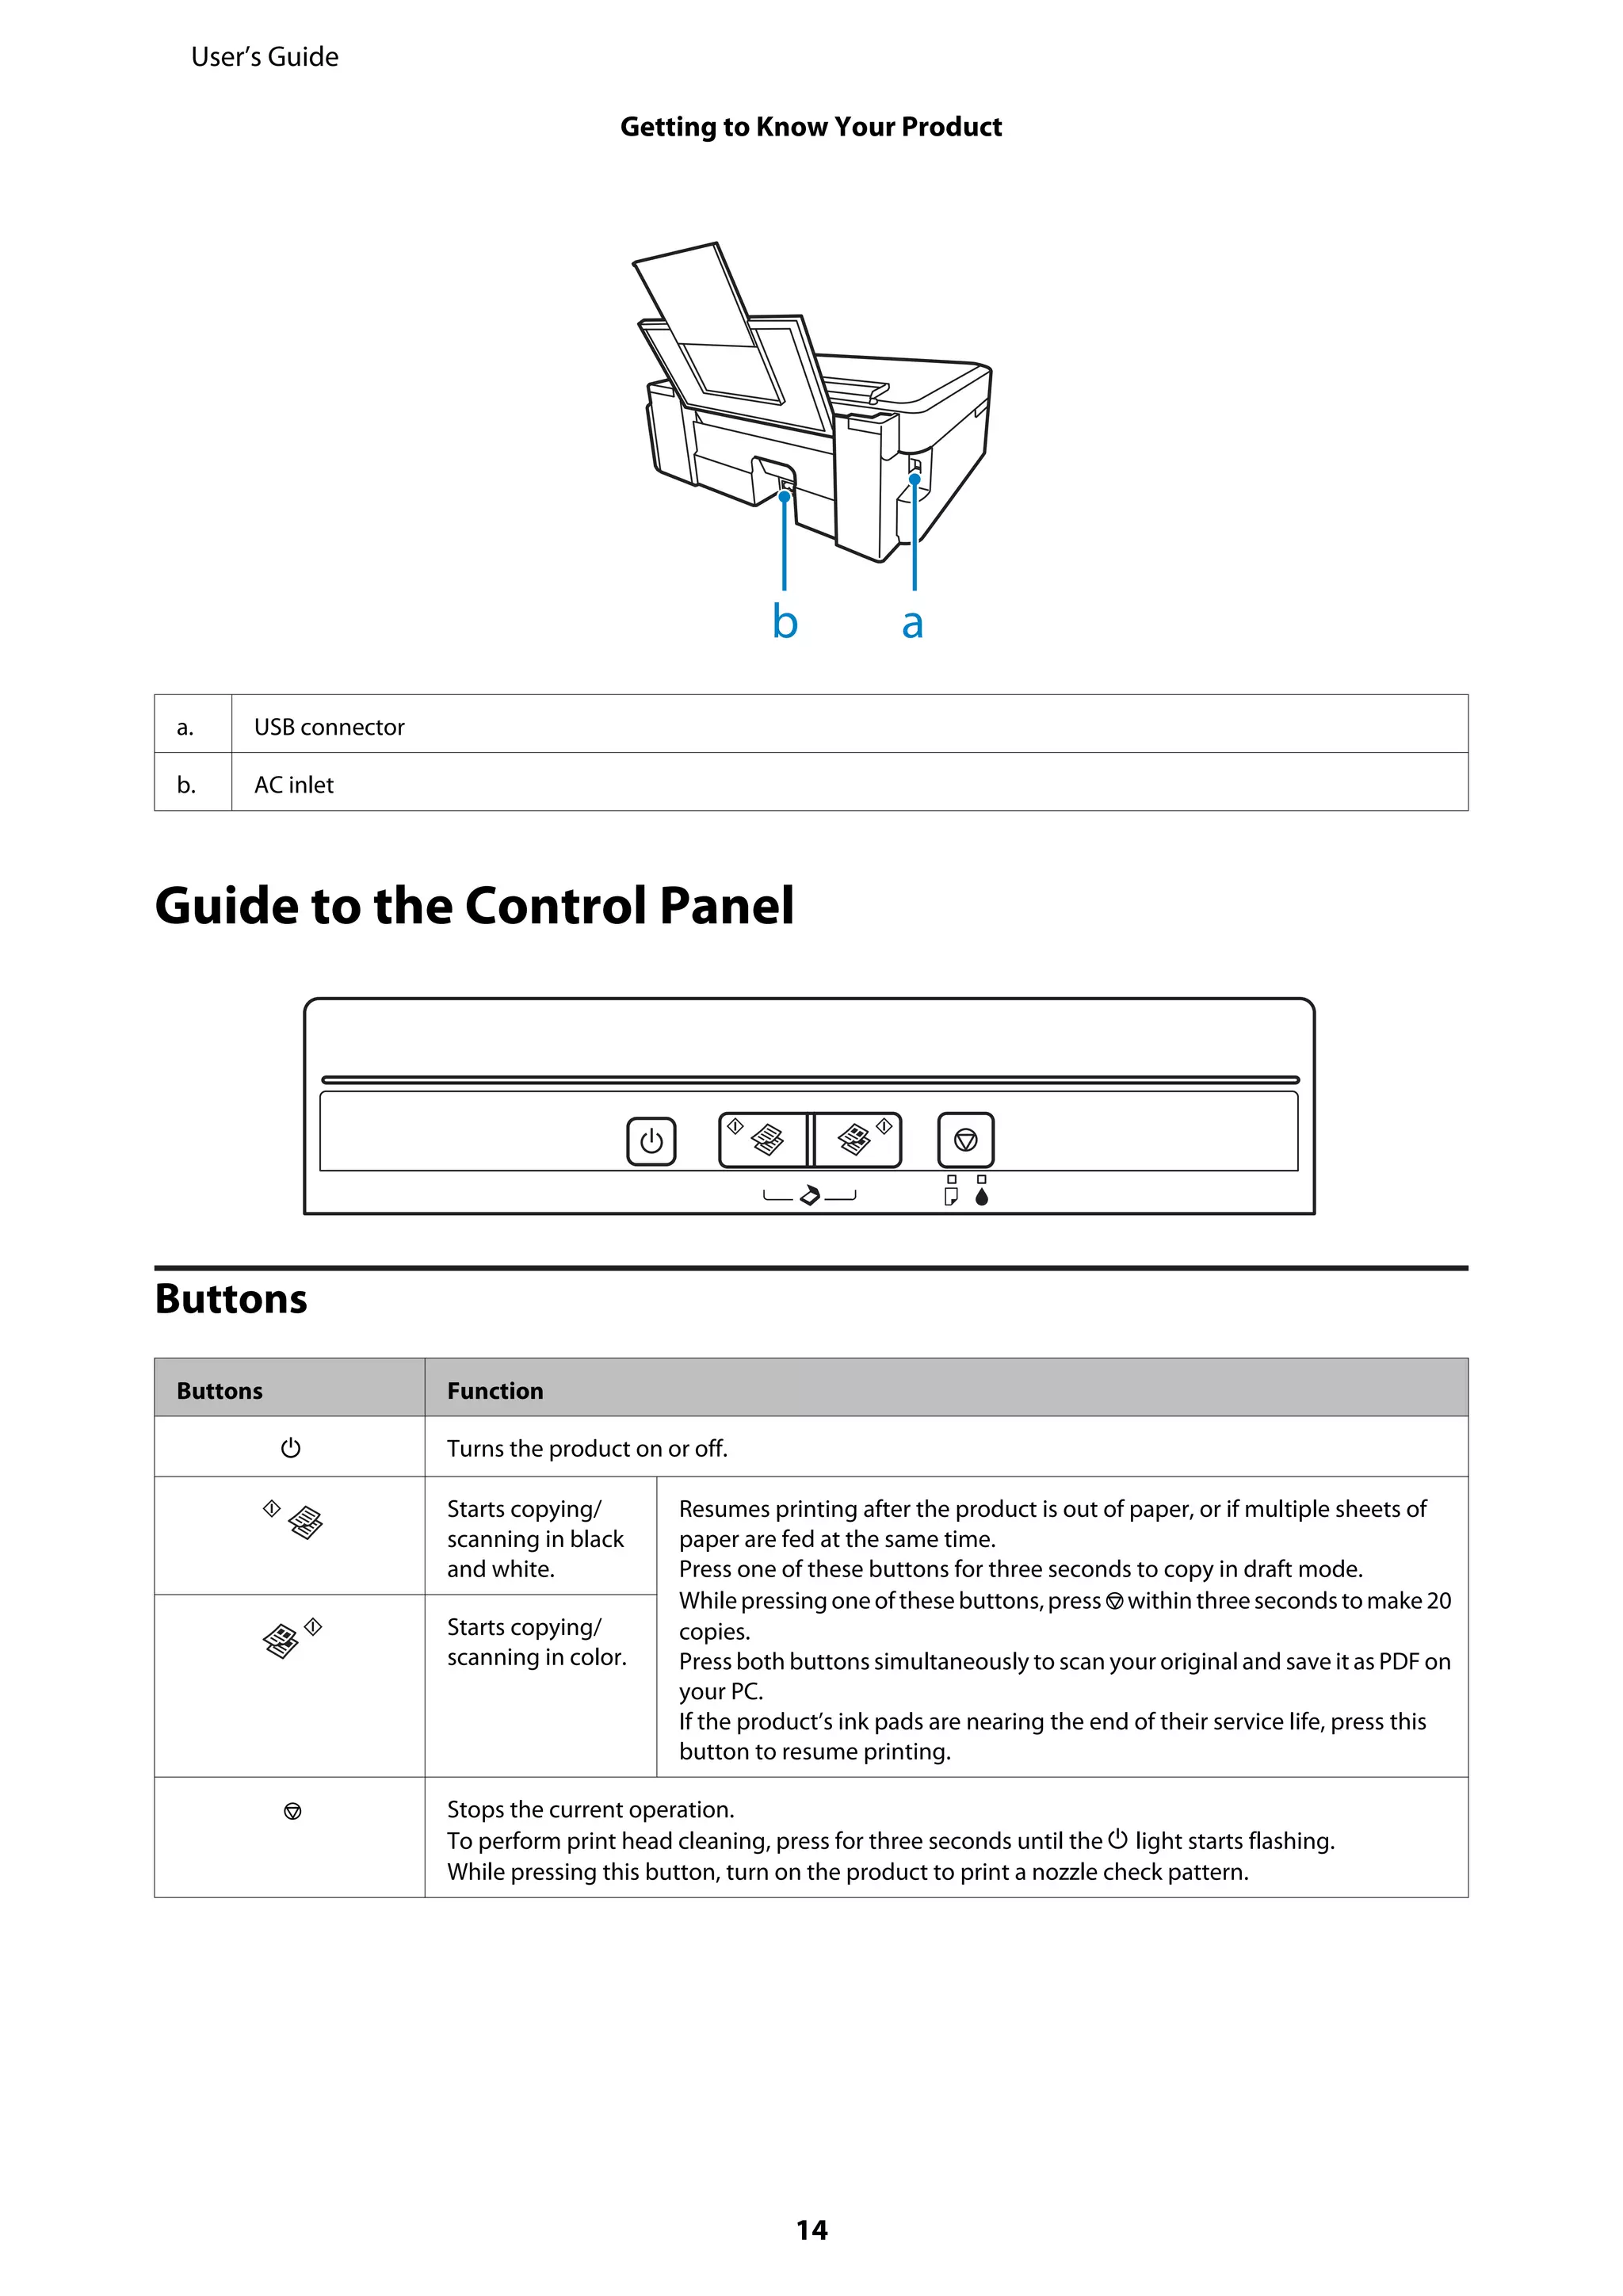
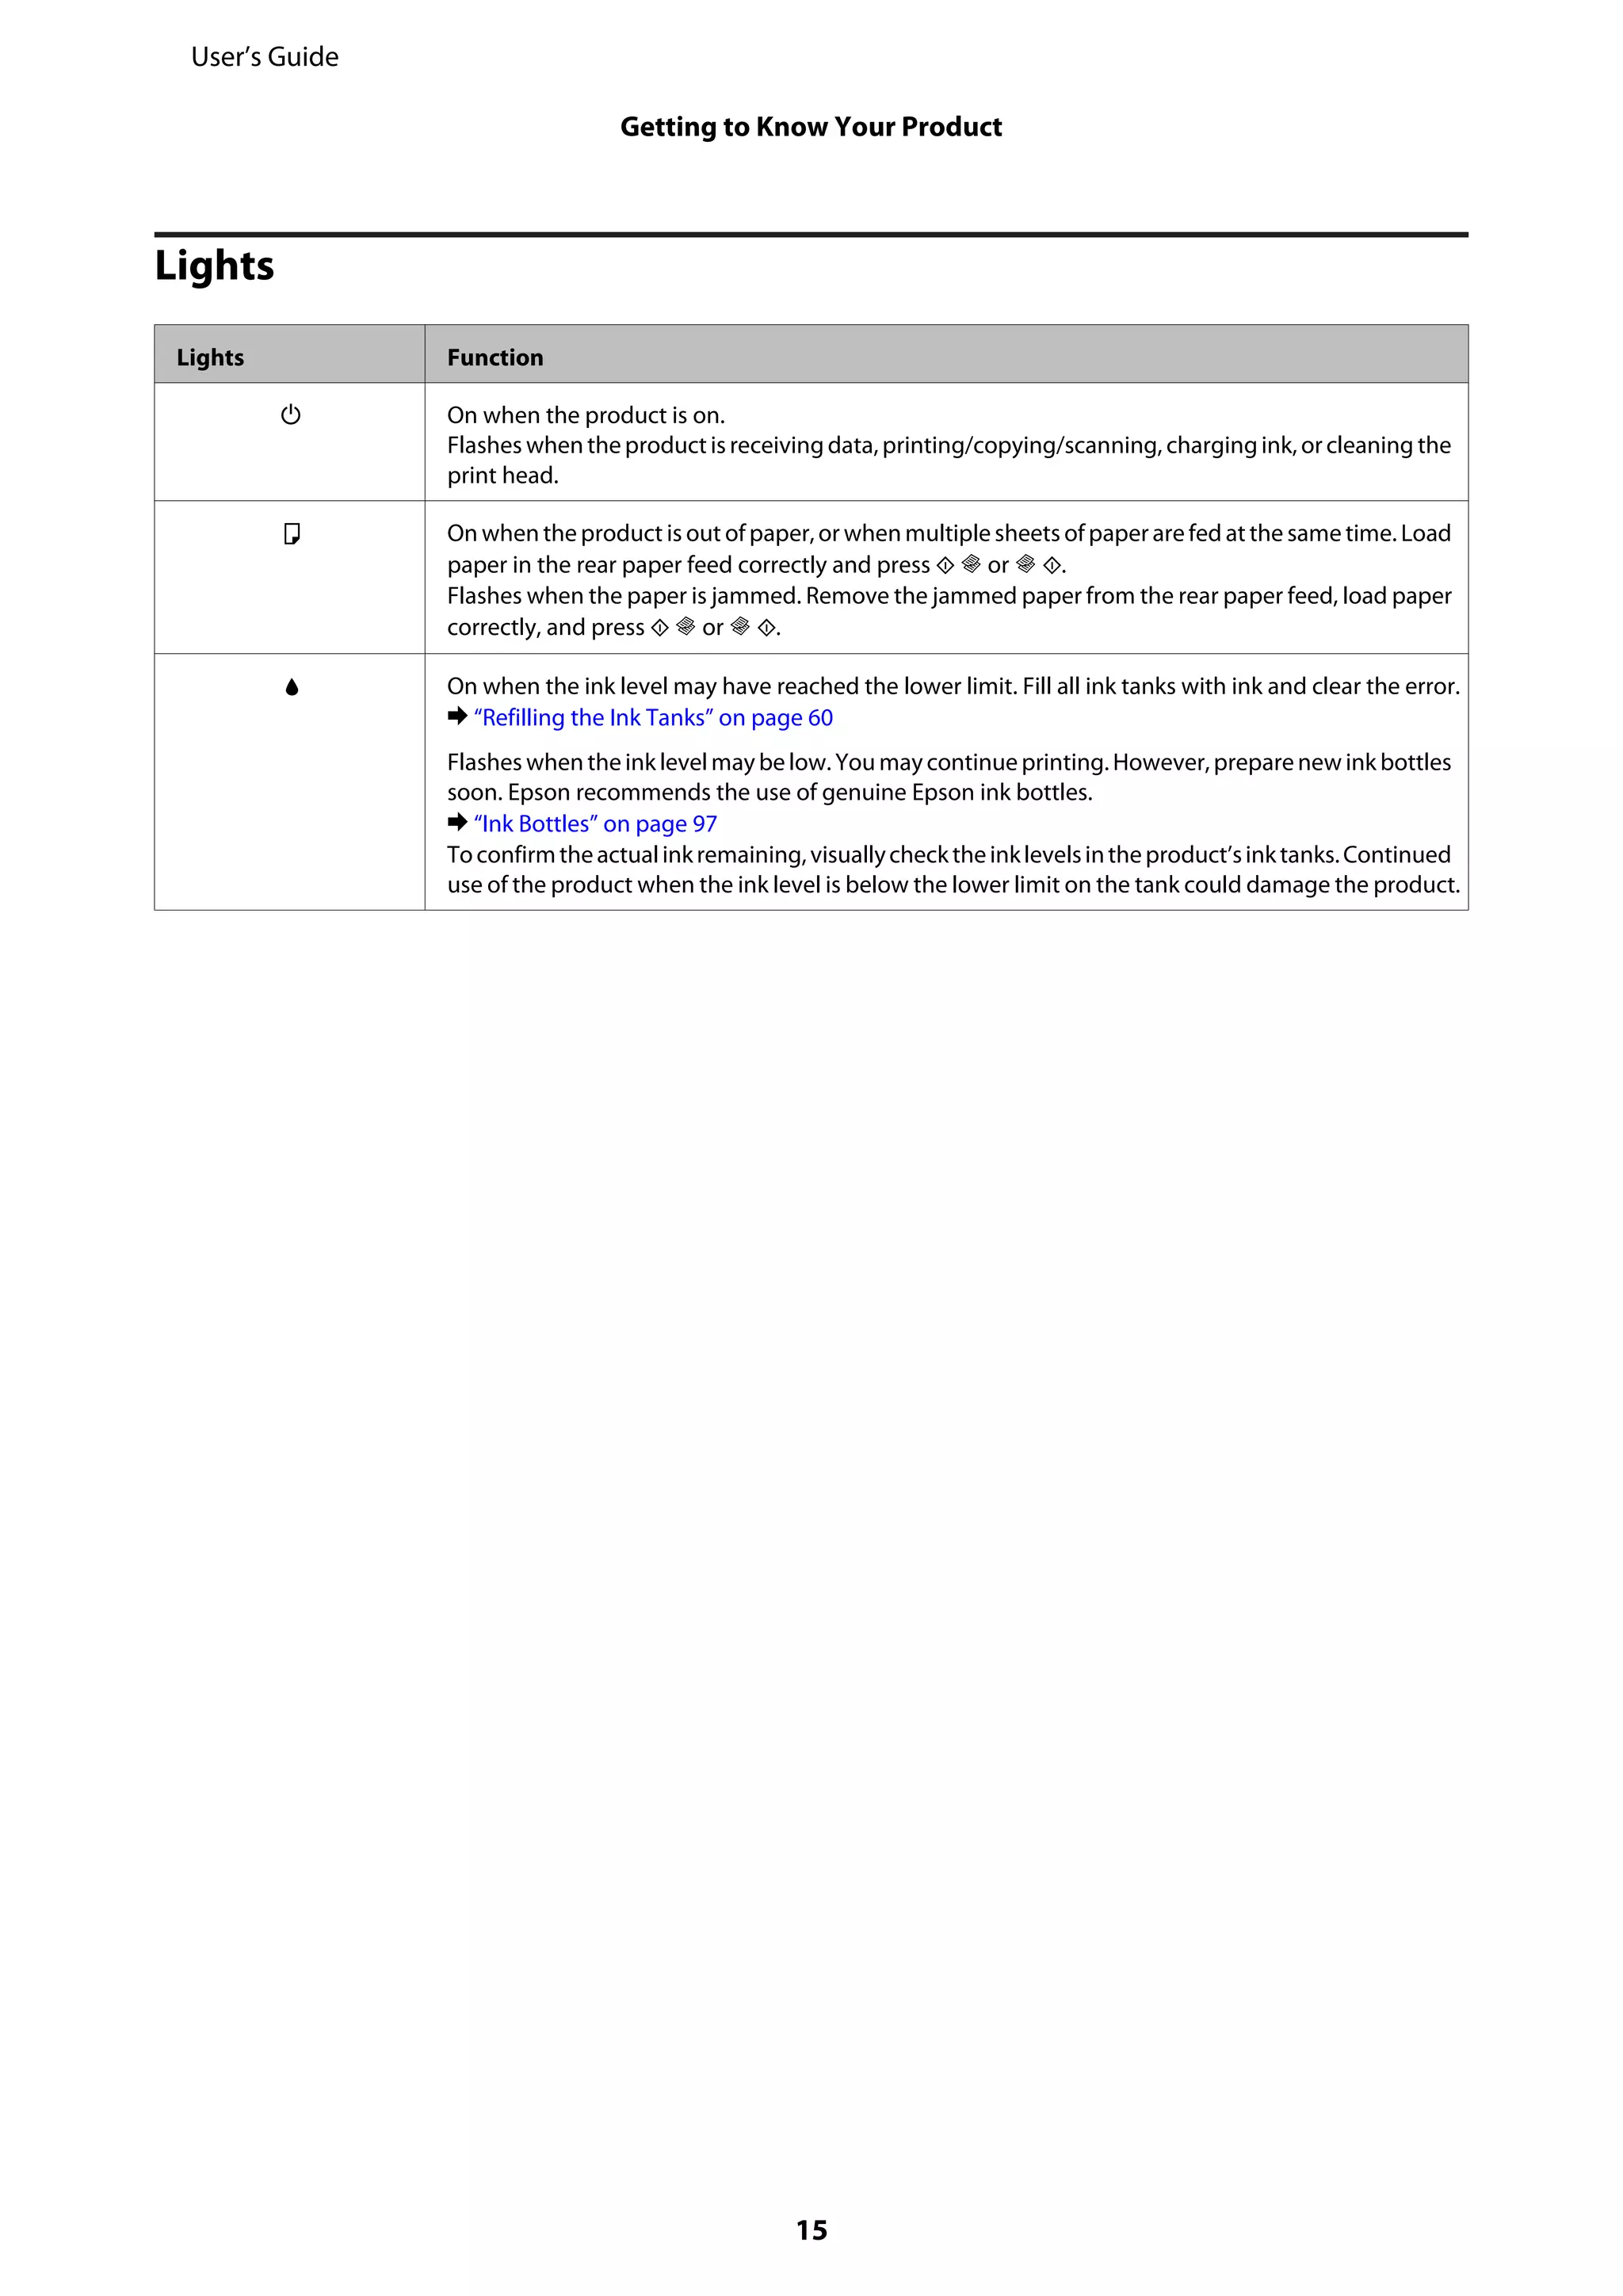
3. An introduction to the printer's parts and control panel buttons and lights.
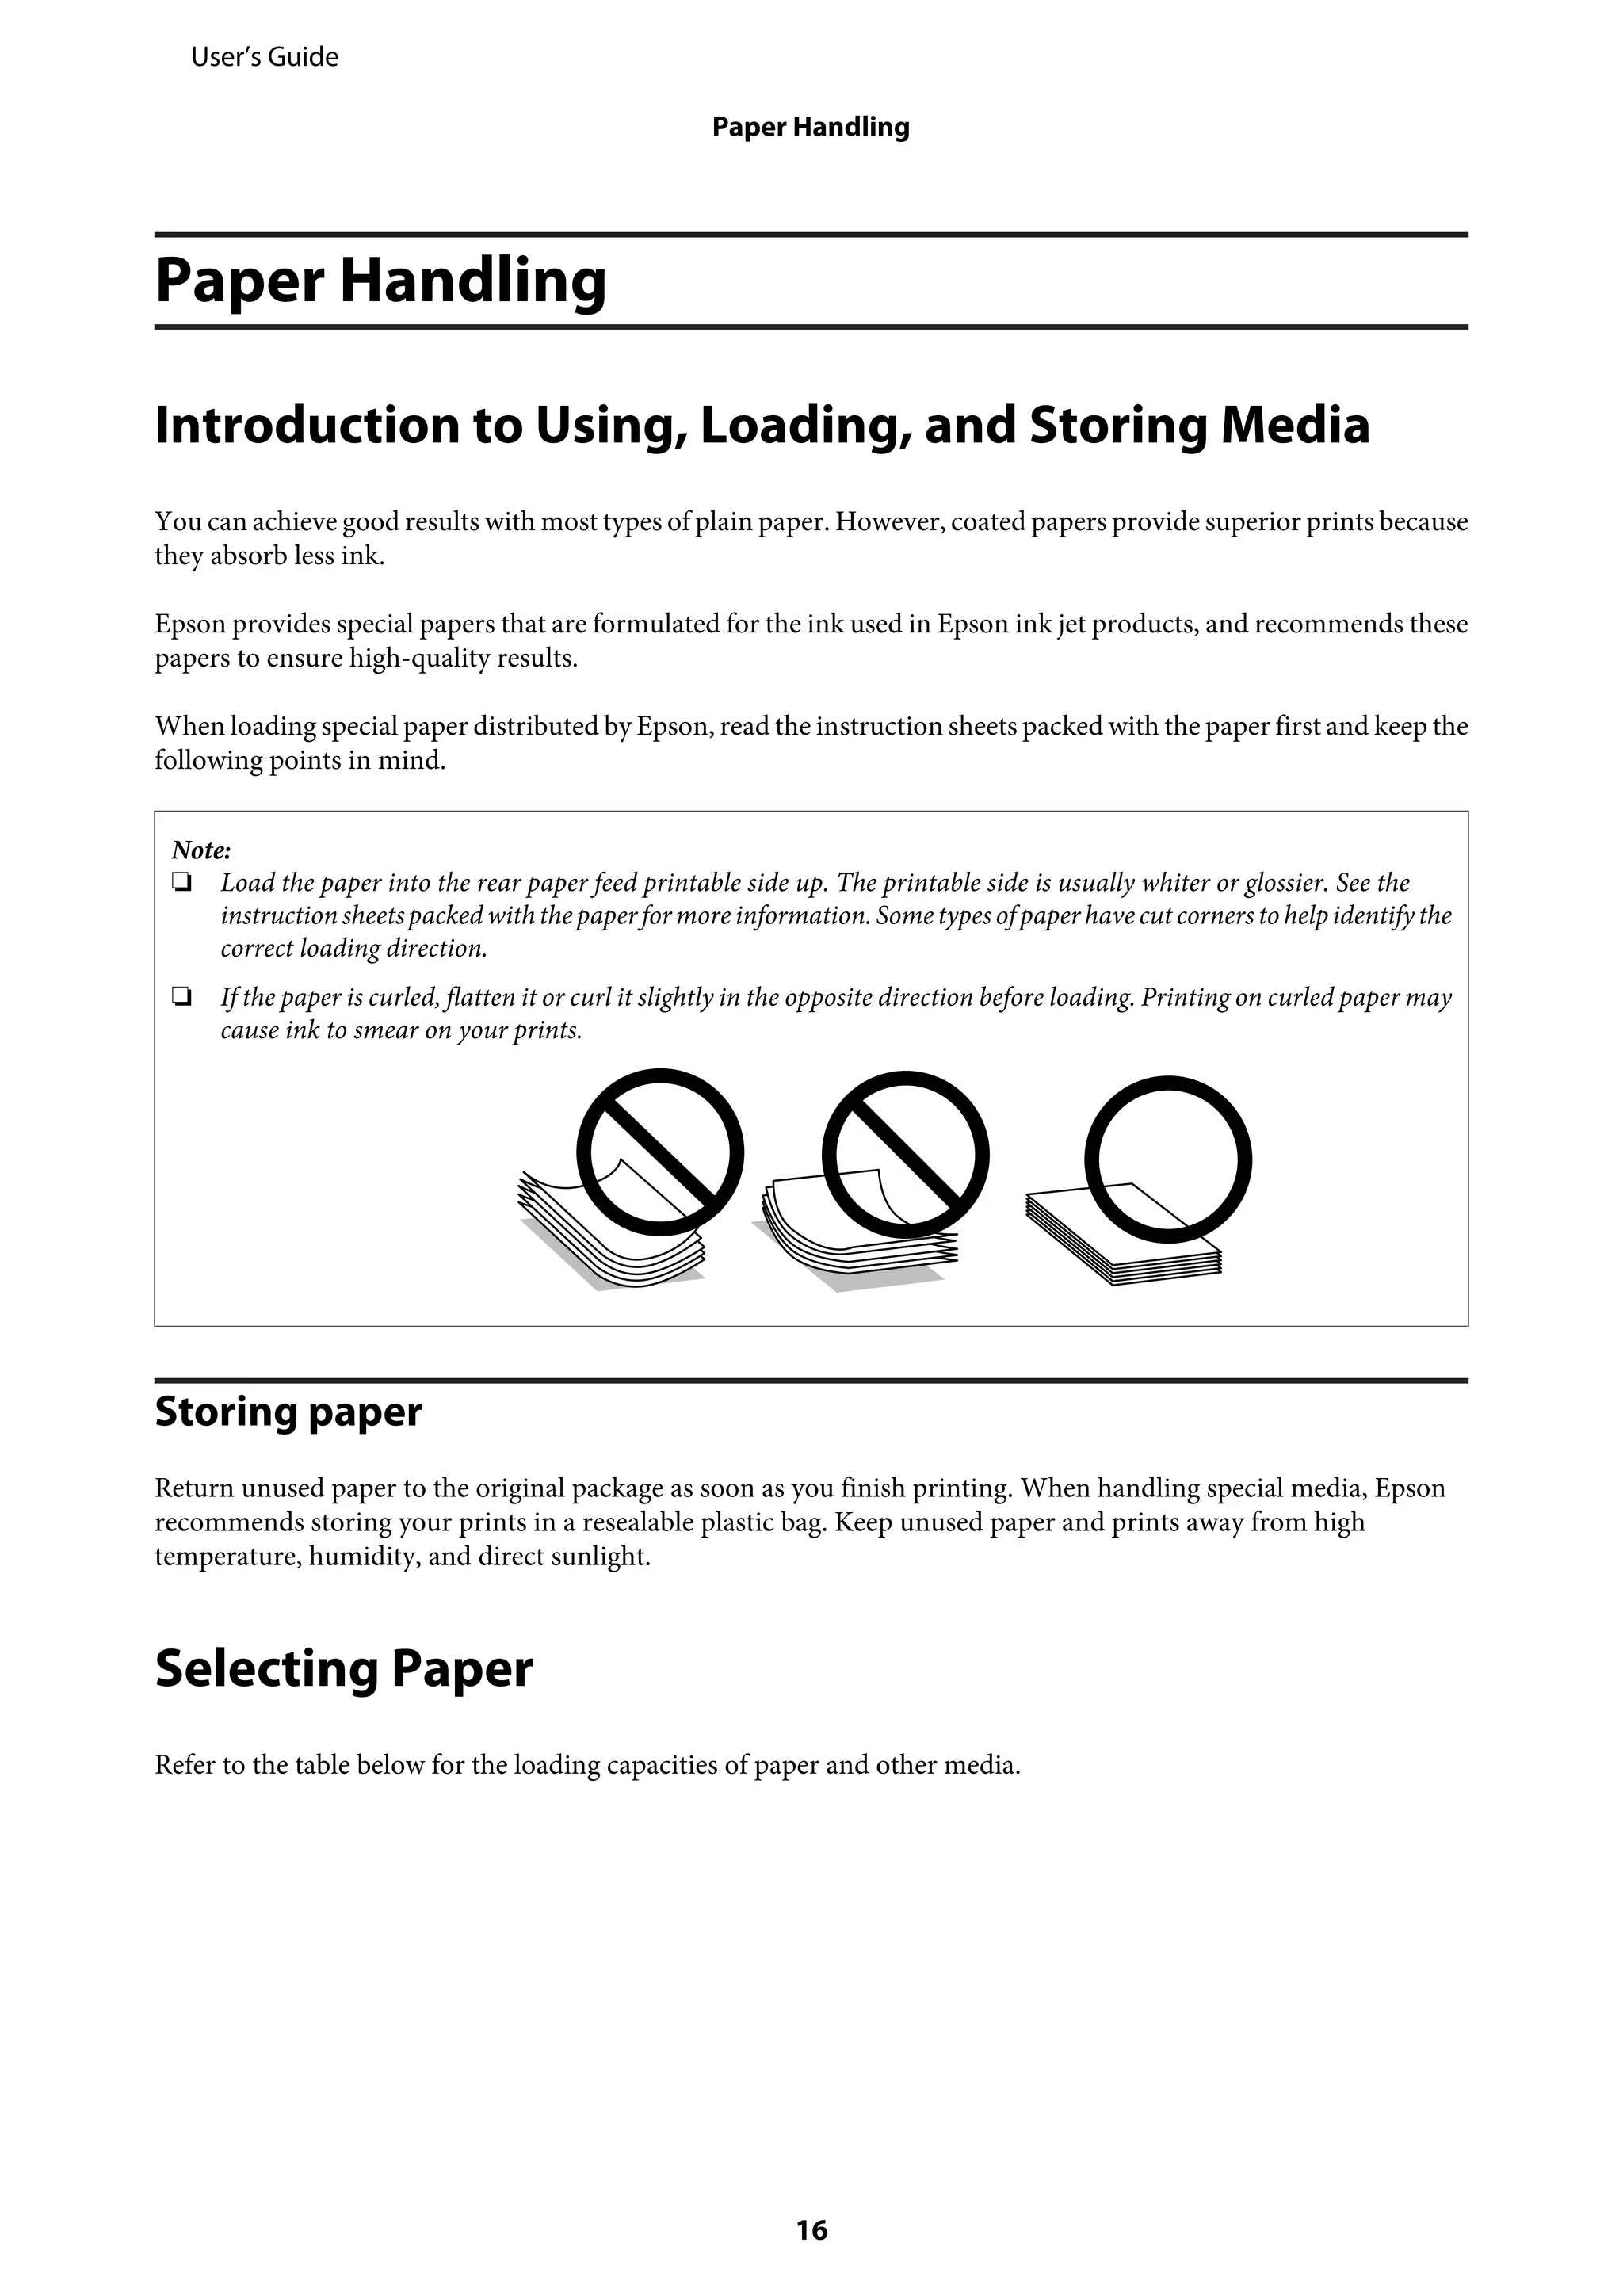
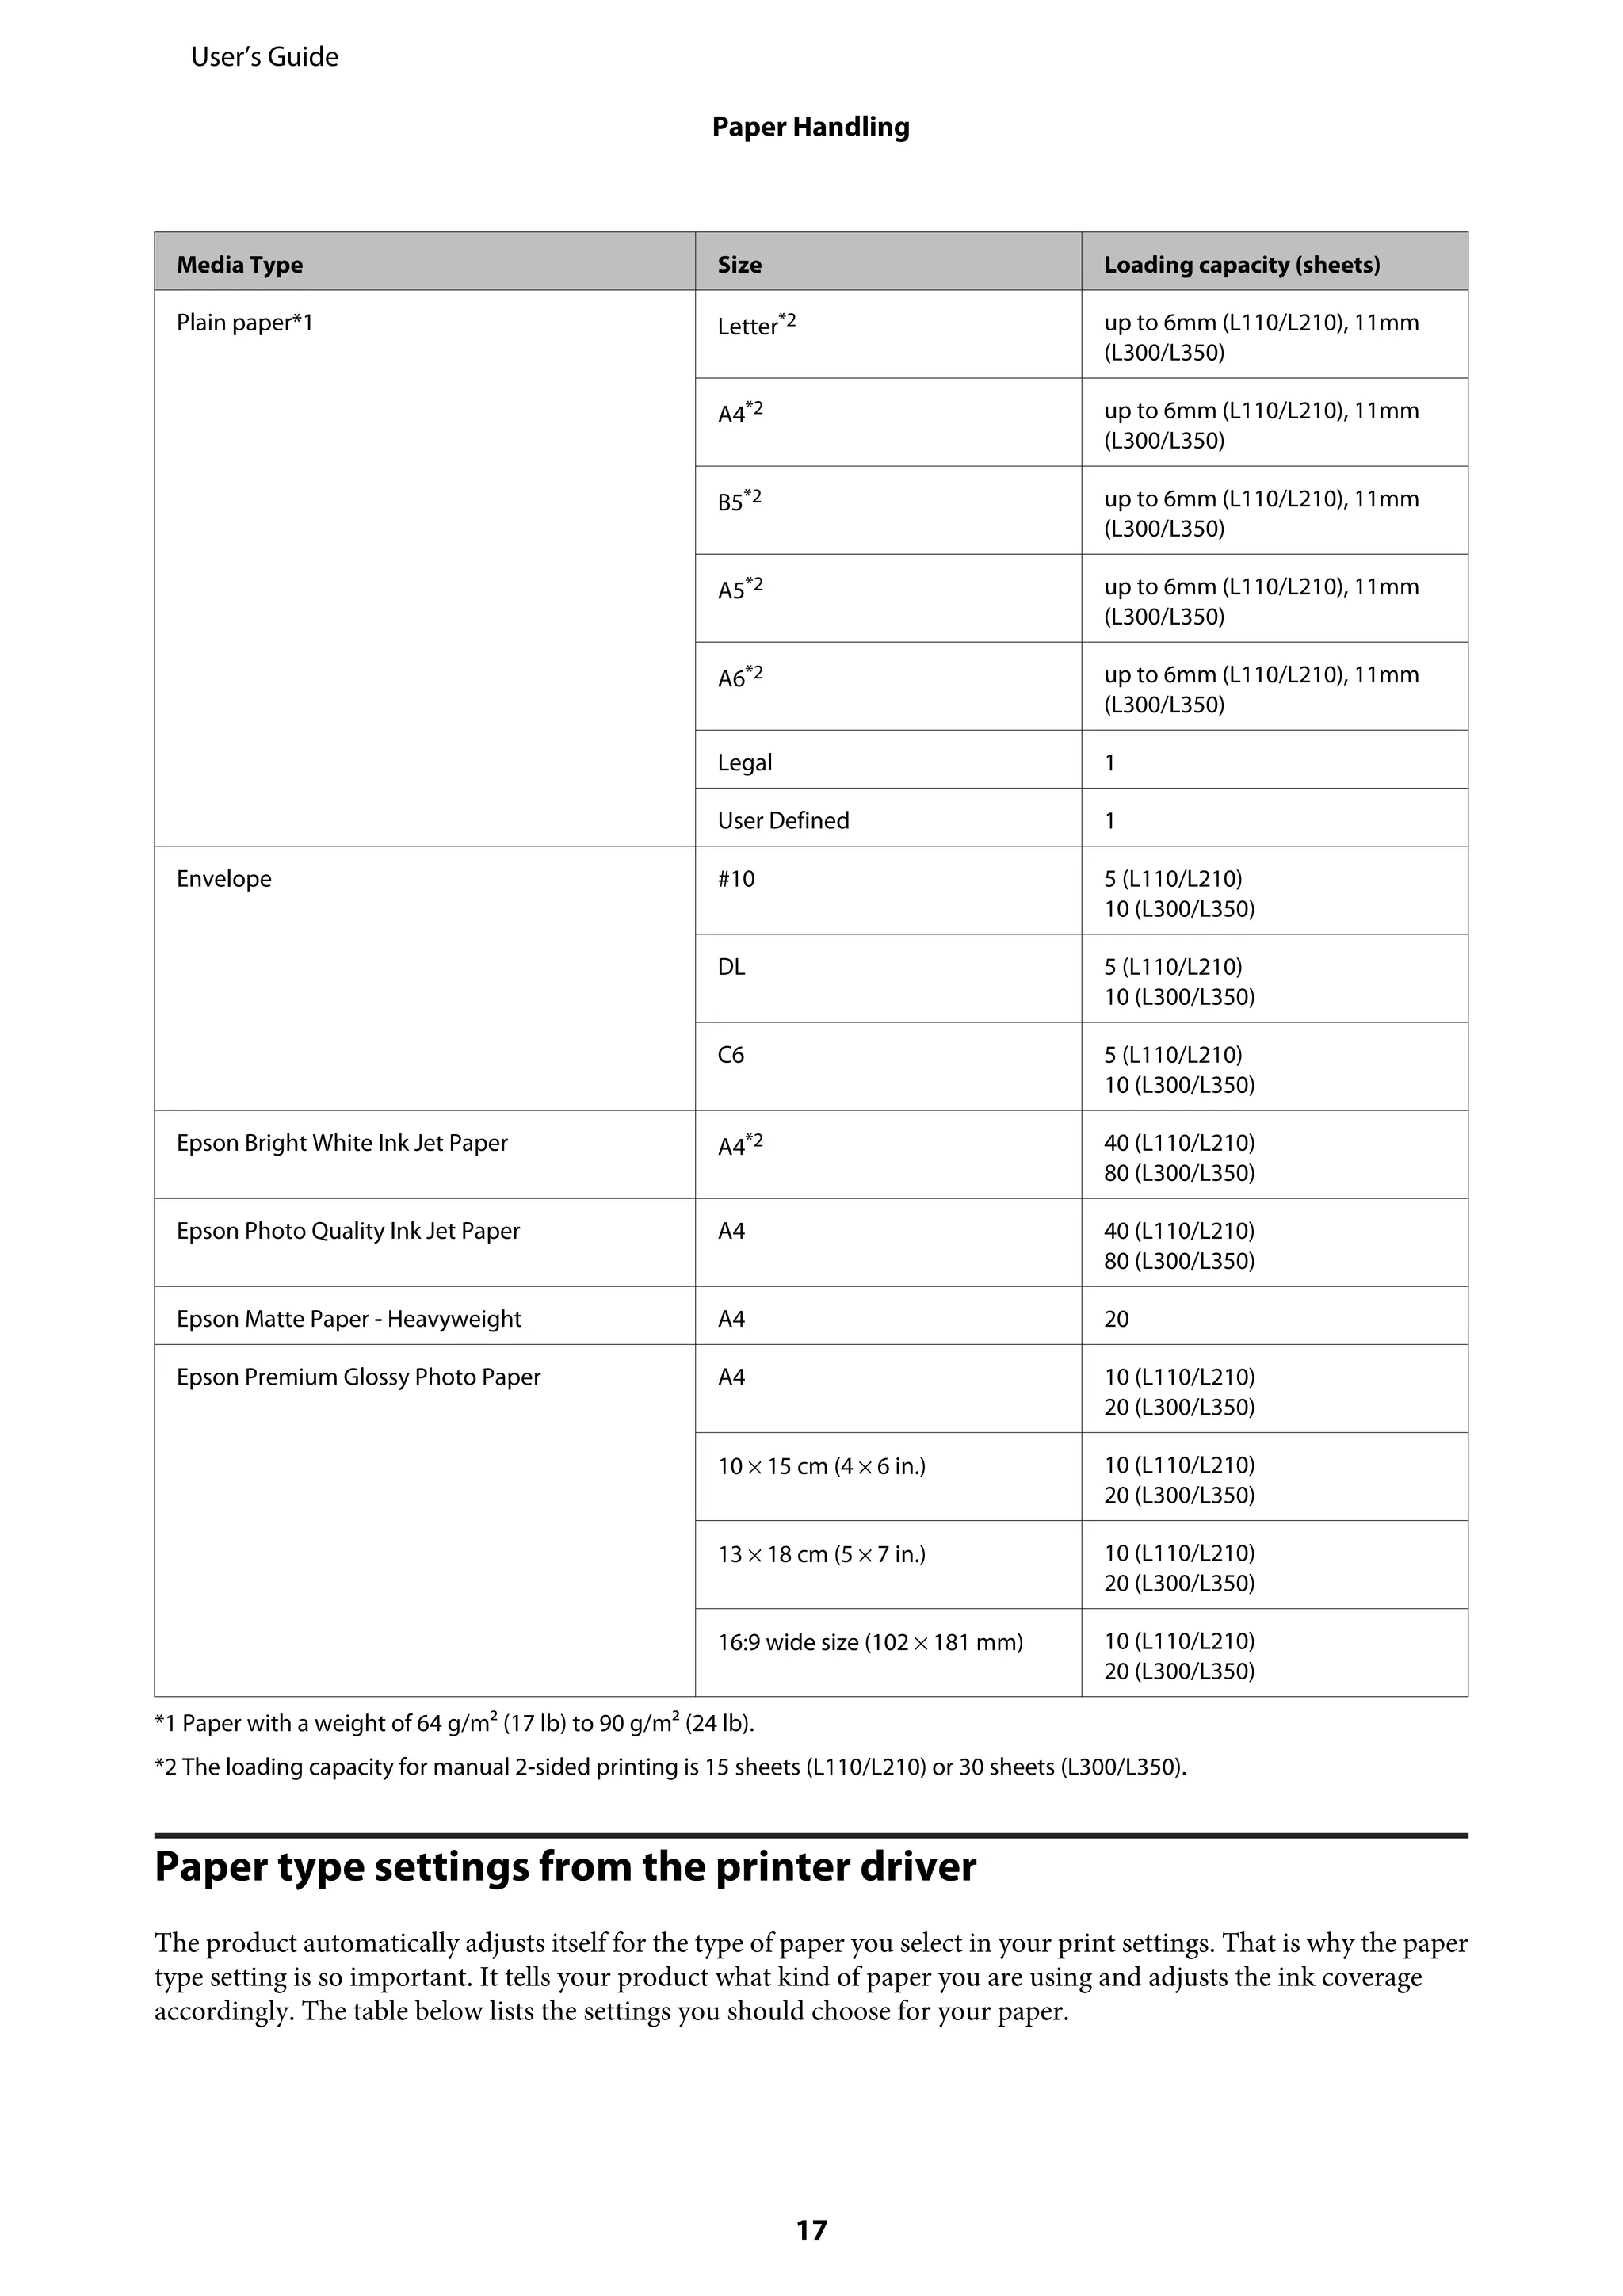
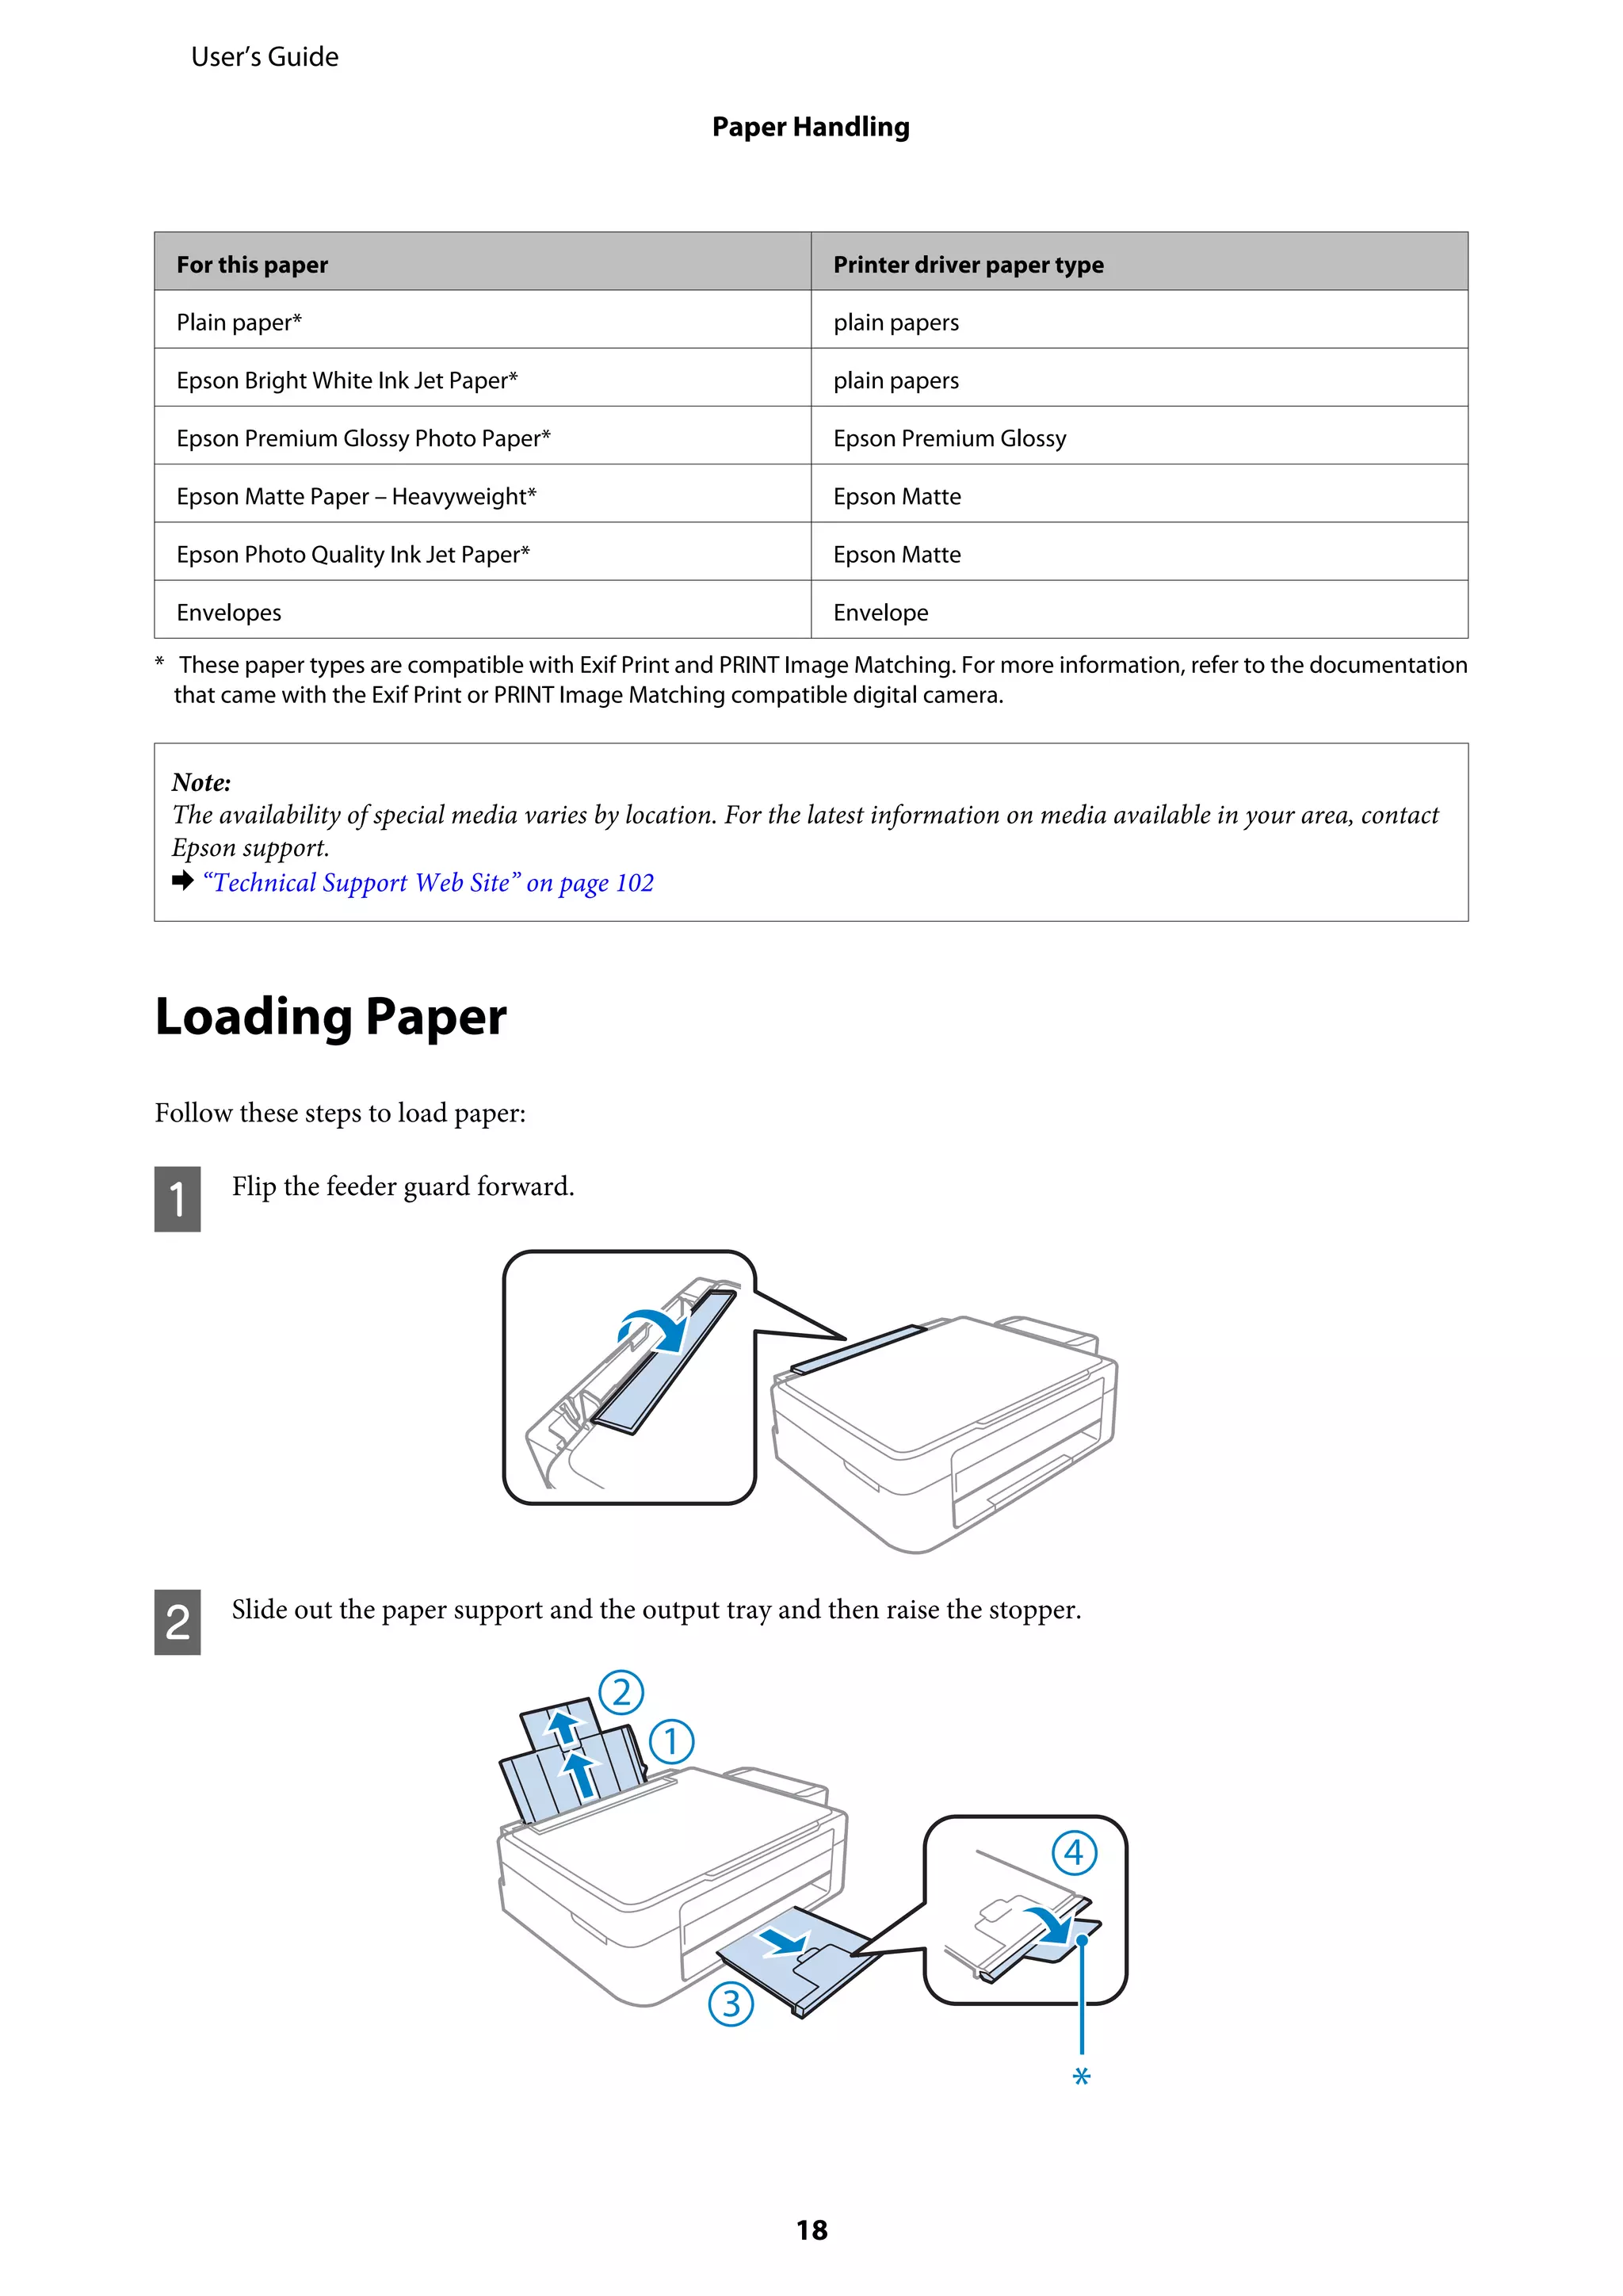
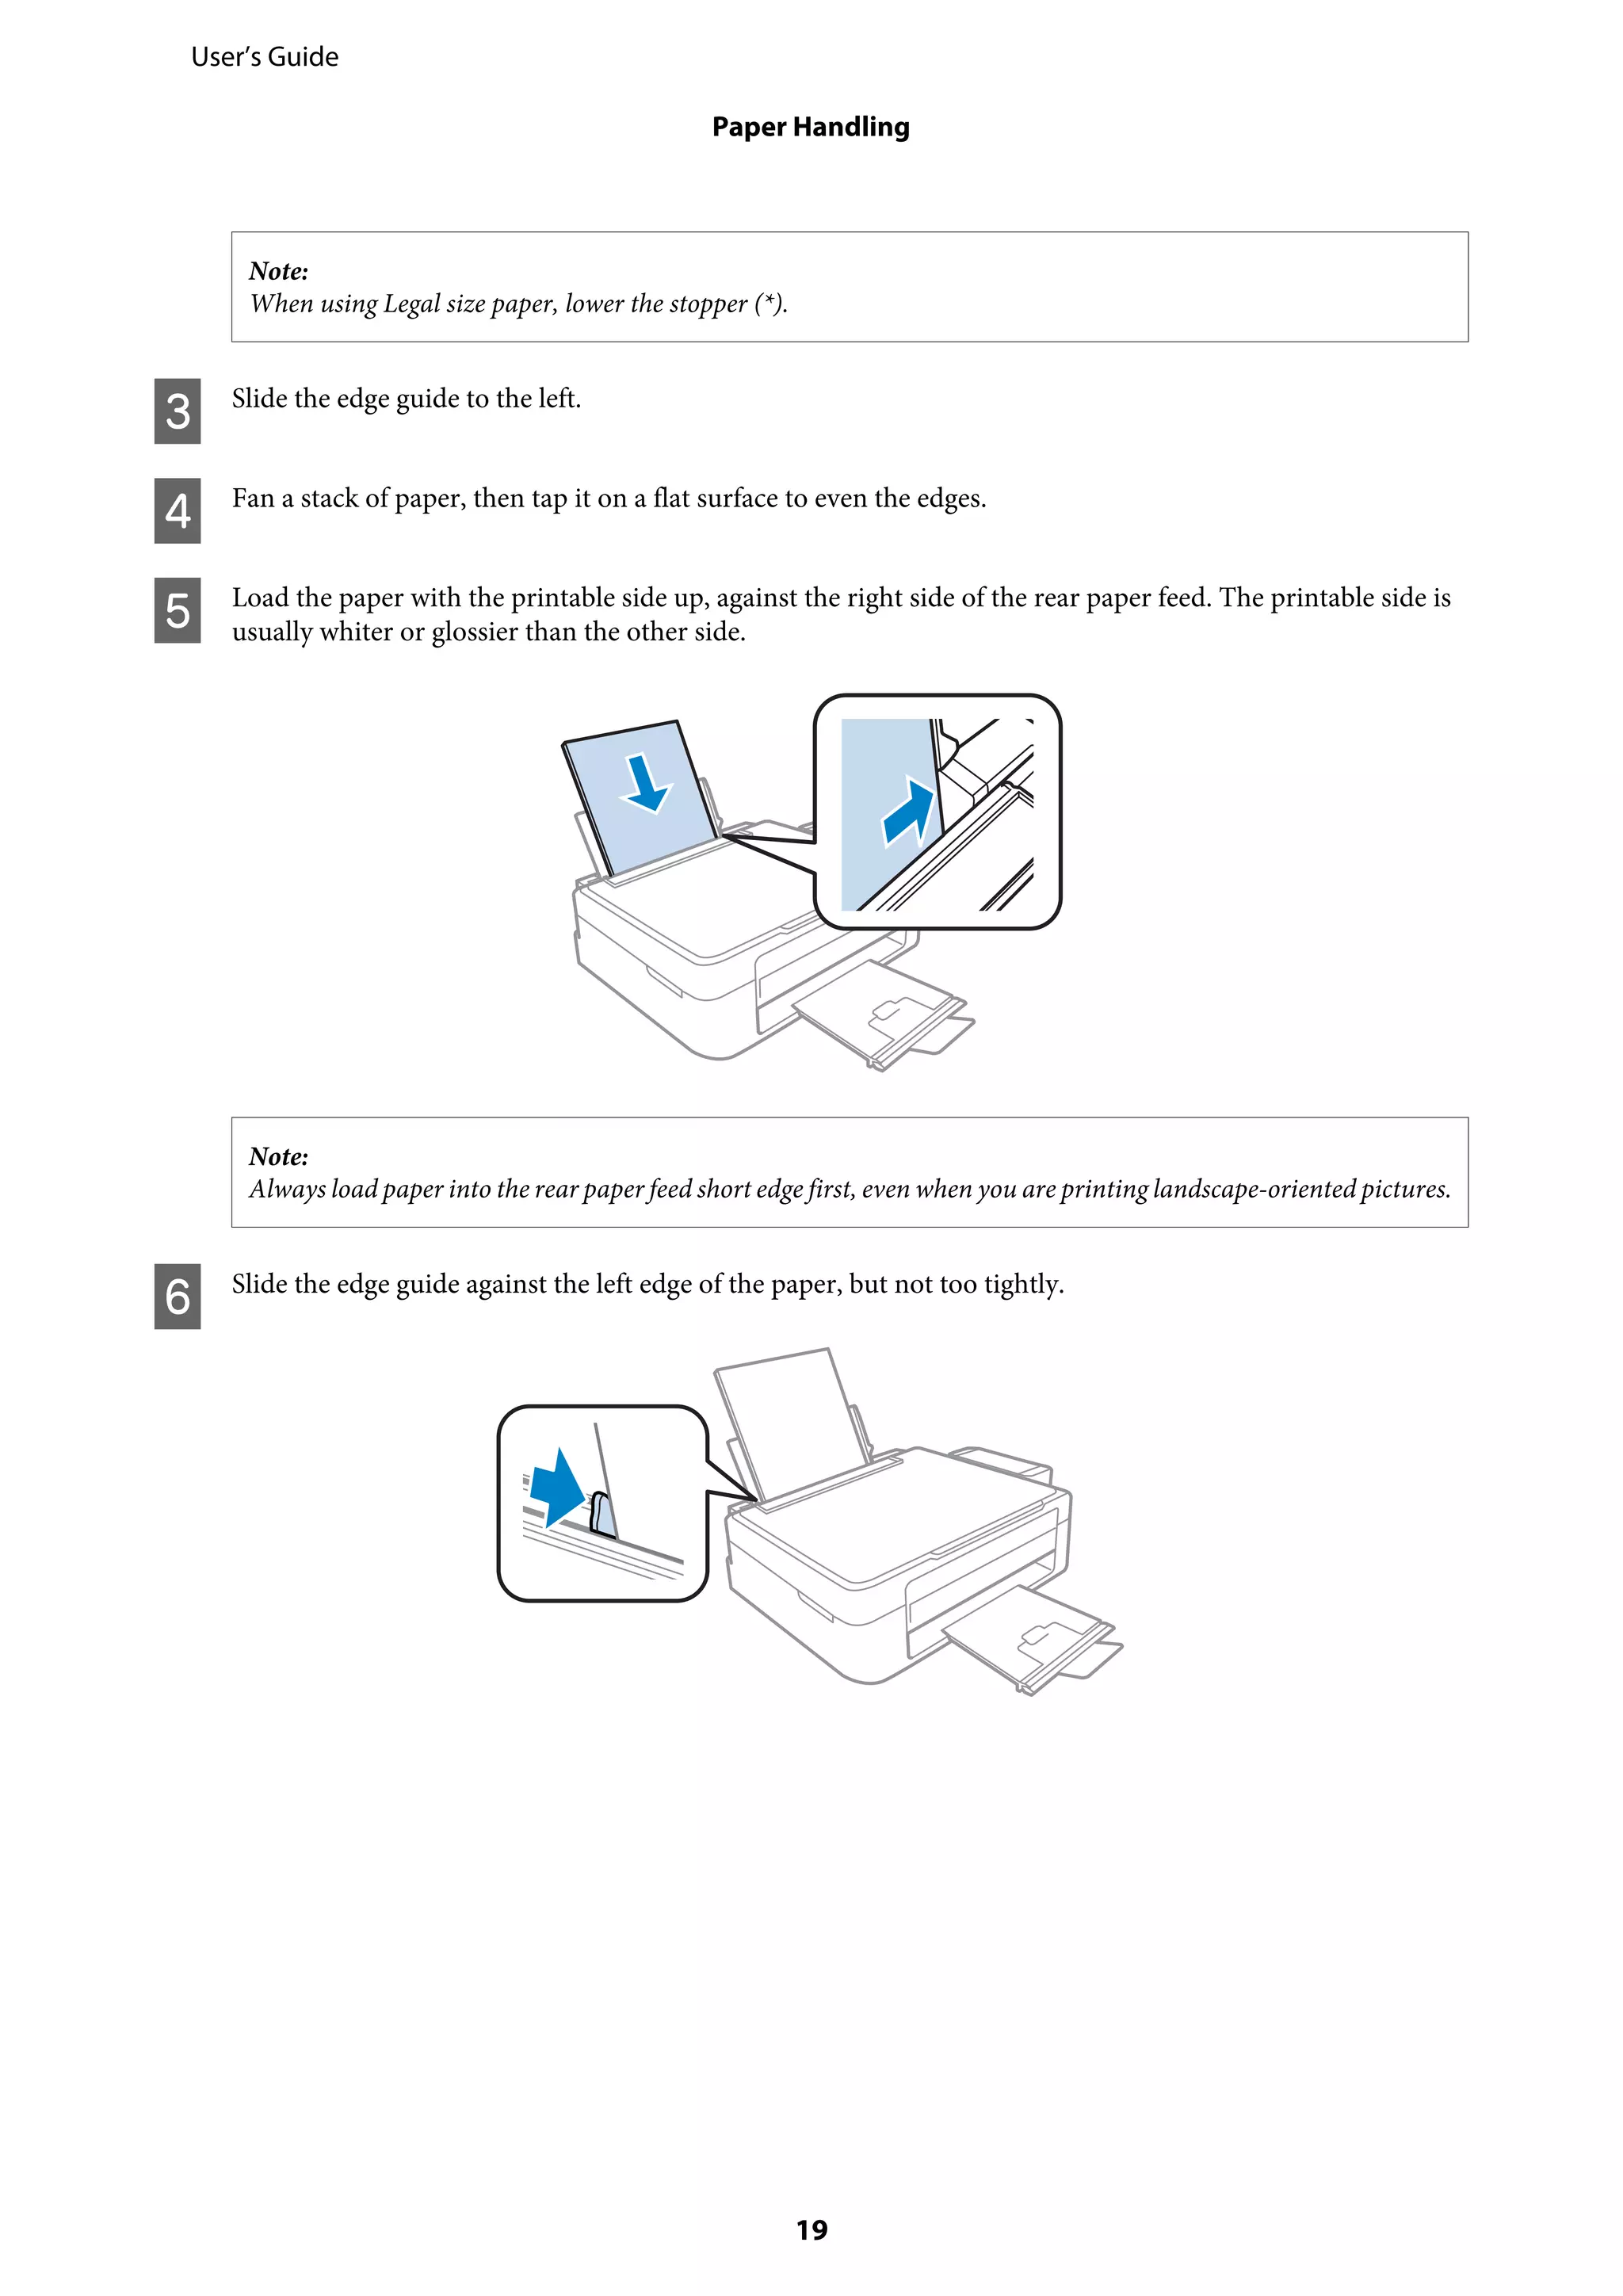
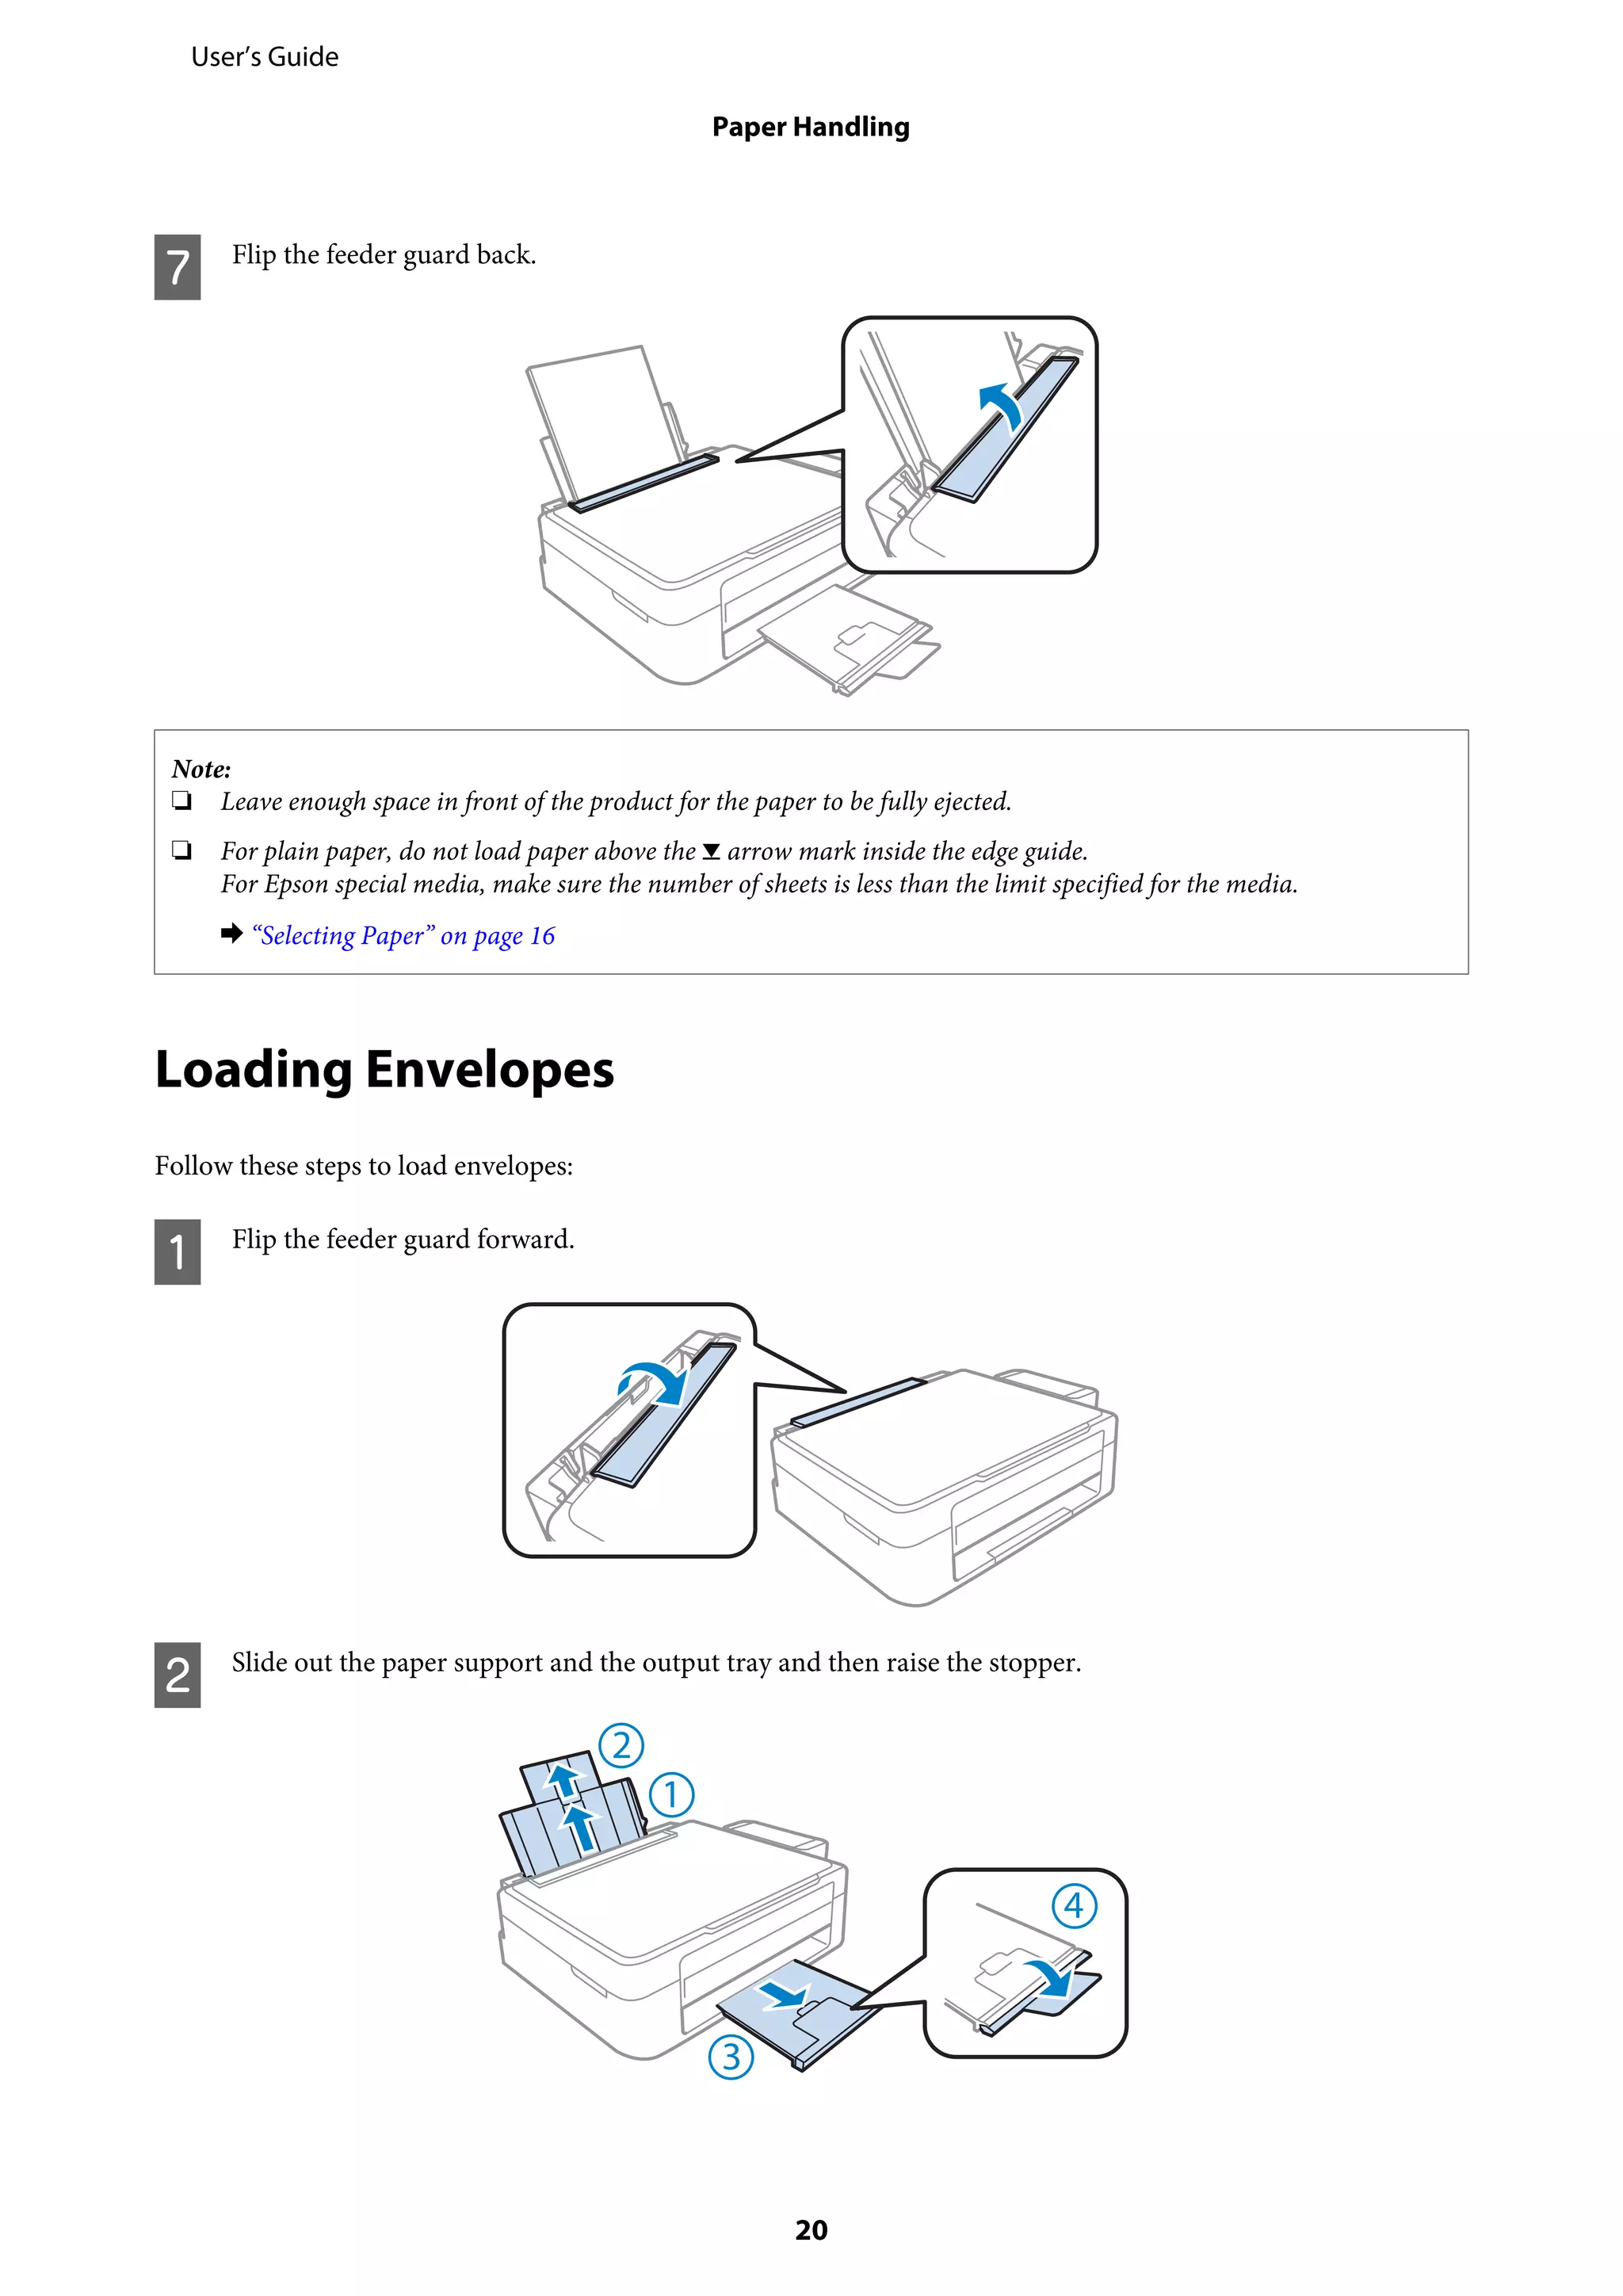
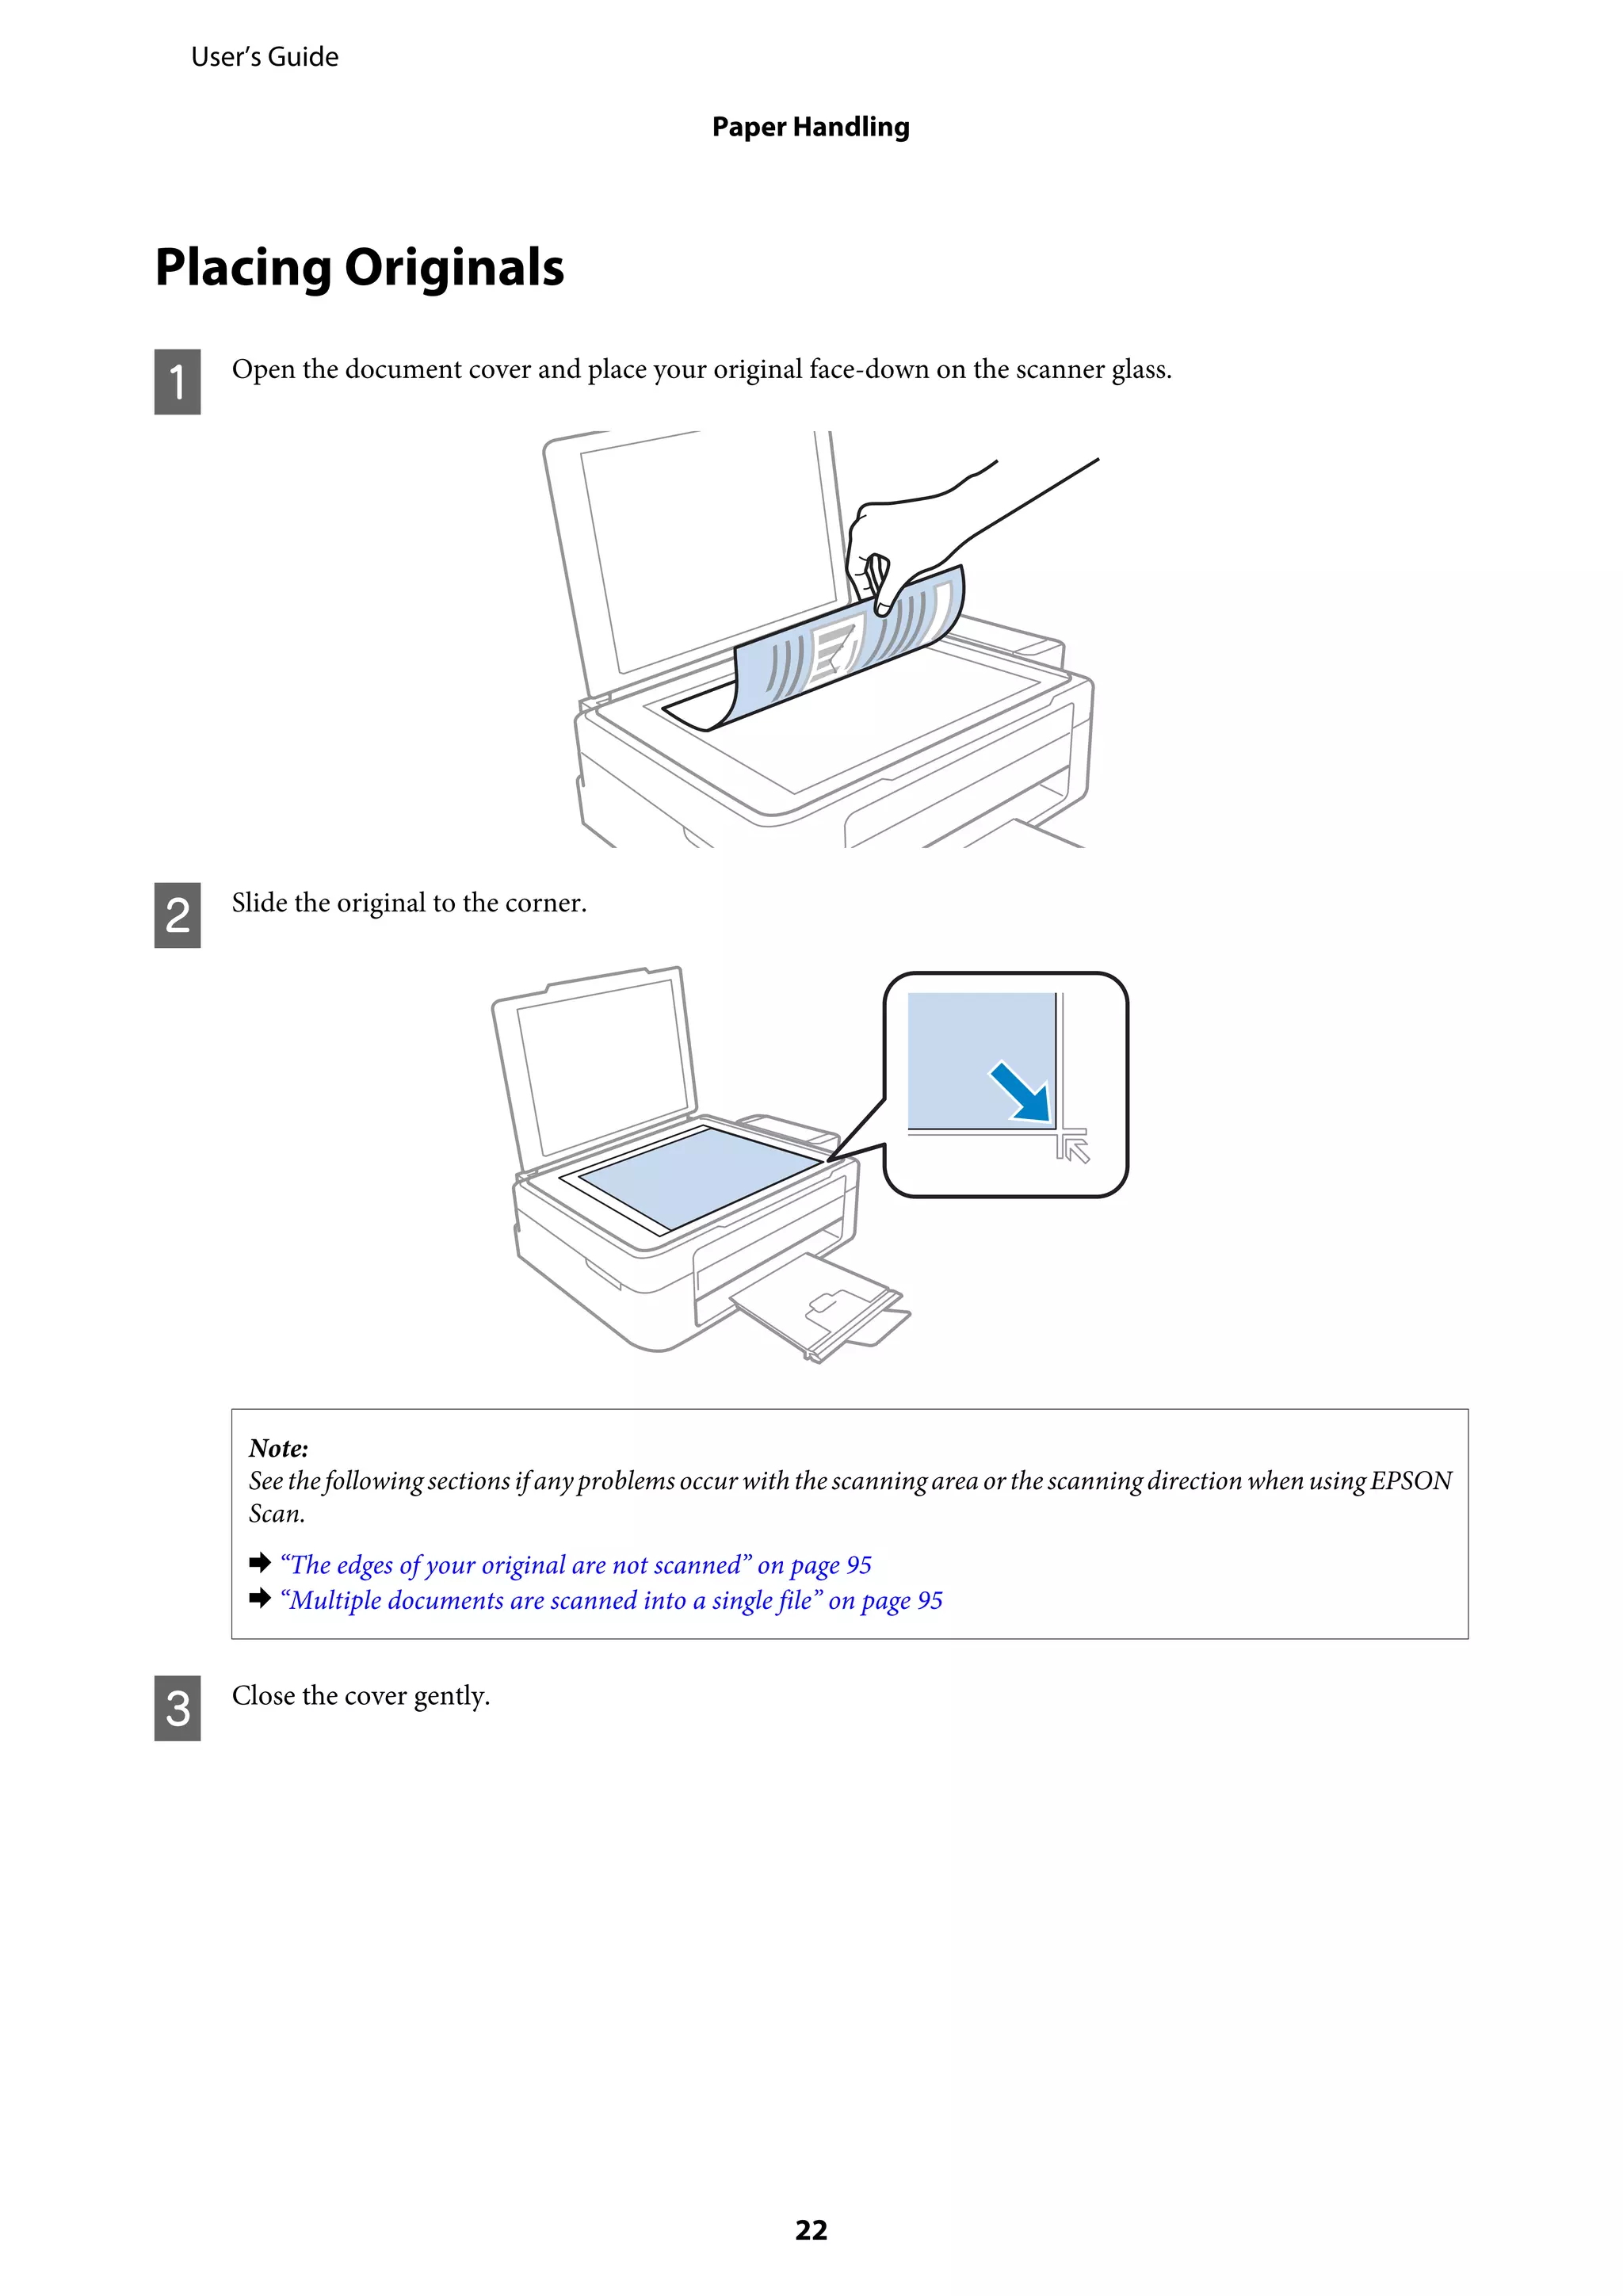
4. Instructions for paper handling including loading paper, envelopes, and placing originals.
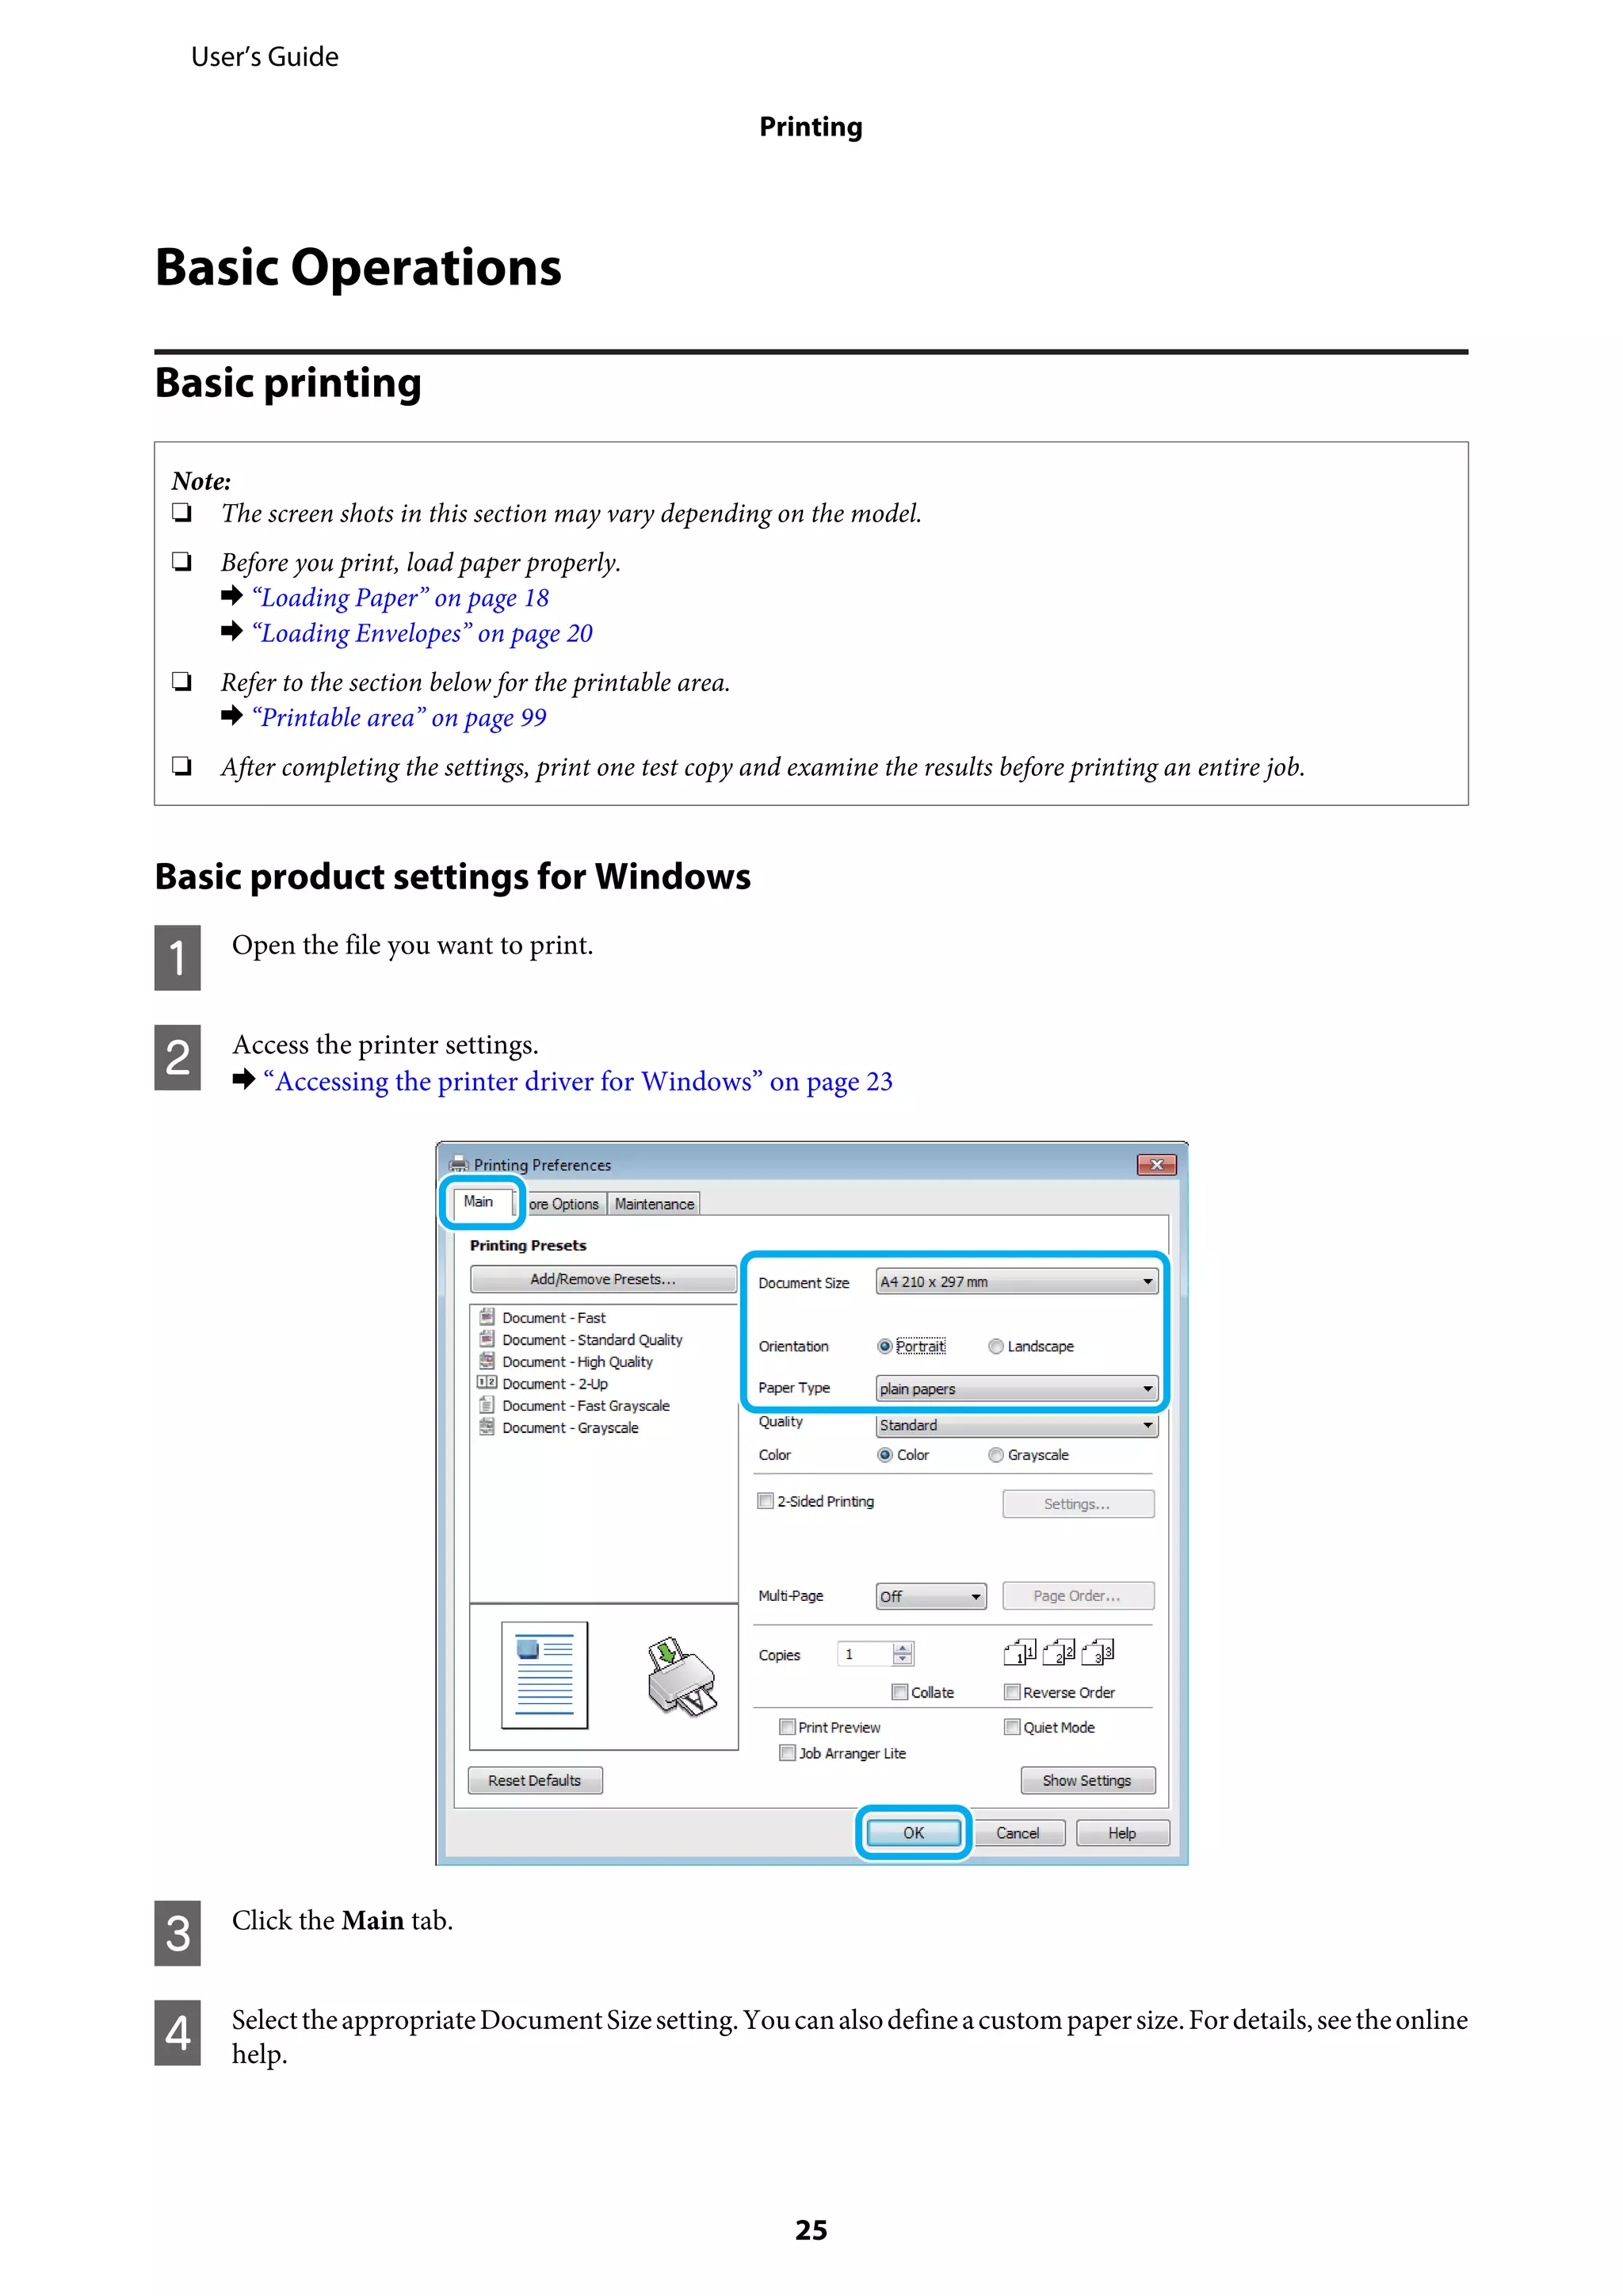
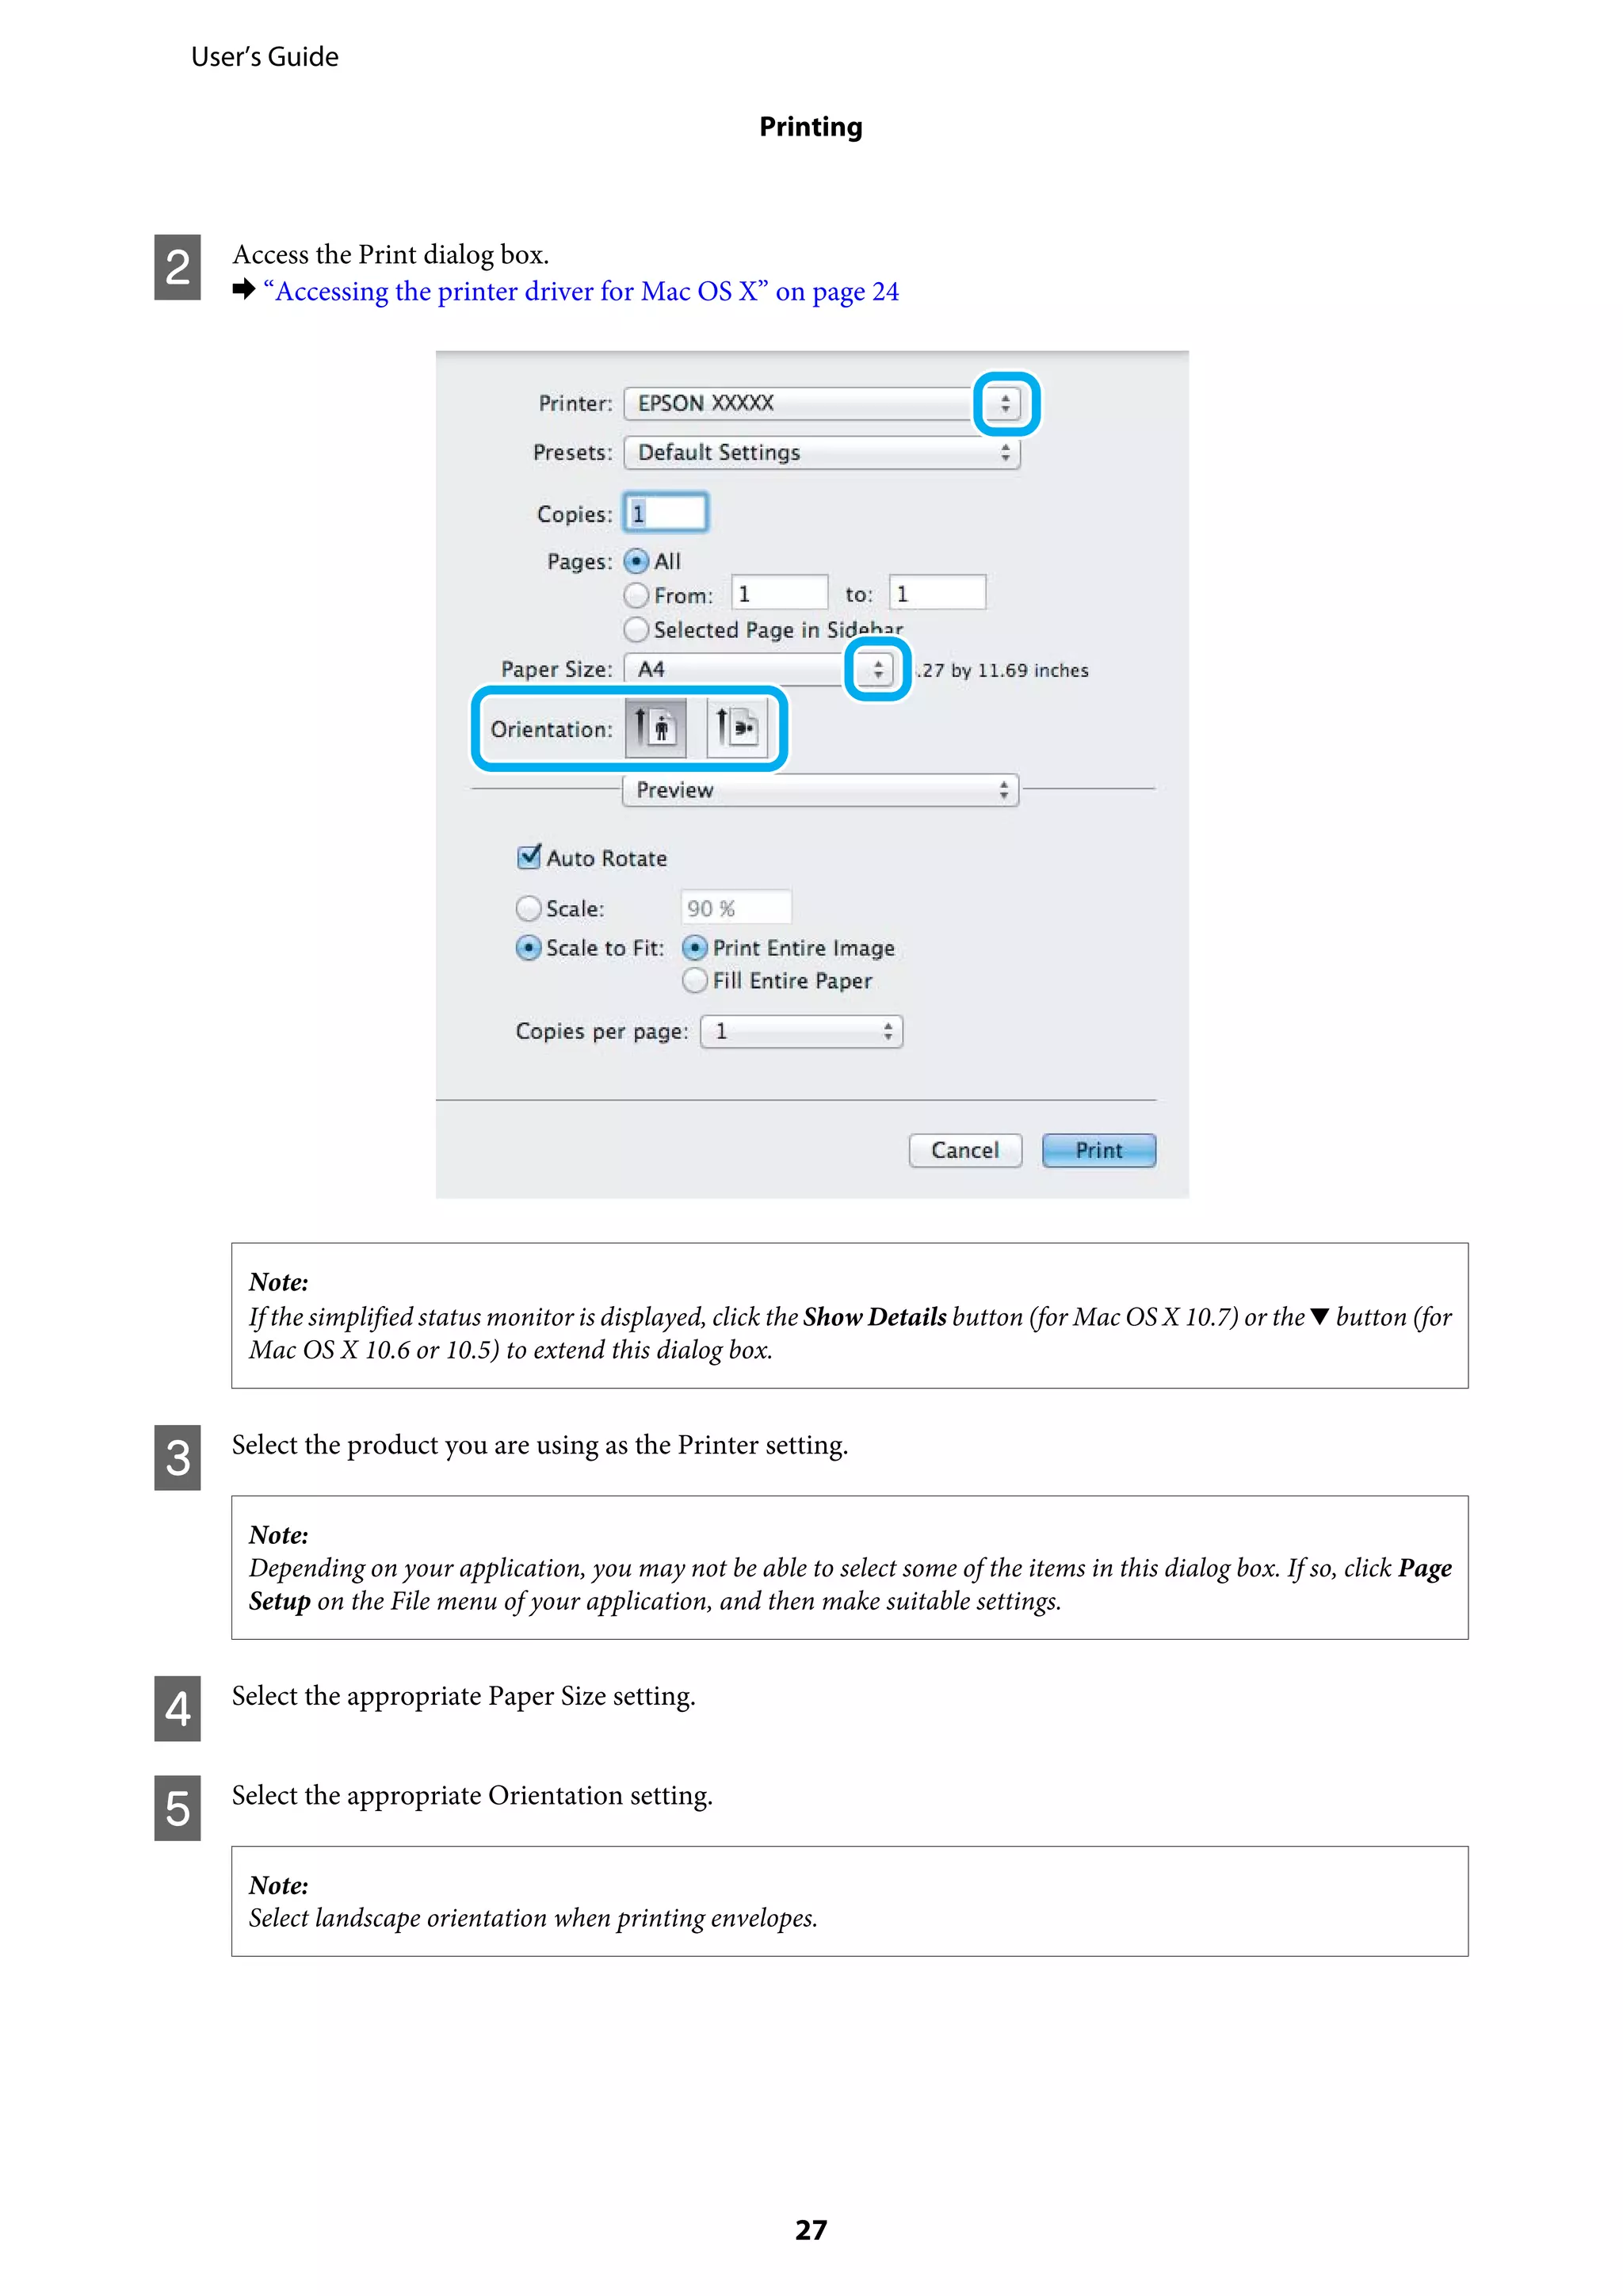
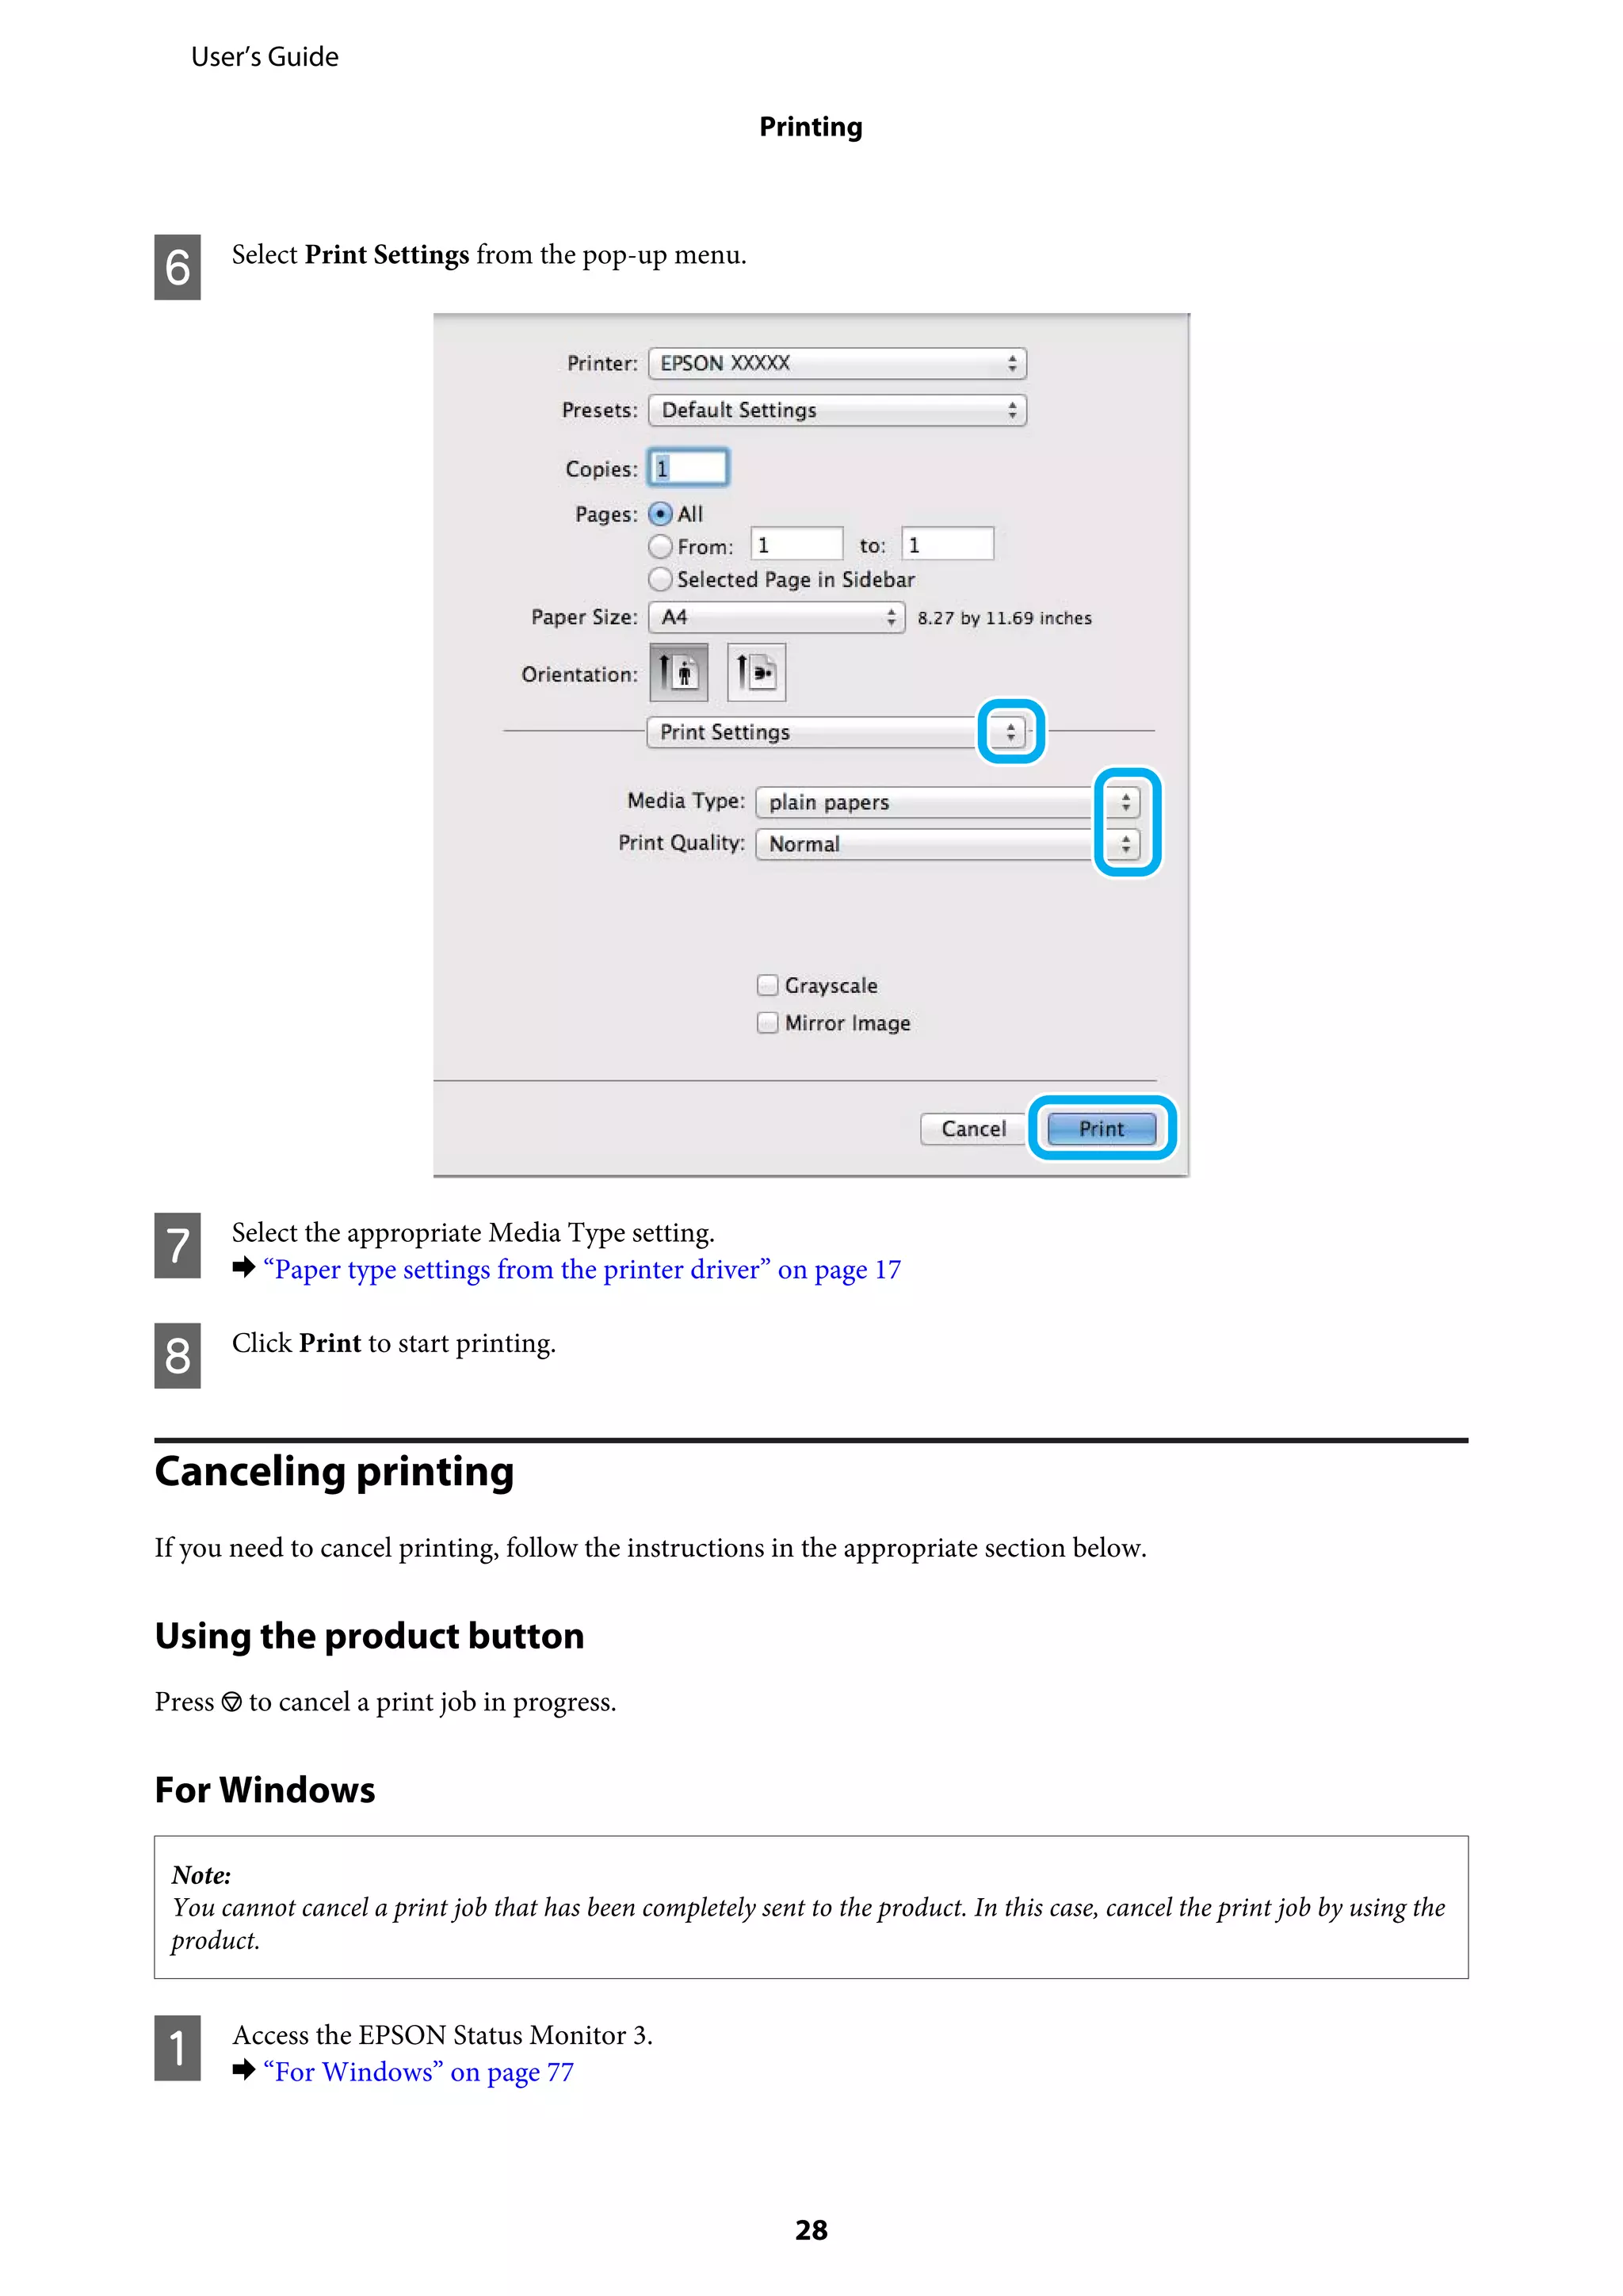
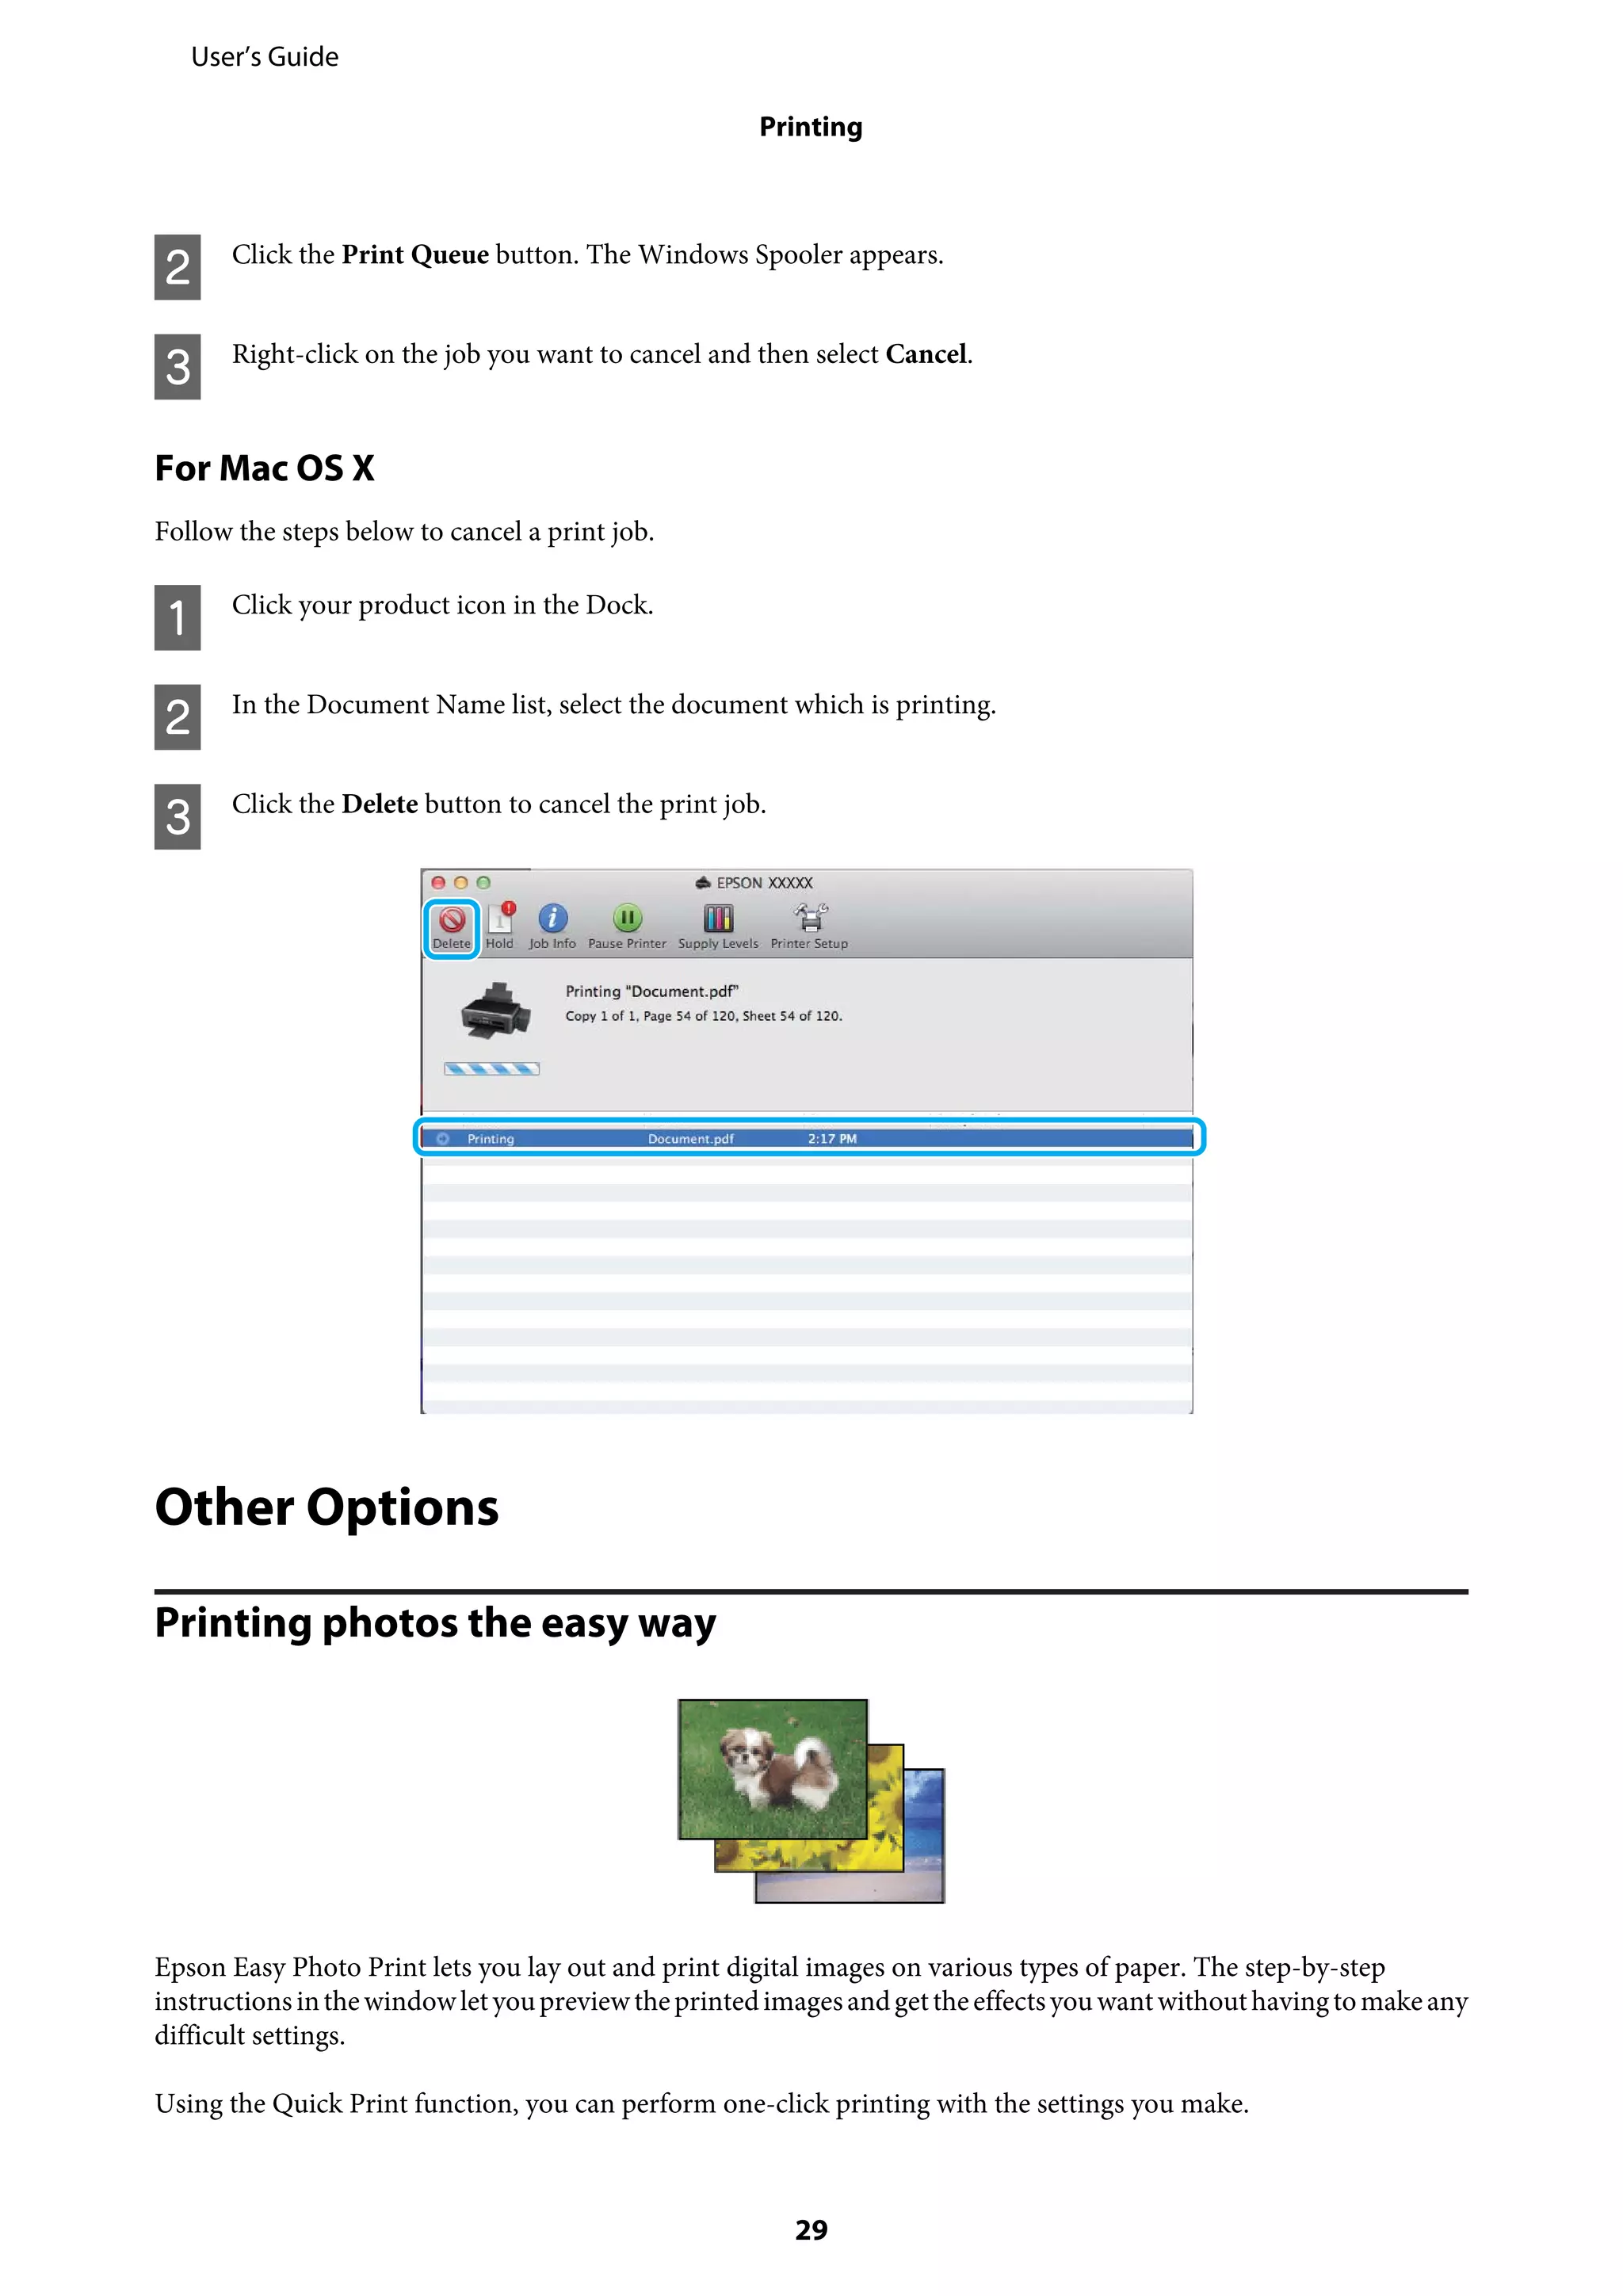
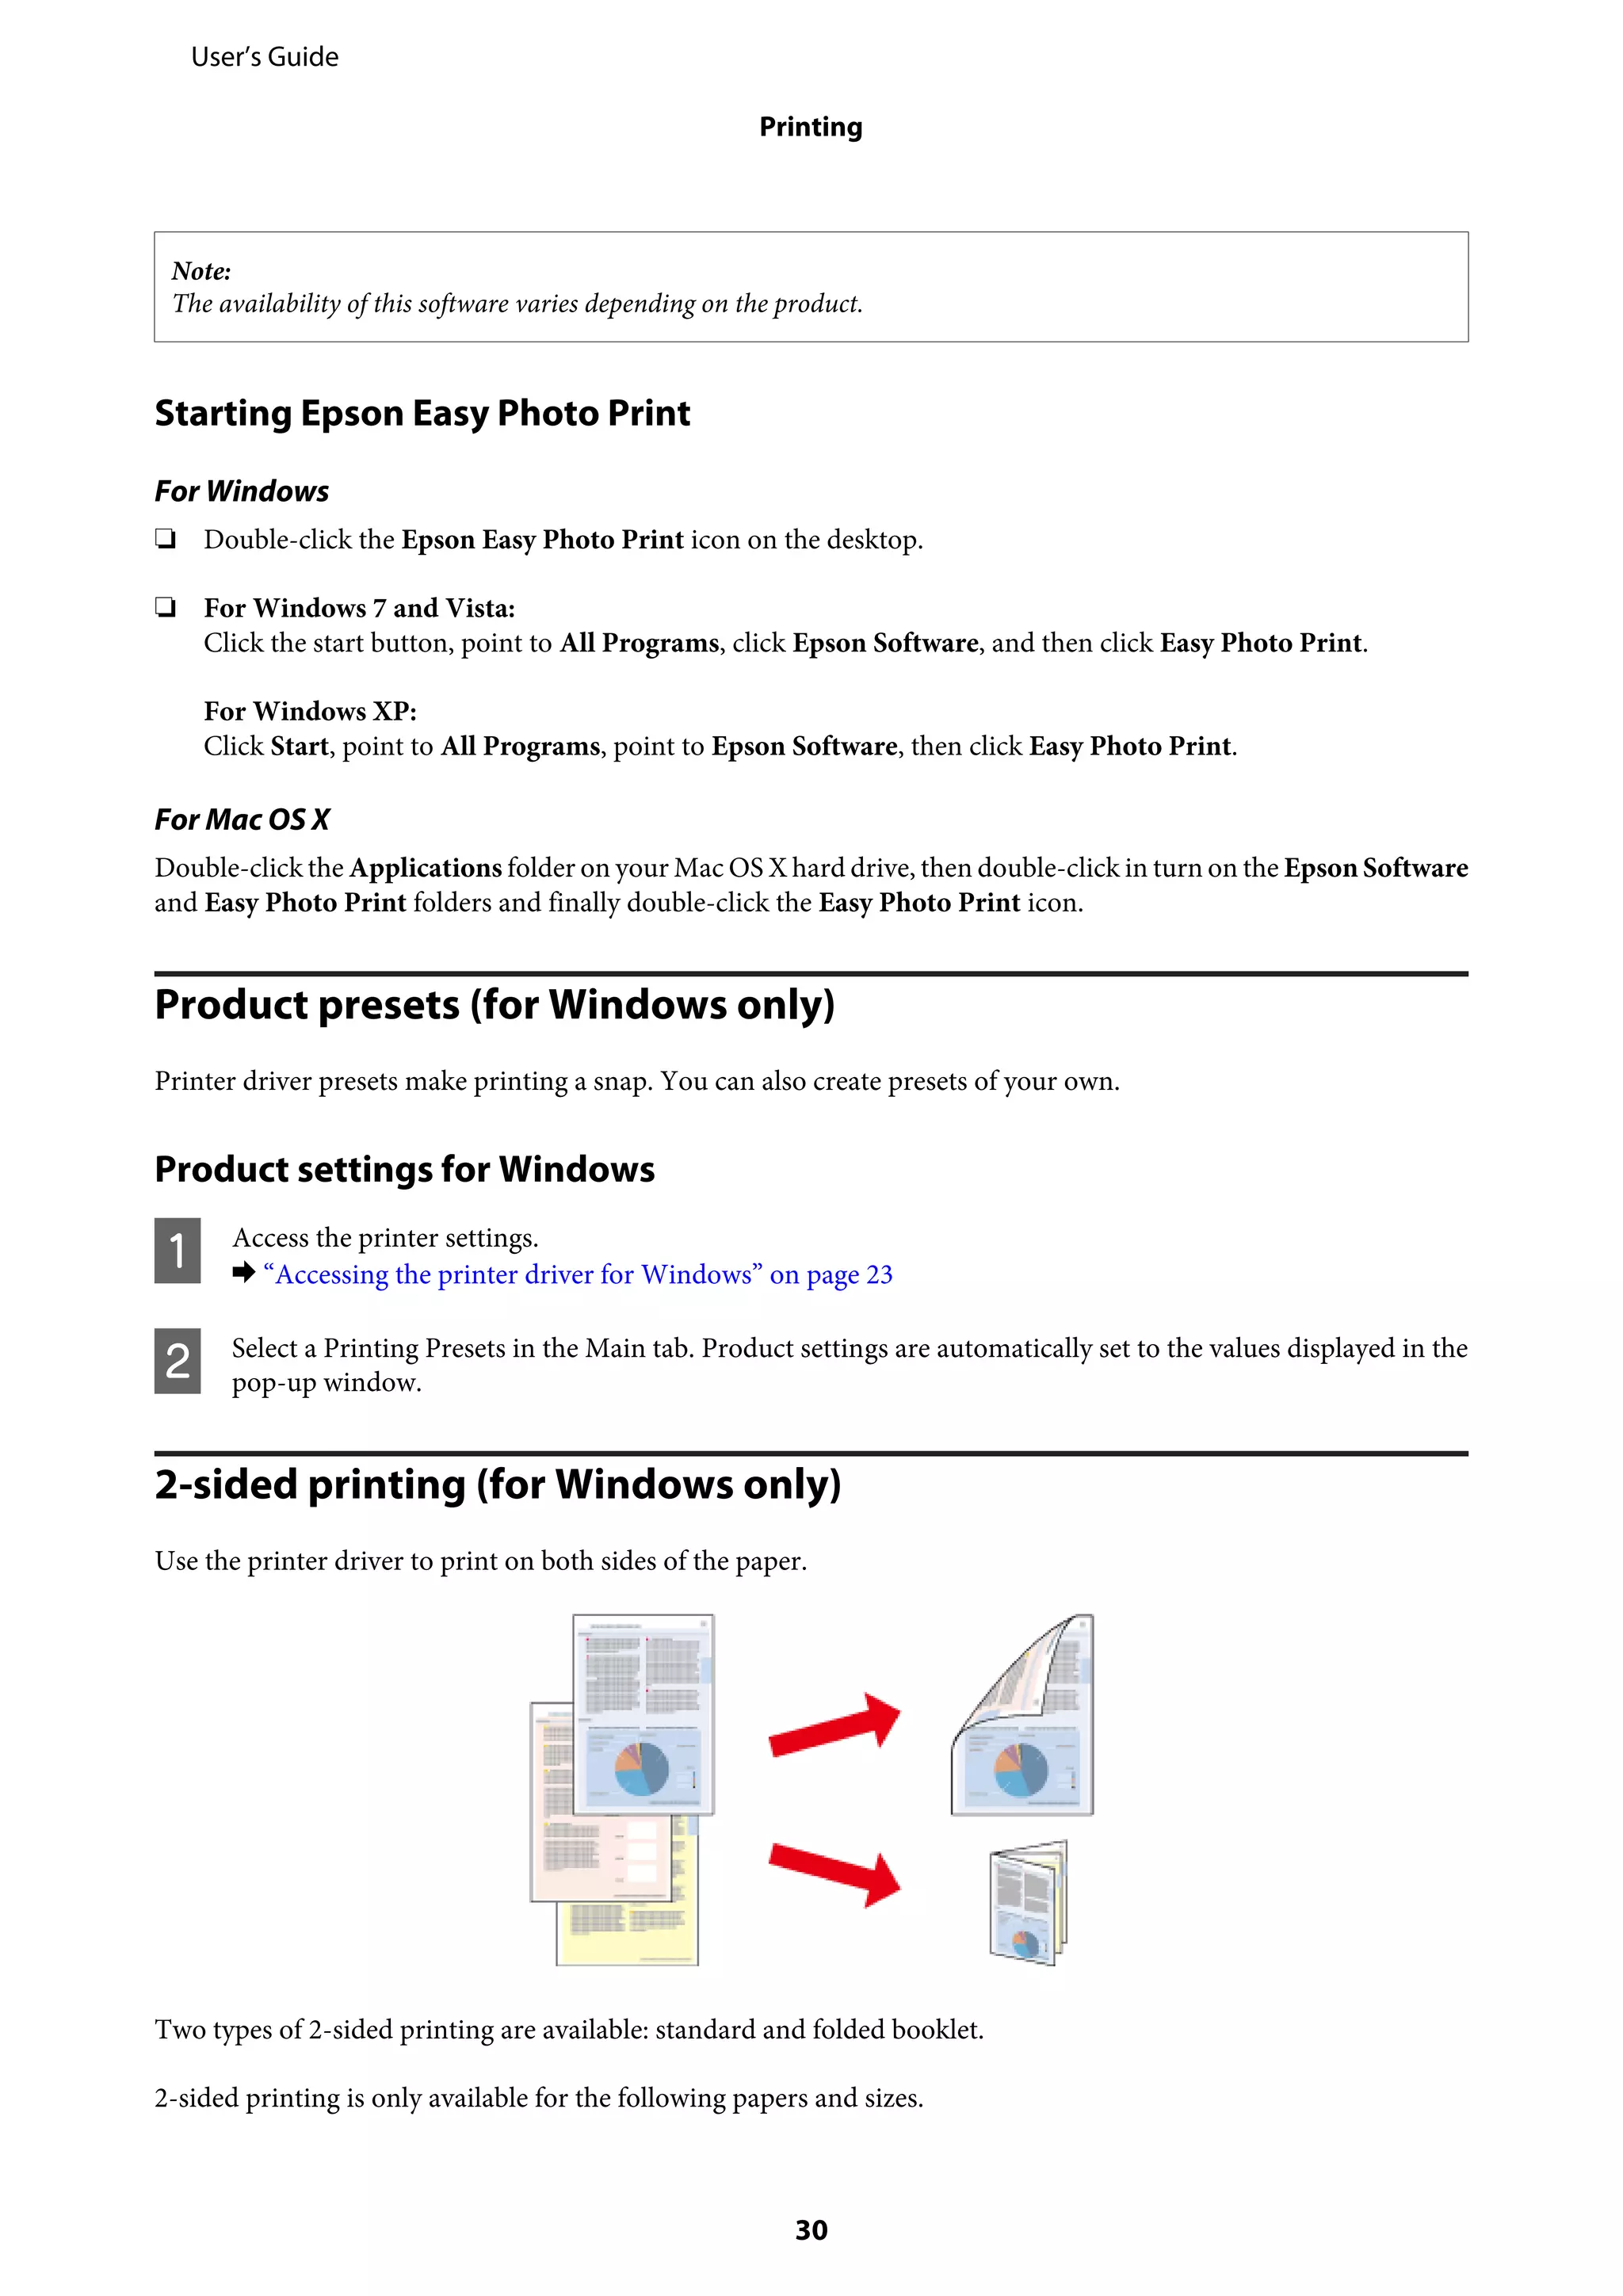
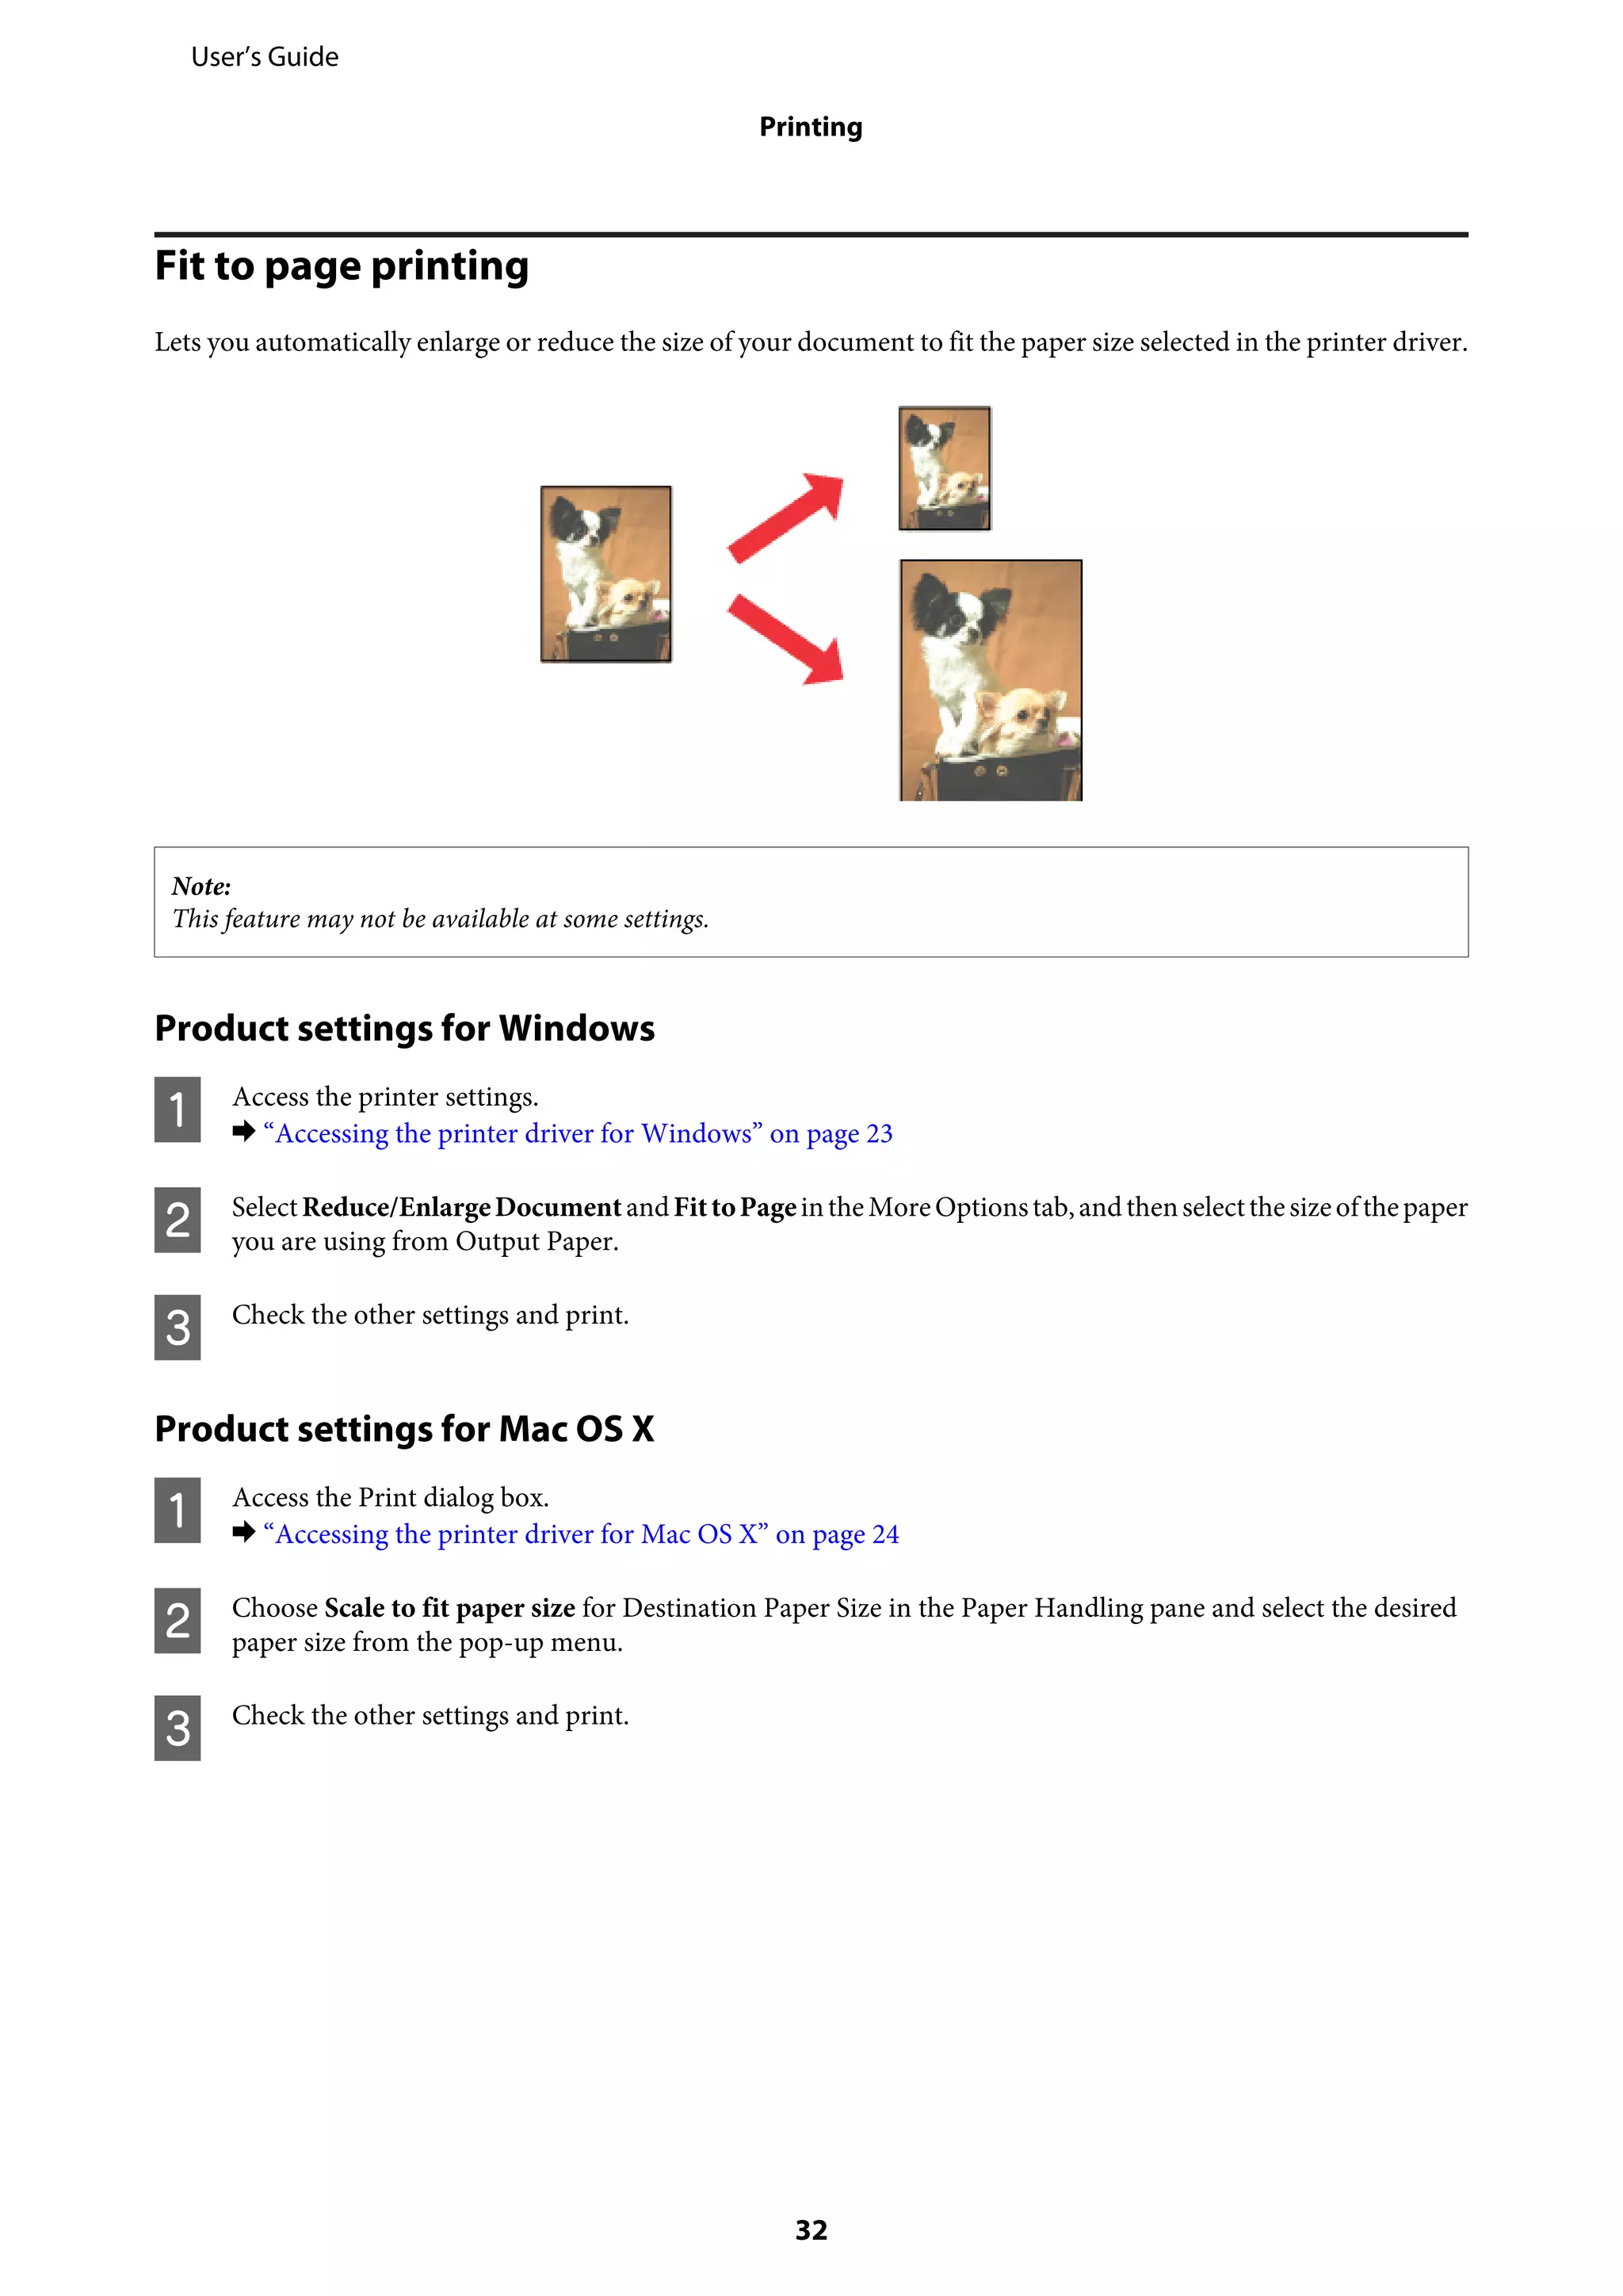
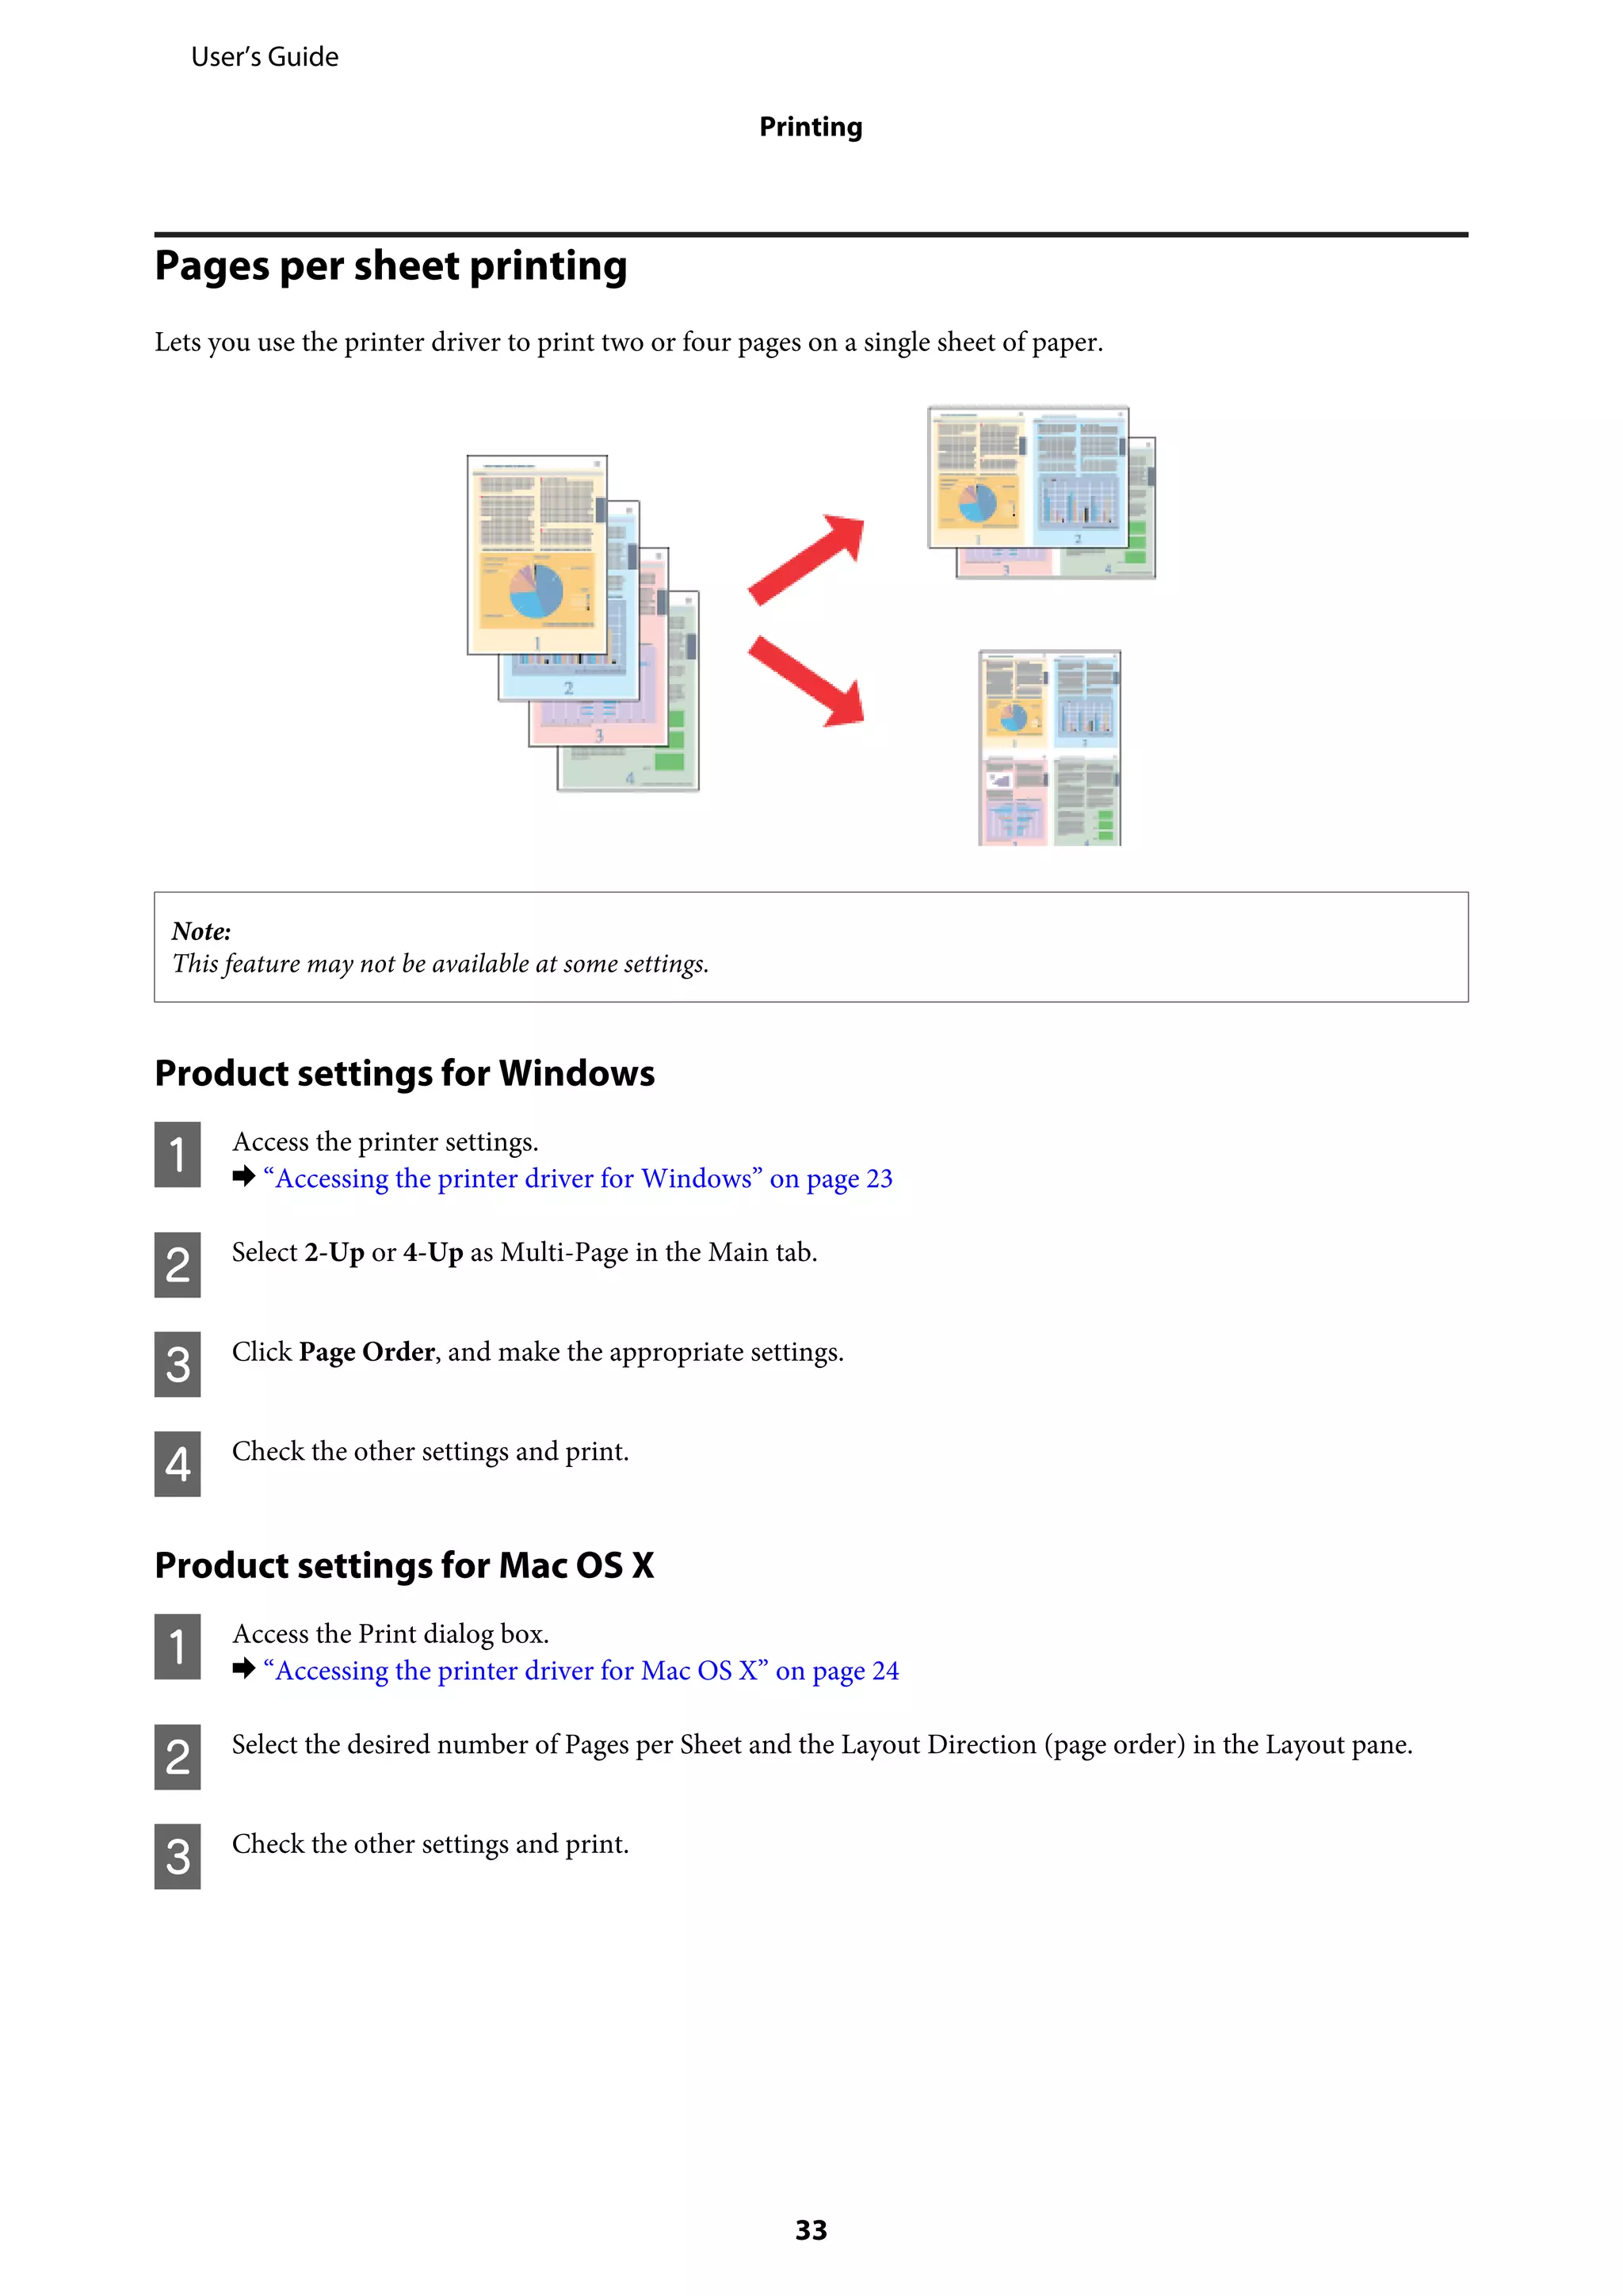
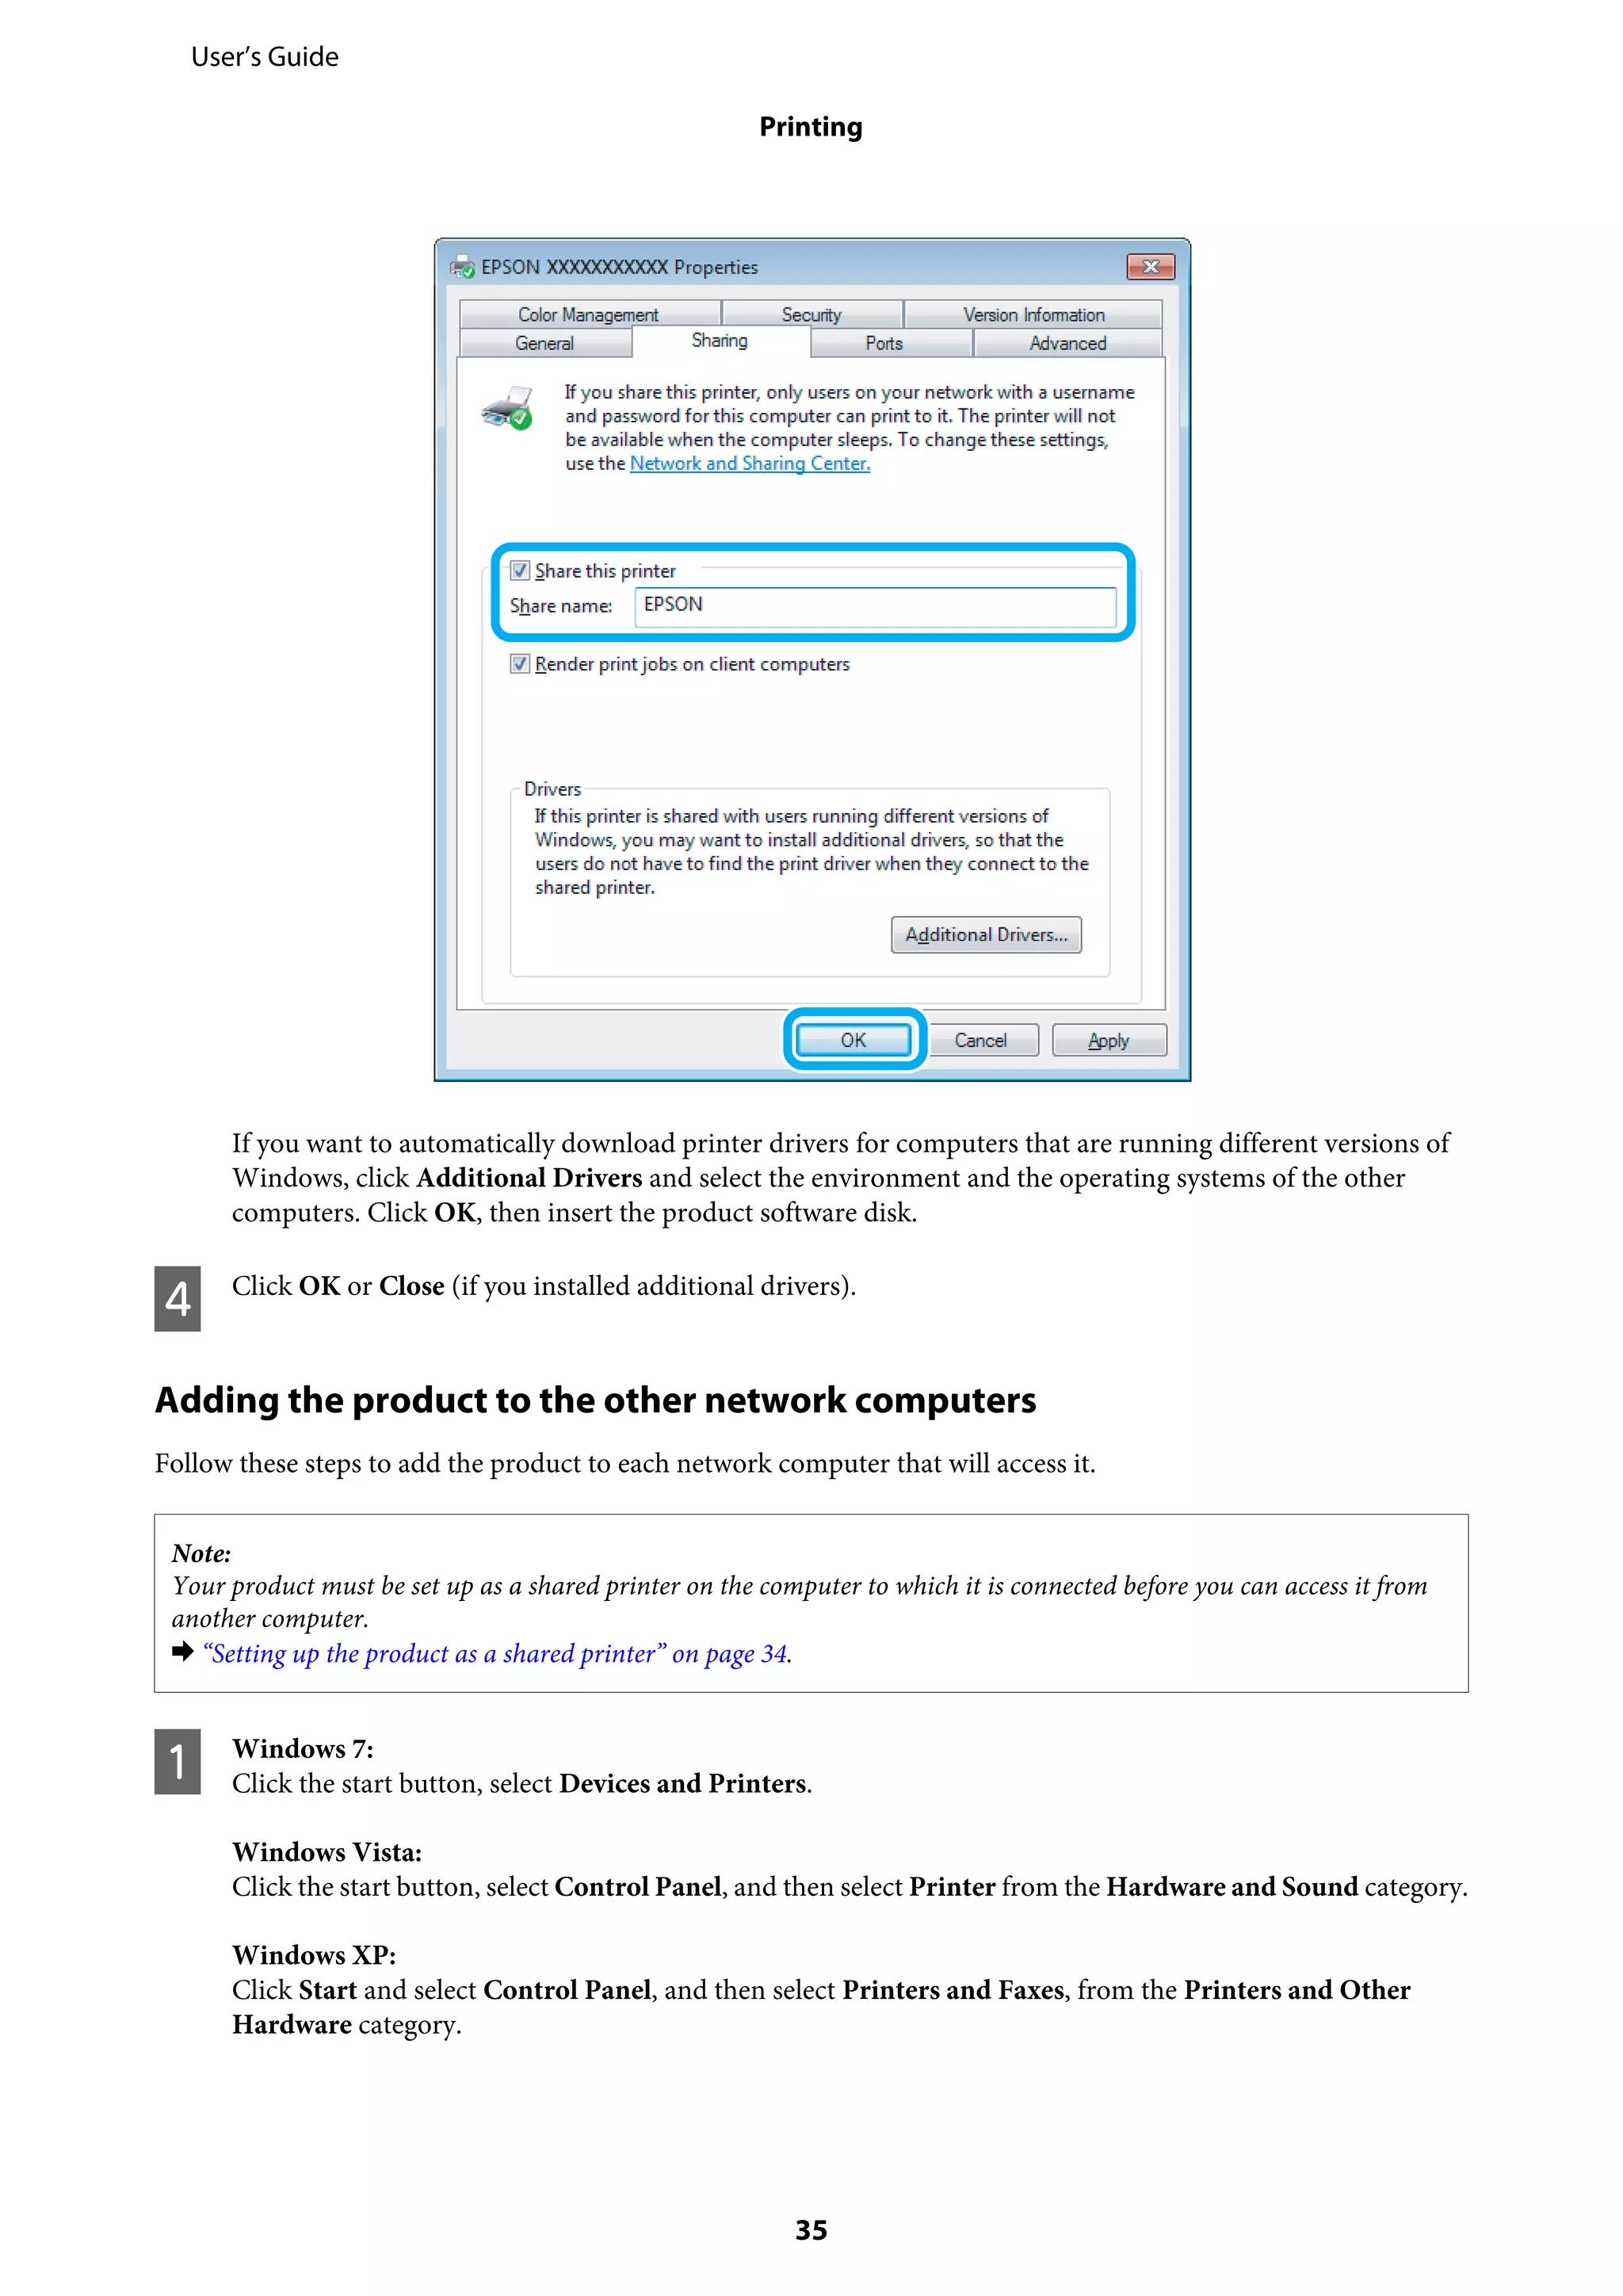
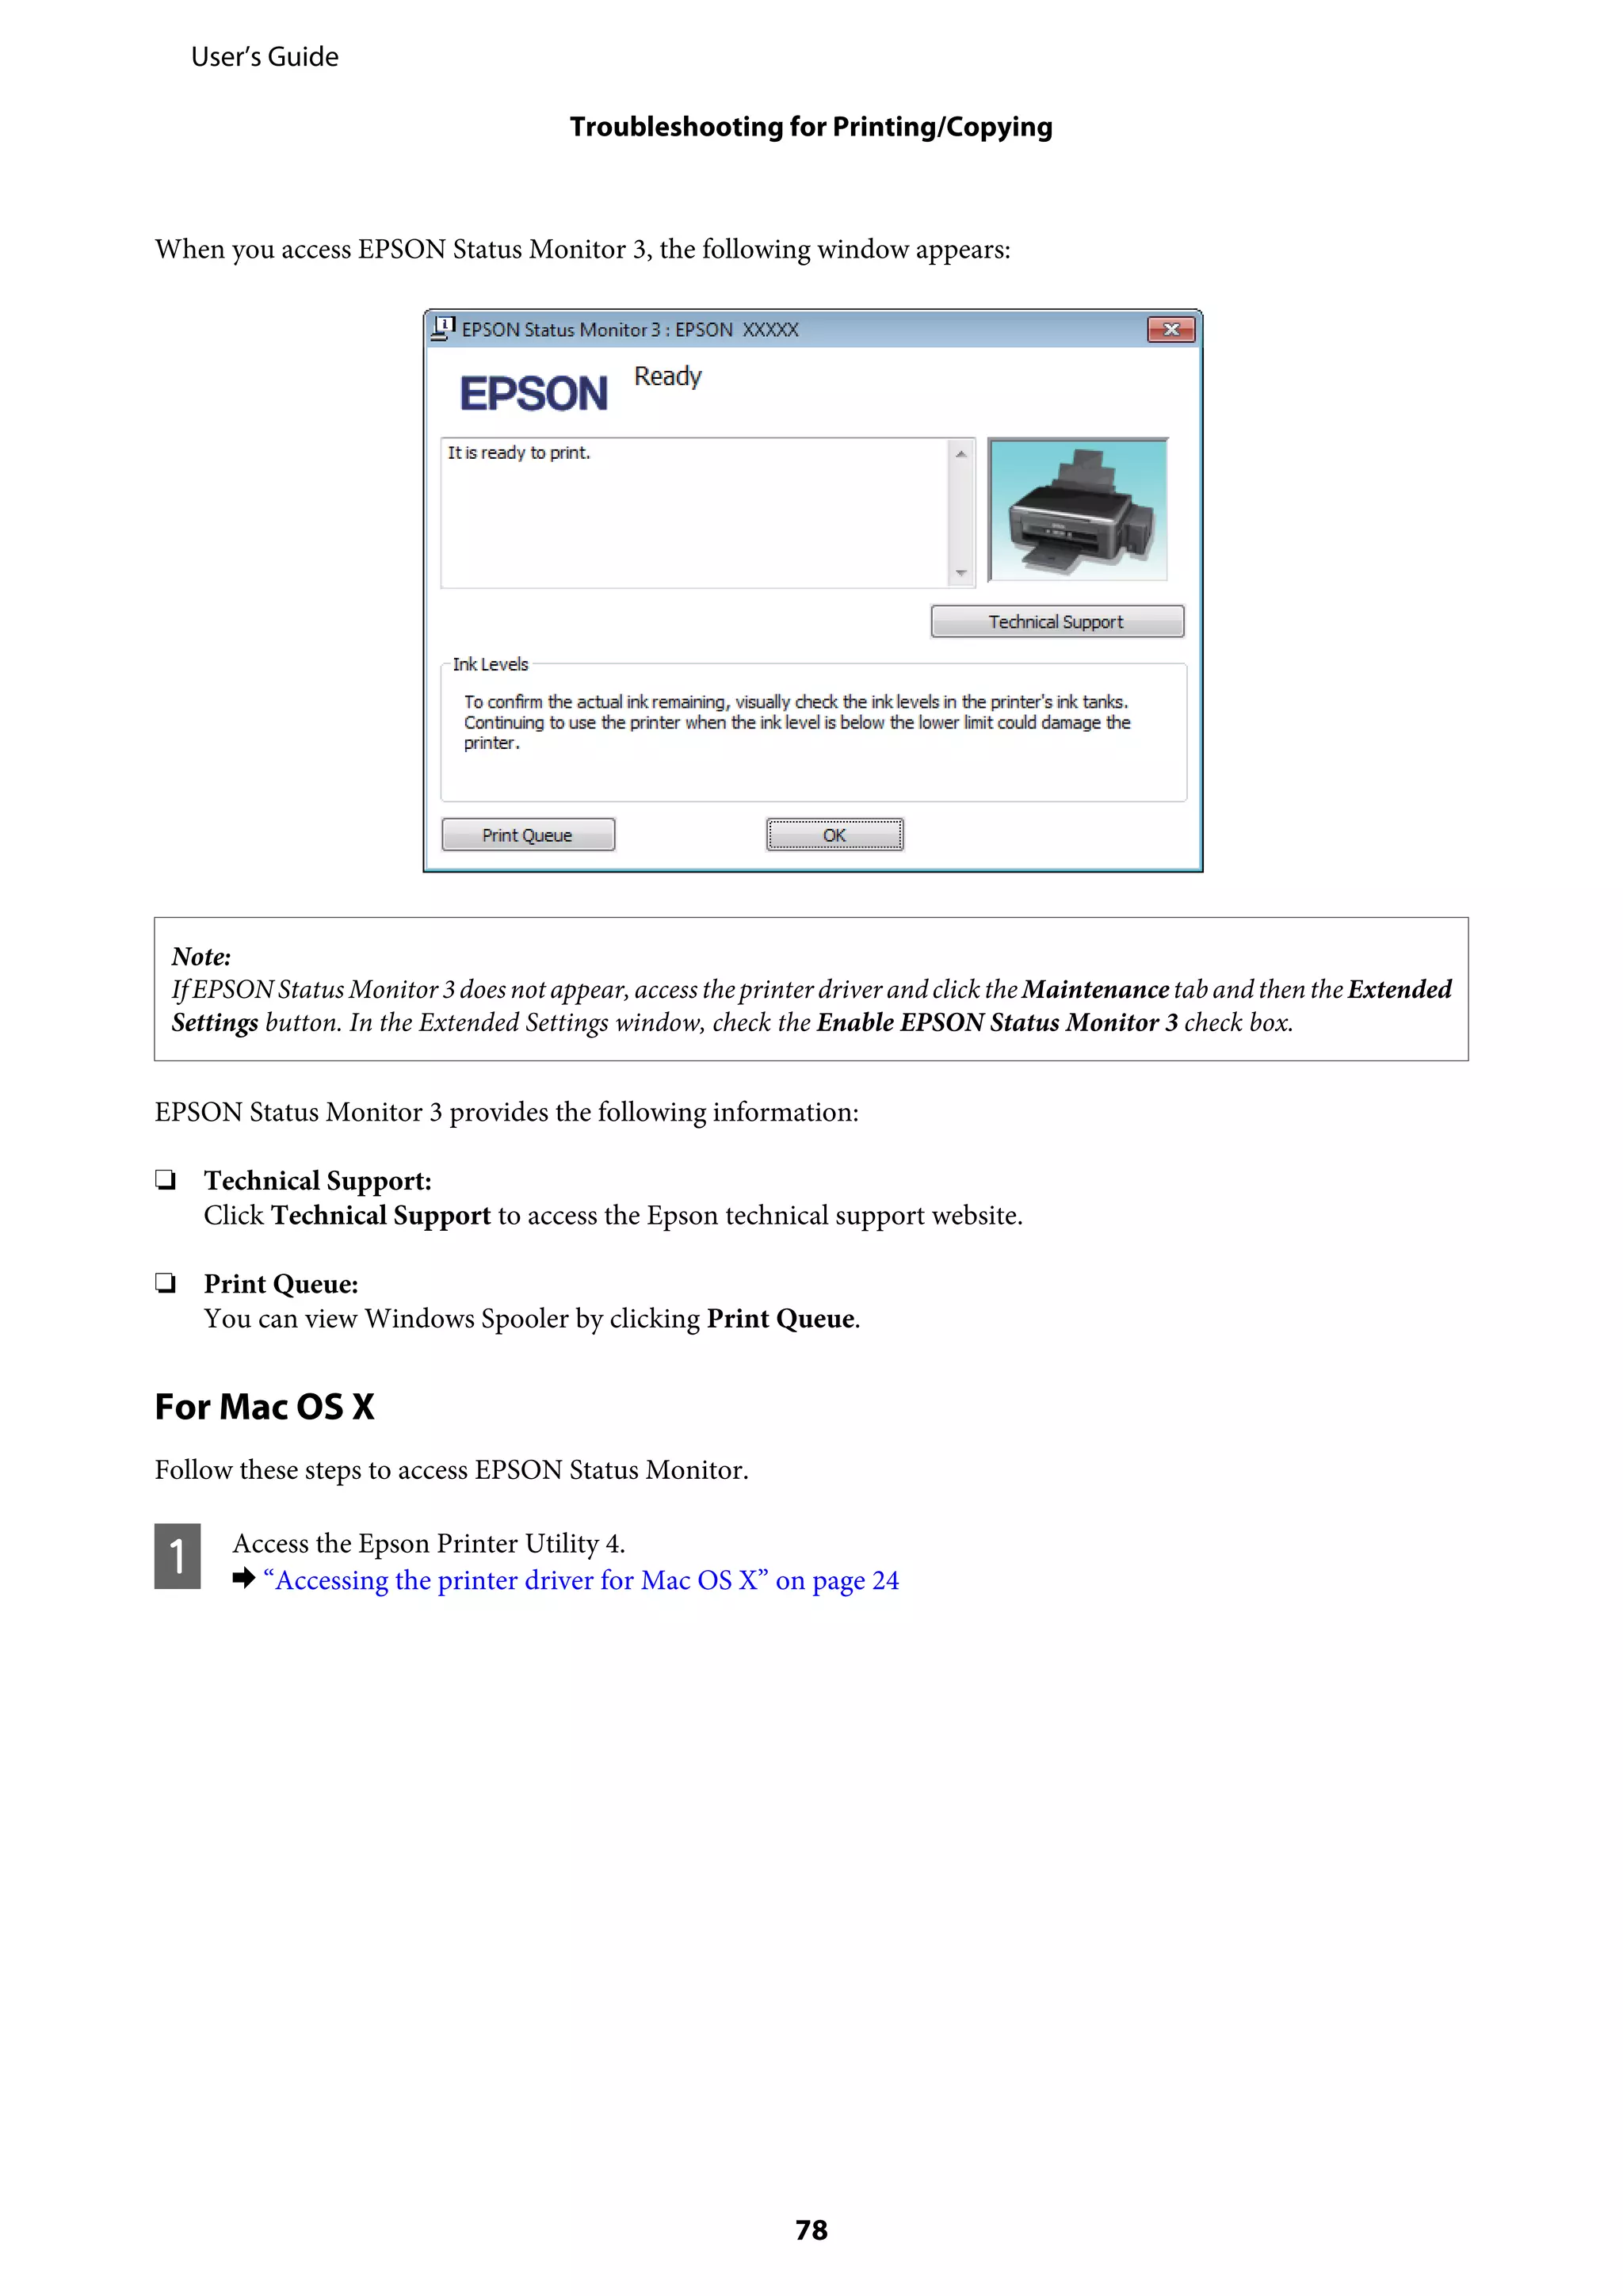
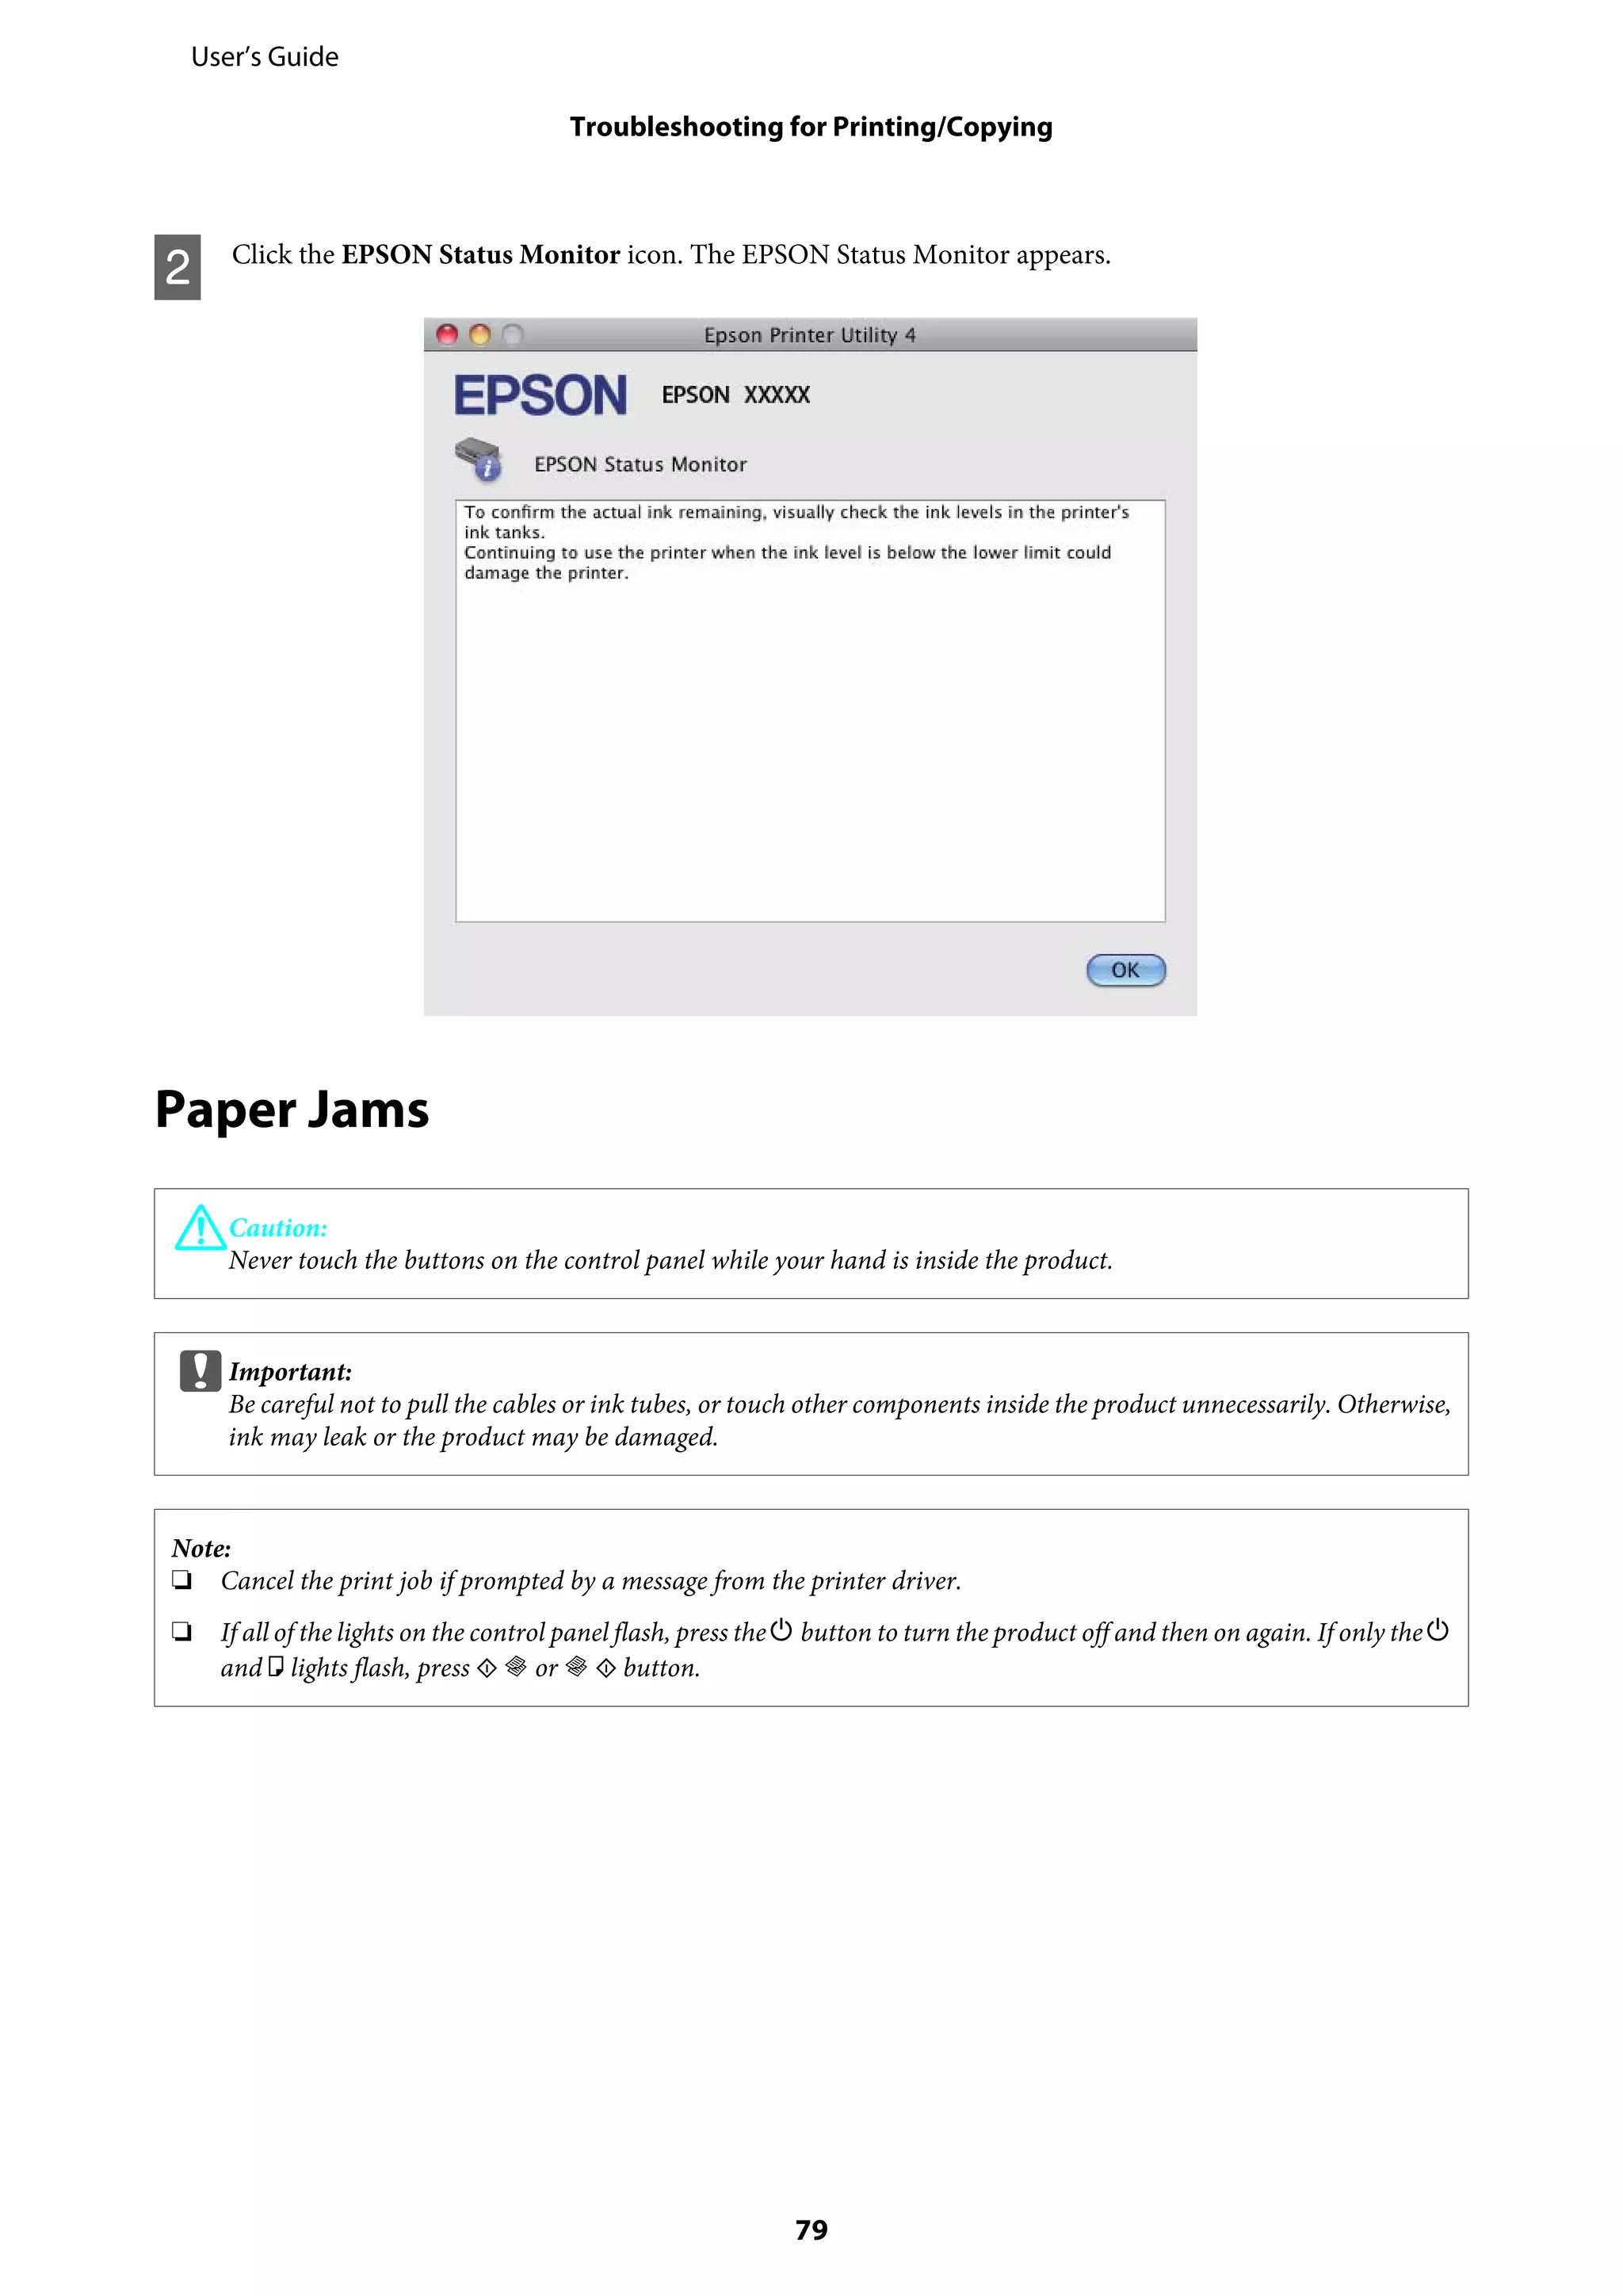
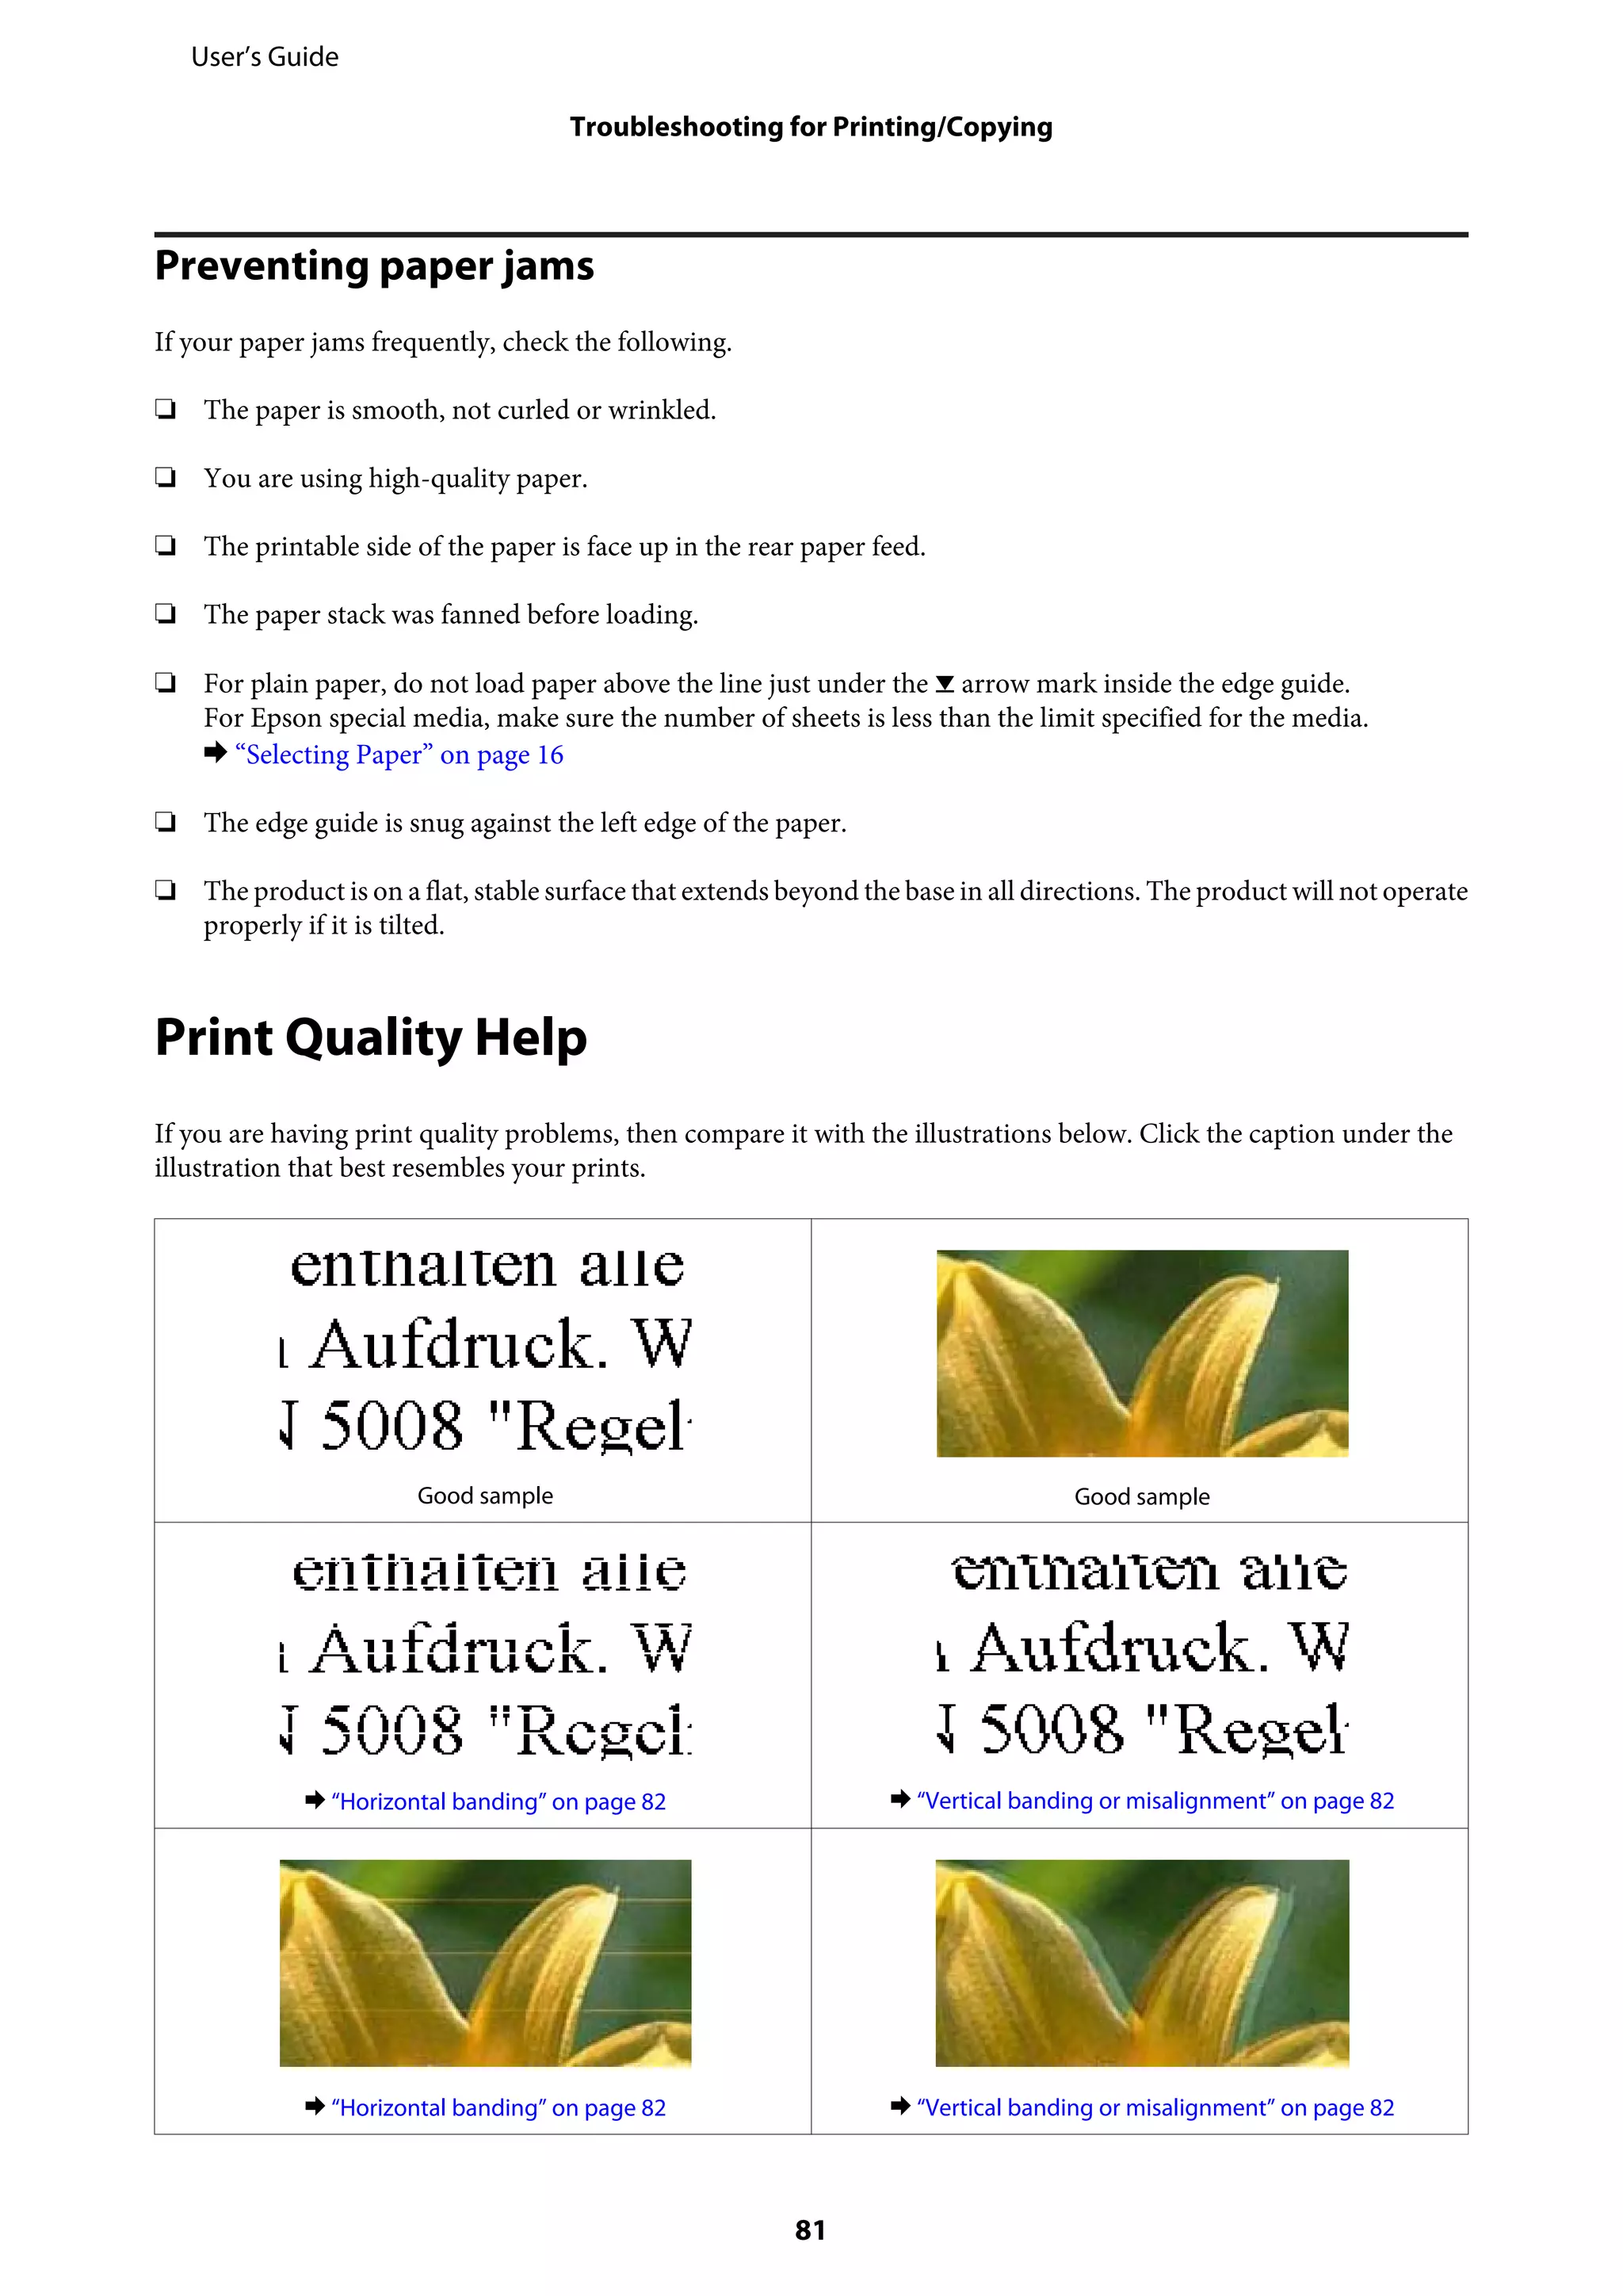
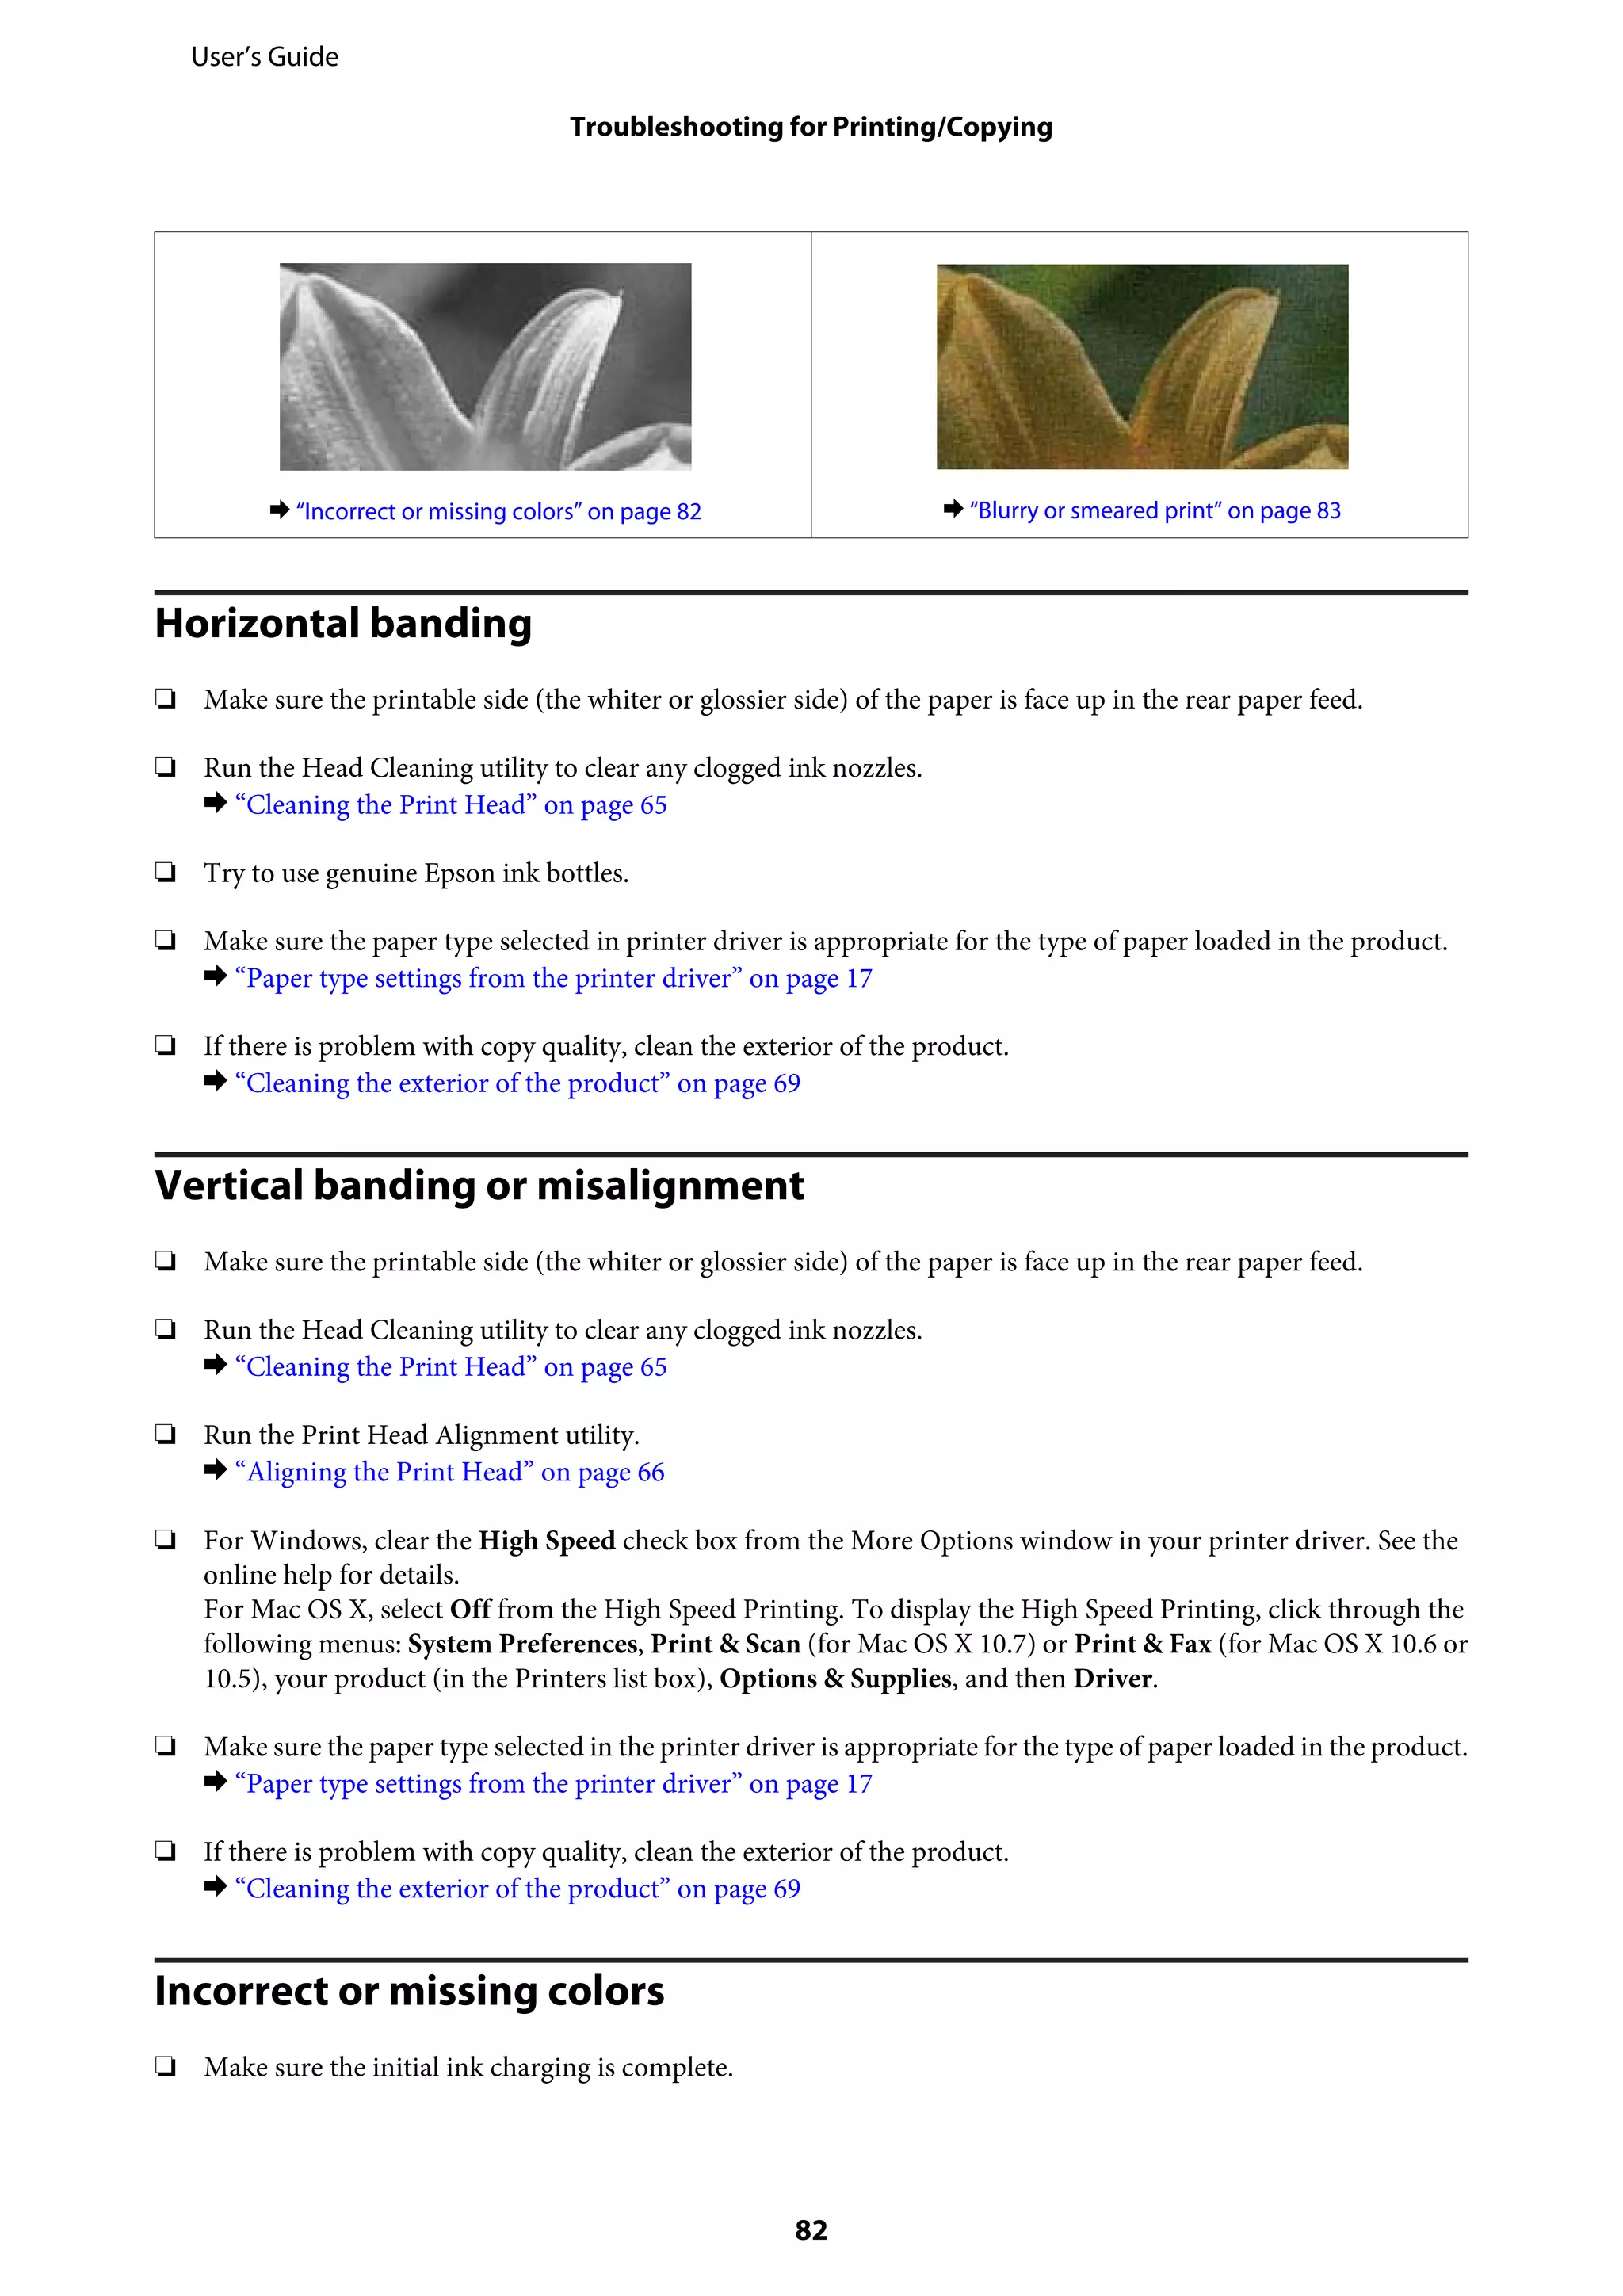
5. Details on printing including accessing the printer driver, basic printing operations, other printing options, and sharing the printer on a network.
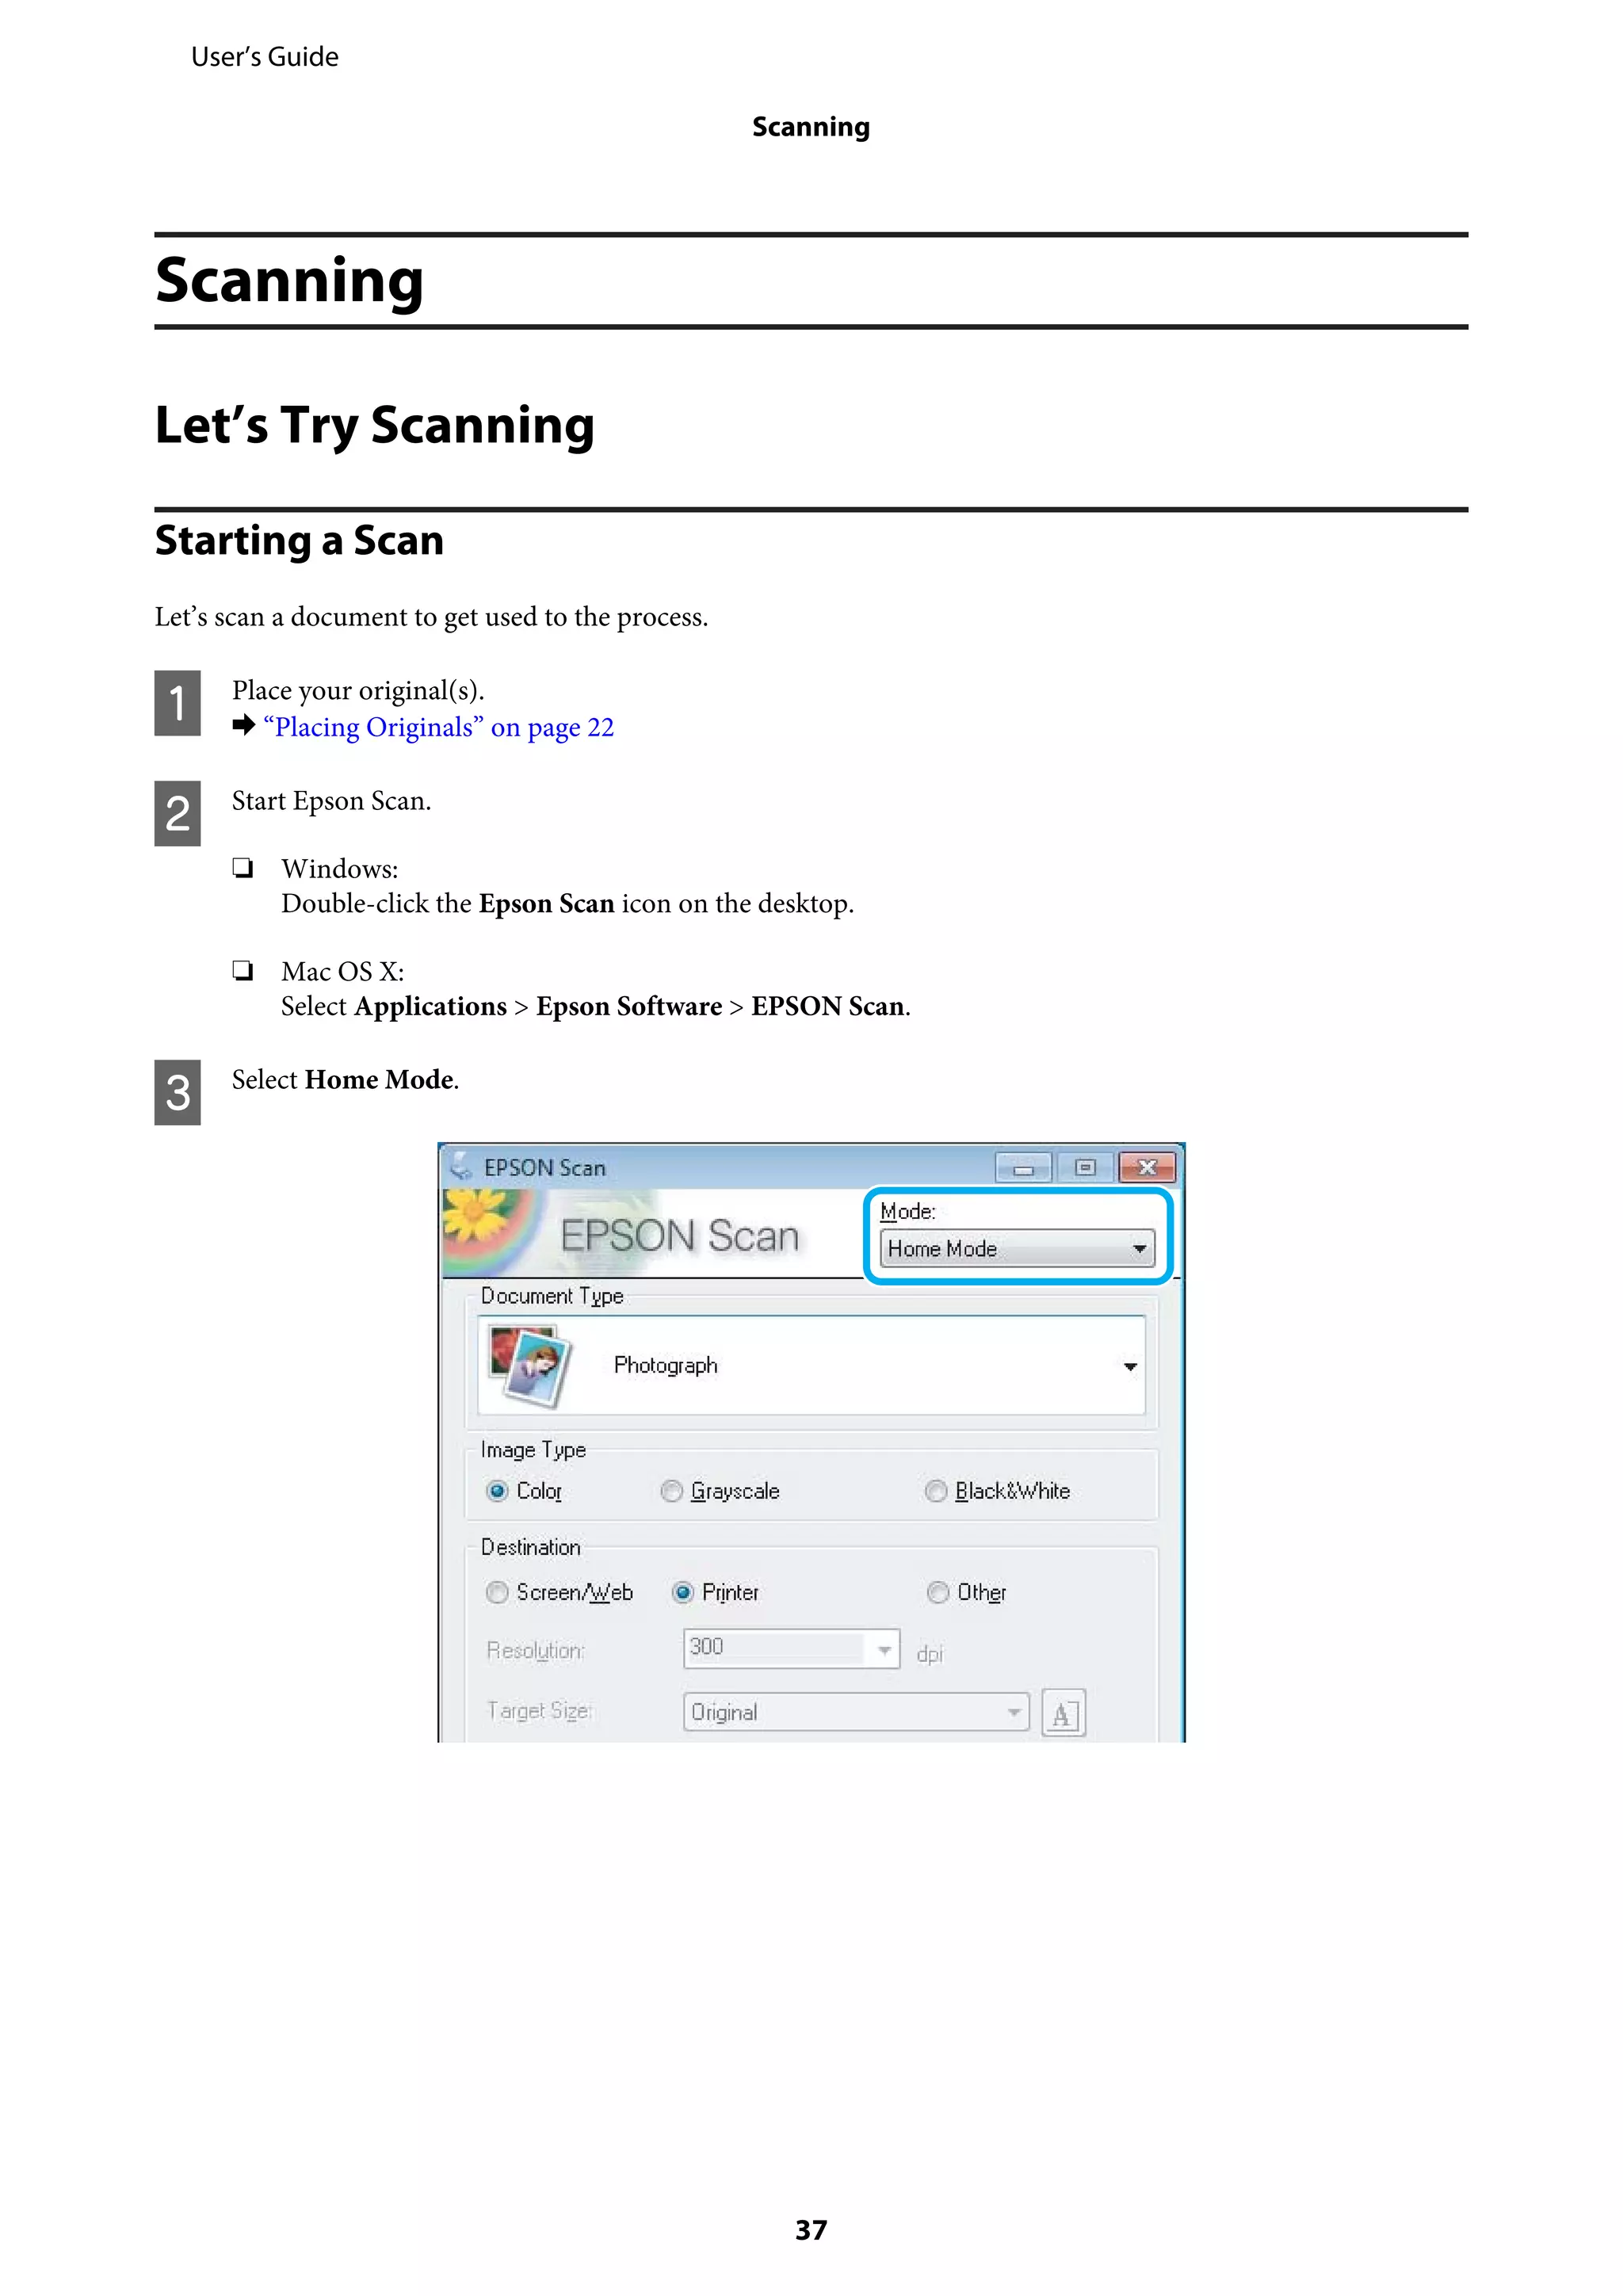
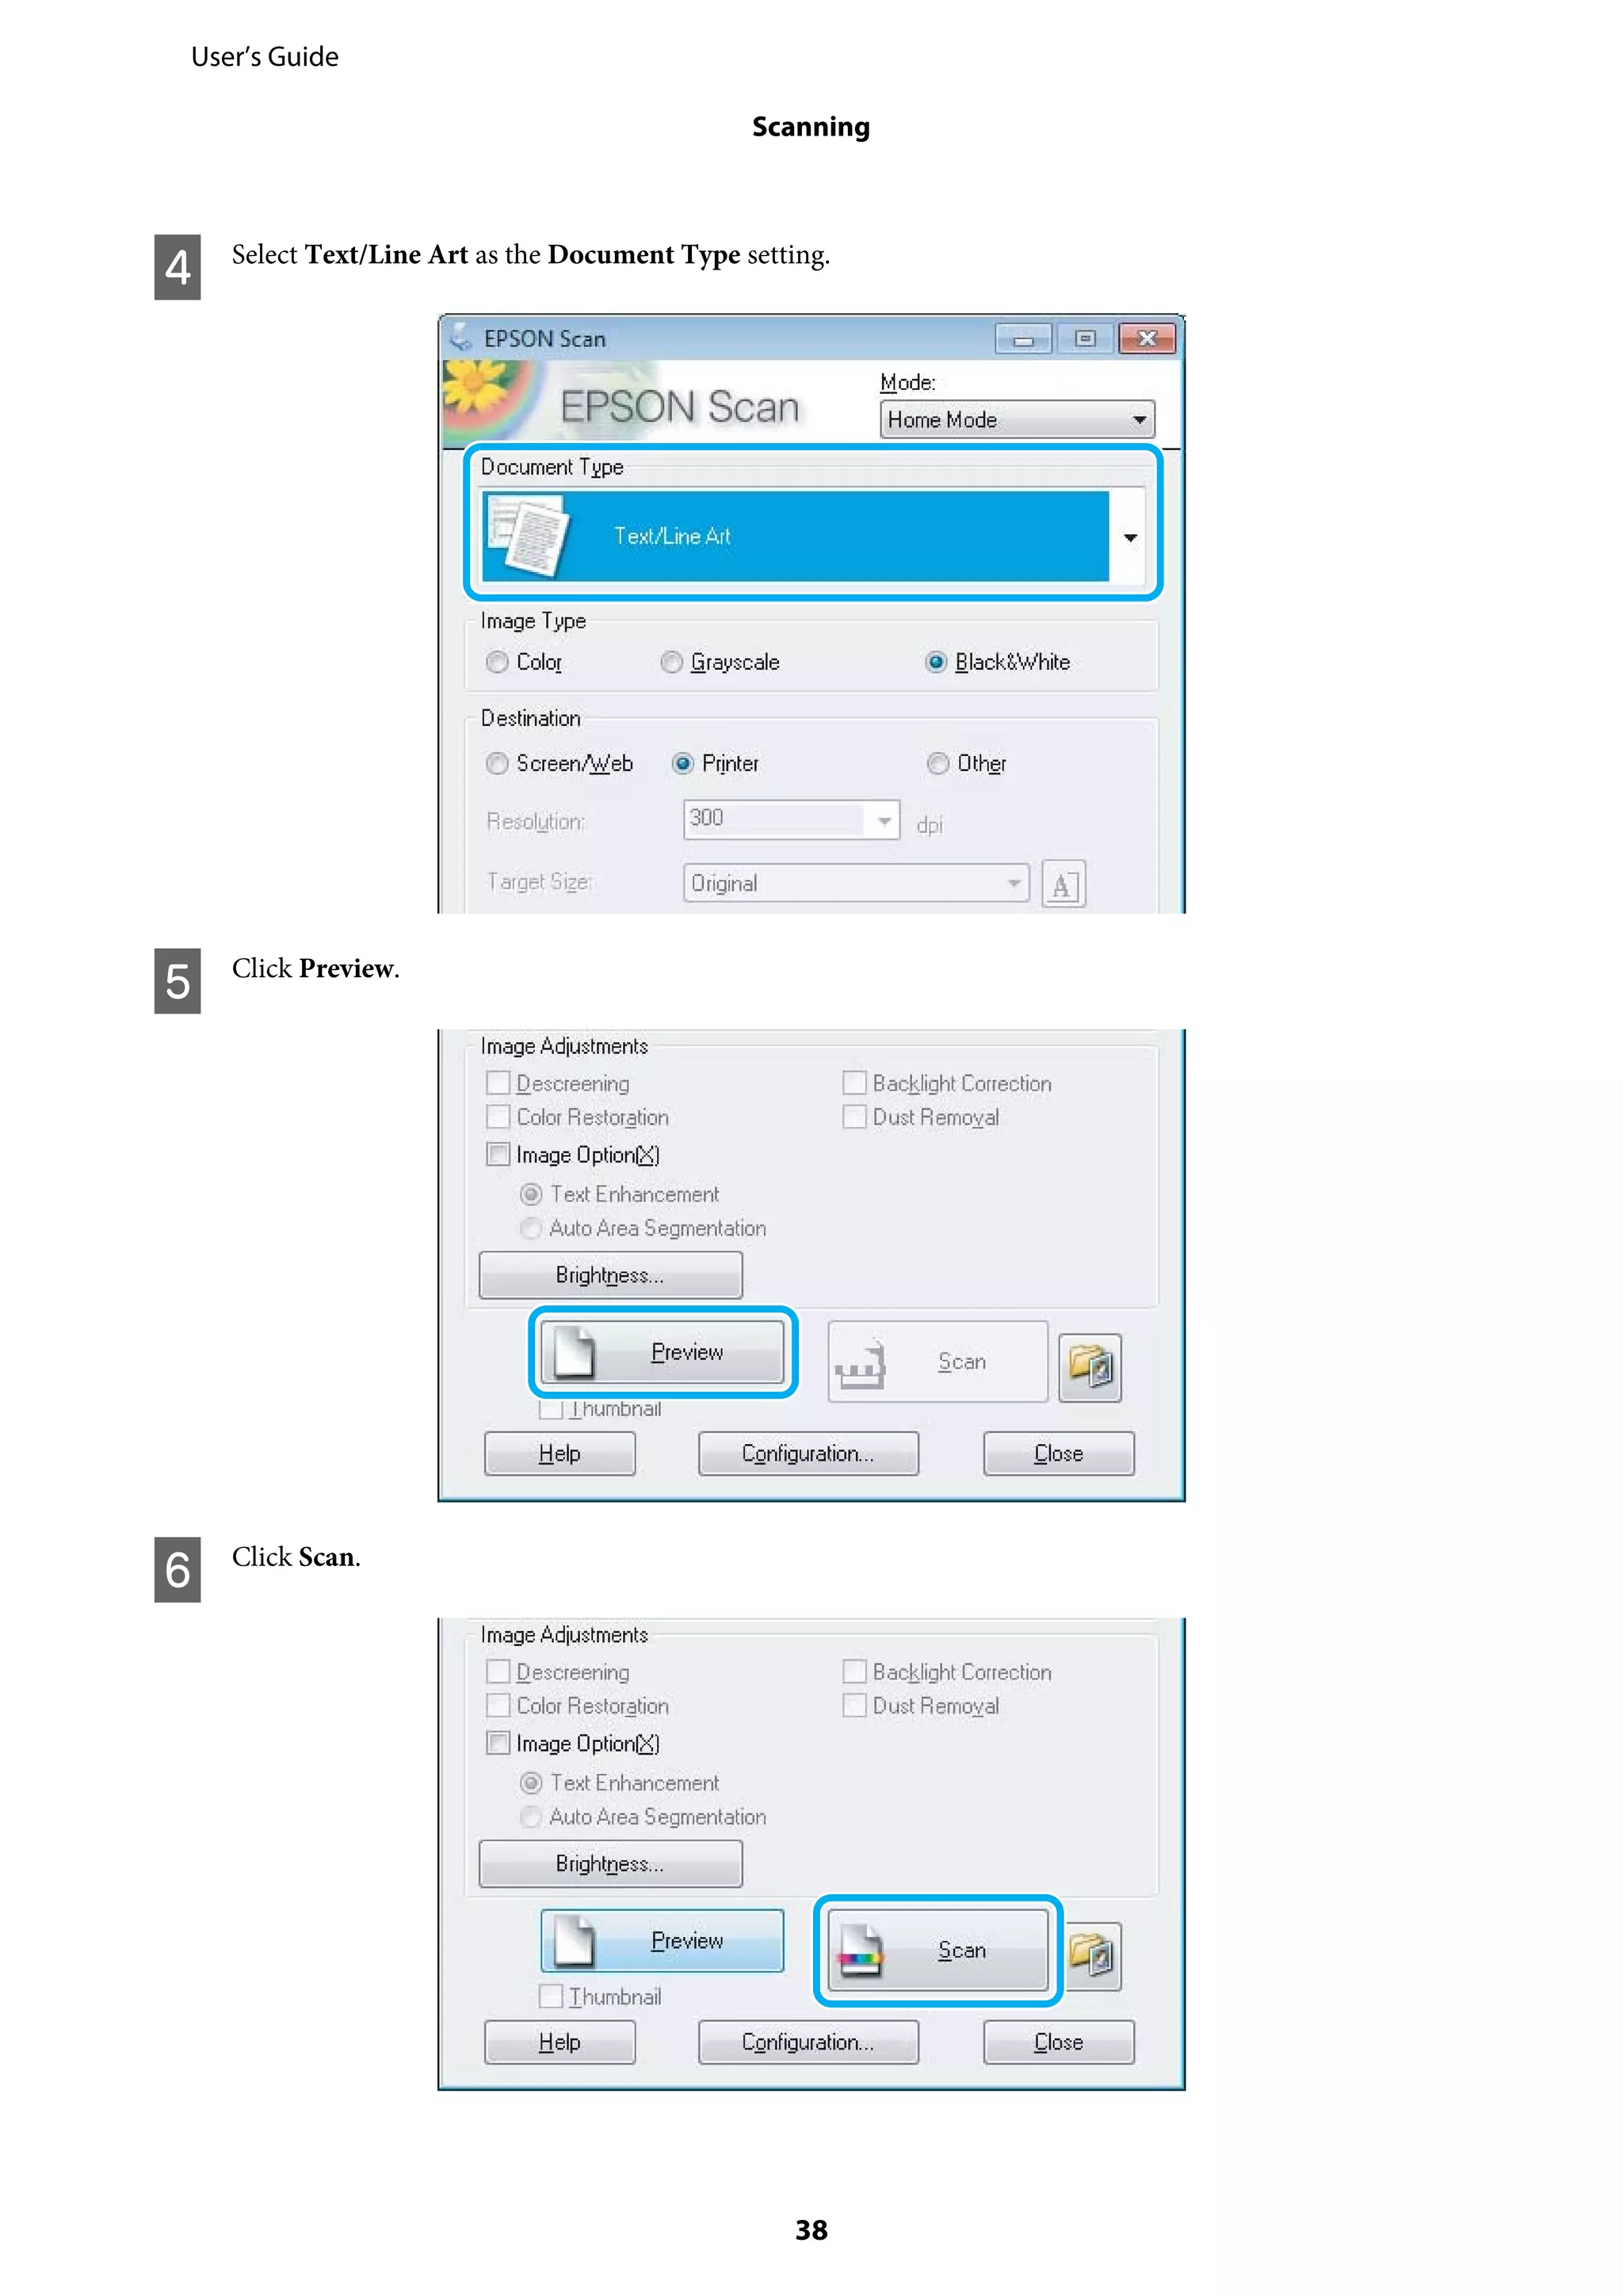
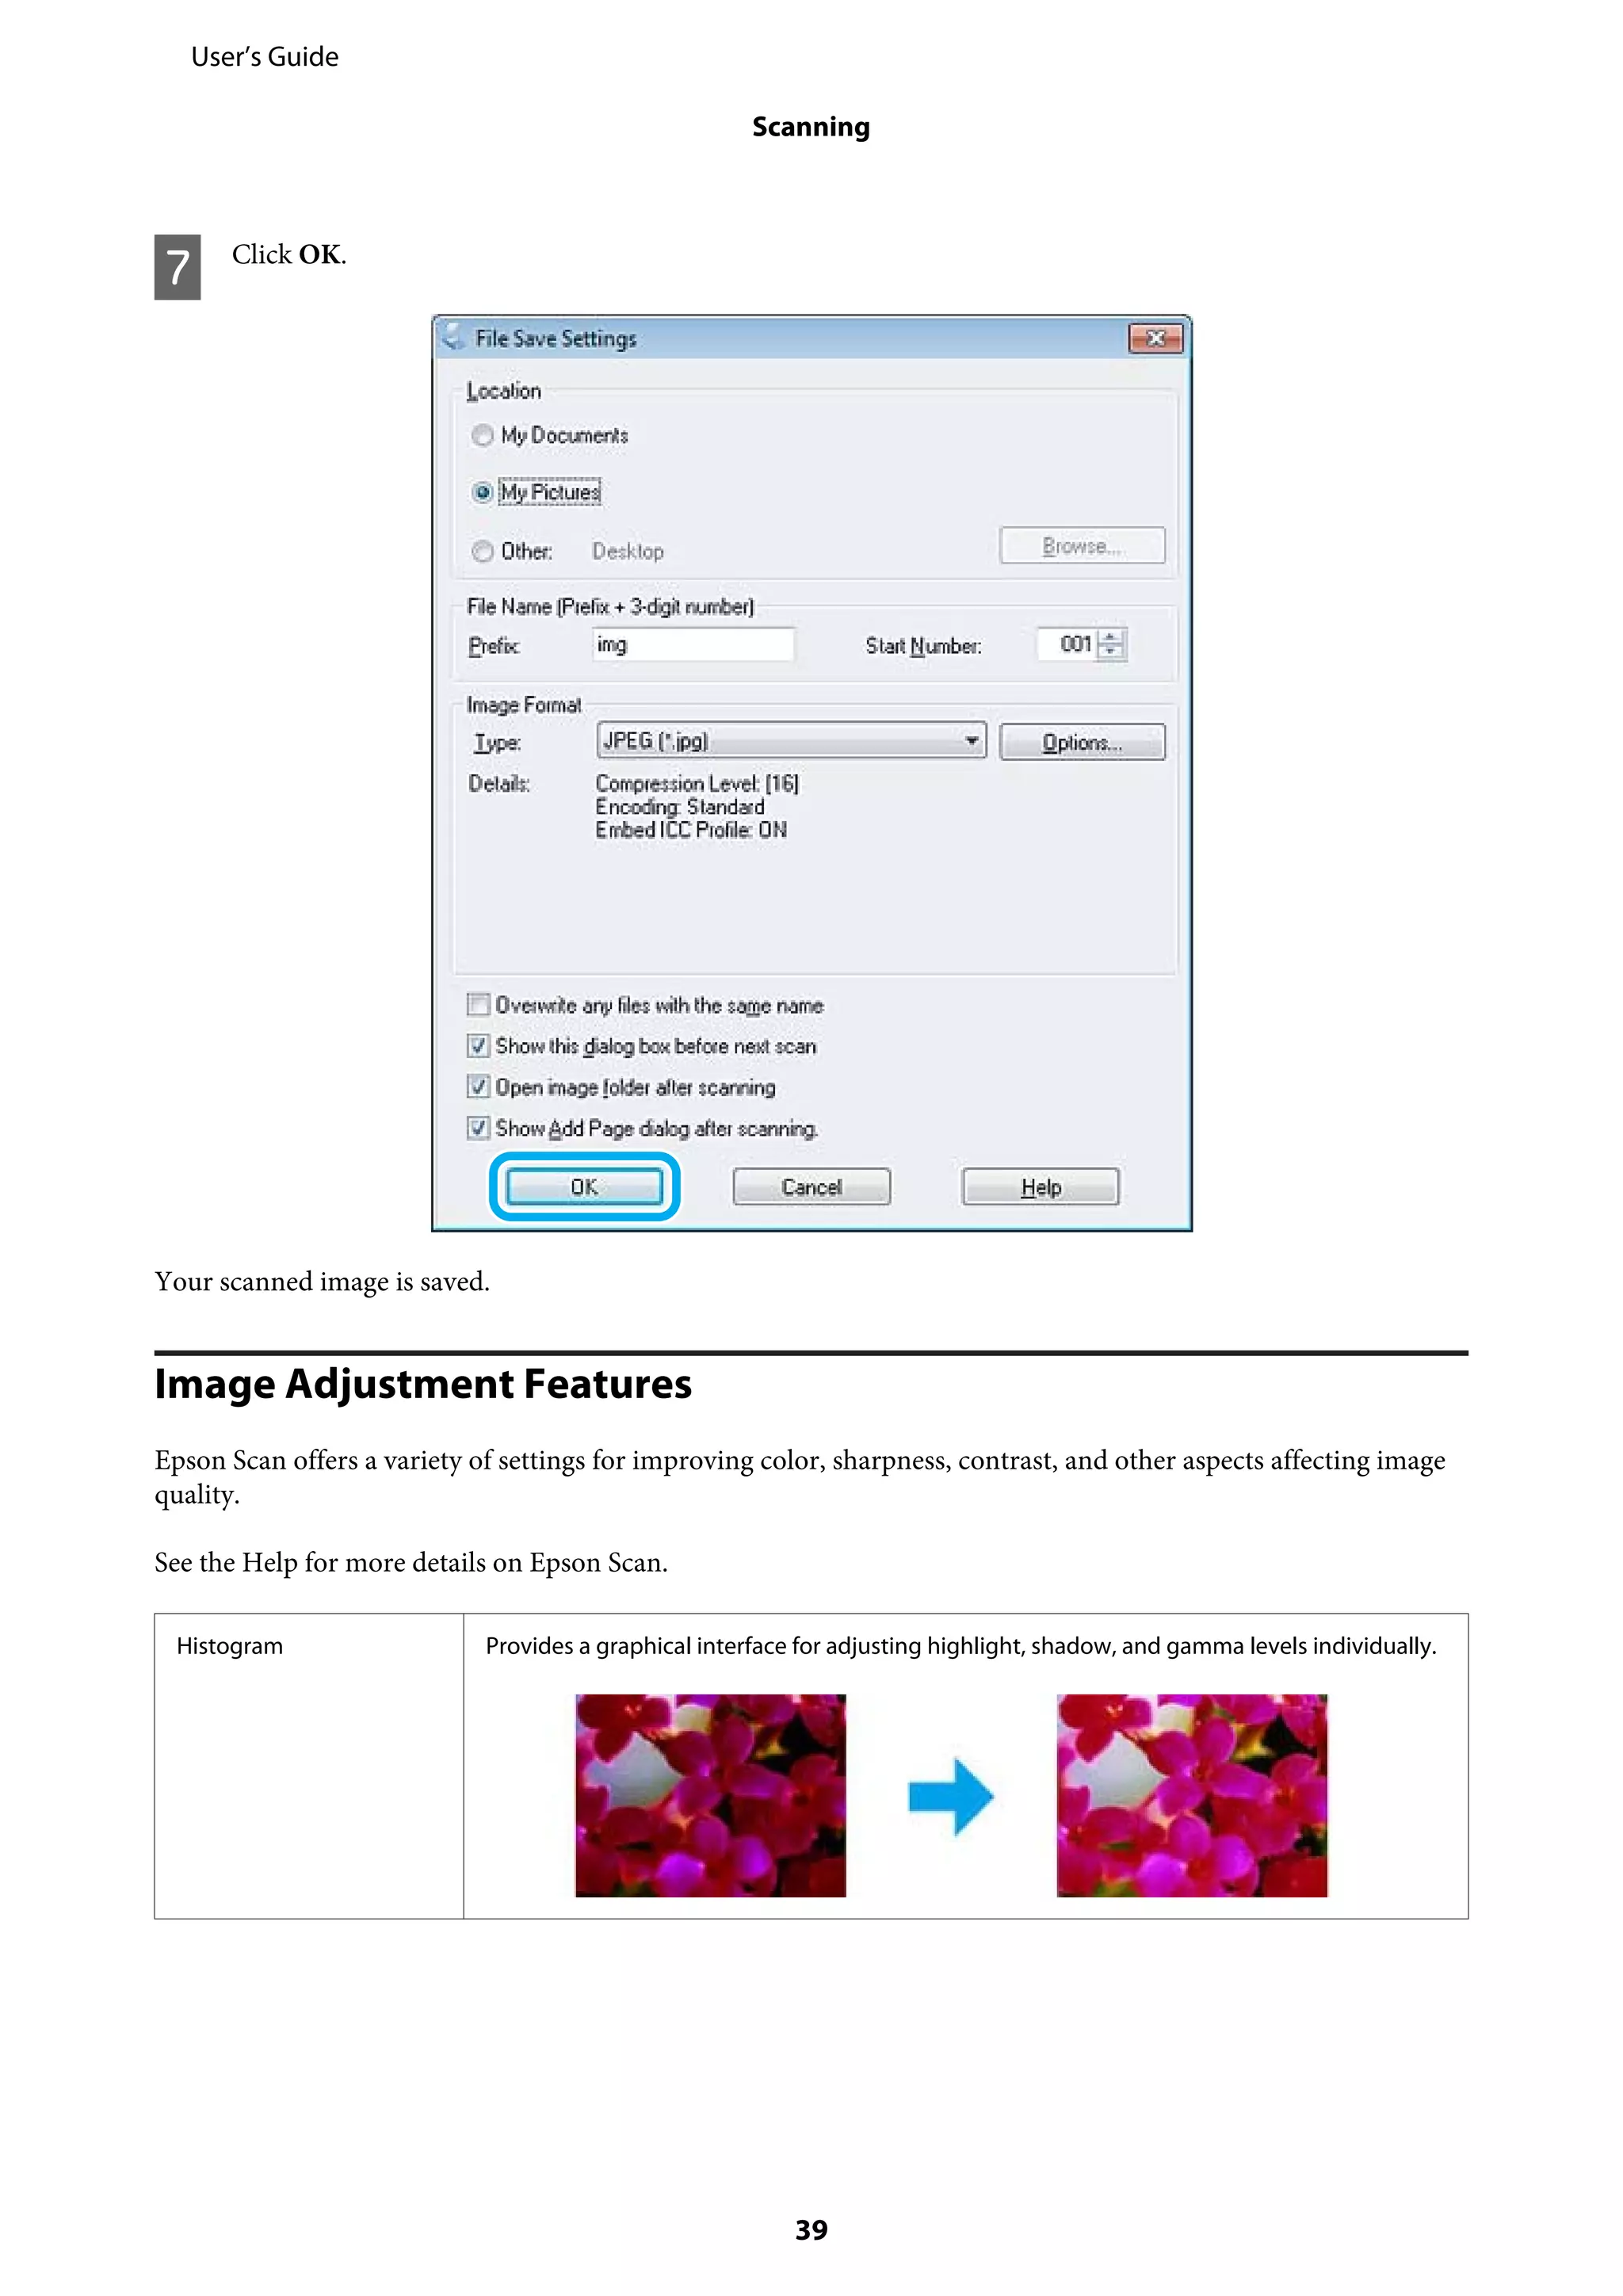
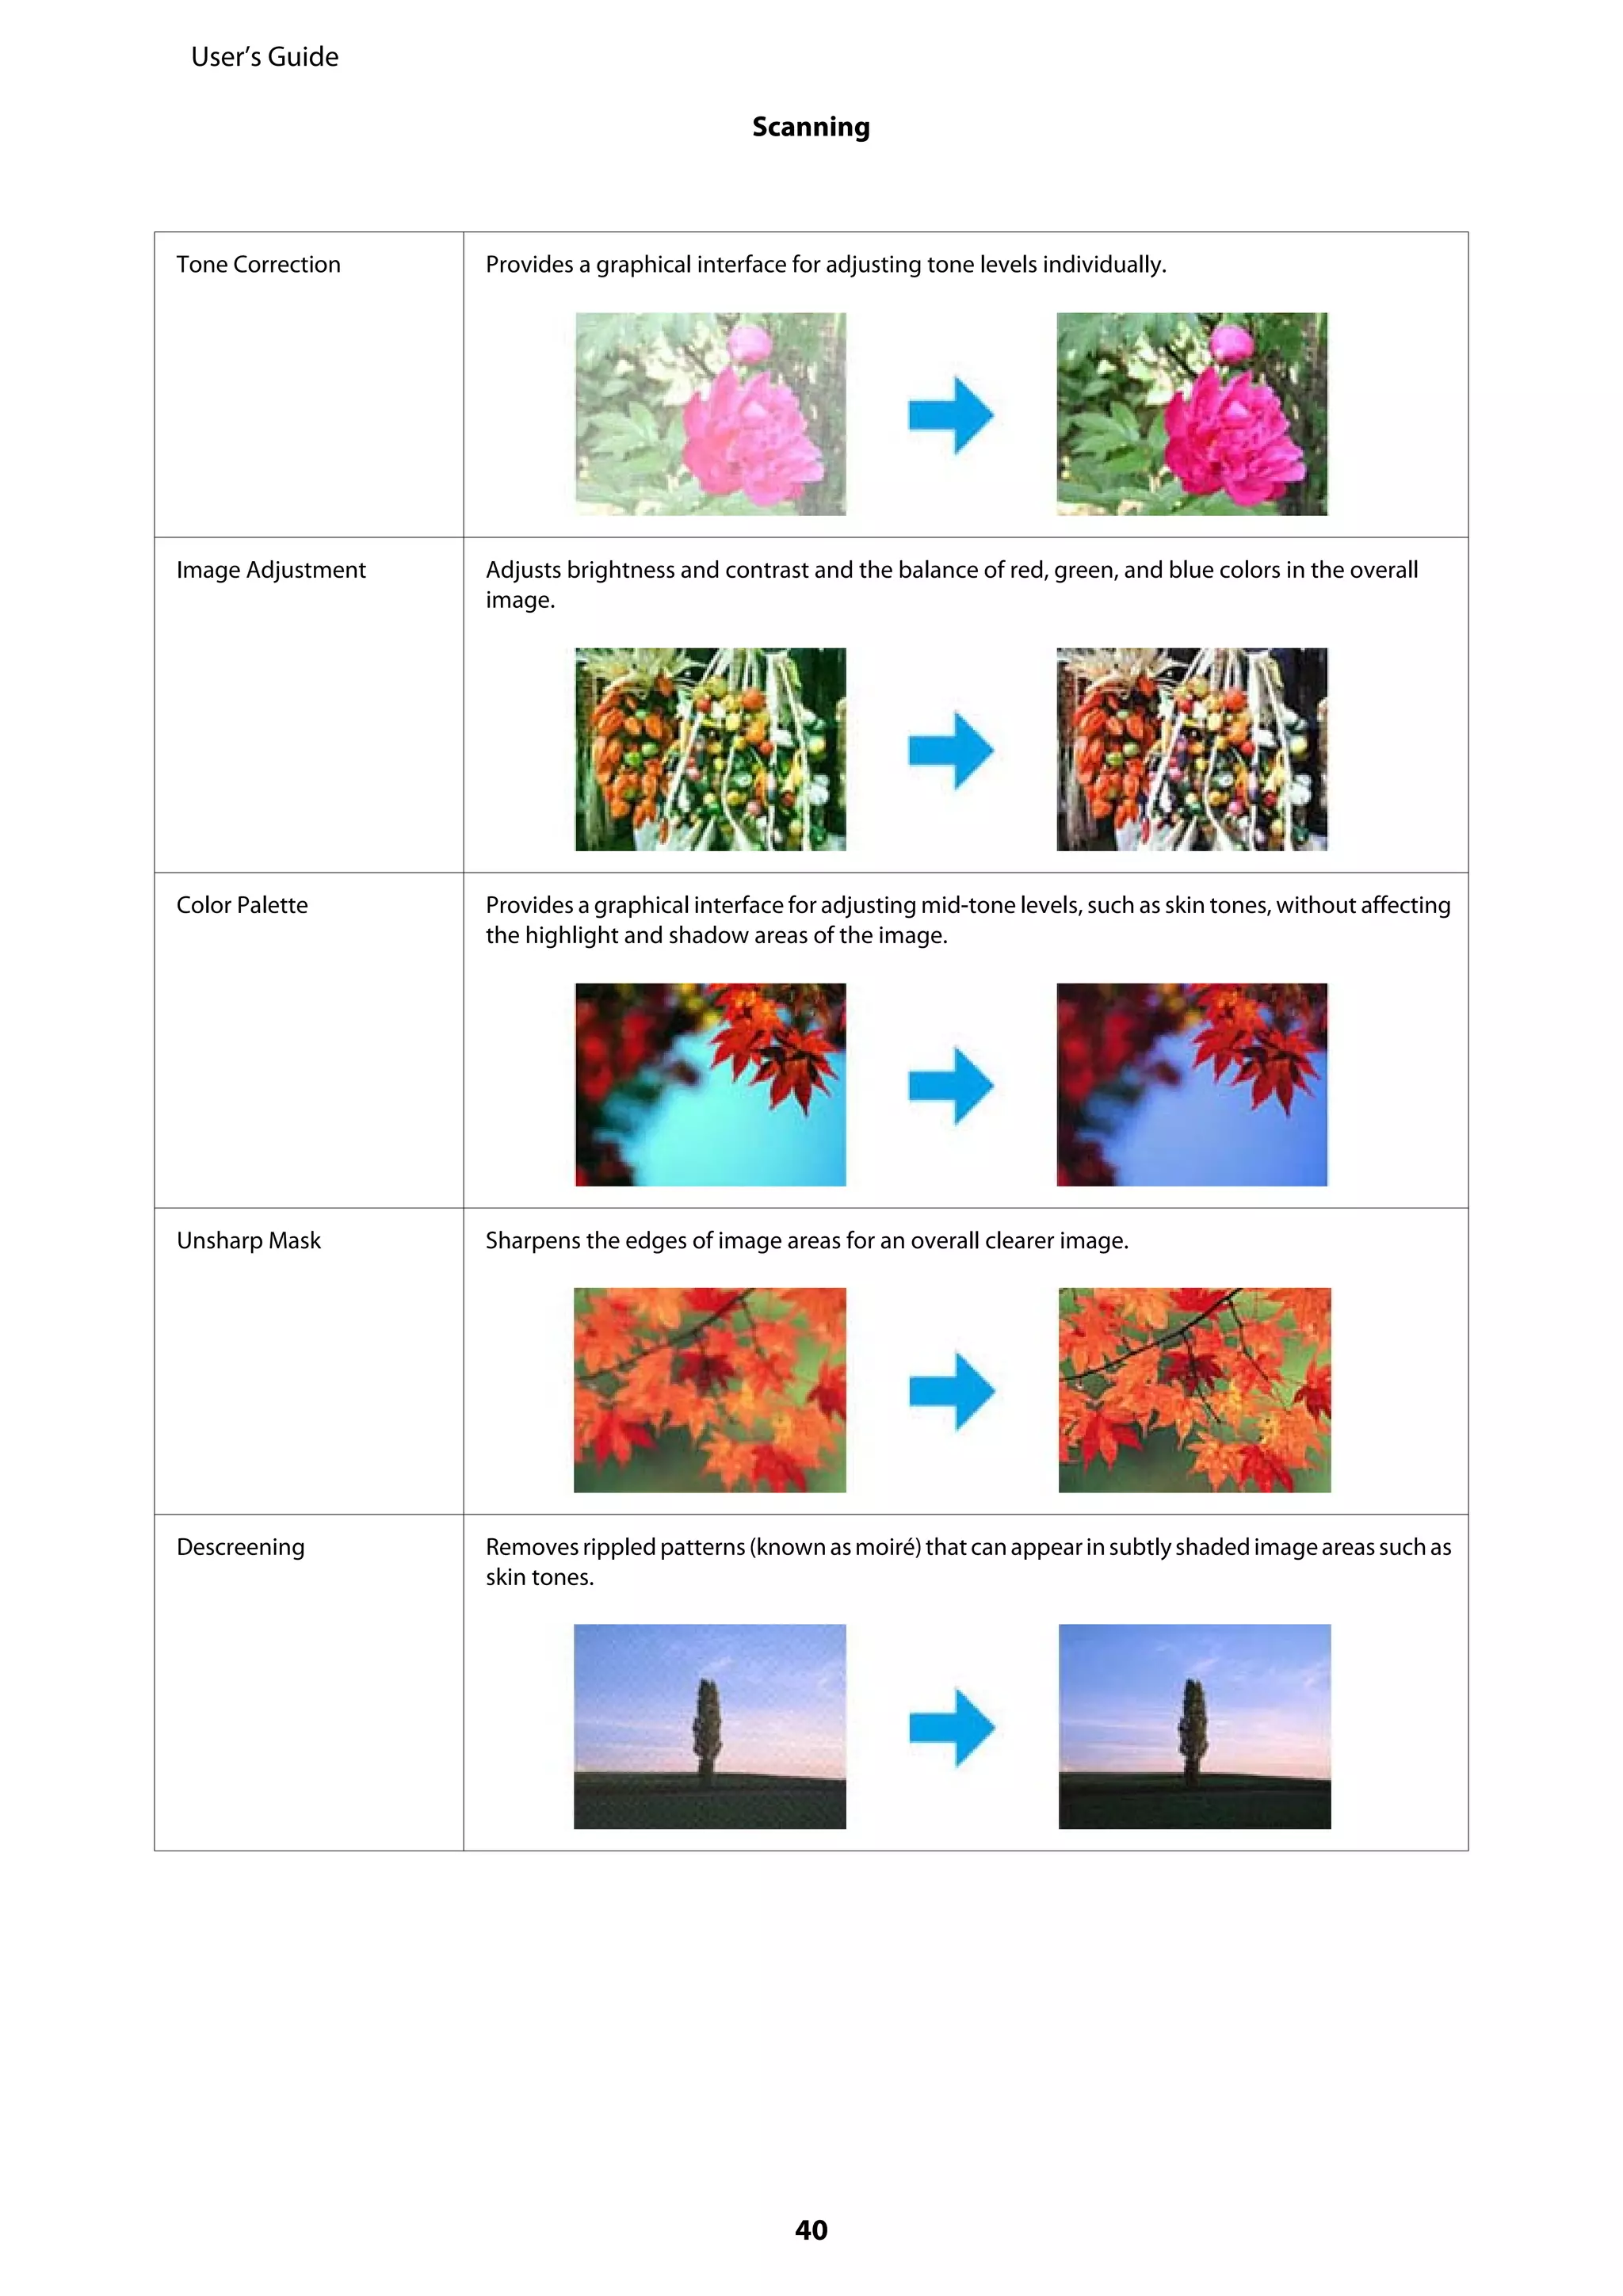
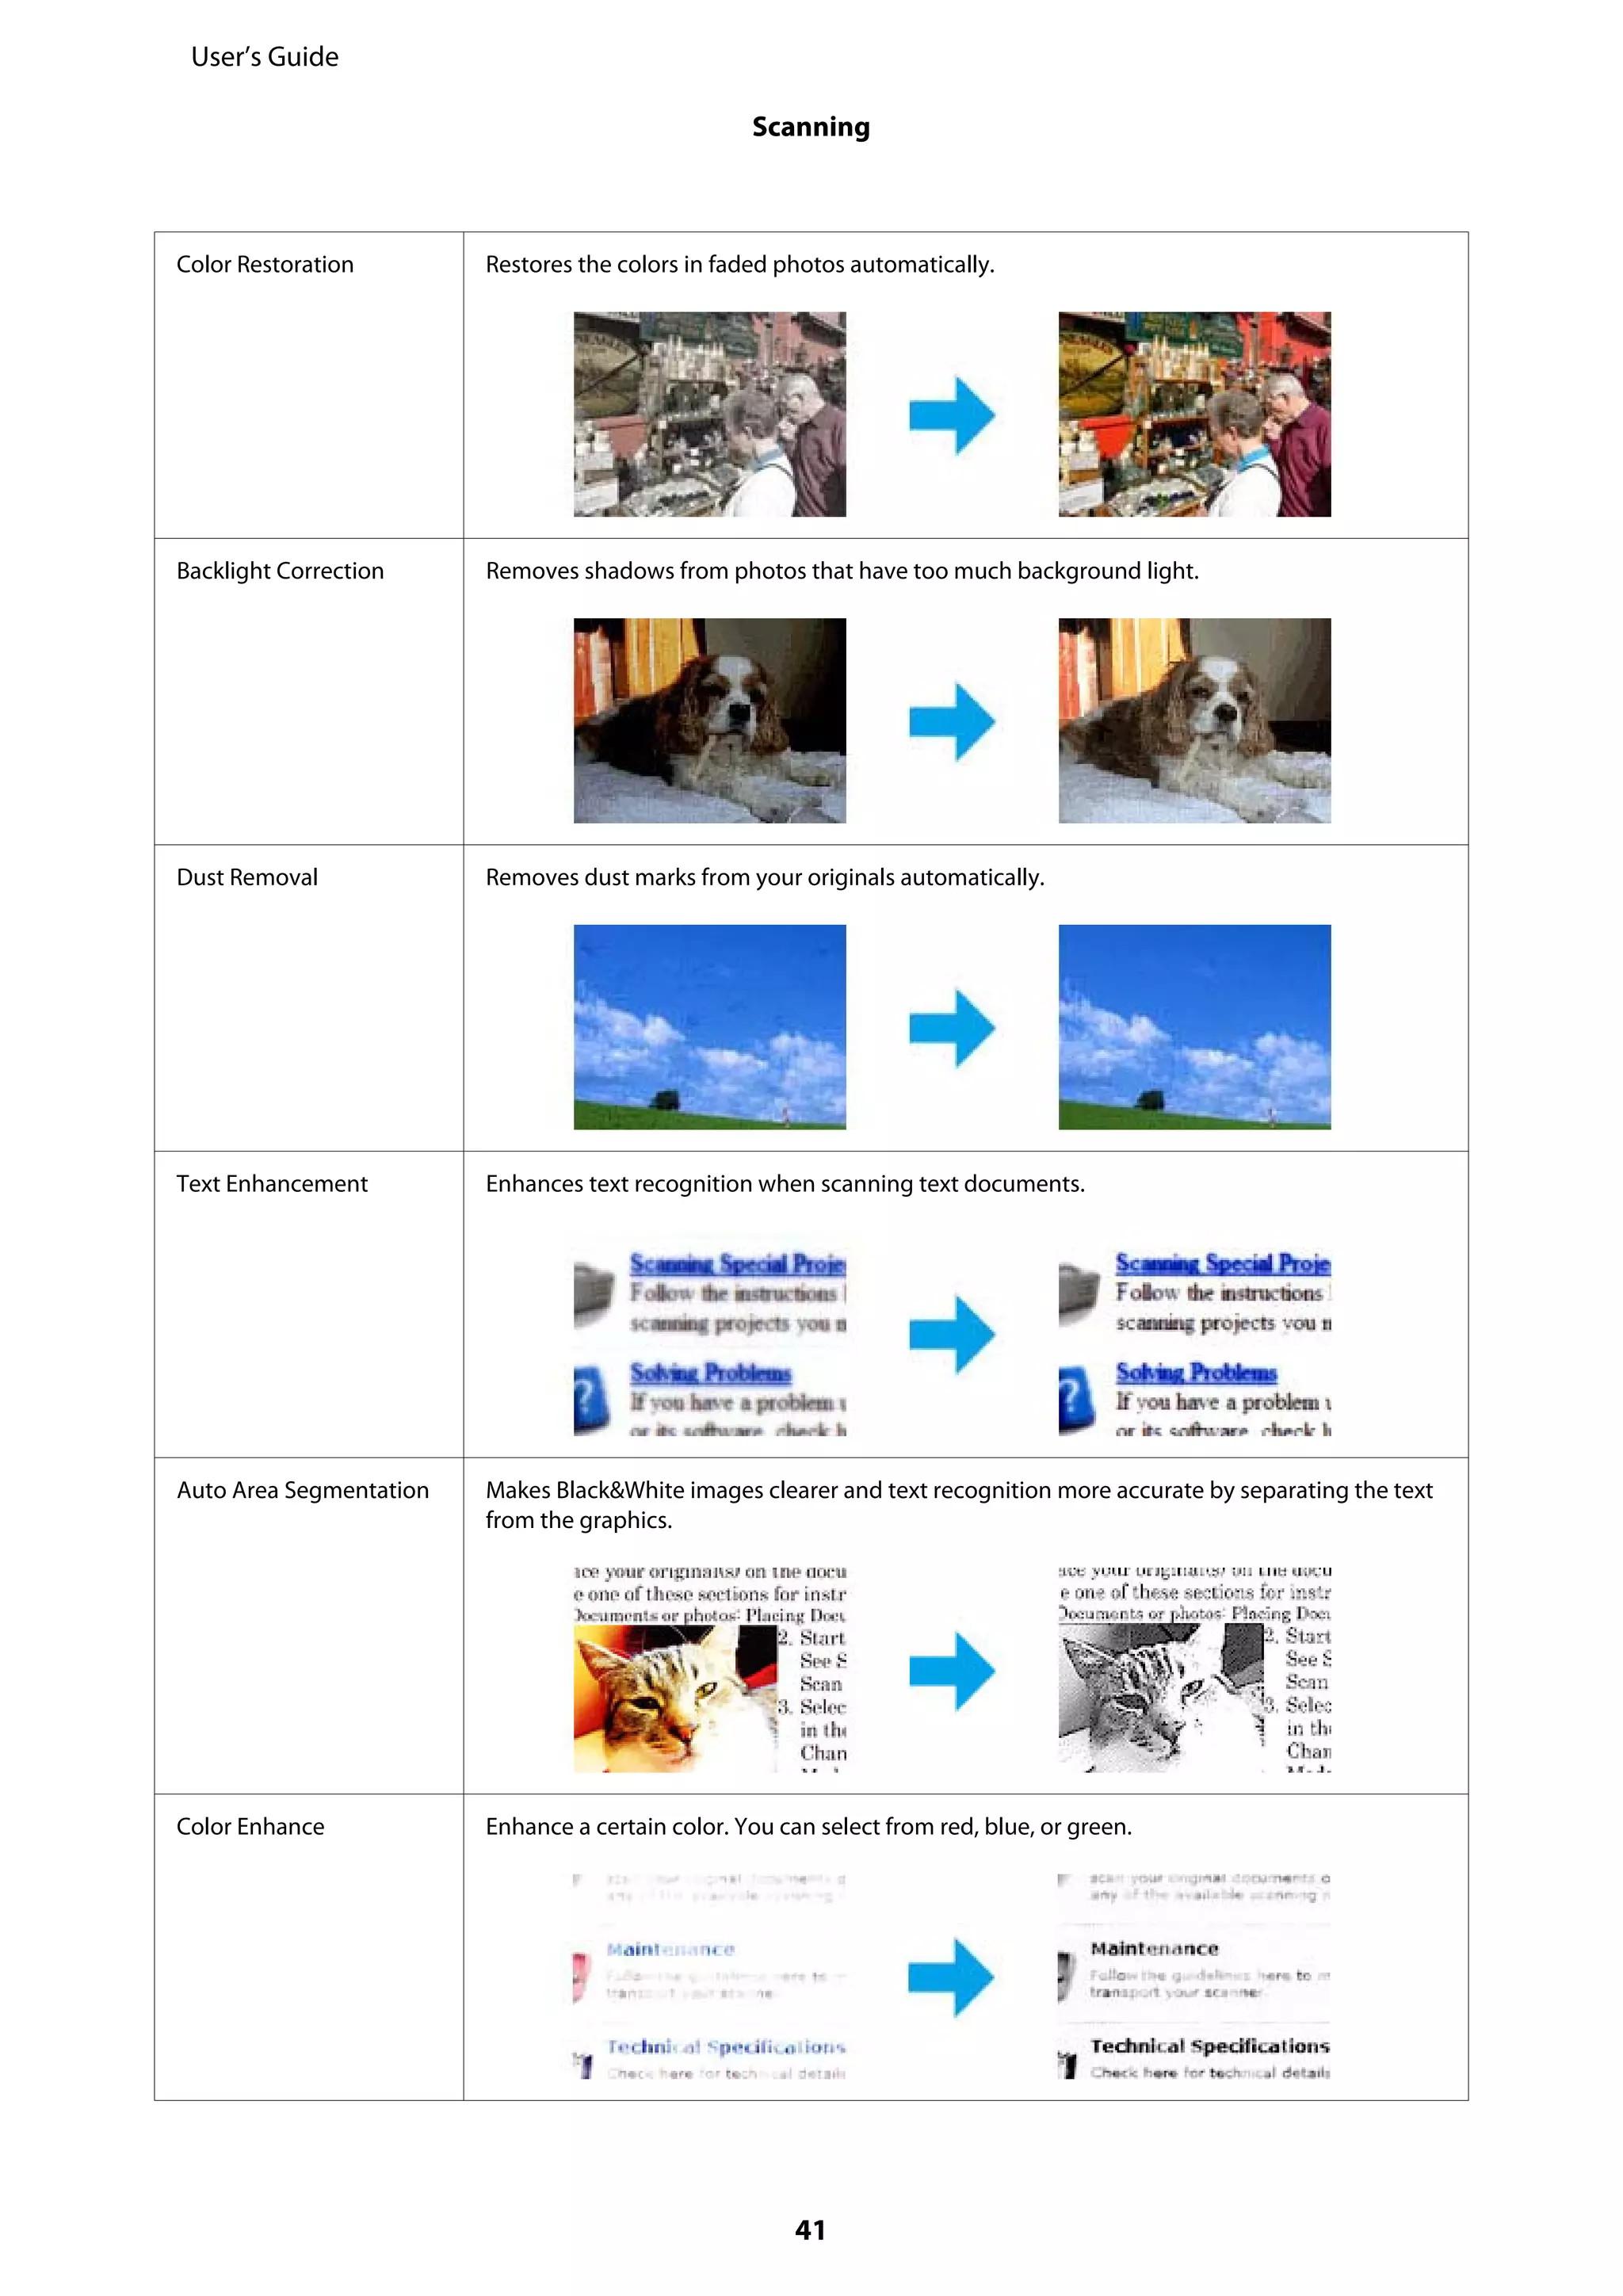
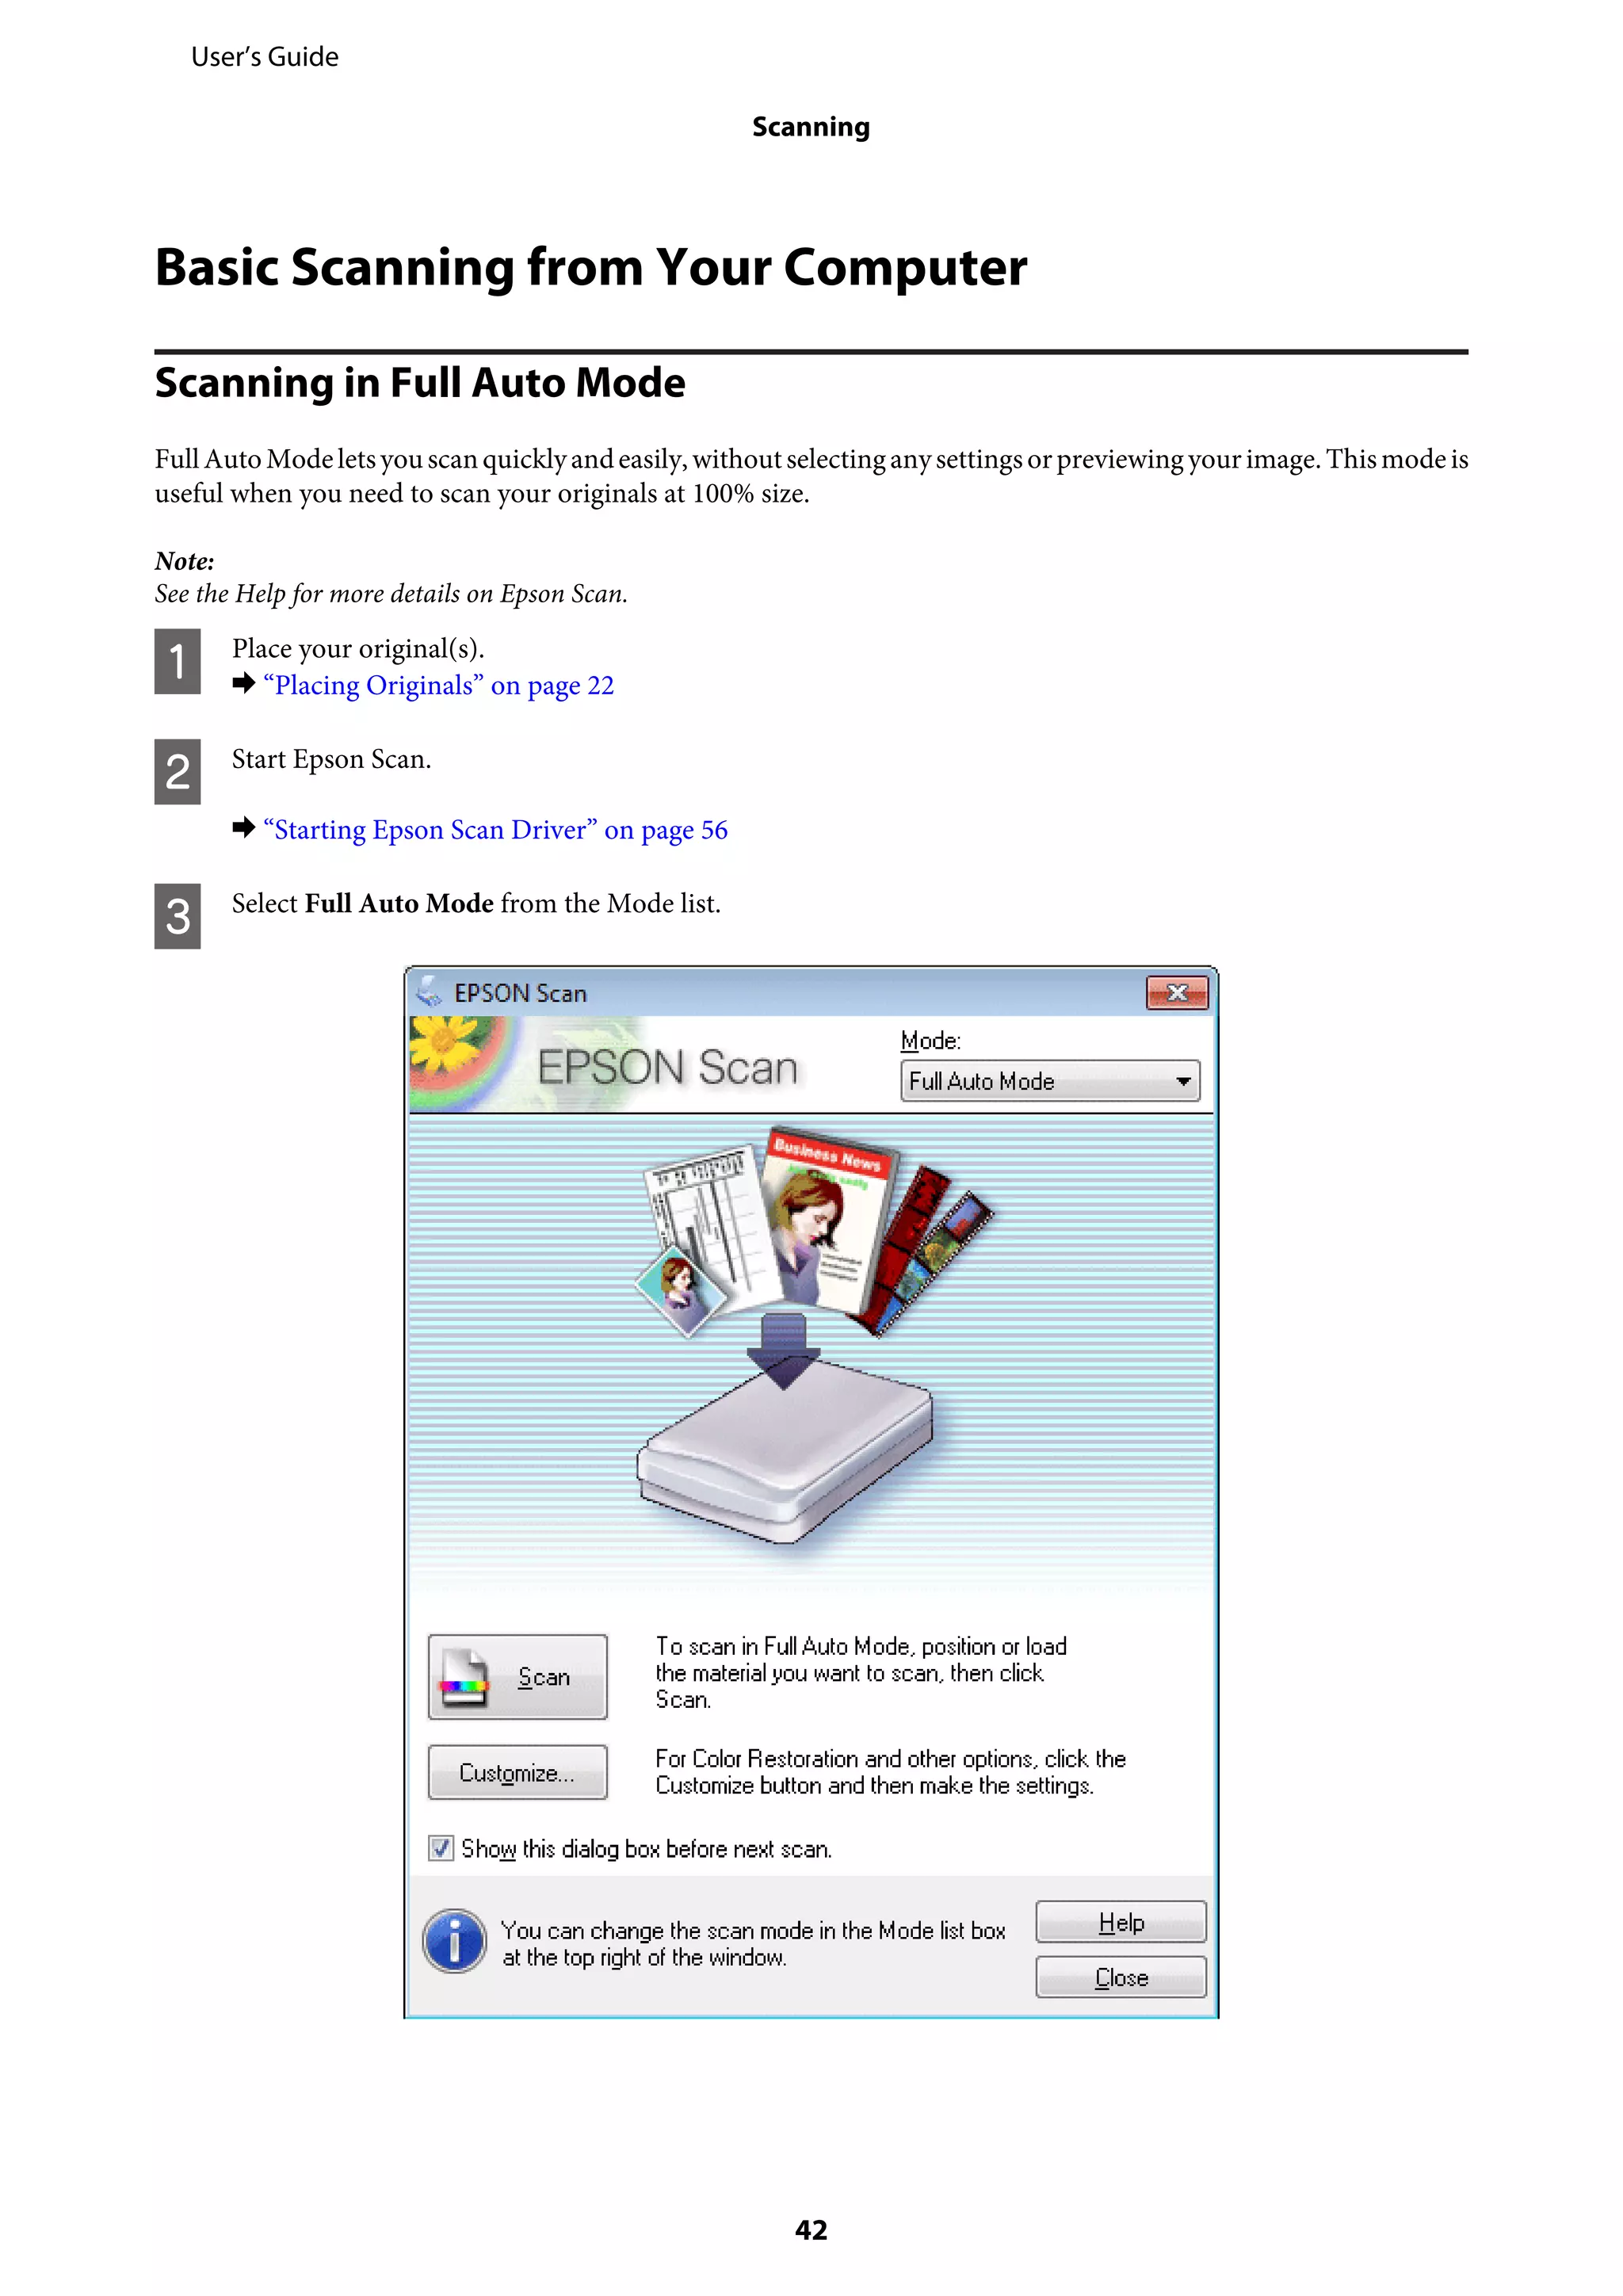
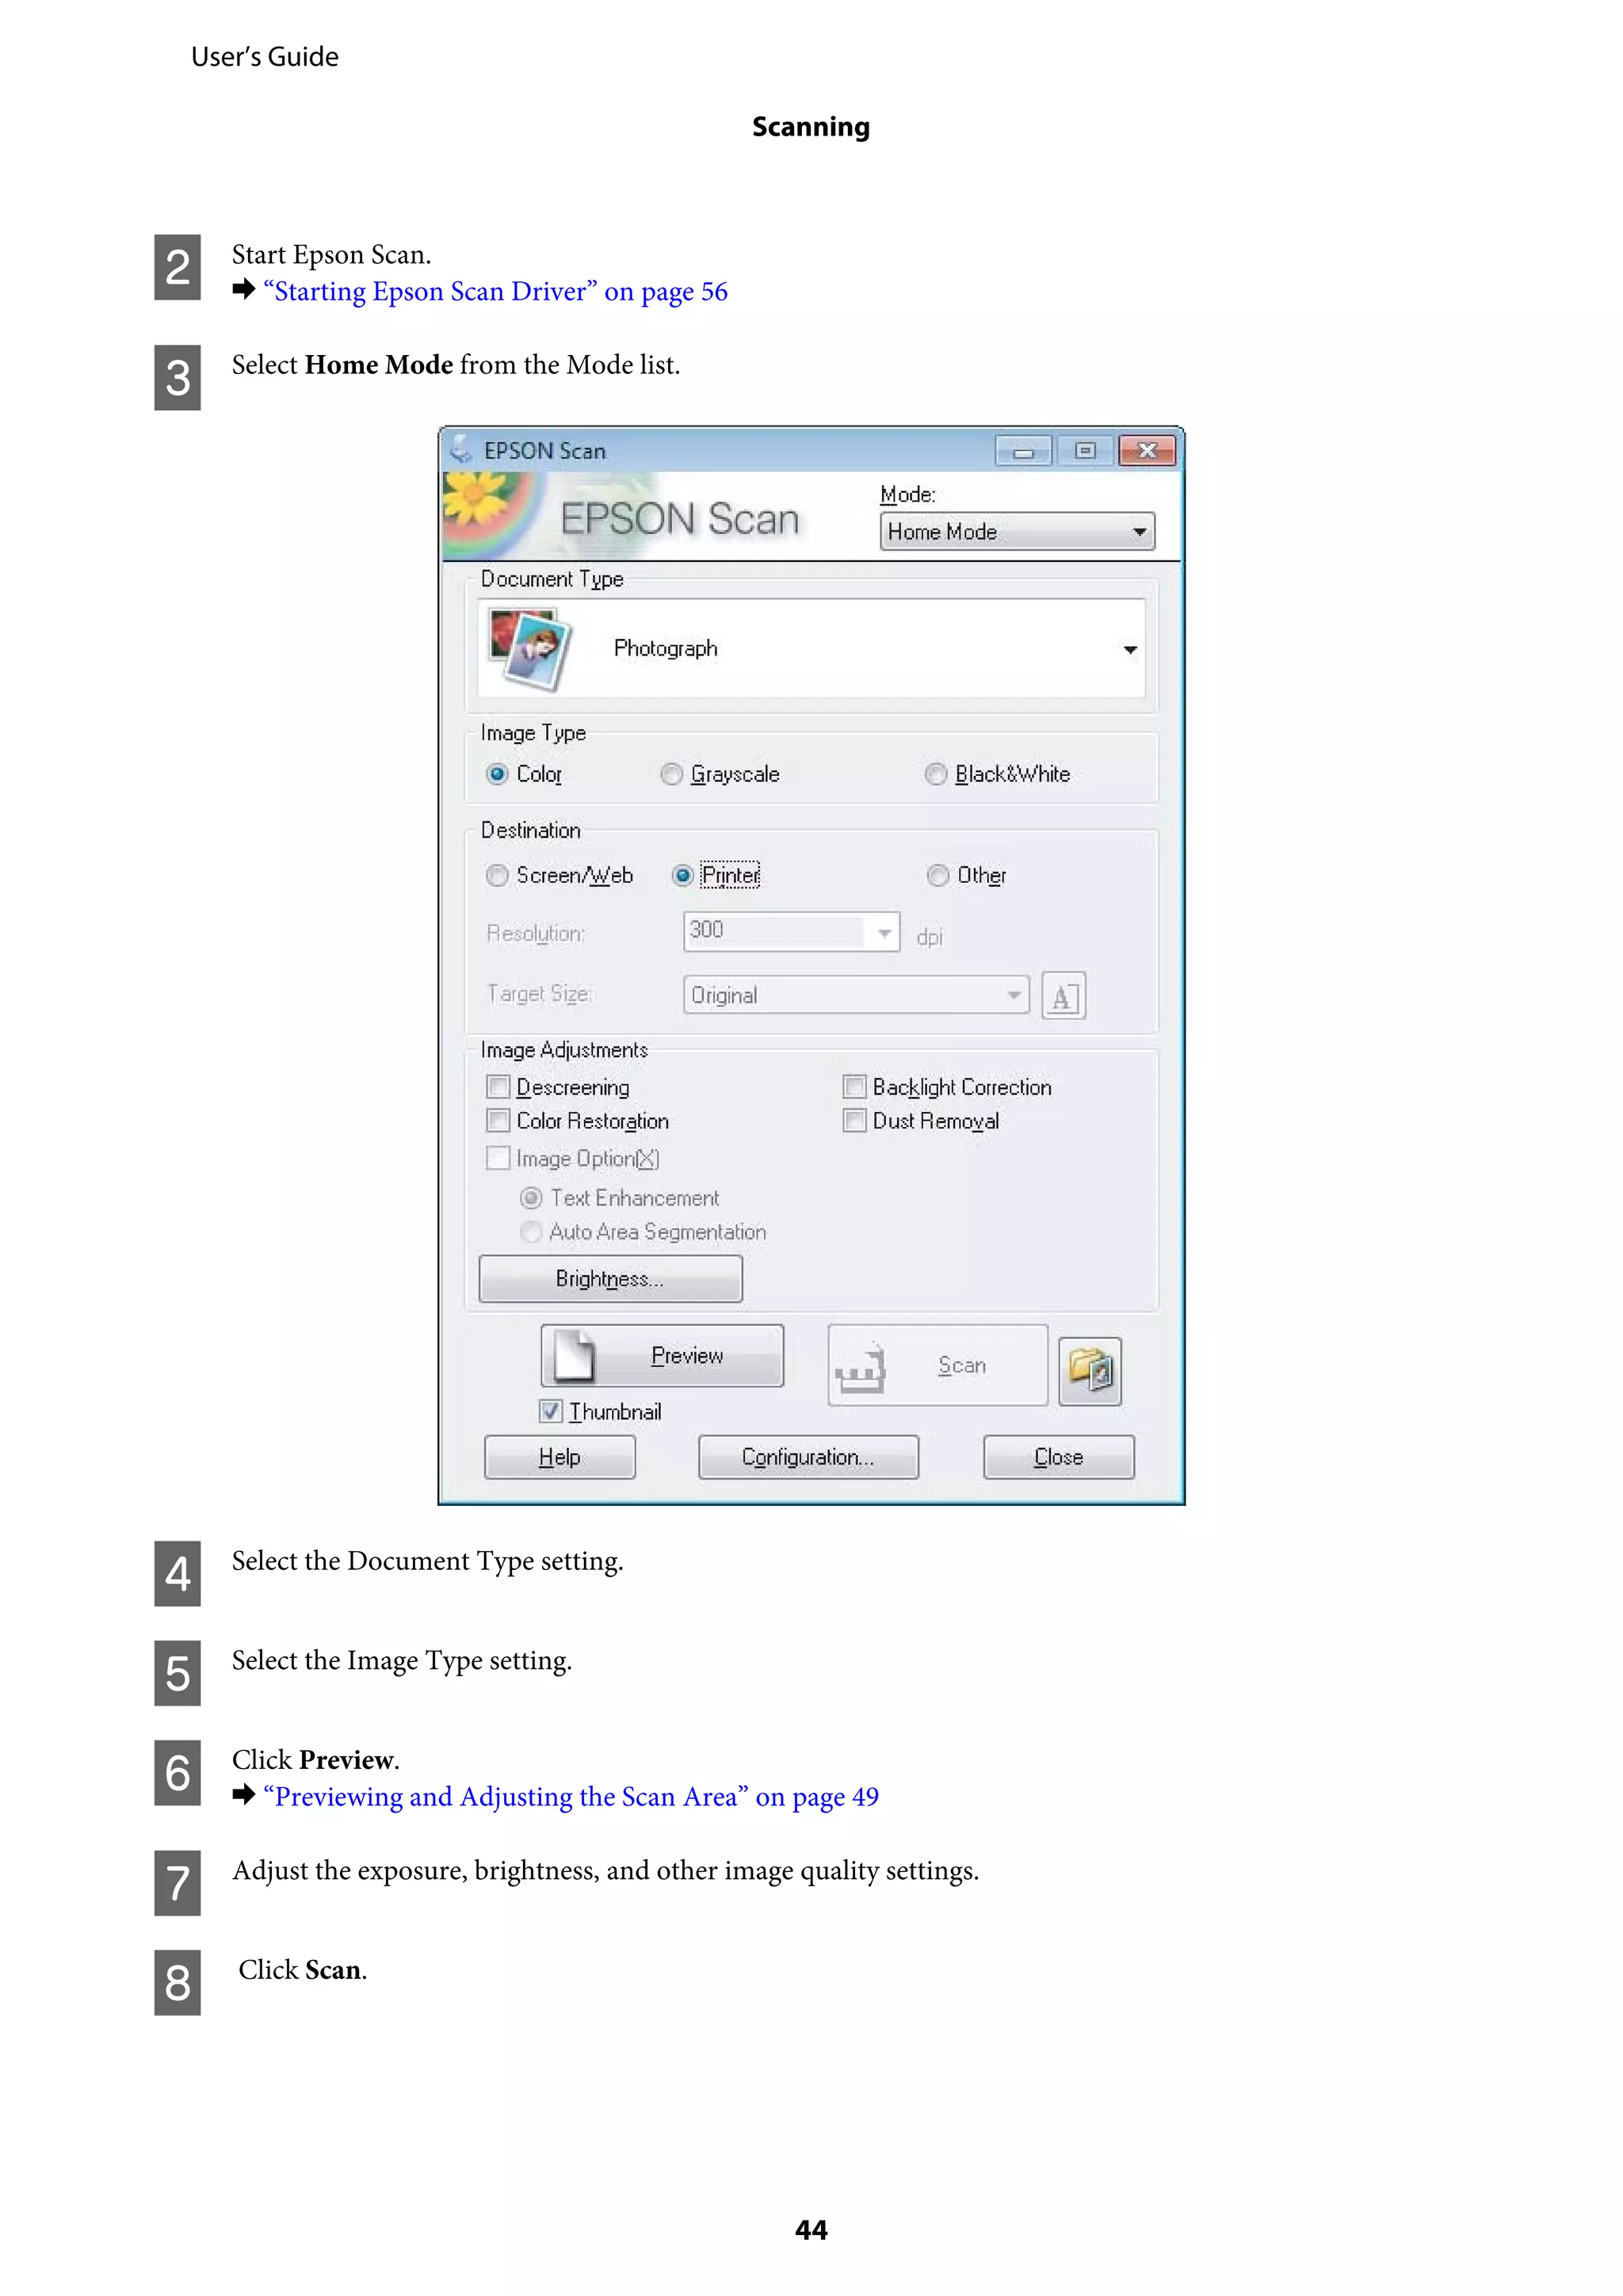
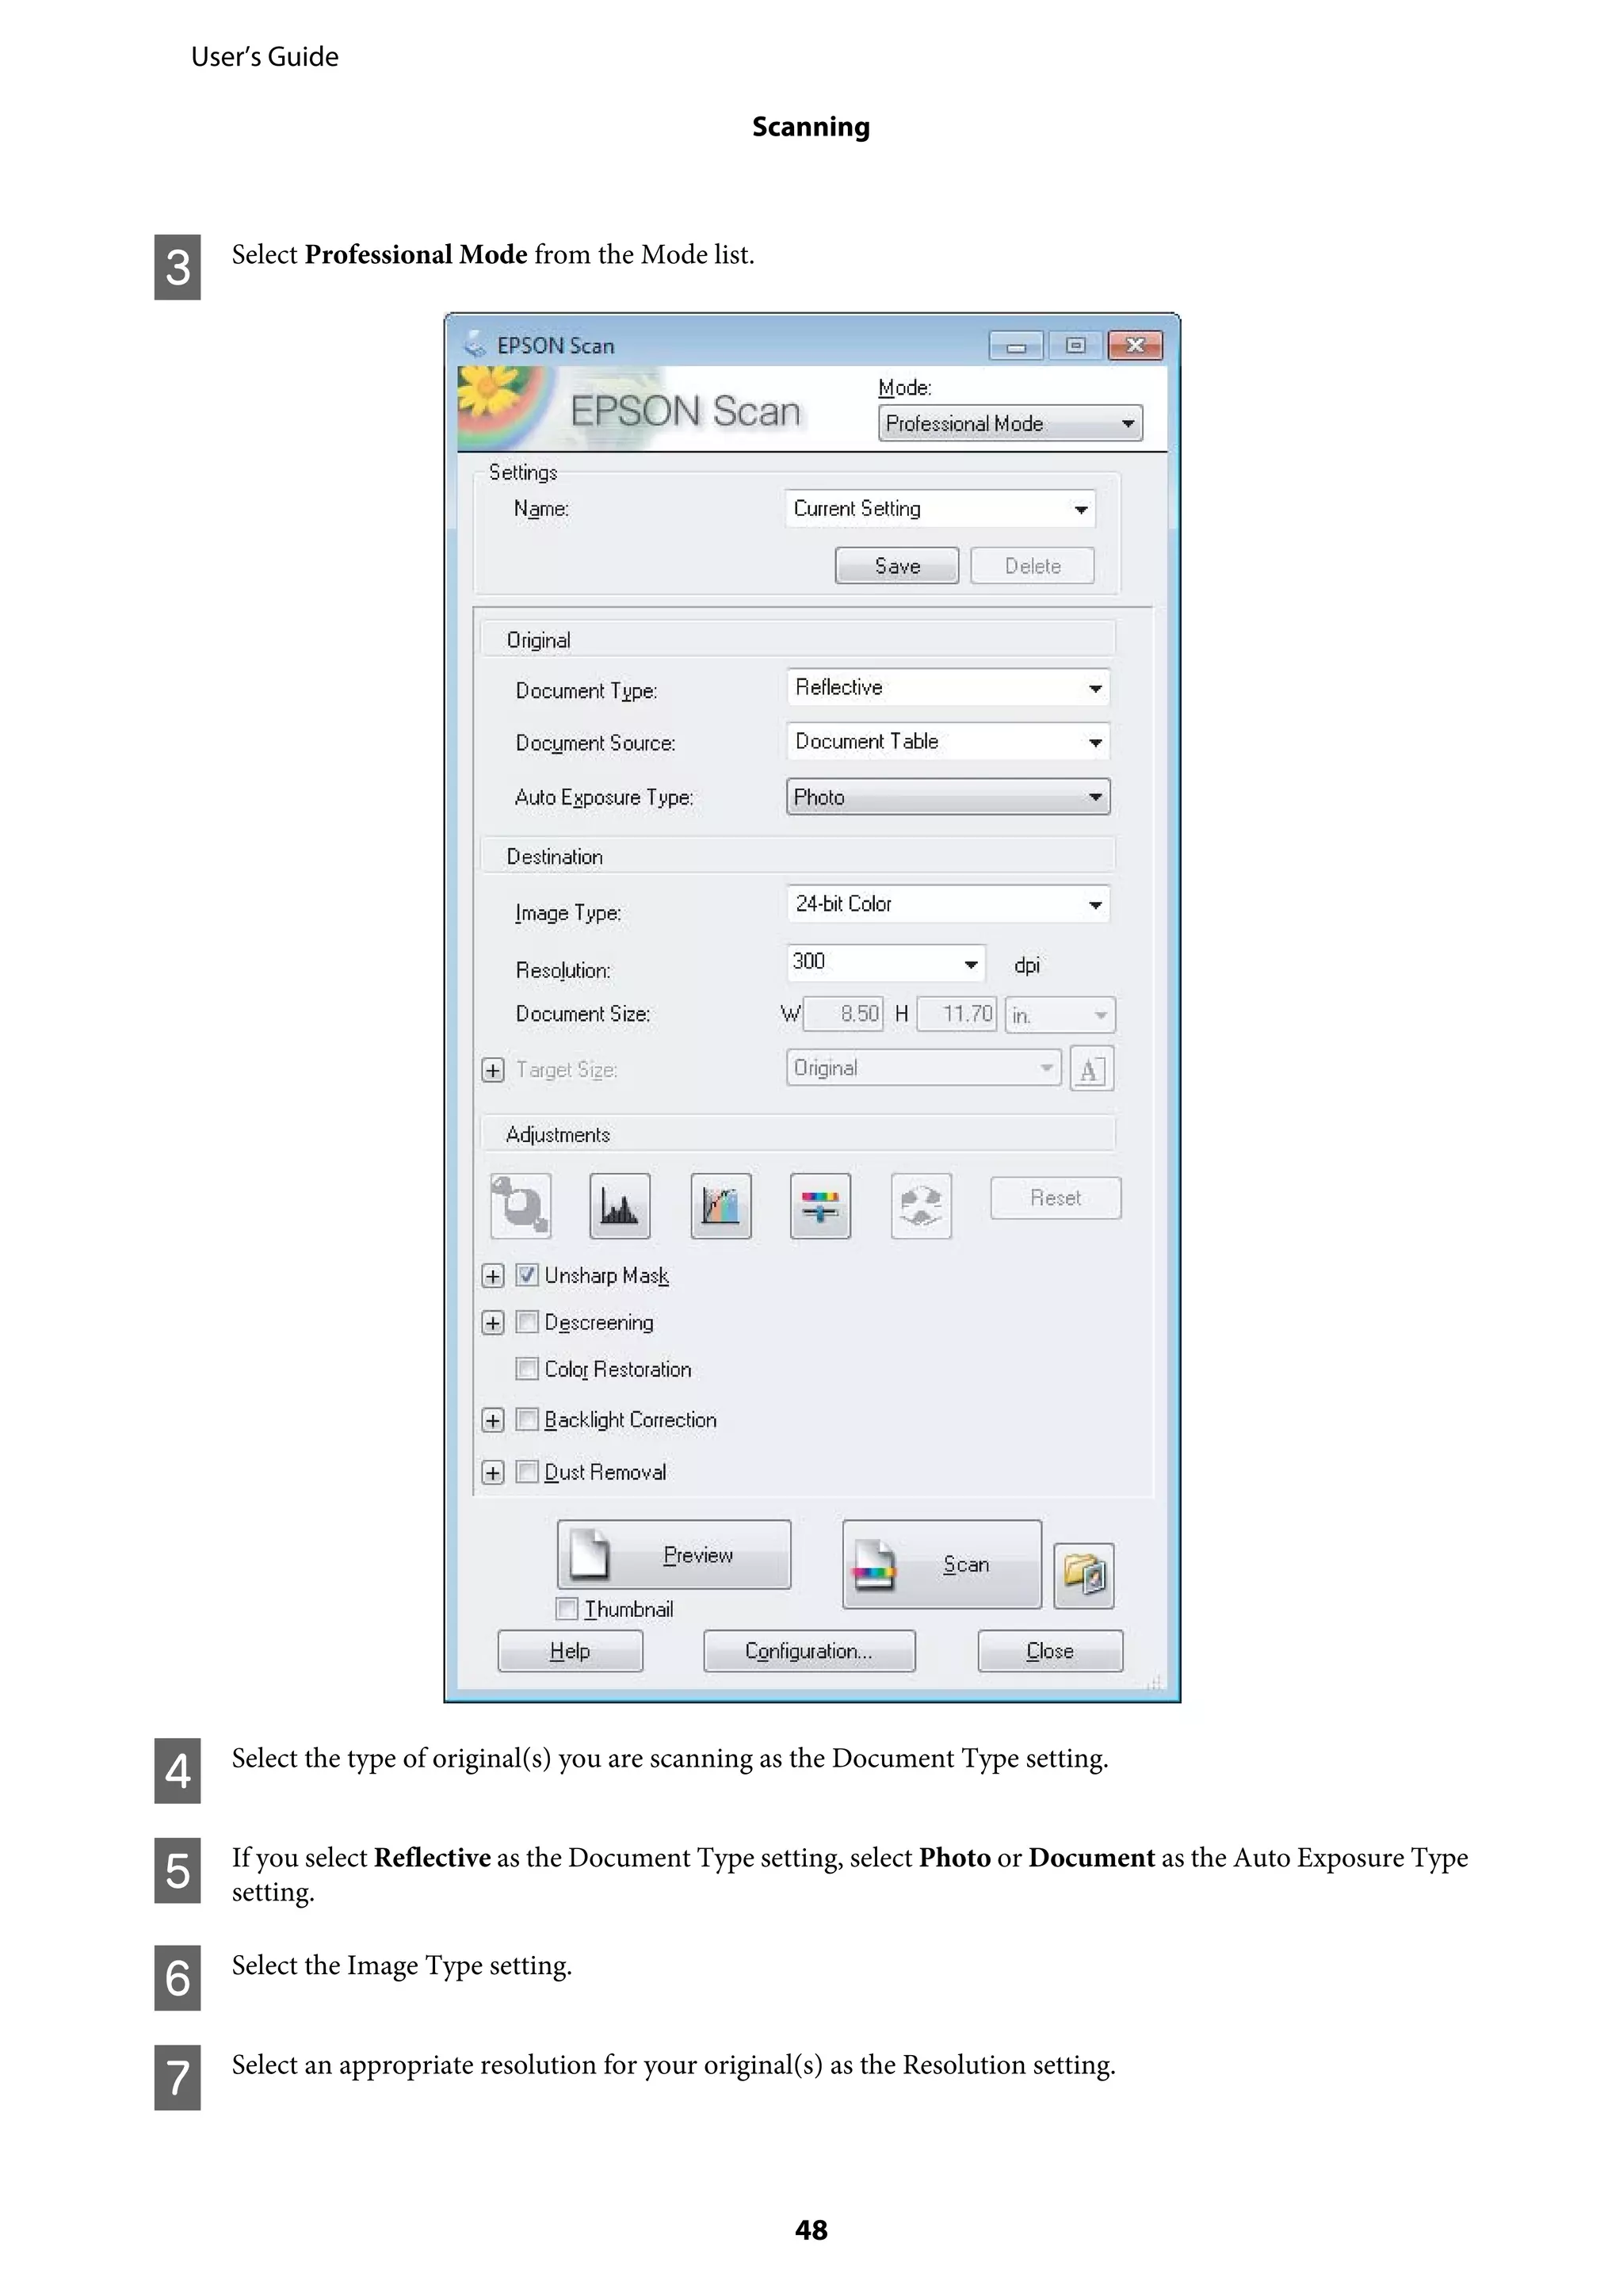
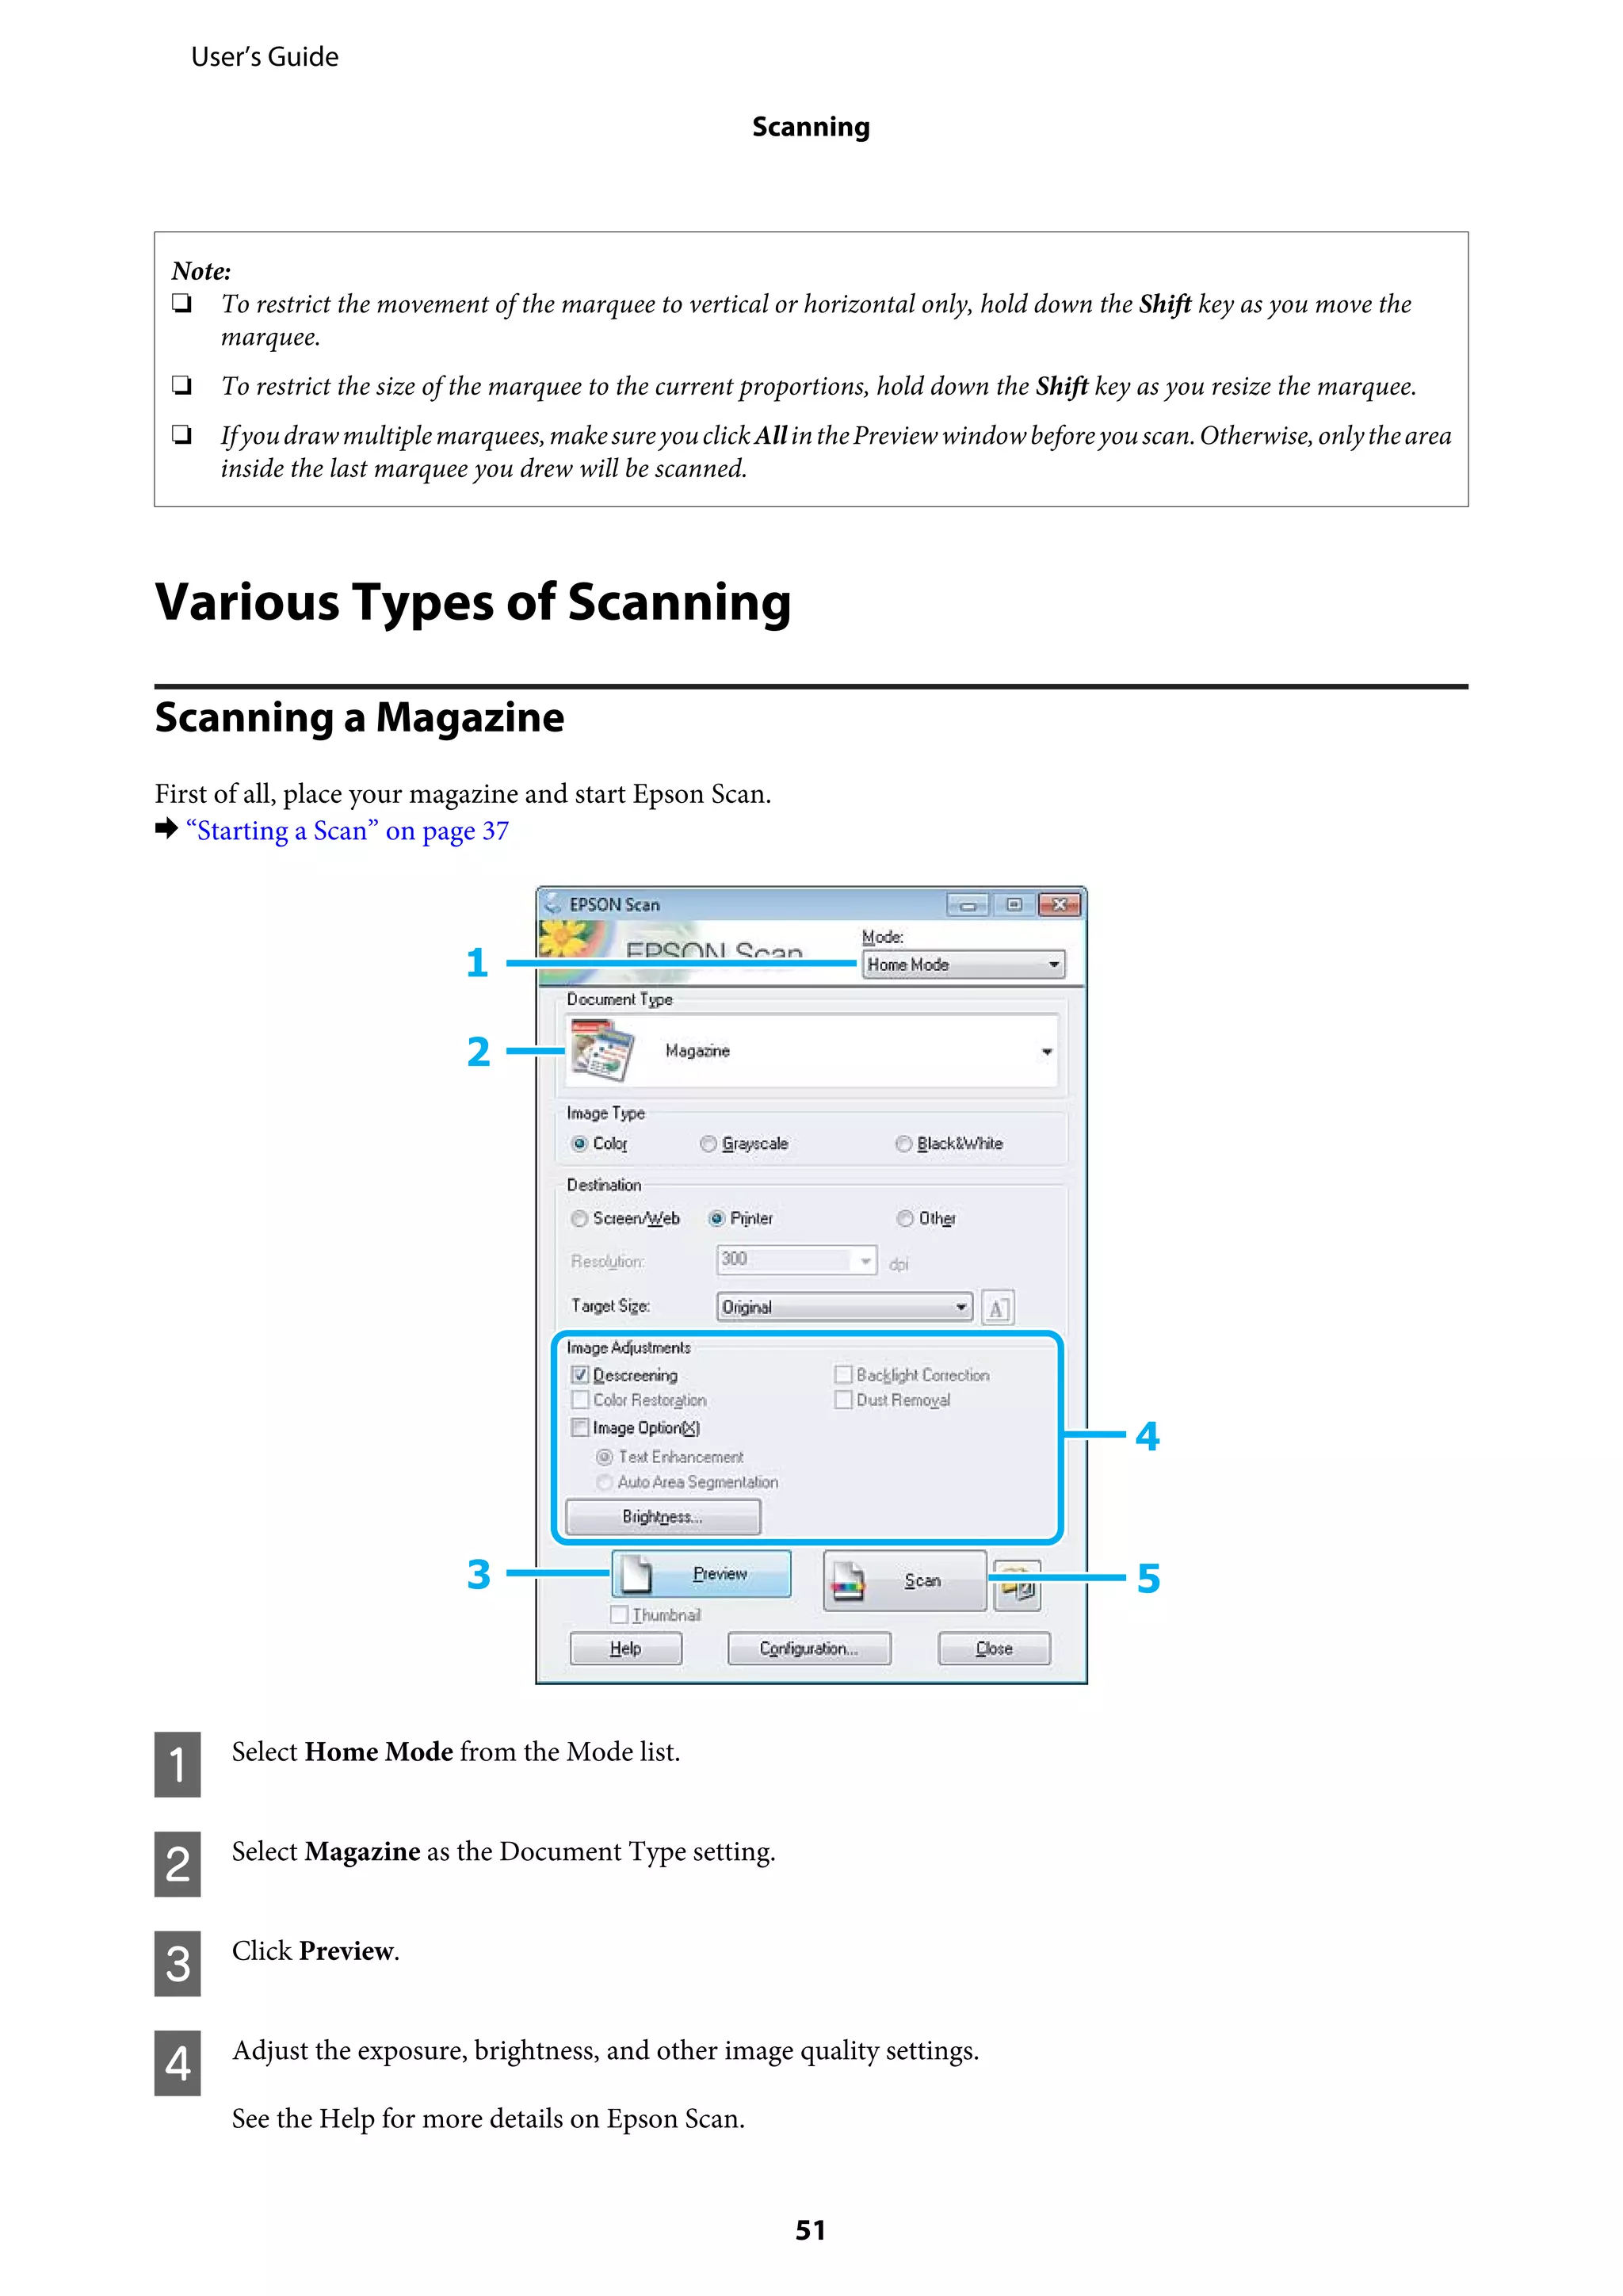
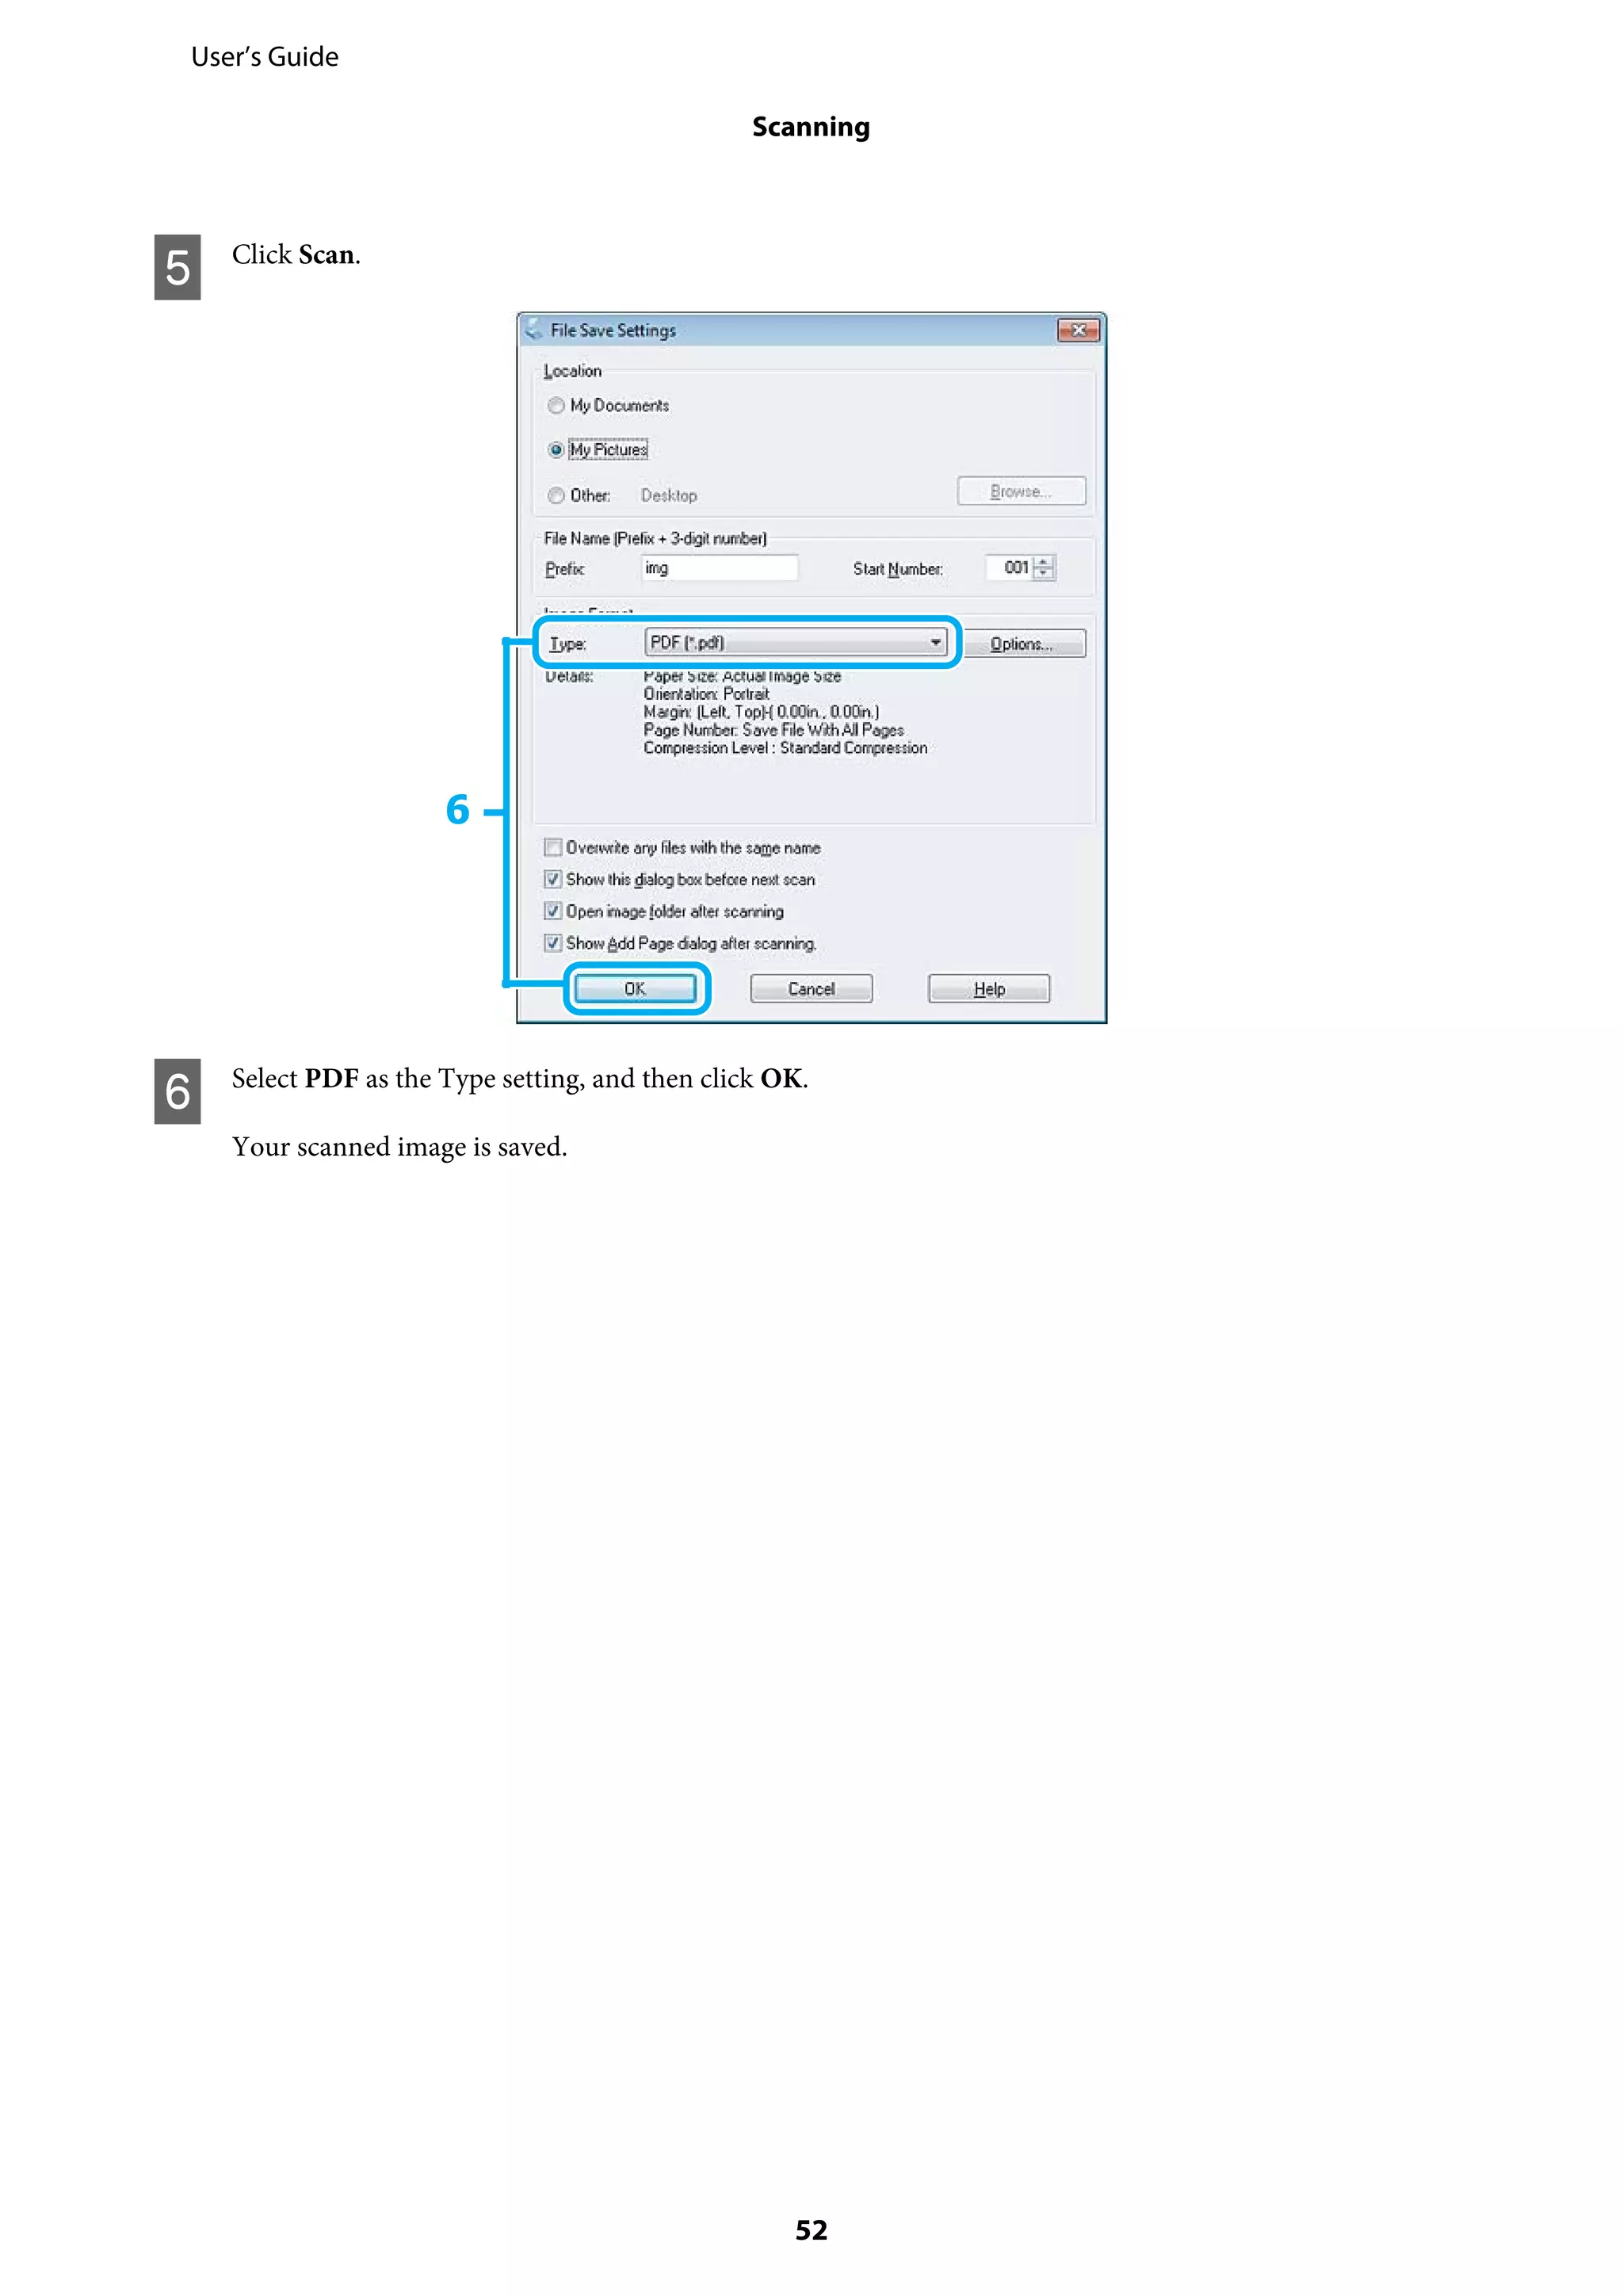
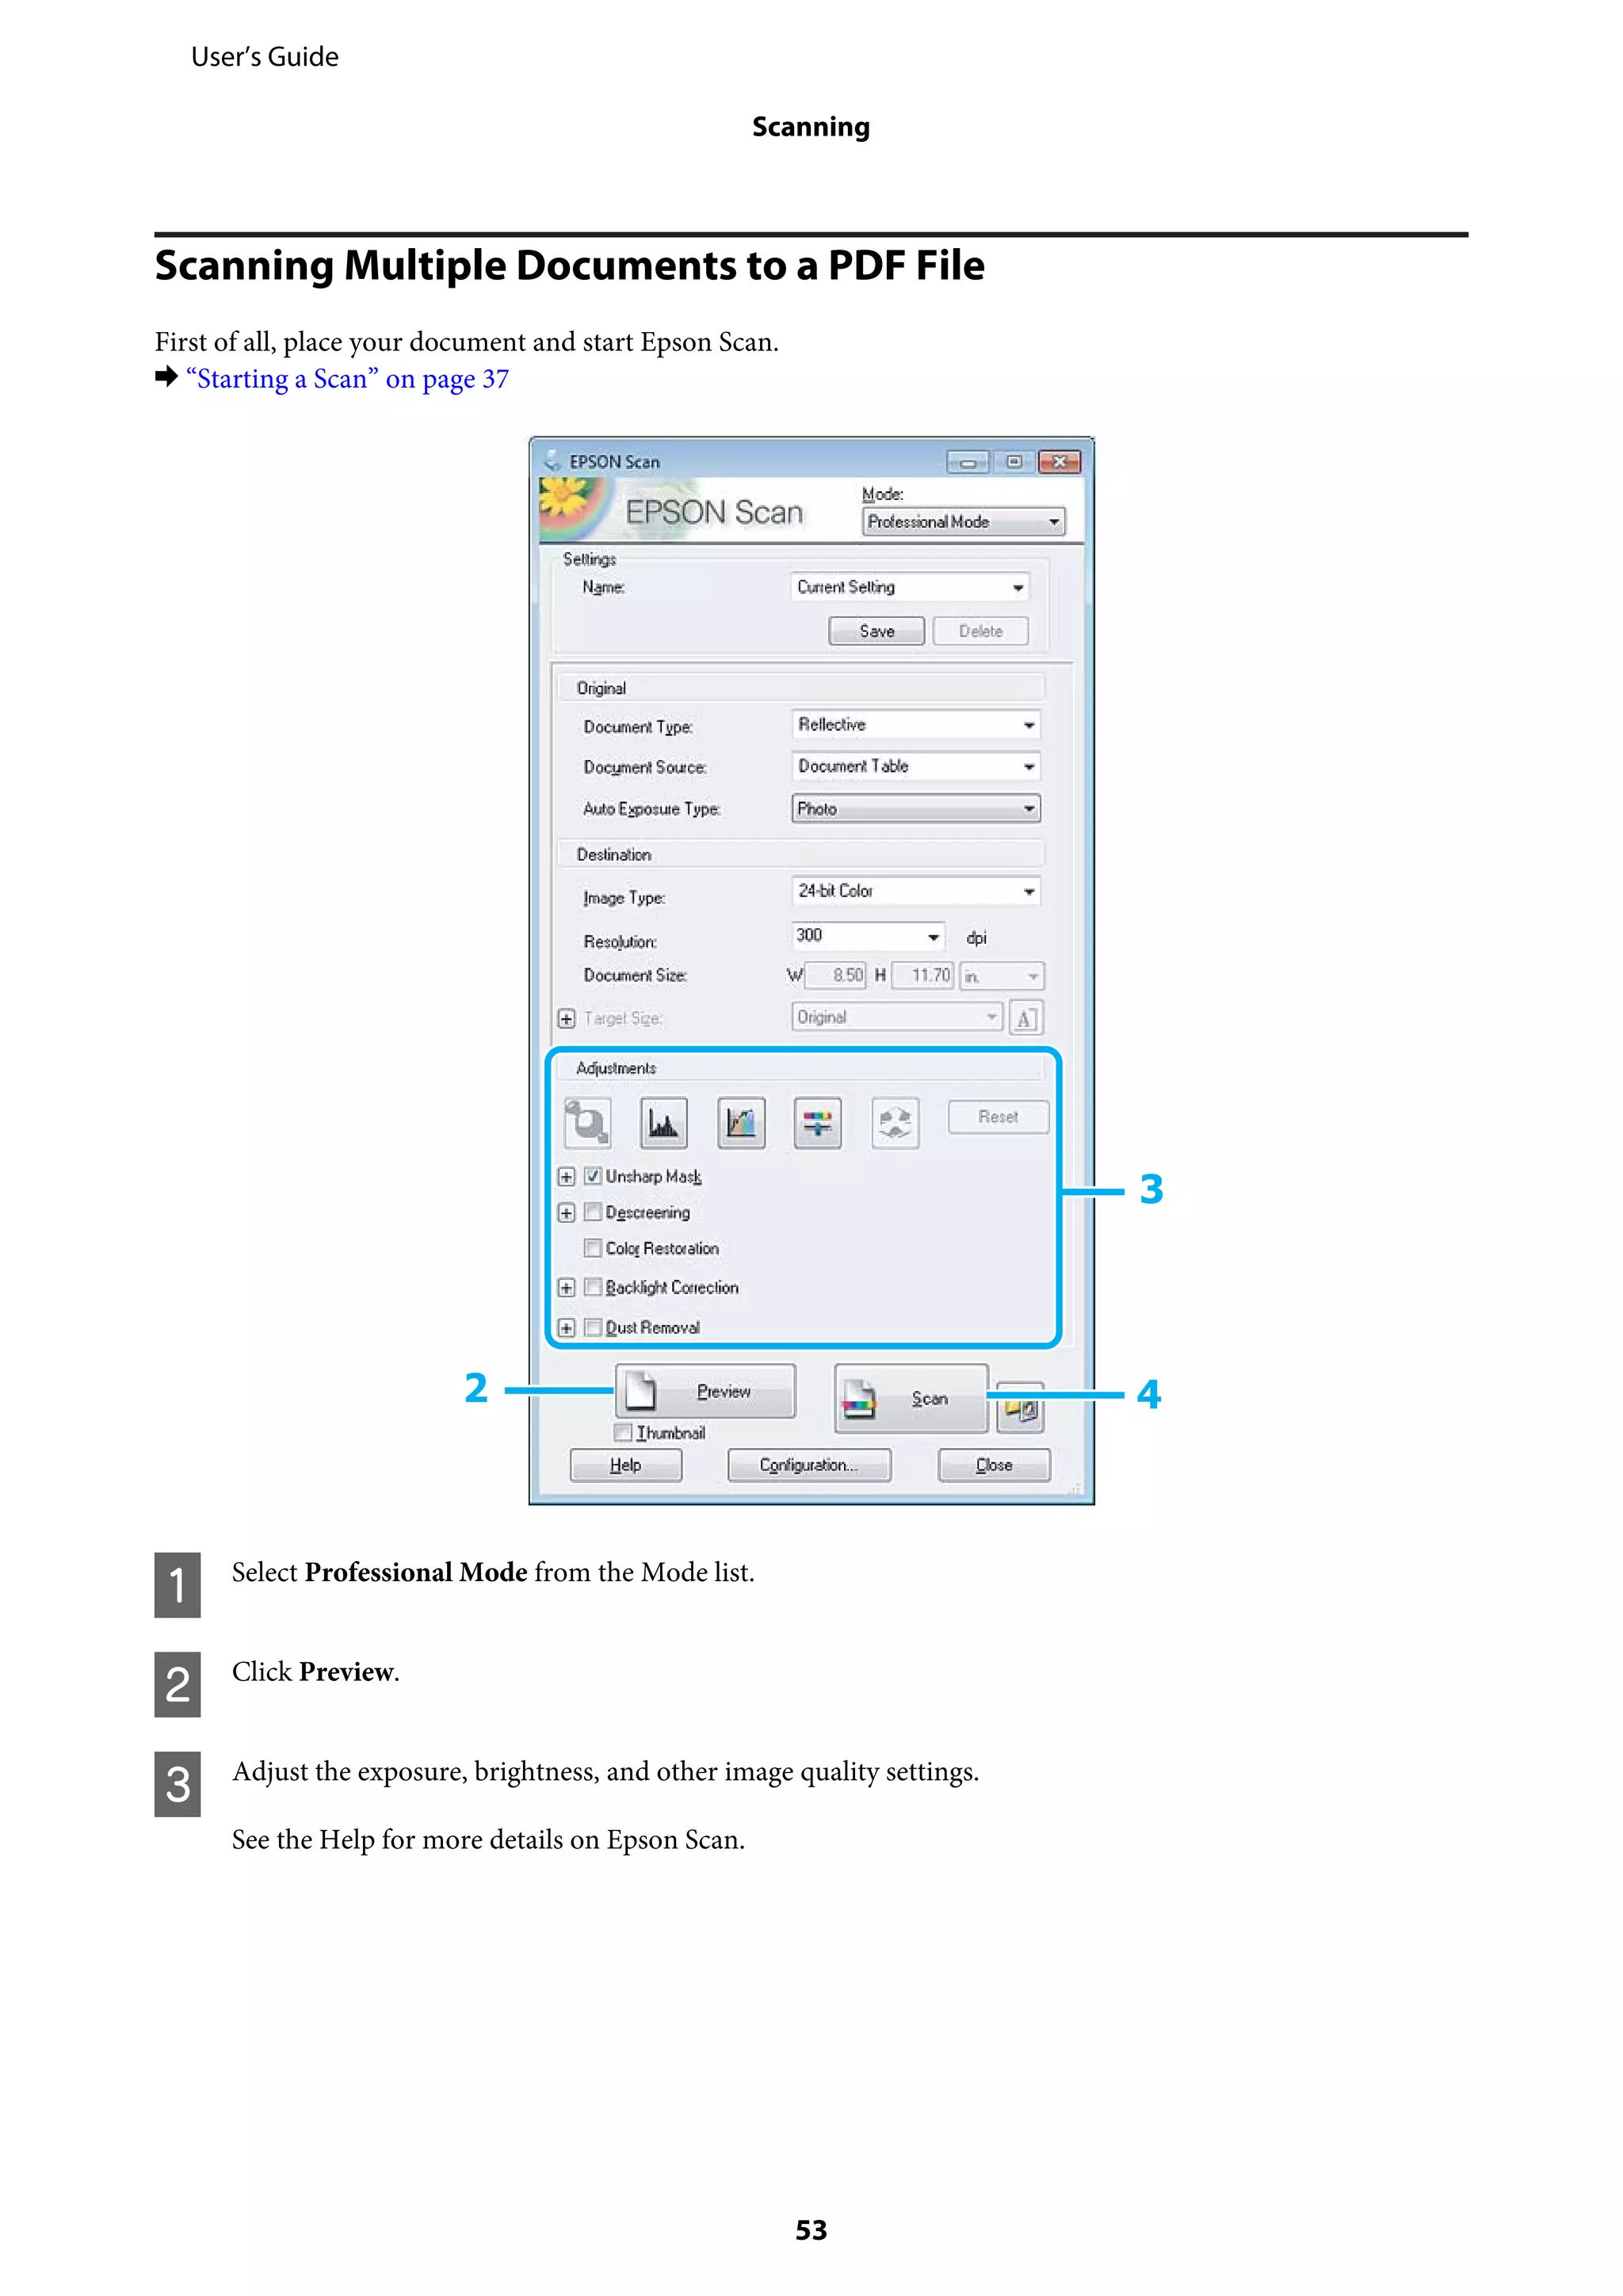
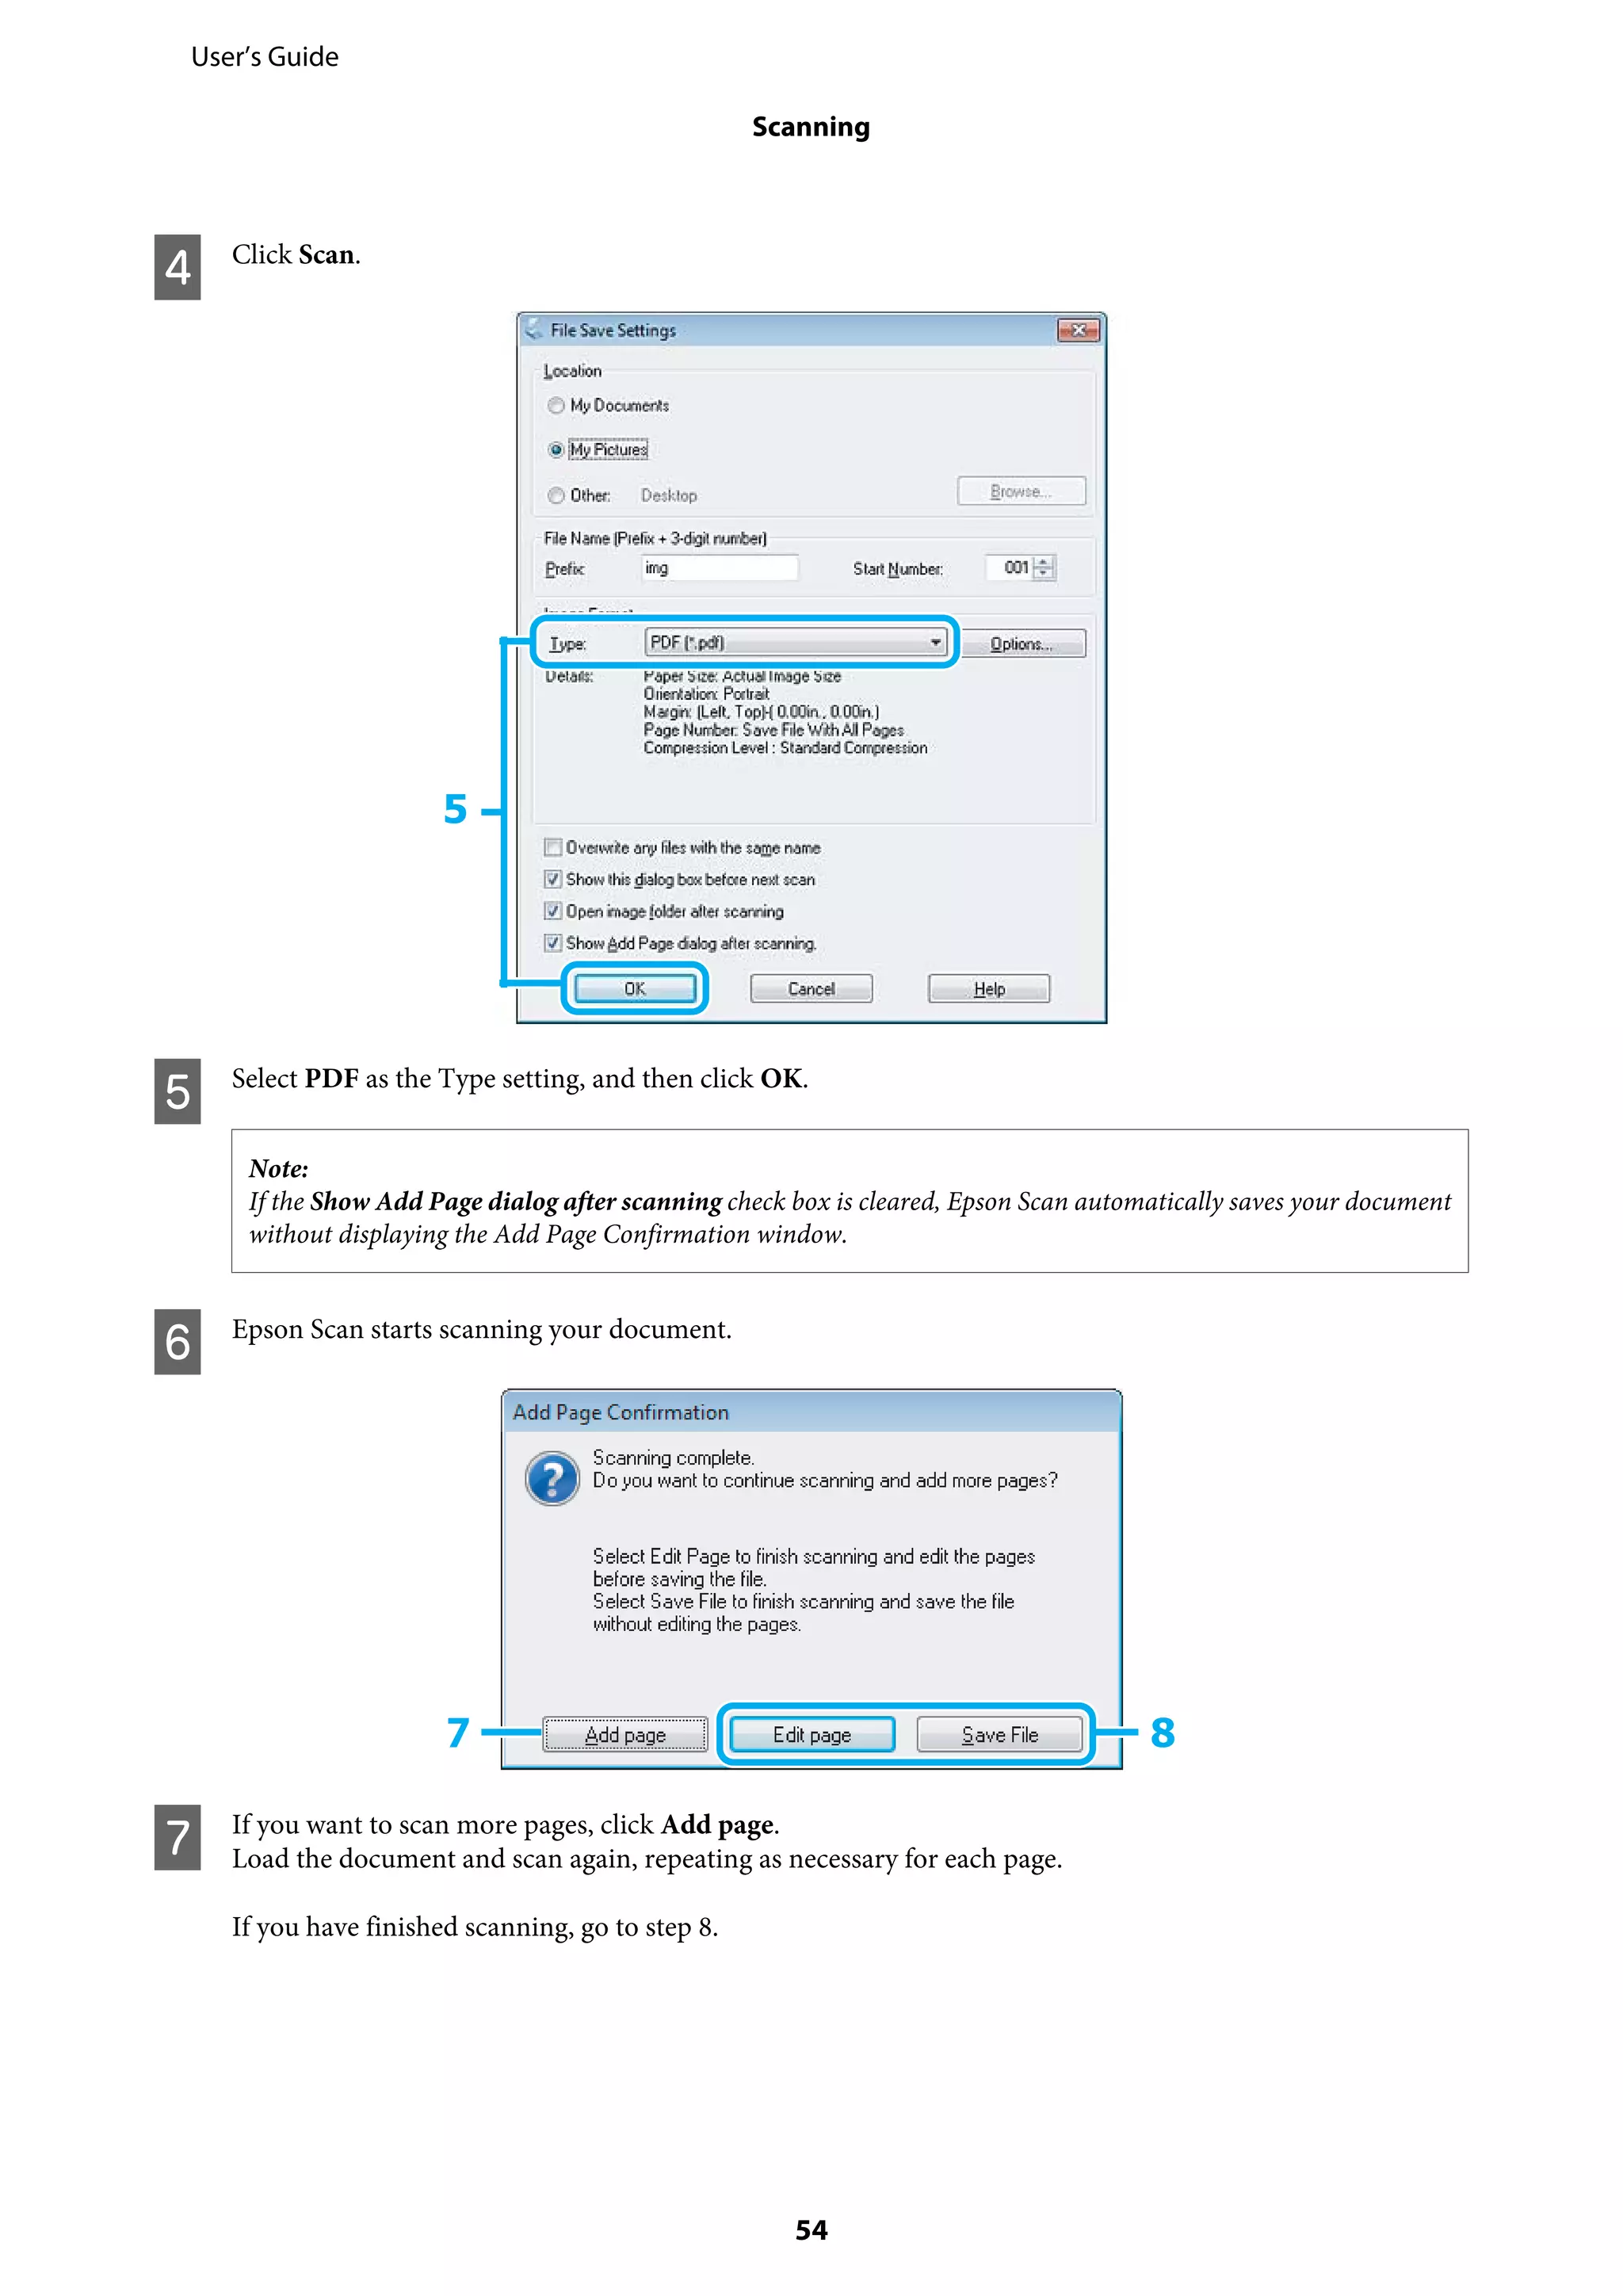
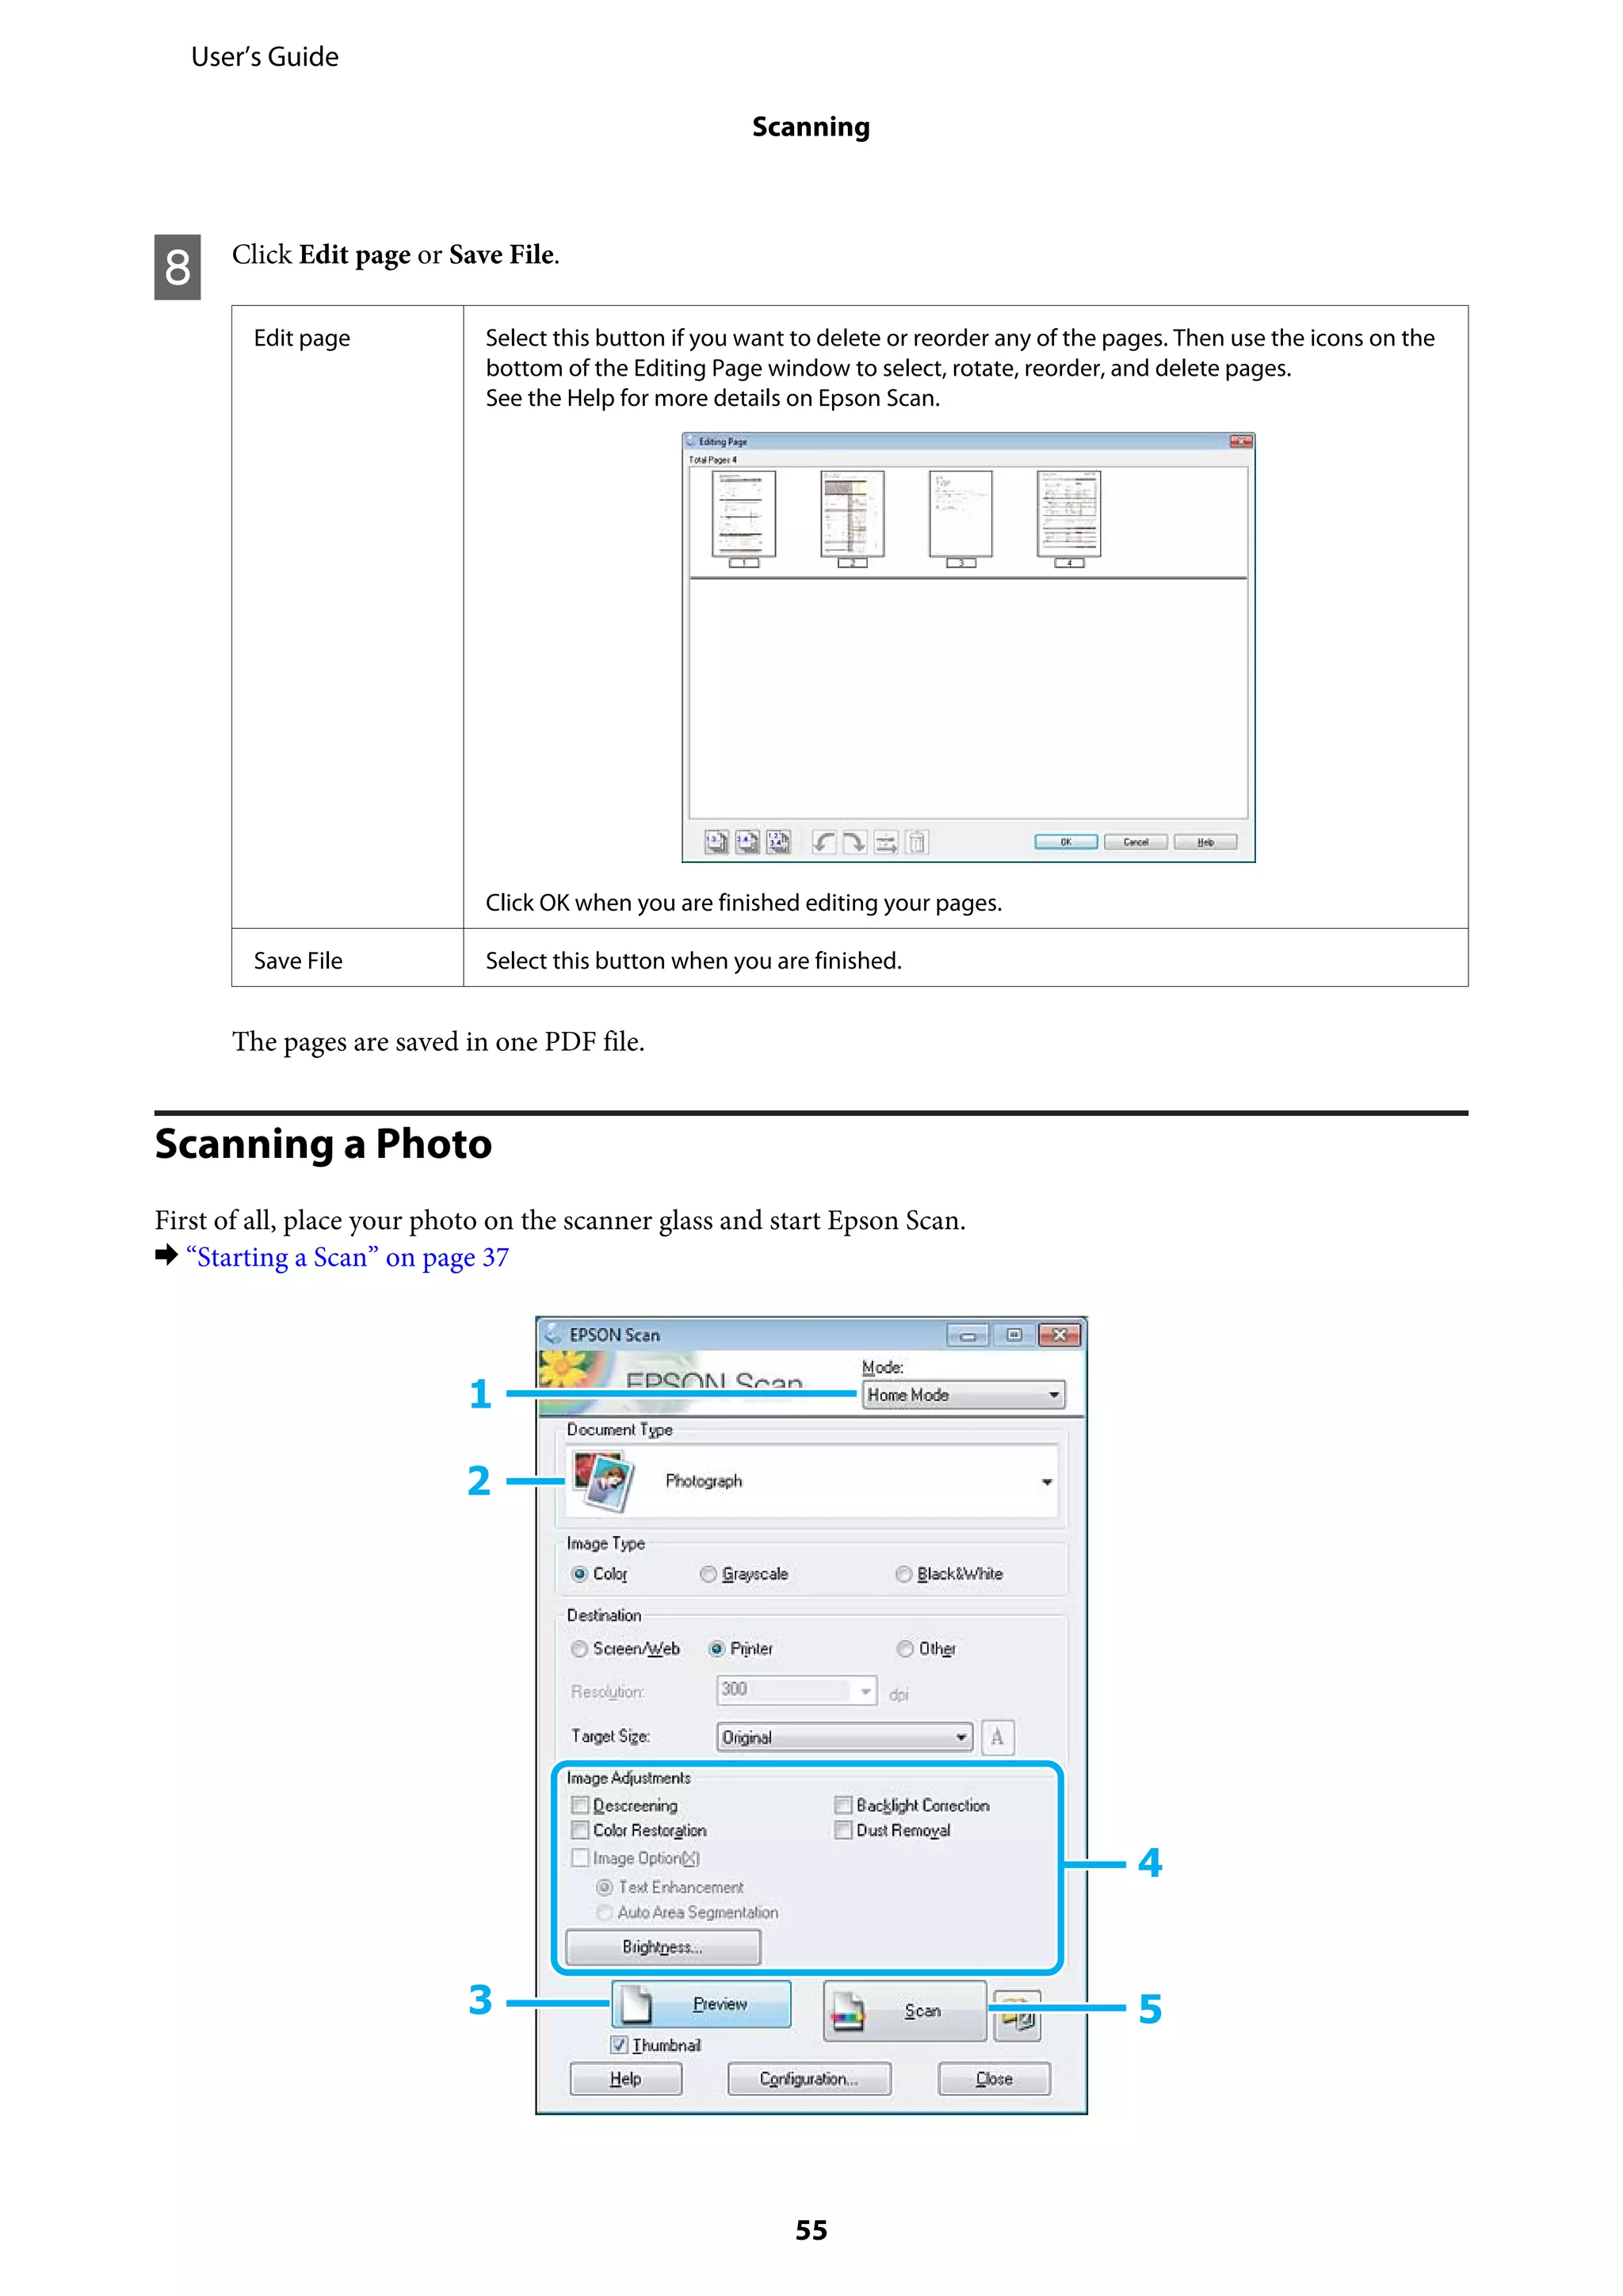
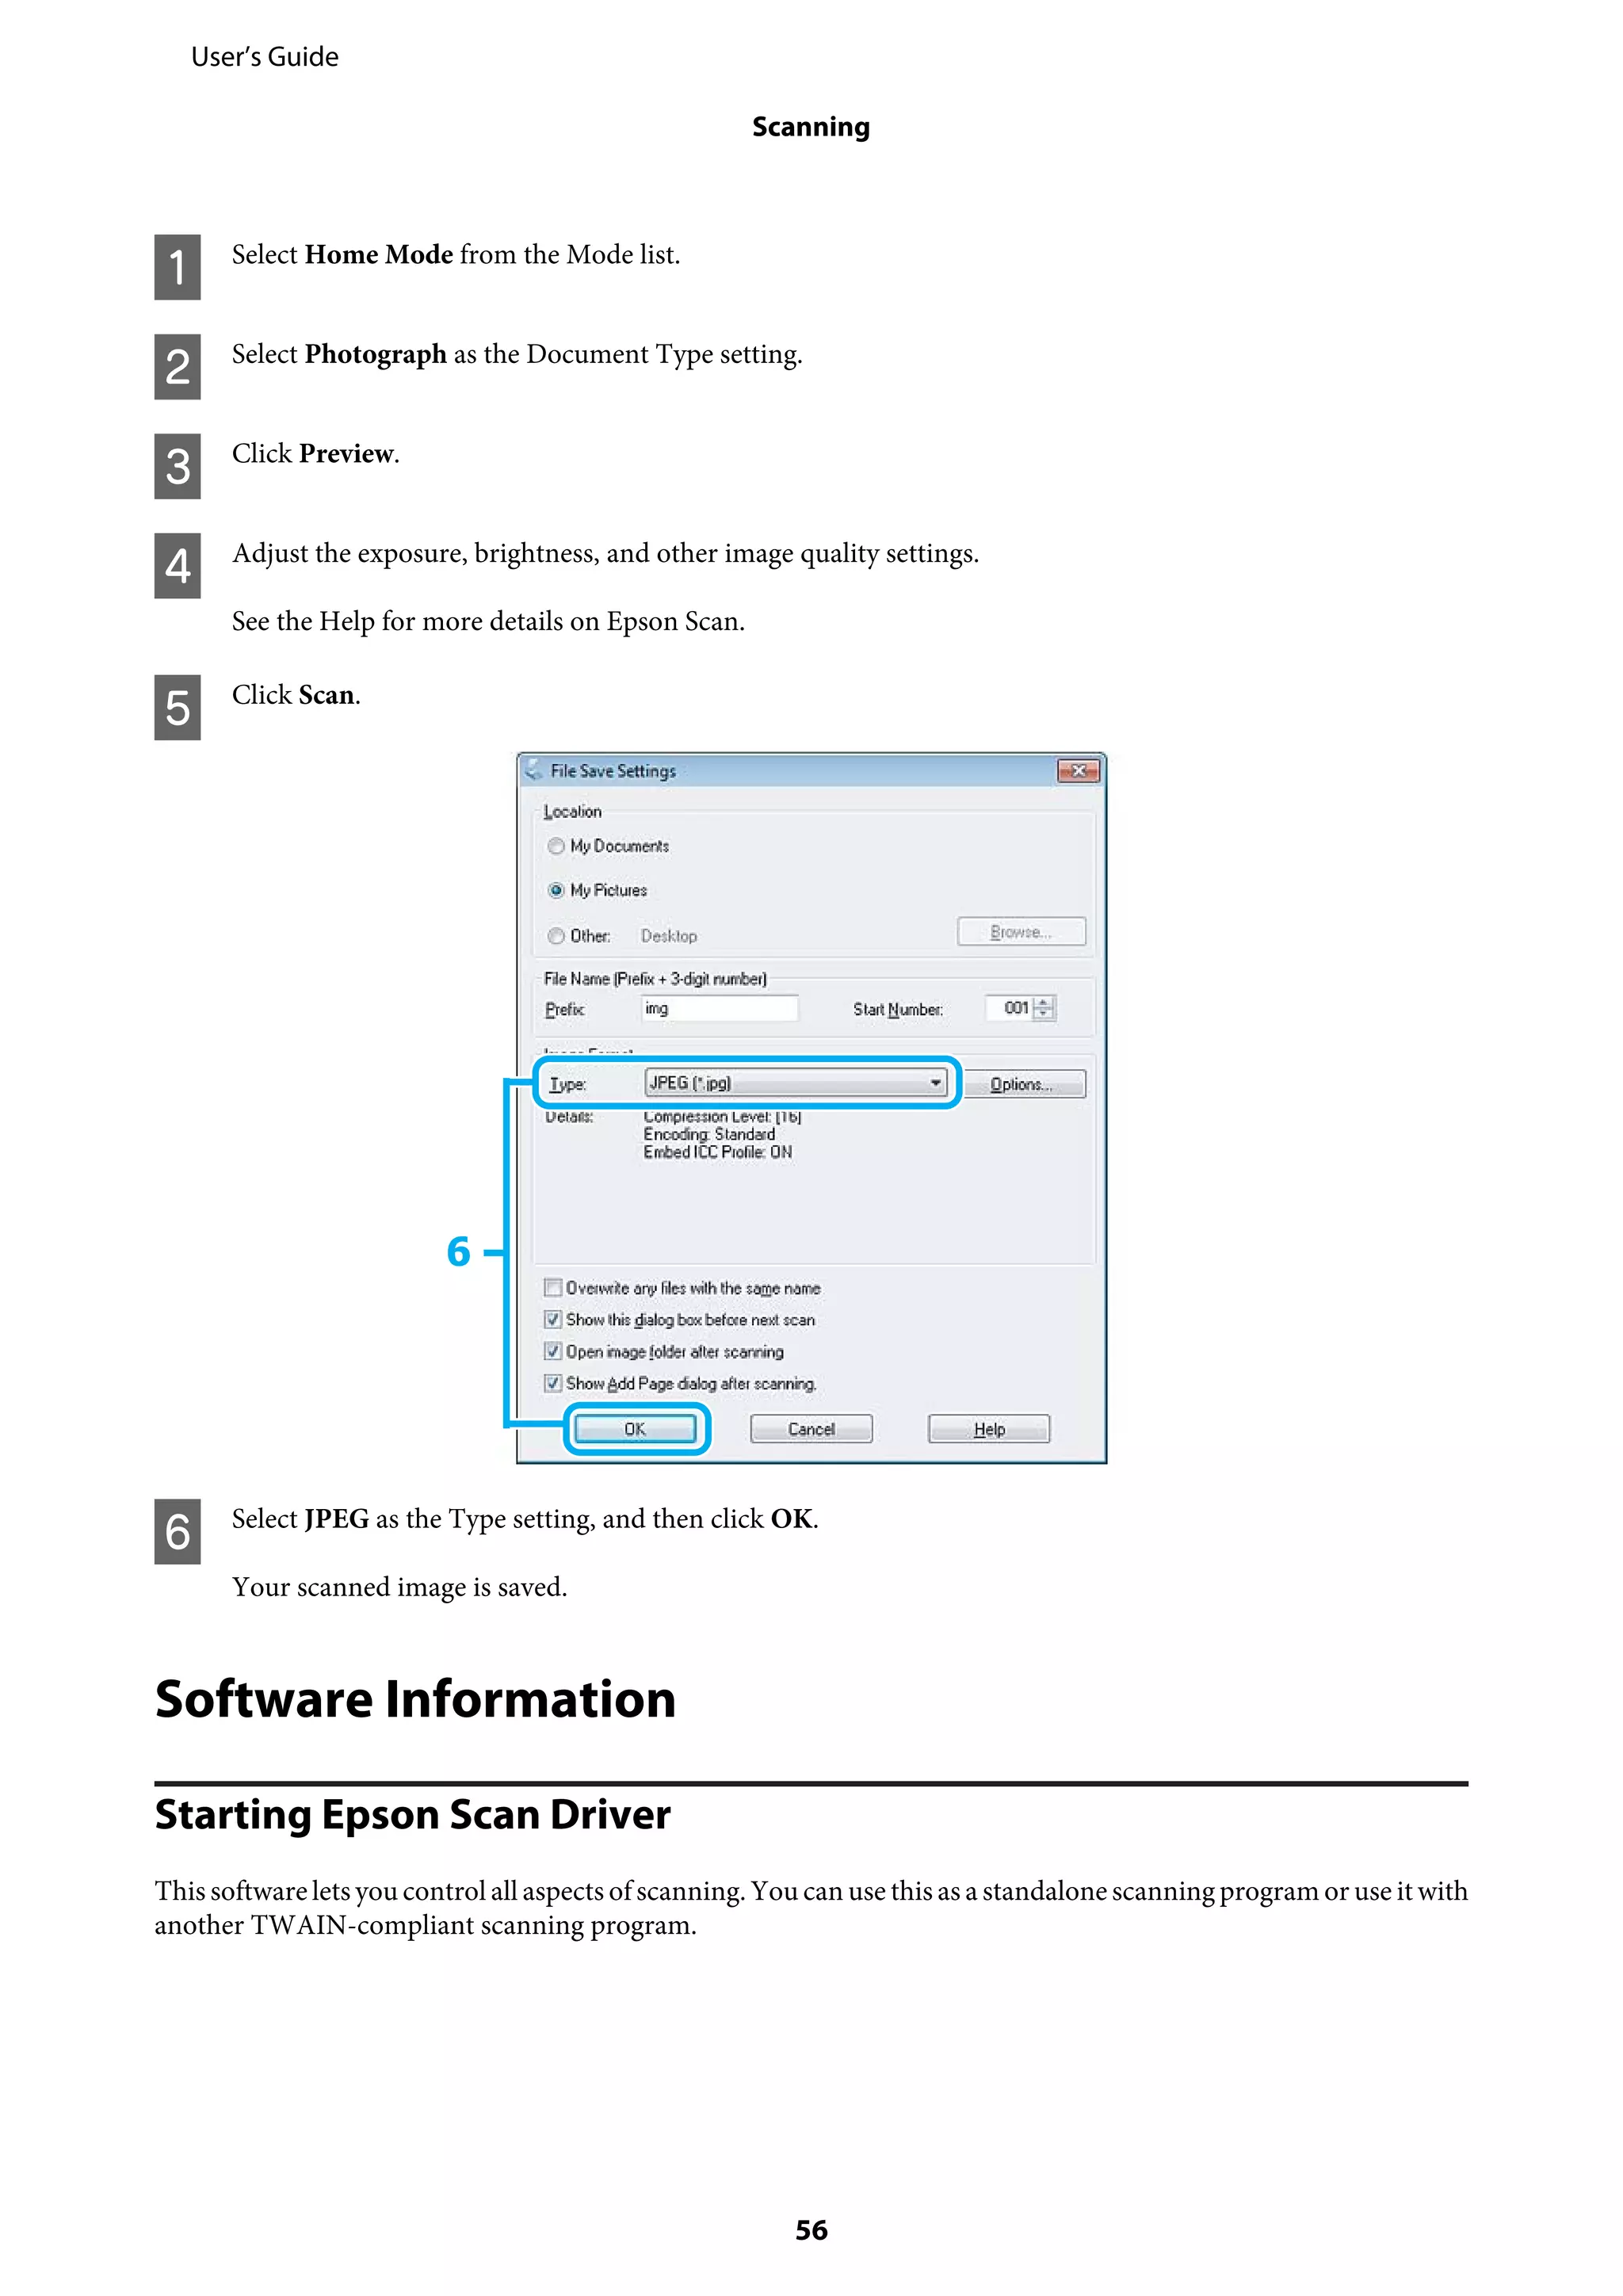
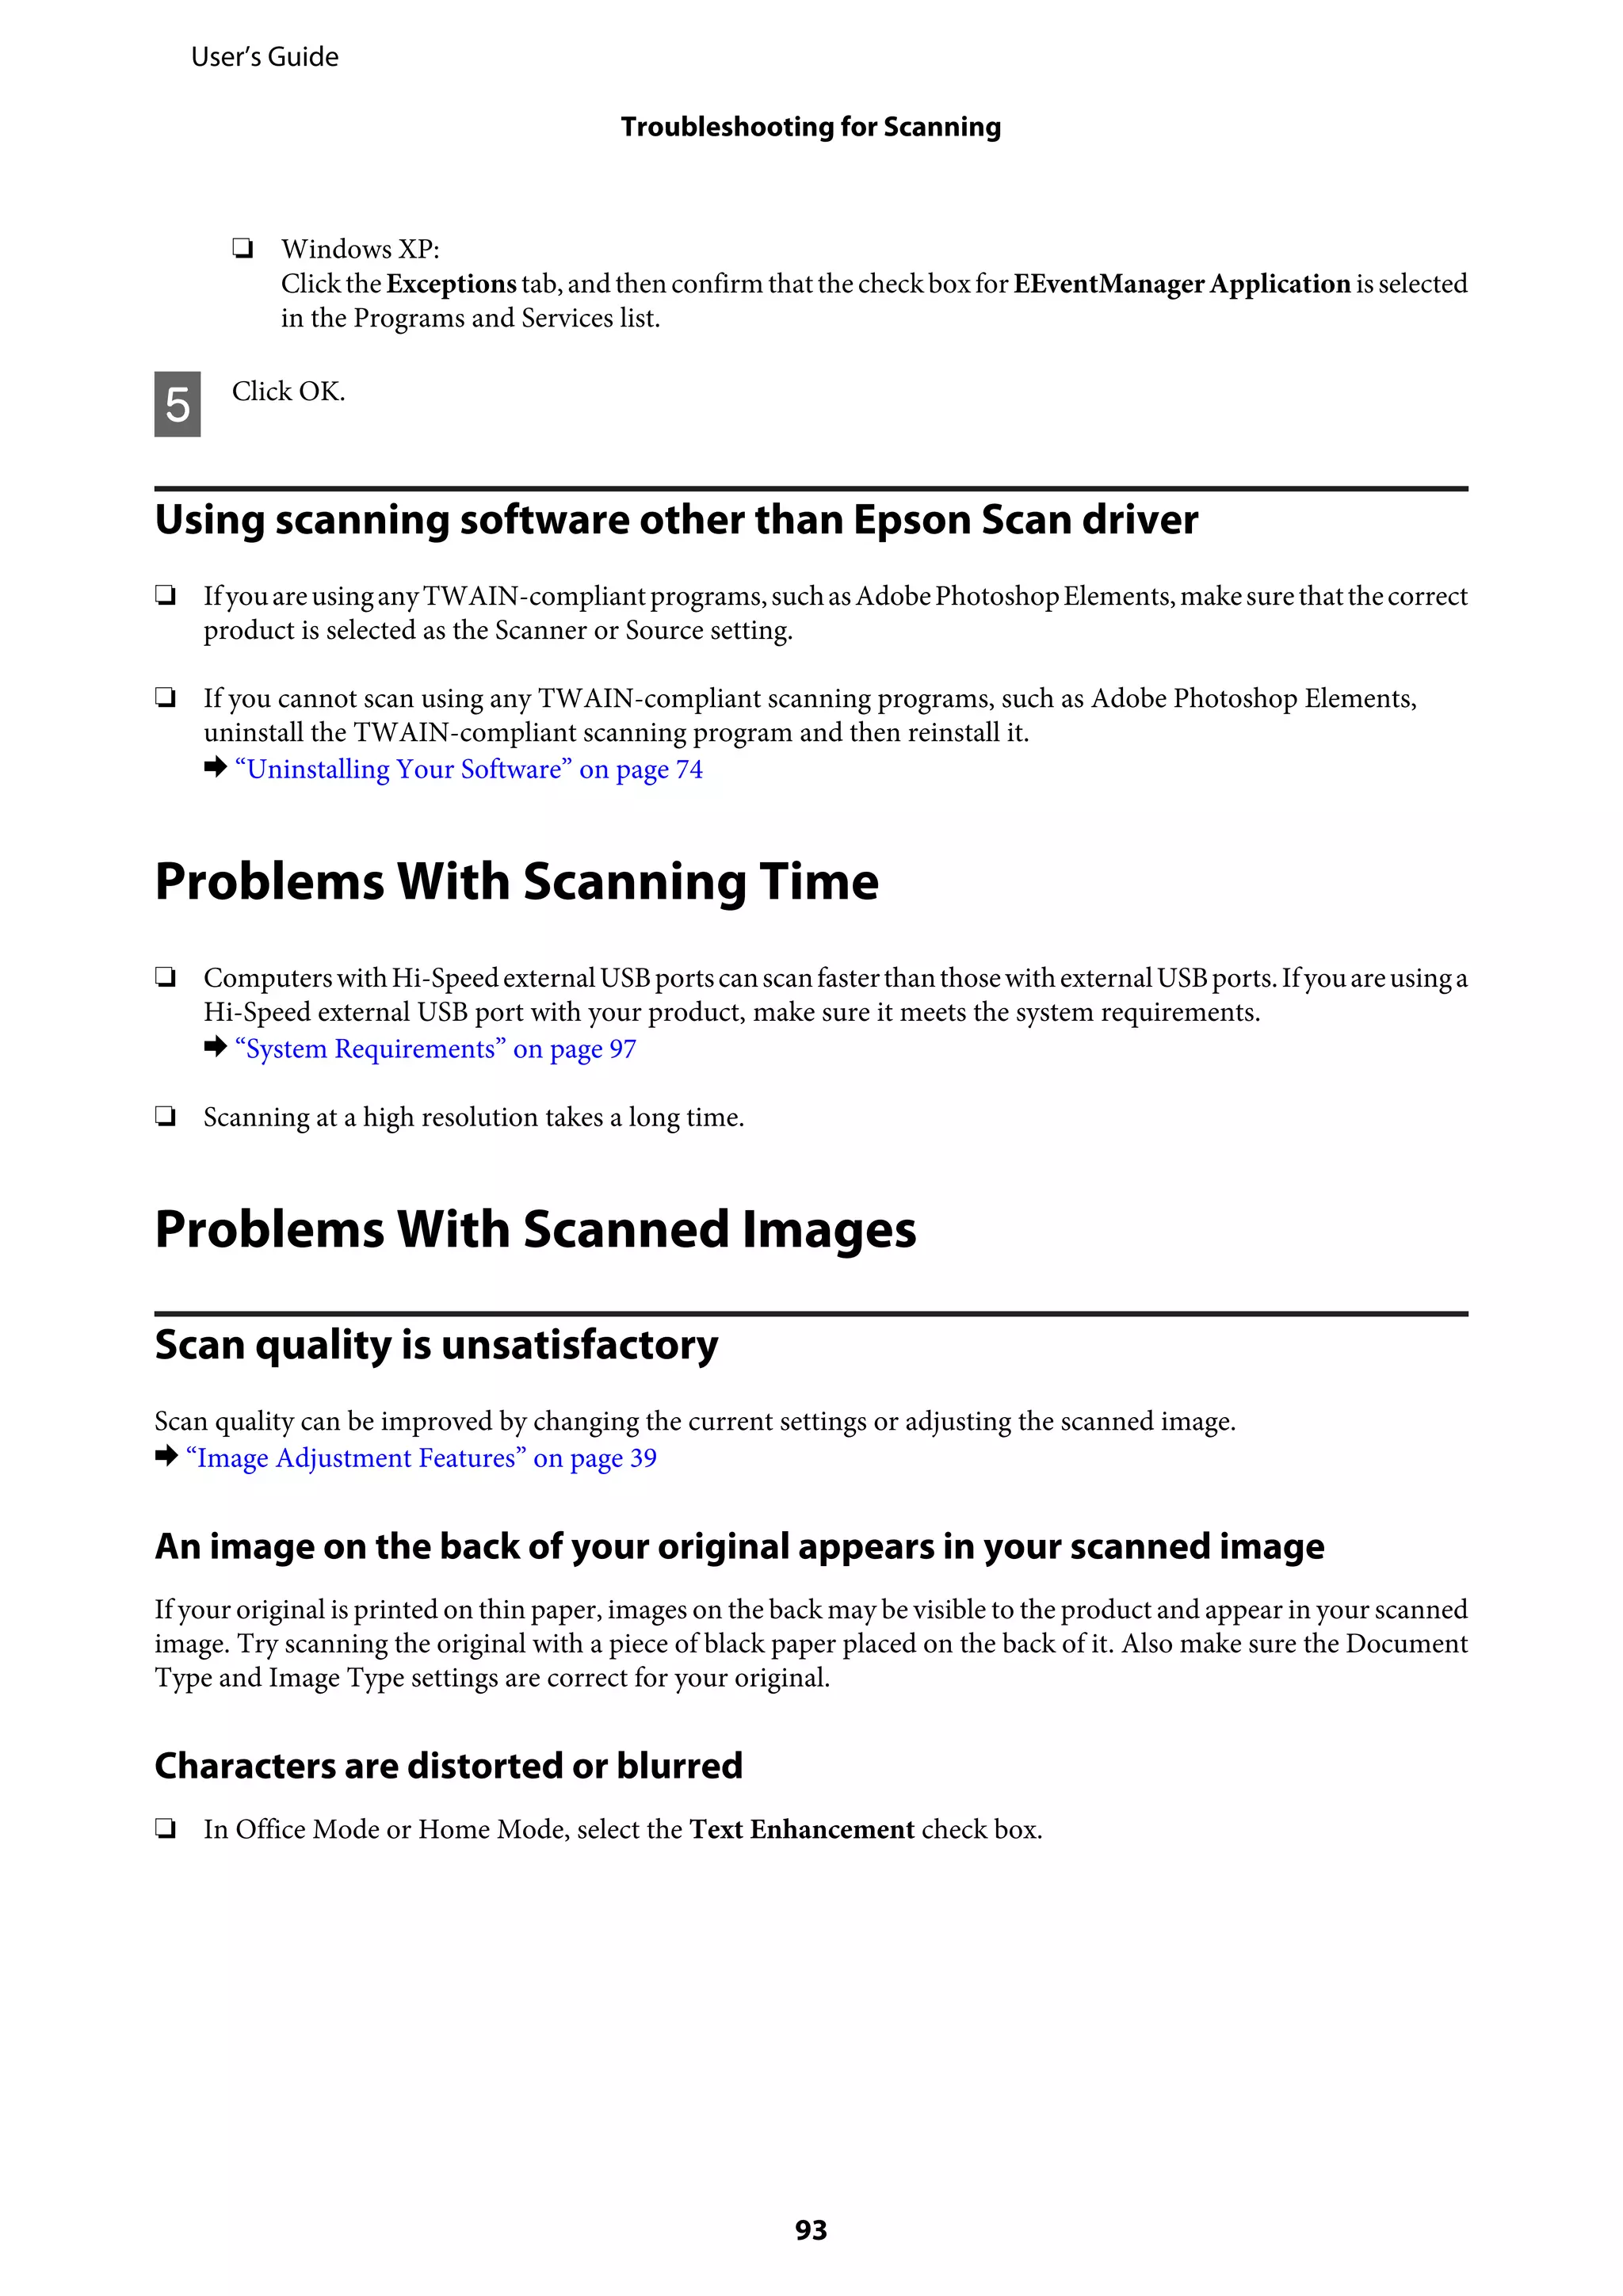
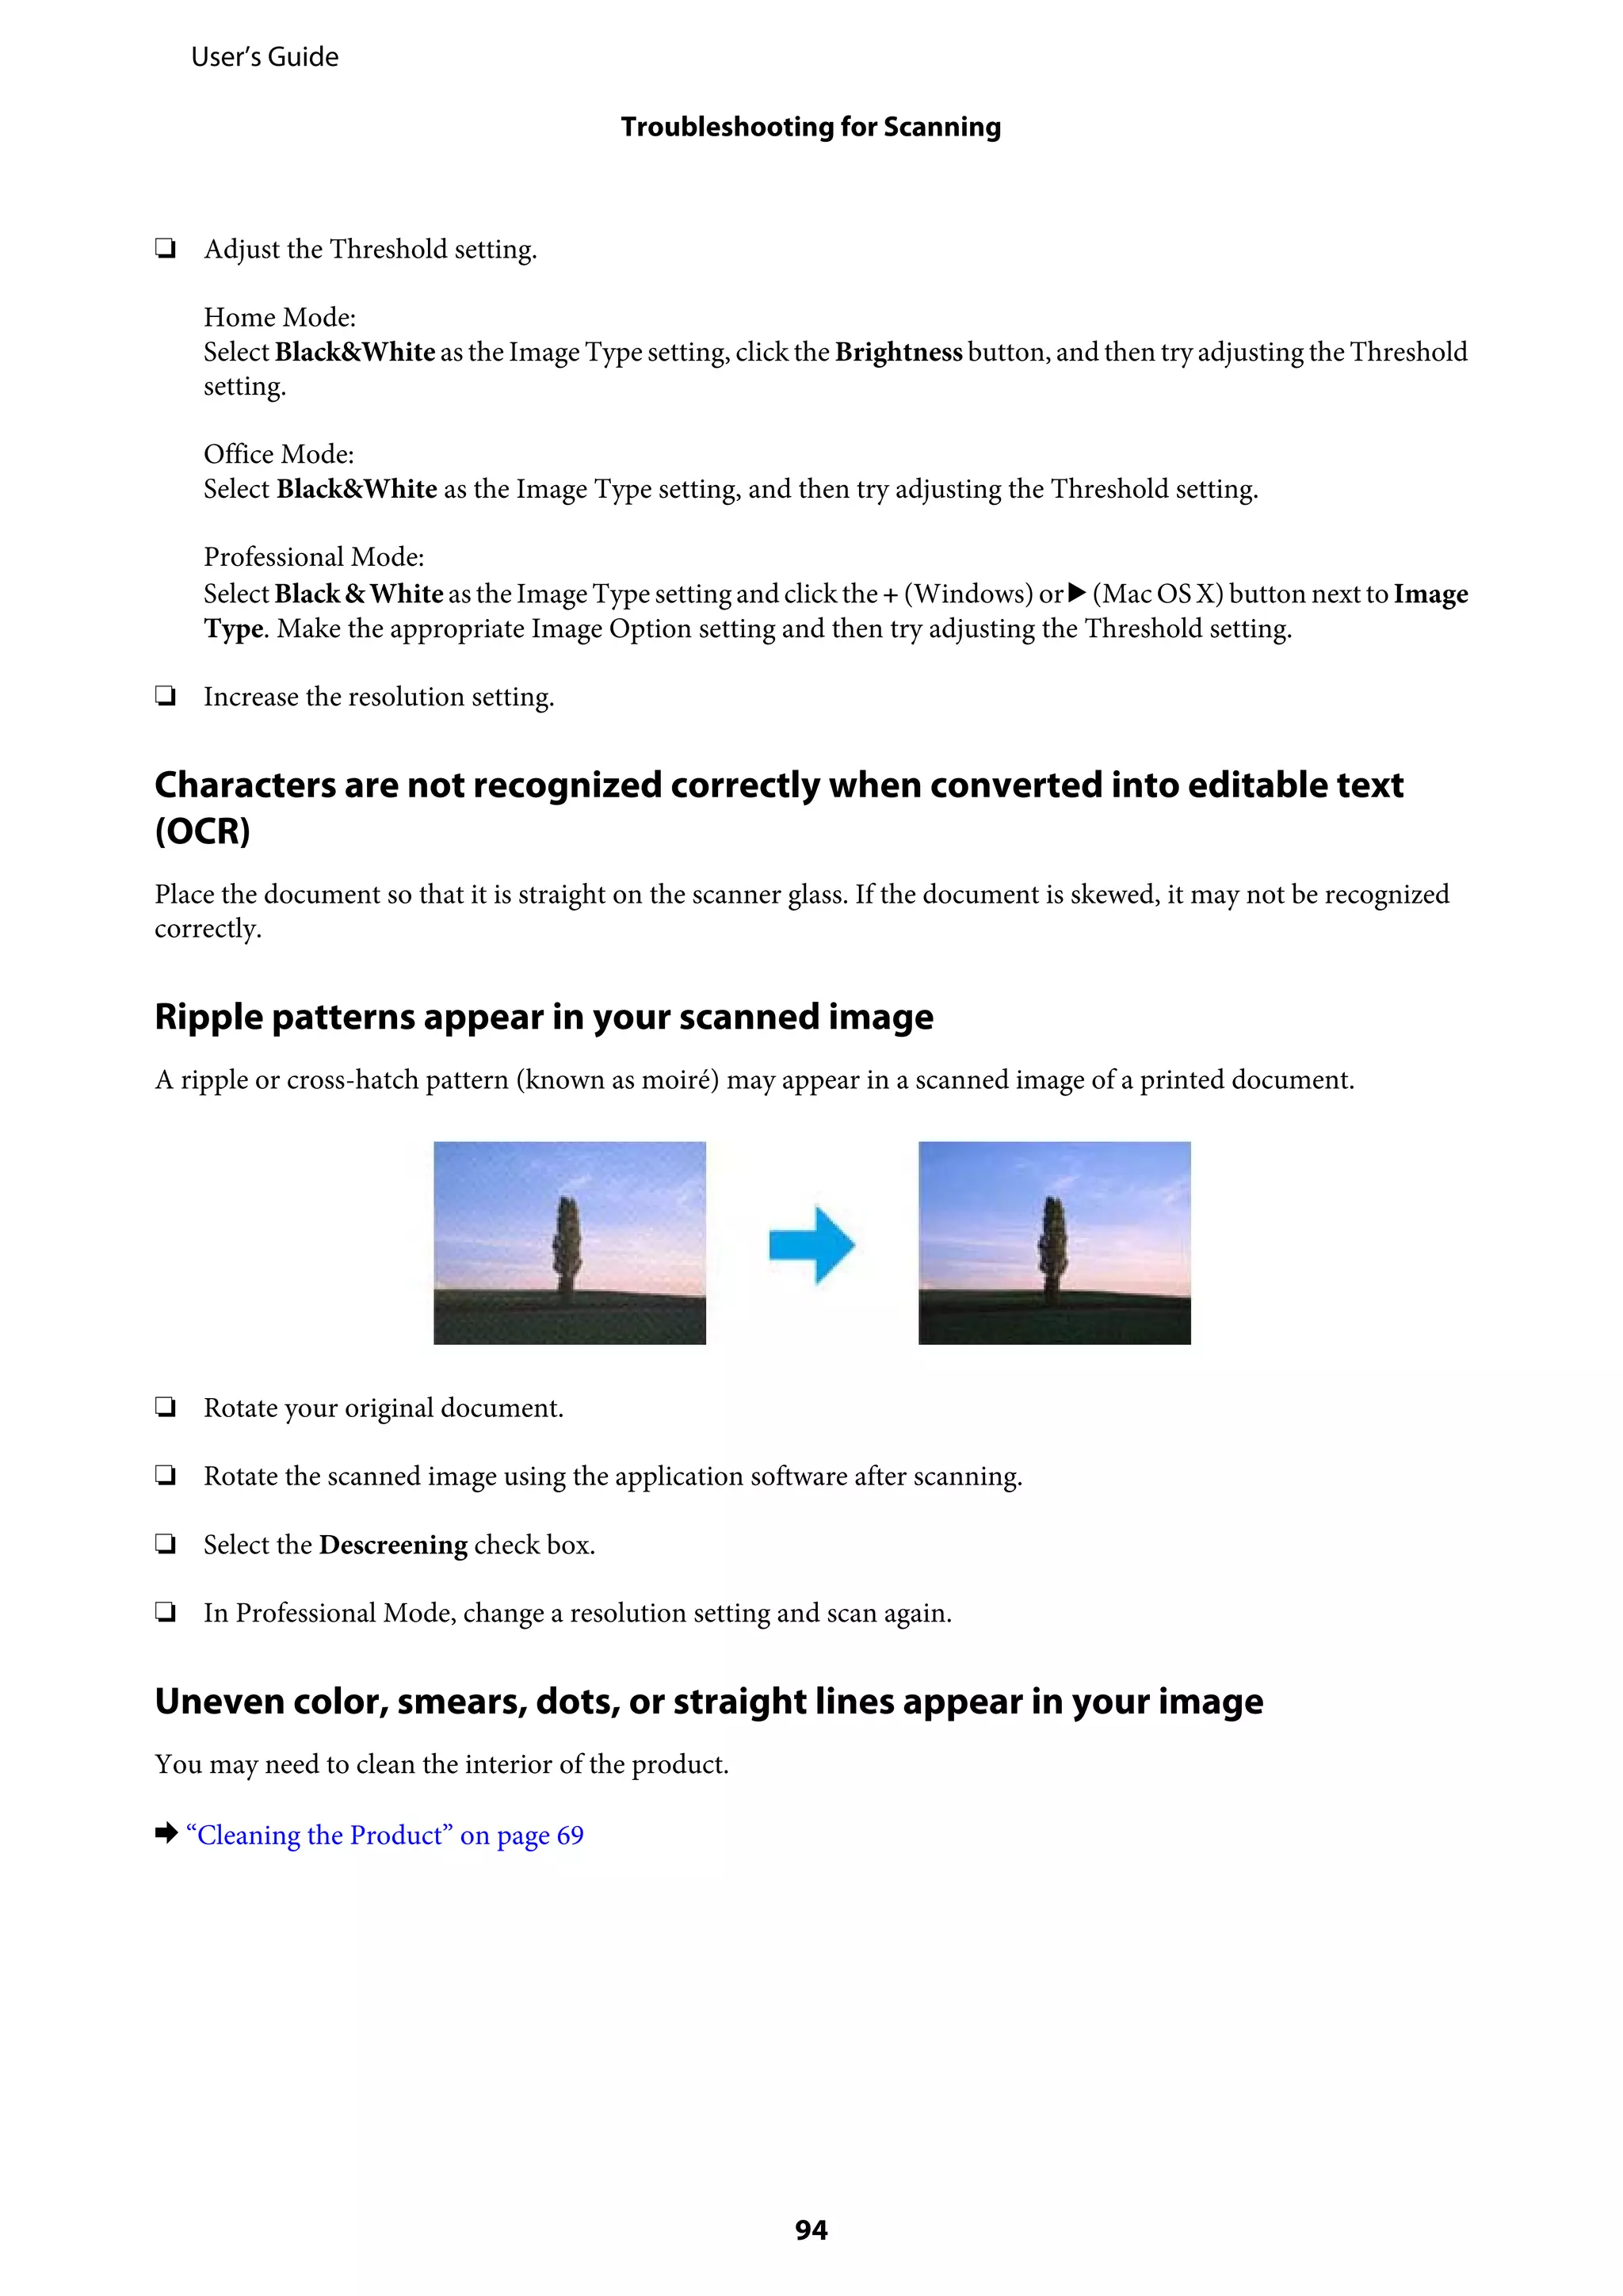
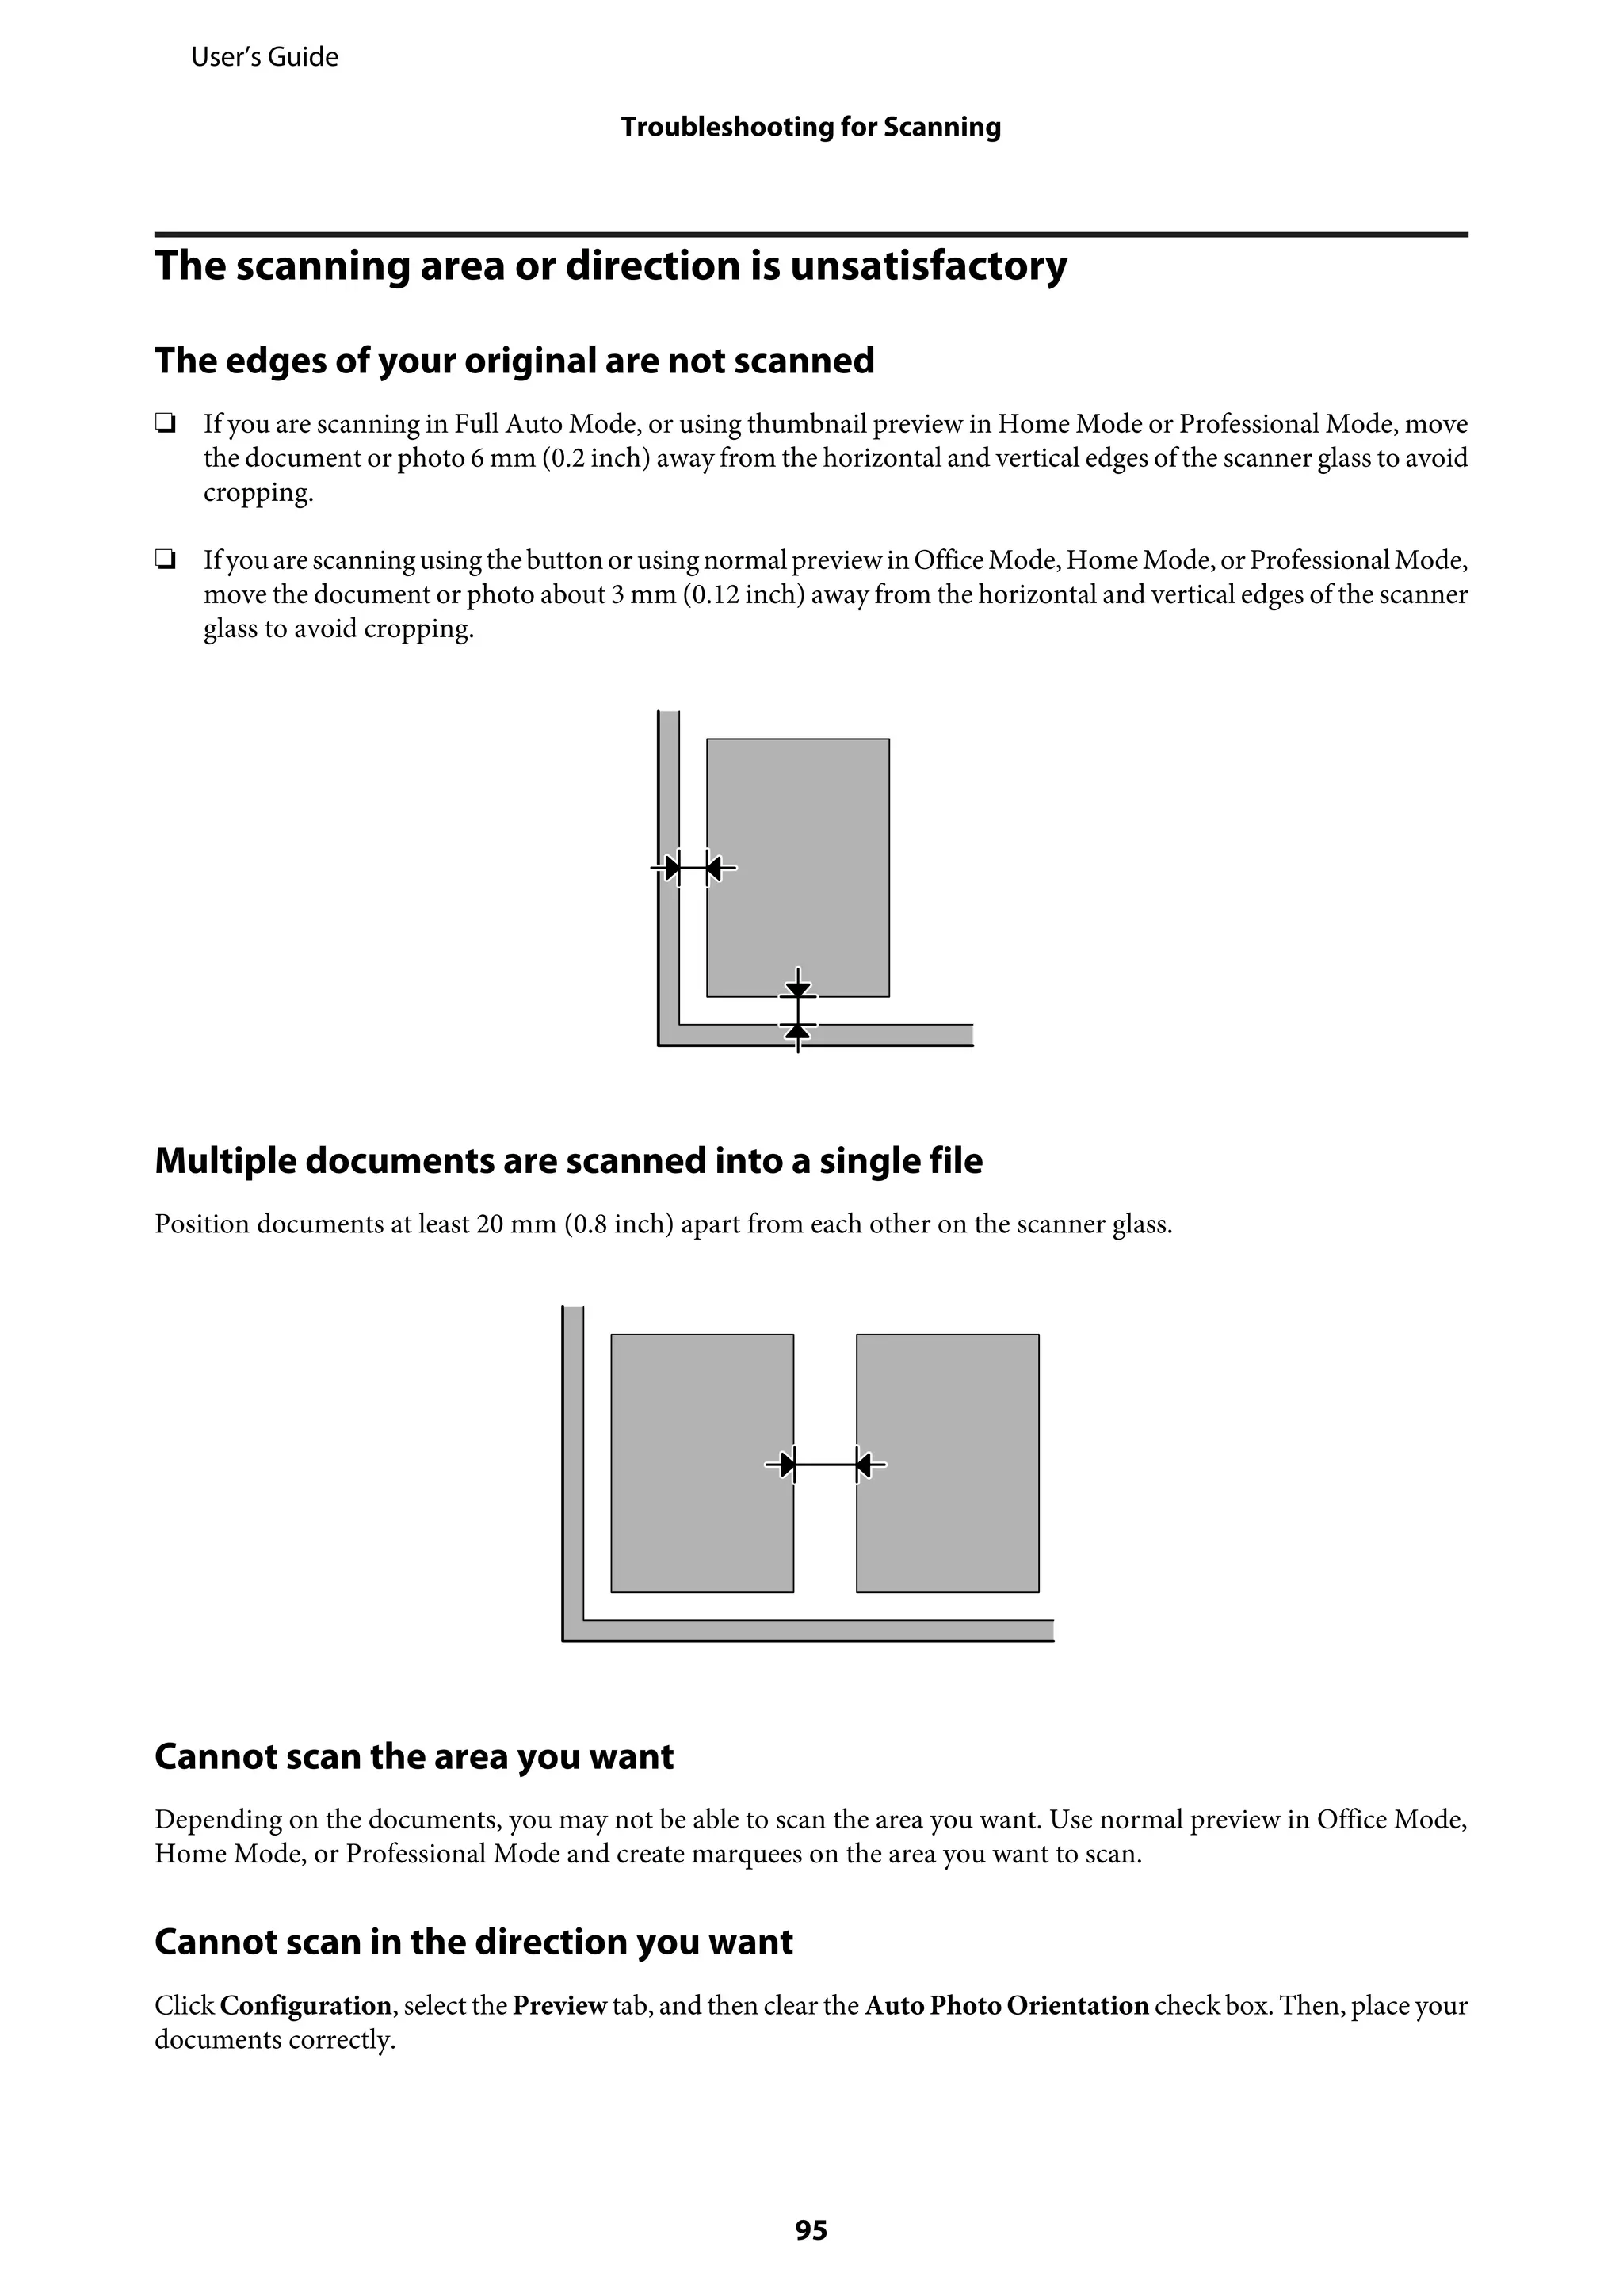
6. Scanning instructions and information on using the scanner software.
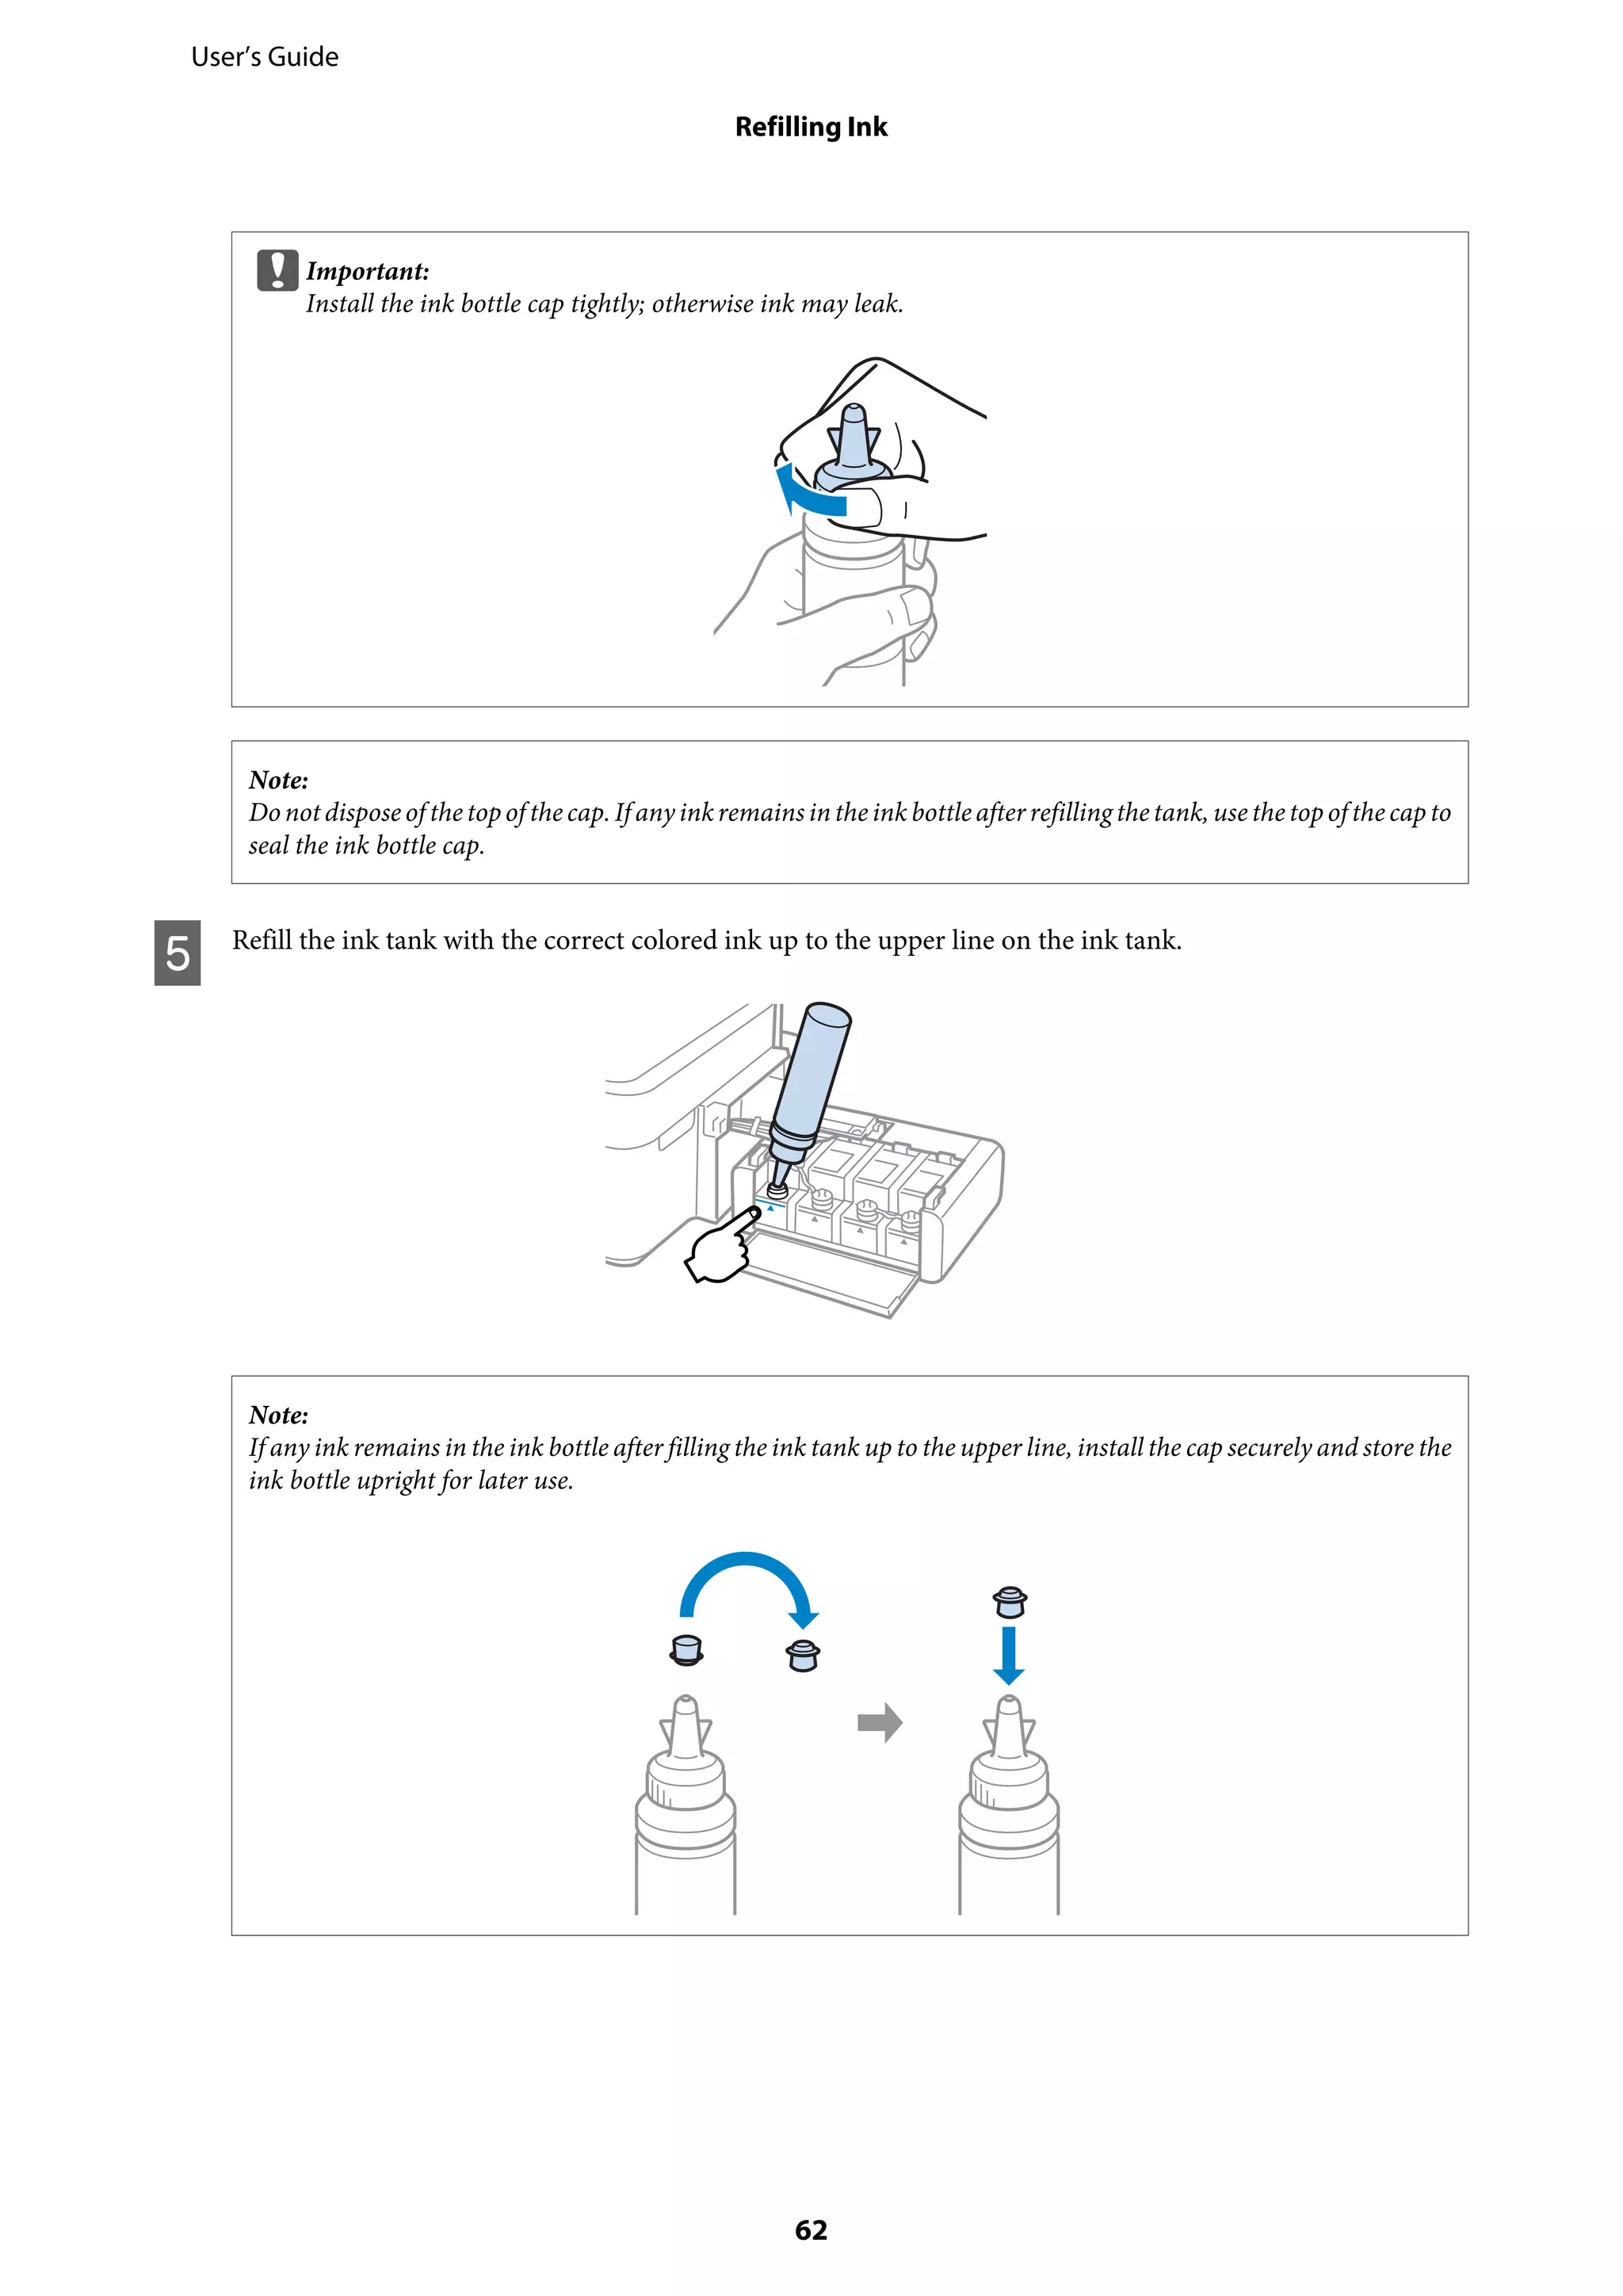
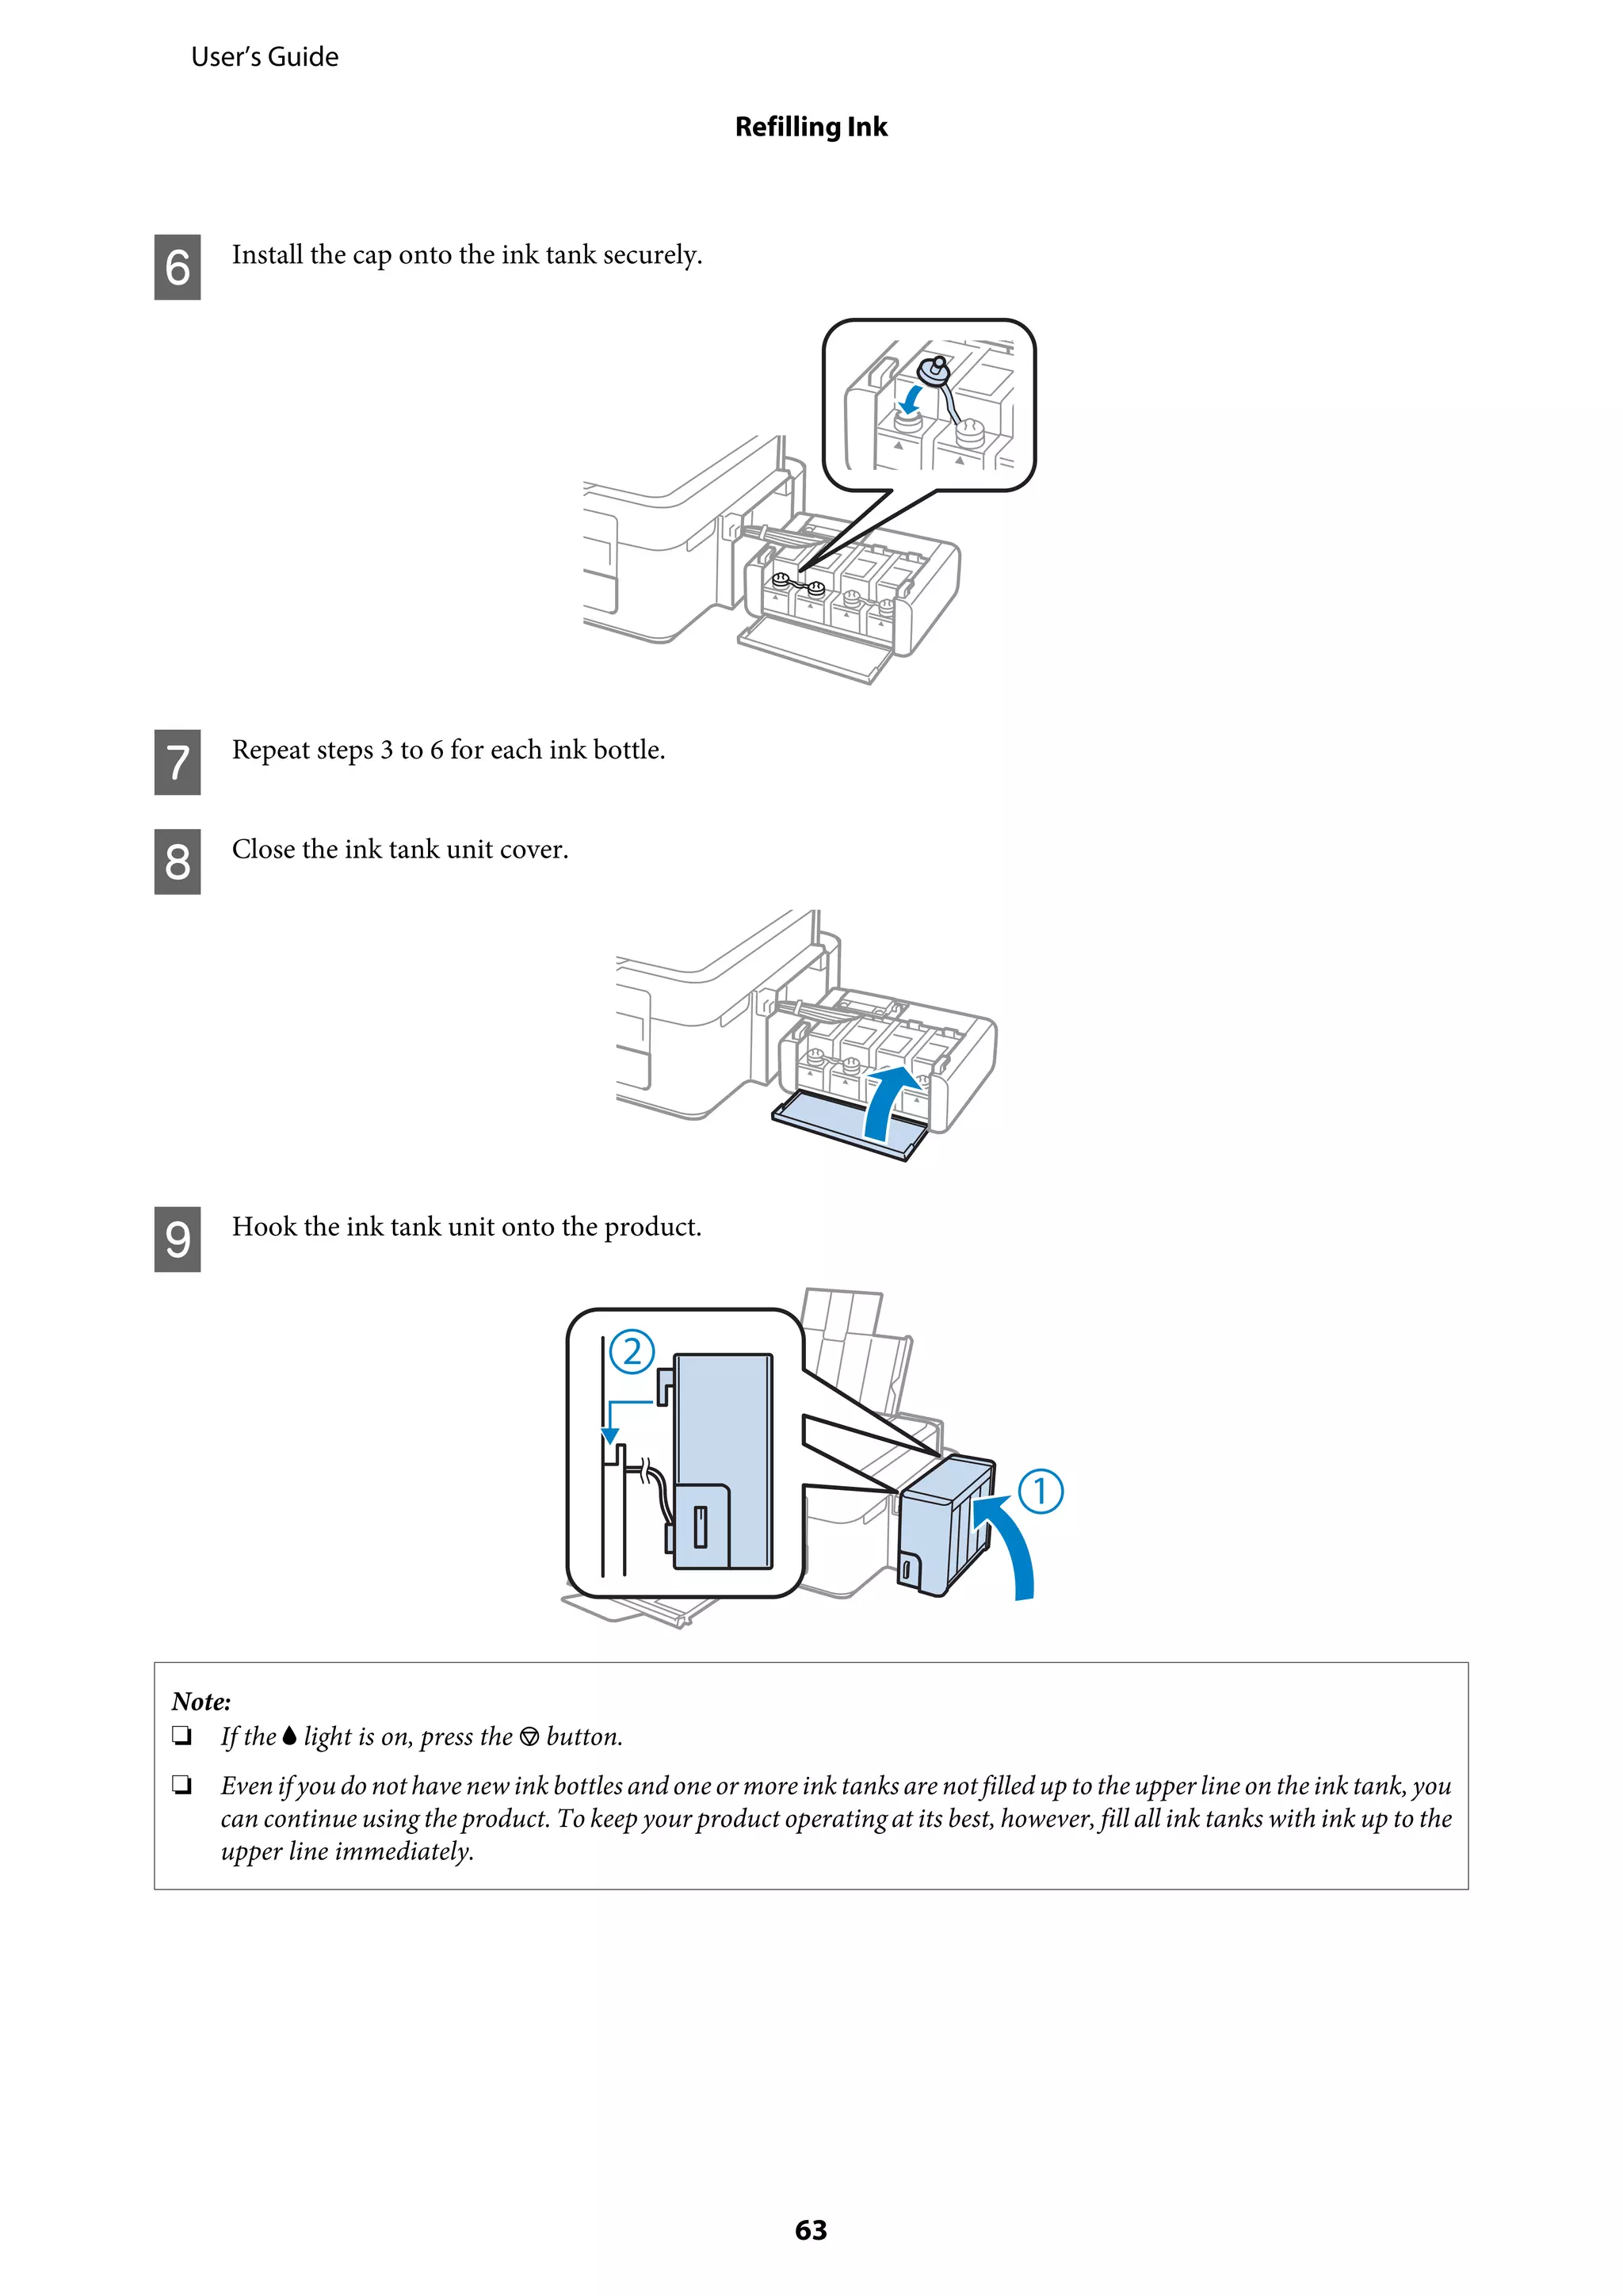
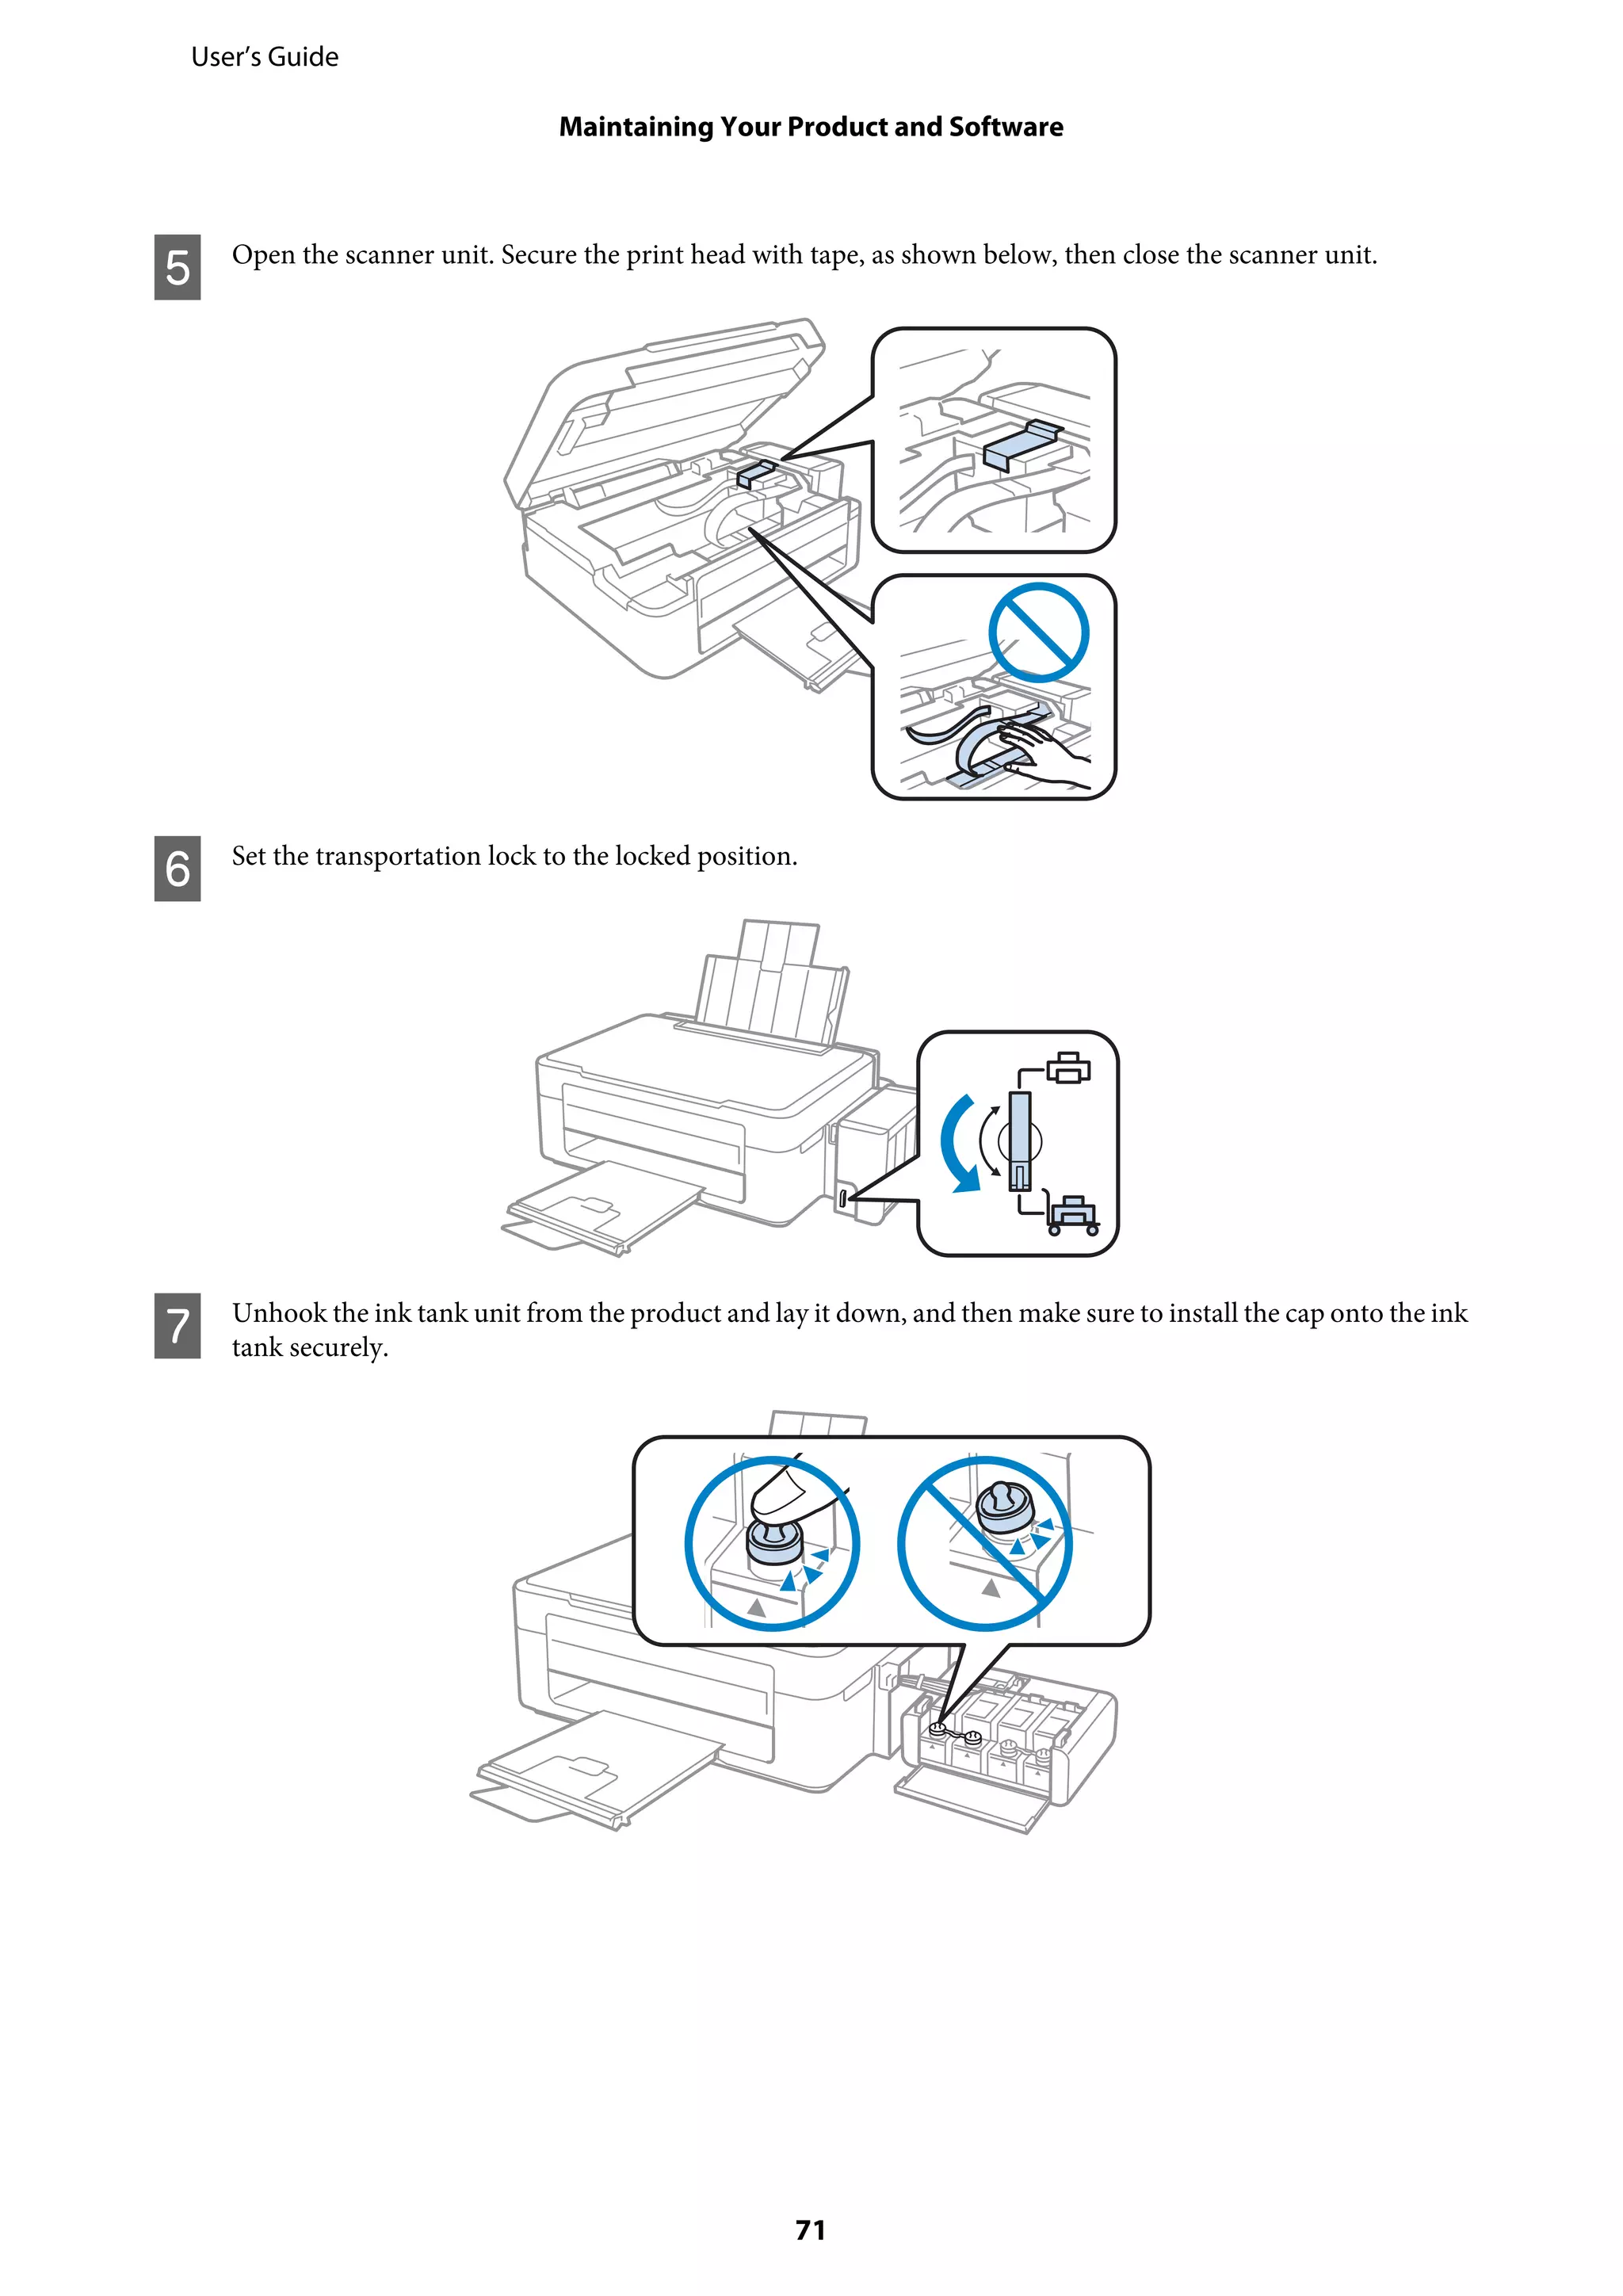
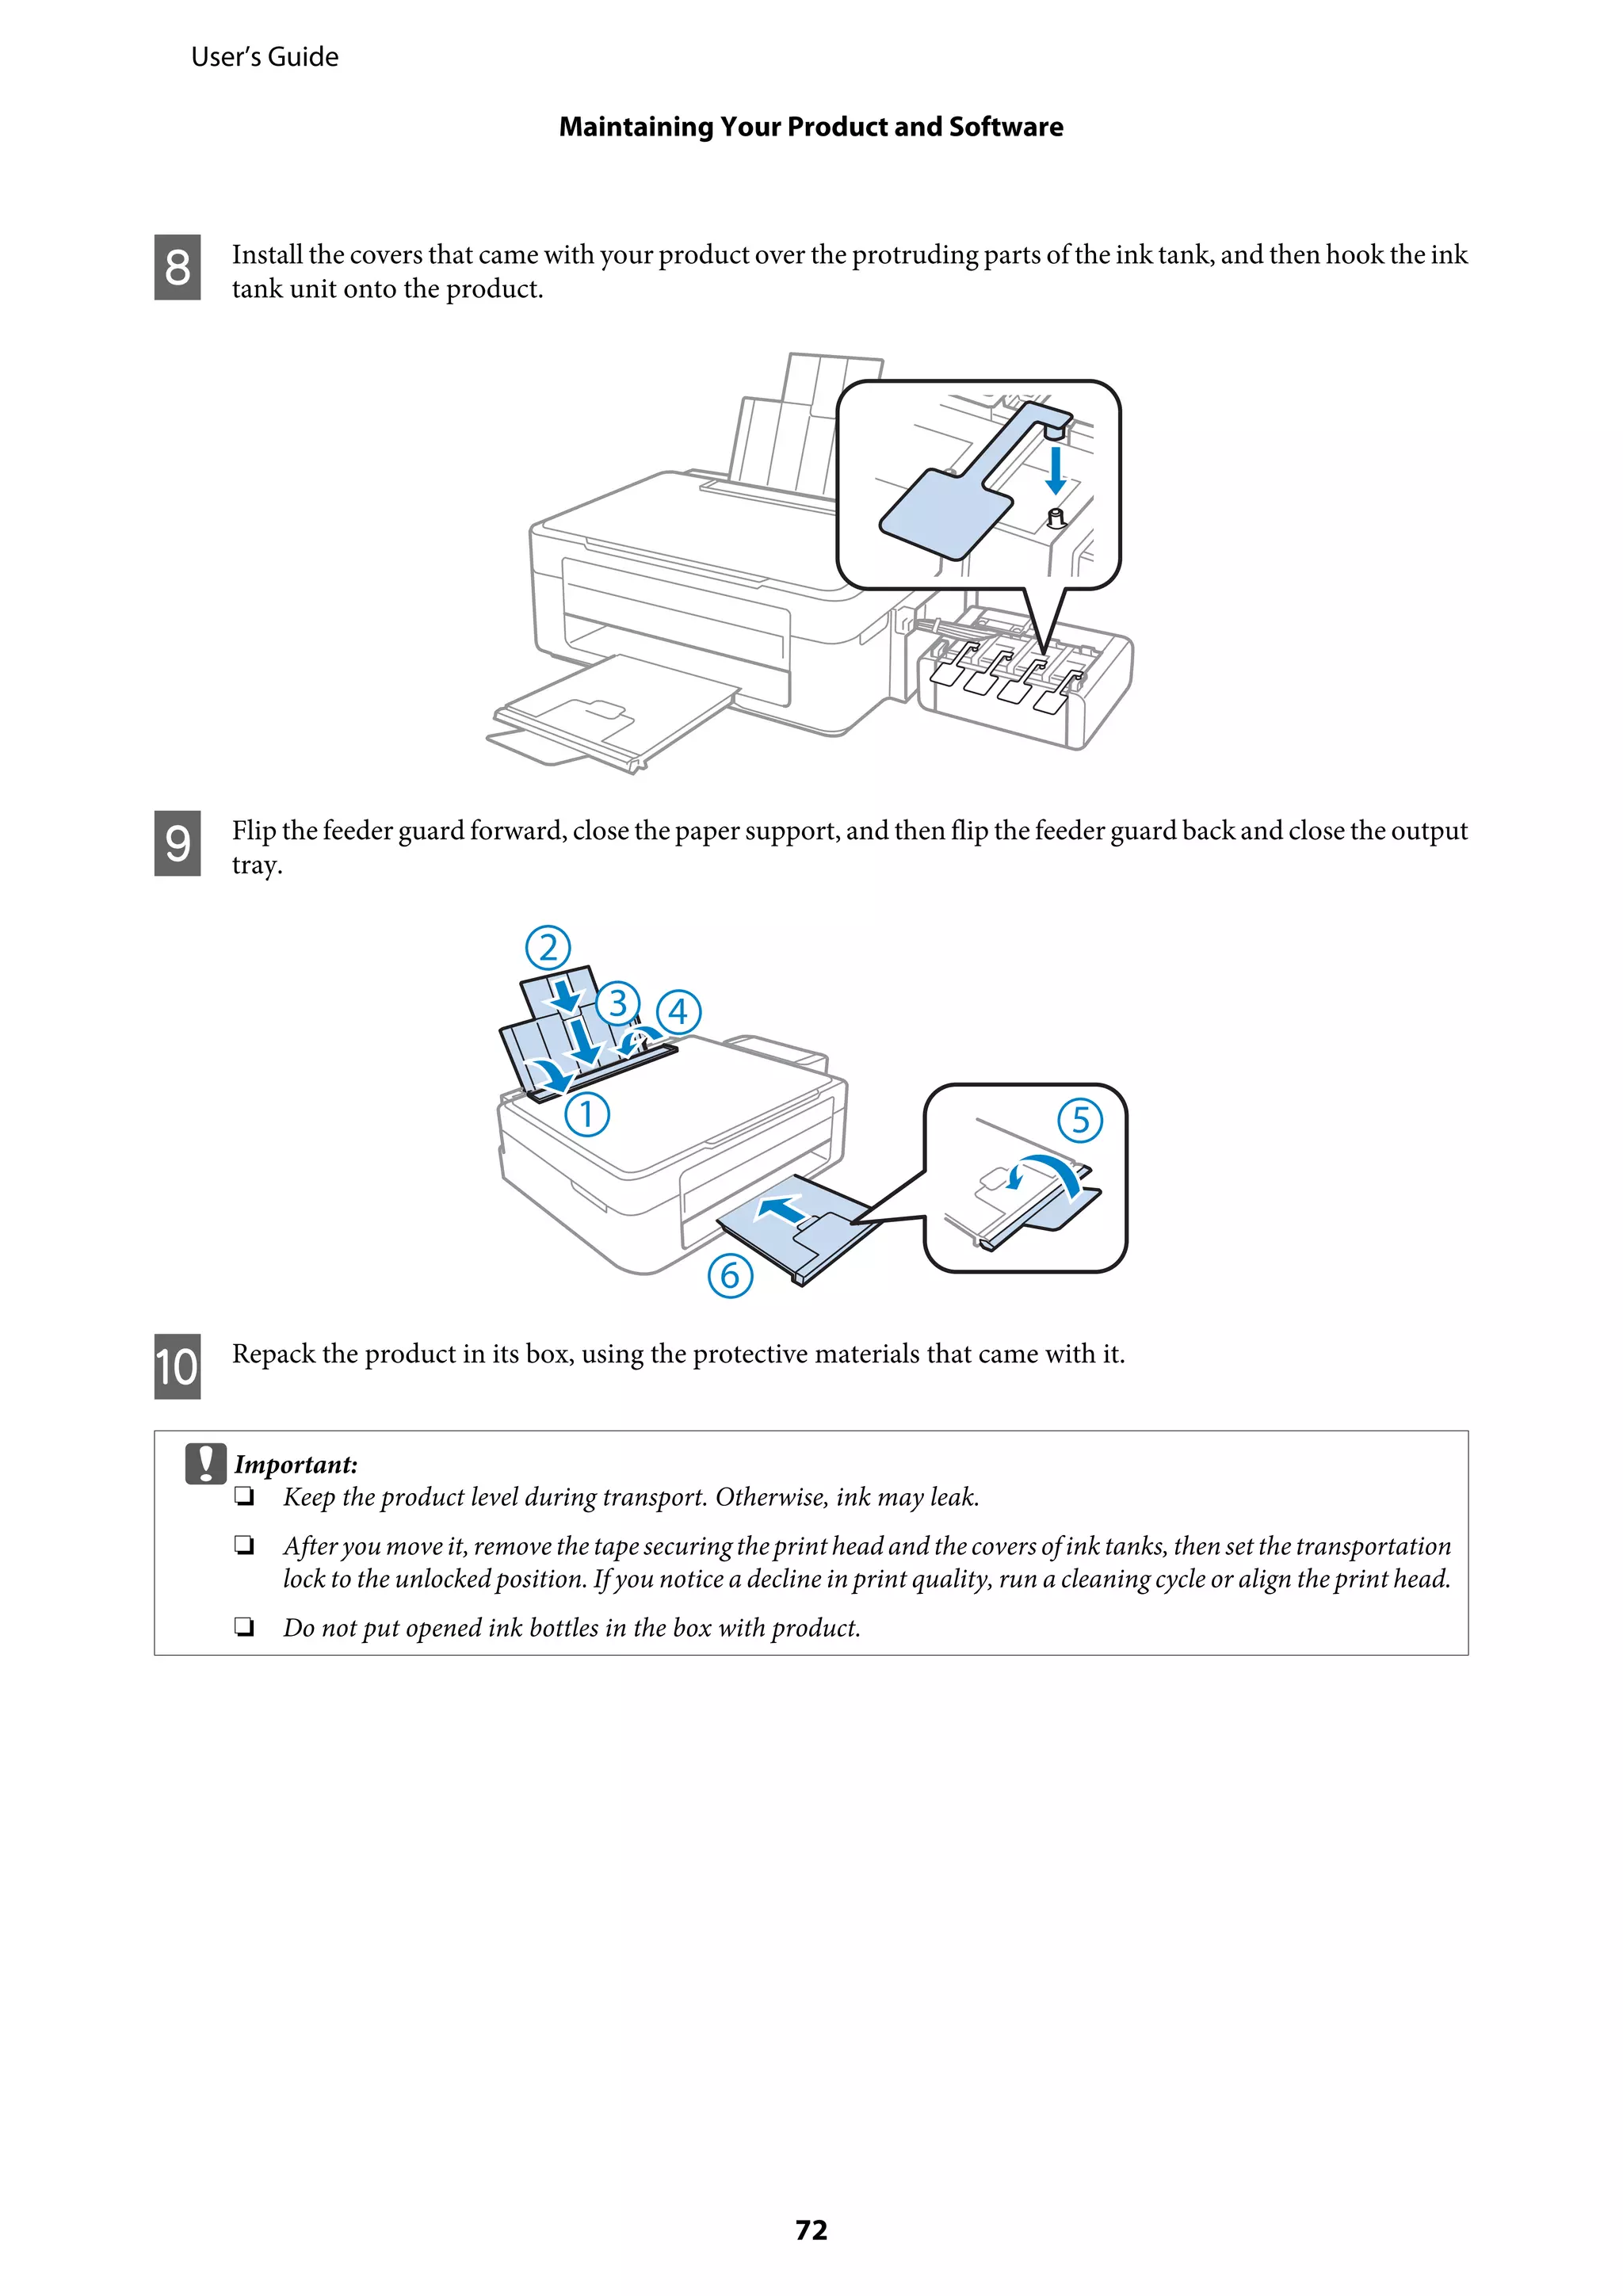
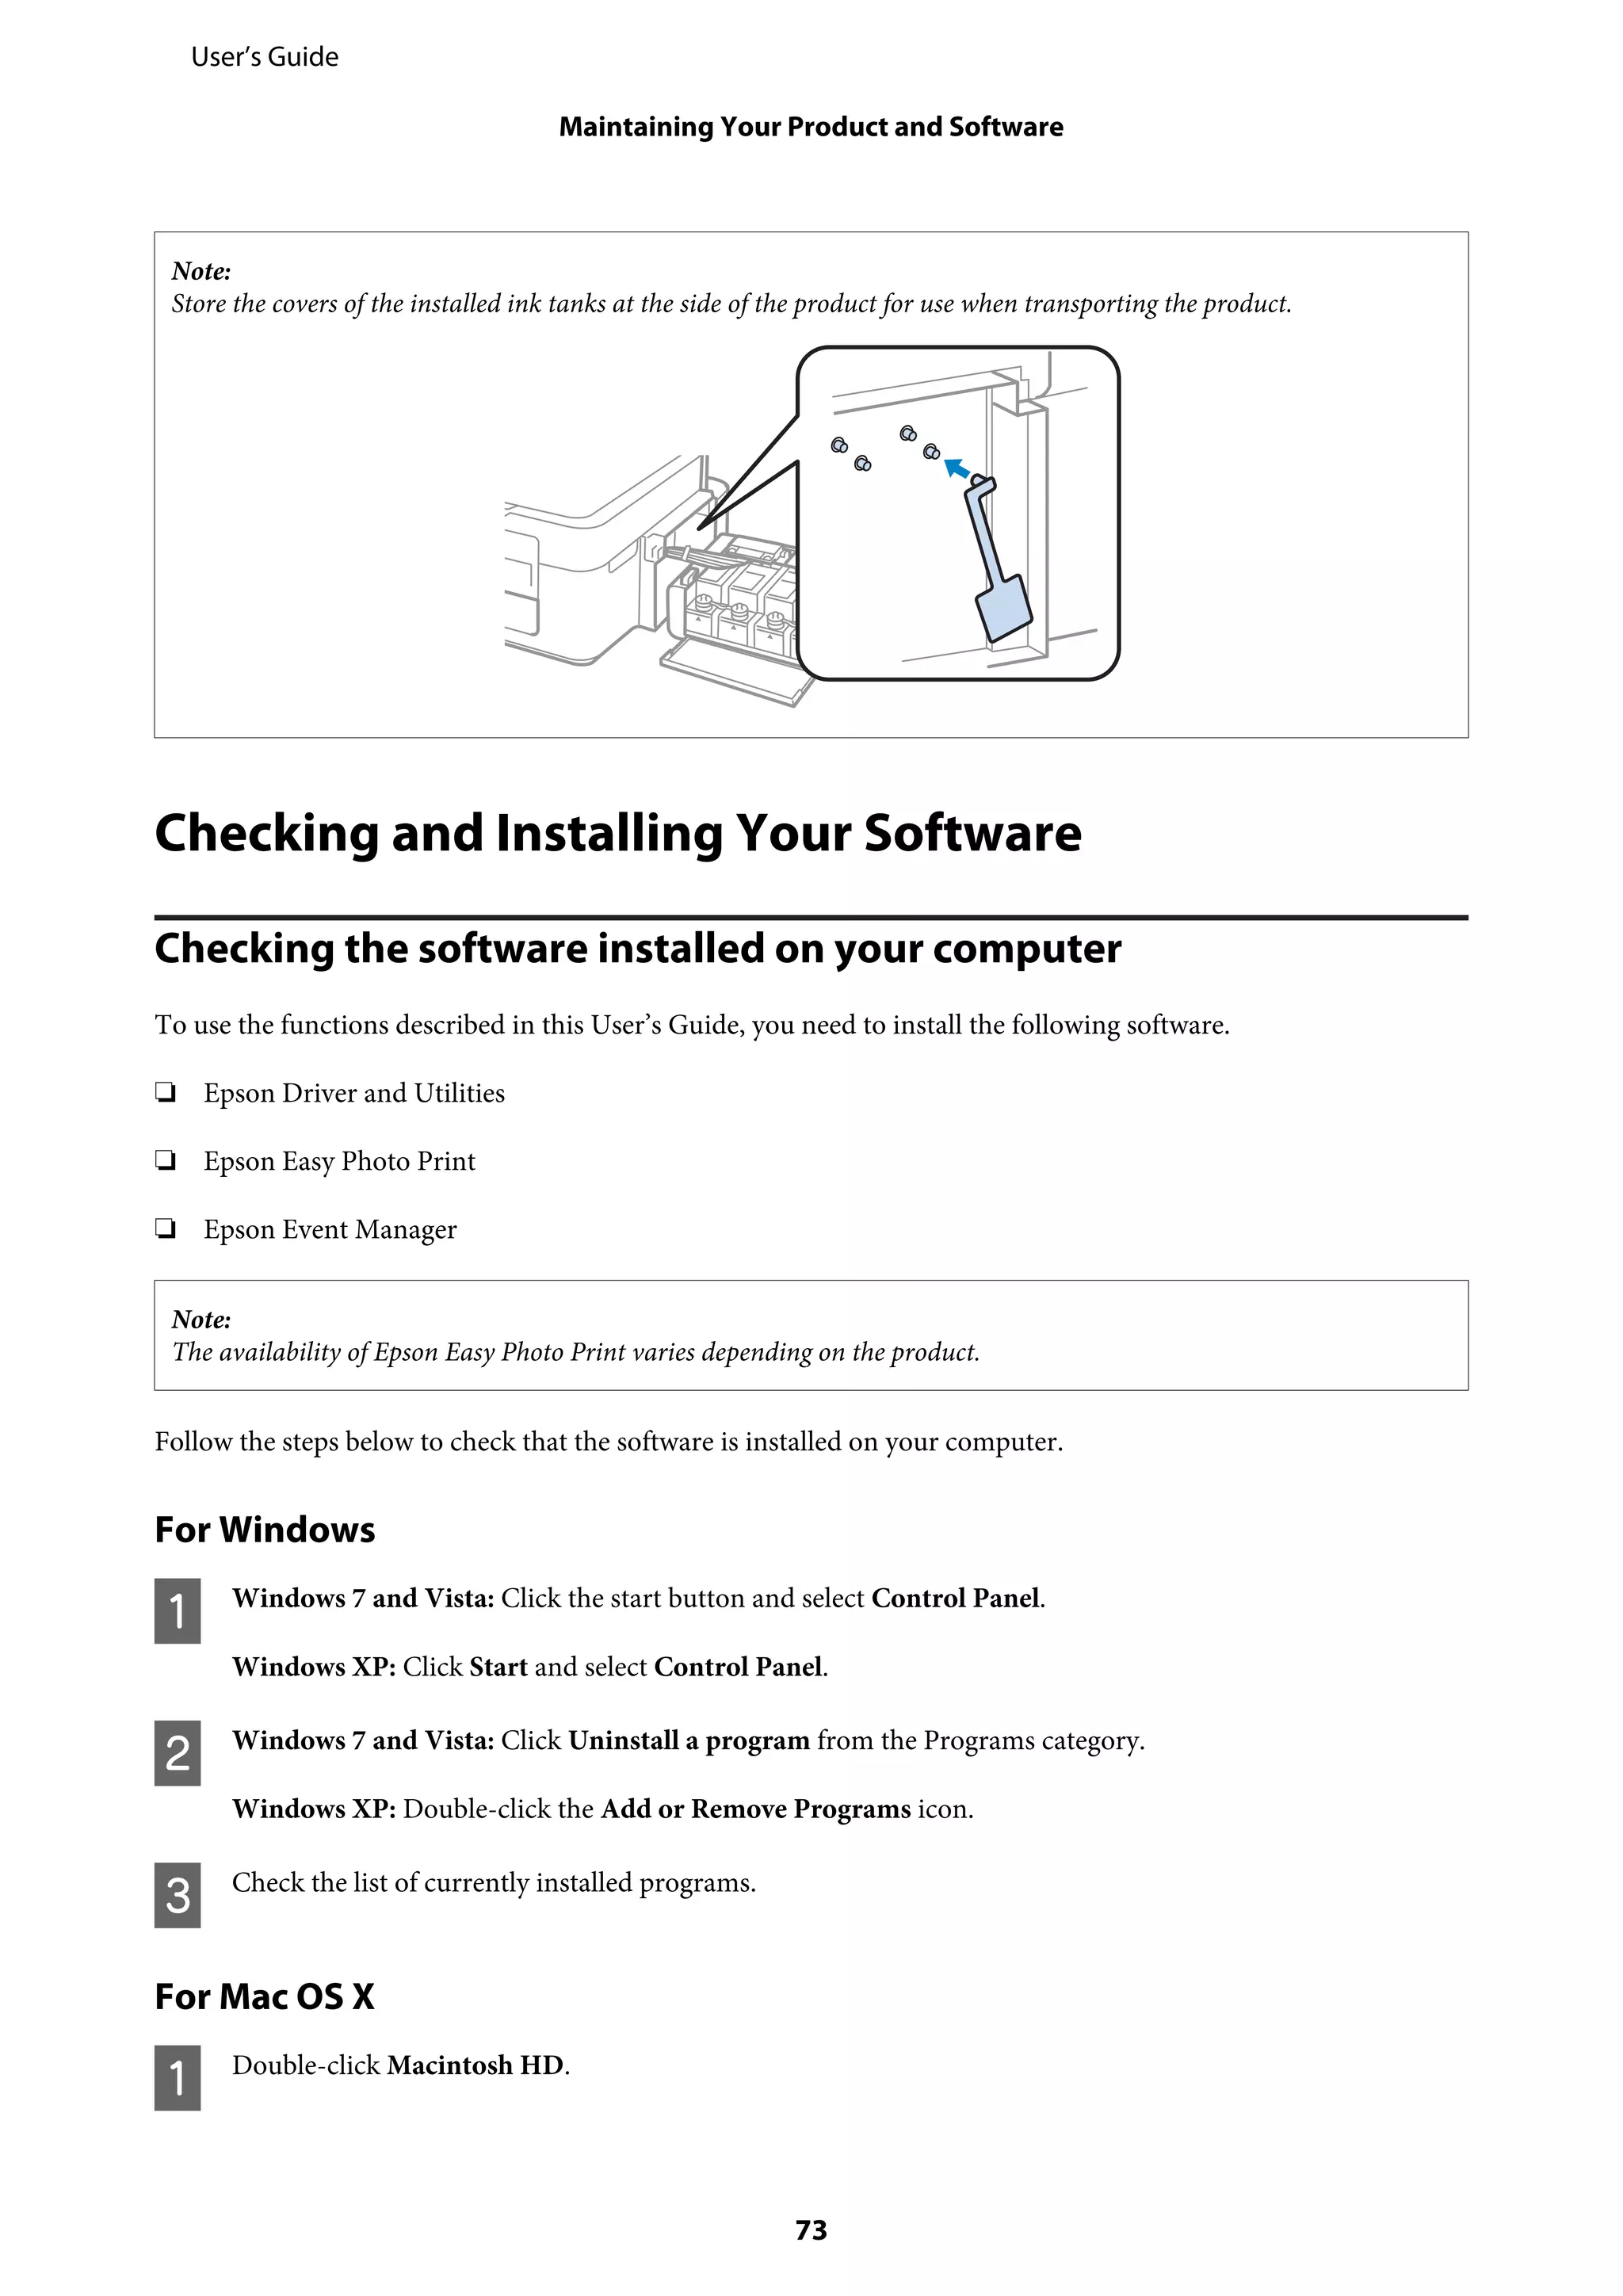
7. Instructions for refilling ink, maintaining the