- The document discusses copyright and trademark information for Xerox and other companies. It lists copyrighted materials, trademarks, and logos that are not to be reproduced without permission.
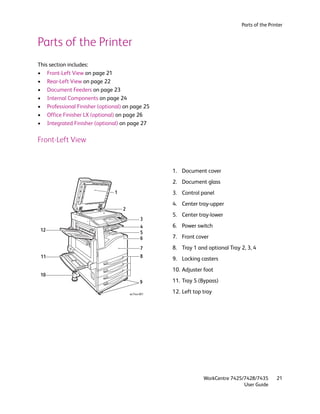
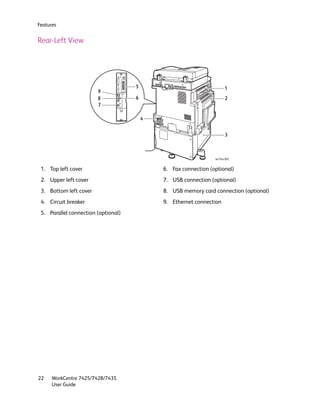
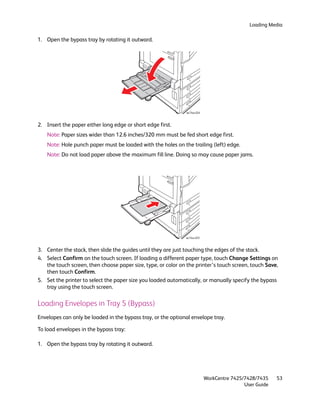
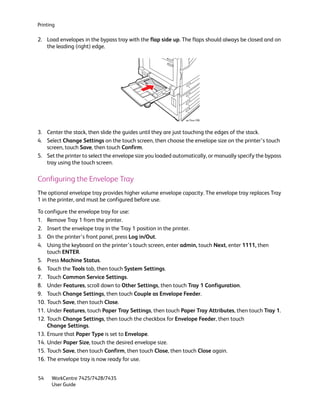
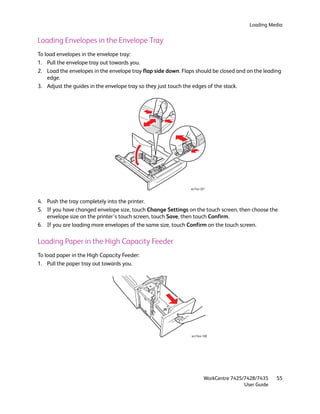
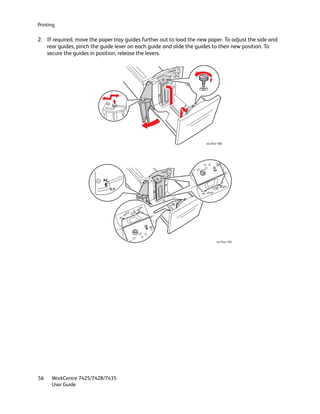
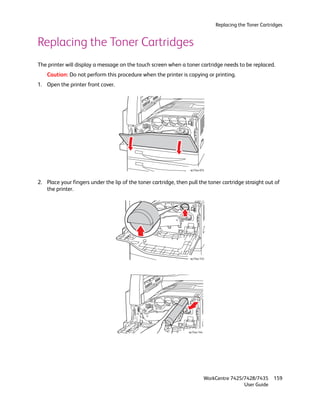
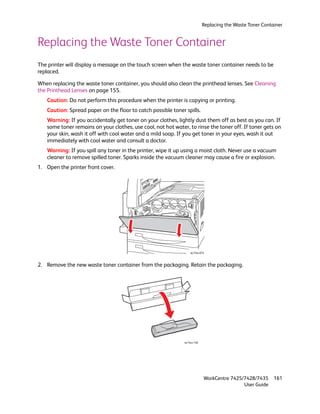
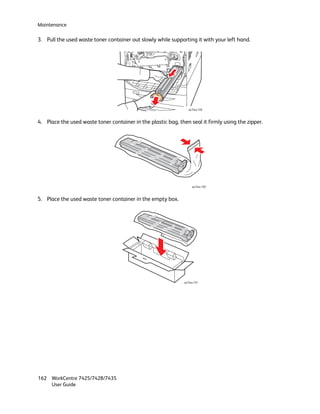
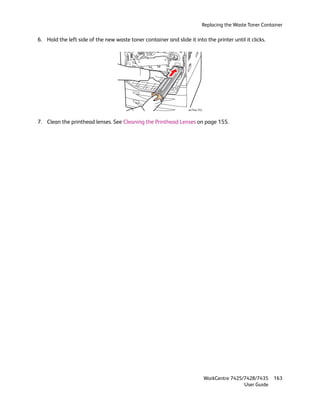
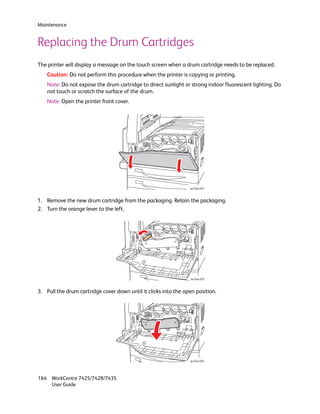
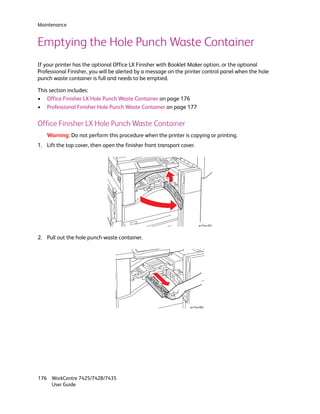
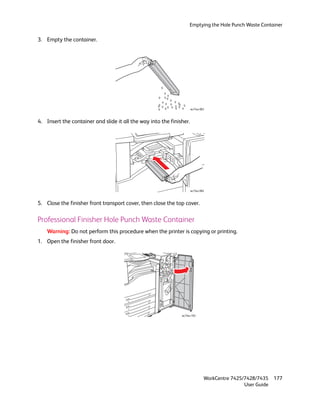
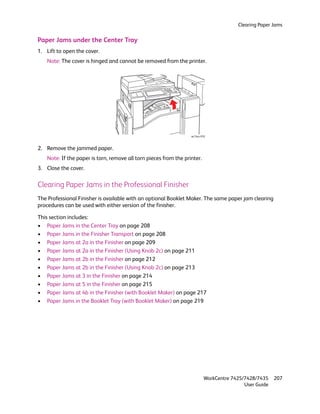
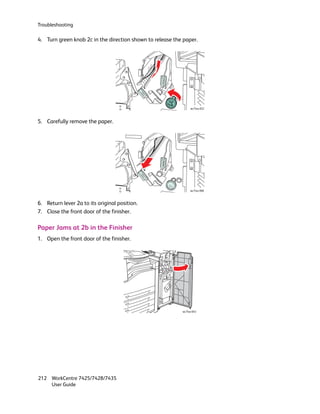
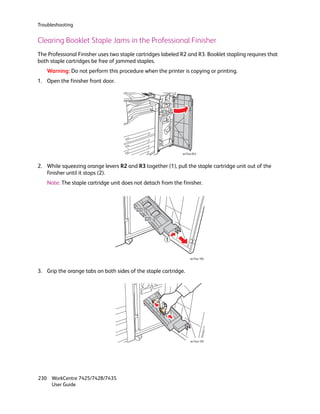
- Parts of the printer are described, including views of the exterior and interior components. Optional finishers that can be added to the printer are also depicted.
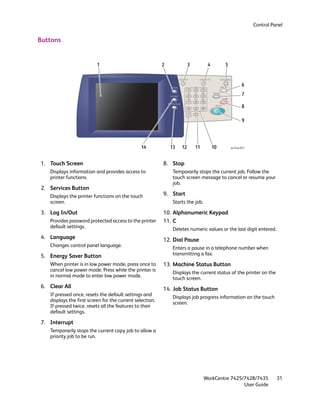
- Standard features, configurations, and options for the printer are provided. The control panel layout is shown and its functions are explained.


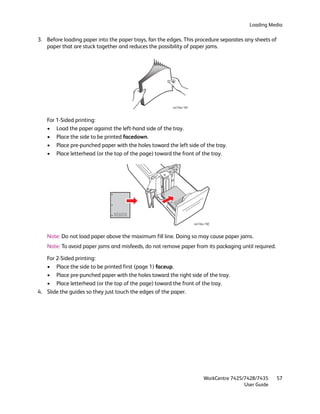
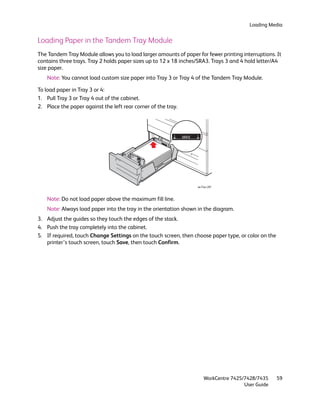


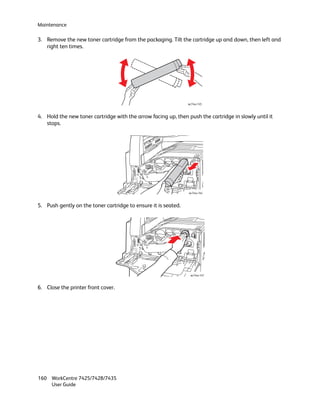
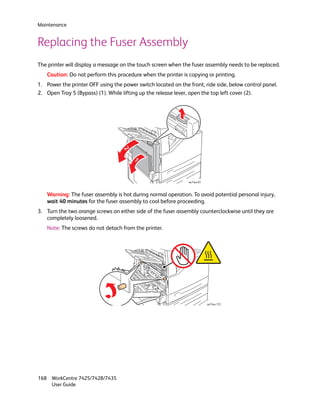
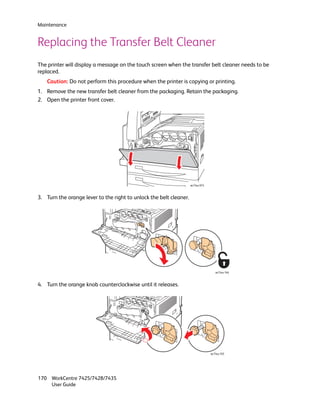

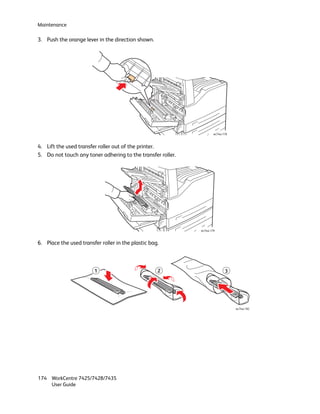
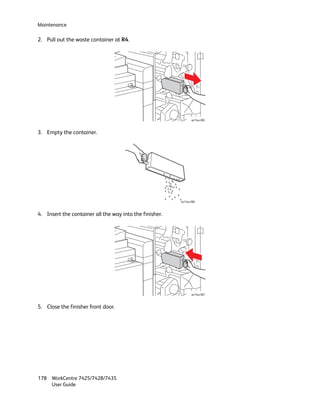
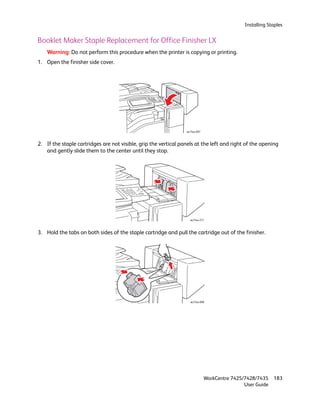
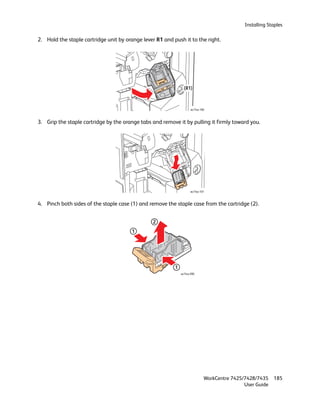

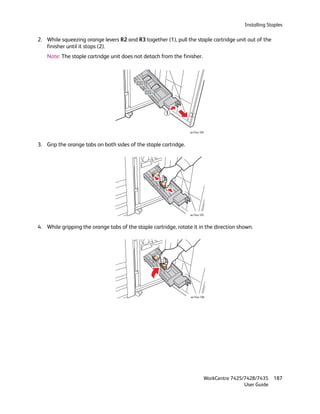
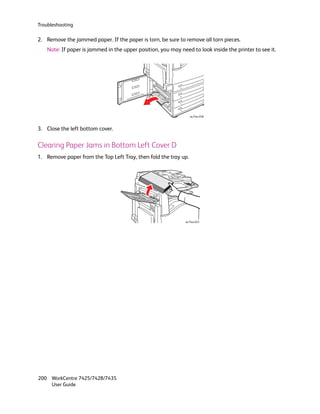
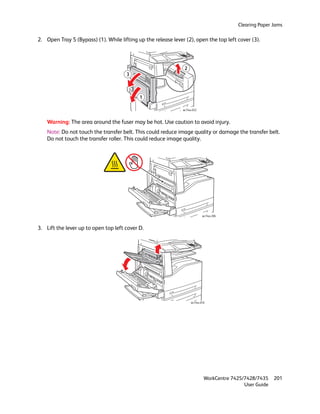
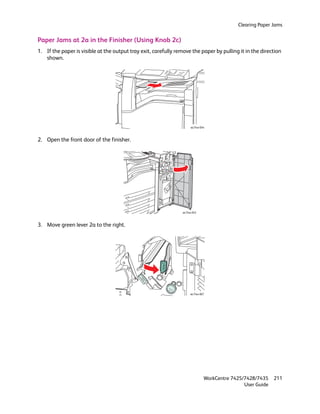
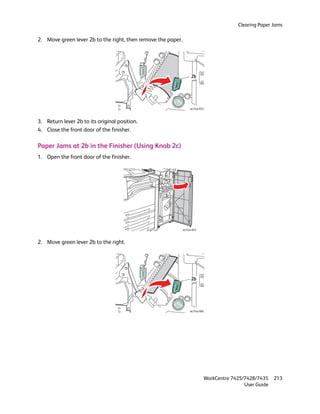
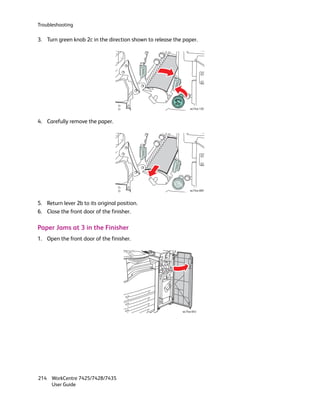


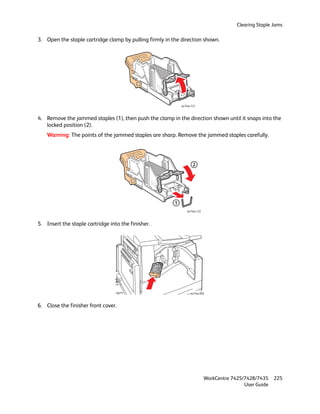

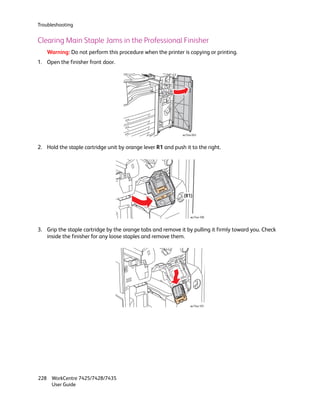


![Erpi admin 11123510[1] by иссам неязын issam hejazin](https://cdn.slidesharecdn.com/ss_thumbnails/erpiadmin111235101-140814022227-phpapp01-thumbnail.jpg?width=640&height=640&fit=bounds)


