
Download to read offline


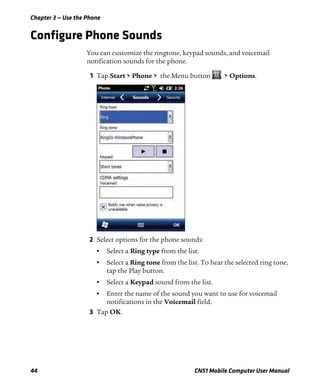
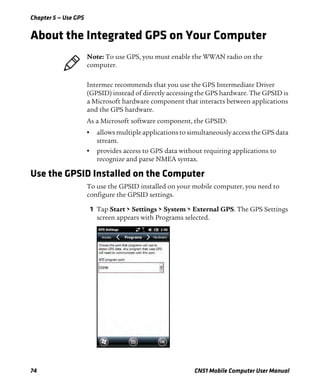


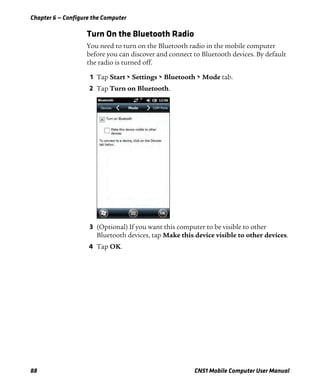
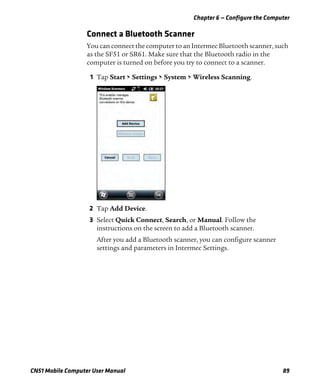
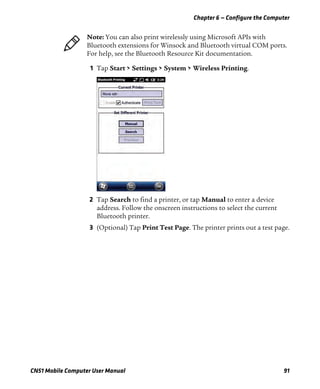
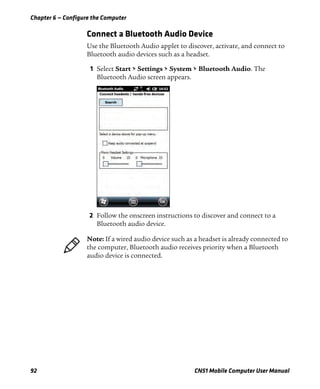

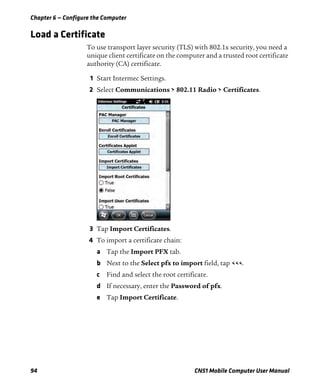


The document is the user manual for the CN51 mobile computer, providing operational and servicing information for users of the product. It includes safety information, warranty details, and a detailed description of features and functionalities, including battery management, user interface, and communication capabilities. The document also notes that specifications may change without prior notice and lists trademarks relevant to the equipment.


