Downloaded 24 times
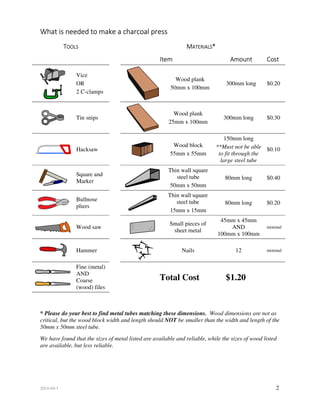
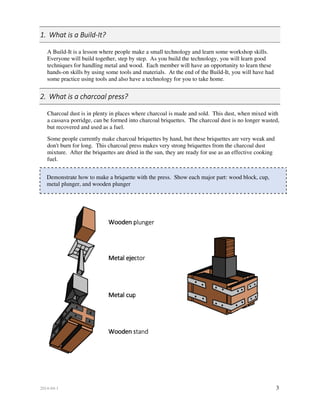
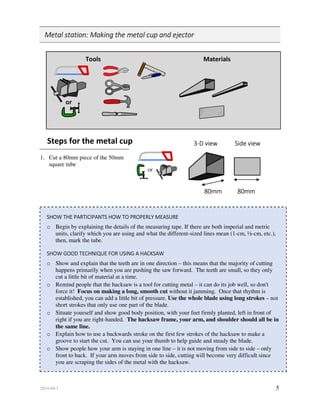
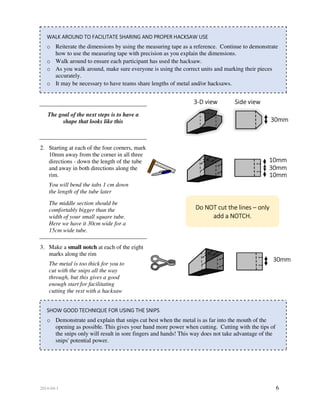
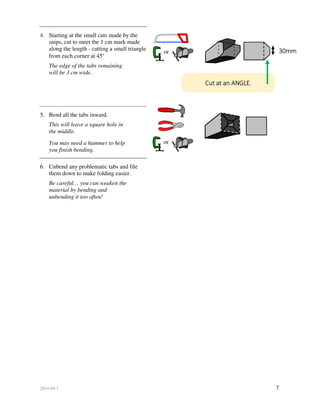
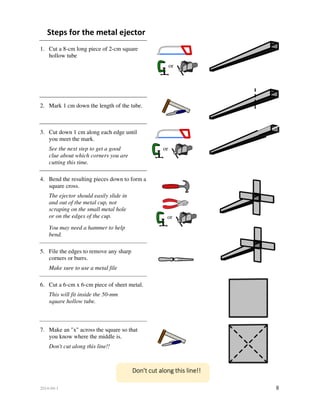
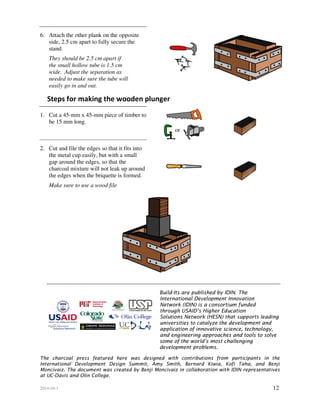

The document outlines a workshop focused on building a charcoal press, where participants learn basic woodworking and metalworking skills to create briquettes from charcoal dust. It includes detailed instructions on setting up the workspace, preparing materials, and step-by-step guides for using tools to construct both the press and its components. Additionally, it promotes hands-on learning and encourages collaborative engagement among participants during the build process.


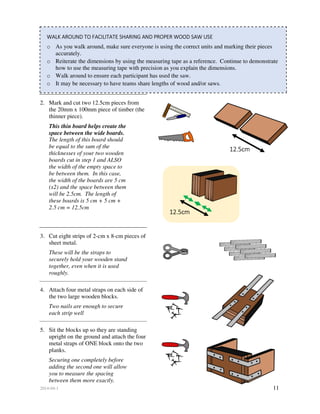
![5G Explained! A High Level Overview [Introduction]](https://cdn.slidesharecdn.com/ss_thumbnails/5gexplainedahighleveloverview-260119165306-cc137a3e-thumbnail.jpg?width=640&height=640&fit=bounds)


