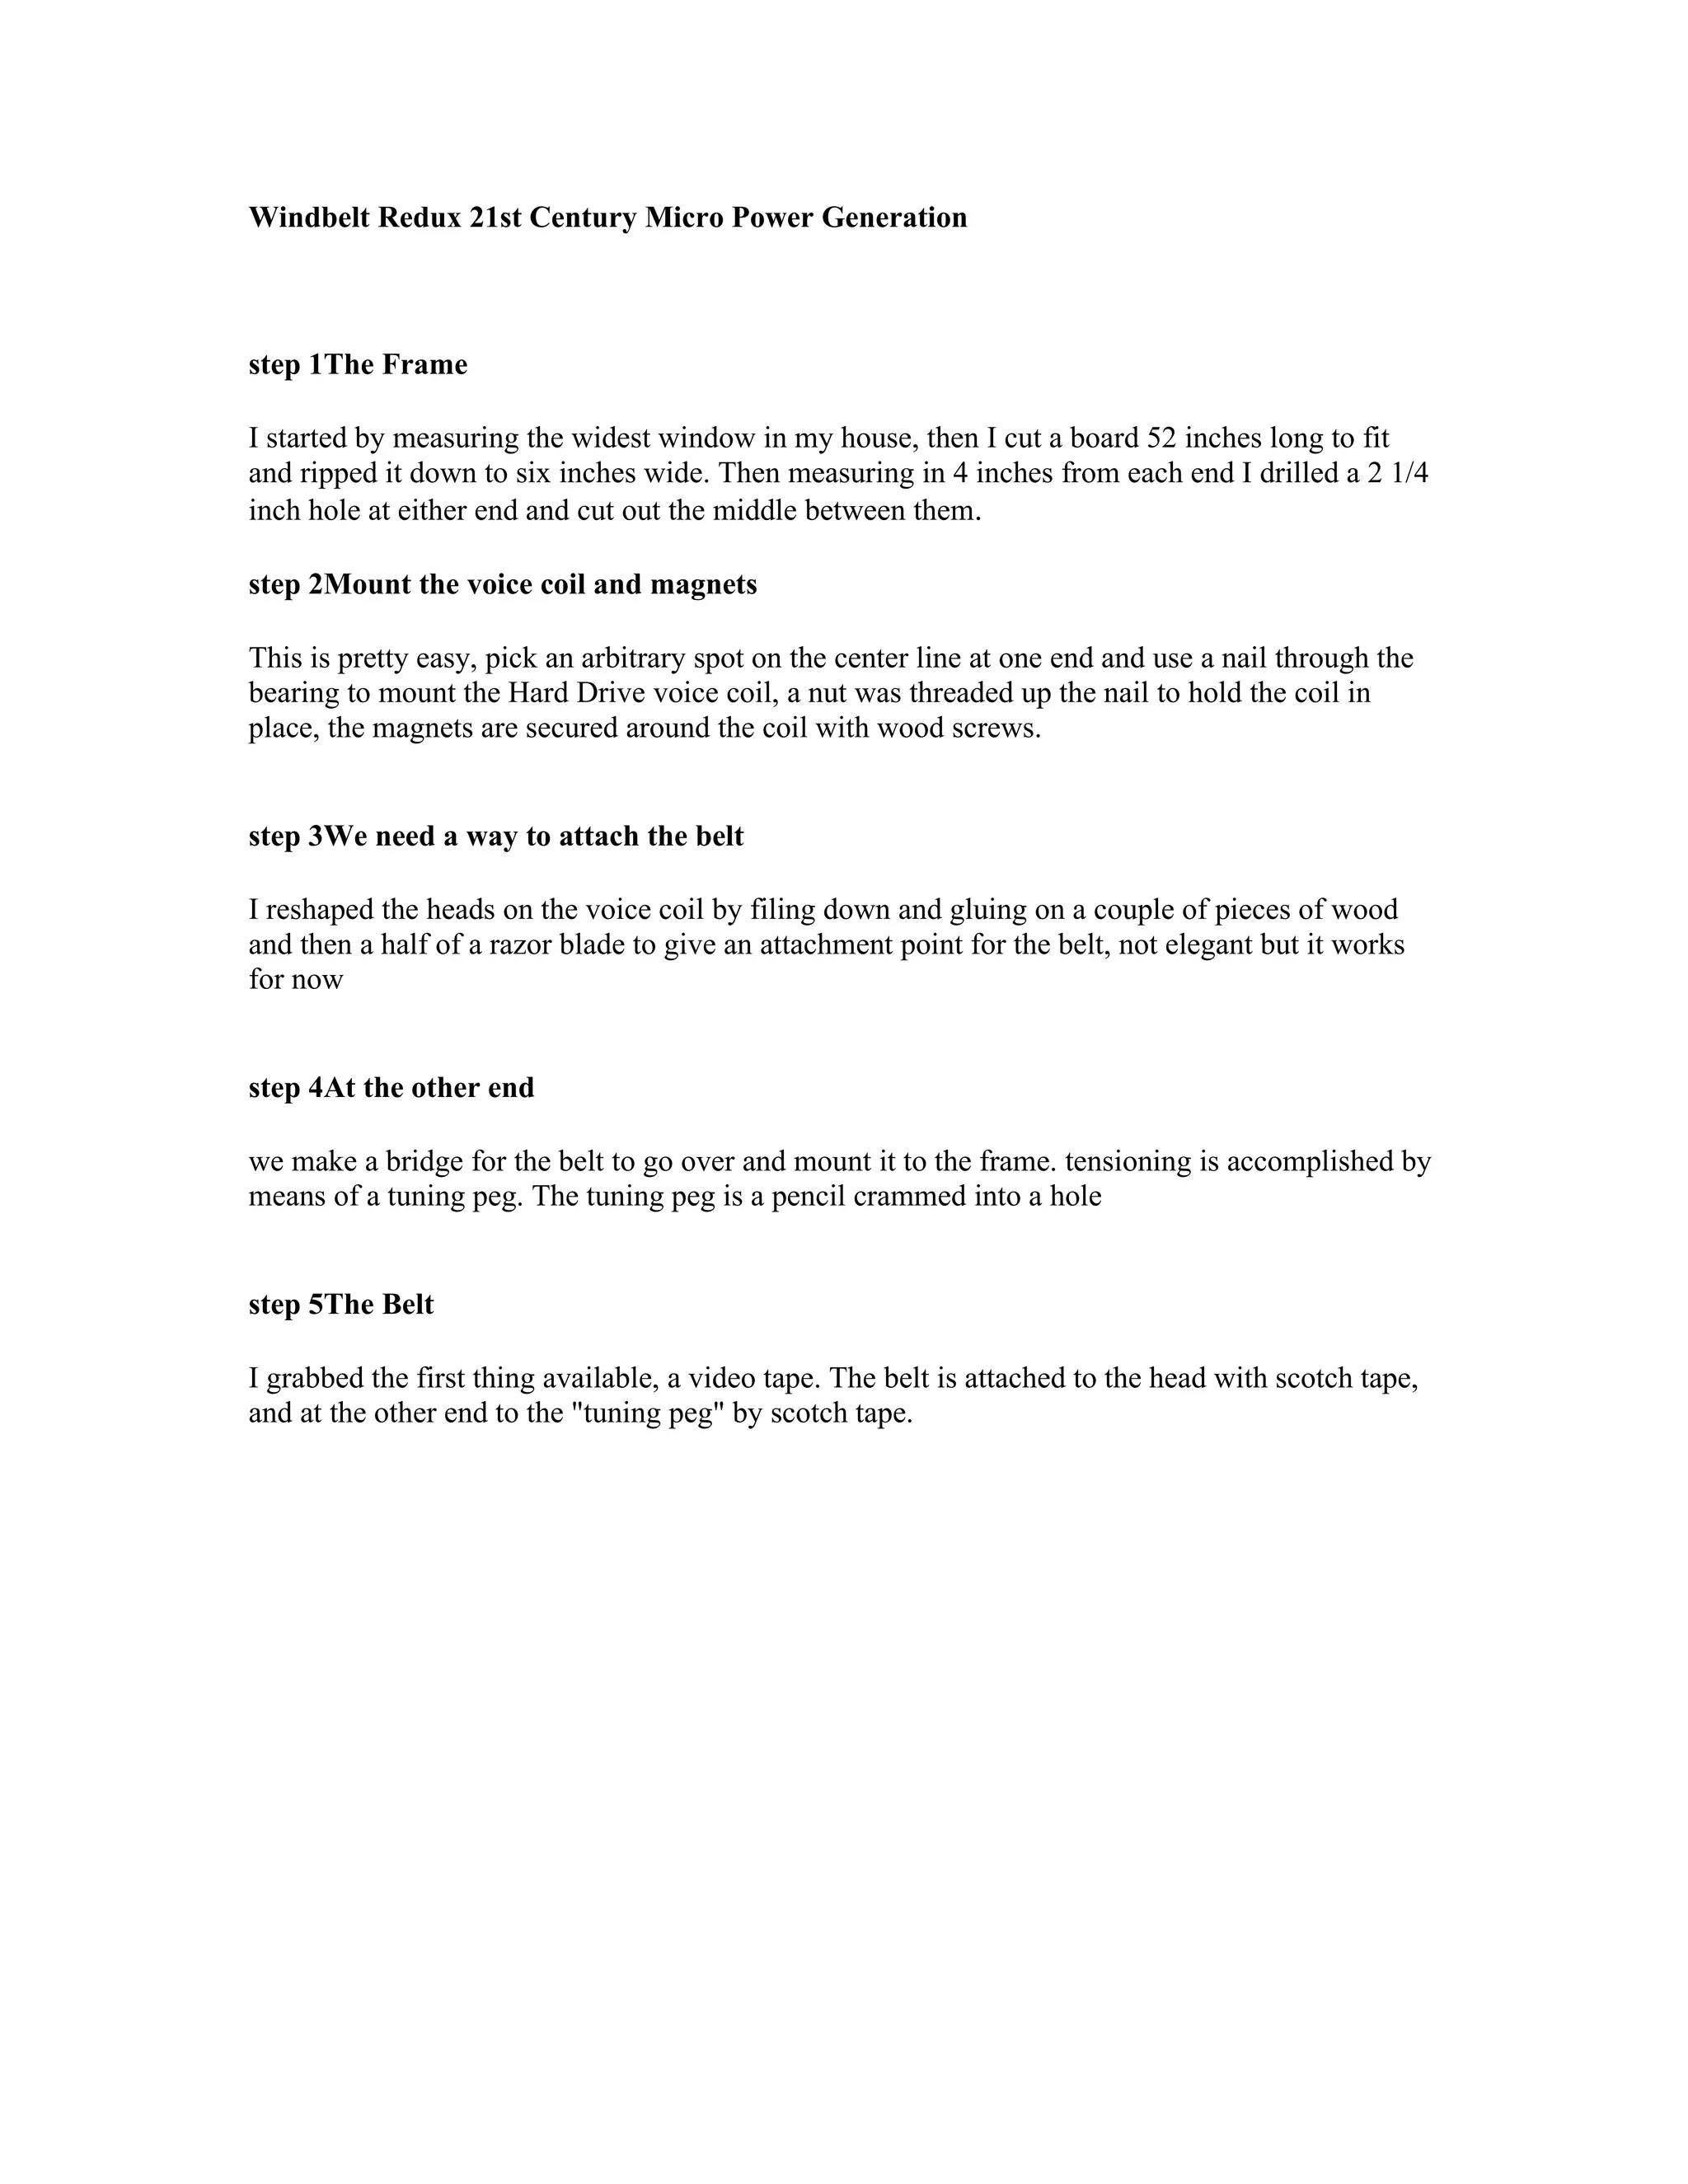
Download to read offline

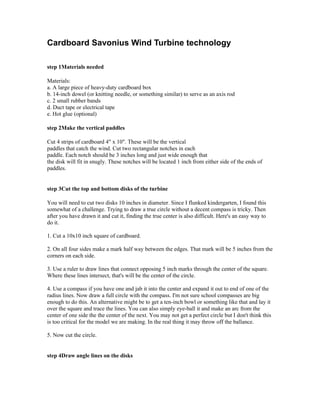


This document provides instructions for creating several homemade devices: 1. A wind turbine generator made from cardboard, dowels, rubber bands, and tape that uses Savonius-style vertical blades to harness wind power. The instructions describe cutting blades and disks, marking angles, and assembling the turbine. 2. A small portable gravitational shield made from a conductive non-ferromagnetic tube and rare earth magnets that are inserted inside to create a field. 3. An improvised measuring device made from common household items like string, a ruler or measuring tape, and weights that can measure the depth of pools or distances without specialized equipment. The instructions explain tying knots in the string and using weights to take accurate underwater


![Final [Presentation] AIAA_ImprovedSurfaceMarkerBuoyforScubaDivers](https://cdn.slidesharecdn.com/ss_thumbnails/1a326d83-ebdd-4c78-80fd-dcb47e4b4a78-150429153156-conversion-gate02-thumbnail.jpg?width=640&height=640&fit=bounds)


