More Related Content
Similar to Kumihimo crystal
Similar to Kumihimo crystal (20)
More from Jose Miguel Lopez Garcia
More from Jose Miguel Lopez Garcia (20)
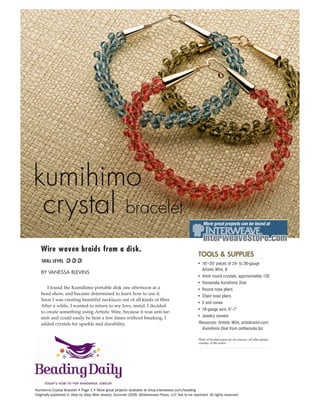
Kumihimo crystal
- 1. kumihimo
crystal bracelet
Wire woven braids from a disk.
TOOLS & SUPPLIES
SKILL LEVEL
• 16"–20" pieces of 24- to 26-gauge
Artistic Wire, 8
BY VANESSA BLEVINS
• 4mm round crystals, approximately 120
• Hamanaka Kumihimo Disk
I found the Kumihimo portable disk one afternoon at a • Round nose pliers
bead show, and became determined to learn how to use it.
• Chain nose pliers
Soon I was creating beautiful necklaces out of all kinds of fiber.
• 2 end cones
After a while, I wanted to return to my love, metal. I decided
• 18-gauge wire, 6"–7"
to create something using Artistic Wire, because it was anti-tar-
nish and could easily be bent a few times without breaking. I • Jewelry cement
added crystals for sparkle and durability. Resources: Artistic Wire, artisticwire.com;
Kumihimo Disk from ontherocks.biz.
Photo of finished piece by Jim Lawson; all other photos
courtesy of the author.
Kumihimo Crystal Bracelet • Page 1 • More great projects available at shop.interweave.com/beading
Originally published in Step by Step Wire Jewelry, Summer 2008. ©Interweave Press, LLC Not to be reprinted. All rights reserved
- 2. kumihimo crystal bracelet
1 Measure your wrist, and add
1"–11⁄2" for comfort. This is the 2 Bring all the wire ends together
and twist them with your fingers 3 Insert the twisted wire ends
through the center hole on the
woven length of your bracelet. The a few times, like you are twisting a top side of the disk. Use your left
cones and clasp will add more bag tie. hand to hold the twist underneath the
length, so measure them and add to disk. It is important to maintain con-
your total. Measure eight 16"–20" sistent tension throughout the project,
pieces of wire. so that the weave is uniform in shape
and size.
4 Separate the strands of wire, one
on each side of #8, #16, #24, 5 Hold the disk so #32 is at the
top. While holding the twist with 6 Take the wire on the right side of
#32 (top right), and bring it down to
and #32 on the disk. your left hand on the under side of the the right side of the bottom (#15—bot-
disk, begin by taking the wire on the tom right). Turn the wheel to the left, or
left side of #16 (bottom left) and bring- counter clockwise, so that #8 is on top,
ing it up and to the left of the two and repeat the pattern: bottom left-top
wires on the top (#31—top left). You left, top right, bottom right. Continue
now have three wires on the top. weaving one time around the circle until
all the wires have been moved.
7 At this point, you have woven about 1", or made one complete rotation.
Start adding the crystals. You will only add the beads on the upstroke 8 Remove the wires from the disk,
and snip the ends.
move. Add the crystal to the wire, and push it down through the hole so that it
sits snugly against the weaving. Use your left hand to hold it down while you
make the other cross over. Make sure that the crystal is held under the wire that
is crossing over to the inside left of the circle. Continue the same pattern until
you have reached the desired length. Weave about 1", or one more complete
rotation without crystals at the end.
Kumihimo Crystal Bracelet • Page 2 • More great projects available at shop.interweave.com/beading
Originally published in Step by Step Wire Jewelry, Summer 2008. ©Interweave Press, LLC Not to be reprinted. All rights reserved
- 3. 9 Take the 18g wire, and cut it in
half. You should have two 3"–31⁄2" 10 Insert the wire ends ofchainbraid 11 Placeof the 18g wire. the long
into the coil, and use
the
ends
the cones over
Add jew-
pieces. Wrap them around the fattest nose pliers to them squeeze the coils elry cement to the inside of the cone
part of the chain nose pliers two to closed. Snip the ends of the braid to hold it in place.
three times, forming a coil. close to the end of the coil.
12 Makeusing end middlewrapped 13 On the other⁄ "– ⁄ " graspthe
loop
one
the
into a
or the wire about
end,
from
the
14 12 14 Hammer strength.curve of the
hook for
the top
base of the round nose pliers. The cone with the fattest part of the round
loop needs to be big enough for the nose pliers, and bend it over the pliers
hook to pass through. with your fingers to form the hook.
Roll up the end of the wire with the tip
of the pliers, forming a tiny loop.
Keeping track of the next number to move to is not important. The
Vanessa Blevins numbers are merely there for reference. What is important is to keep
has been crafty all her
life. A friend introduced up the same pattern, and to keep your wires across from each
her to jewelry making, other. You can use the numbers to check yourself every time you
starting with stringing, and then moving come around one full rotation. All eight wires should be on one of
to metalwork. After teaching herself many
the numbers with dots.
techniques by reading or trial and error,
she began selling her creations. She is cur-
rently a teacher at On the Rocks, a local
bead shop. Contact Vanessa at
vlblevins@bellsouth.net.
Step by Step Wire Jewelry
RISK-FREE Trial Offer
Subscribe today!
interweave.com/go/bdsw
Kumihimo Crystal Bracelet • Page 3 • More great projects available at shop.interweave.com/beading
Originally published in Step by Step Wire Jewelry, Summer 2008. ©Interweave Press, LLC Not to be reprinted. All rights reserved