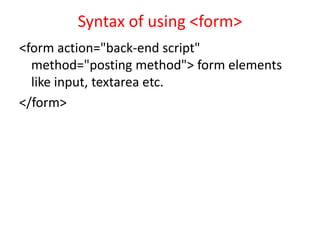
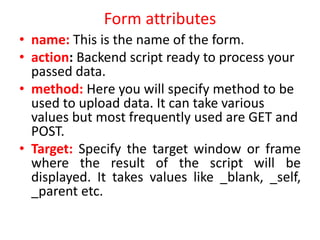
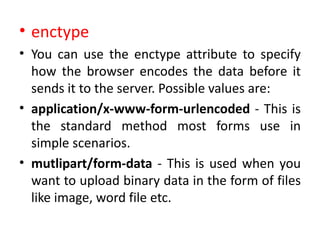
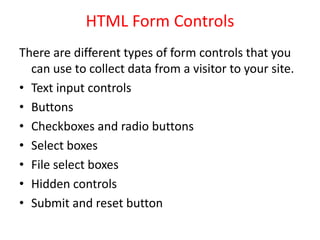
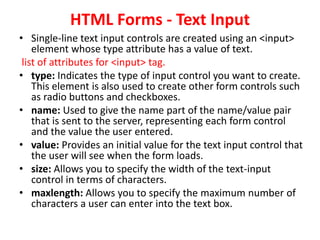
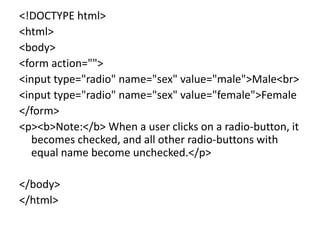
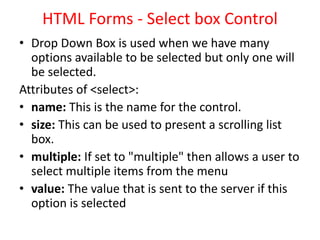
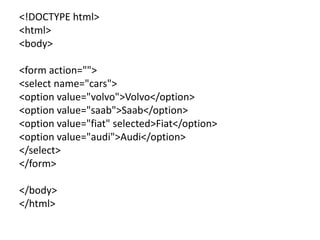
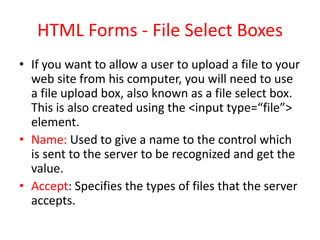
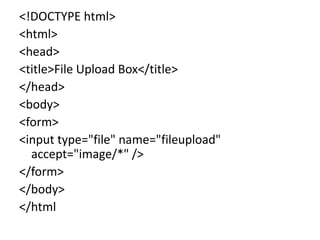
HTML Forms
• HTML Forms are required when you want to
collect some data from the site visitor. For
example registration information: name, email
address, credit card, etc.
• A form will take input from the site visitor and
then will post your back-end application such as
CGI, ASP Script or PHP script etc. Then your back-
end application will do required processing on
that data in whatever way you like.
• Form elements are like text fields, textarea fields,
drop-down menus, radio buttons, checkboxes,
etc. which are used to take information from the
user.
Syntax of using <form>
<form action="back-end script"
method="posting method"> form elements
like input, textarea etc.
</form>
Form attributes
• name: This is the name of the form.
• action: Backend script ready to process your
passed data.
• method: Here you will specify method to be
used to upload data. It can take various
values but most frequently used are GET and
POST.
• Target: Specify the target window or frame
where the result of the script will be
displayed. It takes values like _blank, _self,
_parent etc.
• enctype
• You can use the enctype attribute to specify
how the browser encodes the data before it
sends it to the server. Possible values are:
• application/x-www-form-urlencoded - This is
the standard method most forms use in
simple scenarios.
• mutlipart/form-data - This is used when you
want to upload binary data in the form of files
like image, word file etc.
HTML Form Controls
There are different types of form controls that you
can use to collect data from a visitor to your site.
• Text input controls
• Buttons
• Checkboxes and radio buttons
• Select boxes
• File select boxes
• Hidden controls
• Submit and reset button
HTML Forms - Text Input
• Single-line text input controls are created using an <input>
element whose type attribute has a value of text.
list of attributes for <input> tag.
• type: Indicates the type of input control you want to create.
This element is also used to create other form controls such
as radio buttons and checkboxes.
• name: Used to give the name part of the name/value pair
that is sent to the server, representing each form control
and the value the user entered.
• value: Provides an initial value for the text input control that
the user will see when the form loads.
• size: Allows you to specify the width of the text-input
control in terms of characters.
• maxlength: Allows you to specify the maximum number of
characters a user can enter into the text box.
Password input controls
• This is also a form of single-line text input
controls are created using an <input> element
whose type attribute has a value of password.
• <input type=“password“>
Multiple-Line Text Input Control
• If you want to allow a visitor to your site to enter
more than one line of text, you should create a
multiple-line text input control using the
<textarea> element
Attributes for <textarea> tag.
• name: The name of the control. This is used in
the name/value pair that is sent to the server.
• rows: Indicates the number of rows of text area
box.
• cols: Indicates the number of columns of text
area box.
<!DOCTYPE html>
<html>
<body>
<textarea rows="10" cols="30">
The cat was playing in the garden.
</textarea>
</body>
</html>
HTML Forms - Creating Button
• There are various ways in HTML to create
clickable buttons. You can create clickable
button using <input> tag.
• When you use the <input> element to create a
button, the type of button you create is
specified using the type attribute.
• There are various ways in HTML to create
clickable buttons. You can create clickable
button using <input> tag.
• When you use the <input> element to create a
button, the type of button you create is
specified using the type attribute
Button Type
• submit: This creates a button that
automatically submits a form.
• reset: This creates a button that automatically
resets form controls to their initial values.
• button: This creates a button that is used to
trigger a client-side script when the user clicks
that button.
HTML Forms - Checkboxes Control
• Checkboxes are used when more than one option
is required to be selected.
Checkbox Attributes
• type: Indicates that you want to create a
checkbox.
• name: Name of the control.
• value: The value that will be used if the checkbox
is selected. More than one checkbox should share
the same name only if you want to allow users to
select several items from the same list.
<!DOCTYPE html>
<html>
<body>
<form action="">
<input type="checkbox" name="vehicle"
value="Bike">I have a bike<br>
<input type="checkbox" name="vehicle"
value="Car">I have a car
</form>
</body>
</html>
HTML Forms - Raidobox Control:
• Radio Buttons are used when only one option
is required to be selected.
Radiobox attributes:
• type: Indicates that you want to create a
radiobox.
• name: Name of the control.
• value: Used to indicate the value that will be
sent to the server if this option is selected.
<!DOCTYPE html>
<html>
<body>
<form action="">
<input type="radio" name="sex" value="male">Male<br>
<input type="radio" name="sex" value="female">Female
</form>
<p><b>Note:</b> When a user clicks on a radio-button, it
becomes checked, and all other radio-buttons with
equal name become unchecked.</p>
</body>
</html>
HTML Forms - Select box Control
• Drop Down Box is used when we have many
options available to be selected but only one will
be selected.
Attributes of <select>:
• name: This is the name for the control.
• size: This can be used to present a scrolling list
box.
• multiple: If set to "multiple" then allows a user to
select multiple items from the menu
• value: The value that is sent to the server if this
option is selected
<!DOCTYPE html>
<html>
<body>
<form action="">
<select name="cars">
<option value="volvo">Volvo</option>
<option value="saab">Saab</option>
<option value="fiat" selected>Fiat</option>
<option value="audi">Audi</option>
</select>
</form>
</body>
</html>
HTML Forms - File Select Boxes
• If you want to allow a user to upload a file to your
web site from his computer, you will need to use
a file upload box, also known as a file select box.
This is also created using the <input type=“file”>
element.
• Name: Used to give a name to the control which
is sent to the server to be recognized and get the
value.
• Accept: Specifies the types of files that the server
accepts.
<!DOCTYPE html>
<html>
<head>
<title>File Upload Box</title>
</head>
<body>
<form>
<input type="file" name="fileupload"
accept="image/*" />
</form>
</body>
</html

Html4

  • 1.
    HTML Forms • HTMLForms are required when you want to collect some data from the site visitor. For example registration information: name, email address, credit card, etc. • A form will take input from the site visitor and then will post your back-end application such as CGI, ASP Script or PHP script etc. Then your back- end application will do required processing on that data in whatever way you like. • Form elements are like text fields, textarea fields, drop-down menus, radio buttons, checkboxes, etc. which are used to take information from the user.
  • 2.
    Syntax of using<form> <form action="back-end script" method="posting method"> form elements like input, textarea etc. </form>
  • 3.
    Form attributes • name:This is the name of the form. • action: Backend script ready to process your passed data. • method: Here you will specify method to be used to upload data. It can take various values but most frequently used are GET and POST. • Target: Specify the target window or frame where the result of the script will be displayed. It takes values like _blank, _self, _parent etc.
  • 4.
    • enctype • Youcan use the enctype attribute to specify how the browser encodes the data before it sends it to the server. Possible values are: • application/x-www-form-urlencoded - This is the standard method most forms use in simple scenarios. • mutlipart/form-data - This is used when you want to upload binary data in the form of files like image, word file etc.
  • 5.
    HTML Form Controls Thereare different types of form controls that you can use to collect data from a visitor to your site. • Text input controls • Buttons • Checkboxes and radio buttons • Select boxes • File select boxes • Hidden controls • Submit and reset button
  • 6.
    HTML Forms -Text Input • Single-line text input controls are created using an <input> element whose type attribute has a value of text. list of attributes for <input> tag. • type: Indicates the type of input control you want to create. This element is also used to create other form controls such as radio buttons and checkboxes. • name: Used to give the name part of the name/value pair that is sent to the server, representing each form control and the value the user entered. • value: Provides an initial value for the text input control that the user will see when the form loads. • size: Allows you to specify the width of the text-input control in terms of characters. • maxlength: Allows you to specify the maximum number of characters a user can enter into the text box.
  • 7.
    Password input controls •This is also a form of single-line text input controls are created using an <input> element whose type attribute has a value of password. • <input type=“password“>
  • 8.
    Multiple-Line Text InputControl • If you want to allow a visitor to your site to enter more than one line of text, you should create a multiple-line text input control using the <textarea> element Attributes for <textarea> tag. • name: The name of the control. This is used in the name/value pair that is sent to the server. • rows: Indicates the number of rows of text area box. • cols: Indicates the number of columns of text area box.
  • 9.
    <!DOCTYPE html> <html> <body> <textarea rows="10"cols="30"> The cat was playing in the garden. </textarea> </body> </html>
  • 10.
    HTML Forms -Creating Button • There are various ways in HTML to create clickable buttons. You can create clickable button using <input> tag. • When you use the <input> element to create a button, the type of button you create is specified using the type attribute. • There are various ways in HTML to create clickable buttons. You can create clickable button using <input> tag. • When you use the <input> element to create a button, the type of button you create is specified using the type attribute
  • 11.
    Button Type • submit:This creates a button that automatically submits a form. • reset: This creates a button that automatically resets form controls to their initial values. • button: This creates a button that is used to trigger a client-side script when the user clicks that button.
  • 12.
    HTML Forms -Checkboxes Control • Checkboxes are used when more than one option is required to be selected. Checkbox Attributes • type: Indicates that you want to create a checkbox. • name: Name of the control. • value: The value that will be used if the checkbox is selected. More than one checkbox should share the same name only if you want to allow users to select several items from the same list.
  • 13.
    <!DOCTYPE html> <html> <body> <form action=""> <inputtype="checkbox" name="vehicle" value="Bike">I have a bike<br> <input type="checkbox" name="vehicle" value="Car">I have a car </form> </body> </html>
  • 14.
    HTML Forms -Raidobox Control: • Radio Buttons are used when only one option is required to be selected. Radiobox attributes: • type: Indicates that you want to create a radiobox. • name: Name of the control. • value: Used to indicate the value that will be sent to the server if this option is selected.
  • 15.
    <!DOCTYPE html> <html> <body> <form action=""> <inputtype="radio" name="sex" value="male">Male<br> <input type="radio" name="sex" value="female">Female </form> <p><b>Note:</b> When a user clicks on a radio-button, it becomes checked, and all other radio-buttons with equal name become unchecked.</p> </body> </html>
  • 16.
    HTML Forms -Select box Control • Drop Down Box is used when we have many options available to be selected but only one will be selected. Attributes of <select>: • name: This is the name for the control. • size: This can be used to present a scrolling list box. • multiple: If set to "multiple" then allows a user to select multiple items from the menu • value: The value that is sent to the server if this option is selected
  • 17.
    <!DOCTYPE html> <html> <body> <form action=""> <selectname="cars"> <option value="volvo">Volvo</option> <option value="saab">Saab</option> <option value="fiat" selected>Fiat</option> <option value="audi">Audi</option> </select> </form> </body> </html>
  • 18.
    HTML Forms -File Select Boxes • If you want to allow a user to upload a file to your web site from his computer, you will need to use a file upload box, also known as a file select box. This is also created using the <input type=“file”> element. • Name: Used to give a name to the control which is sent to the server to be recognized and get the value. • Accept: Specifies the types of files that the server accepts.
  • 19.
    <!DOCTYPE html> <html> <head> <title>File UploadBox</title> </head> <body> <form> <input type="file" name="fileupload" accept="image/*" /> </form> </body> </html