How to add features to your screencast
•Download as PPTX, PDF•
0 likes•717 views

The document provides instructions for adding different media types like pictures, sound effects, titles, and voiceovers to a screencast project in iMovie. It explains how to import these materials and drag them into the timeline at the desired locations. Viewers are guided through editing options for each media type, such as trimming sound clips, adjusting picture size and cropping, customizing title fonts and backgrounds, and recording and positioning voiceovers.

More Related Content
What's hot
What's hot (20)
Similar to How to add features to your screencast
Similar to How to add features to your screencast (20)
More from Dawn Anthony
More from Dawn Anthony (11)
How to add features to your screencast
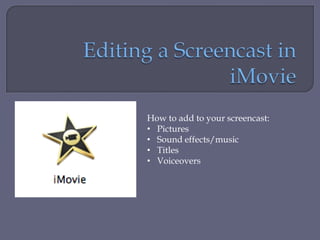
- 1. How to add to your screencast: • Pictures • Sound effects/music • Titles • Voiceovers
- 3. This menu is where you click to : • Add music/sound effects • Pictures • Titles
- 4. To add music or sound effects click on the button with the music note This screen will appear. Click on where you’d like to get your sound from: iMovie Sound Effects iLife Sound Effects GarageBand Or iTunes
- 5. Sound Effects When you select your sound effect source, the files in that choice will appear here. To hear the sound effect, click on one of the files. And click the play button.
- 6. Sound Effects To add a sound effect, you click on the file and drag it up to the portion of your project where you want the sound effect to go.
- 7. Sound Effects You know your sound effect was successfully added when you see this green box under the selected still in your project.
- 8. Sound Effects To edit you sound effect, click on this button
- 9. Sound Effects Click on Clip Adjustments to adjust the time length of your sound effect.
- 11. Click on the button with a camera on it to add a photo to your screencast. Your pictures must be in iPhoto in order to to be able to add a picture to your screen cast.
- 12. You can add slides from a PowerPoint into your iMovie. When you save your PPT, click Save as Pictures. Your slides will be saved to a file folder. Drag that file folder into iPhoto and you will be able to add those slides into your screen cast.
- 13. Pictures To add your picture, click on it and drag it into the part of your project where you want the photo to be in your screencast.
- 14. iMovie defaults to the Ken Burns effect when you add a picture into iMovie. The Ken Burns effect is when the picture zooms in. iMovie allows to fit the picture to the screen or crop the picture.
- 15. Steps to take to adjust a picture 1. Click on the picture in your project 2. Click on the Crop button (it is located in the middle of the iMovie screen)
- 16. Then this screen will appear in the upper right hand corner of the iMovie screen Click on Fit for the picture to be stable on the still. Click on Crop to crop your picture. When you click crop these green bars will appear, crop your picture by dragging the green lines to the part of the picture you want to show on your still. Remember to click Done when you are finished adjusting your picture.
- 18. Click on this button to add a Title to your screencast. All of the different titles you can choose from will appear. To see how the Title will move, move your mouse over the Title and it will show how the title will appear in your screencast.
- 19. There are two ways to add Titles to your screen cast: The Title can be its own still The Titles can be inserted to a still
- 20. Title To add a Title to your screencast click on the title and drag it into to part of your project where you want the Title.
- 21. Title To add a Title as it’s own still, drag the Title between stills, when a vertical green bar appears, drop the title into the project. To add the Title into a movie still, drag it to the still you want it to go and drop it into the still.
- 22. Title: Adding it as its own still After you drop the Title into your project, this screen will appear. This is your choices of background. Select the one you prefer.
- 23. After you choose your background, this screen will appear in the upper right hand corner of you iMovie screen. Click on Show Fonts to change the size, color and type of font.
- 24. This screen will appear 2. Select color of font 3. Select 1. Select the size style of font 4. Click Done to save your changes.
- 25. Your changes will show up in the upper right had screen. 1. Type your title here 2. Click Done to finish editing your title. To see how your title will look click this button to play the still.
- 26. To add a title into a still To add a title to your screencast click on the title and drag it into to part of your project where you want the title. Click on the blue rectangle to type your Title.
- 27. Click on the Voiceover button
- 28. To change the microphone click on the double arrows.
- 30. This message will appear in the upper right hand screen. Follow these directions and where you want the voiceover to begin
- 31. When you click on the project (where you want the voiceover to begin) the still have a yellow frame around it. Click on the spacebar when you are ready to record. You will hear a series of beeps that will let you know when to start speaking. When you are finished speaking, click the spacebar to stop recording.
- 32. This purple rectangle will appear to show you where your voiceover is. If you need to rerecord your voiceover, be sure to click on the purple rectangle until you see a yellow frame and click on the delete button on your spacebar.
- 33. Next you have to turn down the original audio. Click on the still with the voiceover, the frame buttons will appear.
- 34. This drop screen will appear. Click on Audio Adjustments.
- 35. 1 .Slide on the Volume bar until the sound is turned all the way down. 2. Click on Done Your Voiceover is finished.
- 36. View the next slide presentation to learn how to finalize (save) your project and share it to YouTube.